Download
1 variant available


(Note: in ComfyUI you can disable nodes with Ctrl+M. You can quickly disable whole groups with right click option. Useful to turn off parts you don't want.)
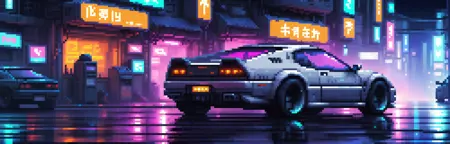
This workflow takes an image to generate 4 different photo versions of it.
Reverse workflow: Photo2Anime
Comparison of results

Installation and dependencies
Install WAS Node Suite custom nodes;
Install ControlNet Auxiliary Preprocessors custom nodes;
Download ControlNet Lineart model (both .pth and .yaml files), and put it into "\comfy\ComfyUI\models\controlnet".
(optional) Install WD 1.4 Tagger custom node;
(optional) Install SD Prompt Reader custom node;
Download and open this workflow;
(kind of important) Check "Resources and substitutions" section below for recommended extras.
You only need WD 1.4 Tagger if you want to interrogate image for prompt automatically.
You only need SD Prompt Reader to get prompts from metadata of realistic generations.
With neither, you'd have to write the prompt for picture manually.
Resources and substitutions
Workflow was made with possibility to tune with your favorite models in mind. There is the node called "Quality prefix" near every model loader. Just put most suitable universal keywords for the model in positive (1st string) and negative (2nd string). Note that KSampler parameters are thoroughly tested and fine-tuned for selected models.
General realistic model: epiCRealism. How to substitite: with the most versitile realistic model you know. PicX_real works. Add photorealism-guiding keywords to "Quality prefix" node.
"Old film" model: LomoStyle. How to substitite: with any model with unique style. Examples of retro realistic models: LazyMix+, Good Old Days, Z_phyr Remember. Add universal quality tags recommended by the model author to "Quality prefix" node.
Photorealism + realistic 3D models: Analog Madness + RealCartoon-Realistic. How to substitite: with a duo of "photorealistic, but not too versitile" (like Refined) and "versitile, but not too realistic" (like XenoGASM) models. Add universal quality tags recommended by the model author to "Quality prefix" node.
Ulzzang models: MagMix + LEOSAM's HelloWorld Film Grain. Same as above, but with strong tendency for asian faces. NextPhoto works for both slots. Add universal quality tags recommended by the model author to "Quality prefix" node.
VAE: vae-ft-mse-840000-ema-pruned. Standard, recommended. If your results are too contrast and bright for you, consider using Tone Range Compressor to decode.
Embeddings: bad-prompt-version2 (optional), bad-hands-5 (optional).
How to use
Choose where to get image and prompts from and connect nodes for image, positive and negative into ">> Route your inputs here <<" group:
By default, manual written prompts are used
Turn on (Ctrl + M) and connect "WD 1.4 Tagger" node to generate prompt from picture
Turn on (Ctrl + M) and connect "SD Prompt Reader" node to get prompts from metadata
Run it!
Note
Turning artistic pictures into photo-like images is harder than the other way around. Workflow works best with SD generated pictures, not real anime frames. If results still look anime, increase denoise by 0.1 in "Retro" and both "Semireal" KSampler nodes.