Hey this is my first ComfyUI workflow hope you enjoy it!
I've never shared a flow before so if it has problems please let me know.
Both of my images have the flow embedded in the image so you can simply drag and drop the image into ComfyUI and it should open up the flow but I've also included the json in a zip file. (The zip file is the purpose of this post)
If you use the metadata from my images you'll get my entire workflow which has nice settings to save CivitAI-compatible metadata -- This flow is a little messy but its not the purpose of this post so have mercy if you look at it lol
Install Requirements
1. UltralyticsDetectorProvider and FaceDeaitler - https://github.com/ltdrdata/ComfyUI-Impact-Pack
2. Eyes detection (Adetailer) - https://civitai.com/models/150925?modelVersionId=168820
3. ADetailer (After Detailer) Lips Model - https://civitai.com/models/142240/adetailer-after-detailer-lips-model
4 Put these Adetailer models in to the bbox folder. Mine was located at ...\ComfyUI_windows_portable\ComfyUI\models\ultralytics\bbox
How to use
Note: Feel free to bypass (CTRL+B is the hotkey for bypass) if you don't want to use one the detailers. For example, the Lips detailer is a little bit too much so I often turn it off.
Step 1
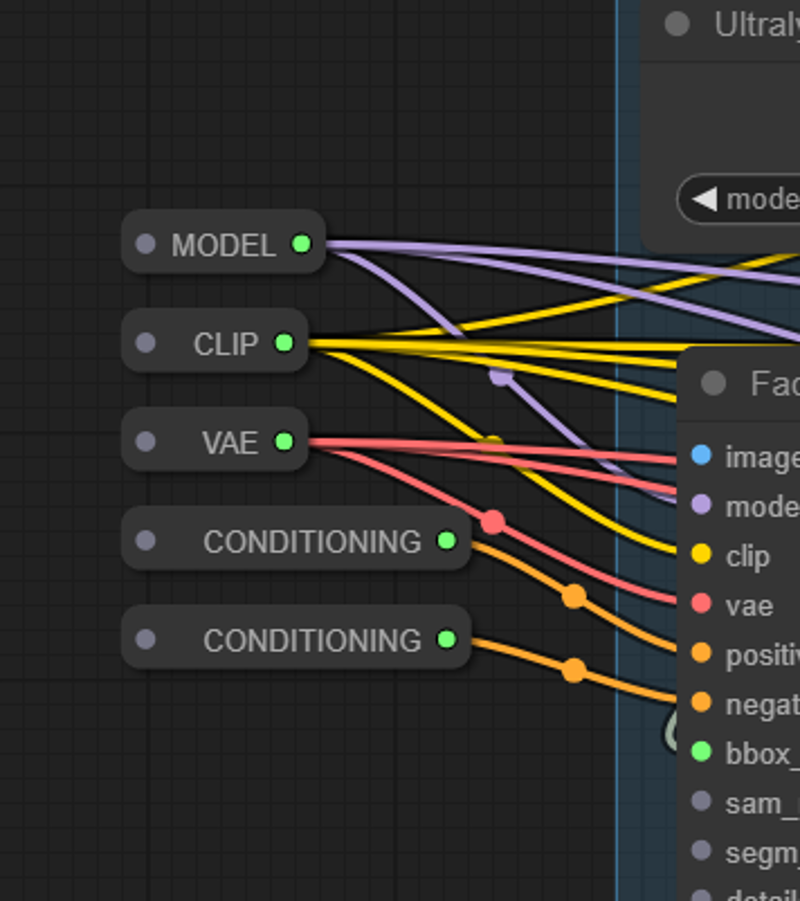
1. Please begin by connecting your existing flow to all the reroute nodes on the left

These are already setup to pass the model, clip, and vae to each of the Detailer nodes. I typically use the base image's Positive and Negative prompts for the Face detailer but you could use other prompts if you want to.
Step 2
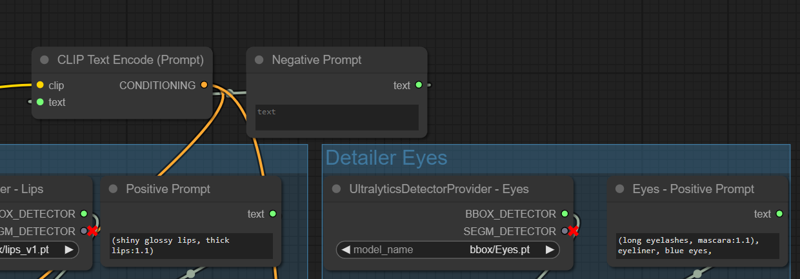
2. Populate the Positive prompts for the Lips and Eyes. I left the Negative blank but you could populate it if you want. Right now the "blank" negative is applied to both Lips and Eyes because I don't use it. 
Step 3
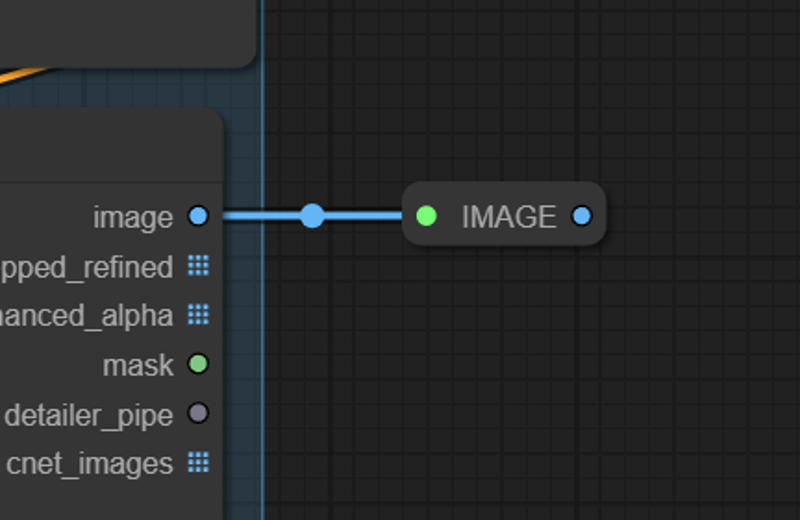
3. Connect the final output to the rest of your flow. There is an "Image" reroute node at the end. This is simply to make it obvious where the final image comes out. You don't need to use it. I only included it for accessibility.


