Download
1 variant available


Before to use
You have to know how works Stable Diffusion. I recommend using Automatic1111 like an interface to launch the model.
This is a model trained on SD 1.5 model, so you have to consider that it is not perfect. I have to make so much testing before to arrive to a stable generation. I will enhance the model when a better base model arrives (like SD XL new one).
This is a LORA model, so it is recommended to use like an extension of a Checkpoint. I recommend you to use realistic dataset models.
I recommend you to follow me on my instagram account, where I will explain about AI image generation: https://www.instagram.com/eddiemauro.design/
Intro
PRODUCT DESIGN (Elegant minimalism-eddiemauro) LORA: Hi, I’m a product and car designer, and I’m so excited to test with AI, I think is a good tool for designing. This tool (Lora) is so useful for the design process (shapes-ideas generation), but more than that it helps so much to refine aesthetically. Also, you can turn sketch and 3D schemes into render style. I created a basic Lora and tested it with so many kinds of checkpoints, and the result was a different type of "minimalism". The style is more aggressive and elegant (taken from Szechuan), but it preserves the minimalism style. Furthermore, the colors tend to be darker and opaque.
If you want to support my work and help me to upload more models (with better quality), you can do it by entering here and donating, I would greatly appreciate it: https://ko-fi.com/eddiemauro
Installation
I use Automatic1111, the best UI for Stable Diffusion image generation, so I recommend you to install locally or use it online with some Colab or other hosting. You can find online instructions or videos to do that. If you are going to install locally, you can watch this tutorial online and I recommend you to have at least a 6-8 Gb of VRAM Graphic Card (nvidia) to have a stable interface and launch with “Microsoft Edge” because you will have problems on “Google Chrome”. Try also to install “medvram” or “lowvram” options besides “xformers” (search online how to).
This is a Lora model. You can watch this video to know how to install it. It is just to download a file and put it inside Lora file models. The Lora file extension is “.safetensor”, and mostly the size is lower than a Checkpoint (that could be more than a gigabit).
You have to install also a Checkpoint model to use with, select one focused on realism visualization or 3D/render aspect.
Please for image creation you have to follow all my recommendations, if you don't, it is impossible to generate a good image quality. Also, you have to consider that from today AI image generation is not so consistent and perfect, you have to invest time to get it and make plenty of tests.
Recommendations for image generation
Checkpoint best models: SD 1.5 based models. It is mandatory to use with a checkpoint called "Szechuan Special Sauce RC003" or "Experience v8", so download first, install and load inside SD UI.
Activation token/caption: Inside prompt space, the first word has to be: “emauromin”or “emauromin style” to activate the style. It is mandatory, if you don't do it, it will not work properly.
Another recommended prompting: Inside prompt you can use those words that will enhance the image generation: in the positive space, “futuristic, finely detailed, purism, ue 5, a computer rendering, minimalism, octane render, 4k”; in the negative space: “(worst quality:2), (low quality:2), (normal quality:2), lowres, ((monochrome)), ((grayscale)), cropped, text, jpeg artifacts, signature, watermark, username, sketch, cartoon, drawing, anime, duplicate, blurry, semi-realistic, out of frame, ugly, deformed”. You can also watch the image metadata of example images here and simulate the prompt.
Textual inversion/embedding or Lora tool recommended: I consider that “EasyNegative” is one best of textual inversion for negative prompt space, you should use it. Download here and install it, putting the file inside “embeddings”. You can use it also “Detail Tweaker” to even reduce the details of the image, for that, you have to download from here, install like a Lora and use it inside positive prompt with a value of “-0.5”. Use it when you realize the checkpoint used has so many details, but not when you see that minimalism is on it. This can change the shape of objects considerably.
Lora's weight: I'm trying to enhance the model, for now, this model works fine from 0.7 to 1, the most you increase the value, minimalism is higher. Sometimes the values 0.8-0.9, adapt better than 1.
VAE: This depends on what checkpoint are you using. Mostly it is recommended to use the “vae-ft-mse-840000-ema-pruned” Stable Diffusion standard.
Clip Skip: It was trained on 2, so use 2.
Steps and CFG: It is recommended to use Steps from “20-40” and CFG scale from “6-8”, the ideal is: steps 30, CFG 7. For next models, those values could change.
Sampler: I use mostly “EulerA”, “DPM++SDE Karras” or “DPM++2S a”. Euler tends to be simpler and more creative. Make experimentation with other samplers if you like.
Batch: In txt2img try to put a value of 4 to generate more than 1 image and watch the generations. If you have a good graphic card, you can use “Batch size”, this will create at same time 4 images, increasing generation time; but if your computer cannot handle this, change to “Batch count” that will create 4 images in a row (not a same time), but generation time will be more.
Image aspect: Try to use these dimensions: 512x512, 768x512, 512x768, but even you can experiment with different. Don't generate bigger images because the style could be lost, if you want to create a bigger image, use hires.fix in txt2img mode, img2img increase method or Ultimate SD Upscale script extension + ControlNet, or just upscaling with GAN models.
Create bigger images: There are 4 different methods to create large images in Stable Diffusion, you can check online how to. For first method “txt2img hires.fix”, I recommend you to use upscale model called “4x-UltraSharp”, downloading here just “.pth” file, and then installing it, putting inside “ESRGAN” file. In hires.fix option put any “upscale by” value, and then with a “denoise strength” of “0.5-0.7”. For the second method, you have to select first the image generated in txt2img and then putting in img2img mode, increasing dimension at least “1,5 times” with a “denoise strength” from “0.3-0.5”. For the third method, you can use the same configuration of img2img, but activating “tile” mode of “ControlNet” extension and also the script of “Ultimate SD Upscale”, but for that, I recommend you to watch a tutorial here. For the last method, you have to pass the generated image in txt2img to “extras” and then select a GAN model and scale it, you can also use the “4x-UltraSharp” model.
Get more control of your creation: Use “ControlNet” extension to generate a more controlled shape of what you want, and even you can test it with sketches. Use “Scribble” or “Lineart” modes. For that, I recommend you to install this extension and then learn to how to use. There are plenty of online videos about it.
Copy prompt for image metadata: You can download my example images here and put it inside “PNG info” tab from Automatic1111
Example Prompting:
Positive prompt:
emauromin style, futuristic armchair, finely detailed, purism, ue 5, a computer rendering, minimalism, octane render, 4k <lora:eddiemauroLora2:0.8>
Negative prompt:
EasyNegative, (worst quality:2), (low quality:2), (normal quality:2), lowres, ((monochrome)), ((grayscale)), cropped, text, jpeg artifacts, signature, watermark, username, sketch, cartoon, drawing, anime, duplicate, blurry, semi-realistic, out of frame, ugly, deformed
Steps: from 20-40 (For EulerA is enough 20, DPM++SDE Karras or DPM++2S a)
CFG scale: 6-8 (7 Ideal).
What comes for the future
I’m already trying to enhance the model. This was trained with 512 image aspect, so I will try with 768 (bigger one), and also other configurations (like changing captions, steps, epochs, etc.). If you like a better model of this version, try to keep supporting me on ko-fi, if there are more people supporting me, I can invest more time to train and enhance models, but if this doesn't happen I cannot.
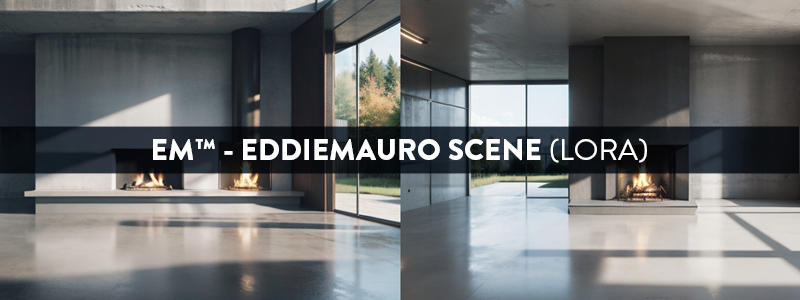
I launched my first private model for my Ko-fi membership lv.1, called "eddiemauro scene" minimalistic scenery creation for rendering. If you want to access to private models, you can support me and subscribe to this membership. I will also start to upload here more models centered on product and car design.
License
Watch here a Stable Diffusion license link. In the case of this specific model, use it for whatever you want in terms of image generation, also commercial (sell images you generate). It is prohibited:
Upload this model to any server or public online site without my permission.
Share online this model without my permission, using my exact model with a different name or uploading this model and then run it on services that generate images for money.
Merge it with a checkpoint or a Lora, and then publish it or share online, just talk to me first. In the future,
Sell this model or merges using this model.
Supporting
You can follow me on my social networks. I will show my process and also design tips and tools. Also, you can check my webpage and in case of you need a design service, I work like a freelance.
https://www.facebook.com/eddiemauro.design
https://www.instagram.com/eddiemauro.design