

SparseCtrl Animation Comfyui Workflow Guide
This AnimateDiff LCM Animation Workflow is designed to make subtle animations easy and compatible with low VRAM setups. This workflow integrates a range of models, control nets, and custom nodes to provide refined, high-quality animations using Stable Diffusion.
Getting Started: Initial Setup and Downloads
You’ll need several model files and custom nodes to replicate this setup. Here’s a list to get started:
Recommended Checkpoints: AniVerse - V5.0, IMP, PerfectDeliberate and PhotonLCM high-quality Stable Diffusion checkpoints.
AnimateDiff Motion Model & LoRA: AnimateLCM by wangfuyun – Includes both the motion model and LoRA for smooth frame-by-frame animations.
Advanced Control Nets: Advanced ControlNet by Kosinkadink – Adds scheduling, masking capabilities, and sliding context support for refined animation control.
SparseCtrl Control Net: SparseCtrl – Provides sparse control for precise motion guidance.
QRcode Monster Control Net: QRcode Monster – this is responsible for the morphing animations.
Clip Vision Model: Clip Vision is essential for enhancing image conditioning.
Upscaler Model: 4x NMKD Siax Upscaler – Used for the final upscale pass to ensure your animation looks sharp and high-quality.
Tip: Make sure to place these models in their appropriate directories within ComfyUI (e.g., ./models/checkpoints, ./models/controlnets, ./models/upscalers).
Input Steps for Creating Animations
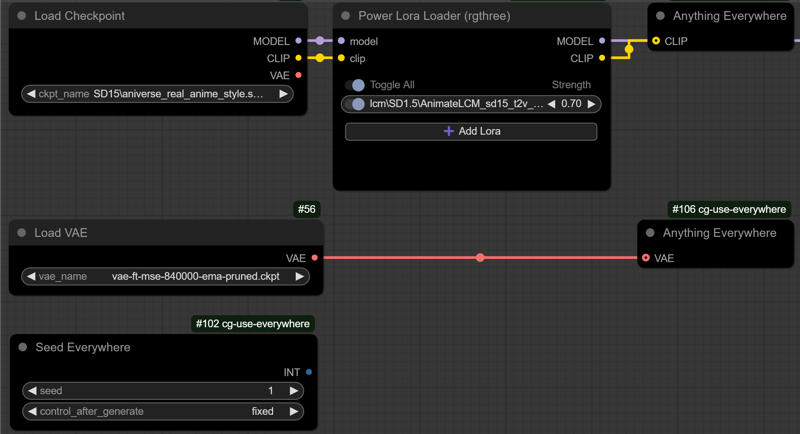
Configure the Initial Setup:
Checkpoint: Select your Stable Diffusion checkpoint, such as AniVerse V5.0.
Required LoRA: AnimateLCM_sd15_t2v_lora @ strength of 0.5 - 1.0
Optional LoRAs: Include any LoRA models you’d like to enhance specific features.
VAE, Seed, Prompt: Set your VAE for image quality, choose a seed for consistency
Models for Additional Control: Select the CLIP Vision and SAM models for added conditioning and segmentation used by the detailer nodes.
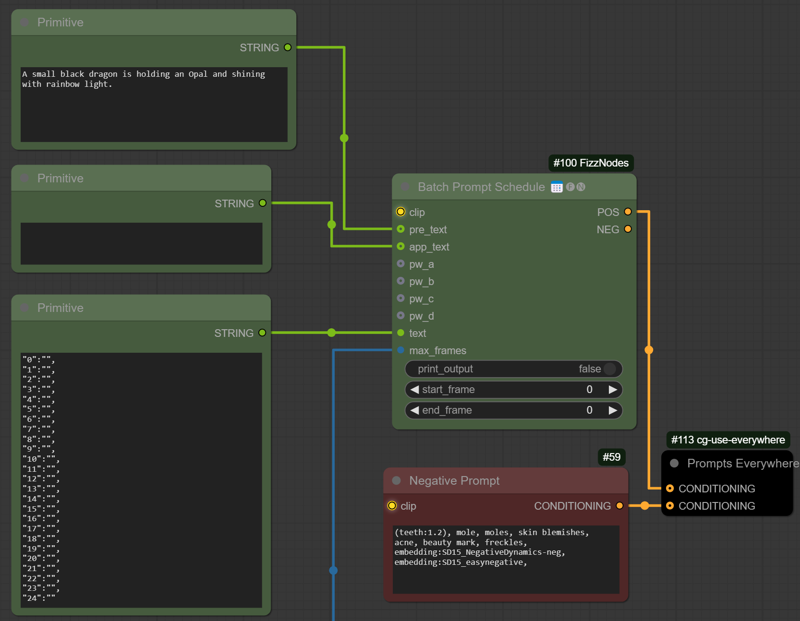
 Craft Prompt:
Simple is better. You can use prompt travel to change the prompt on specific animation frames.
 Prepare the Input Image:
Resize and Adjust: Upload an input image that serves as a base for the animation. Resize it to ensure compatibility with IPAdapter and SparseCtrl Control Net.
Quality Check: Optimizing the image dimensions helps IPAdapter and SparseCtrl process it more effectively, creating smoother animations.
 (tip: use right-click "queue group output nodes (rgthree)" to view your adjustments to the image resize and crop before queuing up the entire workflow.
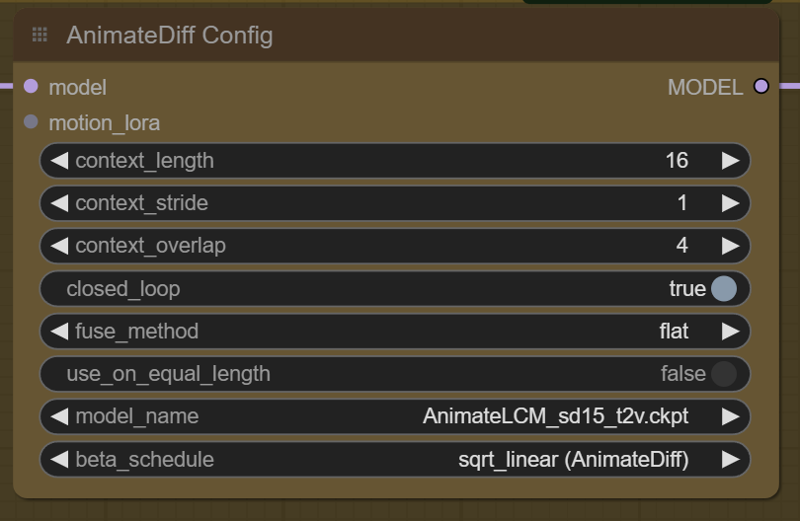
AnimateDiff Configuration:
AnimateDiff Model: Load the AnimateDiff LCM model, specifically designed for seamless motion.
Set the Scheduler and Looping: Use the beta scheduler to control frame variation and enable looping for continuous animation. (models are trained on a context_length of 16 and a context_overlap of 4. You can adjust it, but your results may vary). Select if you want a loop or not with closed_loop.
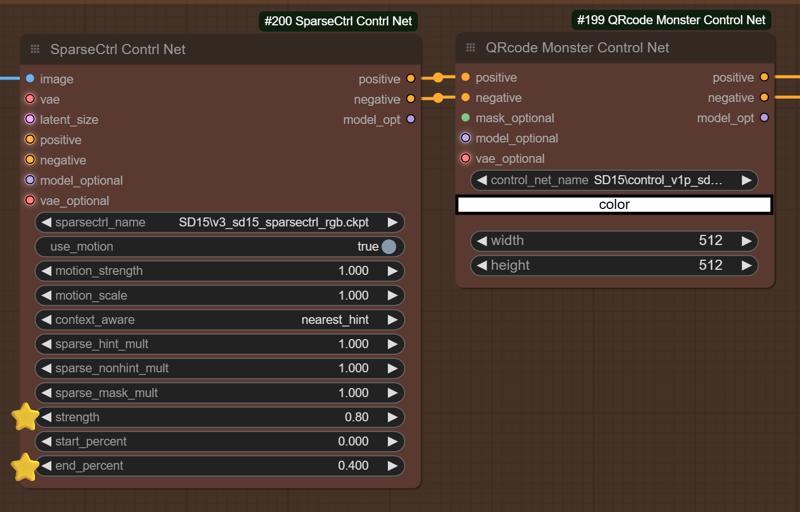
Control Net Configuration:
Adjust Control Net Strength: The SparseCtrl and QRcode Monster control nets should work well with default settings, but adjusting the strength can fine-tune the animation’s motion.
Optional Customization: To influence the animation’s style more, experiment with the control net parameters to match your desired effect.
Processing Steps for Refining Animation Quality
Initial Rough Sample:
This step creates a rough animation pass to establish the movement, though it may appear choppy initially. It’s a foundational pass intended for further refinement.
Latent Upscale and Resampling (Highres Fix):
Apply a high-resolution fix to enhance image quality. This latent upscale reduces artifacts and improves clarity, particularly useful for animations generated on lower VRAM setups.
Face and Eye Detailing:
Use the face and eye detailer to reduce common artifacts for close-up animations. This optional step can refine facial details for smoother, more natural animations.
If you experience VRAM limitations, consider bypassing this step to optimize processing speed.
Final Upscale and Interpolation to 30 FPS:
The final upscale pass uses the 4x NMKD Siax Upscaler model to enhance the resolution.
30 FPS Interpolation: This final step smooths motion by interpolating frames, delivering a polished animation with fluid motion at 30 frames per second.
Tips and Recommendations
Experiment with Settings: Adjusting parameters like checkpoint model, image size, control net strength, and IPAdapter configuration can significantly impact animation quality.
Handling VRAM Constraints: This workflow can work well even on lower VRAM systems. If you encounter memory issues, try simplifying by bypassing the face detailer step or reducing image resolution.
Custom Nodes: This setup uses several custom nodes in ComfyUI’s manager, including MTB, Efficiency, AnimateDiff, RIFE, and Face Detailer. Ensure all custom nodes are installed and up-to-date.
Final Notes
This SparseCtrl Animation Workflow offers a straightforward way to create expressive animations, combining powerful movement, quality, and detail tools. If you’re new to Stable Diffusion animations, this guide provides a solid starting point.
Enjoy experimenting, and don’t hesitate to share feedback or troubleshooting questions.
Posting images to this page is appreciated for the buzz ⚡⚡⚡😊