Crystal Court Jester - Vodka V2


created using Vodka model https://civitai.com/models/61086/vodka-by-followfoxai
Parameters and Workflow that Works Well for Vodka V2
There is a lot more to test here, but we will share a few observations:
Compared to V1, you can try a wider range of CFG values; anything from 3 to 7.5 can generate good output
Booru tag-only prompts do not work well since we didn’t tag the dataset
Human sentence-type description followed by adjectives and “magic words” works quite well
Almost all samplers seem to generate interesting results.
SD upscale workflow (outlined below) with tile ControlNet enhances the image quality of this model
Using EasyNegative TI (link) is recommended. “blurry” in negative prompts also helps.
Upscale Workflow to Try in Automatic1111
After generating the initial image you like in the txt2img tab (we recommend doing a grid of different samplers and CFG values for each prompt to find the promising ones), send it to img2img.
Use the same prompt and sampler as in the original generation
Set sample steps high; in our case, we used 150 for most of the images
Set width and height to 2x the original. So 512x512 should have 1024x1024
Set the denoising strength to something low; we used 0.2 to 0.25.
For the CFG value, we used the (original - 0.5) formula. So if the original image was generated at 7.0, we would set it to 6.5.
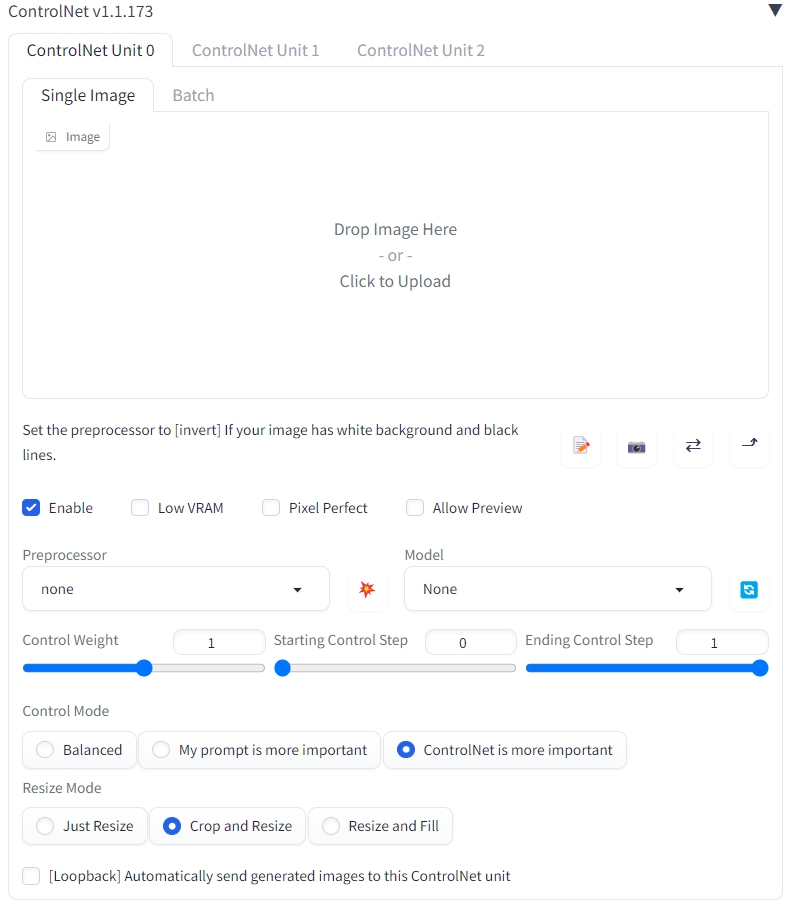
ControlNet settings: enable it; for preprocessor select “tile_resample,” and for model ‘control_v11f1e_sd15_tile’. You can also switch to the “ControlNet is more important” option. No need to adjust any other settings.
Make sure to have the “Ultimate SD upscale” extension installed. Select it from the Script dropdown, select the 4x-UltraSharp upscaler, and set tile width and height to 640x640.

Press generate, wait a bit, and you should have a decent output. You can repeat the process to go even higher resolution.