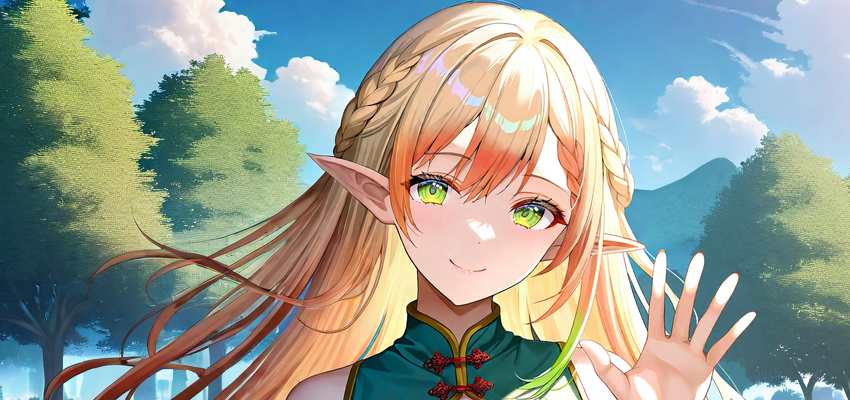
Hello, fellow latent explorers!
Update is here.
It took me quite some time to figure out how to make NoobAI-XL model work and produce results that I like. Today is the first time my image generated with Noob v-pred got over a hundred likes, so I am confident in quality and ready to share how I am creating images with it.
This guide will show you what parameters to use to turn generations from this:
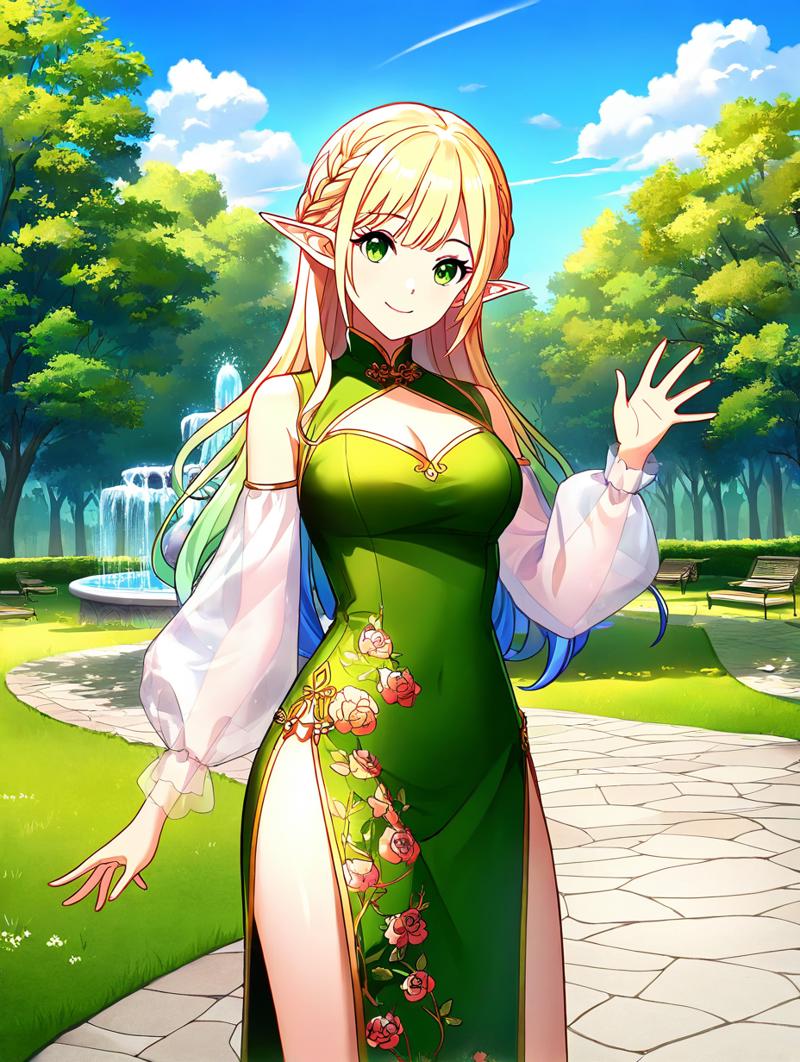
To this:
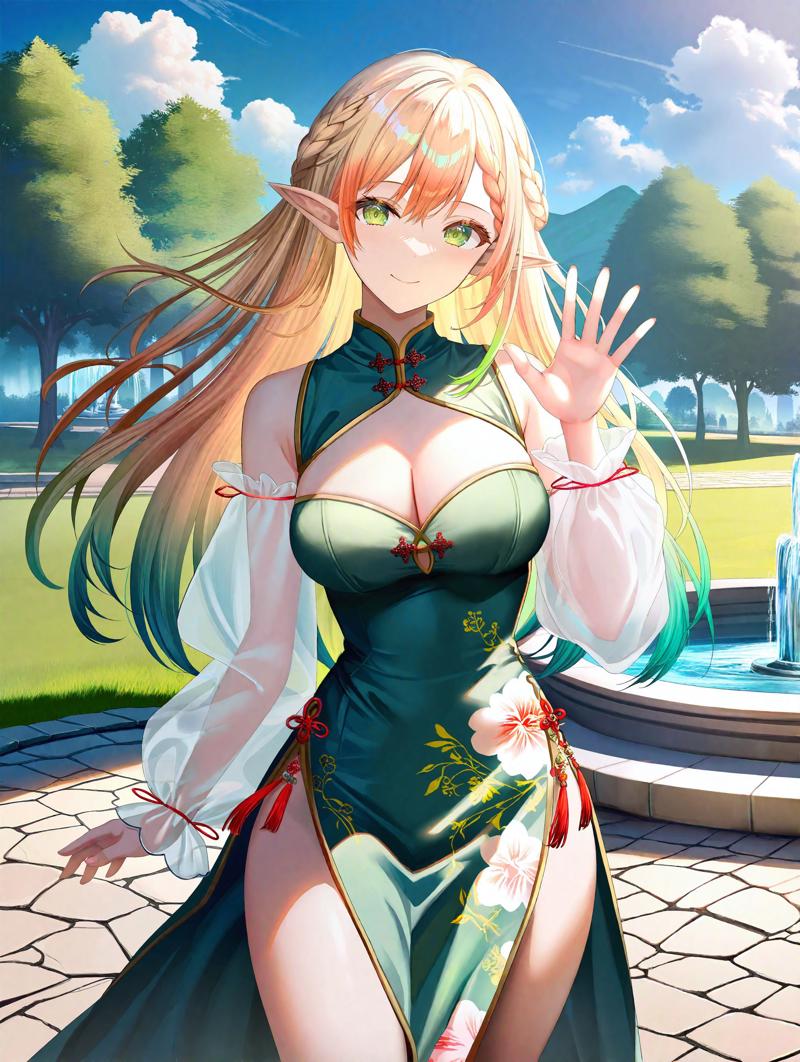
There was a lengthy version with lengthy explanations about how I got to this exact set of parameters but I accidentally closed the tab and there is no autosave on this platform 😤 You cannon even save as draft before making cover, so this version is technically a second one.
There are different ways to make it work, like using bunch of loras to shift it towards eps or using CFG-Fix, but none of those methods gave me satisfactory results.
Before starting
Update your Forge UI. Sriously.
Make a clean install with separate venv if something goes wrong.
Also read manual. Generation parameters here are different, but it will give you insght into prompting, artist tags and other good stuff. Also read this. No idea why there are 2 separate guides but whatever, here you have third one.
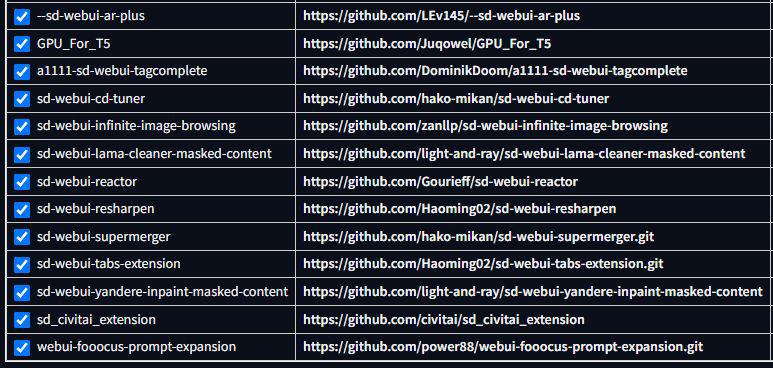
List of extensions that I recommend:
I use this VAE during generation. You will not notice any resut difference in txt2img, but during img2img I see slightly better performance. Maybe it is a Forge implementation issue.
Generation parameters
DDPM Exponential, CFG 5.5, 40 steps.
Under Latent Modifier:
Combat Cfg Drift -0.15 This one is debatable but I found images are better overall with this setting. Disable it if your colors get too washed out.
Rescale Cfg Phi 0.7
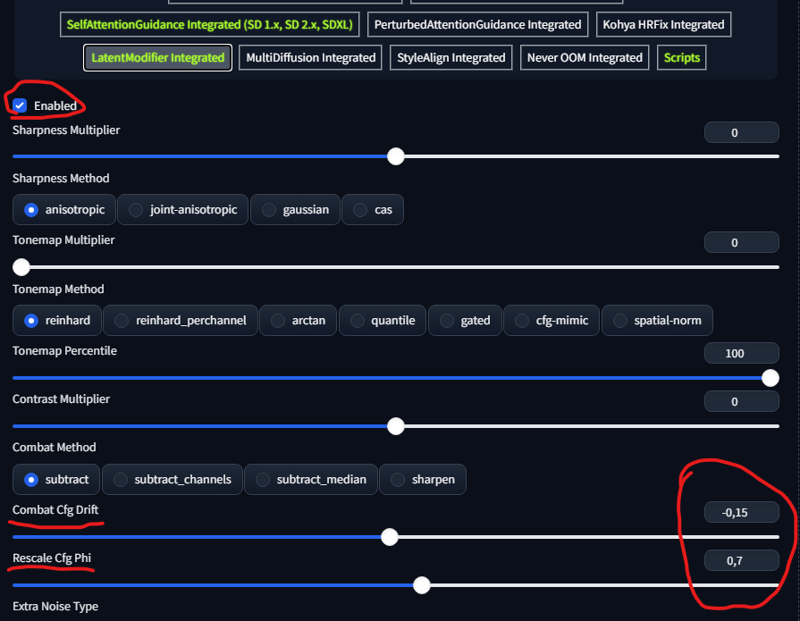
SelfAttentionGuidance: Enabled, default parameters.
FreeU. SDXL preset start at 0.6 stop at 0.8. Still was not able to get it work as it should. If you have better options - tell me.
ReSharpen extension. Enabled, Sharpness 0.9 Scaling 1-Cos.
This thing here is the main reason why I use DDPM Exponential. It just doesn't really work for Euler. And doesn't work on ancestral samplers in general, like Euler A. See yourself:
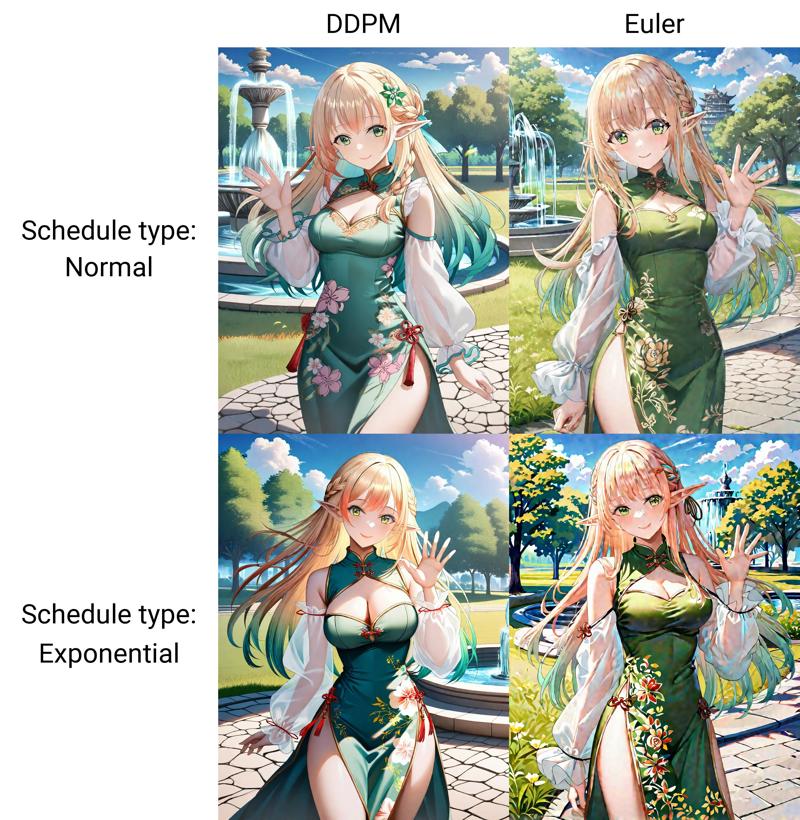
Euler without ReSharpen seems to produce good result with plenty of detail. But that's an illusion. And I spent a lot of time to make it work, and it always produces messy details and overall image don't really make sense. It is even worse at high complexity scenes. While DDPM Exponential just work like a charm even with extensions:

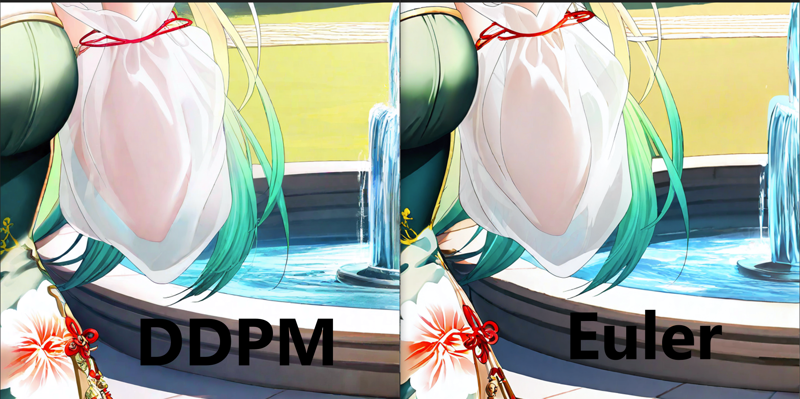
Maybe inpainting with euler over a generated image can give you better result? I tried to use it during upscale, but DDPM with ReSharpen details made much more sense:
Loras and styles
This took me more time then anything else. Regarding Loras right now I use two:
NoobAI-XL Detailer by yours truly.
Pony: People's Works by Dajiejiekong. Nice but rather random at times, I'll get to it later.
There is an issue here. Technically you can use any lora made on Illustrious and even Pony base. But there is an issue, they are all trained as epsilon prediction. You may not notice it first, but they tend to worsen coloring, light and even prompt atherence. Like detailer-xl slautering hands (that's why I went out of my comfort zone and made own detailer). Check this out:
https://civitai.com/images/49504727
1girl sitting, coastal beach village, dark, night, illuminated by the light of a smartphone
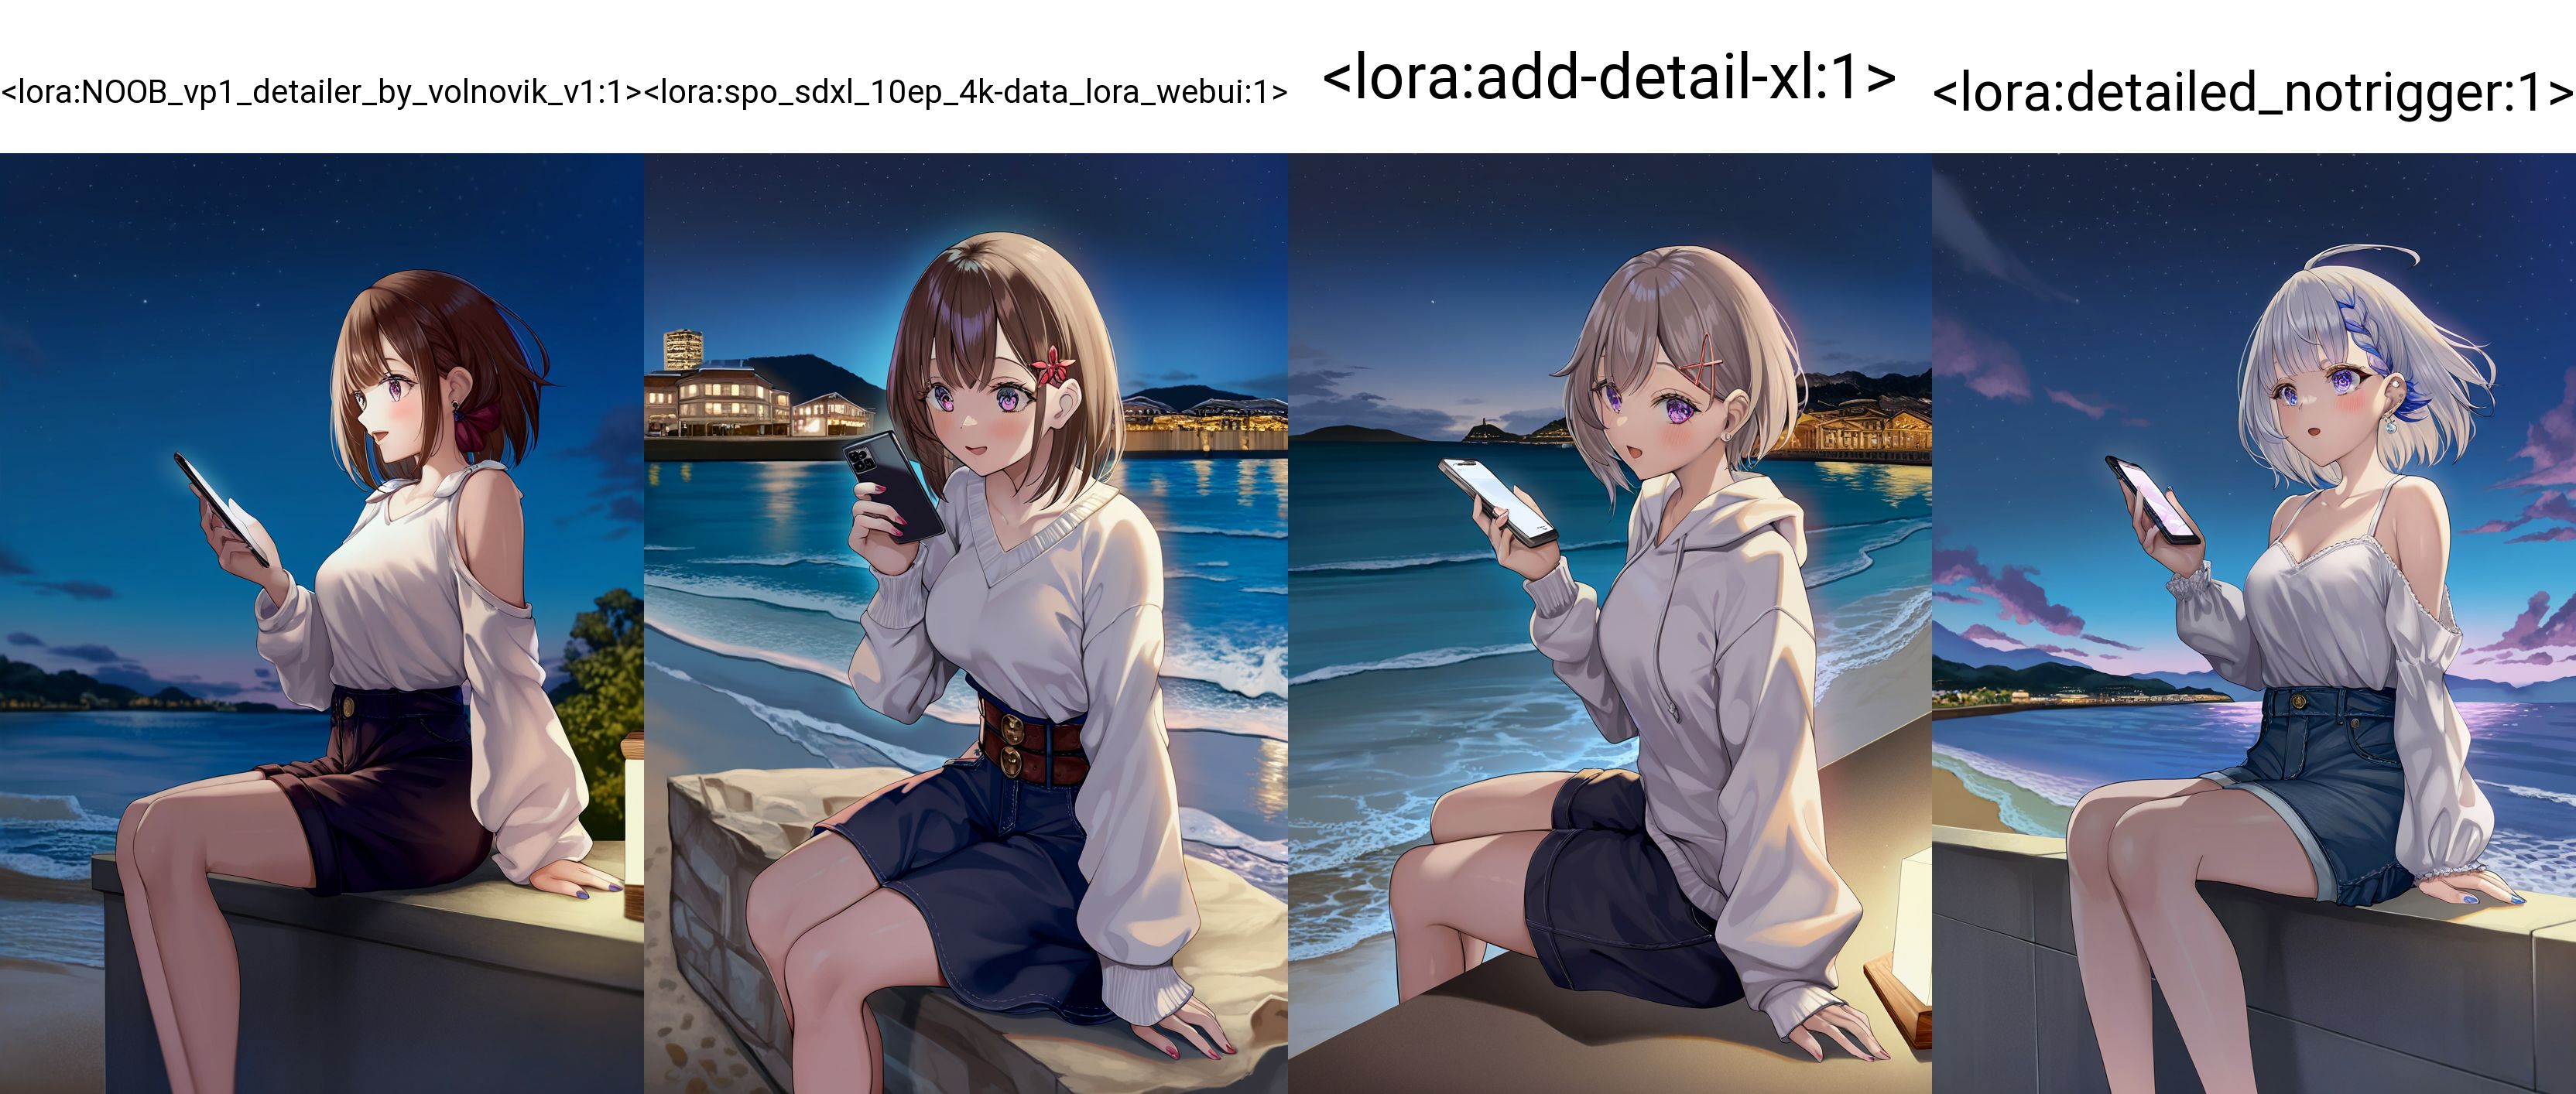
Only v-pred lora got on the left got illuminated by smartphone right. I saw people slap on ton of eps loras and not having any issues with NoobAI v-pred, most probably because latent is shifted towards eps. This is a solution, but why not just use EPS version instead then? It is good one by itself.
But what about style then? Are we stuck with awful backgrounds and all that?
No. This model supports artist tags. But there are couple of quirks. First refer to official guide to learn about danbooru and related stuff. You can also use this awesome site posted by ho889 for reference.
BUT.
For whatever reasons artist tags with lots of white backgrounds tend to slaughter backgrounds. See yourself on this lengthy comparison I made: https://civitai.com/images/48132030
Also artist tags tend to introduce certain weird shifts. One can lolify all you generations, other one gives serafuku to everything. torino aqua tends to give blue skin to everything under certain conditions. I was not able to get a single artist to get style that I want: detailed character, detailed backgrounds, nice shading but not 3D, normal skin color, not that pinkish stuff that is everywhere on danbooru. Universal, I do not want to bother every time to tweak negative with simple background etc. Just adding some did not really work for me because some tend to shift style more then others. Right now I ended up with following prompt:
[achyue:0.4],[(momoko \momopoco\:0.8)::0.3], [torino aqua::0.5], kiniro tofu, [junpaku karen:0.5],[(leveen:0.7):0.6], sencha bashira, [takashia \(akimototakashia\):0.7], (masaki nanaya:0.7), nagi itsuki, [aoi sakura \(seak5545\):0.5],
In case you are not aware about all that brackets - those are 2 features of A111. You can read more here.
(xxx:1.0) is weight of the token. Others are
[to:when]- addstoto the prompt after a fixed number of steps (when)[from::when]- removesfromfrom the prompt after a fixed number of steps (when)
Basically I disable some artist tags before middle of generation so they influenced overall composition and background and add others closer to end for additional influence withou altering shapes too much. For example [junpaku karen:0.5],[(leveen:0.7):0.6] those two give you that detailed strands of hair. But if used at full they produce odd skin tone and blurry backgrounds. Here is comparison with weights on and off:
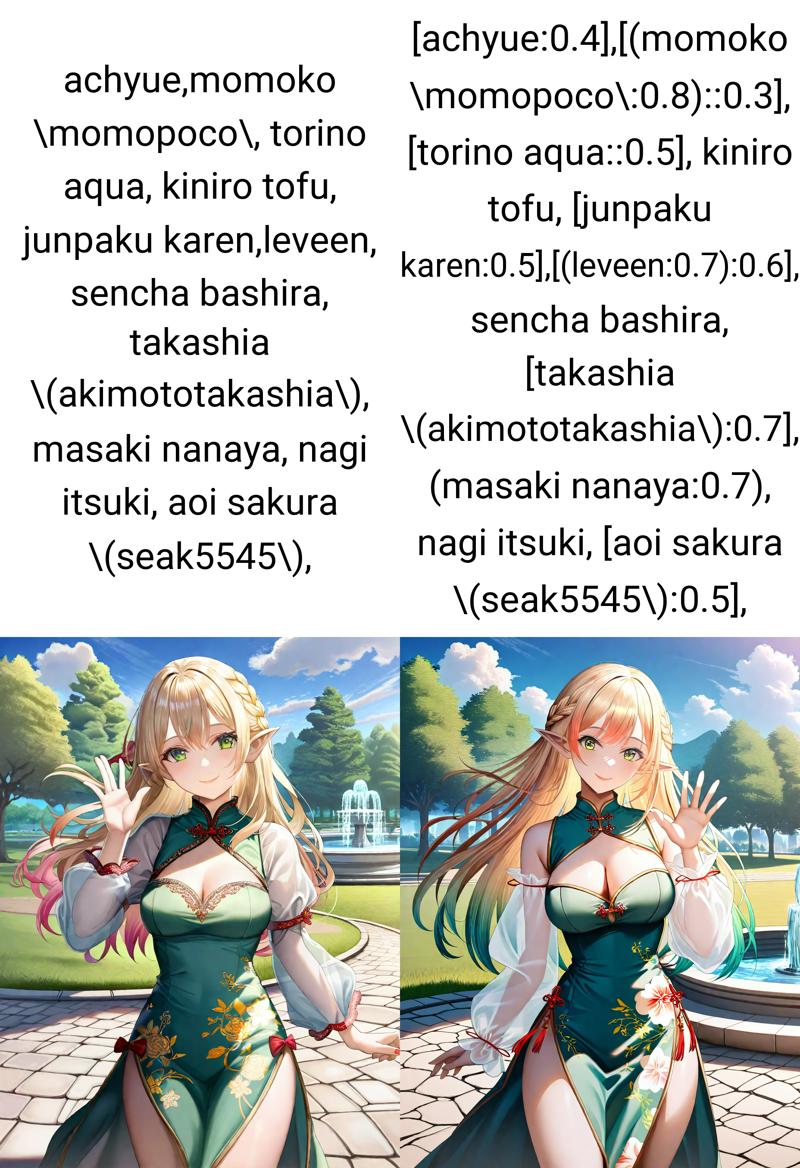
Basically I traded some fine details for more contrast and bigger booba. Worth it.
That's basicaly how to make style you want - search what you want on booru, add, mix and match, experiment. It is fun.
But remember that shifting latent midway like this can slaughter more complex scenes. If you get blobs of flesh with limbs sticking everywhere - that's most probably the issue. It took me couple of weeks to finetune this line. Also thats the reason why I use Pony: People's Works with weight 0.7. It fixes skin but higher values tend to shift image. Be aware of those shifts. For example one of the things Pony: People's Works introduce with dark and dim light tag is making everything red for no apparent reason:
1girl, red china dress, dark, dark scene, chiaroscuro, black background, mist, seductive, dark aura, rim light, thighhighs, double bun,pose, dim light, muted color,
[achyue:0.4],[(momoko \momopoco\:0.8)::0.3], [torino aqua::0.5], kiniro tofu, [junpaku karen:0.5],[(leveen:0.7):0.6], sencha bashira, [takashia \(akimototakashia\):0.7], (masaki nanaya:0.7), nagi itsuki, [aoi sakura \(seak5545\):0.5],
masterpiece, best quality, very aesthetic, high quality, newest, very awa, crisp, detailed skin texture,
<lora:NOOB_vp1_detailer_by_volnovik_v1:1>, <lora:ponyv6_noobV1_2_adamW:0.7>,
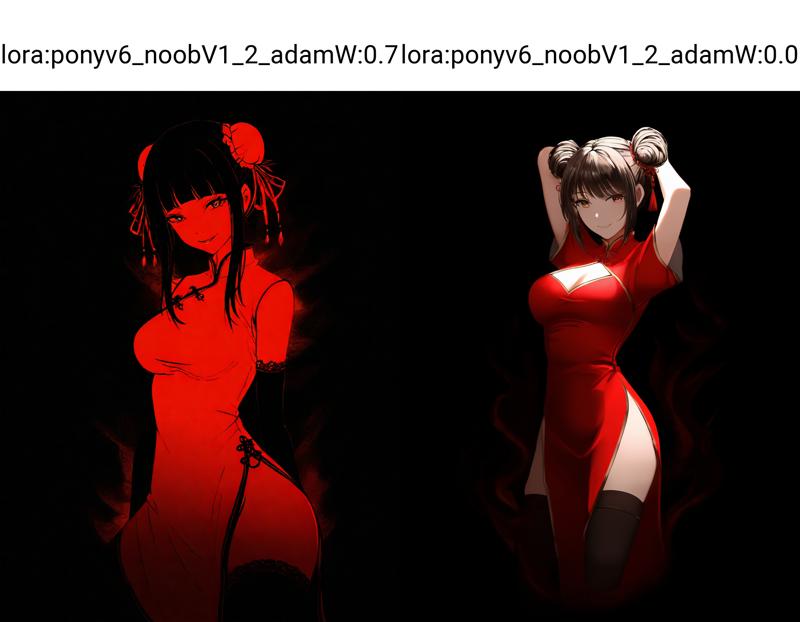
Just adding red theme to negative fixes it:
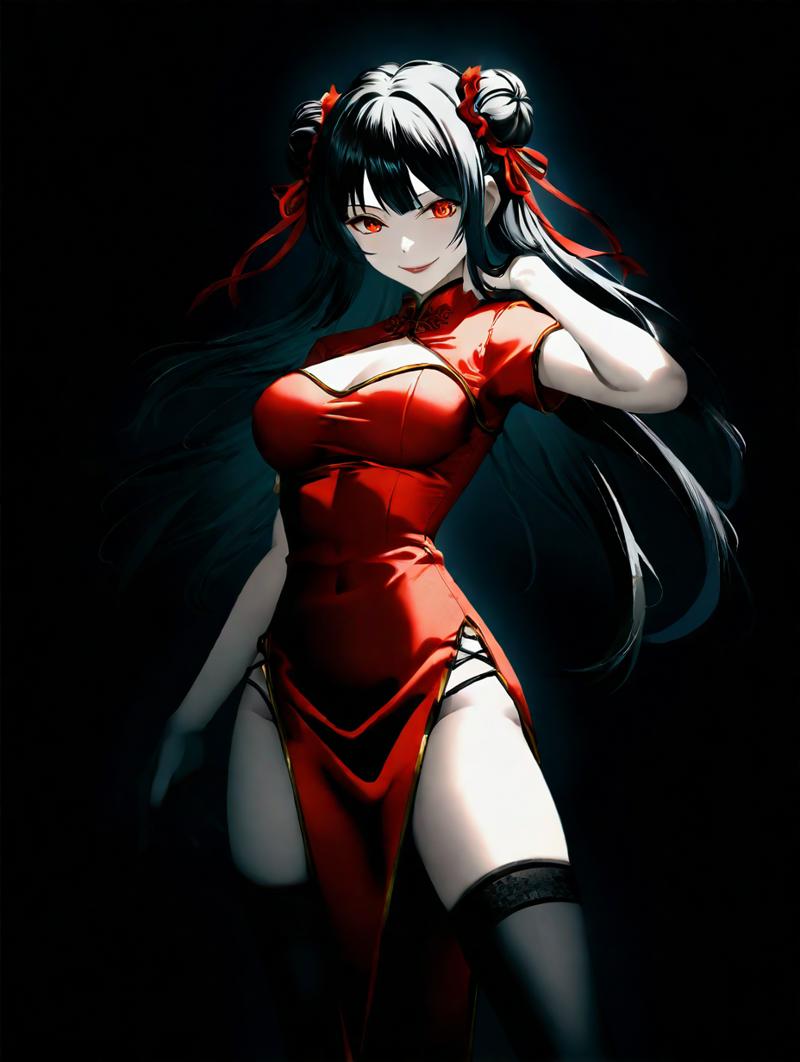
This can happen with any lora or tag and you may consider it to be oversaturation, but it is not.
Better way to fix it is being more descriptive, this model likes long prompts in general. Check you prompt carefully and use prompt S/R feature to search for outliers.
Inpainting
Please read my previous guide for general inpainting tips and tricks. They are all applicable here.
With is combination of parameters I settled on 0.02 Extra noise multiplier. And Apply color correction to img2img results to match original colors On most of the time. Especially during upscale.
Denoise should be lower in this case. Consider 0.3 as redrawing, 0.45 praying everything more - complete mess. Sweet spot for fixing hands is around 0.39 - 0.41.
Upscaling
At first I used previous technique described here. Sweet spot with parameters above is 0.25 denoise. But there is an issue, with 0.02 multiplier and ingeneral this combination tends to introduce odd details. Lowering denoise does not give you desired hires effect. This is weird because with usual samplers and schedulers I got those reults starting at 0.5, so basically we are introducing weirdness a lot faster. So I ended up adding controlnet to the mix. Fortunately authors provided with a bunch of controlnets. We need a tile controlnet for this type of task. It works greatly with mixture of diffusers. I do not use ultimate sd upscale, but hey, maybe someone can compare them. Main thing is that with mixture of diffusers and everything from both guides on I was not able to notice any seams. Maybe you can tweak batch size and tile resolution to make it work on lower end GPUs with controlnet maintaining the image.
By the way, for whatever reason controlnets are in full fp32 which is an overkill IMO. I converted it to FP16 and did not see any difference. You can download smaller version here.
I ended up with this parameters for controlnet:
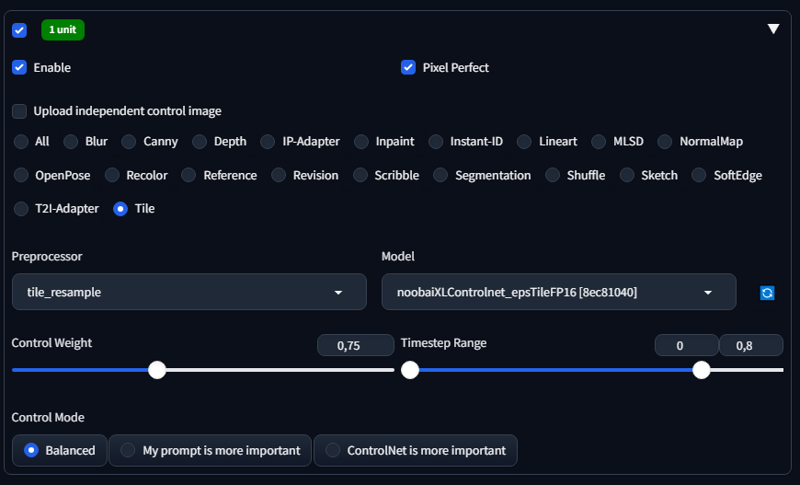
With this I can safely crank denoise up to 0.35. Do not forget to set Apply color correction to img2img results to match original colors On because controlnet tend to introduce weird color shifts by itself. Just wait if you have preview on, it will get better closer to finish. Maybe thats because it is eps, but thats a general thing about controlnets. In sdxl they were always this tug between actual details and composition, thats one of the reasons people still revert to sd1.5 for upscaling.
Sometimes I run couple of inpaints of face, hands etc. at 0.25-0.3 denoise after upscale because extra noise multiplier + controlnet sometimes introduce odd smears on skin. This way I get cleaner look.
So thats it folks, thank you for reading, experiment and share your awesome generations!
Edit: almost forgot the link to image used as example:
https://civitai.com/images/54092034
You can see metadata there in case you wondered.

