
If you find our articles informative, please follow me to receive updates. It would be even better if you could also follow our ko-fi, where there are many more articles and tutorials that I believe would be very beneficial for you!
如果你觉得我们的文章有料,请关注我获得更新通知,
如果能同时关注我们的 ko-fi 就更好了,
那里有多得多的文章和教程! 相信能使您获益良多.
For collaboration and article reprint inquiries, please send an email to [email protected]
合作和文章转载 请发送邮件至 [email protected]
By: ash0080
The TOPOLOGY i2i model allows you to add topology to existing images, giving it the ability to draw content beyond the training set of LoRa itself. This expands its toolset, but it needs to be used in conjunction with ControlNet. In the following, I will use two examples to introduce it, which should cover most use cases.
Prepare your image
First, you need to prepare the image for i2i. You can use extras > upscaler to enlarge smaller images, and it is recommended to use the Realistic upscaler instead of the Anime upscaler, which enhances lines.
It is best to have the image around 1024, as images that are too small cannot generate clear wireframes, while images that are too large may cause the grid to be fragmented.
Your image does not need to be generated by SD; it can be any image. However, images with clear light and dark transitions and a texture similar to 3D rendering are more suitable. If your image has large areas of white, such as a white porcelain vase, it may not be able to add topology.
ControlNet Canny Only
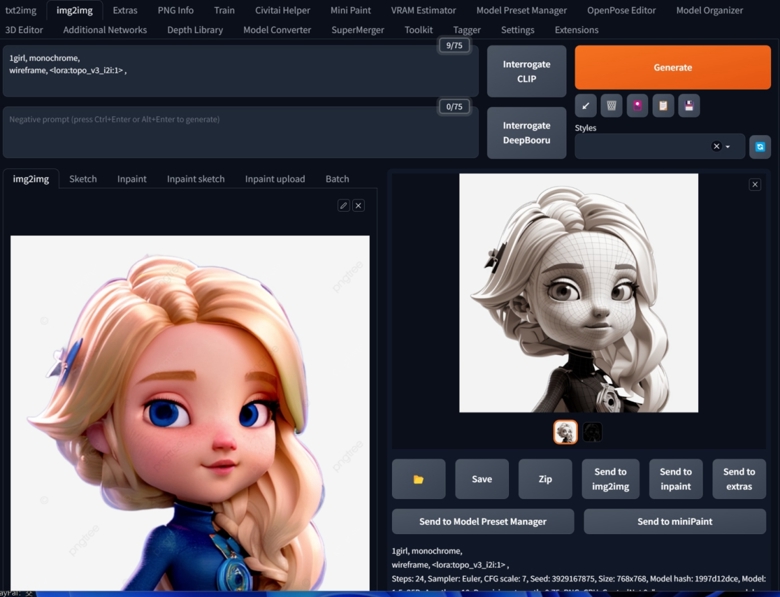
Drag the image you want to add topology lines to into i2i. This image does not have to be generated by SD; all examples below are images randomly searched from Google.
Write the main word such as "1girl" in prompts, then add
wireframe, <lora:topo_v3_i2i:1>
Add "monochrome" to positive/negative prompts as needed. Sometimes it will help you generate clearer topology lines.
sampler: Eular
steps:20~30
denoise strength: >= 0.7
Drag the same image into ControlNet Canny, adjust the thresholds to make the preprocessor generate only clear outlines as much as possible. If your image is too complex, you can also manually modify the image generated by Canny, referring to our previous articles.
https://civitai.com/articles/494/black-magic-master-class-canny-the-only-god-in-controlnet
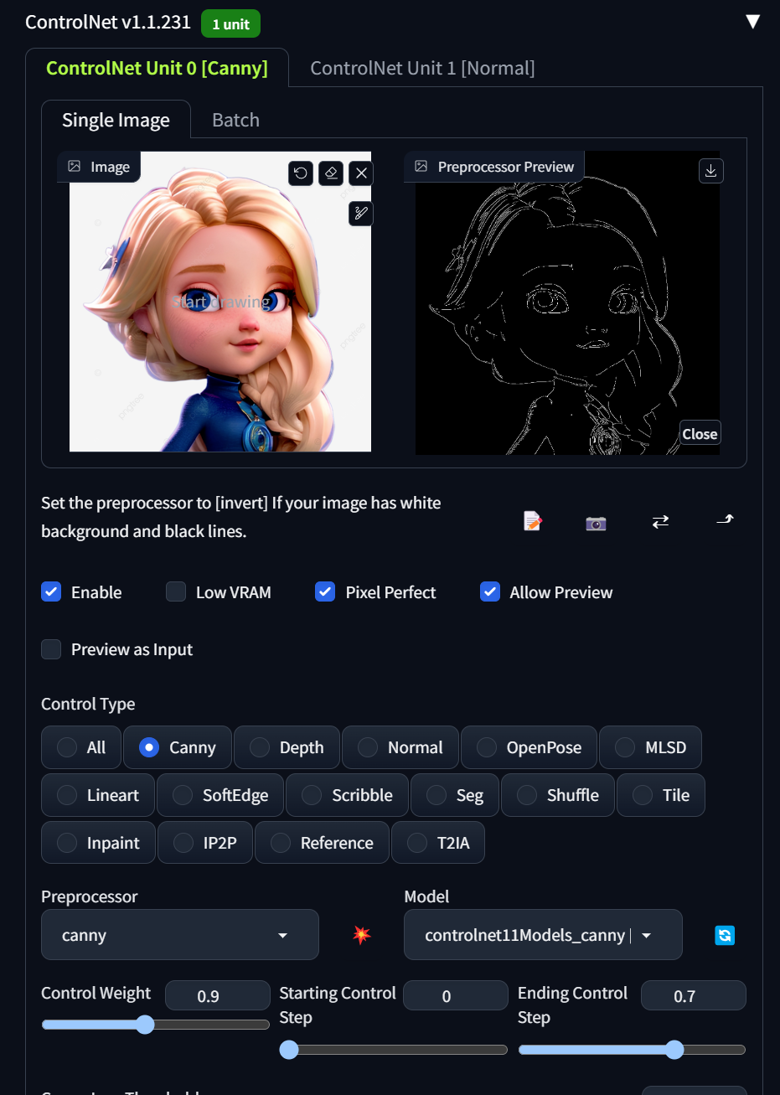
Adjust the Control Weight and Ending Control Step to give the AI more room to play, and then click Generate. It is recommended to enable batch at the same time to provide more choices.
Another example
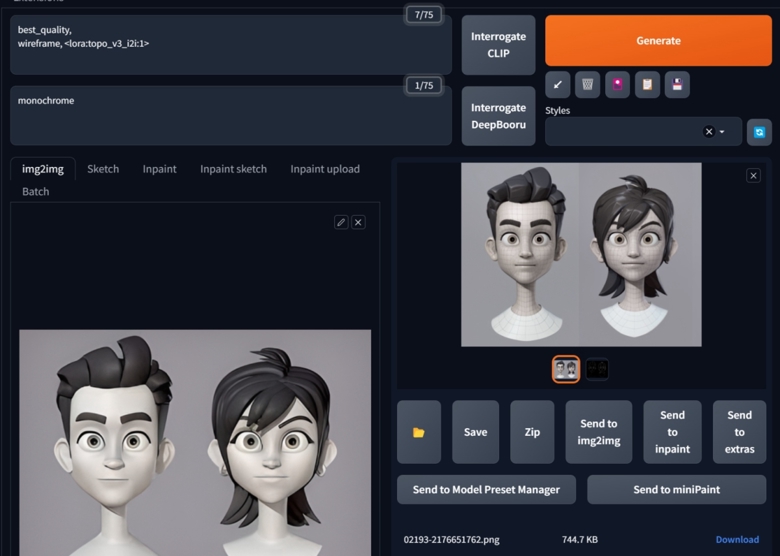
ControlNet Canny + Normal
Sometimes, some images are significantly different from the dataset (the current dataset only has 3D characters). In addition to using Canny to constrain image contours, you also need to use Normal to provide the surface 3D information of the model.
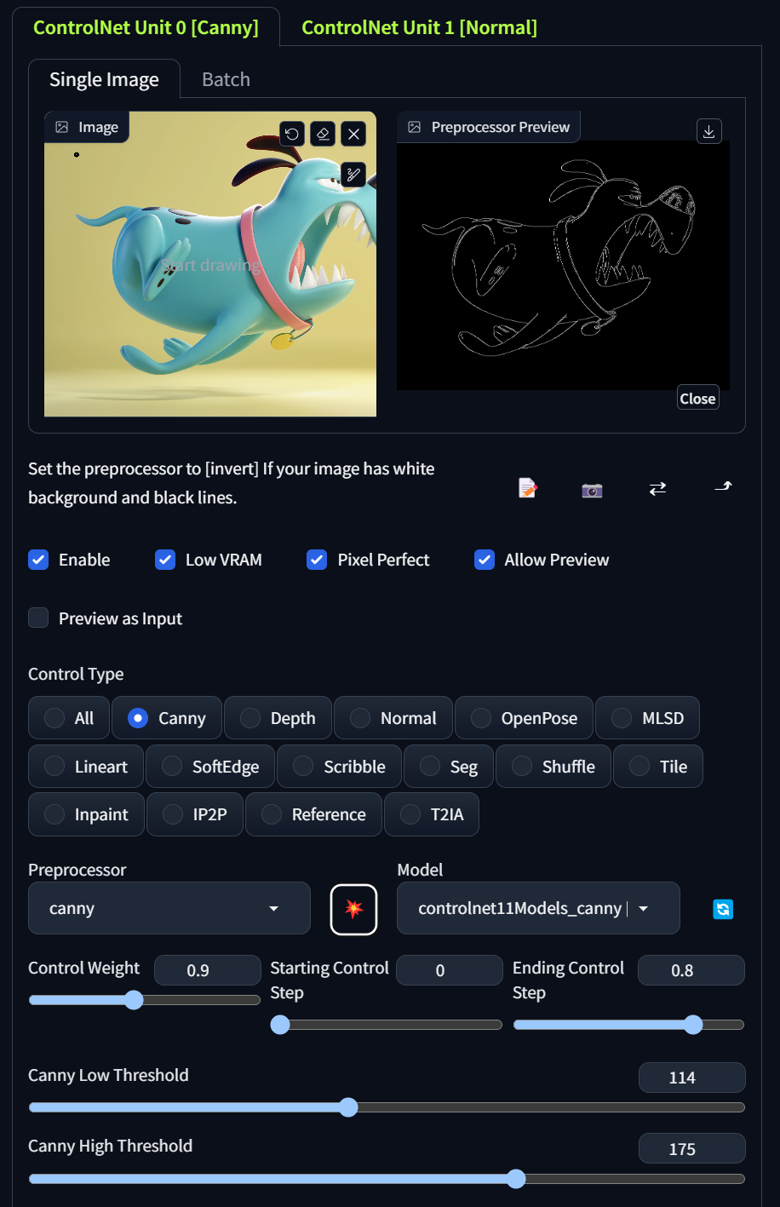
The above is the Canny settings in ControlNet Unit 0.
The following are the Normal settings in ControlNet Unit 1.
I recommend using Midas for the preprocessor. By dragging the Normal Background Threshold slider, try to separate your drawn object from the background as cleanly as possible. There is no recommended value here, and it may be arbitrary depending on the image you drag in. You need to try it yourself.
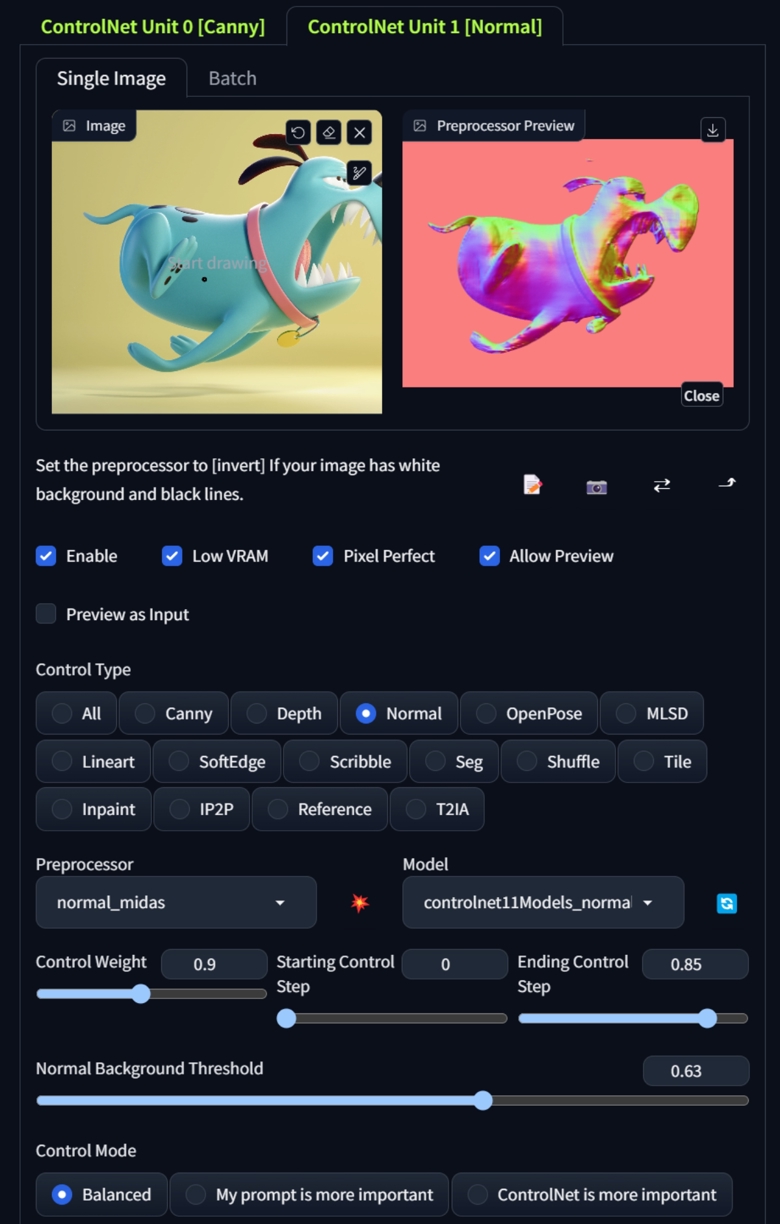
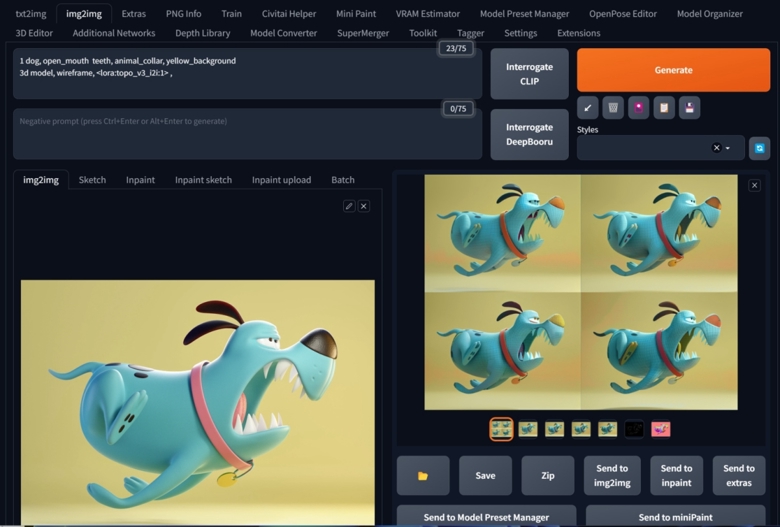
After setting up, click Generate. If some content is not drawn correctly or mixed with the background, such as teeth, you can adjust your prompts to add these words. Similarly, using Batch can improve fault tolerance.
Next
This version of the model has poor generalization and is quite picky about the quality of the input. It is also quite picky about image style. However, the new version I am currently testing has largely solved these issues. If the I2I functionality of this version is not satisfactory, please look forward to the next version, which is completely refined using a different approach and is very different.

