This guide is deprecated, instead use the A1111 interrogator extension and ViT-g-14-laion2B-s34B-b88K model with "fast" batch captioning.
Introduction
Why use Blip2 for captioning? Especially for large datasets, it allows you to create much richer captions requiring much less manual revisions as compared to Blip1. Consider the following examples.
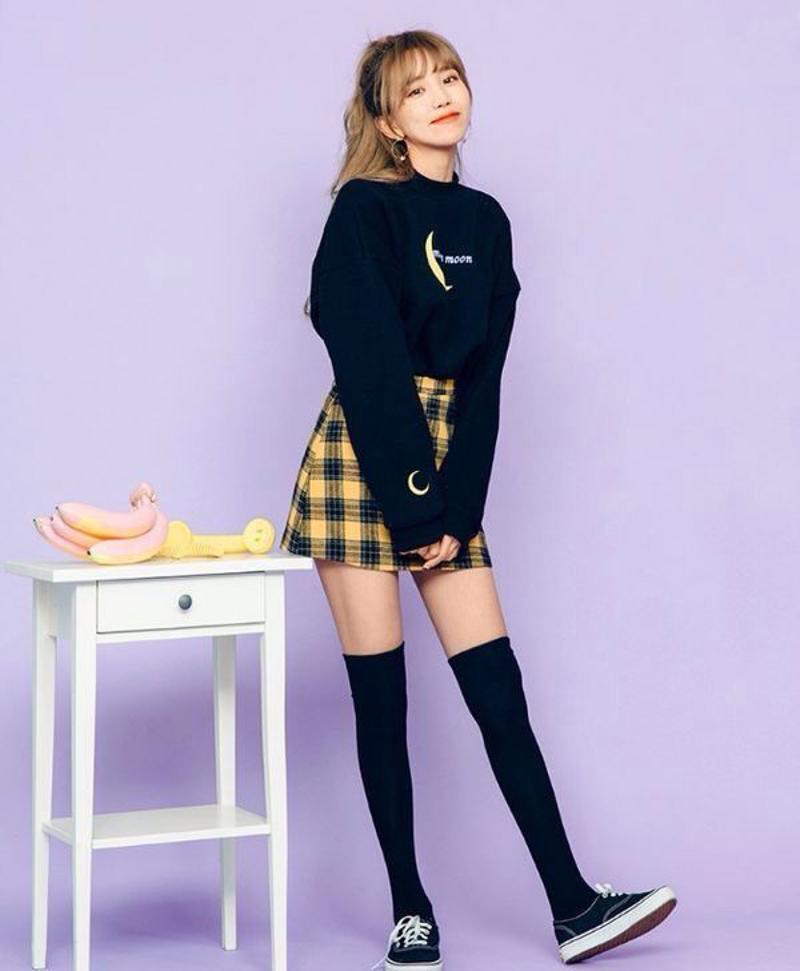
Example 1:

With blip1 using default settings, the generated caption is:
a woman in a skirt and sweater posing for a picture
With blip2 using the jiwenjiWorkflow.json file attached to the article, the caption is:
blip2_t5 This person is asian. This person is a girl. a woman. The person is normal weight. The subject is posing. The person is smiling.. a black sweatshirt and yellow plaid skirt. The scene is inside a bedroom. The room contains a chair and lamp. The image is realistic. blip2_t5
Not perfect, it fails the hotdog/not hotdog test by confusing a banana for a lamp, and a side table for a chair, but the captions are clearly of higher quality than blip1.
Different workflows, different captions
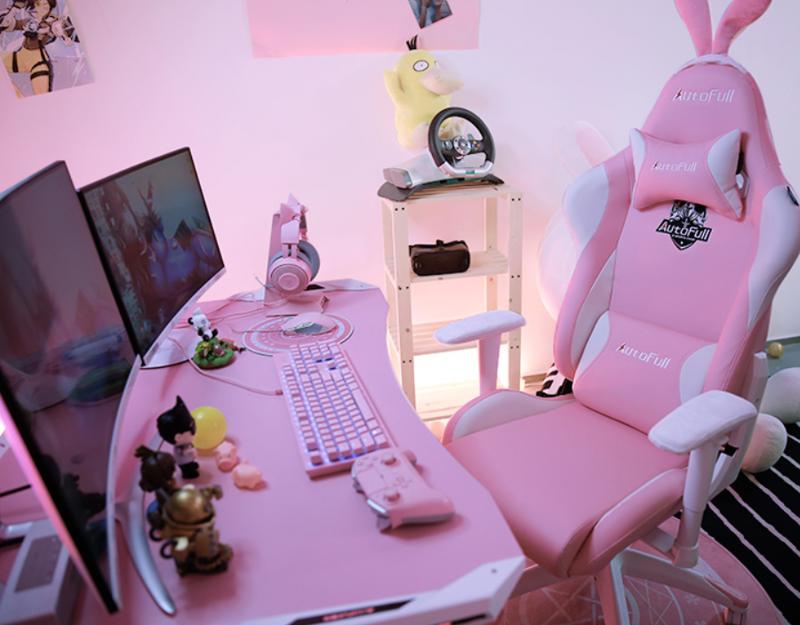
Example 2:

with jiwenjiWorkflow.json
blip1: a pink computer desk with a pink chair and a computer
blip2 (jiwenjiWorkflow.json): blip2_t5 This person is white. This person is a girl. a woman. full body, The person is skinny. no The subject is sitting. The subject is sitting in a chair. The person is smiling.. this person is wearing a pink t-shirt with bunny on it. The scene is inside a bedroom. The room contains a monitor, keyboard, and mouse. The image is realistic. blip2_t5
There are more incorrect tokens in this caption, due to the questions in jiwenjiWorkflow.json being oriented towards images with human subjects. With Blip2, it is important to create new workflows to affect how captions are generated in a more general way. By using the included jiwenjiWorkflow_reduced.json , no captions related to human subjects are outputted.
Blip2 with jiwenjiWorkflow_reduced.json:
blip2_t5 closeup shot of The scene is inside a bedroom. The room contains a monitor, keyboard, and mouse. The image is realistic. colors: pink. blip2_t5
Overall, this reduced and very basic caption workflow is neither better nor worse compared with blip1. With this result, it would depend on the size of the dataset whether time is better spent manually tagging, or revising and improving the workflow json.
The next sections will tell you how to install and use the Blip2 captioner.
Installing
open a terminal window andgit clone https://github.com/tjennings/describedchange to the project foldercd describedcreate a new virtual environment in the project folder(you only have to do this the very first time, next time just activate the environment in step 4)python -m venv venvnow activate the environment./venv/scripts/activateand install the requirements (only have to do this once)pip install -r requirements.txtDownload thejiwenjiWorkflow.jsonin the attachments in this article and put the file in the/workflowsfolder
Running the captioner
Activate the python virtual environment./venv/scripts/activateChange to the workflow directorycd workflowsrun the captioner on your training data, replace the--pathin this command:python ..\described.py --path "c:/path/to/the/training/images" --workflow jiwenjiWorkflow.json --suffix ", uniqueToken"make sure you're in the/workflowsfolder from step 2 when you run the commandthe--suffixflag is optional but useful for adding a trigger word.
It will load the blip checkpoint and caption the images. You can watch the progress in terminal and view the caption files as they are generated. It will take significantly more time than captioning with blip1. It will not overwrite captions that already exist.You may need to modify the workflow and remove irrelevant questions or add new questions to differentiate other aspects of the images.OpenjiwenjiWorkflow.jsonin a text editor and get your hands dirty!
Here is a brief explanation of additional arguments:
--workflow: This is the path to the workflow file that will be used. By default, it is set to use the standard.json5 workflow file in the workflows directory.--model_name: This option lets you specify the name of the model to be used. You can choose between "blip2_opt", "blip2_t5", and "blip2". By default, "blip2_t5" is used.--model_type: This option defines the type of the model you want to use. The types are organized by the model names and they include:For "blip2_opt", possible model types are "pretrain_opt2.7b", "caption_coco_opt2.7b", "pretrain_opt6.7b", "caption_coco_opt6.7b"For "blip2_t5", possible model types are "pretrain_flant5xl", "caption_coco_flant5xl", "pretrain_flant5xxl"For "blip2", possible model types are "pretrain", "coco"
By default, it is set to "pretrain_flant5xl".--path: This option is required. It's the path to the images that you want to be captioned.--prefix: This is a string that will be applied at the beginning of each caption. By default, it's set to "blip2_t5".--suffix: This is a string that will be applied at the end of each caption. By default, it's also set to "blip2_t5".
To use these arguments, you would append them to the described.py command when running it from the command line.
Please share workflows! Figuring out what questions to use in a workflow is the most difficult aspect of using Blip2. Even with this obstacle, the results are far superior to blip1. Happy captioning!
Next steps?
learn how to properly train a model using tensorboard


