
🔁 Before We Start: Add Text & Graphics to Images in ComfyUI
If you haven’t seen it yet, make sure to check out my previous article:
👉 Add Text and Graphics to Images with My Own ComfyUI Node
In that post, I introduced a custom node I created for ComfyUI that lets you overlay text, speech bubbles, and graphics directly onto your AI-generated images. It’s a powerful and flexible tool that makes image storytelling effortless.
That foundation sets the stage perfectly for this next step: adding your logo!
🎯 Objective
In this article, we’ll extend the idea of image overlays by adding a custom logo to your images using an enhanced version of my ComfyUI node. This makes it easy to brand your images consistently and professionally.
🧩 Components to Use
Install the custom node with the following command:
cd ComfyUI/custom_nodes
git clone https://github.com/maurorilla/ComfyUI-MisterMR-Nodes
You’ll find a new node that supports adding logos, text, and backgrounds all in one pass.
📘 Explanation
Why Add a Logo?
This is especially useful for:
Sharing branded content on social media
Maintaining consistent visuals across outputs
Combining multiple overlays (logo + speech bubble + text)
Adding creator attribution automatically
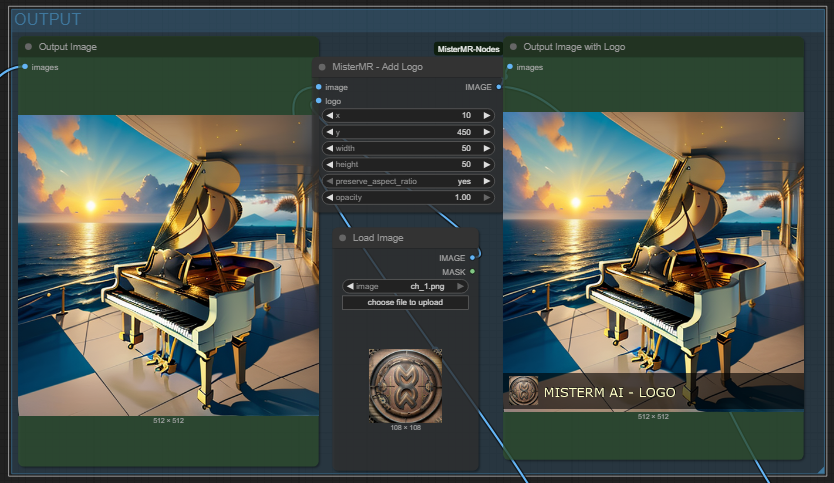
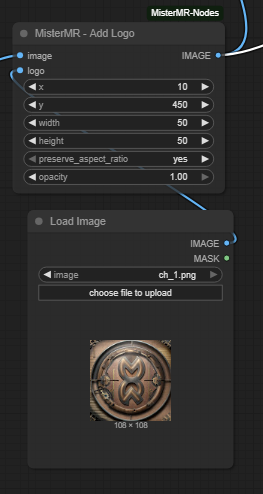
How It Works
The node allows:
Selecting your output image
Loading a custom logo
Setting coordinates, width, and height
Preserving aspect ratio
Adjusting opacity
Adding a semi-transparent black background rectangle (opacity 0.6)
🛠️ How to Use
Clone the repo (see above).
Load or build a simple workflow.
Connect your generated image and logo.
Customize position, size, and transparency.
Add additional images or text overlays if needed.
⚠️ Note: Transparency issues with some PNGs are being investigated.
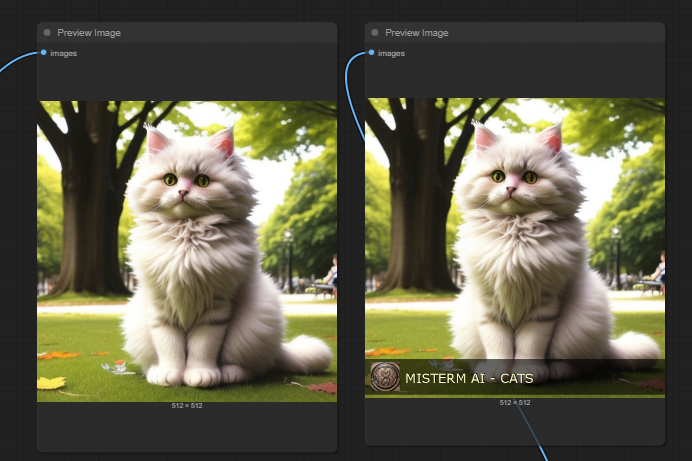
🧪 Use Case Example
You're generating a stylish AI model and want to:
Add your signature logo in the corner
Include a bold caption or thought bubble
Highlight the composition with a soft background rectangle
This node makes that fast and easy.
Here the complete workflow (you find attached to this article)

✅ Conclusion
This new node builds on the work shared in my previous article and gives you even more control over your visual outputs. It’s a simple way to ensure your work stays recognizable, professional, and share-ready.
🔗 Start from the beginning: Add Text and Graphics to Images
📥 Try this node: https://github.com/maurorilla/ComfyUI-MisterMR-Nodes
Let me know if you'd like a downloadable example workflow or a visual guide for the UI!