

Intro
as a Windows user with an AMD card, my only option for image generation was using my CPU when AI art first started gaining traction - which meant that if I wanted to join the club, I had to sacrifice being able to do literally anything else on my PC while it was generating images. cue ONNX runtime - it converts models in a way that allows them to run on AMD cards as well, and it's been a godsend for me.
with that, I've been using @ssube's ONNX Web UI for AI image generation for awhile now, and I like it quite a bit. obviously the fact that it uses ONNX runtime is huge draw for me, but the creator is also quite responsive and helpful in the discord server, and he's very welcoming of community contributions. it's been really cool watching the tool develop as new features are added, and if you take one thing away from this post, it's that I really think you should give ONNX Web a try.
Step One: Base Image
while ONNX web is setup so that you can chain together each step/pipeline and only have to hit "generate" once, as I've played more and more with AI image generation I've found that I prefer breaking up each step. there are a few reasons for this, but the biggest one is just that it gives me much more control over the development of the image.
so for my first step, I run basic image generation from the txt2img tab, with no hires or upscaling:
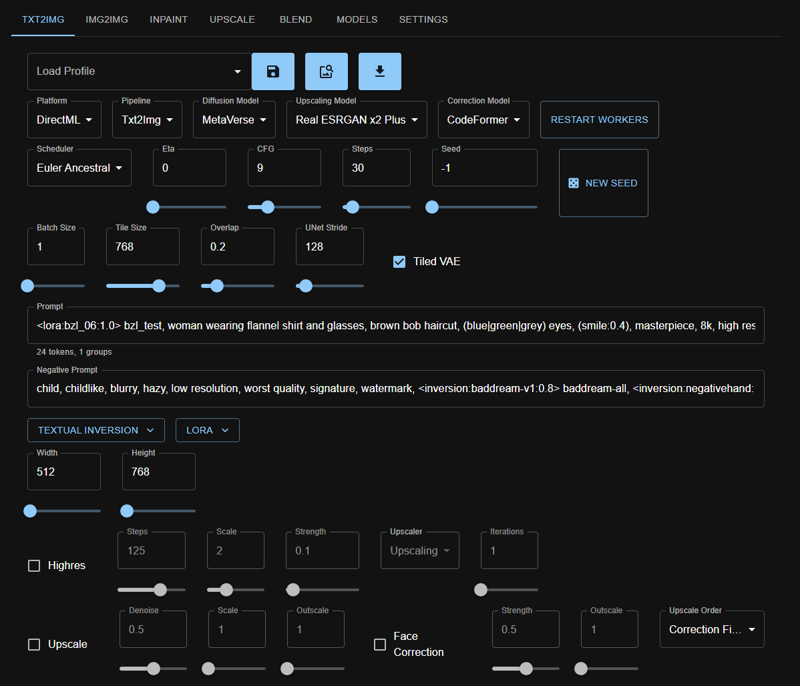
there's a lot of fields here that I'm not actually using, but the important params are:
Platform: DirectML
Pipeline: Txt2img
Diffusion Model: for this example, I'm using one of my current favorites, Metaverse
Scheduler: Euler A
I know it's not the most popular, but I live and die by Euler A
CFG: 9
Steps: 30
Tile Size: 768
when I'm generating portraits, I do 512x768, so I want my tile size here to match the larger dimension. otherwise, you can get some weird totem pole effects which can be neat but also very very cursed.
Prompt:
<lora:bzl_06:1.0> bzl_test, woman wearing flannel shirt and glasses, brown bob haircut, (blue|green|grey) eyes, (smile:0.4), masterpiece, 8k, high resolution, shallow depth of field, sharp focusthe second half of the prompt is something I use on pretty much image:
masterpiece, 8k, high resolution, shallow depth of field, sharp focus. I personally don't find that you need a ton of extra keywords, but these ones consistently have an impact on overall quality IME.the lora I'm using is a personal lora :)
Negative Prompt:
child, childlike, blurry, hazy, low resolution, worst quality, signature, watermark, <inversion:baddream-v1:0.8> baddream-all, <inversion:negativehand:1.0> negativehand-allagain, most of this is prretty much the same negative prompt for every image I make - sometimes I'll add things to the negative prompt if I'm not getting the results I want (like adding
humanif I'm generating anthropomorphic animals).child, childlikeis almost always present if I'm making human portraits, but I take it out if I'm generating anything else since it's not relevant.I also usually only use negative embeddings when generating human portraits - I just haven't found that they have much benefit on other subjects. the two I'm using in this example are Bad Dream and Negative Hand.
and then it's time to generate! another reason why I like generating images without any hires or upscaling first is I can generate a lot within a short timeframe and then cherry pick which ones I like to use in the next steps. here's 10 that I spun up for this exercise (a modest number for me):
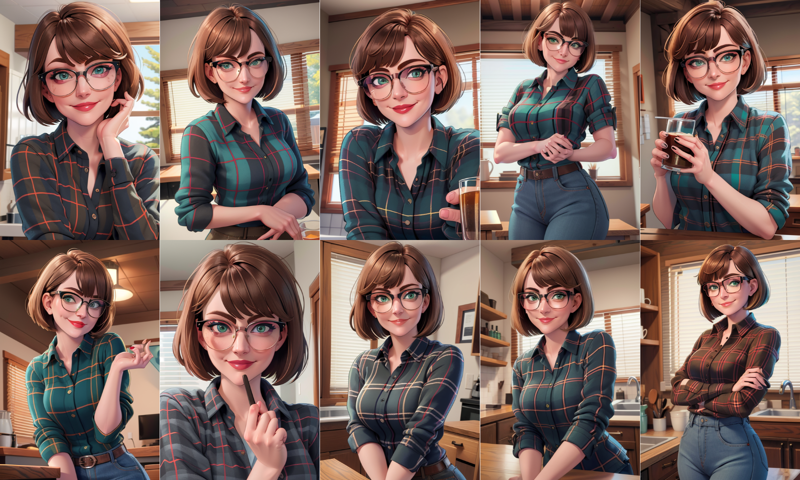
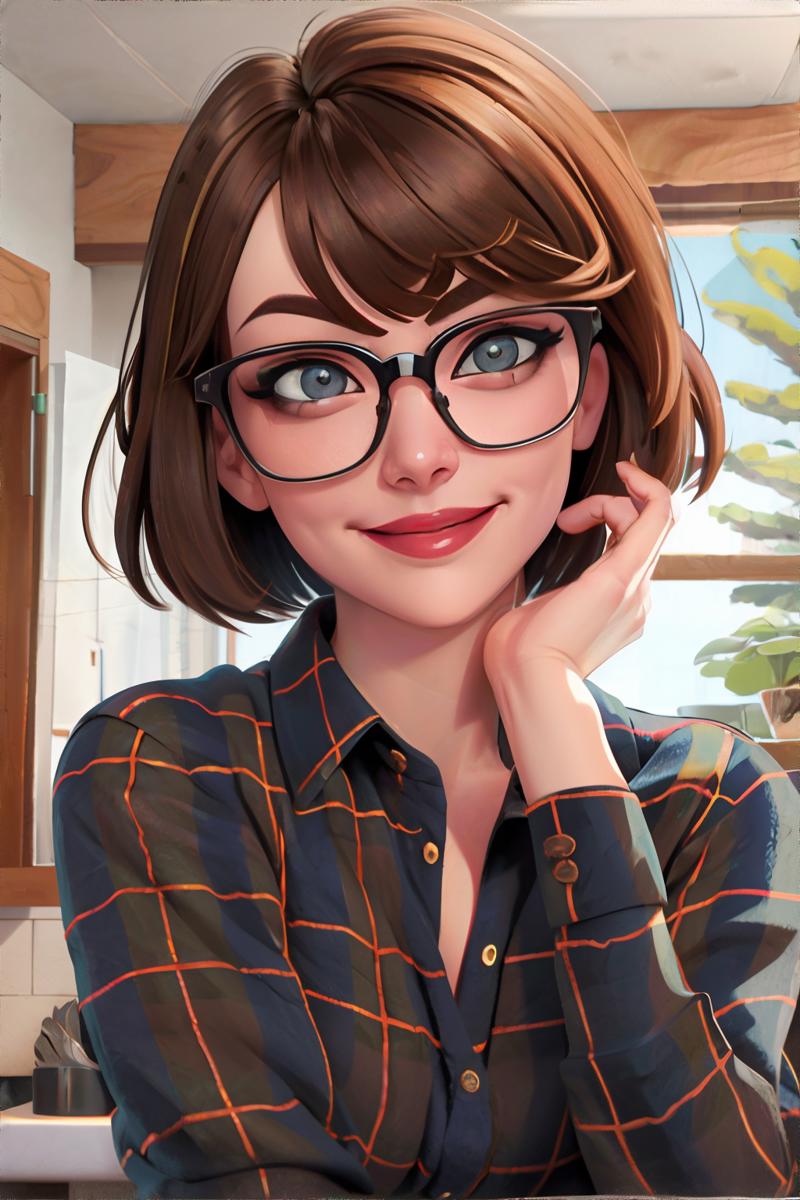
I like a number of these, but I think the top leftmost one is my favorite:
now that I have my base image picked, it's time to move over to img2img!
Step Two: Base Image... Again?
over on the img2img tab, I'll use the handy profile loading button to automatically adjust most of my params to match my base image, and then make tweaks as I see fit:
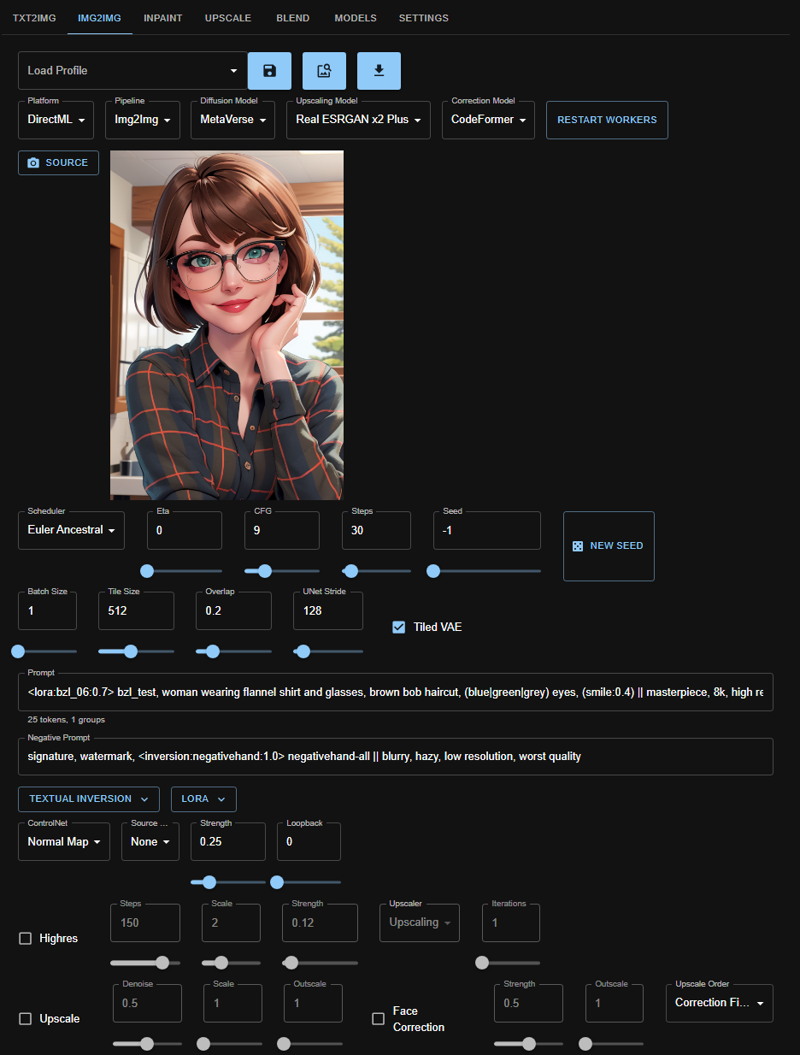
there are a couple of params here to call out:
Seed: -1
I reset the seed rather than use the base image's seed; I've found I prefer a random seed with a lower img2img strength, as it gives me more variety in the next set I generate while staying true to what I like most in the original image.
Tile Size: 512
this is more important for when I get to hiresing, but I usually do it here just so that I don't forget later. running hires or upscaling with a 768 or even 1024 tile size absolutely devours my memory.
Strength: 0.25
this is specifically dictating how much freedom I want to give the AI to make changes to the base image. I usually do something between 0.20 and 0.30.
Positive Prompt:
<lora:bzl_06:0.7> bzl_test, woman wearing flannel shirt and glasses, brown bob haircut, (blue|green|grey) eyes, (smile:0.4) || masterpiece, 8k, high resolution, shallow depth of field, sharp focusthere are two changes here to call out: I lowered the strength of the lora from 1.0 to 0.7, and I added a double pipe where there used to be a comma before the
masterpiece, ....portion of my prompt. I've found that lower strengths are better for loras in img2img - I don't know why, it's just been my anecdotal experience. the||is just important for hiresing but I do it at this point, again, so I don't forget later.
Negative Prompt:
signature, watermark, <inversion:negativehand:1.0> negativehand-all || blurry, hazy, low resolution, worst qualityagain, I separated the content parts of my negative prompt from the quality parts of my negative prompt with a double pipe. I also usually take out negative embeddings - if I leave any in, it's Negative Hand, and only on the left side of the pipes.
you might notice that I don't have the hhires or upscale boxes checked yet - and that's intentional. the first thing I do in img2img is just generate a few more versions of my base image, both to get the base model and any loras/embeddings loaded into the cache first and to give myself a few more options:

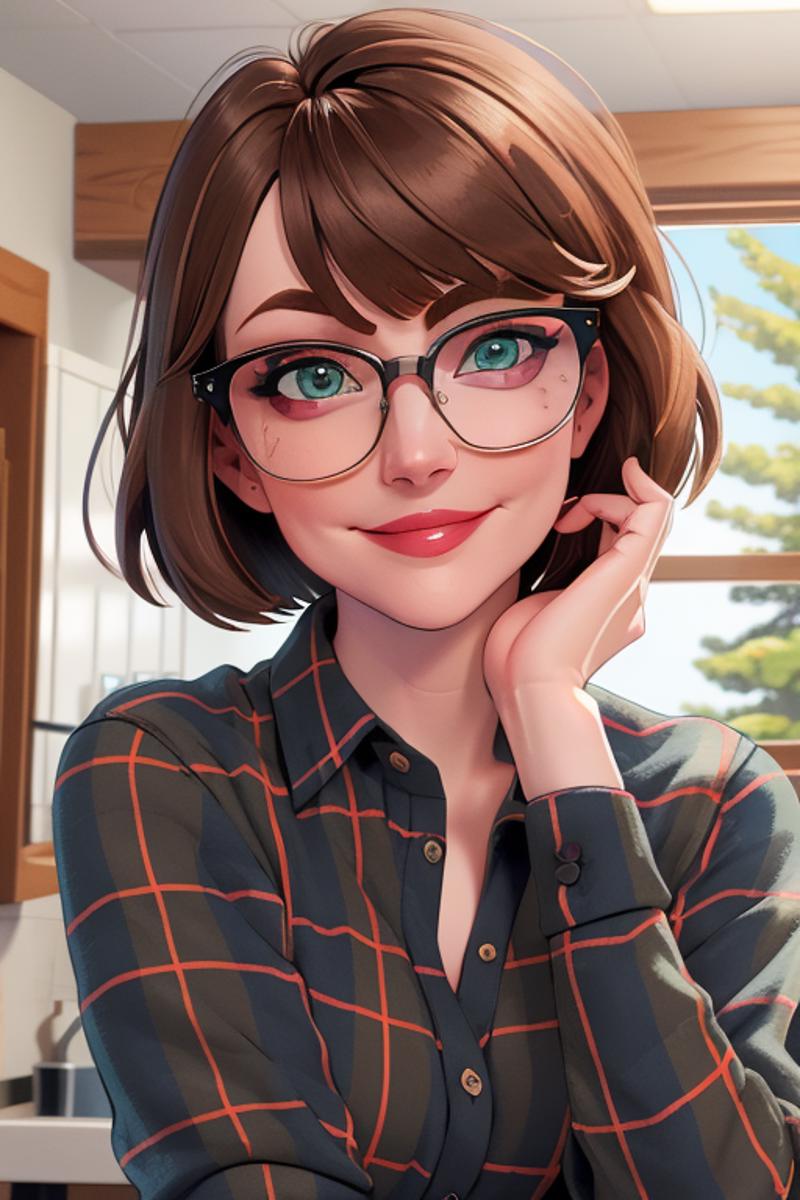
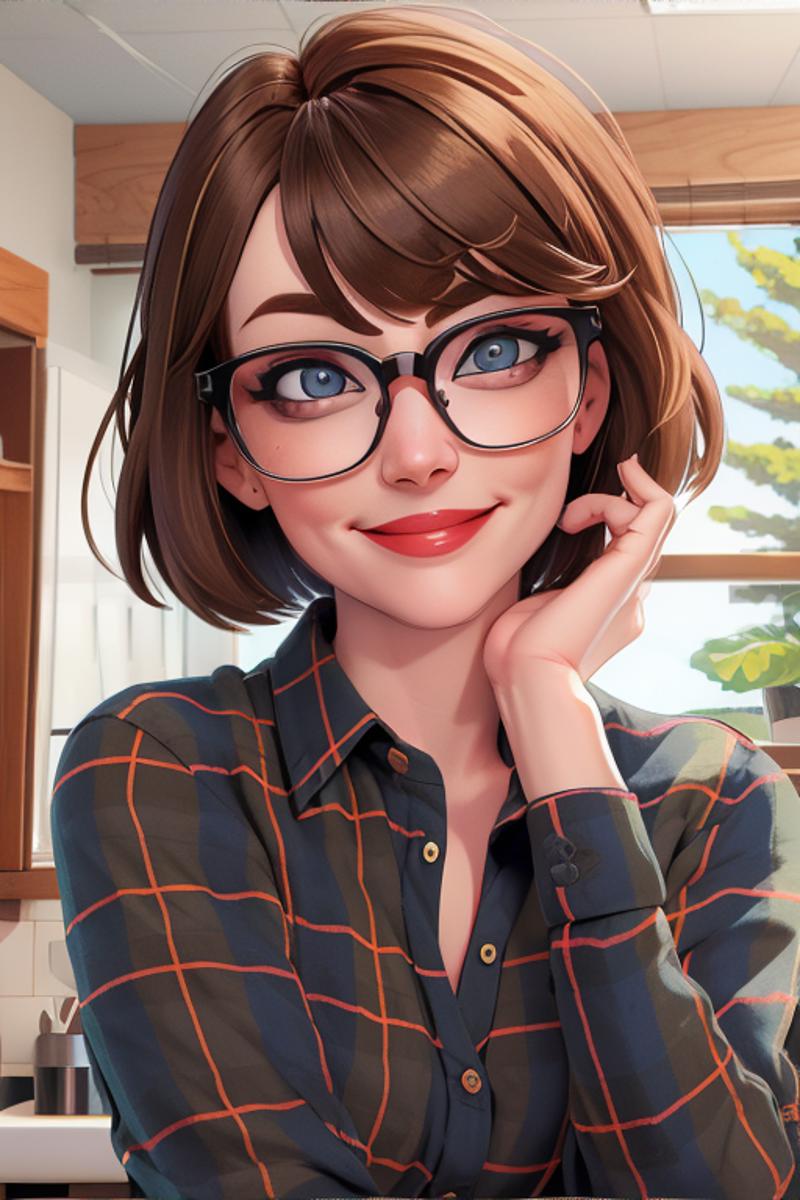
I often end up sticking with the original image - this step really is mostly just for loading the model into my cache so hiresing is faster. however, in this case, I actually liked one of the img2img results better - the flecks/noise on the glasses are gone, the irises are better defined and a more realistic color, and the definition of the smile is more pronounced. so in this case, I am actually going to change my source image:
Step Three: Hi-Res
now it's time to actually hi-res this lady! honestly, the image as it is now is in a pretty good state - it's incredible just how far AI image generation has come in such a short amount of time! that said, we can make it bigger, so why not?
the changes that I made to my positive and negative prompts come into play here now - the || in each prompt is actually separating the prompt into two prompts - the left-hand side will be applied during the base img2img to run, and then only the right-hand side will be applied during the hi-res phase. this means that when the AI is focusing on adding in extra detail, it's only doing so with quality keywords, which helps cut back on random extra body parts and things getting added in. it also means that the lora and embedding I have loaded are only getting applied during the first round, which makes things run a bit quicker and keeps the final image from looking overbaked.
I usually just use hires, and will only use upscaling if I'm making a landscape or a wallpaper or something. I know some folks like to churn out 4k images, and they have stunning results. but for me, I'm okay with just slightly bigger, more detailed pics.
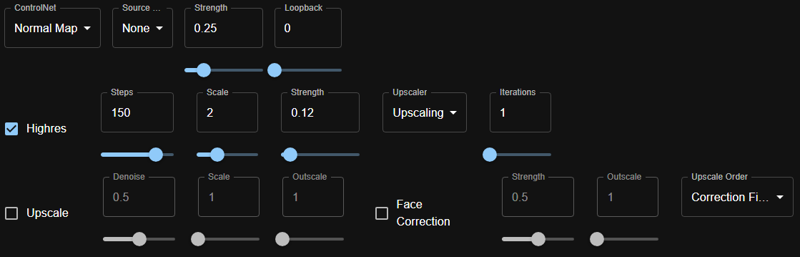
for my hires params, I'm using:
Steps: 150
100 is the minimum number of steps I'll use for hires. if I'm using a super photorealistic model or an intricately detailed image, I'll go up as high as 200. but 150 is the sweet spot that I use the most.
Scale: 2
Strength: 0.12
I usually start with 0.12, but my range is between 0.10 and 0.20. anything below 0.10 and hires starts to not matter IMO, and anything above 0.20 starts to get weird for me (in a cool, but not necessarily desired, way).
Upscaler: Upscaling
there are three options with ONNX Web; Upscaling is the most resource-intensive, but also the highest quality. I'm usually generating these while working on something else/otherwise not using my PC, so I prefer to opt for top quality.
Iterations: 1
I very very very rarely do more than 1 iteration because, again, I don't feel the need for more. if I do want a larger image than what 1 iteration at 2 scale will give me, I'm more likely to add in upscaling rather than a second round of hires.
strength is the param that I will do the most fiddling with, so while 0.12 is what I usually start with, I will often adjust it based on what I want - the lower the number, the less detail it adds, which usually is best for illustrative/2D models. higher strengths tend to work better with more photorealistic models. I ran the image 3 times at 3 different strengths this time, just to give you an idea of the differences.
0.10 strength:
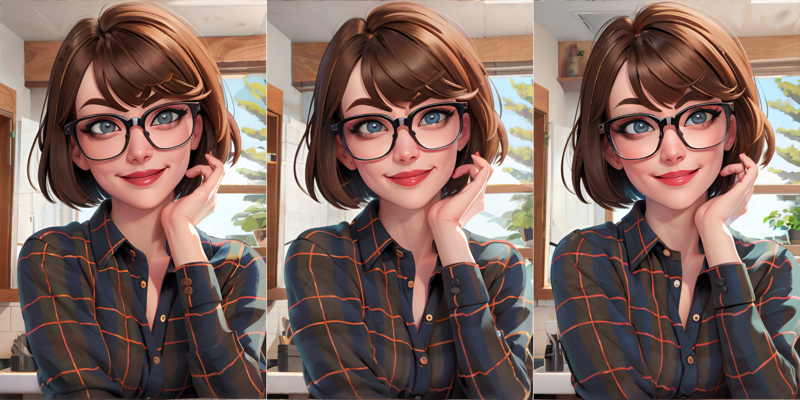
0.12 strength:
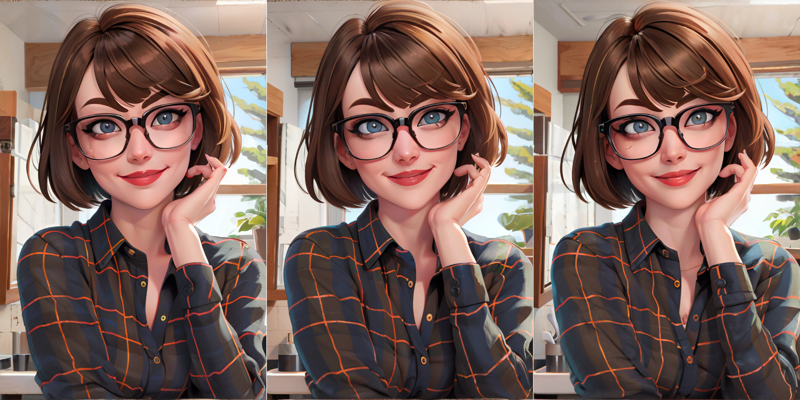
0.20 strength:
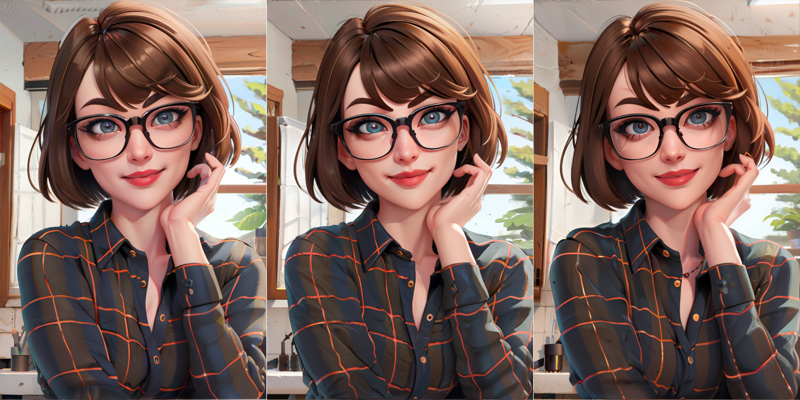
(these are also scaled 80%, because I may have started to hit the filesize max for images in articles.)
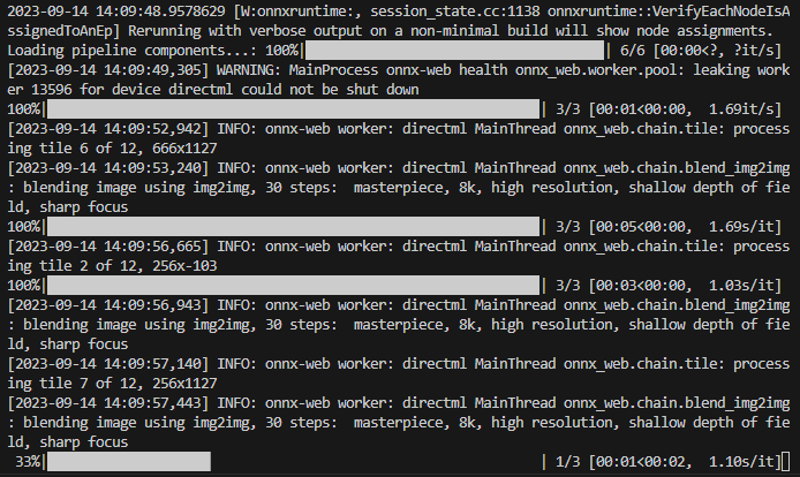
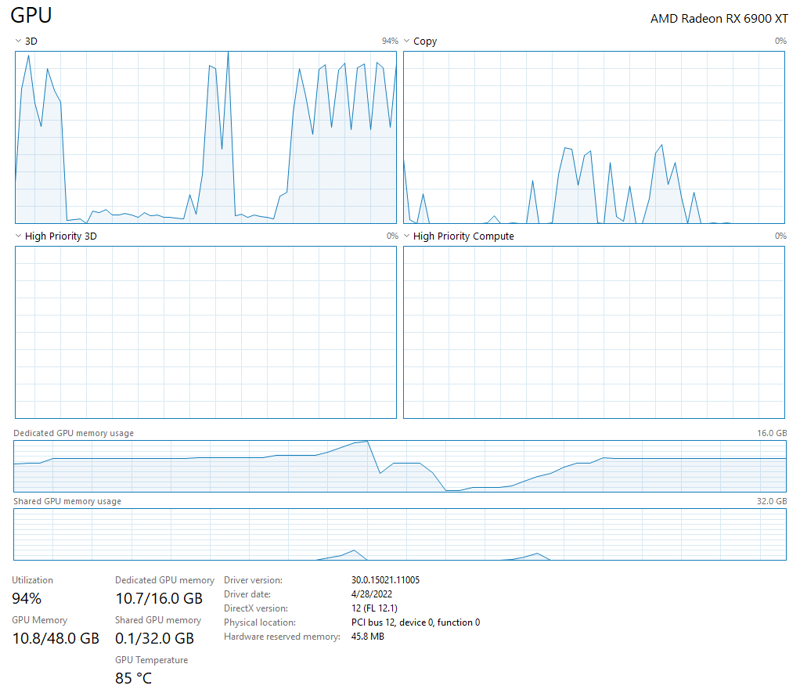
and for fun, here's what's happening under the hood while these were generating:
I actually ended up liking one of the results from 0.10 strength best, so that's what I've decided to go with as my final result! I'm especially pleased with this looking back at the first base image from step 1, and I don't think I would be as happy with the result if I hadn't broken up the chain.
Step Never: Inpainting
I suck at inpainting, and that's all there is to it. ONNX Web does have an inpainting tool, and it works well - I just personally am terrible with it, and prefer to do any painting-like edits on my own in the GIMP anyway.
Step Extra: Playtime!
Another benefit of breaking up the chain is that it really lets me play around. Applying a different base model, using a specific seed from a different image, switching up the scheduler, and even completely changing parts of the prompt - the world is my artificial oyster, and I intend to have fun with it!

that's it for me - if you found this post useful, have tips of your own, or have any questions I didn't cover above, let me know in the comments! 💕