A Comprehensive Guide to Inpainting: Part 2, Advanced Concepts and Hands
Welcome to part 2 of the inpainting tutorial. Today, we’re going to explore inpainting more difficult subjects (hands). In addition, I’ll introduce the two remaining factors in inpainting, Information and Authority, as well as discussing how those factors relate to the one introduced in part 1: Pixels.
A Simple Hand
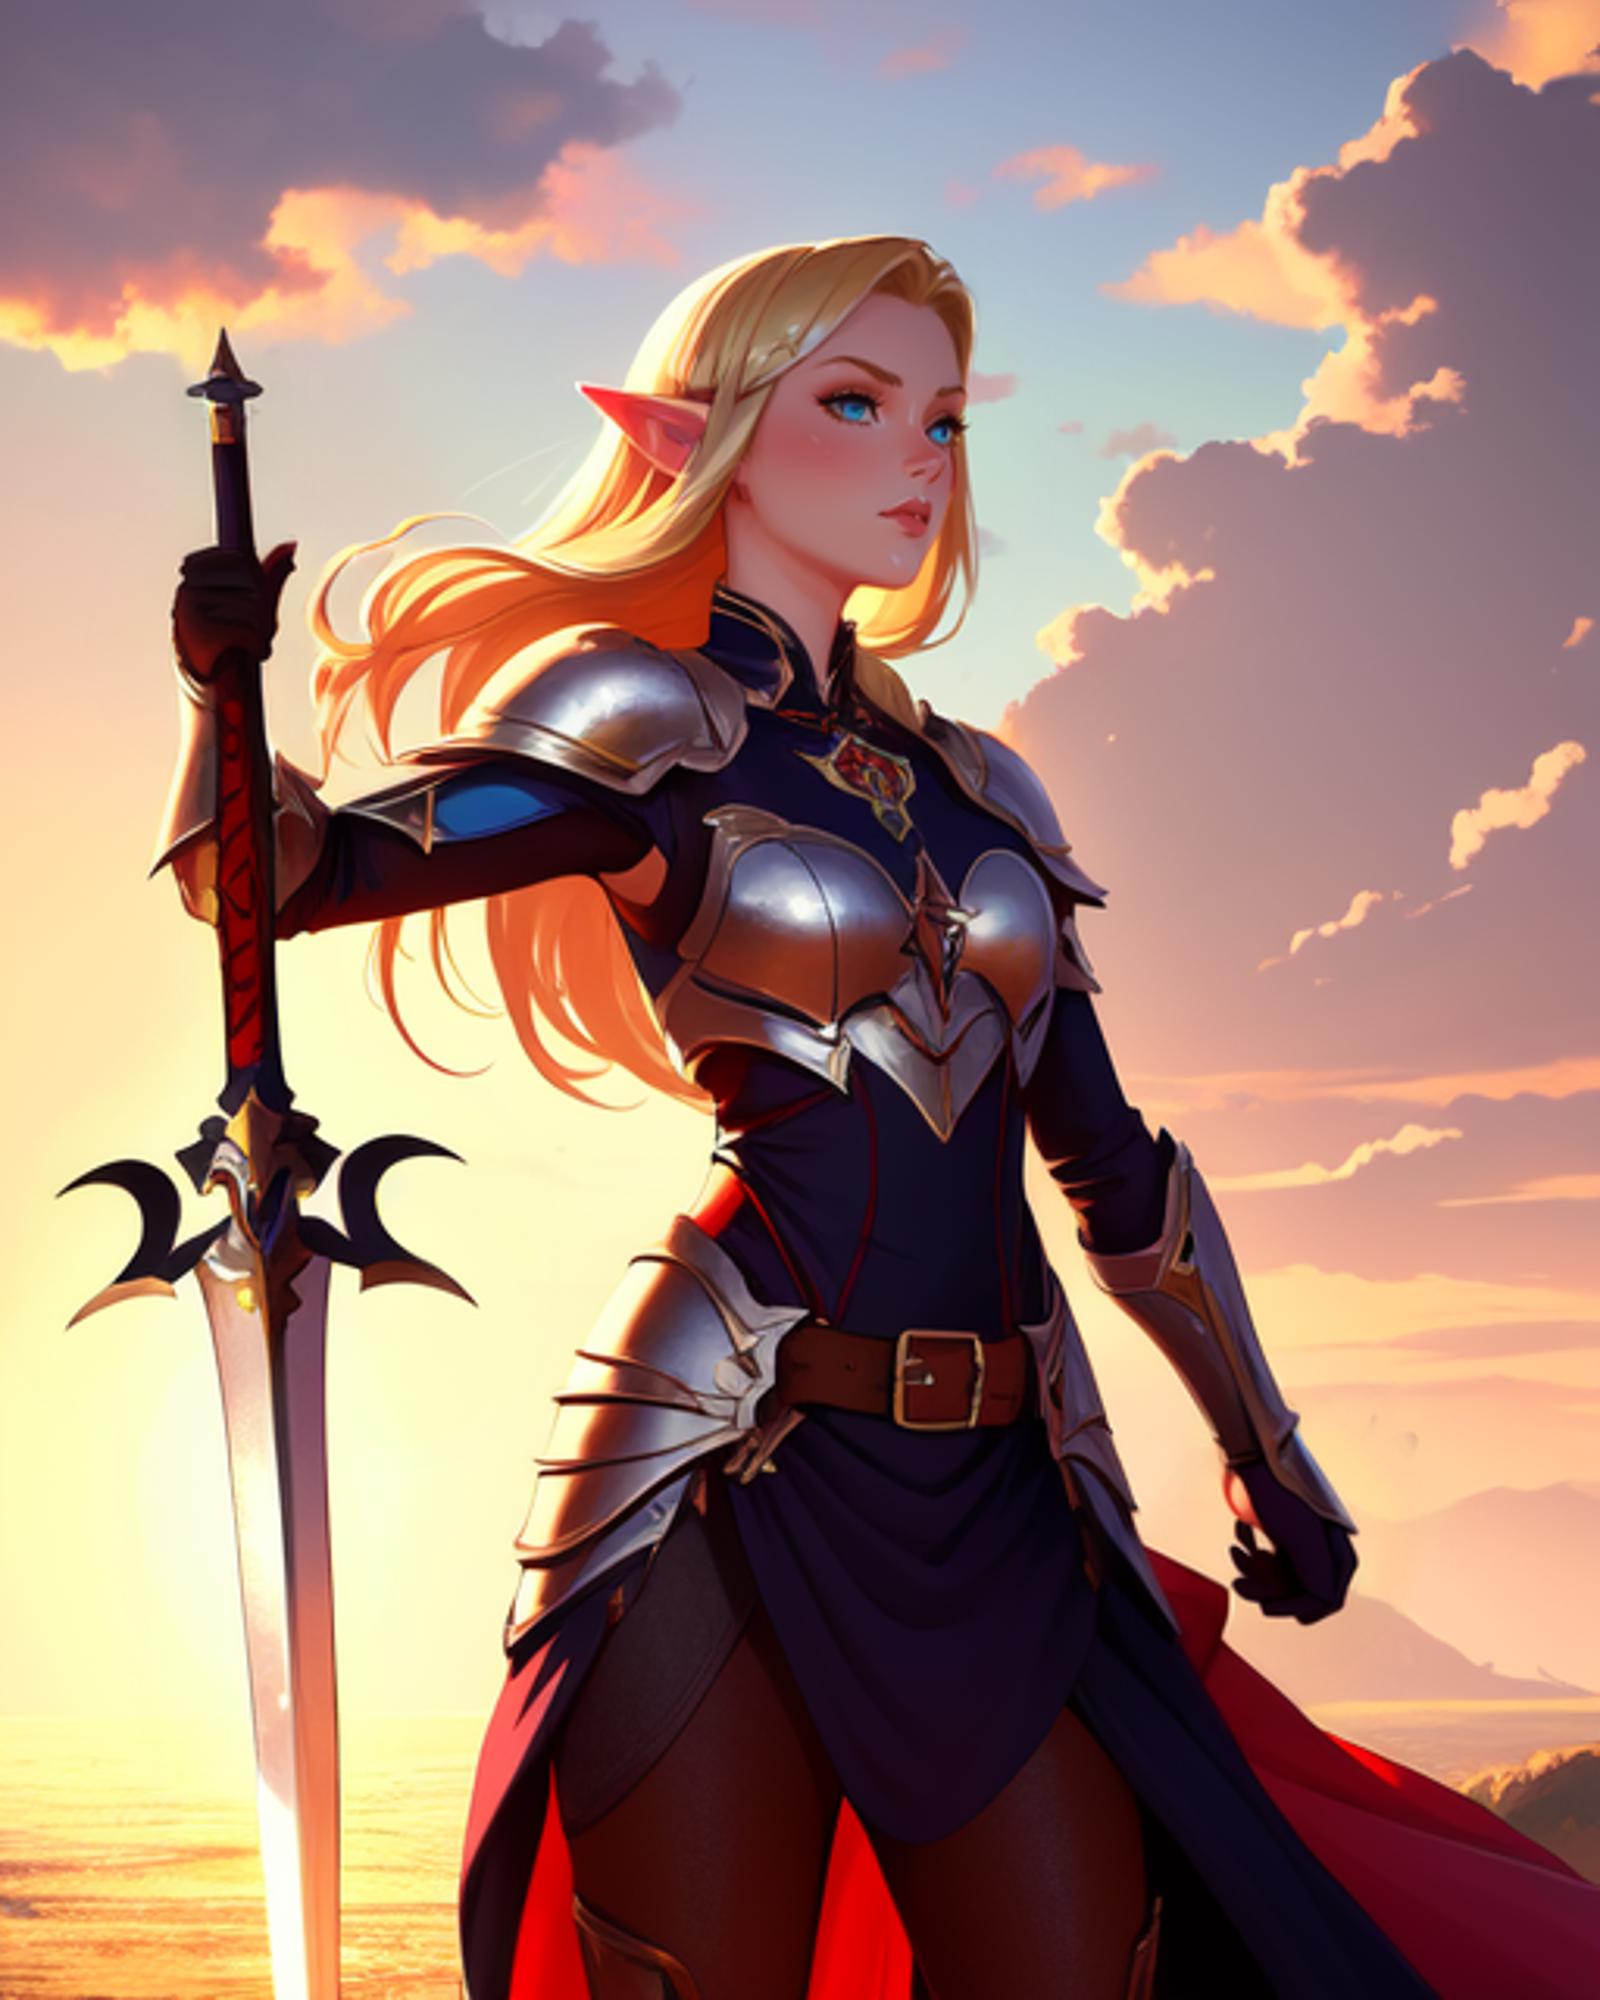
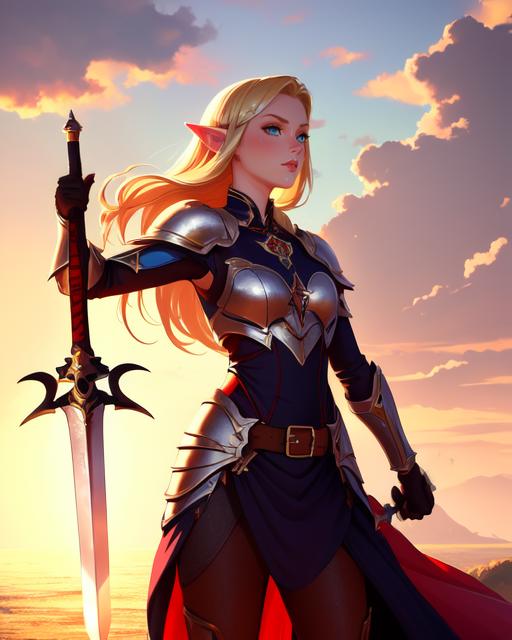
We’ll be starting with the same image from part 1, as we left it last.
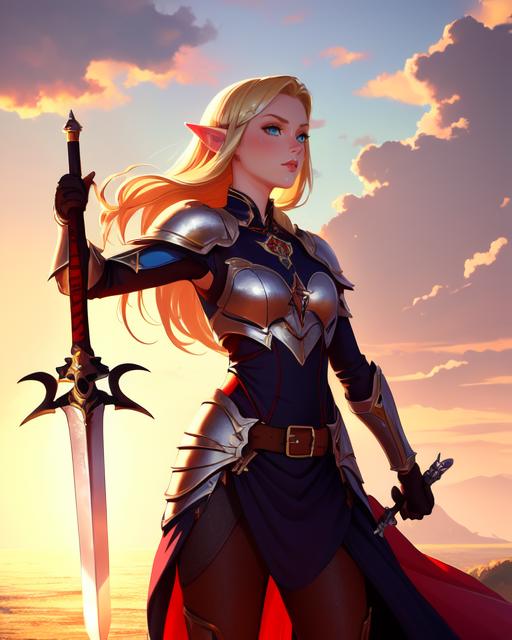
Definitely better than before, but there’s still a number of weird bits and pieces to rectify. First we’re going to take care of her right hand, the one holding the sword. It’s not bad, but it’s a little blobby and indistinct, and could use a better silhouette. Most importantly, though, it gives us an opportunity to discuss Information before we start getting too advanced.
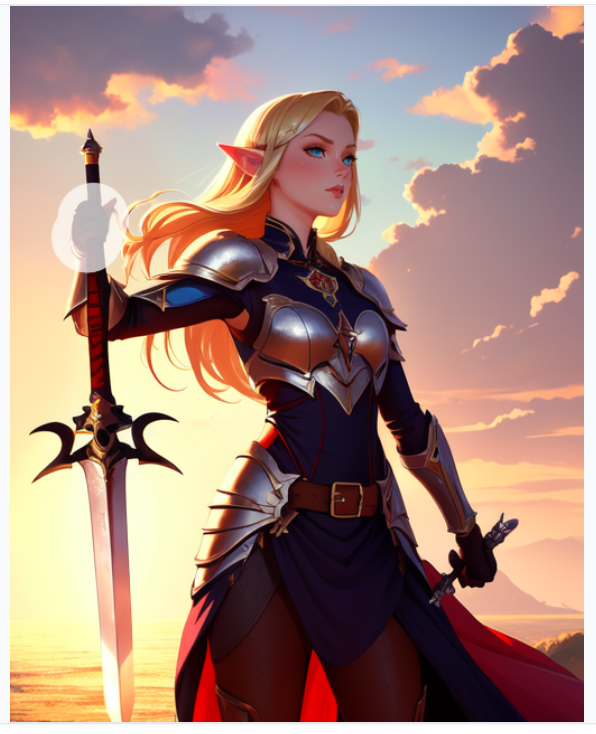
In addition to needing enough Pixels to provide the amount of detail we want, the AI requires Information in order to know what it’s supposed to be drawing. We have three ways to give it this information:
Starting Point: When the existing image is close to what we want, the “Original” setting in Masked Content provides the AI with a lot of the information it needs. However, as we increase the denoising strength to allow it to make more significant changes to the image, more of that information is lost and we need to find other sources to inform the AI.
This is also content dependent. In Part 1 of this tutorial, we inpainted a face. Stable Diffusion has been trained on a lot of faces, and a lot of zoomed in faces, so even with very little information (typically up to 0.5 denoising strength) it will be able to recognize and reconstruct a face without difficulty
In the case of most other objects (say, a hand), it has more trouble. Not only is it less tuned to produce pictures of only hands, but the fingers of a hand can be in almost limitless different configurations, so it’s harder for the AI to recognize when ‘blurred’ by denoising strength. If the hand is very close to what we want, we can get away with a very low (0.15 or so) denoising strength to fix tiny details, but otherwise we need to feed the AI information through other methods.Context: Luckily, the AI is able to guess what should be somewhere based on what is around it. In part 1 we left the “Only Masked Padding” slider at the default of 32, despite saying it was one of our two most important controls. This is where it comes into play.
By increasing the amount of padding, we give the AI information about the larger image, and through that context help it decide what should be in the portion it’s inpainting. A face only needs a little bit of padding in order to let the AI blend it into the image. For something like a hand, or part of an outfit, it needs more.
For our hand here, we need to show the AI that it’s connected to an arm, and a torso, and that it’s holding something in order for the AI to be able to really know what it’s doing.
A good general rule of thumb for images of people is to include enough padding on your inpaint area to include the face. Most images of people are centered on the face, so if it is included, you’re probably on pretty solid ground with regards to the AI recognizing what’s going on.Prompt: The third source of information the AI has is the prompt we’ve given it. For the most part you won’t be messing with it much, and it’s providing more vague guidance than the other factors. However, as we’ll touch on later, when it does become important, it can be very important.
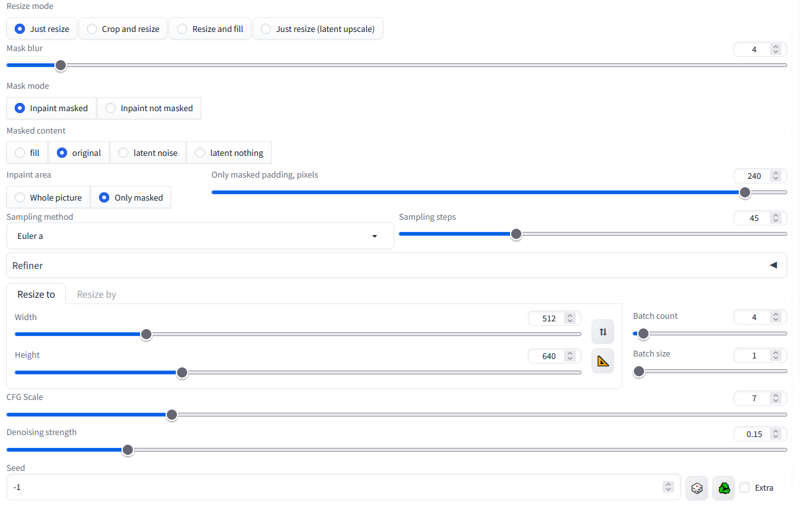
Let’s take a look at our settings. The first thing you’ll see is that we’ve increased the “Only Masked Padding” to 240, or almost half the width of the image. This puts the face solidly inside our inpaint area. Combined with the information we’ve retained by setting the Denoising Strength to 0.25, this should leave the AI with plenty of information to work with.
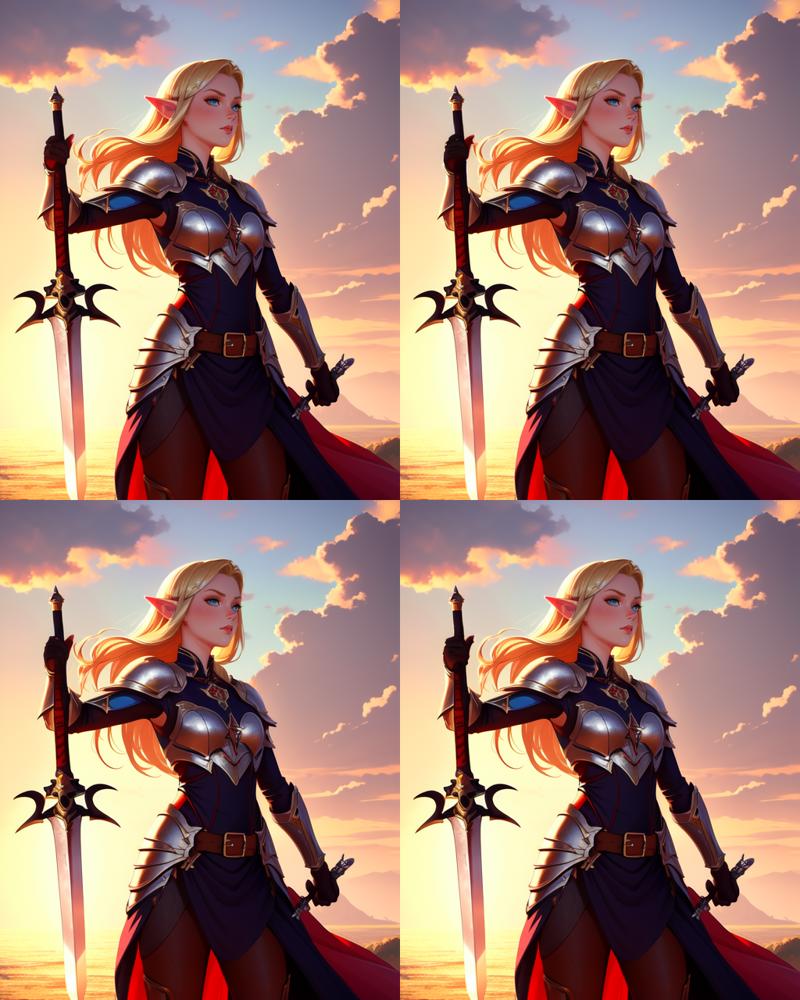
These are our results. I went with the bottom right. It may not be a massive improvement, but I like the more defined silhouette of the hand, and the fact that it’s separated from the hair instead of overlapping.
A More Difficult Hand, Part 1
With the basic concept under our belt, we need to move on to the other hand. This one, however, is a bit of a tough nut to crack. All the extra junk around it is going to cause us trouble if we try to use “Original” as our “Masked Content” Original tends to retain what is present and has trouble adding or removing elements. We could change our settings to “Whole Picture” in “Inpaint Area” and “Fill" or “Latent Noise” in “Masked Content” and just have it regenerate this section in the context of the entire image.
There are issues with this. All of the problems that gave us a wonky hand in the first place would still be present, With only a handful of pixels focusing on the area we want, we’re likely to be trying for quite a while before we get something we like.
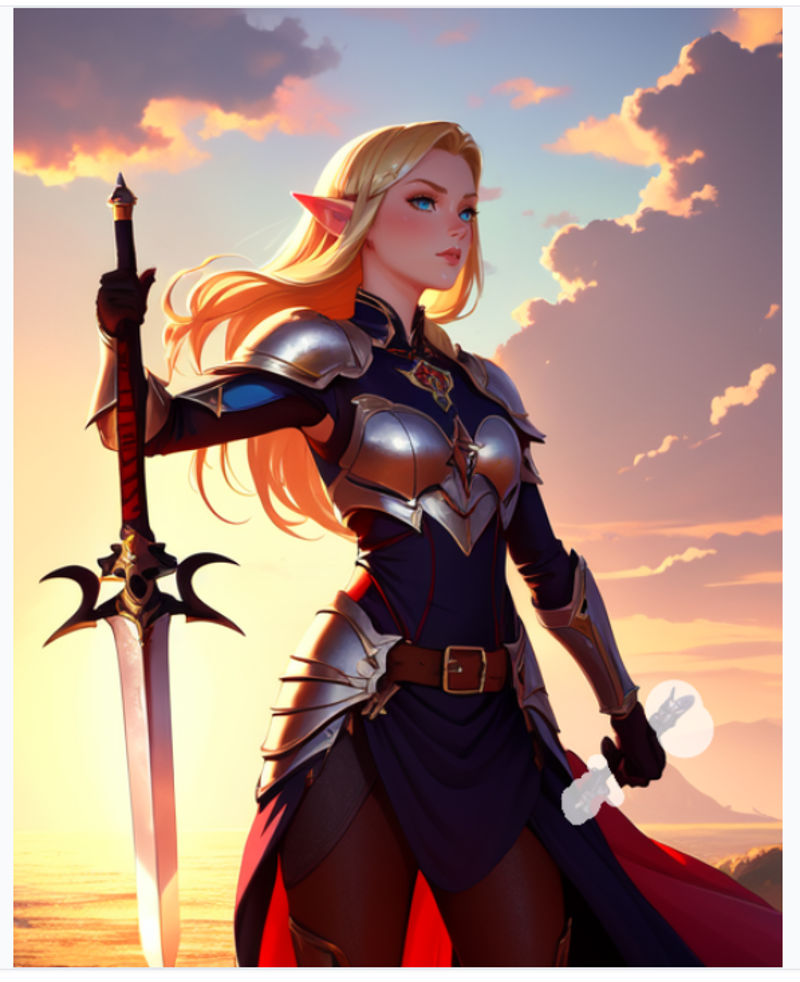
By taking a step by step approach, on the other hand, we can first turn the hand into something closer to our goal, then we’ll have a much easier time inpainting it into a final product. The first step is to remove the junk surrounding the hand. We’ll do this using the “Fill” setting.
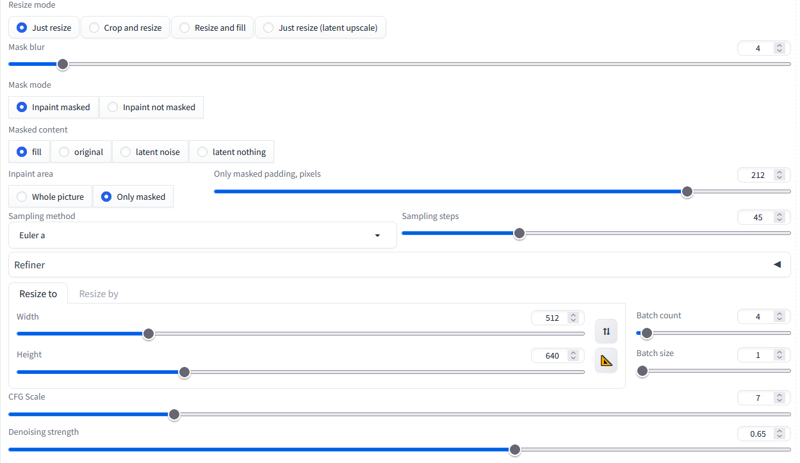
The first important setting is, obviously, “Fill” in “Masked Content”. This will pull in a mess of random colors from the surroundings to fill in the masked areas, then work from that to recreate the image.
Secondly, we have the padding, set to 212. For replacing sections wholesale, it generally pays to have a good amount of padding. When using the higher denoising strengths required to replace areas from scratch, the AI has a tendency to try to recreate an entire new image inside of the inpainted area. Including sufficient context is the easiest way to prevent that.
Lastly, we have denoising strength set to 0.65. I’ve found that this is a good strength to start with when replacing areas. It gives the AI enough freedom to recreate the portion you want it too, without letting it run rampant creating whatever random mess it feels like.
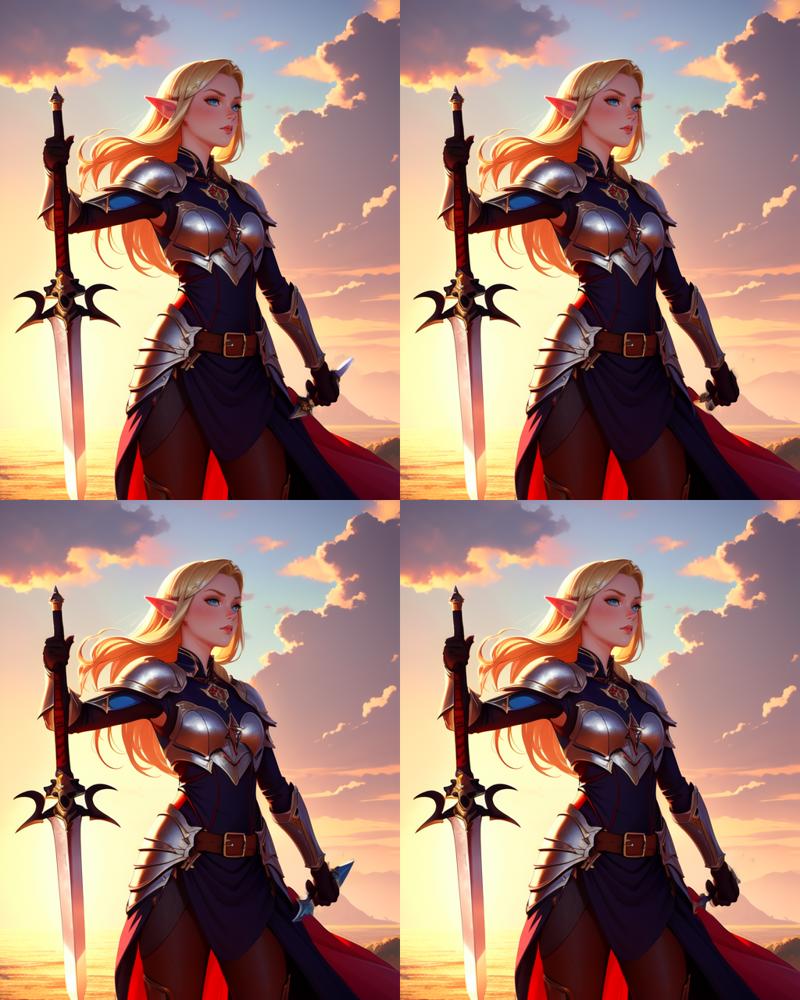
We end up with this. Again, I went with the bottom right image. It managed to remove the bulk of the mess around the hand, while leaving the lines of the skirt pretty coherent. All of this will make later inpainting easier.
You might notice that this looks like a hand if you squint, which is perfect, because that’s roughly what the AI will be doing in the next step.
A More Difficult Hand, Part 2
We now have a hand that’s close enough to the goal that the techniques we used for the face and first hand will work well on it:
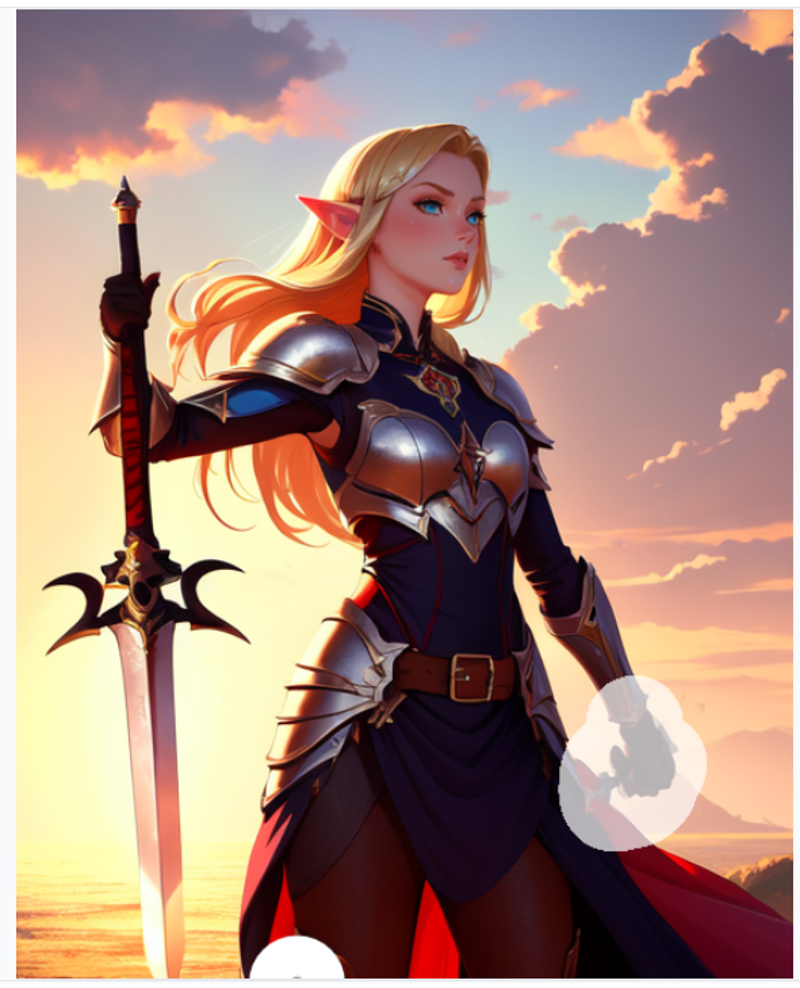
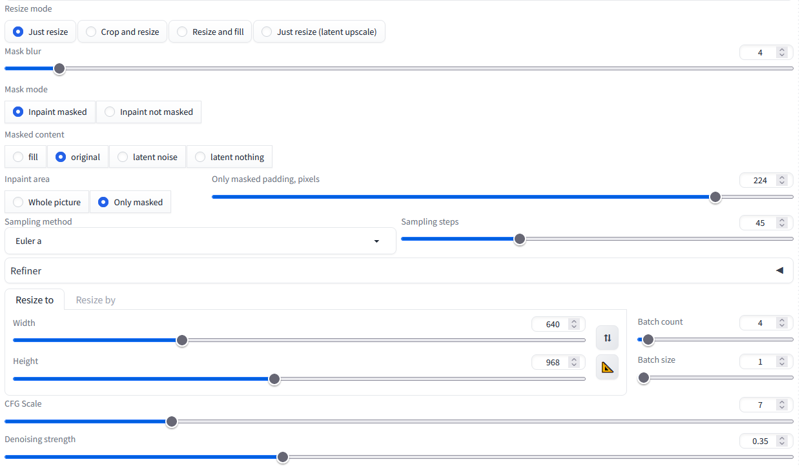
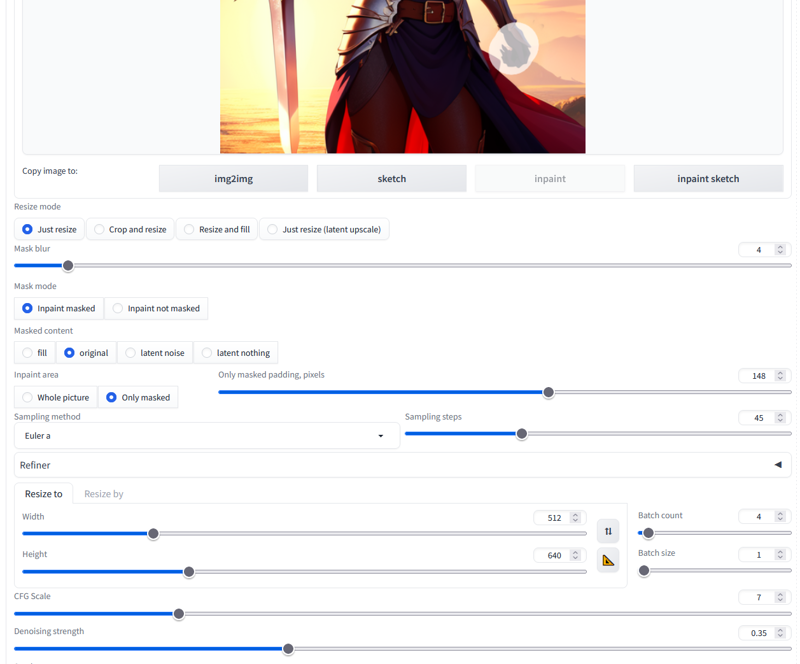
These settings should look pretty familiar. The content is set to “Original”, and the padding set high enough to make some of the face visible to the AI while inpainting. The denoise strength of .35 is enough to let it make some changes, but will maintain the general structure of what’s there already.
The keen eyed among you might also have noticed the change in the “Resize to” dimensions. This takes us back to the Pixels factor we covered in part one. To get a detailed hand, we want the AI to have enough space to render detail. Because we’ve increased the padding so much, we will start running into issues with detail.
If your graphics card can’t handle increasing the resolution, you can inpaint at lower resolution hoping to get close, then tidy it up zoomed in more tightly. If your graphics card can handle the larger canvas, though, it’s often quicker and provides better results to throw a bit of computing power at the problem and get it all done in one go.
So let’s get it done-
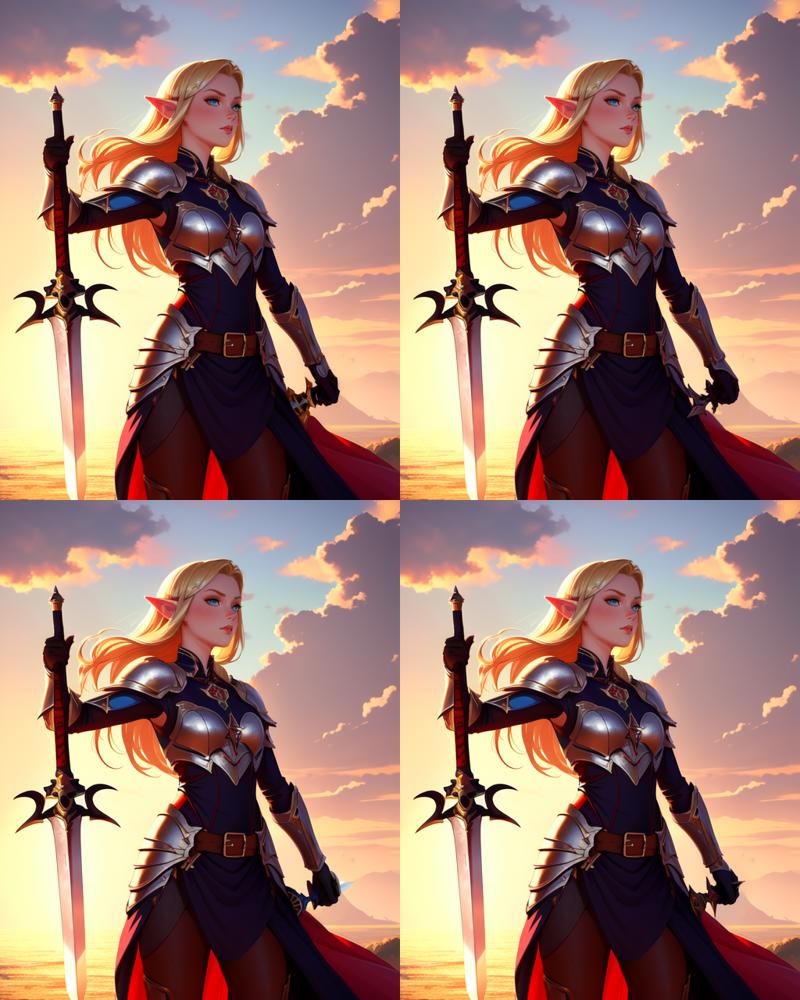
But wait, it’s adding back the junk that we removed in the last step. This takes us to the most common situation where our Prompt as a source of information becomes relevant. Let’s take a look at our prompt again:

Now our problem becomes clear. The AI is doing exactly what we’re telling it to do. While inpainting with these settings, this is roughly what it’s sees:
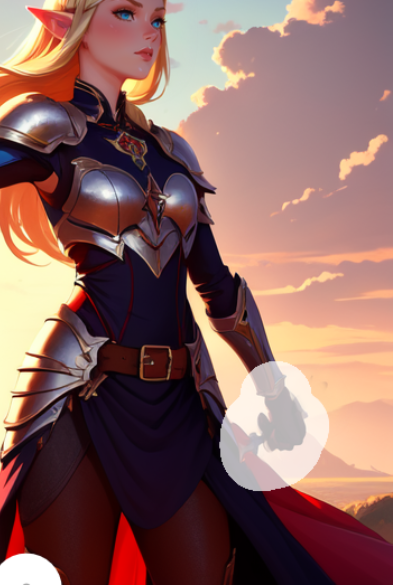
It sees what we’ve given it, and with the limited authority to change the image we’ve given it, it’s trying to give us an image of a person holding a sword. Let’s try the exact same settings, but with “holding sword” removed from the prompt.
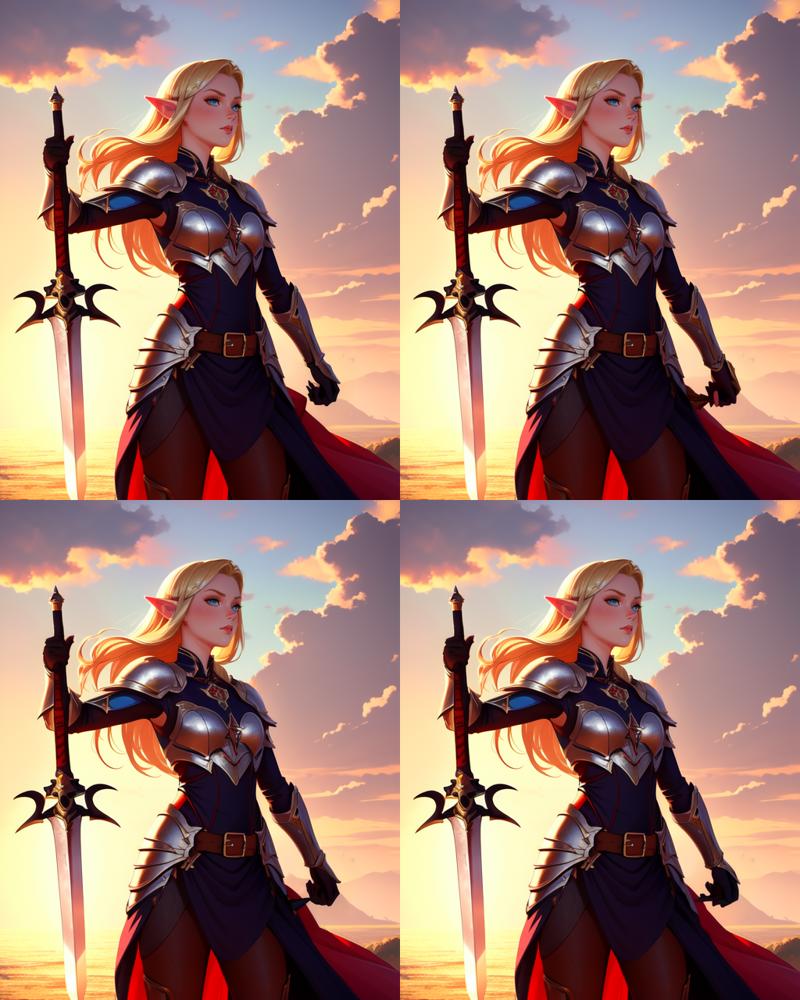
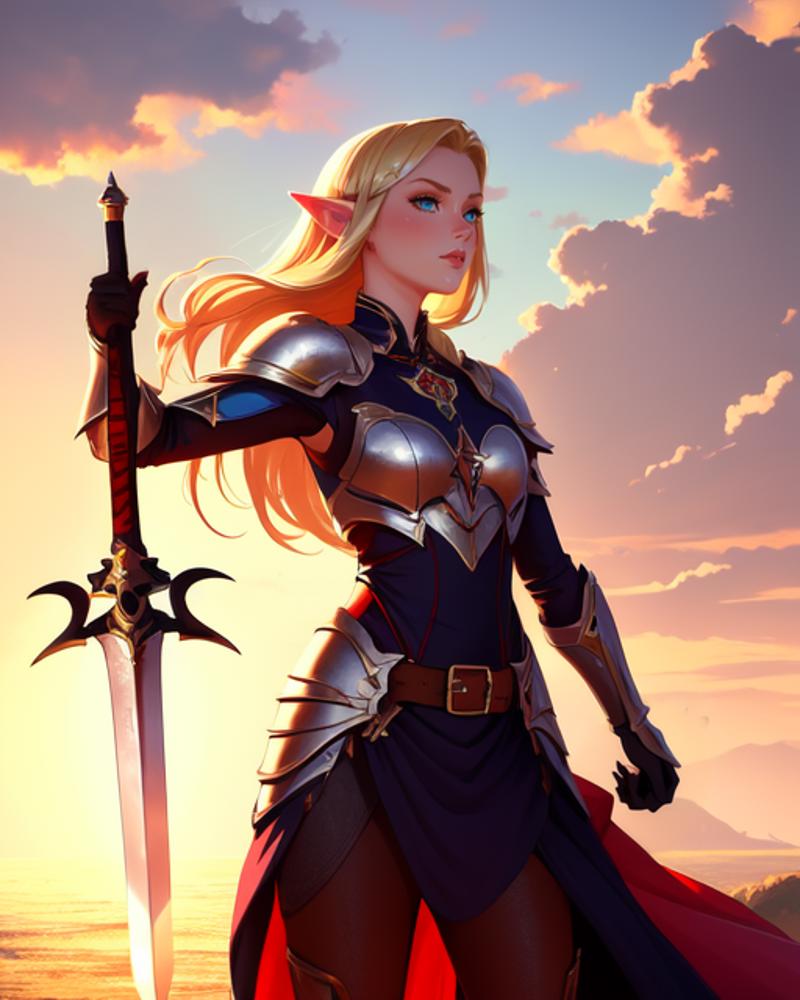
Much better. We’ll take the top left and very quickly clean it up The process is similar to the other hand and with settings that, by now, should look quite familiar.
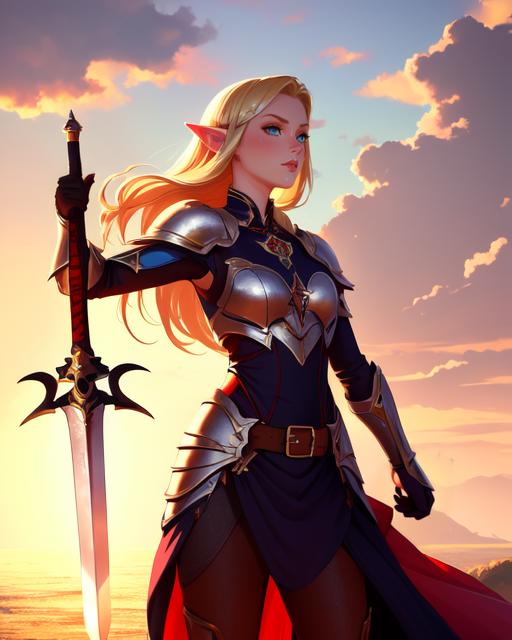
We end up with a pretty good hand and a quite clean image, but there’s one last thing to take care of.
Fixing the Sword, and Discussing Authority
The sword. It’s crooked, and it starts tapering to a point way too quickly at the bottom of the image. Little details are the things that can take your AI art from being obviously AI to being barely distinguishable from digital paintings. Let’s sort it out.
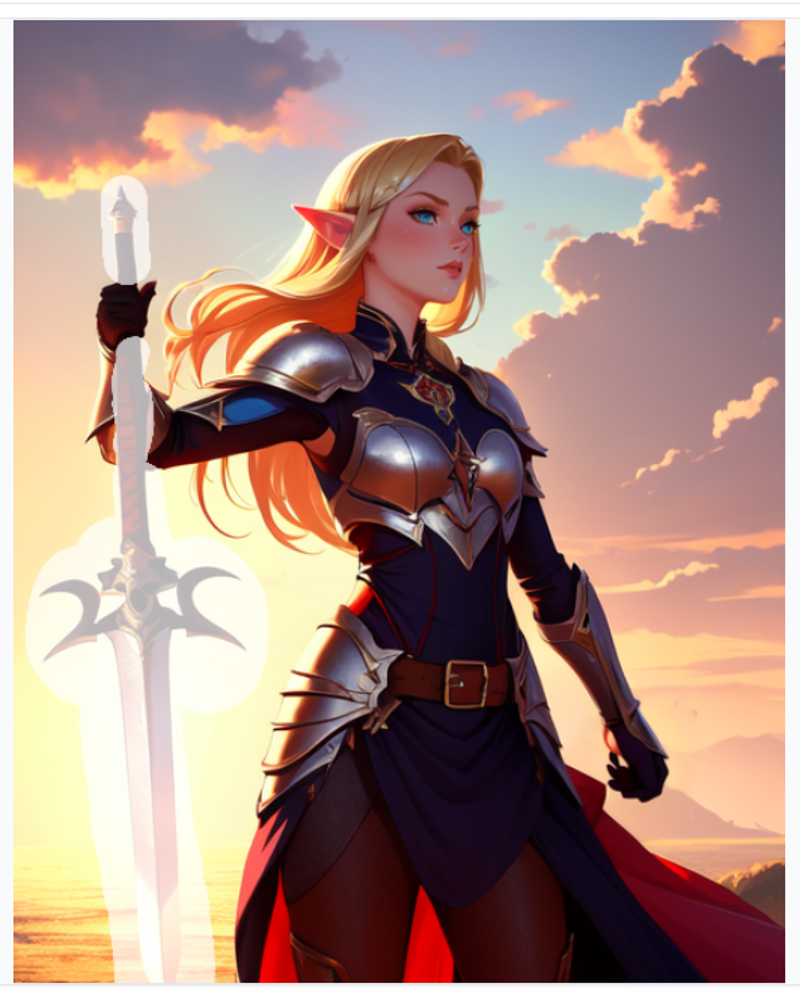
So far we’ve mostly glossed over the topic of what we select to inpaint. In this case, I’d like to go a bit deeper into it. The hand is not masked. We have that exactly how we want. However, the pommel and end of the sword handle above the hand are masked, despite looking just fine.
The reason for this is Authority. We’ve touched on the topic in our other inpainting, primarily in the guise of denoising strength. Authority is how much control we give the AI when it comes to making changes. With denoising strength, we can give the AI more or less control over how much it can change the masked area, but it can also be important to consider what we include in the masked area in the first place.
In this case, our main goal is to make the sword straight. StableDiffusion often has trouble lining up different portions of an object. It has even more trouble when not in control of the entire object at once. By allowing it to change the pommel of the sword we give the AI an important extra tool to straighten it out.
Authority can also be used in the negative.With an object that StableDiffusion has a lot of trouble with, such as a firearm, and you’ve generated something with some good portions, you can strategically exempt portions of the object from the mask in order to ‘anchor’ them and give the AI context to reconstruct the problem areas. Like with the sword if we hadn’t allowed the AI to change the pommel, this can give somewhat incoherent results, but once you have something that’s mostly right, inpainting the object together as a whole can blend it back together.
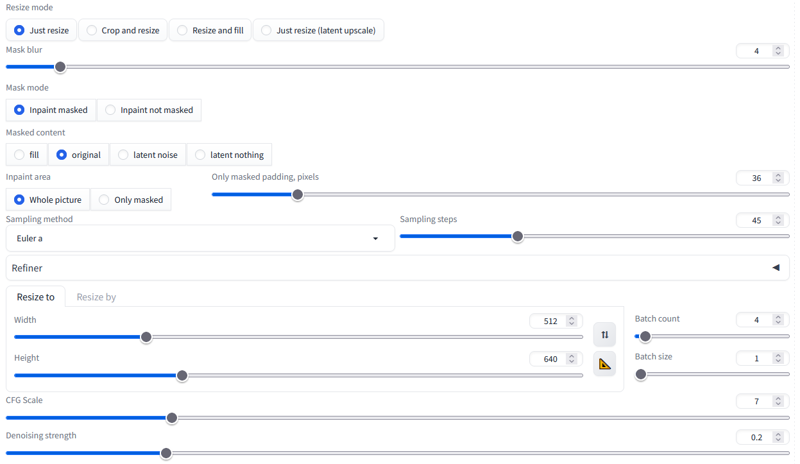
The only new setting we have here is setting the “Inpaint Area” to “Whole Picture”. In this case, the inpaint area is so large it doesn’t really matter which we choose. Almost the entire image is going to be included either way. Using “Whole Picture” for large structural changes that benefit from seeing the image as a whole is good practice, though.
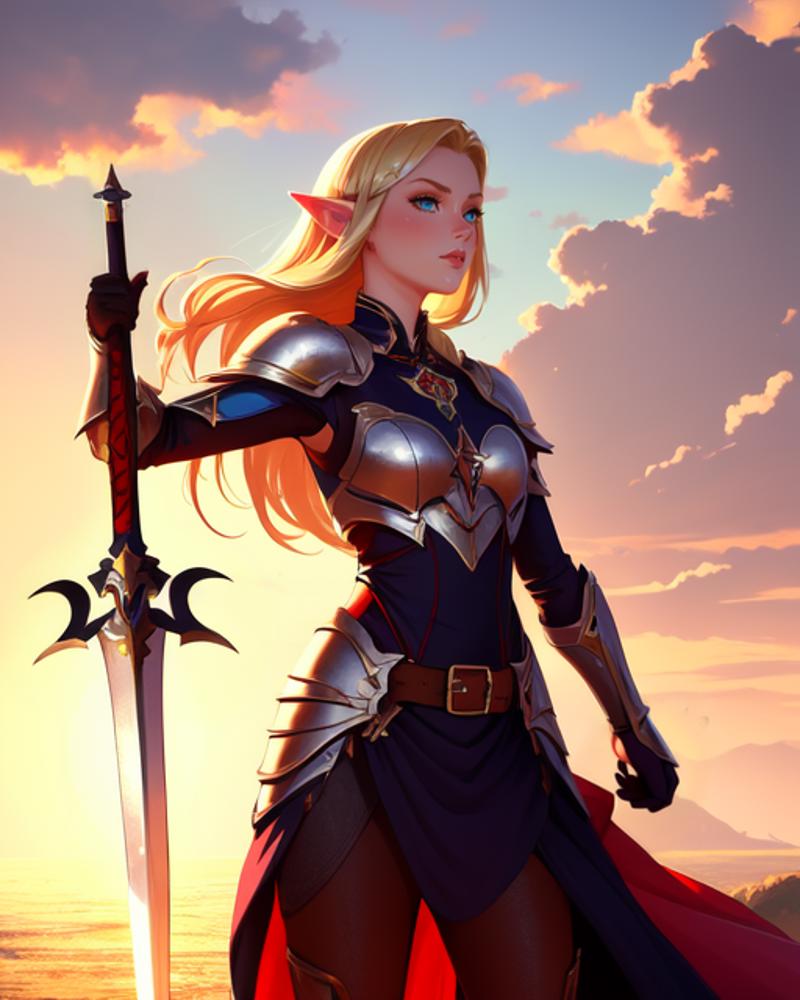
And out comes the finished image. If we compare it to the original we see that it’s maintained most of the image, as well as the composition and ‘soul’ of it, but we’ve cleaned up the details.
This tutorial (with images) may have come out to 30 pages, but once you understand the concepts well, you can go from point A to B in only a few minutes, most of which are just waiting for the AI to do its magic.
It may be a bit longer between this tutorial and the next, but there are a few more tips and tricks that I’d like to share regarding inpainting to help you get the most out of your AI art.
Part 2: Advanced Topics and Hands (You Are Here)


