
After generating hundreds of videos with Wan 2.2, I've learned what actually makes a difference in quality - and what's just a waste of time. This guide shares the key insights that took me way too long to figure out.
📌 Is This Guide For You?
This is a more advanced guide. You should have already generated at least 2-5 videos and be familiar with the basic workflow.
Brand new to Wan 2.2? Start with the beginner guide first:
👉 Generate Your First AI Video Using Wan 2.2 (Beginner's Guide)
It covers installation, your first generation, and common beginner mistakes.
Once you've made a few videos and want to level up your results, you're in the right place.
Let's start with the single most important thing I learned:
🎯 My Top Suggestion: Consider Locking Your Resolution
This is something I wish I knew earlier - it would have saved me a lot of time.
My recommendation: Decide your final resolution early and stick with it throughout your testing.
Why I Suggest This:
When you change resolution, the AI interprets your scene differently. The same seed + same prompt + same LoRA can give you very different results at different resolutions.
My experience: I spent a lot of time with seed set to -1 (random), using the same prompt, same LoRA, same everything - and kept getting different results.
This is seed:

Once I started locking my resolution AND seed, I could actually understand what my prompt and LoRA changes were doing.
Resolution Guidelines:
Both width and height should be divisible by 16.
The AI processes video in 16-pixel blocks, so this helps avoid artifacts and generation issues.
Common resolutions that work well:
832 x 1024 (portrait - this is what I use for final outputs)
512 x 704 (faster generation, still looks fine)
1024 x 576 (landscape/widescreen)
704 x 704 (square format)
Examples of what to avoid:
800 x 1000 (not divisible by 16)
850 x 1050 (not divisible by 16)
Quality vs Speed:
832 x 1024: Takes me ~10 min for 5-6 second video with 24 VRAM. Great quality.
512 x 704: About 2x faster, still looks good - this is also a solid resolution for actual work
Above 1300x1300: Quality improvements become less noticeable while generation time increases significantly.
My workflow: I pick my resolution at the start and generate everything at that resolution from the beginning.
🌱 Understanding Seeds
Seeds can be confusing at first. Here's what helped me understand them:
What is a Seed?
A seed is the initial noise pattern the AI starts with. Think of it like a starting point for generation.
My Recommendation:
Keep your seed AND resolution the same when testing prompts and LoRAs.
This helps you understand what your changes are actually doing. If you keep changing seeds randomly, you're testing multiple variables at once.
My Workflow:
Set my final resolution (832x1024)
Run 3-4 generations with different seeds
Pick whichever looks best
Lock that seed while testing prompts and LoRAs
This way I can see what my changes actually do
Advanced Tip - Small Variations:
If you like an output but want something slightly different:
Increment seed by 1-5 (e.g., 12345 → 12346)
Decrement seed by 1-5 (e.g., 12345 → 12344)
This gives you variations that are close to your original.
Do I Save Good Seeds?
Personally? No. I just find one that works for particular image. But keeping a list of "good seeds" for different content types could be helpful if you're more organized.
✍️ Prompting for Video
Video prompting is different from image prompting in some important ways.
My Approach:
Describe the video like you're explaining it to a friend.
Imagine telling someone what happens in the video:
"She has green hair and is looking at him..."
"At the start, he pushes forward..."
"She moans throughout the whole video..."
Focus on Key Moments:
Rather than describing every single frame, I focus on:
Starting position/pose
Key movements
Expressions/reactions
How motion flows
Motion Descriptions Matter:
Speed and movement words make a big difference:
"slowly"
"rapidly"
"rhythmically"
"gently"
"forcefully"
Example Prompt That Worked Well:
High-quality 3DCG animation of an intimate romantic scene between a female and male partner.

The female has long green hair, striking green eyes, and is wearing a dark, elegant dress. She is gazing lovingly at her partner. Her arms are wrapped around his neck, pulling him close.

The male is tall and muscular, holding the female gently but firmly. They are in a close embrace.

The animation begins with them drawing closer together. Their lips connect in a passionate kiss. Their tongues wrap together as the kiss deepens. Throughout the video, they maintain this intimate kiss, with their bodies pressed close together and gentle movements showing the intensity of their connection.
Note About Examples:
I'm keeping this guide SFW-friendly, so the example prompts here focus on romantic scenes.
For NSFW prompt examples (which is what most of you are probably here for), check this post for reference: link
The prompting principles are the same - just describe the action clearly, focus on key movements, and write it like you're explaining the scene to a friend.
Common Mistakes I Made:
1. Using AI to write prompts from scratch
ChatGPT/Claude often add too many unnecessary details. I found it better to write my own prompt or use AI to help refine what I already wrote.
2. Being too vague
"Girl and guy having sex" doesn't give enough information. Being specific about positions, expressions, and movements works better.
3. Writing it like an image prompt
Video needs ACTION descriptions, not just static details.
🎨 Understanding LoRAs
LoRAs are very important.
What is a LoRA?
Think of LoRAs as additional training data for your base model.
Base models are trained on general data, but there's often not enough specific training data for certain movements or positions. LoRAs fill this gap - they're small files trained specifically to replicate something:
Dance styles
Sex positions (doggy style, cowgirl, etc.)
Specific movements
Visual styles
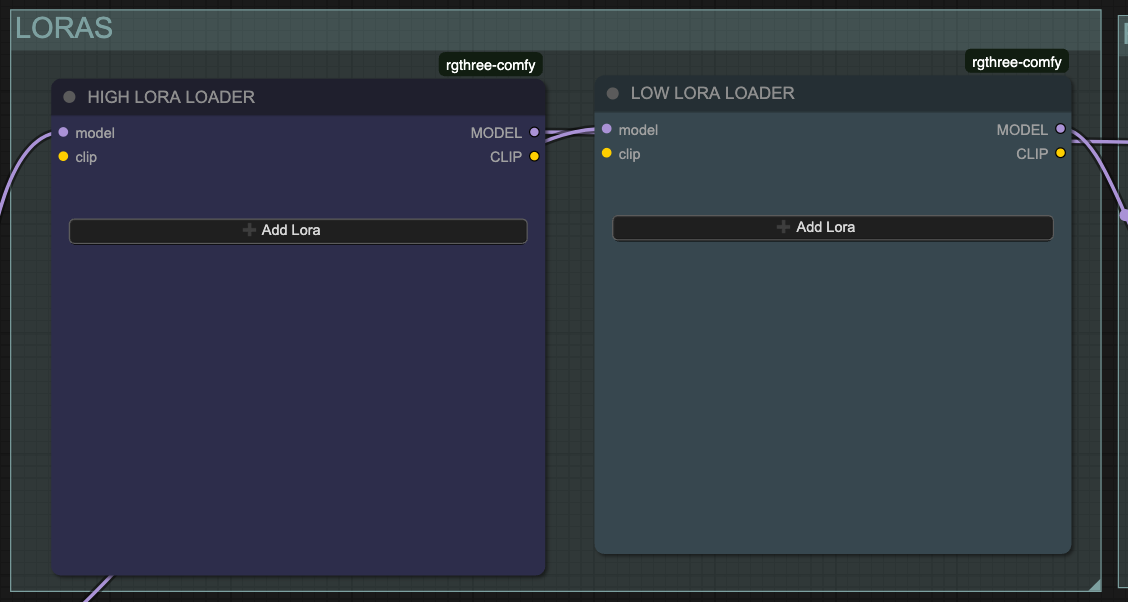
High Noise vs Low Noise LoRAs:
High Noise LoRA:
Sets the general direction
Controls overall movement style
Defines broad motions
Low Noise LoRA:
Cleans up artifacts
Handles fine details
Smooths out imperfections
I think of it like: High noise paints with a big brush, low noise refines with a small brush.
LoRA Weight Starting Point:
Check the LoRA creator's recommendations first - if they say use 1.0, start there.
My general starting point if no guidance:
High LoRA: 0.75
Low LoRA: 0.25
Then adjust based on results:
If motion style is good but small details are weird:
Increase low LoRA weight
If overall motion feels wrong:
Adjust high LoRA weight
General principle I follow: Use the lowest LoRA weight possible while keeping the desired effect. Too high can cause unnatural or laggy motion.
What Happens at Wrong Weights:
Too high: Motion can look unnatural, laggy, or strange Too low: Behaves more like the original model, loses the LoRA's intended effect
Stacking Multiple LoRAs:
Yes, you can!
2-4 LoRAs work well in my experience
More than 4 becomes harder to control
Adjust each one's weight individually.
LoRAs I Use:
General NSFW: https://civitai.com/models/1307155/wan-22-experimental-wan-general-nsfw-model
Additional: https://civitai.com/models/2040641?modelVersionId=2376136
🎬 Model Selection
I primarily use SmoothMix for NSFW video generation. It's been my preference after testing various models, but your results may vary.
Why I like SmoothMix:
Good for NSFW content
Natural motion
Decent anatomy
Smooth results
Another solid option to try:
Dasiwa (GGUF format):
I recommend trying both and seeing which works better for your content.
⚙️ Understanding Steps
What are Steps?
Steps determine how many times the AI refines your video. More steps = more refinement = better quality.
Think of it like editing a draft - the more times you review and improve it, the better it gets.
My Step Recommendations:
Minimum: 4 steps

Better: 6 steps

What I use: 6 steps
Diminishing Returns:
Here's the thing - more steps DO improve quality, but the improvement gets smaller and smaller.
Example:
2 steps → 4 steps: BIG improvement
4 steps → 6 steps: Noticeable improvement
6 steps → 8 steps: Small improvement
8 steps → 10 steps: Barely noticeable
After about 6-8 steps, you're spending a lot more time for very little quality gain.
Time Impact:
More steps = longer generation time.
Going from 4 steps to 6 steps increases generation time by roughly 25-30%.
My Advice:
Start with 6 steps. This is the sweet spot for quality vs time.
If you have extra time or run generations overnight, you can try 8 steps. But honestly, I find 6 steps works great for most content.
📋 My Workflow (Step-by-Step)
Here's how I approach generation:
Phase 1: Setup (5 minutes)
Set final resolution (e.g., 832x1024)
Prepare 2-3 similar input images
Why multiple? Not all images animate equally well
Same pose, same concept, just slightly different shots
Write initial prompt
Phase 2: Finding the Best Base (15-30 minutes)
Animate all 2-3 images with:
Same prompt
Same LoRA weights (starting point based on creator's recommendation or 0.75 high, 0.25 low)
Same seed
Same resolution
Pick the image that produces the best motion/quality
Phase 3: Refinement (30 minutes - 2 hours)
Test LoRA weights (keeping everything else the same)
Refine prompt (keeping everything else the same)
If results aren't improving - try a different seed
Batch Generation:
I almost always batch generate - running 3-5 variations at once with slight tweaks.
Time Estimates:
When I'm being a perfectionist: 1-3 hours for one video
When I just need something good: 30-40 minutes
Lucky first tries: They happen sometimes!
🔧 Troubleshooting Common Issues
Problem: Blurry Output
Possible causes:
Resolution too low
High and Low noise models swapped (very common mistake!)
Solution: Double-check that High and Low models are in the correct positions.
Problem: Motion Looks Unnatural
Possible causes:
LoRA weight not optimal
Prompt doesn't describe motion clearly enough
Seed doesn't work well for this scene
What I try:
Adjust LoRA weights
Add more motion descriptors to prompt
Change seed
Problem: Small Details Are Off
Solution: Try increasing LOW noise LoRA weight - it handles fine detail cleanup.
Problem: General Direction/Vibe is Wrong
Solution: Adjust HIGH noise LoRA weight - it controls overall movement direction.
Problem: Nothing Seems to Work
Solution: Change the seed. Sometimes a particular seed just doesn't work well with your concept. Try 3-4 different seeds.
💭 Final Thoughts
The Multi-Image Approach:
Having 2-3 similar images to test with has saved me a lot of time. You quickly learn which compositions animate better.
My Take on Resolution:
Some people test at low resolution and render at high. That's valid for seeing how LoRAs behave.
My preference: I generate at final resolution from the start because scaling up can give different results.
Seed Philosophy:
I don't obsess over finding the "perfect" seed. I find one that works for that session, lock it in, test my other variables, and move on.
Remember:
This guide is just what worked for me. Your results might be completely different, and that's okay. Experiment and find your own workflow.
Most importantly: Enjoy the process! We're all learning together.
📚 Quick Reference
✅ Set final resolution (divisible by 16)
✅ Consider locking that resolution
✅ Run 3-4 seeds, pick one, lock it
✅ Prepare 2-3 similar input images
✅ Write descriptive prompt (like explaining to a friend)
✅ Check LoRA creator's recommended weights first
✅ Test one variable at a time
✅ Use 3+3 or 4+4 steps
✅ Don't stress too much about negative prompts
✅ If stuck - try changing the seed
My typical generation time: 1-3 hours when being picky, 30-40 min for good results
My settings:
Resolution: 832x1024
Steps: 3+3
Models: SmoothMix or Dasiwa
LoRA: Check creator's recommendation, or start with 0.75 high, 0.25 low
Good luck with your generations! Feel free to share your results and what worked for you.