Make a clickable Kayne West on any website
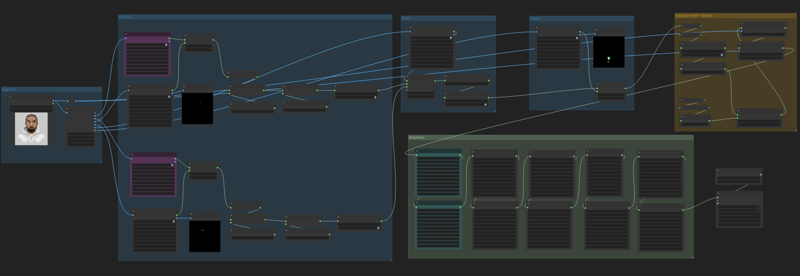
This is a simple comfyUI workflow of emoji-style Kanye West. This is one of the simple workflow to animate the eyes, head and breath. The following pictures will show the process flow with few groups, Segment, Mesh Generation (Blink+Iris, Head, Breath), Cleanup mesh+texture, Shapekey and Shape Flow.
Step0: download your https://emoji.fly.dev (Base SDXL)
Step1: Segment body parts
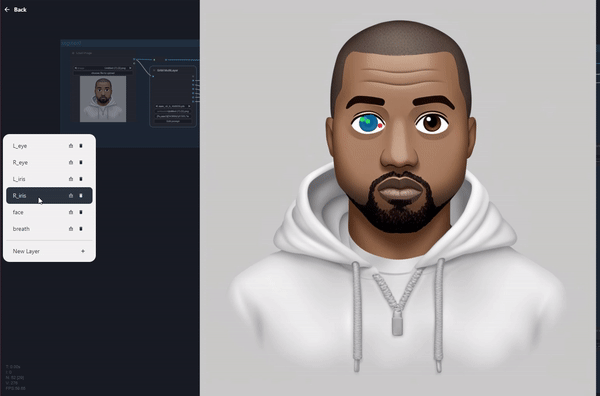
Segment the necessary part.
Eyes in this example is separated to 4 segments, LR whole eye and LR iris.
For choosing the breathing part, we'll select a part near chest to make movement this time. You can select different areas
Step2 : Create mesh and group
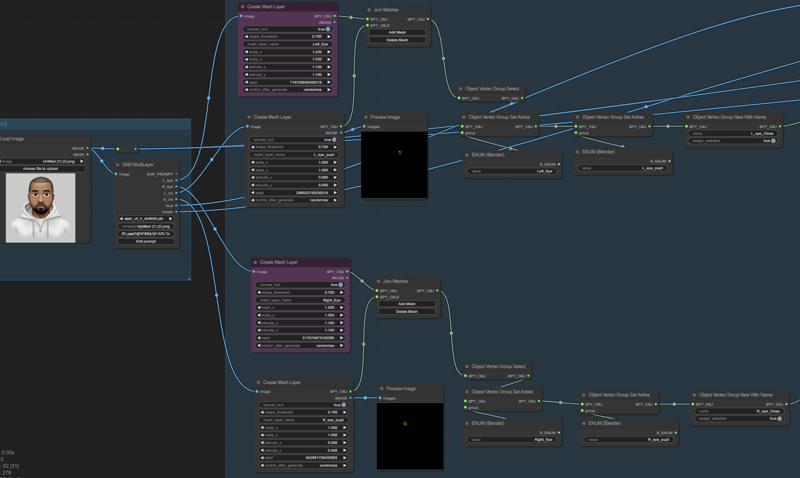
Link the SAM layers to the suitable Mesh layer. (Blink+iris, head and breath).
The mesh layer name would be reused in the Blender-related nodes later on.
Step3: Cleanup mesh+texture
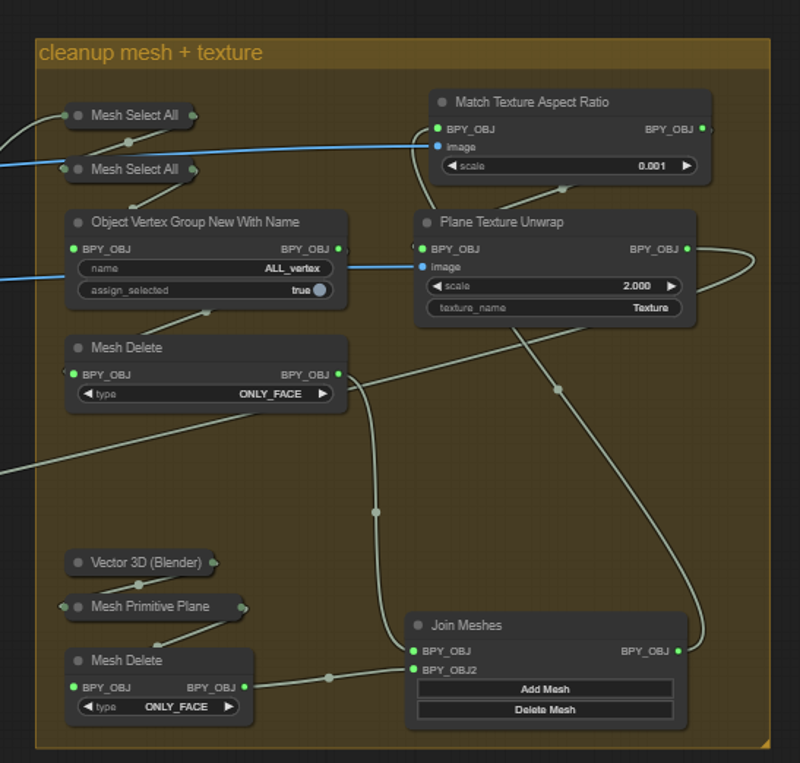
The function of this group is to create a base and clean up all the mesh, to prevent the meshes crashing in blender.
You can think of the "Mesh Primitive Plane" and "Plane Texture Unwrap" as putting a Painting Frame around the character, so the rest would be layers and deformed correctly.
For the beginner case, you can simply follow this setup without further editing.
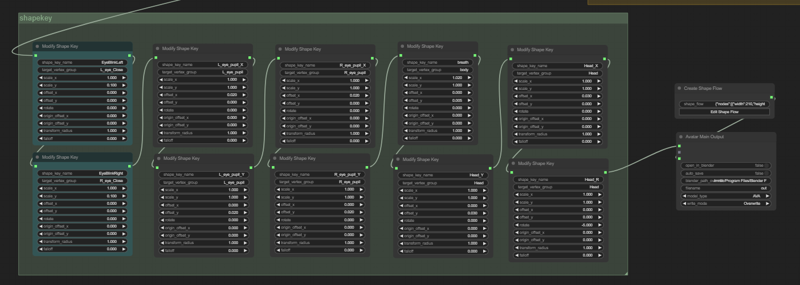
Step4: Set Target shape via ShapeKey
The shape key controls different mesh. There are the preset of those mesh and you can twerk the parameters from there. (parameters guide from previous article). Select which vertex group you want to change, and name it with a new shape_key_name.
If you need to add new shape key, you can add new node, then reuse the "mesh name" you chose in Step2 in your target_vertex_group, and set new shape key name. (examples structure are like head_xy, head_rotate etc following structure of {bodypart}_{axis} )
Step5: Move/Control via ShapeFlow
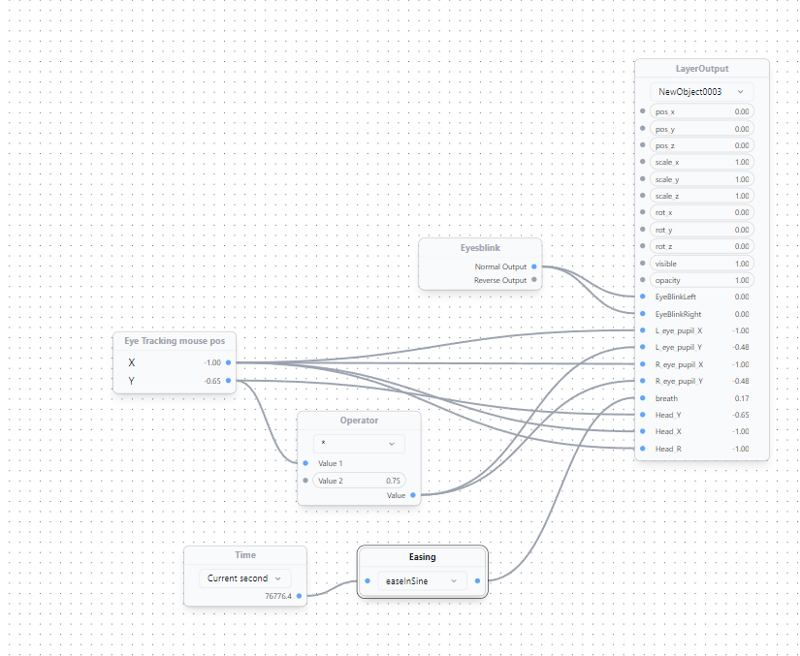
After defining the appropriate motions and its look, now it's the time to control and make it move as you desire.
A new concept, called Shape flow, control and active the keys. You can imagine it as a continuous streams values, and they change accordingly while you make new actions.
In the shape flow page can set different input and trigger to control all of the movement. Examples from previous article can show you more about mouse/click/other trigger events.
Step6: Run the Design

After all of above, the original picture will be alive.
If some part of it are not satisfy, you can tune them in Shapeflow (in the white editors) to adjust the results.
What Next?
Generate a new Emoji character in AI Emoji editors
Change around the parameter for finer control
Switch around the inputs to make it fun (click/keyboard instead of mouse_pos)
try to add body rotation
Connect it with more complex workflow (
Load them into a website (details in tutorial)
If you like this content or have more questions, please feel free to join our Discord or Star our Github for more details
