Stable Diffusion prompt: Ultimate Beginners Guide
Crafting the perfect prompt is an art. It's the bridge between your thoughts and the desired outcome. This guide will help you master the art of prompt creation.
If you enjoy my content, please consider becoming a Patreon supporter to help sustain my work.
patreon.com/AIKnowledgeCentral
1. How to structure a good prompt?
Crafting an effective prompt requires precision and clarity. Think of it as giving directions - the clearer you are, the closer you get to your desired destination. One way to achieve this is by considering various keyword categories. While you don't need to use all of them, they serve as a helpful guide to ensure you've covered all bases.
Here are the keyword categories to consider:
1. Topic
2. Camera Angle
3. Medium
4. Style
5. Artist
6. Focus
7. Lighting
8. Refined details
Now, let's delve deeper into each category. We'll craft prompts using keywords from these categories and generate images as examples. For this demonstration, I'll use the Stable Diffusion 1.5 Dreamshaper 8 model:
https://civitai.com/models/4384/dreamshaper
am currently working on an install guide for Automatic 1111 when its finished It will be available here on my channel. Probably around the 11th or 12th of October
https://www.youtube.com/channel/UCIW7RllJpfnjhlYr9W_IC3g
To purely showcase the power of the prompt, I'll refrain from using negative prompts at this early stage. But don't fret, we'll explore the realm of negative prompts later in this guide. Note: All showcased images are produced using the DPM++ 2M Karas sampler with 35 steps and have dimensions of 512×768.
Many of the images featured in this book utilize an extension for Stable Diffusion known as "After Detailer." This tool aids in enhancing the quality of facial details. While my typical process involves a more intricate workflow to achieve optimal results, I've chosen to present primarily the raw outcomes in this book for ease of understanding and replication.
For a more in-depth look into After Detailer, I've created a video tutorial:
https://youtu.be/y3DxX9s0NhQ
1.1 Choosing Your Topic: The Heart of the Image
The topic is the central theme of your image. It's what you envision and wish to bring to life. A frequent oversight is being too vague about the topic. Before you even launch your webui client, you should have at least a general idea of what you expect from stable diffusion.
For instance, if you're aiming to depict a Female Superhero, merely stating "female Superhero" is too broad. Such a statement leaves a vast expanse for interpretation. Consider the following: How should the Hero appear? Are there specific attributes or attire that define her? What type of superpower is she wielding? Is she stationary, in motion, or levitating? What's the backdrop?
Remember, Stable Diffusion isn't telepathic. It can't discern our innermost visions unless we articulate them.
For demonstration purposes, let's envision our superhero resembling Elizabeth Olsen, who played scarlet witch in the Marvel Movies.
Prompt:
Elizabeth Olsen as a female superhero, dark mysterious, black fire with red outline powers
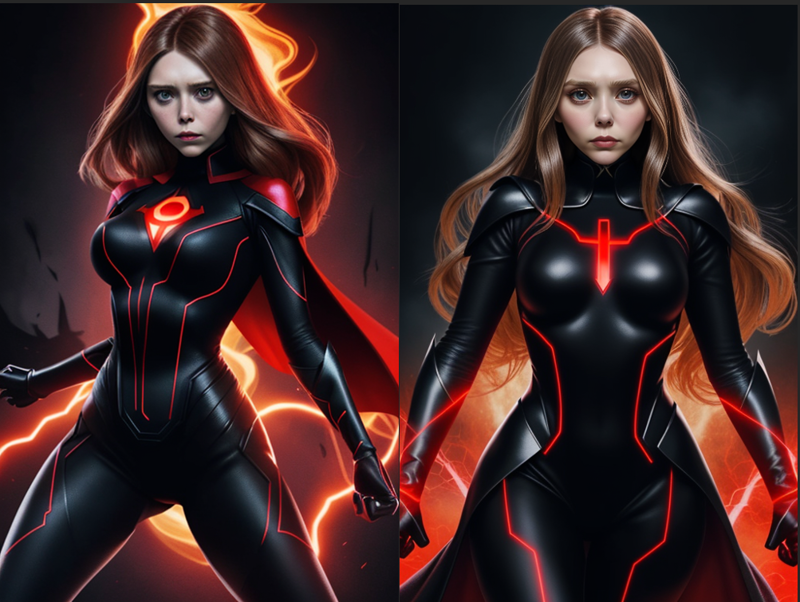
As you can see the results are compelling, showcasing a clear resemblance to the actress. However, it's worth noting that not every actor or actress has been extensively integrated into Stable Diffusion. Consequently, the output can vary based on different individuals, reflecting the data Stable Diffusion has been trained on.
1.2 Mastering the Camera Control
One of the pivotal elements that can significantly influence the outcome of your image generation is camera control. While it's not mandatory to adjust this, it's essential to recall our initial discussion about having a preconceived notion of the composition. The camera angle plays a crucial role in this.
1.2.1 Camera Angles
Drawing parallels with photography, you have the liberty to experiment with various camera angles. However, it's vital to remember that Stable Diffusion might not be familiar with every conceivable angle. For instance, it might be a stretch to expect Stable Diffusion to accurately depict a bird's-eye view of a bustling marketplace.
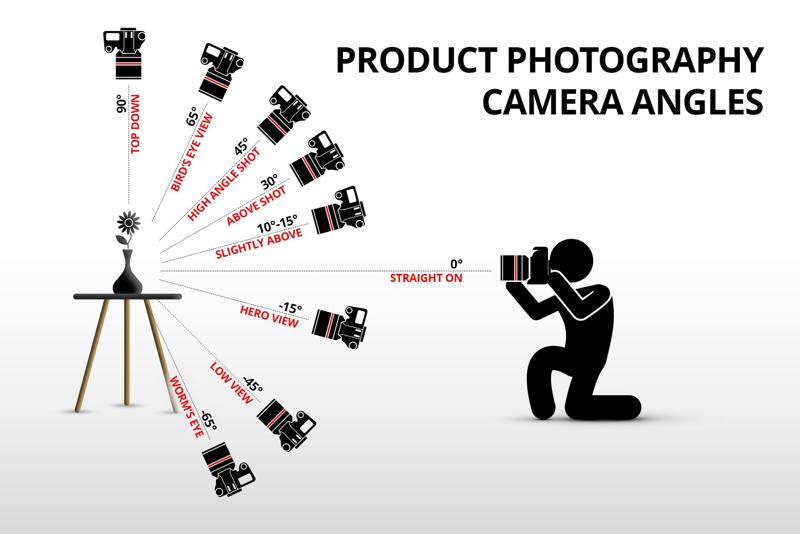
(I do not grant permission to copy or use the image above)
In the following illustrations, you'll observe that I've expanded upon our initial prompt and experimented with two distinct camera angles.
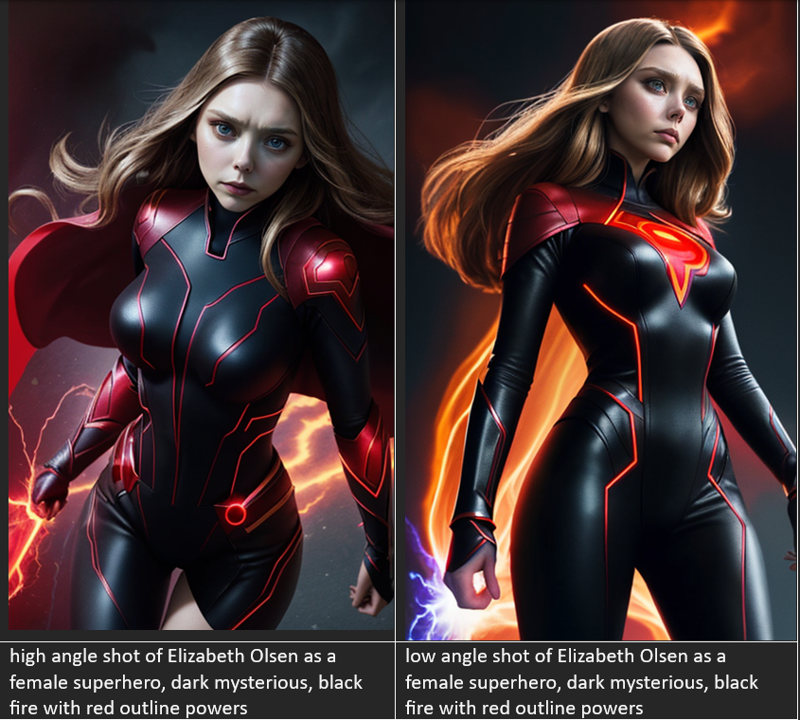
In these Examples you can see I have extended our prompt used and used 2 different Camera angles and stable diffusion realized it. Each Angle tells a different story and lets the character seem a little different.
1.2.2 Camera Position & Shot Size
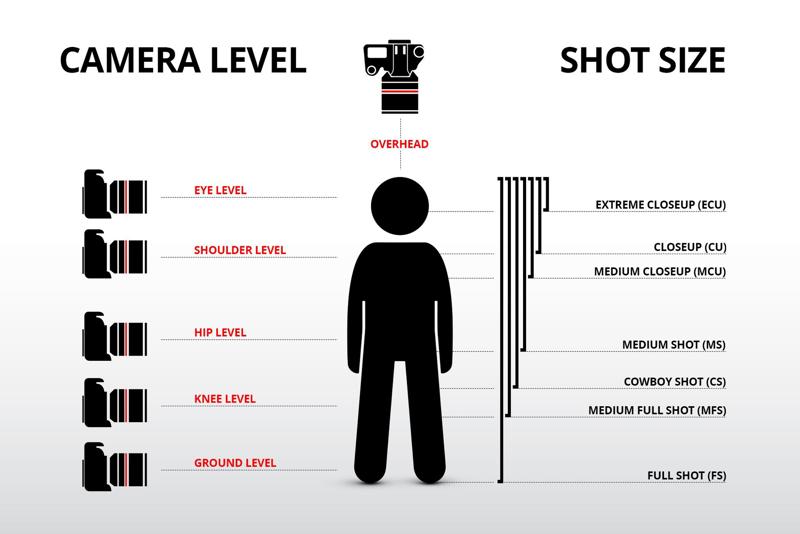
The camera's position and shot size are instrumental in adding depth, nuance, and perspective to your visuals. But how do you decide on the perfect shot size for your scene? Or from which angle to capture it? Each choice you make alters the visual narrative of your image, conveying different emotions and stories.
(I do not grant permission to copy or use the image above)
For example:
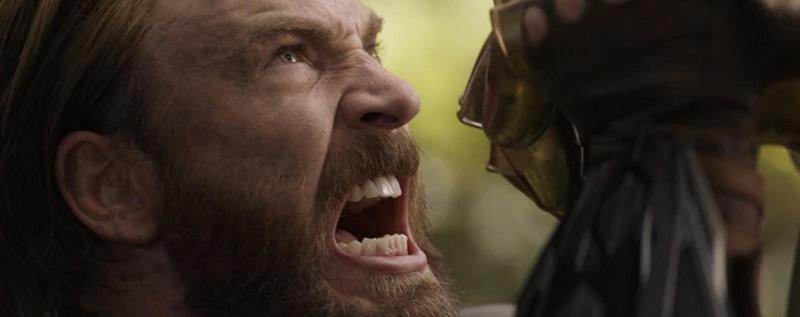
When you wish to unveil the emotions and responses of a subject, it's the perfect moment for a close-up shot. This type of shot dominates your frame with a specific portion of your subject, frequently capturing the face if it's a person. Here in Avengers Infinity War.
Or:
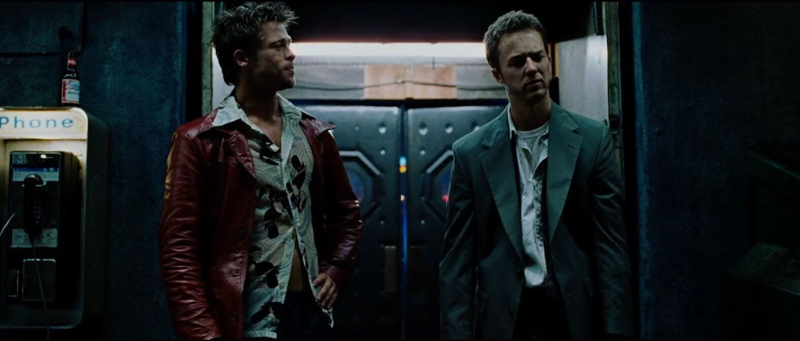
When you aim to present the subject in their surrounding context without losing detail, the medium shot is your go-to. This shot usually frames a subject from the waist up, providing a balance between their environment and their expressions. Think of it as the bridge between close-up and wide shots. Here's an example from the movie fight club:
or your convenience I added this cheatsheet for your shots.
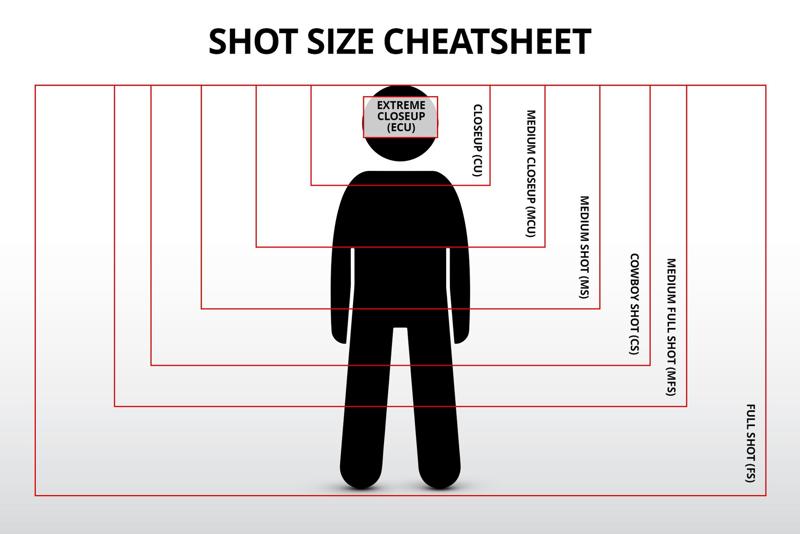
(I do not grant permission to copy or use the image above)
In the subsequent images, I've expanded our prompt to showcase a full body shot for you to compare to our works so far.
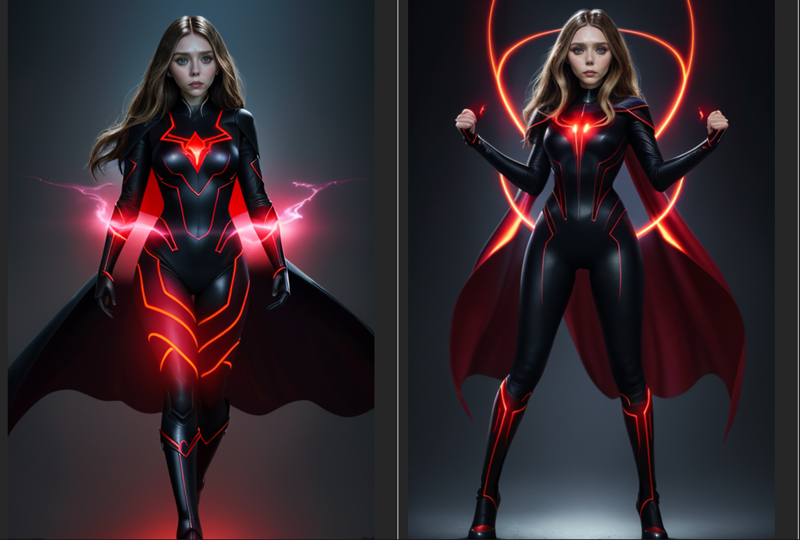
Prompt:
Full body shot of Elizabeth Olsen as a dark, mysterious female superhero, wielding black fire powers outlined in red.
These visuals splendidly capture our heroine in all her glory. However, it's worth noting that occasionally, Stable Diffusion might introduce minor inaccuracies, like the tear in her cape seen on the right.
Let’s experiment further with different Angles, you can also combine Angles
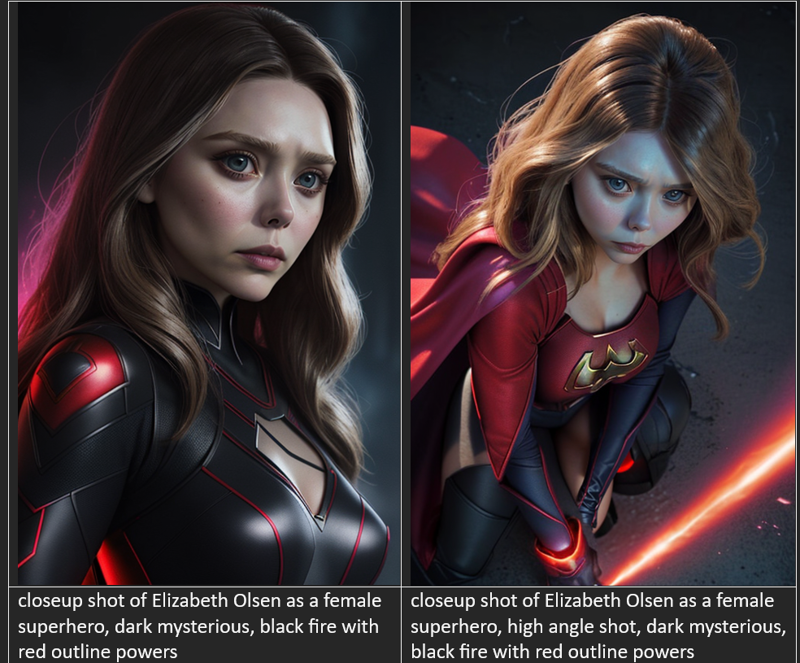
To the left, the focus shifts to a close-up shot, emphasizing intricate details and emotions. Meanwhile, on the right, there's a harmonious blend of shot size and angle, crafting a unique visual narrative.
It's essential to understand that there isn't a universally "correct" shot size or angle for any given moment. However, certain combinations resonate more effectively in evoking specific moods, feelings, and tones. The choice of camera shot size can offer viewers context about a character's intentions, the overarching theme, or even highlight the ambiance of the setting.
There's a vast world behind the decisions of which shot to employ for specific scenarios, and it's genuinely fascinating how each choice can transform the storytelling of a scene. I could expound on this subject at length, diving into the intricate details and subtle distinctions of each shot. However, I must be mindful not to stray too far from the primary purpose of this guide, which is centered on prompting techniques. Consider this brief discussion as just the tip of the iceberg. If I sense a strong interest from many of you, expressing a desire to explore the depths of camera angles, framing, and shot sizes, I would be more than happy to curate a dedicated guide on that topic. Your feedback and curiosity drive the content, so let me know your thoughts!
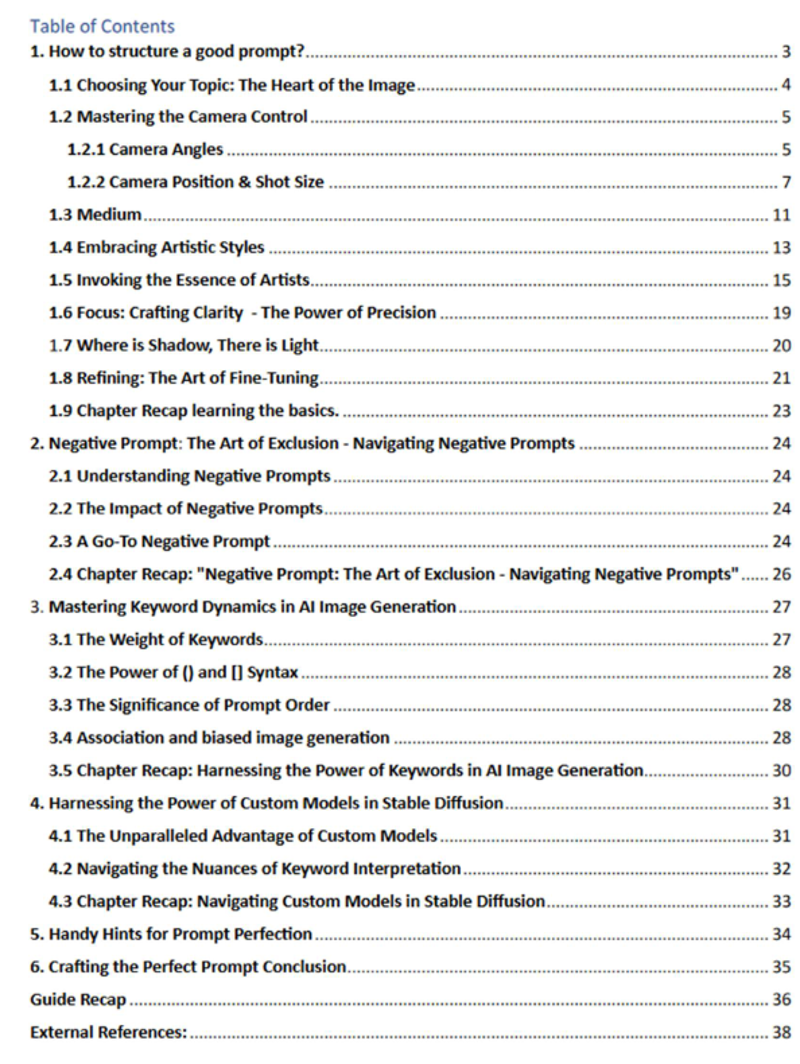
This is merely a Demo of my full guide. Available to all my Patrons.
Full Guide Includes:
· Over 7900 Words (including prompts)
· 38 Pages
· 40 Examples and Images to help you understand better.
· All Prompts are included
See Table of Contents:
FAQ: Why is your full content behind a paywall?
A: I invested approximately 40+ hours into creating this, and I aim to earn a livelihood from my efforts.
External References:
My Youtube Channel:
https://www.youtube.com/channel/UCIW7RllJpfnjhlYr9W_IC3g
My Patreon:
patreon.com/AIKnowledgeCentral
My Automatic 1111 Playlist:
https://www.youtube.com/watch?v=SHikMK39Q30&list=PL8HbYkSF5f9FjjQA_C05RFxbmU6nRWgJS
Other References in full guide…


