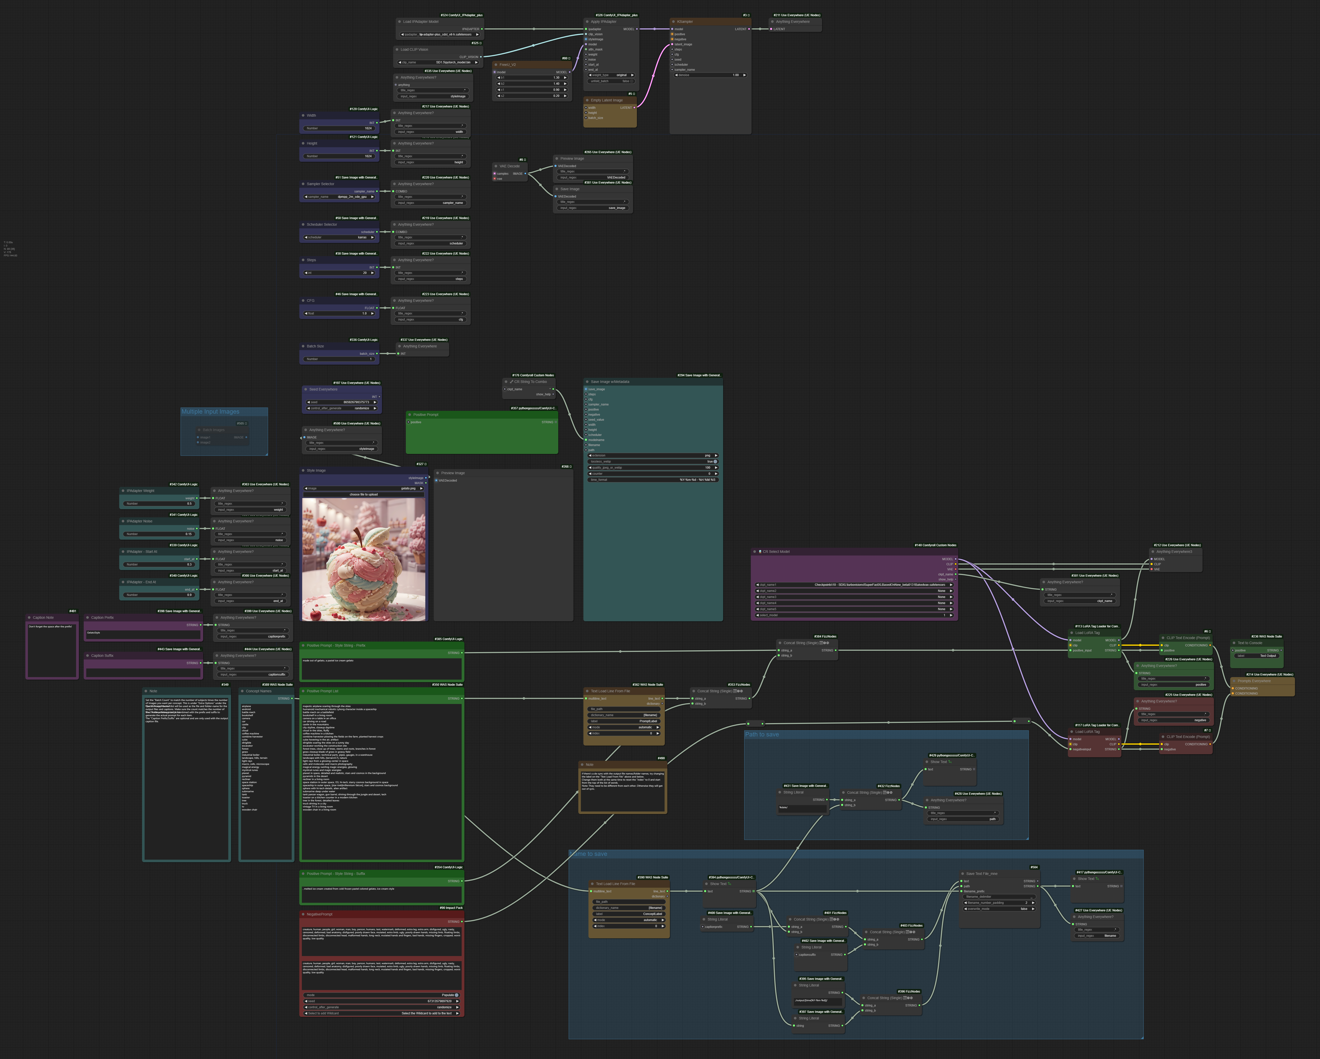
This is a small workflow guide on how to generate a dataset of images using ComfyUI.
It generates a full dataset with just one click. You will need to customize it to the needs of your specific dataset. I have included the style method I use for most of my models.
This is part of a series on how to generate datasets with: ChatGPT API, ChatGPT, Bing, ComfyUI.
Here's a video showing it off.
Workflow Download
The workflow can be downloaded from here:
https://civitai.com/models/234424/comfyui-one-button-dataset-generator
or
https://openart.ai/workflows/serval_quirky_69/one-click-dataset/QoOqXTelqSjMwZ0fvxQ9
It's also available in the attachments to the right of this article.
Installing Missing Nodes
The workflow uses a lot of custom nodes. A bunch of them can be replaced by similar nodes, but there are a few that are required for specific parts of the workflow.
Make sure you have the ComfyManager installed.
Click on the Manager-button in the right-side menu
Click on Install Missing Custom Nodes
Install them all, then restart Comfy completely and refresh the page
You should now see something like this:
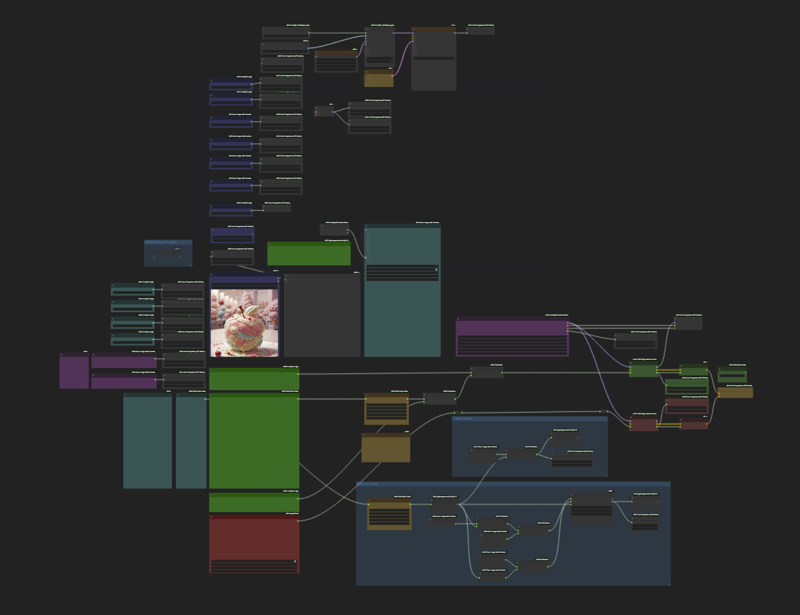
It may look overwhelming, but there's just a few sections to tweak, so don't worry.
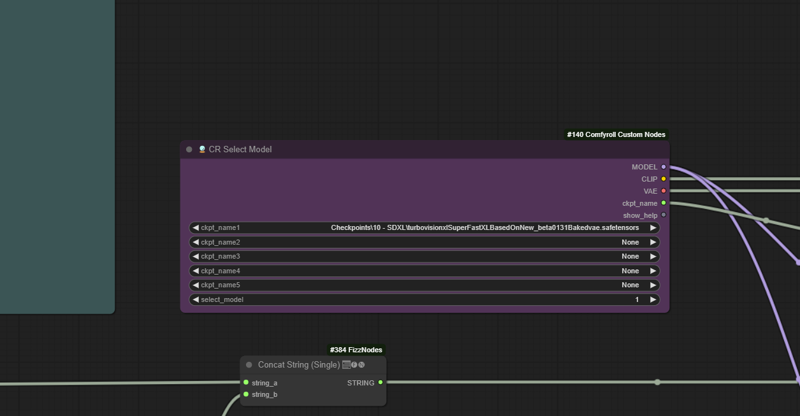
Change Checkpoint
Find the purple box towards the center right, and change which checkpoint you want to use for the generation of the dataset. Feel free to use whatever of course. I recommend using SDXL if you have complex prompts. I have been using https://civitai.com/models/215418/ for my datasets recently. It's fast and stable.
Update other model settings
There's a vertical column of blue settings nodes, where you can change resolution, sampler, steps and CFG. Feel free to adjust theese as needed.
Load IPAdapter & Clip Vision Models
In the top left, there are 2 model loaders that you need to make sure they have the correct model loaded if you intend to use the IPAdapter to drive a style transfer. If you do not want this, you can of course remove them from the workflow.
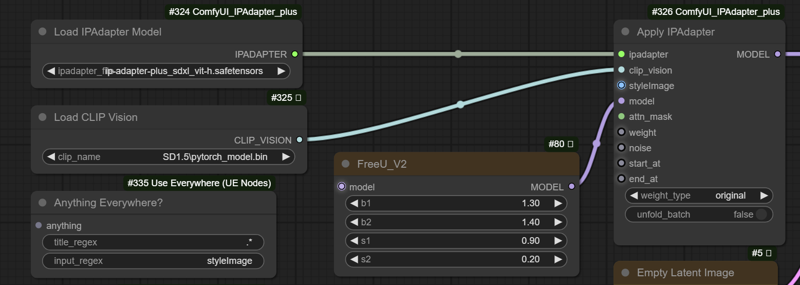
Here is a link to a page with more documentation about which models to use for Stable Diffusion 1.5 or Stable Diffusion XL. https://github.com/cubiq/ComfyUI_IPAdapter_plus
The names are a bit confusing. For some SDXL models, you use SD1.5 CLIP Vision. Just follow the instructions on that list and you'll be good.
You can also download the models from the model downloader inside ComfyUI.
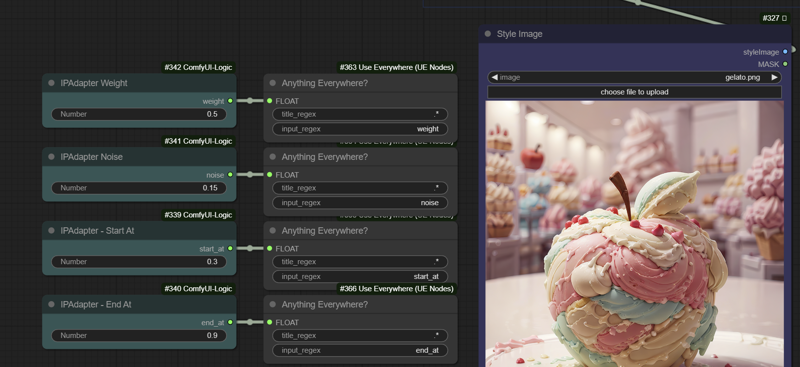
Choose your Style Image and settings
If you are using the IPAdapter to extract a style from a source image, find the teal and blue section and choose an image to load. You'll have to experiment with the teal settings on the left to get good results. In general, the Weight and Start At settings are very important. There's no right answer, it really depends on the style and the prompt. I usually start around 0.5 at both and tweak them from there.
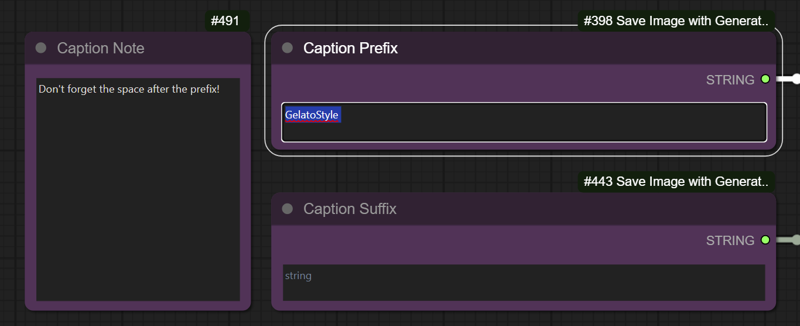
Dataset Name
To the left in the workflow, you have two entries for captioning. Use this to set the "trigger word" for your model if you need it. This is only be used for captions. You can use both a prefix and a suffix.
Don't forget spaces or commas if you need that for your captions.
Dataset Concepts and Prompting
This is the core functionality of the workflow. The ability to input a list of prompts, and a list of words to be used as concepts, and the workflow will batch-generate all this, as well as rename the files, sort them in folders, and provide you with caption files.
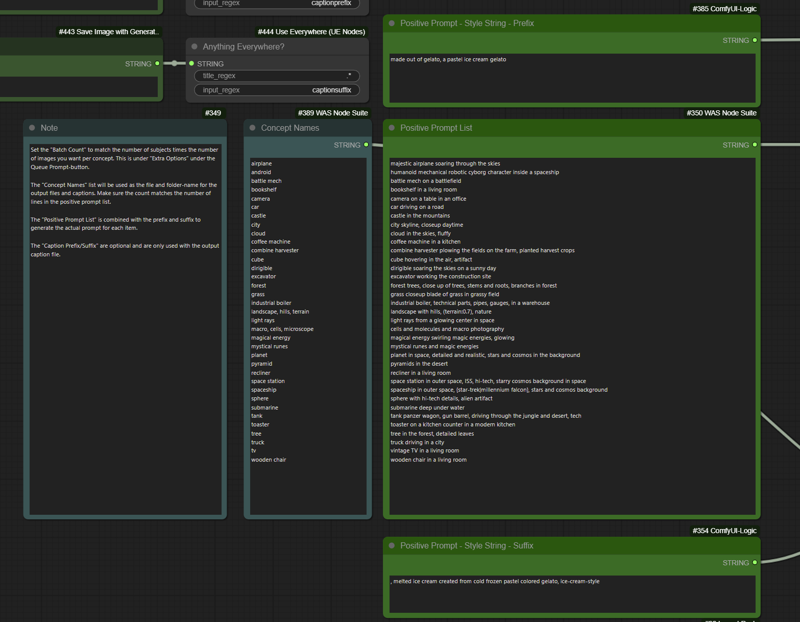
The list of Concept Names is the different concepts you are going to be training. Each entry in this list will create a folder and be used as the file name for whatever you are training. This is very useful when it comes to styles, but can be used for any kind of training. This is not used for the prompt itself, just folder name, file name and captioning.
The list of Positive Prompts is the unique part for each prompt that we will run. Note that the list of prompts should match the list of concept names. They will be used in pairs. Ensure that the lists are matching.
When generating images for a style, I recommend also adding details about the background you want. If you don't, many models will just place the object in a generic setting, either a simple colored background, or a background from the IPAdapter style transfer image.

Above and below the positive prompt you will see two green box "Style String Prefix/Suffix" entry box. Use these sections to guide the style you are training. These will be inserted before and after each of your prompts in the prompt list. They are of course optional.
Below that you will have the negative prompt in a red box.
Generating The Dataset
You should now be all set and good to go! You can run the workflow to verify that you are generating images to your liking.
Once you are happy, all you need to do is set the Batch Count to the number of images you wish to generate. It will generate one concept, then move on to the next until it has done the number of images you enter in the Batch Count.
I usually go with 8 images per concept. So for the list of 35 concepts included in the workflow, I set my batch count to 280.
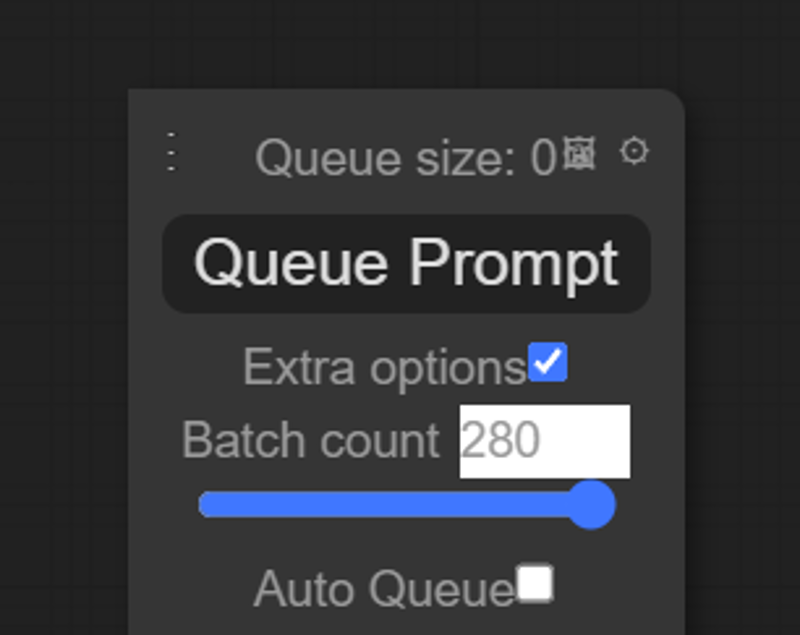
Note: Do not change the "Batch Size" setting in the blue vertical column of settings. This does not work with the automatic naming/captioning system.
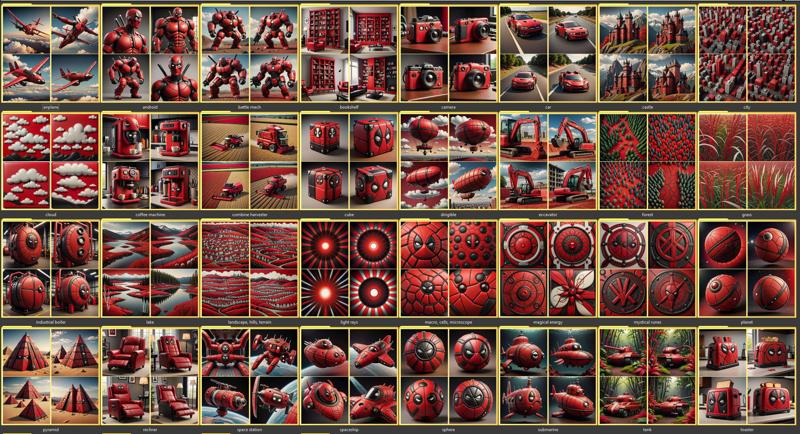
If you are successful, you should now have a dataset all ready! It's likely that some concepts didn't match the settings that you used. Not all prompts in my example usually come out well first try. For those that remain, I edit the list of prompts to redo them, I tweak the IPAdapter settings or the prompt, including the prefix/suffix until I have something that I'm happy with. Sometimes I just remove the concept if I'm not getting any good results.
Common Issues / Errors
The IPAdapter style transfer just isn't giving me good results
Try different settings or different source images. I've had to go between 0.2 and 1.5 in weight to get good results, and the start time between 0.2 and 0.8. It's really sensitive.
Your prompt also matters a lot here. You need to help it match the style to pick up from the image. It's a mix of both, not just one or the other.
There is a mismatch in file names / captions / prompts
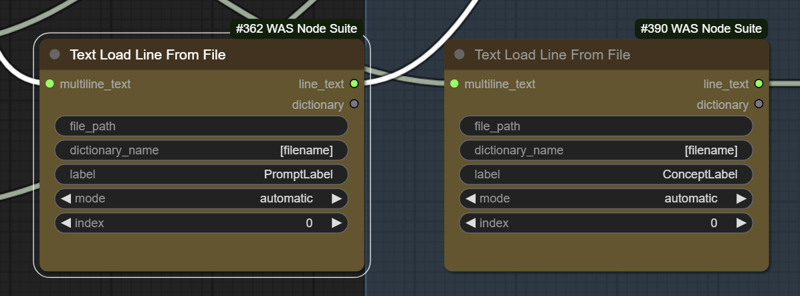
It can happen that these values get out of sync. To reset them, look for the beige boxes to the right of the prompt/negative prompt. Click on the Label value, and change this to something new. You can just add a number to it. You must do it for both "Text Load Line From File"-nodes, as they both need to be reset at the same time.
If you have any other trouble or errors, write below and I'll see what I can do to help.
Also check out the guide and workflow of machinedelusions: Lora/Dataset Creator

