

I have created and shared a few tools to train your own Yolov8 models.
https://github.com/MNeMoNiCuZ/yolov8-scripts/
This article will mirror the instructions on the github.
I also uploaded it as a resource to Civit: https://civitai.com/models/302266 so you can download it from here if you want to.
1. Installation Instructions - Windows
Download or git clone this repository to any folder
git clone https://github.com/MNeMoNiCuZ/yolov8-scriptsEnter the folder
cd yolov8-scriptsGit Clone Ultralytics inside this folder
git clone https://github.com/ultralytics/ultralyticsRun
setup.bat. It will ask you to enter an environment name. Press Enter to use the defaults. Only change it if you know what you are doing. The venv should be created inside the Ultralytics folder. This will also create a few empty folders for you, and an environment activation script (activate_venv.bat). It should also activate the environment for you for the next step.Install torch for your version of CUDA (Pytorch.org):
pip3 install torch torchvision torchaudio --index-url https://download.pytorch.org/whl/cu118.Inside the (venv), install requirements using
pip install -r requirements.txt.
In the future, you can enter the virtual environment by running activate_venv.bat.
2. Downloading a dataset
For our example, we will download this watermark dataset from Roboflow.com by user MFW.
Download the dataset in the Yolov8 format.
Unpack the file and move the train/test/valid-directories into the /dataset/ folder for your project.
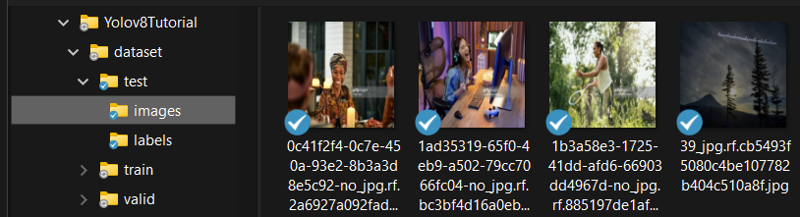
3. Dataset preparation
If you downloaded a Yolov8 dataset, everything should be fine already. Images are placed in /train/images, and the annotations are placed in /train/labels.
You can also have both the images and annotations right inside the root of the /train folder without any /images and /labels subfolders. The same goes for the valid and test folders.
If you downloaded a COCO dataset, you can use the dataset/CocoGetClasses.py and cocoToYoloAnnotations.py scripts to convert the dataset to yolov8. There's also a built-in command that I didn't know about when I wrote the scripts.
If you created your own dataset, you have to make sure the format matches what's expected for yolo training.
Example of a label file:
0 0.76953125 0.665625 0.4609375 0.1015625
0 0.04375 0.9703125 0.0859375 0.025
The first value (0) is the class index.
The second value (0.769) means the center of the bounding box is at 76.9% into the image, horizontally.
The third value (0.665) means the center of the bounding box is at 66.5% into the image, vertically.
The fourth value (0.460), means that the width of the bounding box is 46% of the image's width.
The fifth value (0.101), means that the height of the bounding box is 10.1% of the image's height.This goes for each bounding box. They can overlap.
4. Data.yaml configuration
The dataset/data.yaml must be configured for your dataset.
Edit the file and make sure that the number of classes matches the number of classes of your dataset, as well as the list of class names.
For our watermarks dataset, it should be:
nc: 1 # Number of classes
names: ['watermark'] # Class names
Sometimes the classes are listed on the dataset website, like the screenshot below.
The downloaded data.yaml should also contain the proper training settings, except that the file paths need to be changed for my training script.
train: ../train/images
val: ../valid/images
test: ../test/images

nc: 1
names: ['watermark']

roboflow:
  workspace: mfw-feoki
  project: w6_janf
  version: 1
  license: CC BY 4.0
  url: https://universe.roboflow.com/mfw-feoki/w6_janf/dataset/1
If you can't find the classes, you can try downloading the COCO.JSON version of the dataset, and run the CocoGetClasses.py script from this repository to extract the values you need for the dataset.yaml. But that is not needed for this guide.
5. Run train.py
While inside the environment, run python train.py to launch the training.
Hopefully, you should have something like this now:

If you need to cancel the training, you can just close the window or press CTRL + C to interrupt.
You can find test results and your models in the training_output directory.
The script will always save your latest model (last.pt) and the currently best performing model (best.pt), in the /training_output/project_name/weights/ directory.
6. Generate / Detect / Test your model
Copy your output model into the models directory, you can also rename it to something suitable, like watermarks_s_yolov8_v1.pt.
You may want to try both the last.pt and best.pt separately to see which model perfoms the best for you.
Open generate.py to edit some parameters.
"model_path" is the path to your model.
"selected_classes" is a list of the classes you wish to identify and detect when running the script.
"class_overrides" is a list of overrides. Use this if you wish to substitute one class with another. This could be useful if the model is trained on the classes in the wrong order, or if you just wish to change the name of the label in the overlay images.
"confidence_threshold" is the detection confidence needed to make it consider it a positive detection.
Now place all images you wish to test your model on in the /generate_input folder.
While inside the environment, run python generate.py to launch the generation.
The output images with annotations overlay, as well as the detections text-files will be found in the /generate_output folder.

That should be it. You should now have a trained image detection model that can be used with the ADetailer extension for A1111, or similar nodes in ComfyUI.
There's more to learn, you can make segmentation models, and Yolov8 can be used for things like object counting, heatmap detection, speed estimates, distance calculations and more!
Additional Information
Folder structure
dataset: Contains your dataset images and annotation files (captions), in subdirectories.
train: Contains your training data.
valid: Contains your validation data (start with ~10% of your training data moved here).
test: Contains your test data (optional).
generate_input: Place the images to test your detection in here. Note: These could also be placed inside dataset/test as long as you update the generate.py to that directory.
generate_output: Generated detections and output annotation files are placed here.
models: Downloaded base models are placed here. Place your models in here when generating.
training_output: This is where trained models (weights), curves, results and tests will end up after training.
Scripts
Remember to enter the environment to run the scripts.
train.py: The training script. Configure the training folder name, epoch count, batch size and starting model. It requires the dataset to be properly setup.
generate.py: The inference script used to generate detection results. Configure the model name, which classes to detect, class overrides
yoloOutputCopyMatchingImages.py: This script is a small tool to help you select and copy images from one folder, based on matching image names of another folder. Example:
You have a folder with input images (original) to detect something from.
You run a detection model, and get another folder with overlays showing the detection.
You then run a tool like img-txt viewer to remove text-image pairs of failed detections.
Now you have a folder with only successful detections (curated). Now is when this script comes in.
You now run the tool and choose those directories, and it will copy any original images that matches the names of the images that are in the curated folder.
You can now run the (yoloOutputToYoloAnnotations.py) script to convert the output yolo detection coordinates, to yolo training annotations.
yoloOutputToYoloAnnotations.py: This script converts output yolo detection text-files, into yolo training annotation files. It's used together with the (yoloOutputCopyMatchingImages.py) script to generate training data from successful detections.
cocoGetClasses.py: Extracts the class names from a downloaded COCO format dataset and outputs them in the Yolo training format. Place the script in the same folder as _annotations.coco.json and run the script. Can be run outside of the venv.
cocoToYoloAnnotations.py: Converts annotations from the COCO format to the Yolo training format. Place the script in the same folder as _annotations.coco.json and run the script. Can be run outside of the venv.
Additional / Alternative reading
https://civitai.com/articles/1224/training-a-custom-adetailer-model