This is an "all-in-one" workflow: https://civitai.com/models/539936
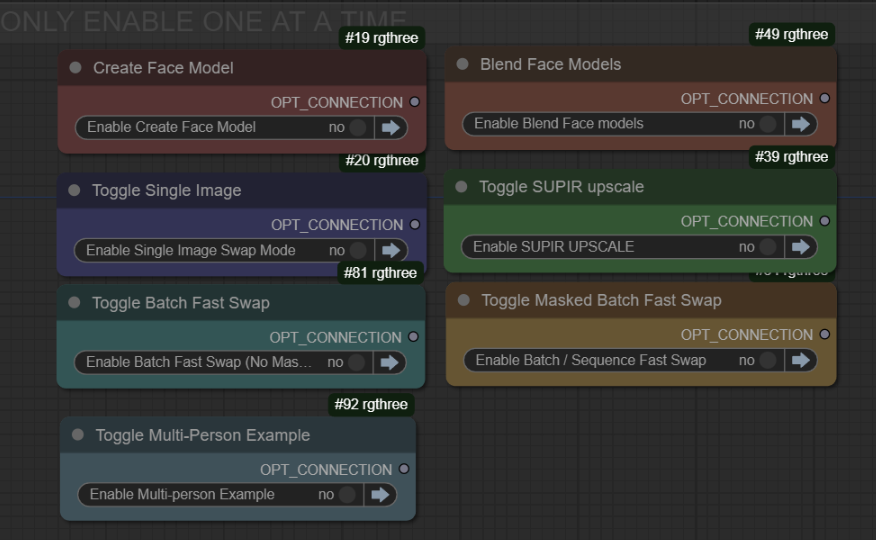
you must only have one toggle activated, for best use. watch the video and/or scroll down for written instructions.
CREATE FACE MODEL:
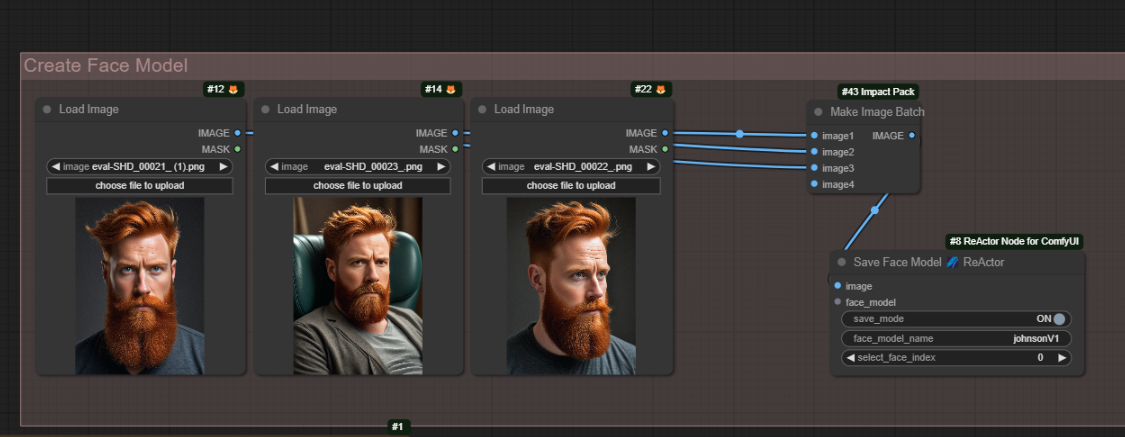
1. Add your highest quality face images, you can add more load image nodes to the batch too.
2. Enter the Face Model Name into the Save Face Model node.
- Start Queue
This will create a Face model in .safetensors format for later use in the other workspaces in this workflow. You can create as many as you like, we will load them later as we need them.
BLEND FACE MODELS:
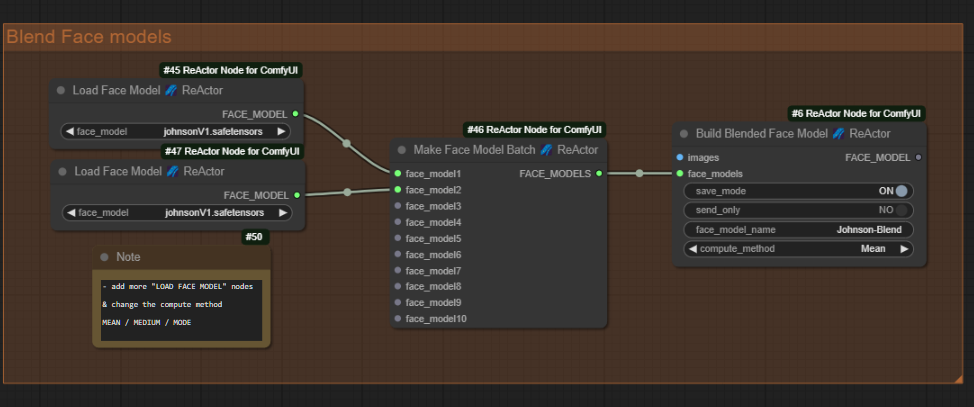
1. Select face models, you can add more face models to the batch node too.
2. Enter the name for your new blended Face Model into the Build Blended Face Model node.
- Start Queue
You can mess around here with your Face Models and create unique faces - experiment with the Compute Method's MEAN / MEDIAN / MODE to further explore your blend.
SINGLE IMAGE SWAP MODE:
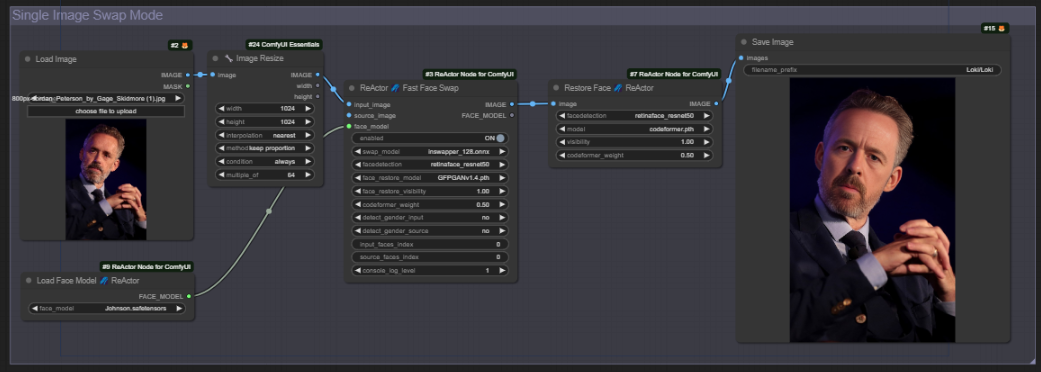
1. Choose your face model
2. Add the Target Image to be swapped
- Start Queue
Here you can just swap a single image as you drag it in and test your created Face models and Blended Faces. Useful for checking frames for a large sequence before you start.
Pay attention to the Face Restore Visibility and Codeformer Weight, as these can affect the quality of the swap. The Restore Face node is placed for convenience, it may produce a higher quality image at the cost of accuracy to the face model.
SUPIR UPSCALING SECTION:
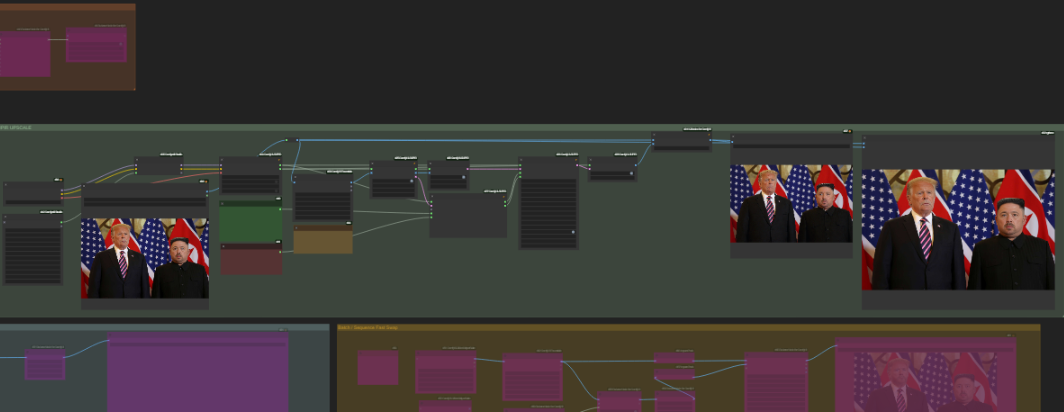
1. Check you have your SDXL checkpoint selected
2. Check you have your Hyper SDXL Lora selected
3. Check you are happy with the Prompt
4. match your height and width maximums to the correct aspect ratio
(default widescreen / 4K max @ 16:9)
- Start Queue
If you create a nice image, you can drag it in here and have the image upscaled using Hyper SDXL with SUPIR to 4K. Make sure you swap the maximum height and width if you are working in Portrait.
BATCH FAST FACE SWAP (NO MASKING)

1. Choice of Video file or path to folder containing images, Default required folder path.
copy and past directory path to the directory field in the "Load images (path)" node
2. Select Face model
- Queue
here we can process a directory containing your images to be face swapped. It will honour the order, so can be used for animation with long sequences of images. Recommend to limit the job to batches of ~500 - ~1000 for a more powerful PC. It will process all the images in the folder in one click so be careful what your PC can chew. create folders with no more than 200 images to break it up for example, if you need to limit the jobs.
Video is an option here too - connect the node and link your video with the path to the file.
BATCH SEQUENCE FAST SWAP (MASKED)
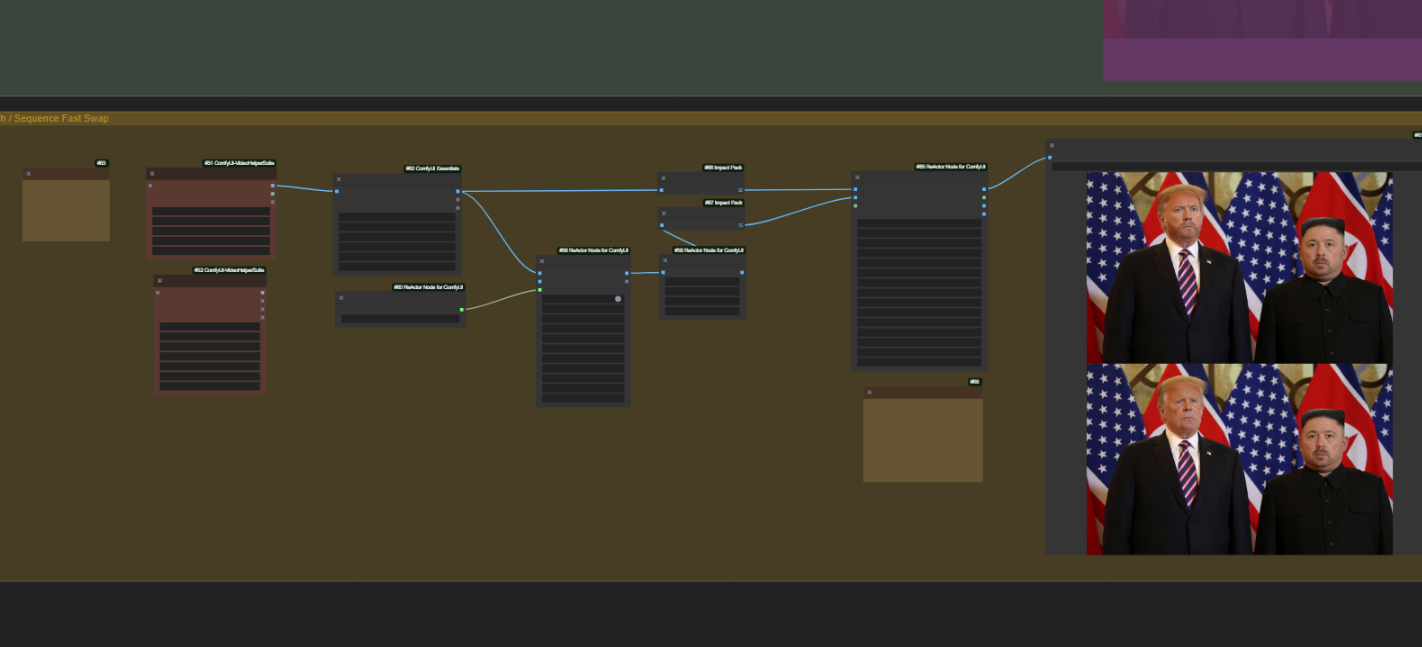
1. Choice of Video file or path to folder containing images, Default required folder path.
copy and past directory path to the directory field in the "Load images (path)" node
2. Select Face model
- Queue
In this workflow we show how to apply masking to the final swapped faces, restoring partially obscured details correctly. This requires additional processing so is offered as a sperate workspace, but is essentially the same as the last one. This may be more beneficial in animation where object may pass in front of the face being swapped, this will aim to deal with restoring the object and obscuring the swapped face correctly.
MULTI-PERSON EXAMPLE:
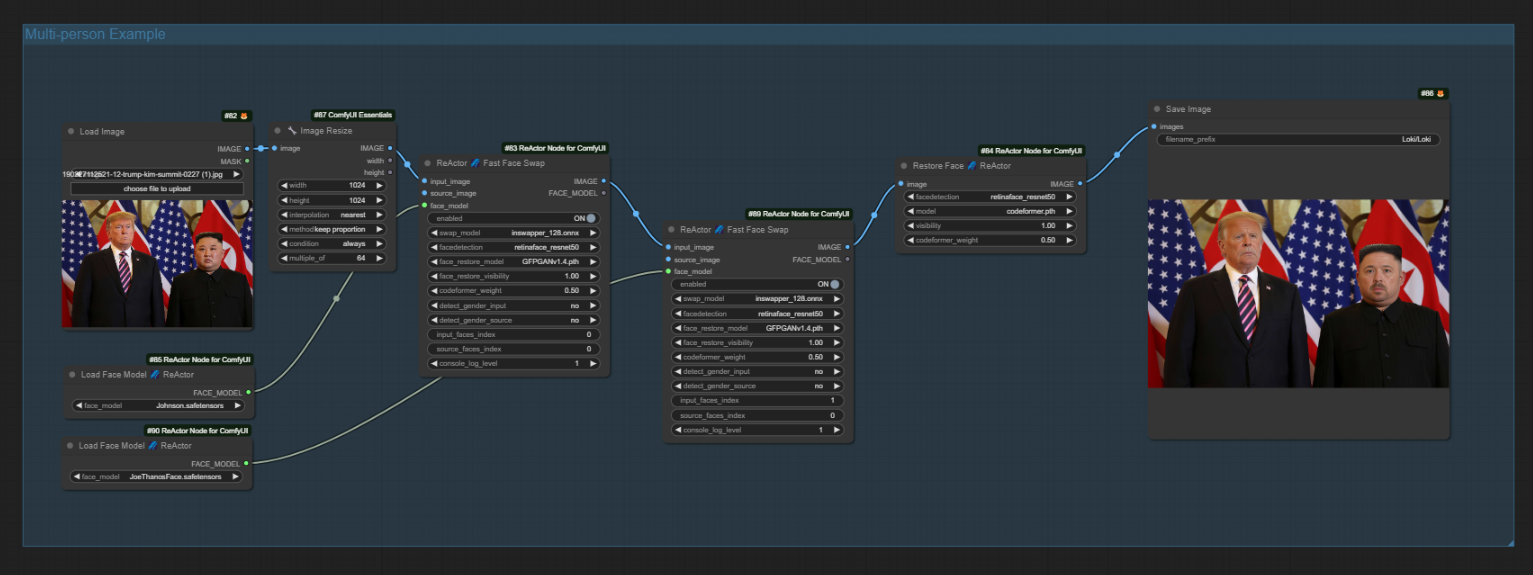
Add the Target image featuring two people
Choose the Face Models for person (1) and person (2)
Using the "input faces index" to select which face model targets which person
- Queue
Here i show an example of how all these workspaces can be altered to support multi-person scenes, with your face models. Note: with images you would use the Source image to determine the face which is selected. With the models it seems to work better with the input index.
That's it ! For more information - watch the video where we can offer a little more details and tips for operating this workflow.

