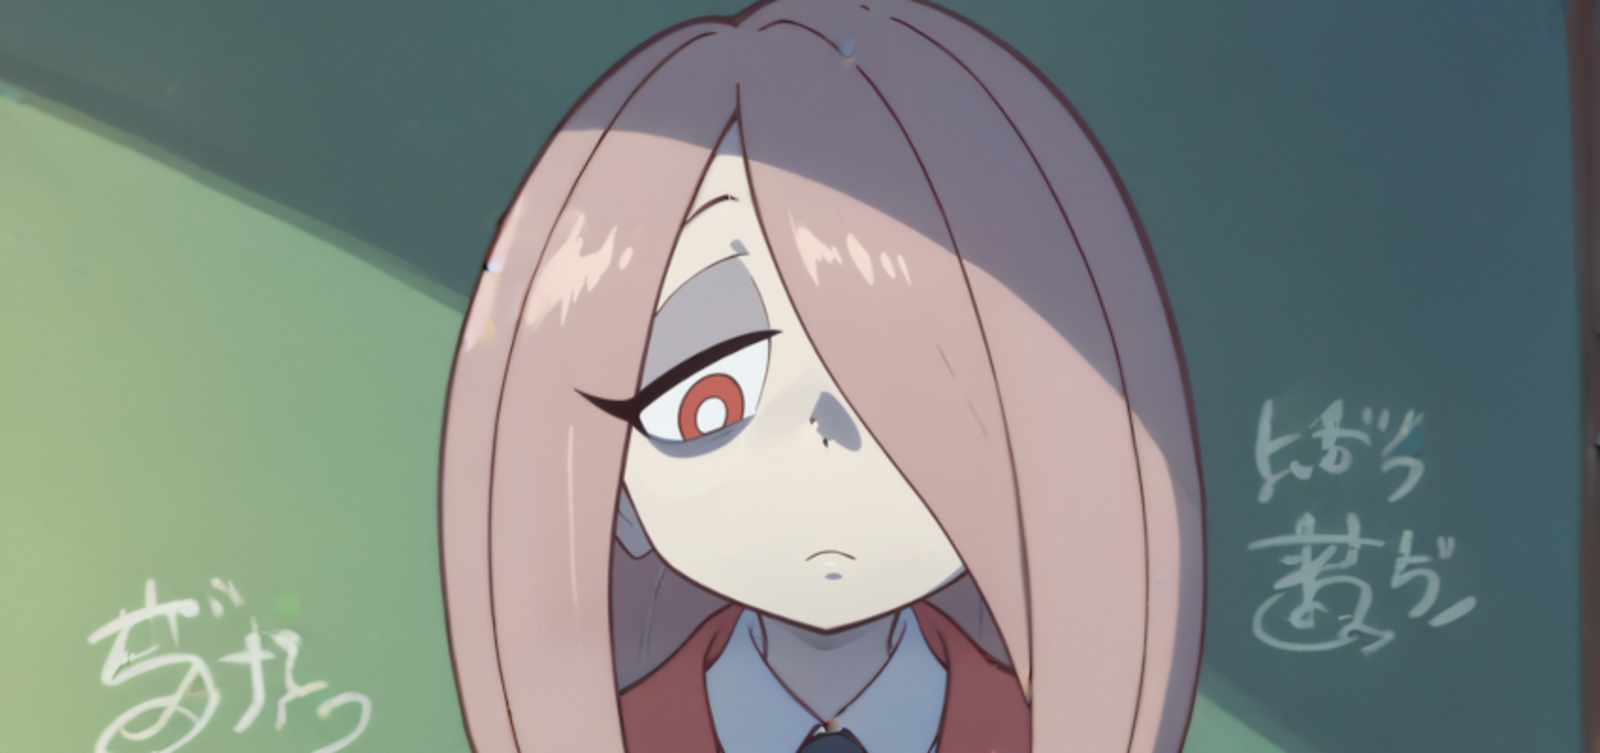
first words: i don't update text part, because it close enought, but some comfy custrom nodes be corrupt from time i create this guide, that why i update workflow, and it can look little different.
P.S. i recommend to use some of illustrious based models now, ~WAINSFW series is fine.
Introduction
Welcome to this guide focused on creating high-quality images in the anime style using PDXL LoRA within ComfyUI. This is not a tutorial on prompt engineering; rather, it's a step-by-step workflow designed to help you achieve commercial-level anime-style images with ease. Since July, I've been using this very workflow for previewing my LoRAs, and I've made slight improvements to enhance it further for this guide. Whether you are a beginner or looking to refine your skills, this guide will walk you through the essential nodes and processes to produce stunning results.
Guide
0) lvl 1 is this guide for easy and fast PDXL generations in ComfyUI if you new at ComfyUI better first do it(not necessary).
if you complete 0 you can start from 6, or else do all steps:
1) Install ComfyUI: Installing ComfyUI
2) Install ComfyUI-Manager: Installing ComfyUI-Manager
3) Download RandomPDXLmodel and put it to ComfyUI\models\checkpoints
4) Download RandomUpscaleModels or and put it to ComfyUI\models\upscale_models
4xUltraSharp.pth With this workflow you can use any 4x model you want, but for test dl this one
5) Download LightningLora4steps and put it to ComfyUI\models\loras
6) Download RandomAdetailer Model and put it to ComfyUI\models\ultralytics\bbox
7) Download workflow from this guide(Look at Attachments).
8) Close comfyUI
open comfyUI
load workflow from 7
click on manager button
click on install missing custom nodes and install everything
Download Sucy Manbavaran Lora and push Like 👍, put lora in loras folder (same as in 5) )
Queue Prompt
Get result
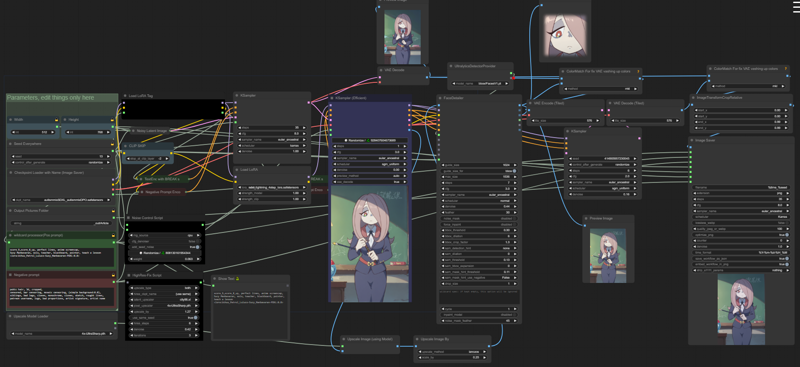
It works! if not - write a message in comments with problems you get, or in my discord.
\\Pls put like on LoRAs(not on images) you found helpfull//
Guide complete, next text for people who like to understand deeper, not just get result.
I specially use for this Guide bad LoRA(this character be only in one scene in this anime, and it trained on ~14 similar looked blurred frames).
What's going on here(bold text is things that not trivial):
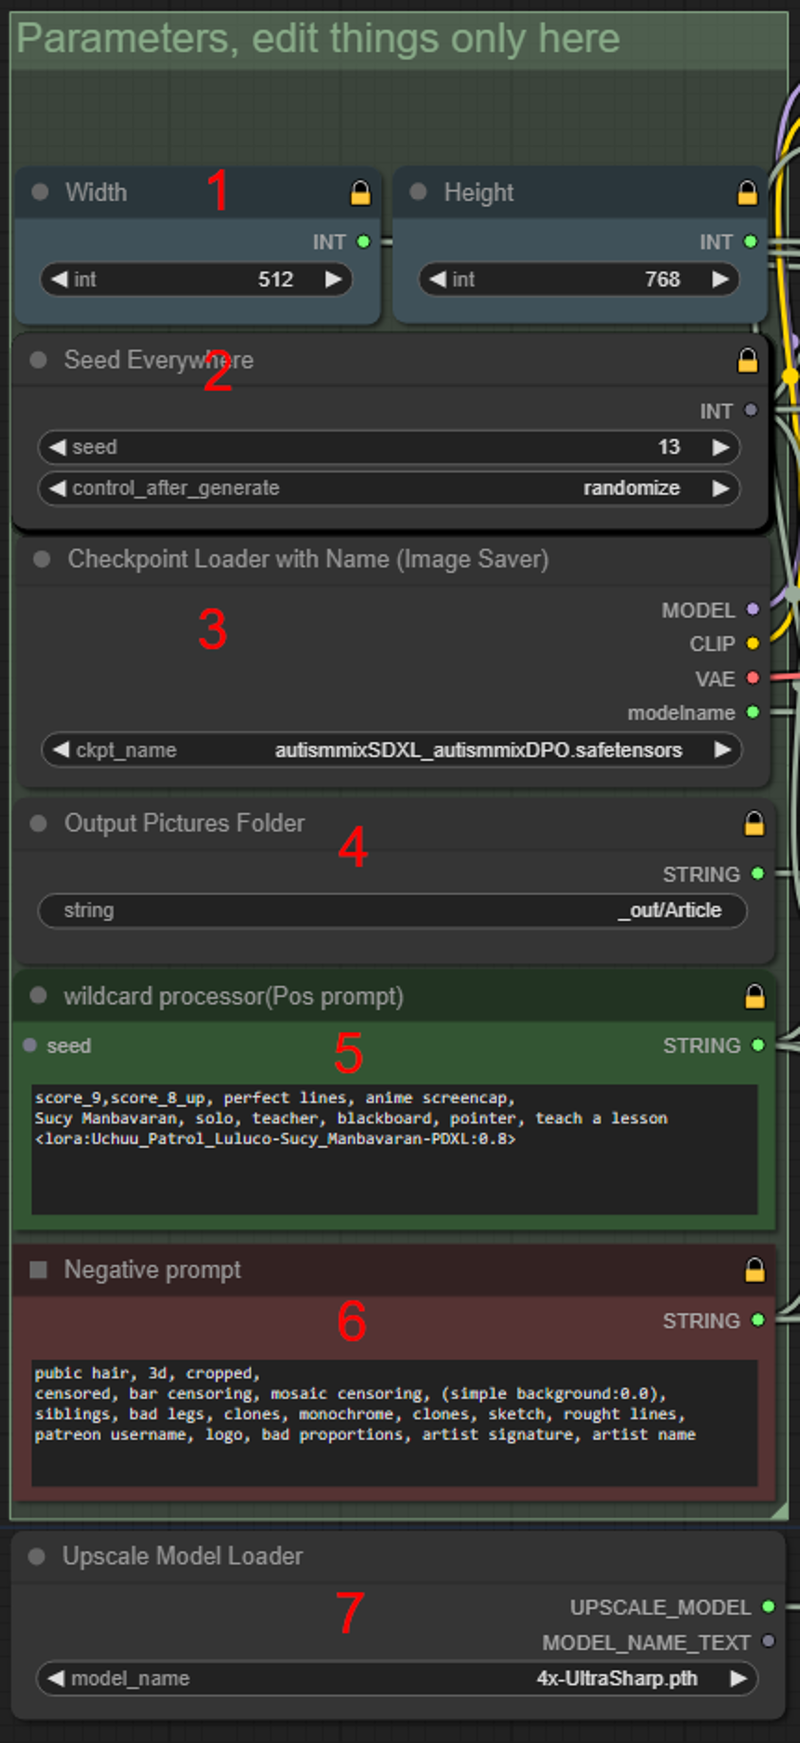
1) setting up base image resolution;
2) set seed value;
3) select checkpoint model;
4) it a output image folder inside "ComfyUI\output" ("ComfyUI\output\_out\Article");
5) positive prompt (wildcard support, BREAK support, lora load support(only positive));
6) negative prompt;
7) select upscale model for later step of add sharpness;
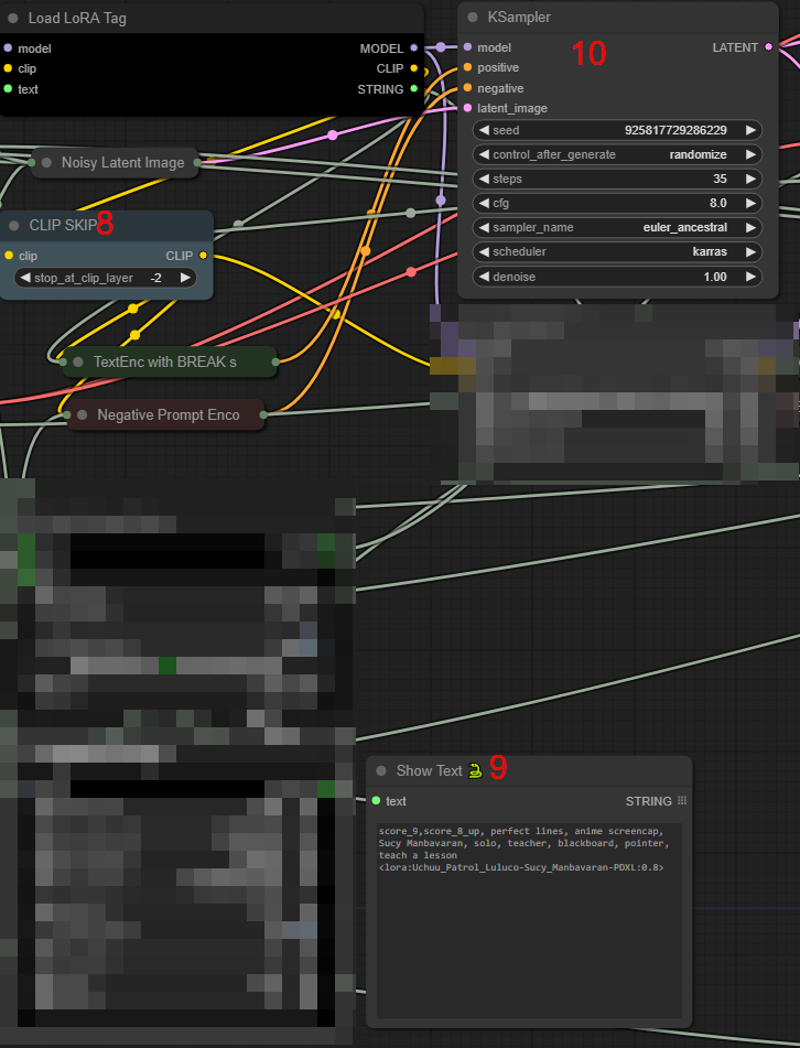
8) Clip Skip 2;
9) Positive Prompt after Wildcards made work (you can check here that wildcard are used, and that LoRA name isn't changed(or it not load));
10) Sampling Node where you can change CFG/steps/scheduler/sampler name (pls don't change denoise value here);
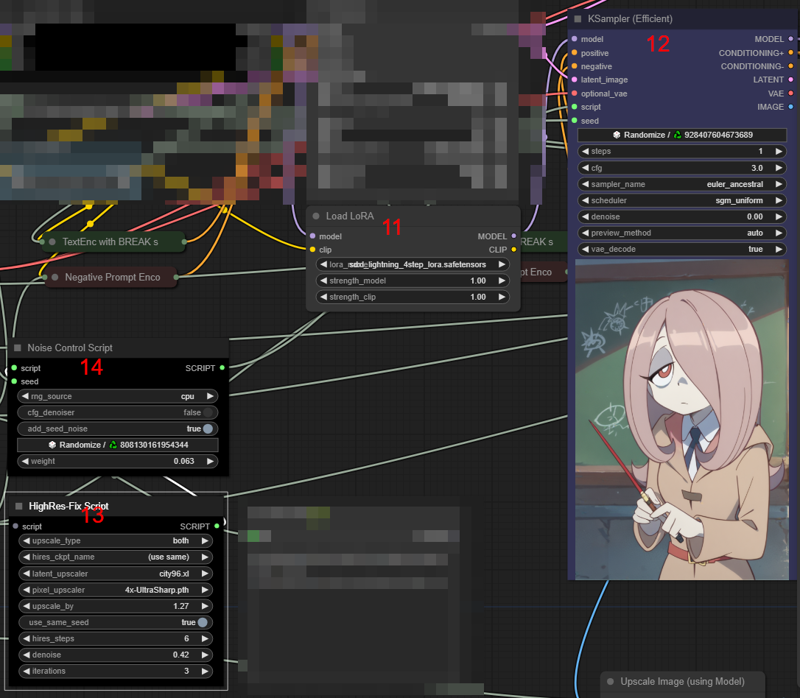
11) Additionally connect the Lightning LoRA for "hiresfix" steps;
12) this is fine that it 1 step and 0 denoising, because we need to made steps from 13;
13) Hires Fix Node, that configured to made 3 hiresfixes one by one each time made image 27% bigger. Why this way - in my tests it can sometimes fixed broken things from base image, and it create more details than 1 hiresfix on 2x;
14) add some little amounth of noise to image (mostly for image details on BG);
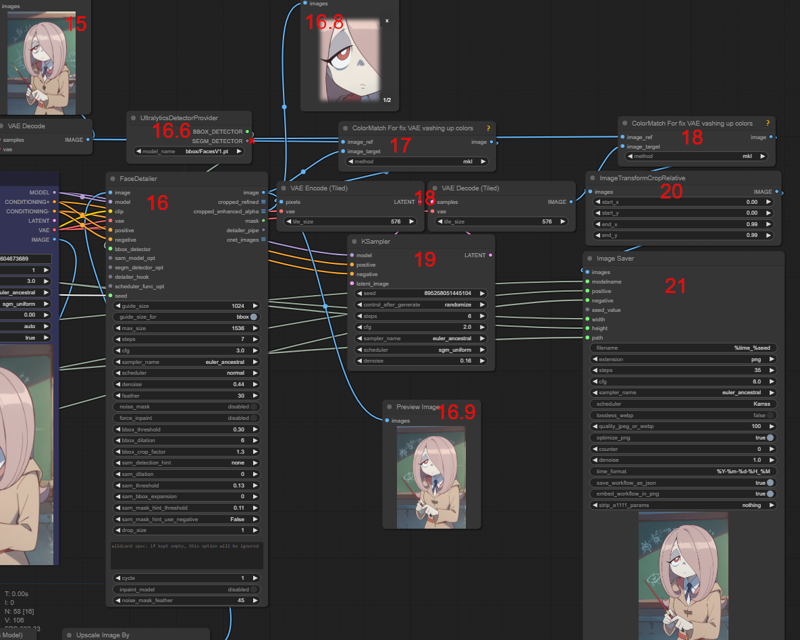
15) preview of base image;
16) Facedetailer node (here used as analog of Adetailer from A1111);
16.6) Adetailer model selector;
16.8) Preview of founded redrawned adetailer elements;
16.9) preview of image with fixed adetailer elements(here face);
17) fix image colors, because VAE in every iteration a little vashup colors, this node made color scheme from basic image(15).
18) tiled versions of VAE Encode/Decode, tile size 576 is good for 8GB VRAM, if you have more - add here, if you have less decrease it. (base Encode/Decode nodes works slower if VRAM not enought, because it not try to find optimal tile size and just use ~256);
19) Additional img2img pass for fix potential problems with visible adetailer areas, and made image more complex.
20) crop right and bottom 1% of image (need because it tends to made lines here, because of latent noise resolution limitations)
21) Save image with Metadata for civitai and workflow inside.


