Hi all! So I've been thinking about doing something like this for a while, but this post on the Stable Diffusion subreddit kind of spurred me on a bit. I've now got 16 Flux Loras released (not including the many failed attempts), and another two queued up ready to be published. From all this I've learnt a lot, either through trial and error or from speaking with other members of the community, and I'd like to give something back in return. So what follows below is an analysis and retrospective of the training runs I've done so far in the hope that it will be useful to some of you.
This is going to be a long one, so buckle in.
Environment
First things first - a little bit about my technical setup and how I train Loras. I'm running locally on a Gigabyte AORUS 3090 24GB, with 64GB RAM and an i7 11700k. I use my integrated graphics card on my motherboard for my display so as not to fill up the precious VRAM on the 3090 (even the tiny amount used to show the monitor makes a difference).
To do the actual training I'm using Ostris' AI-Toolkit script. I've used OneTrainer and Kohya before for SDXL, but I wanted to get started early on Flux and AI-Toolkit was ready to go and is really simple to use. I use ComfyUI to generate images and test Loras once they're done cooking.
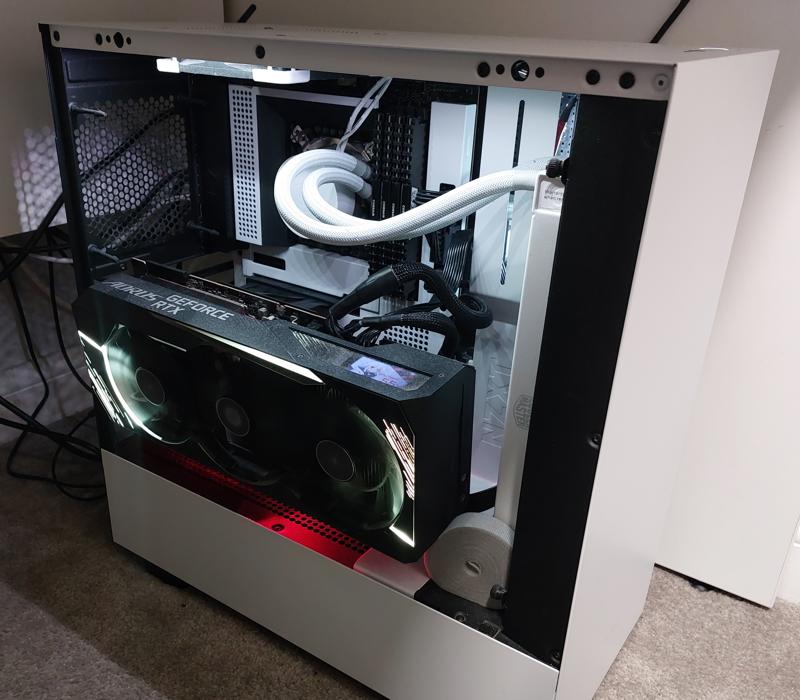
Embrace the jank. Yes, that graphics card is held up with just a roll of velcro.Versioning
As you start to build up datasets and trained Loras, it's really easy to lose track of what files you used to train a particular output, or forget which copy of the Lora you put in your ComfyUI models folder when you come to release it. You should try and version everything - both the config file you use, the output folder the Lora backups get saved to, and the dataset you're using to train it on. Create a folder structure like this when you're preparing your files:
/ai-toolkit/config/my_lora_name/v1.0/config.yaml
/ai-toolkit/datasets/my_lora_name/v1.0/
/ai-toolkit/output/my_lora_name_v1.0/
If you change anything, even if it's just a adding a single file into the dataset or changing the learning rate by a tiny bit, create a new version number, copy all the relevant files into it, and then make the changes there instead. So you'd have a "/ai-toolkit/config/my_lora_name/v1.1/config.yaml" file instead.
Even a small change can have a big effect on the output you get, and you'll sometimes find yourself wanting to go back to how you had it before. You don't want to have overwritten that data or config file and lost it.
You should also try and match this version number to the one you use when you release it on CivitAI, so you can easily pair the two together if you want to come back and do another training run. For example, with my Flat Color Anime style I have version 2.0 for the old SDXL one, and I use 3.0, 3.1, 3.2, etc. for the Flux one and any updates I do on it. These numbers match my local training config names.
Captioning
Bear in mind I've mostly been training styles so I have more experience with that, but I have done a few character runs too.
Style Loras
Edit: Since writing this article I've done a much deeper investigation into captioning images here, and my initial thoughts from below aren't necessarily how I'd go about it now. To summarise a very long experimentation process, you can get good style results without captions, but if you invest the time to caption your data in natural language then you'll get better flexibility on subjects outside of your dataset. I've left my original comments below (striked through) for completeness.
In almost all cases, I've found I get better results matching an art style by not having captions on the images I use for training. I use a single trigger word (usually "<something>_style", e.g. "ichor_style") which I set within the AI-Toolkit config file. I think the logic behind this is you want to capture everything about the way your images look. When you add captions, this is essentially telling the training script things you want to exclude from it's learning.
The key here though is that you need a diverse set of training images. If you have the same character in every image when training for a style and you don't caption it, then it'll just learn how to make that character over and over again. In my Samurai Jack Lora, I had to be careful not to use lots of images that actually showed Jack (not an easy thing to find!). Background screenshots and images of other characters round out the style and tell the training how things should be drawn in general rather than for one specific character.
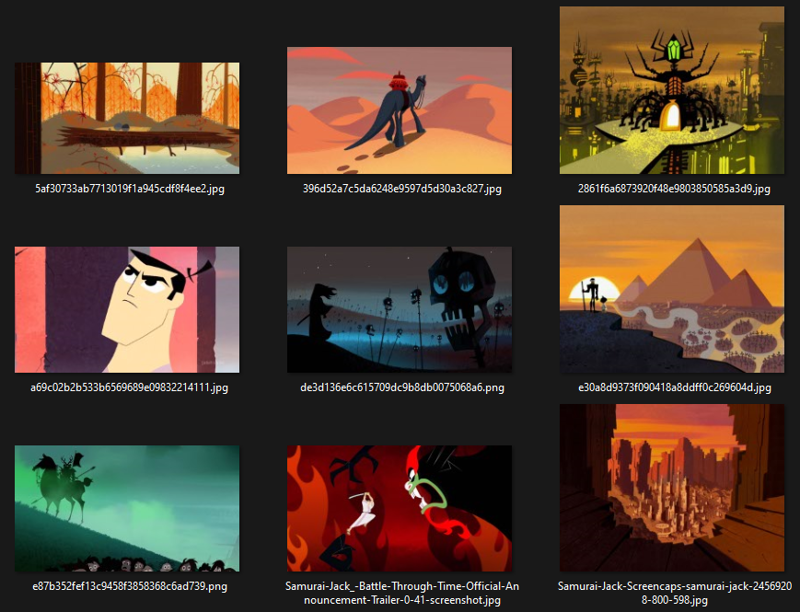
An example of the Genndy Tartakovsky / Samurai Jack style training images.The one exception I've found to captioning (and I have no idea why - edit: I now know) is Flat Color Anime. I get better results when I capture that one in full detail (i.e. at least a few sentences describing each image). This might be because my dataset is very waifu heavy and I don't want it to focus in on that specifically, but I don't really have a good explanation for this yet. Again - versioning is great here as I can run two separate configs both with and without captions and then compare the two.
Character Loras
Captioning is way more important here. You want to describe everything except the character. So for example:
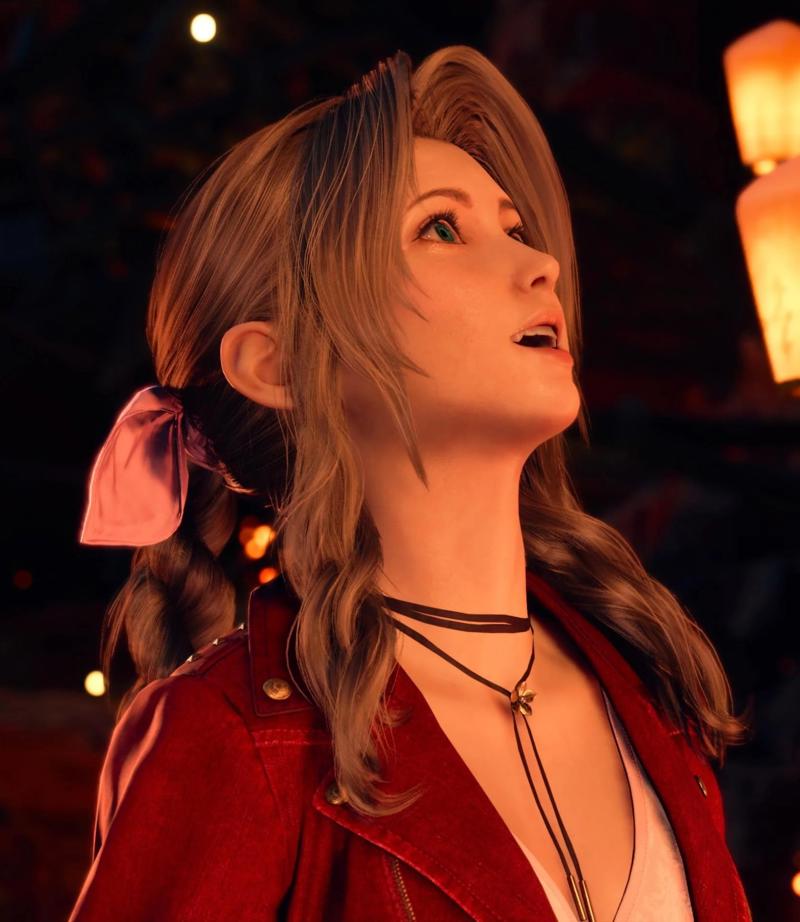
aerith gazes upward with a look of wonder, her eyes wide and lips slightly parted as if captivated by something above. Warm, glowing lights in the background add a soft, ambient glow to the scene, highlighting her featuresNotice that I'm describing everything around her and the things about her that might change (i.e. the look on her face and the direction she is facing), but I'm not talking about how her hair looks, her clothes, eyes, accessories, etc. Captions exclude things from the training run, and when I did my first test where I captioned everything about her clothing and hair I was getting results like this:
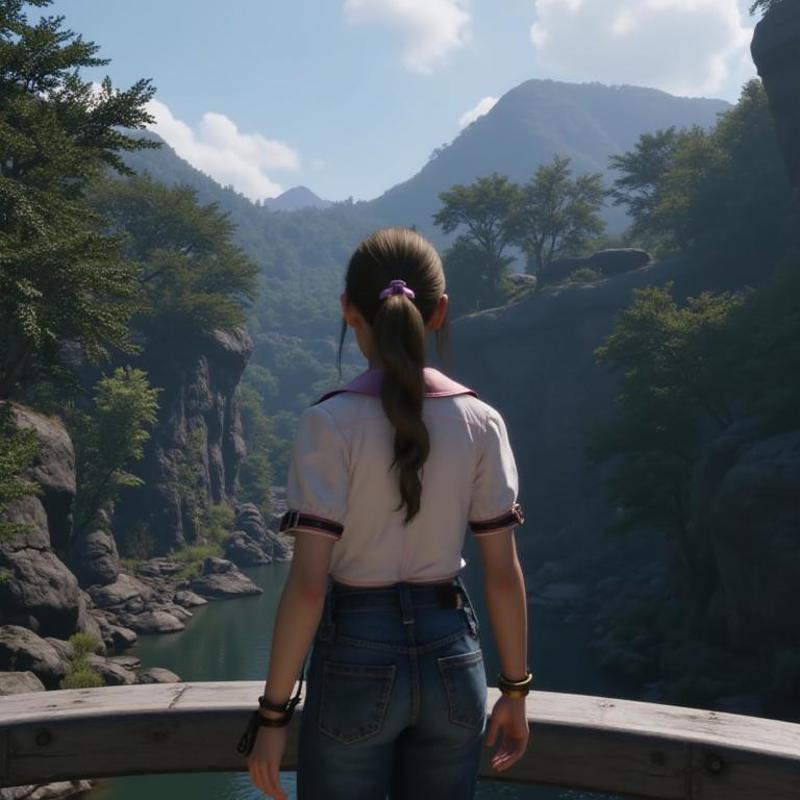
Because I'd captioned her outfit it would show her in completely the wrong clothing.
Dataset
Images should be as high in detail as you can get them. Even if you're training at 512px, you still want a high resolution dataset (i.e. at least 1024x1024 or bigger if you can).
Style
For style datasets you want about 20 to 30 images. You can go as low as 10 to 15 if they're very consistent. The style obviously needs to match between them, and you need to vary what's in the images enough that it doesn't pick out one character or object that's common between them (unless that's the intention as part of the style). My first pixel art attempt had 110 images. They were all in exactly the same style, but Flux doesn't seem to like training on such a big dataset and the result I got from the training run wasn't great. I reduced this down to a cherry-picked 16 images, re-ran the training and the results were much better.
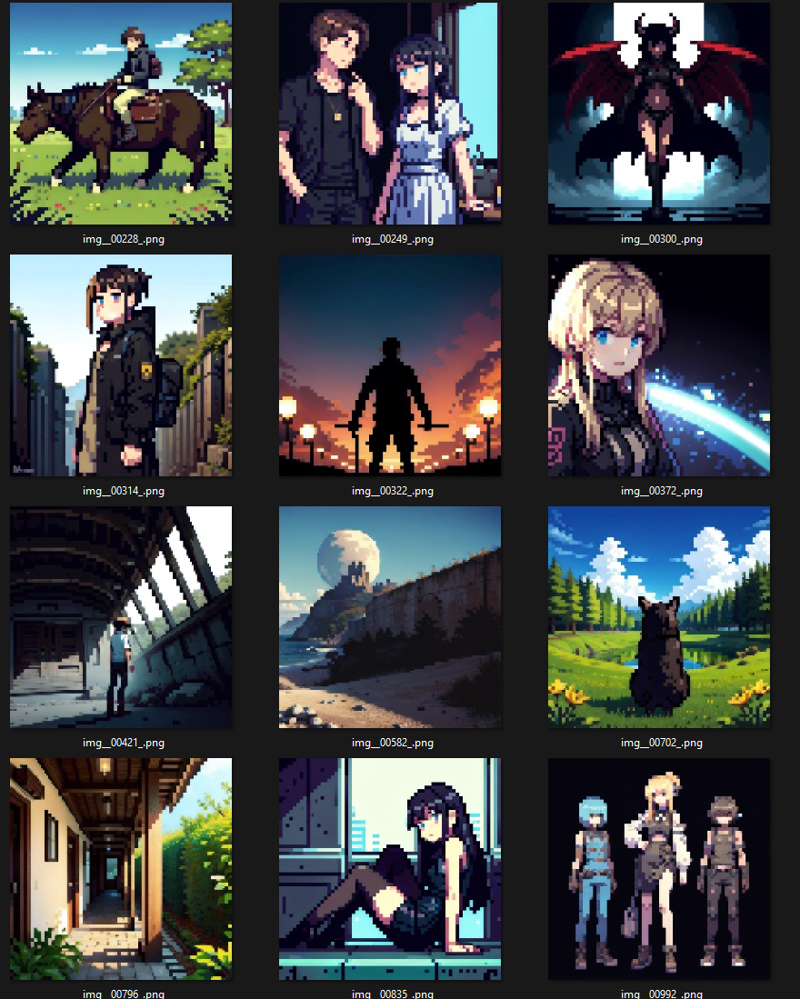
Pixel art style training data examples - no captions (just a trigger word) Character
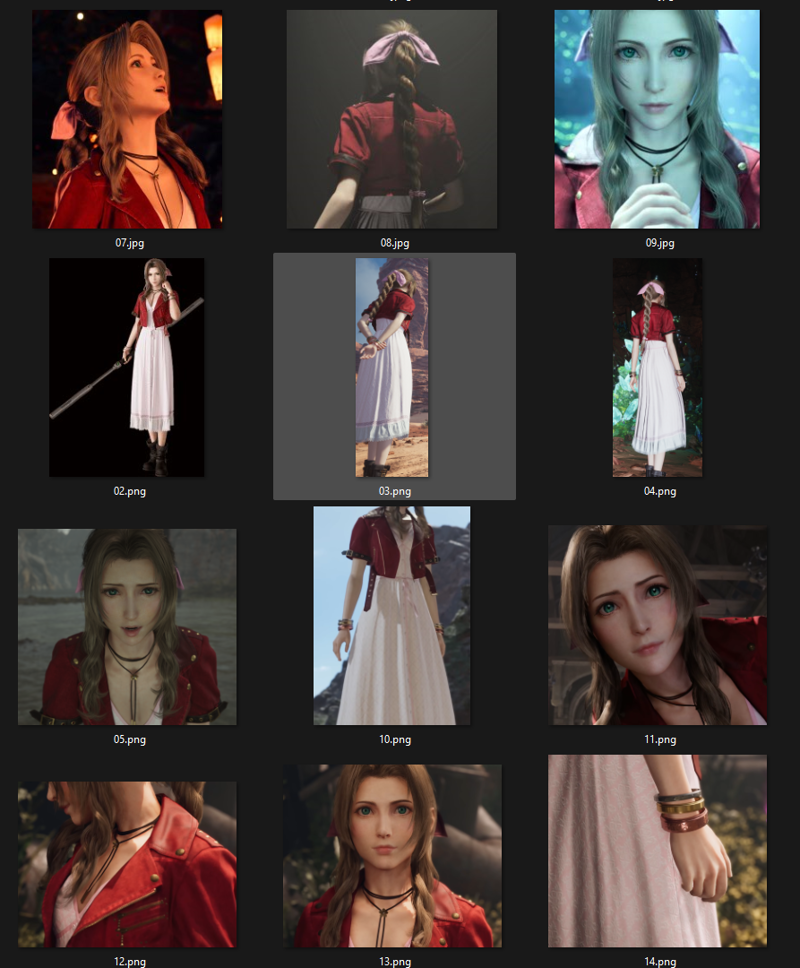
You want a similar amount of images (plus captions as we discussed above). They need to be in the same style (don't mix photorealistic with cartoon/anime), and you want to try and get a good range of shots. At least five direct headshots in different situations, some from side angles, full-body shots (and the same from the side and behind). Include close-ups of specific clothing elements (e.g. the pattern on Aerith's dress, or her bracelets).
Training Settings / Config
You'll see a lot that people will say no two training configs are the same. This is true, but as a general rule you can get away with a standard set of parameters and then just tweak it if you think the output needs a little more or less time cooking.
Style
For style Loras I go with a learning rate of 1.5e-4 and run this for 3000 steps, taking backups every 250 steps and samples every 500 steps. Make sure to keep all of the checkpoint backups and that it doesn't start deleting them as it goes through the training run (the default is to keep the most recent 10 - I change this to 1000 so it keeps them all). Styles tend to converge pretty quickly and you could see good results as early as 1500 steps, but I find between 2500 to 3000 usually gives the best result (almost always 3000). By taking backups every 250 steps you can do your own testing afterwards and find the one that works best, but the samples taken every 500 steps give you a good indication of which ones to look at.
You can also do style training at 512px and get great results, which really cuts training time down (typically about 2.5 hours). If you have something with very fine details you want to capture in the style and you're not getting the results you want, try bumping it back up to 1024px.
I use mostly the default sample prompts with a few tweaks, but I do 5 with the trigger word and two without. This lets me see how much the style is bleeding into the output even when I don't use the trigger word. Ideally you want your two samples without the trigger word to change as little as possible from the start to the end of the training run. You also want something with text in (both in the trigger word samples and without it) so you can test how well text comprehension is affected.
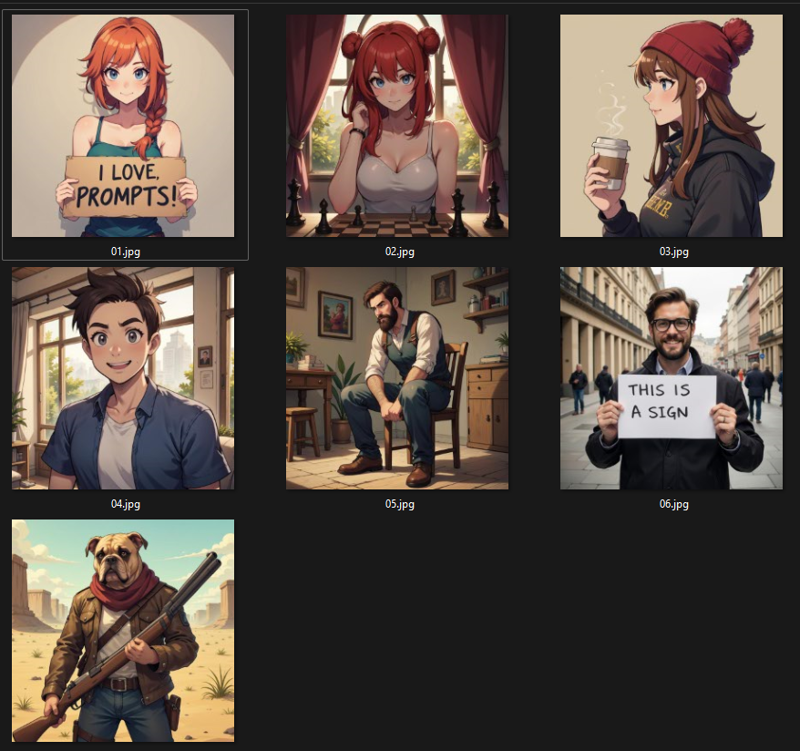
01 - 05 have the trigger word, 06 and 07 don't.Character
This can be a bit trickier. What I've found best so far is to do a much longer training run (up to 8000 steps) with a significantly lower learning rate (2.5e-5). This picks a lot more of the tiny details in the character and generally understands how they should look in different situations better. Use 1024px training resolution for characters to capture the most detail. Backup and sampling settings are as above, but tailor the prompts with the trigger word to show the character in different situations and from different angles.
I still have a lot to experiment with on this to find the middle-ground between quality and training time. Because the training runs take longer (between 8 and 12 hours depending on settings) it's harder to experiment with. Also I have a long list of style Loras to work though first :)
I've attached example configs for both style and character settings to the article.
Conclusion
I threw myself into this two weeks ago when I saw the potential of Flux. It's amazing, and I can't believe we've been giving something as powerful as this FOR FREE and I have so much gratitude for the devs behind it. One thing we all quickly realised was that Flux was missing some of the art styles and characters we'd had in previous models like SD 1.5 and XL, and I wanted to do some small part in working towards bringing those back. Honestly it's been a lot of fun learning this stuff and putting it to use, and the feedback I've had from the community here and on Reddit has made it all worth it.
I'm happy to answer any questions people have to the best of my ability - either post in the comments or send me a message. If this article was useful to you please consider liking it and following me for more updates and styles as I work on them. I'm also going to try and go back to my released models and add the training datasets to them so you can see how they were made.
Much love ❤️
CrasH
I recently set up a ko-fi page. I don't paywall any of my content, but if you found this useful and you feel like supporting me then any donations are very much appreciated 😊

