Last update: 12-23-2025.
Note 1: Like this guide? Consider supporting me at https://www.patreon.com/c/MetalChromeX so I can continue to justify the time to make models of anime girls (and, you know, continue to pay off crippling college debt and other bills)!
Note 2: For more advanced training tips, check out my new article, "A no-nonsense guide for training character LoRA on Google Colab!"
Note 3 (2-15-25): Check out my new Tips on training a character model with multiple characters article/guide!
Intro
So you want to make a character model of a character you like, have some free time (lucky you!), and don't want to pay someone to do it? This will give you a comprehensive overview! There are other guides like this on CivitAI, but I tried to make this one super straightforward and intricate!
Training LoRA directly on CivitAI may seem intimidating, but, generally speaking, it's easier than it initially looks! There are some basic things you'll need to know, though. I'll keep this article as simple as possible to provide a fast lane for those interested in making character models but feel it's either too hard (it's not) or think they need a powerful computer (pretty much any simple PC you can do this with). I will update this guide as I get new information or suggestions from others. Please remember that I predominantly make anime and cartoon character models; I'll provide some input from a commenter regarding how they train realistic characters at the end.
Step 1. Get screenshots/images of your character
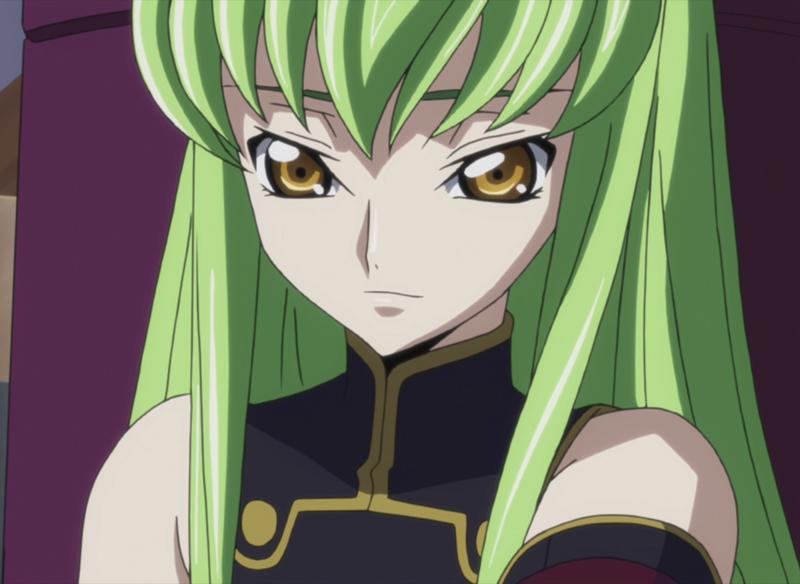
Let's use C.C. from Code Geass as an example, the last character model I did while initially creating this article.
You'll first want to get as many high-quality images of the character you want to make a model of. In other words, obtain a data set. This will likely be the most time-consuming process. The idea is to get as many high-quality images as you can. Try to get the character in as many outfits, angles, poses, etc., as possible. Websites like https://fancaps.net are excellent resources for getting screenshots without manually downloading episodes and using the Snipping Tool on videos or whatnot (the latter is probably the better method, though it can undoubtedly be more time-consuming).
As a side note, you don't need to use only official art or screenshots; this is just the method I use to make character models look as on-model as possible. You may want, or even need to, use non-official sources in your data set, especially if your character has limited screen time.
Avoid screenshots where the character appears blurry, poorly drawn, blocked off by another character, etc. Ideally, you'll want at least 20 high-quality screenshots to provide more info for the model to train with; however, you can get away with less.
To give some examples, I initially trained my original C.C. model with 377 screenshots, while my Shuuko Komi model only used 44. However, Shuuko does have less screen time in her anime than C.C. does. To make a comprehensive character model, you'll want to include screenshots of as many different outfits as possible. If you only want to throw characters in simple outfits, like bikinis or their birthday suit (heh), a large number, like 377, may not be needed. Short version: the more screenshots, the better, but you don't need 100s of screenshots to make a good character model.
Step 2: Prep your data set.
This step may also be time-consuming, but it likely won't take as long as step 1. Crop out any extra characters in your screenshots. For C.C., for instance, you'll want to crop out Kallen, Lelouch, or whoever else may be in that screenshot.
Here's another trick I figured out by playing around a bit. Since PNG images have transparency, manually erasing elements may help you get more "clean" results from your training session. Here's a quick example. Back in late 2024, I was working on a commission for Phi from Undefeated Bahamut Chronicle. I like this cute image of her yawning in her maid outfit and want to include it in my dataset.
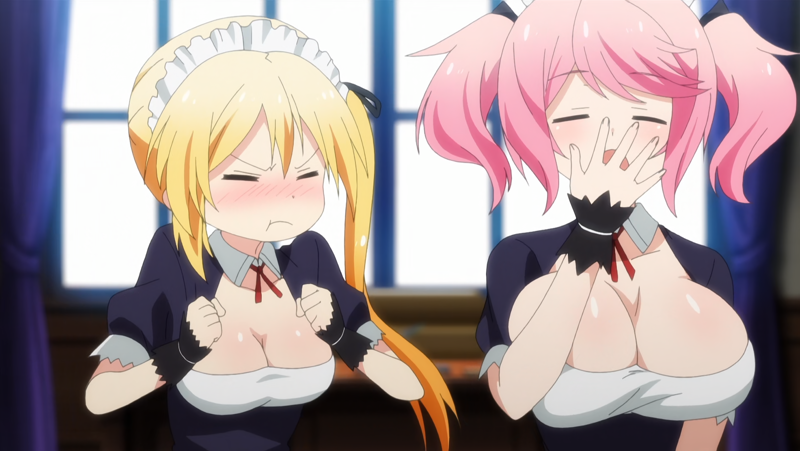
However, despite how cute she looks here, Lisha and her pouty face need to be removed from this picture to get better results for Phi. So, let's crop her out.

Ok, that's better, but we still have Lisha's hair and elbow in the picture. Can we do anything about this? To quote Bob the Builder: "Yes, we can!" Let's try erasing it using an eraser tool in an application. I use Clip Studio Paint; other programs, like GIMP or Photoshop, should also work.
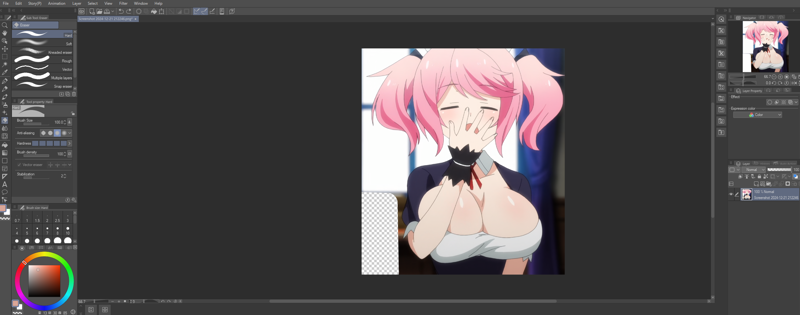
After saving my image as a .png file (for identifying transparency), I have an image that is now missing that undesirable element, and as a result, it looks like someone has "torn off" that part of the image. In theory, this should allow the computer to learn the important elements of the image better. Note: I'm not really sure how much this really improves things, but it hasn't negatively impacted anything that I've seen, so I'll continue to suggest this.
The only other thing I'd suggest taking note of is tagging. I'll get to this in a moment, but if a character has a variety of certain outfits, you will want to keep keywords in mind. For C.C.'s most common appearance, you may want to tag the model with keywords like 'White straigtjacket, wide sleeves, long sleeves'. You could also try a keyword like c2wh1teb0dysu1t or something, as well.
If your character has many different outfits, I recommend making folders for each outfit with a descriptive keyword.
From here, you will want to tag your dataset. You effectively have two main options (because I doubt you want to tag every image manually): use a program like TagGUI, or use CivitAI's built-in tagger. For the sake of brevity, let's use CivitAI's tagging system. If you're interested in TagGUI like I do, I wrote a detailed how-to on how to use it here.
Step 3: Upload your dataset to CivitAi
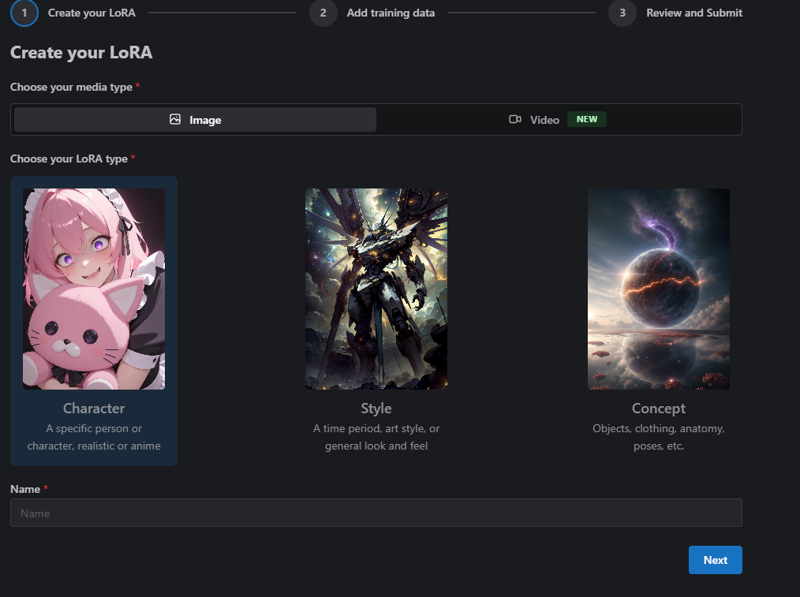
Here's where things start to come together! At the top-right of CivitAI, click the down arrow next to the create button and click 'Train a LoRA.' You'll want to click the character button of CivChan and then type in your character's name.
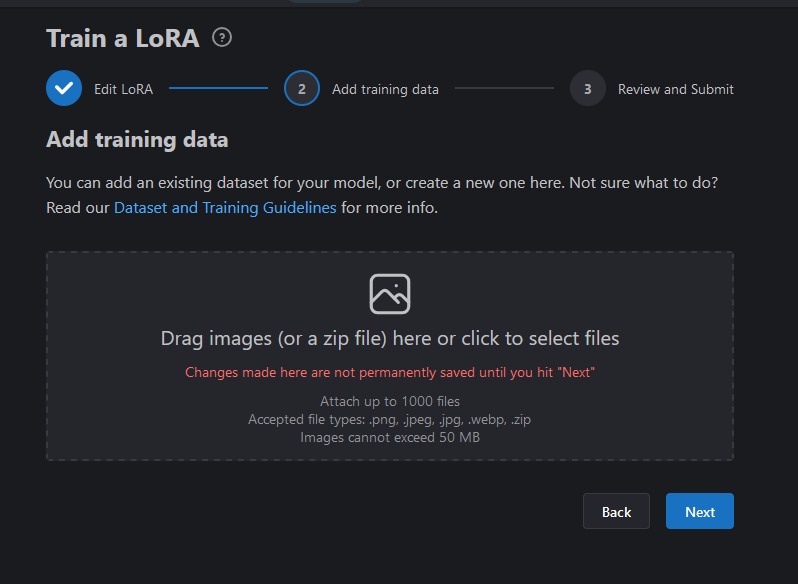
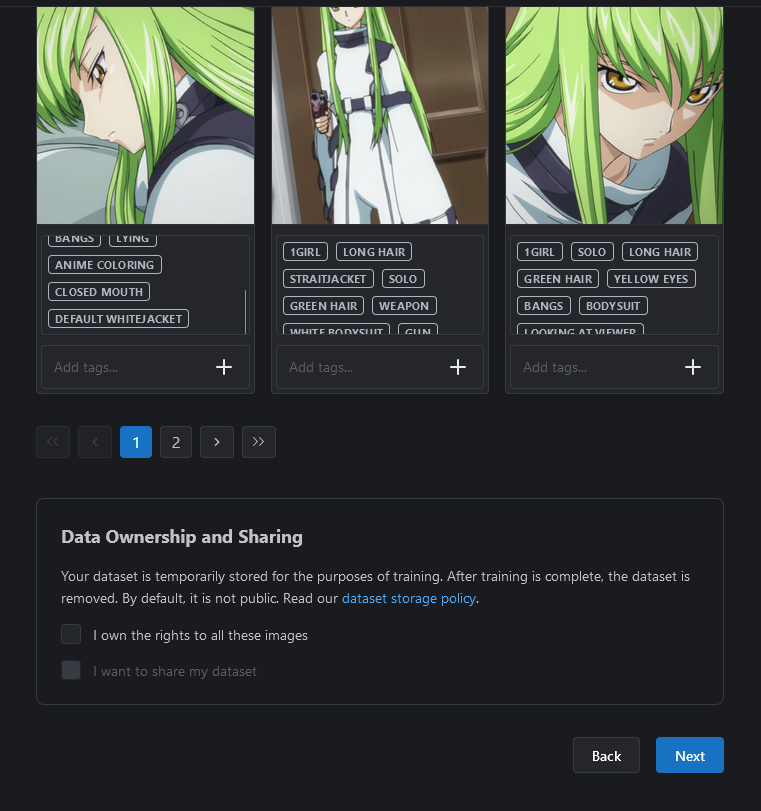
From here, you'll be asked to add training data. Drag and drop your pictures in here.
This will add your pictures. Note that it will say 0/(however many images) labels.
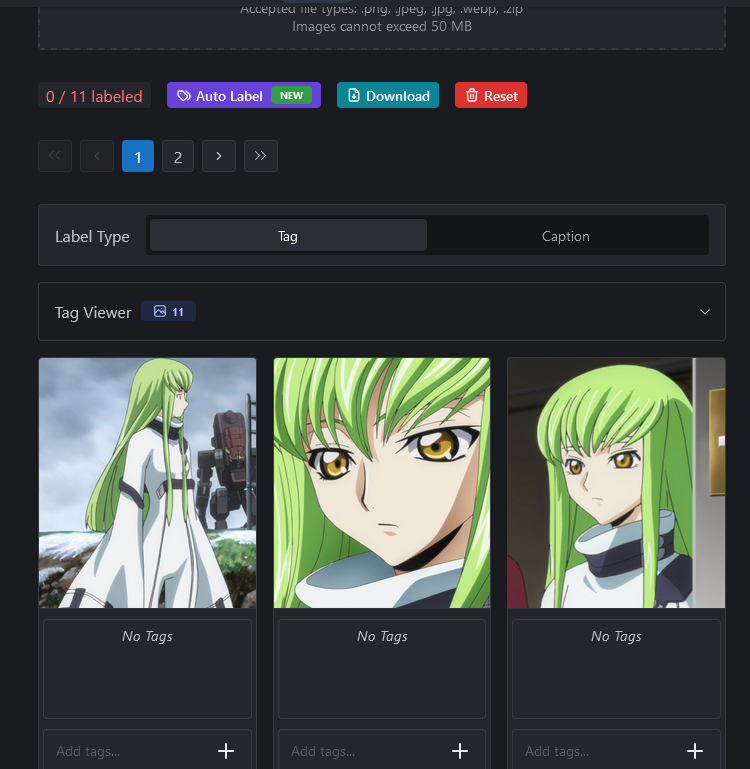
CivitAI makes things easy with the Auto Label button. Personally, I use a program called TagGUI to do this locally to tag and upload my dataset in a .zip file (I'll see if I can write a mini-guide for how to do this later), but the onsite tagger should work fine in most cases.
Click the Auto Label button, and you'll be greeted with a somewhat intimidating screen. Don't worry, though, as this isn't that bad.
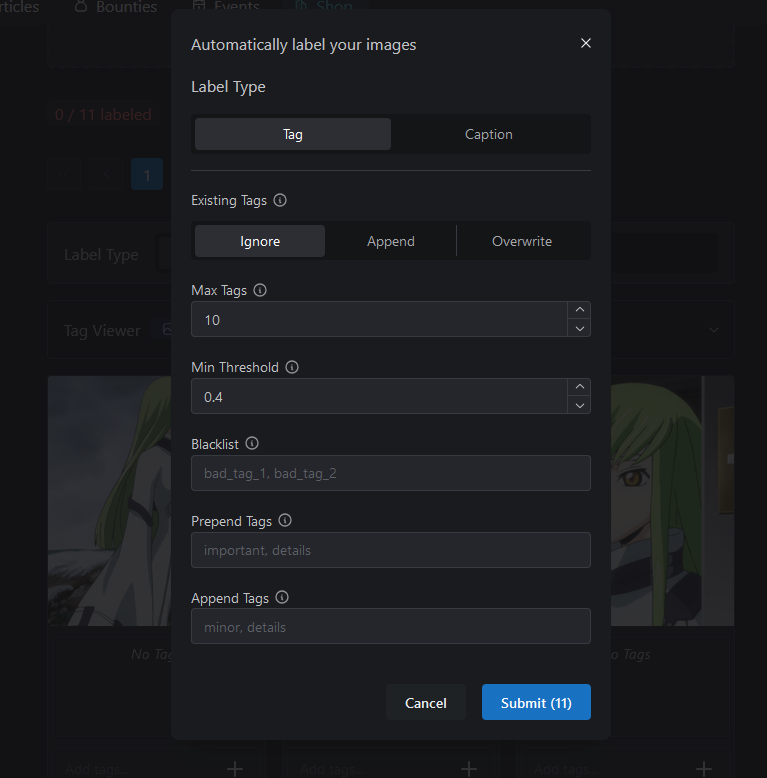
If you uploaded images in folders (like I did with Fujiko), I recommend uploading the contents one folder at a time and then clicking the Auto Tag button. You don't have to worry about Caption (that's for Flux). The only thing you'll need to worry about is Append Tags. For instance, if you want to label all of C.C.'s white straightjacket images under a single tag, type in 'default whitejacket' or whatever you want the trigger keyword to be. Then click submit. If CivitAI isn't pooping out, it'll upload the tags and apply them to your picture.
Note: Sometimes CivitAI poops out and doesn't want to create and upload your archive. This, of course, is annoying and seemingly random (I'd say it has happened about one in every five times for me).
One thing I'd recommend is to name your character something that is not their actual name; the reason is that checkpoints like Illustrious will already know the appearance of certain characters and series. For instance, if you go to https://www.downloadmost.com/NoobAI-XL/danbooru-character/ and search your character, you'll likely find the prompt tags that are associated with your character. So for MetalchromeX, you may want to tag it as M3t&lchr0m3x or something that wouldn't be trained/known already.
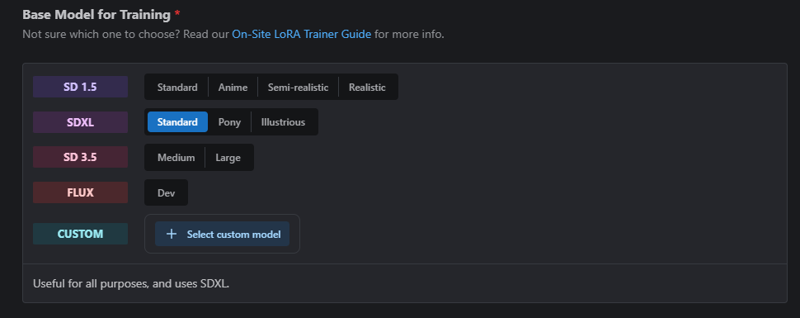
You'll now be asked what base model you want to use. You can use any, but this article was initially written with SDXL Pony in mind, so I'll select that here. From here, you'll likely want to go under advanced settings.
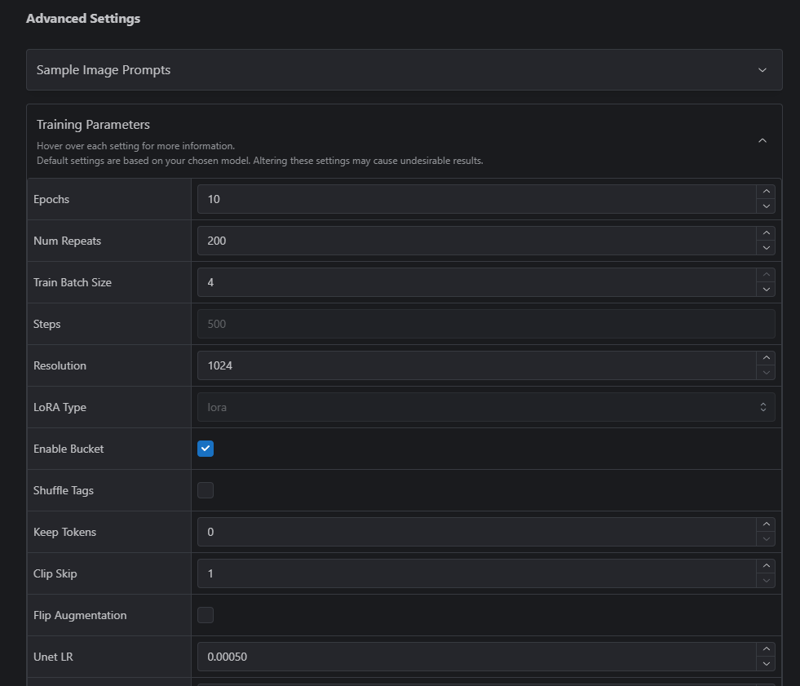
The big things to note are Epochs, Num Repeats, and Train Batch size. Depending on your data set, it'll auto-adjust. I uploaded a single image here as a test to grab a screenshot quickly. Generally speaking, you'll want to leave everything alone except for repeats and/or repeats (which will update the step count).
Steps = images x repeats x epochs.
Key Differences Between Epochs and Repeats
Repeats: Set in the dataset configuration, repeats determine how often each image is seen per epoch.
Epochs: The number of times the entire dataset is processed.
CivitAI allows up to 10,000 steps. More epochs will take longer and cost you more buzz, but the results will learn more from the dataset if you have a larger dataset. Training too much (especially with a smaller dataset) may cause overfitting. Again, I'm lazy, so I'll let ChatGPT explain what it means to overfit a LoRA:
Signs of Overfitting in a LoRA Model:
Overfitting a Stable Diffusion character model LoRA (Low-Rank Adaptation) means that the model has been trained too specifically on the given dataset, causing it to lose generalization ability. This results in images that look almost identical to the training data but fail to generate diverse, high-quality outputs in different contexts.
Lack of Variation: The generated images look nearly identical, even when prompted with different angles, lighting, or compositions.
Training Artifacts: Unwanted visual elements from the dataset (e.g., watermarks, text, or background patterns) appear in the generated images.
Extreme Dependence on Triggers: The model may only generate reasonable outputs when using exact keywords or prompts seen during training.
Loss of Adaptability: Instead of adapting to different styles or scenes, the model rigidly reproduces features from the dataset.
Overexaggeration of Features: Key character traits may become too extreme, making the outputs look unnatural or unrealistic.
How to Prevent Overfitting in a LoRA Model:
Use a Diverse Dataset: Include a variety of images showing different angles, lighting, and styles to improve generalization.
Reduce Training Epochs: Training for too many steps can cause the model to memorize the dataset instead of learning general patterns.
Lower Learning Rate: A high learning rate can make the model overfit quickly; try reducing it for smoother adaptation.
Adjust Rank and Alpha Values: Lower rank values (like 4 or 8) help the model learn fewer details, reducing overfitting.
Apply Data Augmentation: Slightly modifying the dataset (e.g., flipping, rotating, or color jittering) can help the model generalize better.
If your LoRA model is overfitting, you might need to retrain with these adjustments to strike a balance between capturing the character accurately and maintaining creative flexibility.
I'd also recommend considering changing the Dimm and Alpha settings. By default, CivitAI sets these to 32 and 16, respectively; this works great, but keep in mind your file size will be around 200MB. Changing it to 16 and 8 will generally be fine (or virtually the same) and will halve the file size; I've experimented with this and, for the most part, the results are similar to 32/16. Even 8 and 4 should work fine, and you'll knock the file size down to about 50MB.
In most cases, though, CivitAI's default number of training steps will work fine, and that's probably what you'll want to use.
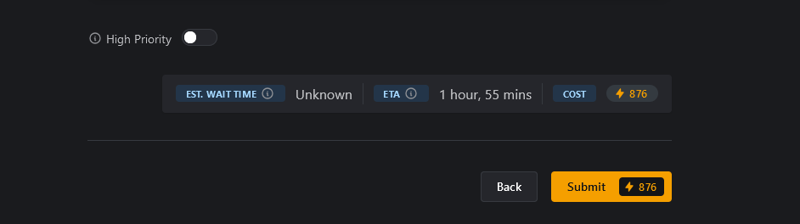
Anyway, when you're done, click the Submit button. This will debit your account with the amount of buzz it takes. From here, you will need to wait. Generally, the ETA is inaccurate, and you must wait longer for it to complete training.
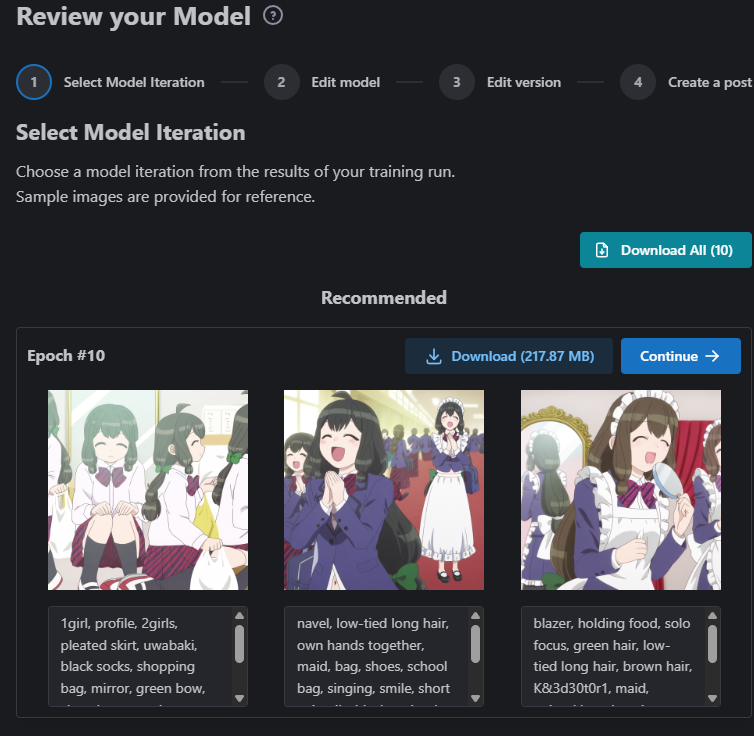
Step 4. What to do after the model is created
After your model is done, you'll receive an email letting you know it's ready for review. From here, it'll give you three (usually hilariously low-quality) sample pictures. I almost always delete these and make images in Forge WebUI or ComfyUI using the newly created model. I won't cover how to make good images here, but I'd highly recommend deleting those three images and uploading at least one good image you created. You'll want to download the latest model (i.e., the one with the highest epoch, 10 in the case of this example image) by clicking the download button and loading it into your models folder on your PC.
From here, you can either immediately publish your model or pre-schedule it by clicking the clock button. I've done this a few times to get the model's page up so I can come back and edit it later before publishing it. You can always immediately publish it when you're ready.
Conclusion
Depending on how complex your character model is, making a model can be quick or time-consuming. However, CivitAI makes it as easy as it can be. There are plenty of methods for making character models, but CivitAI, from my experience, is straightforward, and this way, you can use your local GPU for something else.
Lastly, I want to highlight a comment that was provided regarding training 3D/more realistic characters:
"First of all, i really respect you for your reaction. Maybe it would be good to add, that this guide is especially for Anime-Loras.
As for your question, i had a really hard time, to get my realsitic character Lora, getting the way i want it to be. Since your Guide is targeting CivitAI-online-Trainings, i can share, what the most important training settings of my actual SDXL-Training on CivitAI looks like on a set with 105 pictures: prodigy-scheduler (so your learning rate is overwritten), cosinus with two up to four cycles (still experimenting), 4 repeats, and 20 epochs, because that way you have the maximum number of different models CivitAI is able to save, so to choose from and take the one best trained, but not overtrained - but when using prodigy, it's mostly one of the last two, three or four. For a real life model, i use a higher DIM and alpha, because there are much more details to learn, especially, when you make it full body. Depending on how much angles and specific details of a character you train, you can go up to 128/64 (dim/alpha), but for just face models 16/8 (dim/alpha) could be enough, saving valuable hdd/sd.
That all doesn't really add to your guide, but a better explaining on what scheduler to use and why would be a great addition, so the random answers ChatGPT is giving, are less severe when looking at the actual training results. I asked my ChatGPT the same questions you did, and as expected, results varied on a great margin. Because ChatGPT doesn't "know" anything about training. It's just heard about it! :-D"
From what we can gather from their input, there are a few things different from what I do:
An even higher Dim/Alpha than what is commonly used. I'll mention it again later, but dim which stands for directions, determines the "directions" the model can adapt to the data, while alpha represents how strong the changes are. You usually want a 2:1 ratio between dim and alpha for SDXL-based LoRA. However, a higher value will result in a larger file size.
They recommend the prodigy scheduler. This is the default for Pony, but Illustrious defaults to Adafactor. As of 2-24-25, I have largely been using Illustrious.
Regarding ChatGPT, I've found they are able to give me a good "recipe" on a solid amount of epochs, repeats, and steps. I would probably agree with them that, beyond this, you should take what it says with a grain of salt. Still, ChatGPT is a tool, and I've noticed my results have been a bit better since I've followed its recommended number for these three criteria.