When assembling a dataset for model training, various factors contribute to your success in creating an effective model. This guide aims to provide valuable insights and address common questions, assisting you in navigating the process more efficiently. While this article focuses on general principles and avoids excessive technical details, it aims to steer you in the right direction by emphasizing fundamental concepts that often align with common sense. This article will not explain how to train or test a model. If you are looking for information on these topics please read both Articles below:
Both of these articles do a great job explaining how to train and test a model. They also have additional information about gathering a dataset that may be helpful. They are definitely worth the read in my opinion if you want to learn more about SD, specifically Loras.
This article is divided into 3 Sections and highlighted as this color for easier accessibility:
Tools and Programs That May Help Speed Things Up
Manual Data Collection Method
Image Prep
Tools and Programs That May Help Speed Things Up:
Credit: justTNP and their article: Characters, Clothing, Poses, Among Other Things: A Guide
Grabber
Grabber is an invaluable tool designed to streamline and expedite the process finding images that you can use in your datasets. Instead of tediously scouring numerous websites for images to enhance your model, Grabber automates the task by navigating multiple image boards. This enables you to effortlessly access a comprehensive array of images potentially suitable for your model. Particularly advantageous when dealing with projects featuring limited image availability, Grabber significantly simplifies the dataset acquisition phase. For a deeper understanding of Grabber's capabilities, I recommend perusing the GitHub page and delving into justTNP's article.
dupeGuru
dupeGuru stands as a formidable solution for meticulously examining your dataset, pinpointing any instances of duplicate images. This tool conducts a thorough search to identify duplicate images, and it offers the added functionality of refining your search to uncover similar images if your objective is to trim down the image count. The prowess of dupeGuru truly shines through its adeptness at compiling a comprehensive roster of both duplicate and similar images. Its user-friendly interface facilitates effortless comparison and efficient deletion, rendering the task of managing your dataset an altogether streamlined experience. For more information please look at the dupeGuru website and also justTNP's article.
XnView MP
XnView MP is a free to use image viewer that has a variety of extra tools built into it to help edit and also sort through images. This tool is very useful if you have lots of images, especially 50+. For some examples please go to my article about XnView MP. Also there are some comments about other image viewers i have not tested, you may find them helpful.
Data Collection:
So you don't want to use the fast and easy method, or you just simply want to learn all the ways of collecting images for a dataset. Well this method shows you how to collect images manually.
Gathering images for your dataset can indeed be a demanding and arduous task. To streamline this process, I recommend utilizing a helpful browser extension called "Save to Google Drive." This extension enables you to conveniently store images, videos, and files directly to your Google Drive. Once logged in, simply right-click on the desired image, and an option to save it to your Google Drive will appear. Personally, I find this extension beneficial as it centralizes all collected data in one location. Subsequently, accessing your Google Drive allows you to effortlessly download the entire folder to your computer with just a few clicks.
Where to Find Images: When searching for images, it can sometimes be challenging to locate suitable ones depending on the nature of your model. Here are some valuable sources that can assist you in finding images:
Search Engines
Google: Google is a popular search engine that often provides relevant image results.
Bing: Bing is another search engine that can yield fruitful image search outcomes.
Yandex: Yandex is a search engine known for displaying images that may not be shown by Google or Bing, making it a useful alternative.
Websites
Danbooru: Danbooru is an image hosting platform focused on Anime and Hentai content.
Safebooru: Safebooru is the SFW (Safe for Work) version of Danbooru, a general-purpose image hosting site.
Gelbooru: Gelbooru is a versatile image hosting platform suitable for various purposes.
Deviant Art: Deviant Art hosts a wide range of artistic creations from talented creators.
Pinterest: Pinterest is a user-driven platform where users upload and share images, making it a valuable resource for finding diverse visuals.
Fancaps: Fancaps is a useful sight for finding images/ screencaps of Anime, Movies, and Shows.
Lists of Booru Websites I have found: Booru Project, lxfly2000's list, Awesome-Booru by celsriseup
New Grounds: Remember flash games, this place got those and some images from artists
Buhitter: AI Twitter (X) image post aggregator (I think, nothing is in English but is useful for some stuff) Type in what you want and it will find it.
NSFW Websites
Rule34: Rule34 is a website known for its extensive collection of explicit content covering a wide range of subjects.
E-hentai: E-hentai is a comprehensive collection of images primarily focused on hentai artwork. Please be advised that the content on these websites is explicit and should be approached with caution.
F95zone: This is a place that hosts both nsfw games and collections of images/ video.
Hitomi: Hitomi is an online platform that hosts a vast collection of manga and doujinshi, encompassing both mainstream and adult-oriented content.
While these sources can provide a wealth of images, it's essential to use them responsibly and consider any legal and ethical implications.
Image Prep:
Image Prep Baby Steps
Determining which images to gather for your model is a crucial step in the process. To ensure effectiveness, consider the following ruleset that can guide your selection:
High-Quality Images: Look for images that have a high resolution and clear visual details. Avoid low-resolution or blurry images as they may hinder the model's ability to learn and generalize.
Relevant and Representative Images: Seek out images that accurately represent the subject matter you are training your model on. These images should showcase the key features, characteristics, or attributes you want the model to learn and recognize.
Desired Model Output: Consider what you want your model to produce or resemble. Look for images that align with your desired output or visual style. This can help guide the model's learning process and influence its generated results.
By adhering to these guidelines, you can curate a dataset that enhances your model's performance, enabling it to learn from high-quality, representative images and produce desired outcomes more effectively.
Image Quality
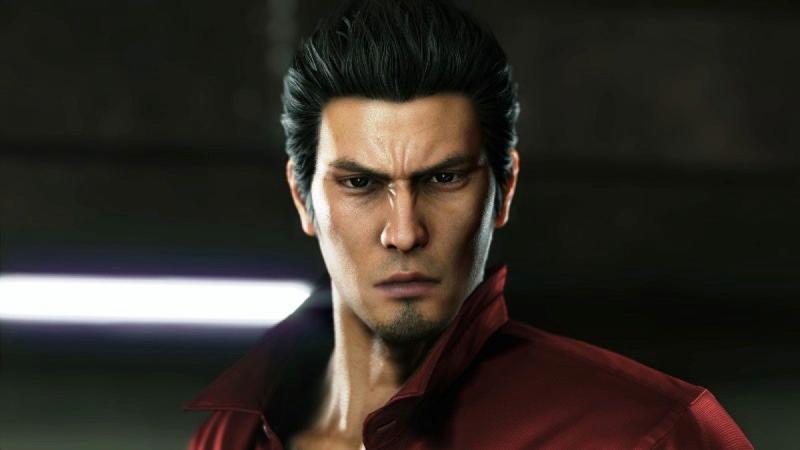
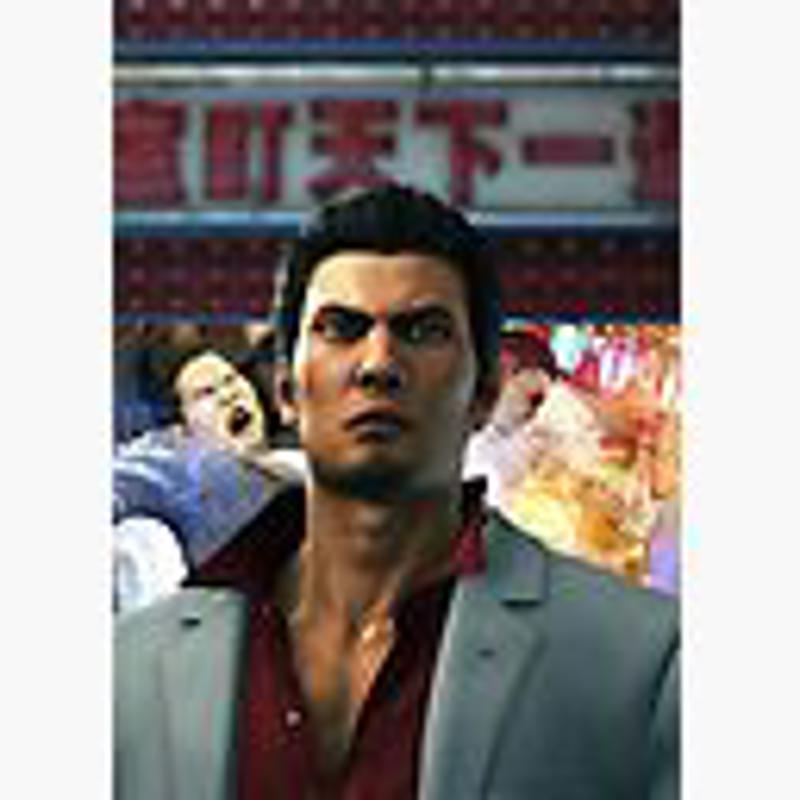
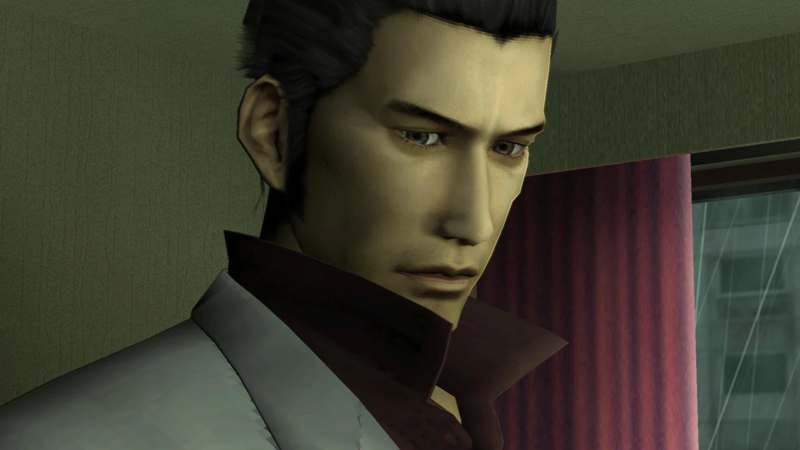
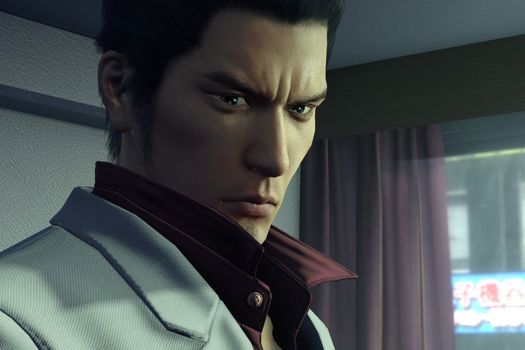
For a model focused on Kazuma Kiryu, it is crucial to prioritize high-quality images. Opting for images with a resolution of 512 or higher (1024 for XL models) is a sensible approach, as it allows the model to capture fine details effectively. While it's possible to include lower quality images, it's important to be aware that the model may struggle to train well, especially when it comes to intricate details like facial features, patterns, or tattoos that are significant in Kazuma Kiryu's appearance. Striving for higher quality images will enhance the model's ability to learn and generate accurate representations of the character.
Example of good quality:
Example of bad quality:
Outfits
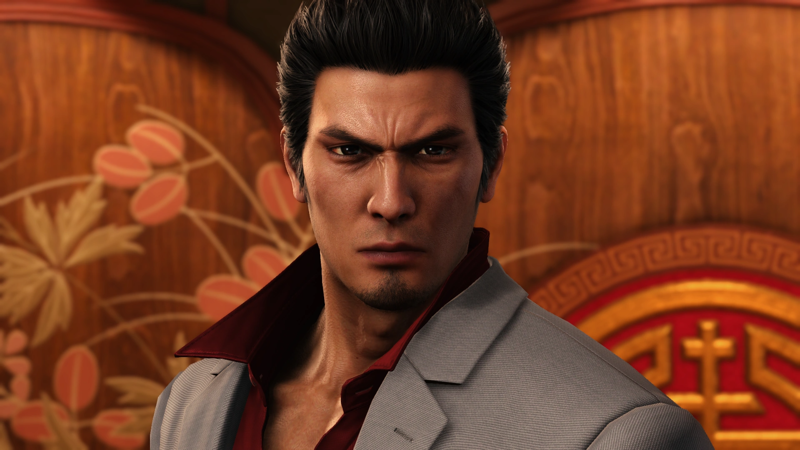
Another important aspect to consider when selecting images for your model, particularly for character-based models like Kazuma Kiryu, is ensuring that the images closely resemble the character in their authentic and official depiction. Having a strong base of images featuring the original outfit is crucial for the model to accurately learn and reproduce the character's distinctive appearance, ensuring visual coherence and consistency.
However, incorporating images with alternative outfits can enhance the model's flexibility. By including a variety of attire, the model can learn to recognize the character across different contexts and appearances. This approach broadens the model's ability to handle variations while still maintaining the core identity of the character. Thus, while the official outfit should form the foundation of your dataset, integrating alternative outfits can provide additional versatility, allowing the model to adapt to diverse scenarios without compromising the character's recognition and representation.
Example of official outfit:
Example of alternative outfit:
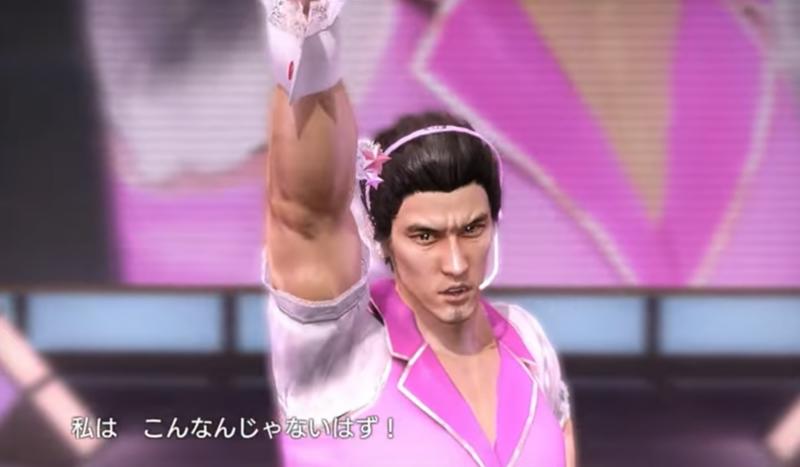
Image Positions
When gathering images for your dataset, it is indeed important to consider the variety of poses and camera positions in order to optimize your model's performance. Taking into account different camera positions allows the model to learn how to generate images from various perspectives and viewpoints. Here are some camera positions to consider when selecting images:
Close-up: Incorporate close-up shots that highlight the character's facial features, allowing the model to learn finer details such as expressions, textures, and intricate elements.
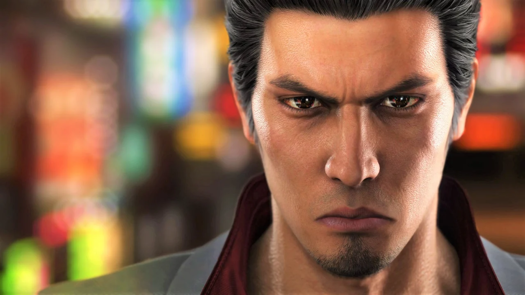
Portrait: Include images that depict the character in a portrait-style composition, emphasizing their overall appearance, including head, face, and shoulders.
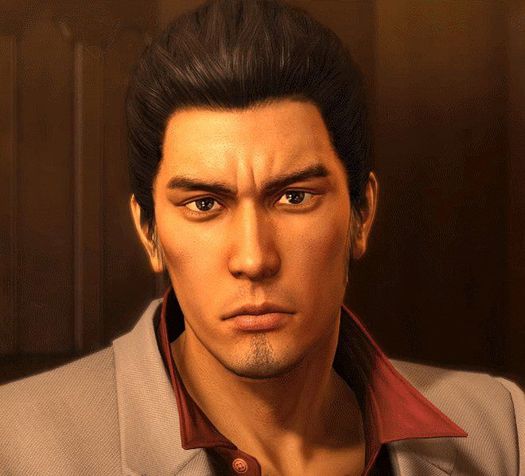
Upper Body: Include images that focus on the character's upper body, capturing details like facial expressions, clothing, and upper torso.
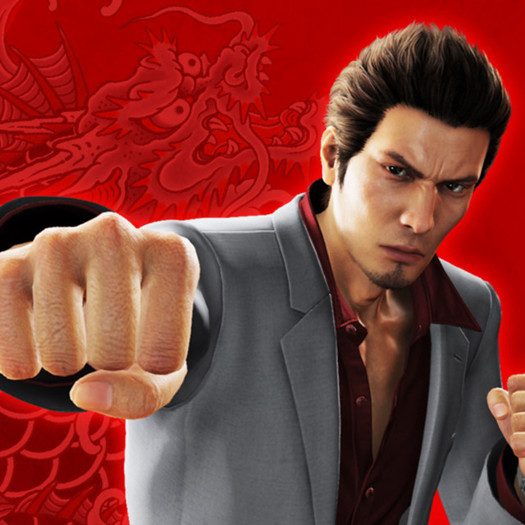
Cowboy Shot: This camera position frames the character from the thighs or knees up, providing a medium shot that showcases the character's body language, attire, and overall posture.
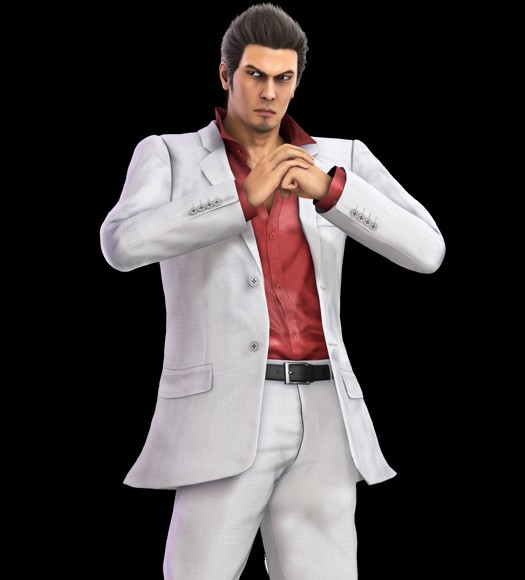
Full Body: Incorporate images that capture the character's entire body, enabling the model to learn the proportions, posture, and overall physique of the character.
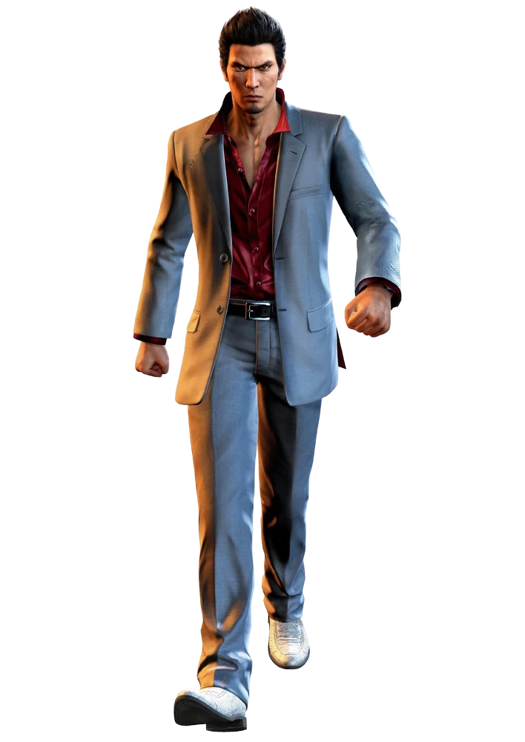
By including a diverse range of poses and camera positions in your dataset, you provide the model with a comprehensive understanding of the character's appearance from different angles and perspectives. This variety will ultimately enable the model to generate more accurate and versatile outputs across various viewpoints and poses.
Image Focus
When searching for images specifically for character models, it is crucial to ensure that the focus remains solely on the character being modeled. Follow these guidelines when selecting images:
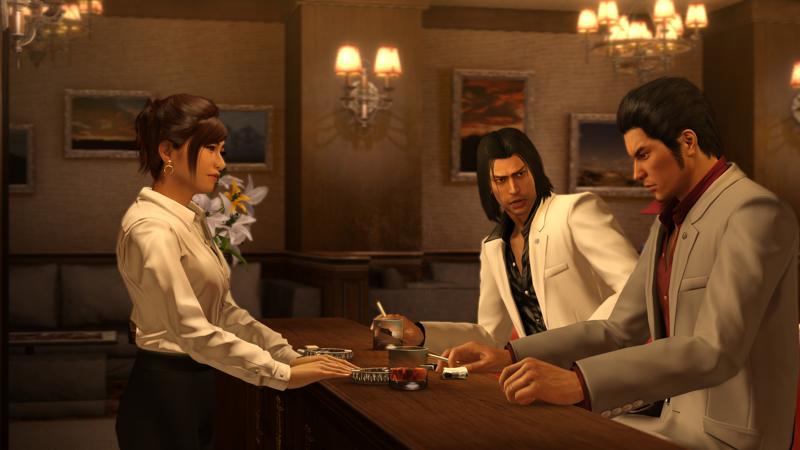
Exclude Second Persons: Images should ideally feature only the character being modeled without any prominent second individuals. However, if there are bystanders or blurred figures in the background, it is acceptable as long as they do not draw attention away from the main character.
Avoid Main Focus on Others: The main focus of an image should always be the character being modeled. Other individuals should not dominate the image or detract from the character's presence.
Crop Images as a Last Resort: If you encounter images where a second person is present but not the main focus, cropping the image to remove or minimize the second person can be considered as a last resort. However, prioritize using images where the character is the primary subject without any distractions.
By adhering to these guidelines, you ensure that the model focuses solely on the character being modeled, enhancing its ability to learn the character's distinct features, expressions, and attributes accurately.
Example of a second person in focus:
Style Prep
When curating images for a style-focused model, it's crucial to maintain consistency and select images that adhere to a single specific style. It's common for artists to experiment with different styles over time, and the same applies to creative teams working on shows, movies, mangas, or animes. To ensure the best results, follow these guidelines:
Choose a Specific Style: Determine the particular style you want your model to learn and generate. This can be a specific artist's style or a consistent style seen in a particular show, movie, or artwork.
Avoid Mixing Styles: Refrain from including images that showcase multiple different styles within your dataset. Mixing styles can confuse the model and result in inconsistent or unpredictable outputs. The aim is to have the model learn and reproduce a single style accurately.
Focus on Cohesion: Select images that closely align with the chosen style throughout your dataset. This will provide a cohesive learning experience for the model, allowing it to capture the unique characteristics and nuances specific to that particular style.
By being mindful of these considerations and ensuring a clear and consistent style selection, your style-focused model will be better equipped to learn and generate outputs that align with your desired artistic vision.
Example of different art styles:
AI Image Upscaling
If you are using low quality images I recommend upscaling them. For more information on how I upscale read this article -> This one thing will make your model better! Keep in mind that not all images can be upscaled with perfect quality and this method may not work for you.
Rule of Thumb
Determining the ideal number of images for a dataset can vary depending on the specific project and desired outcomes. However, as a general rule of thumb, consider the following recommendations:
Character: Aim for approximately 50 or more images for character-focused models. This number provides a reasonable foundation for the model to learn and recognize the distinctive features and characteristics of the character.
Style: For style-based models, it is recommended to have around 100 or more images. This larger dataset helps the model understand the style nuances, enabling it to generate outputs consistent with the desired artistic or design style.
Other Projects: While the amount can vary depending on the specific project, a minimum of 50 or more images is a reasonable starting point for non-character-based models or projects. However, please note that these numbers can be adjusted based on your specific needs and the complexity of the task at hand.
It's important to emphasize that quality should never be compromised for quantity. If you have a smaller number of high-quality images that effectively capture the desired traits, it can still lead to successful model training and generation. Prioritize selecting images that are representative, diverse, and of high quality to ensure optimal results.
Conclusion
Hopefully, this guide provides a clear and understandable overview of gathering images for a dataset. If you have any questions or additional advice that could further enhance this guide, please feel free to share them in the comments. Your input will not only assist in updating and improving this guide but also benefit others who come across it. Thank you for reading and hopefully you were able to comprehend everything in this article.
-Guy ❤️
Changelog
v2.62 - Edited some stuff because some of it is outdated
v2.61 - Added a new site
v2.6 - Added a new site, added underlines to links and also changed information about upscaling
v2.5 - Changed a few sections up, added new photo viewer, and new websites that may help.
v2.0 - Added (Best + Simple Method) Fast and Easy Data Collection Tools
     - Added links to guides that help with both training and testing models
     - Re-wrote some sections to make more clear
V1.1 - Added new section for AI Image Upscaling
V1.0 - Original Release
