Download
1 variant available

36
533


The zip file contains all the original images in the tutorial along with the generation data.
Requirements:
Please follow the installation instructions for each. ControlNet and the various models are easy to install.
Automatic1111 (you already have this, but you may want to update)
https://github.com/AUTOMATIC1111/stable-diffusion-webuiControlNet 1.1+ (official A1111 release coming soon)
https://github.com/Mikubill/sd-webui-controlnetTile Model version v11f1e
https://huggingface.co/lllyasviel/ControlNet-v1-1/blob/main/control_v11f1e_sd15_tile.pth
Install Path: ...\stable-diffusion-webui\extensions\sd-webui-controlnet\models\Ultimate SD Upscale
https://github.com/Coyote-A/ultimate-upscale-for-automatic1111
Install Path: You should load as an extension with the github url, but you can also copy the .py file into your scripts directory ...\stable-diffusion-webui\scripts\
Example Generation
A-Zovya Photoreal [7d3bdbad51] - Stable Diffusion Model
https://civitai.com/models/57319/a-zovya-photoreal
Install Path: ...\stable-diffusion-webui\models\Stable-diffusion\EasyNegative [C74B4E810B] - Embedding
https://civitai.com/models/7808/easynegative
Install Path: ...\stable-diffusion-webui\embeddings\Image Sharpener [FE5A4DFC4A] - Embedding
https://civitai.com/models/43286/image-sharpener
Install Path: ...\stable-diffusion-webui\embeddings\4x UltraSharp - Upscaler
https://upscale.wiki/wiki/Model_Database#Universal_Models
Install Path: ...\stable-diffusion-webui\models\ESRGAN\--xformers
Not required, this will also cause my final outputs to be slightly different than yours.
Install: webui-user.bat edit "set COMMANDLINE_ARGS=--xformers"
Note: Only for newer GPU, if your are missing requirements can build from here (not personally tested).
https://github.com/AUTOMATIC1111/stable-diffusion-webui/wiki/Xformers
Workflow:
1) txt2img
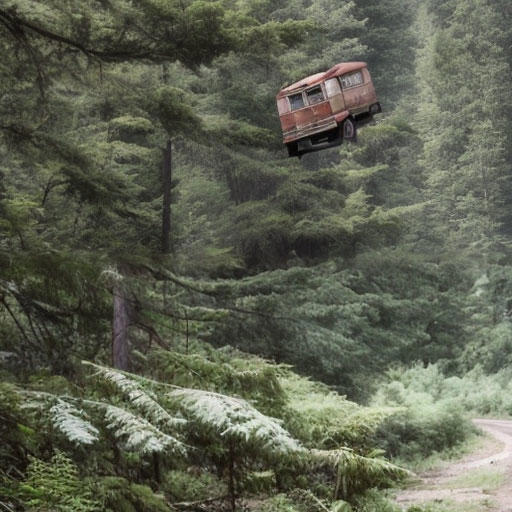
We will generate a base image of 512x512. Note, you will get a better result upscaling 512 to 4096 than you will from 256 to 2048.
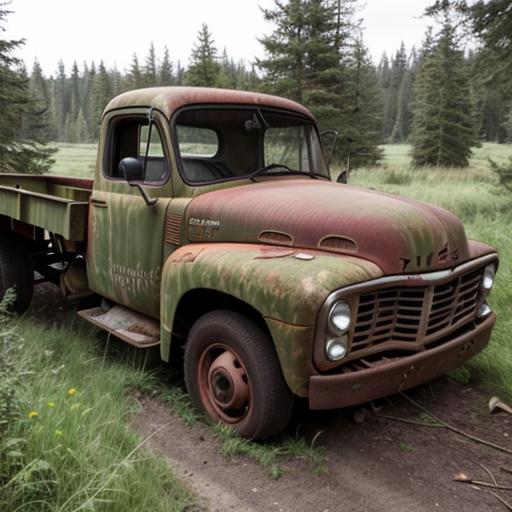
Our generation data:
Abandoned truck in the forest
Negative prompt: lr, easynegative,
Steps: 32, Sampler: DPM++ 2S a Karras, CFG scale: 7, Seed: 979998160, Size: 512x512, Model hash: 7d3bdbad51, Model: aZovyaPhotoreal_v1, Clip Skip 1
Note: The two negative embeddings are not required for good results, only to recreate my example. Image Sharpener (lr) will most always provide a higher quality generated Image. EasyNegative (easynegative) will most always provide better composition.
Send to img2img as shown in the screenshot below:
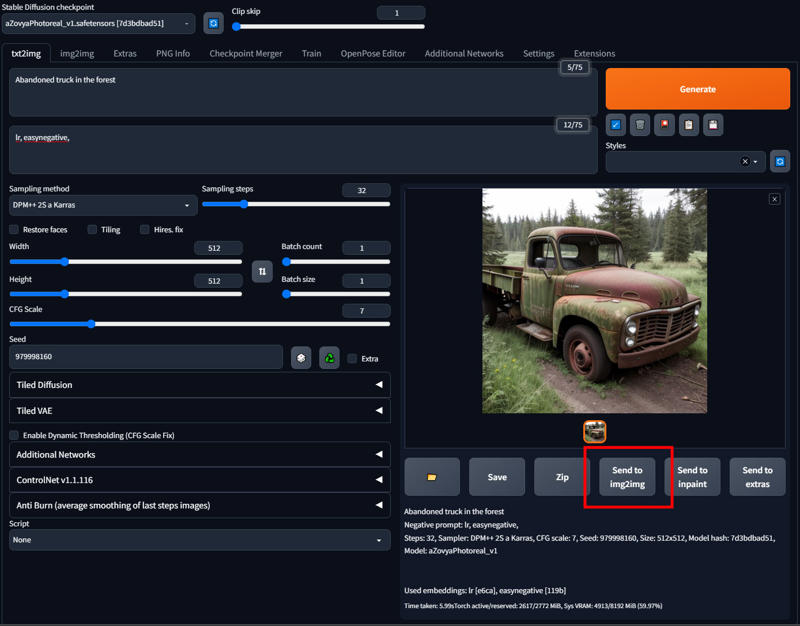
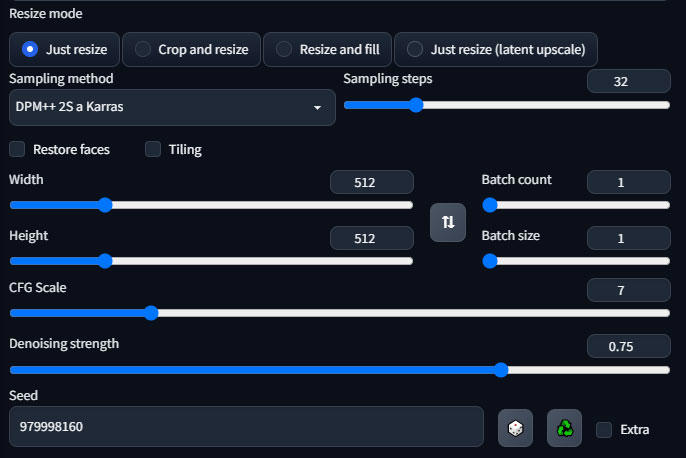
2) img2img
Here you can leave everything pretty much as is. For our demo I will use a high denoising (0.75) to showcase controlnet and how well it can handle the tiling. You can go as low as 0.2, but lower than 0.35 will start to give noticeable smoothing on 4 to 8x upscales. Make sure you select your sampler of choice, mine is DPM++ 2S a Karras which is probably the best (imho) and one of the slowest.
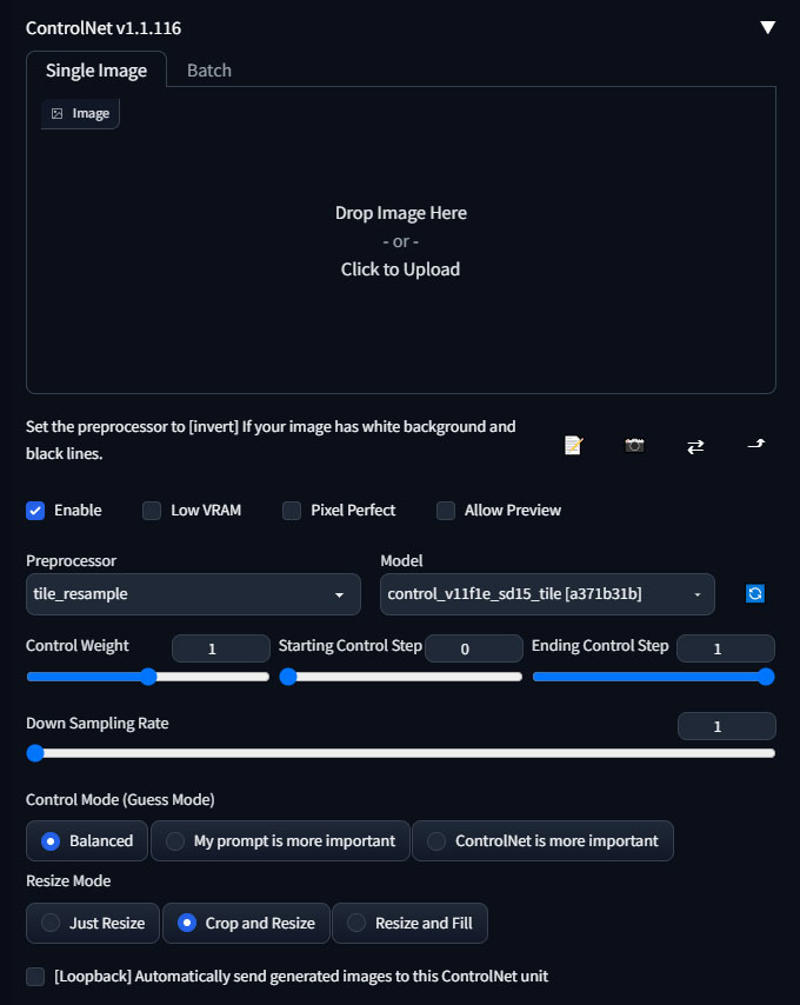
3) ControlNet
Scroll down to the ControlNet panel, open the tab, and check the Enable checkbox. Select tile_resampler as the Preprocessor and control_v11f1e_sd15_tile as the model.
4) Ultimate SD Upscale
This is honestly the more confusing part. Assuming you have installed the script properly, scroll down to the scripts selection at the bottom, choose Ultimate SD Upscale.
Settings:
Target size type: set to Scale from image size, select 8 (4k) or 4 (2k)
Upscaler: Select 4x-UltraSharp, or your preferred upscaler.
Type: Linear, use chess if you noticing seams, this can help (but takes longer).
Tile width/height: Leave at 512 for now, but higher tile size will result in a overall better image. See example of 512 tile and 1024 tile.
Seams fix: none. The example does not use seams fix. I would only recommend experimenting with seams fix if chess redraw type did not help. You can see in our example there are no obvious seams (though they are there).
Our Generation Data:
Abandoned truck in the forest
Negative prompt: lr, easynegative,
Steps: 32, Sampler: DPM++ 2S a Karras, CFG scale: 7, Seed: 979998160, Size: 4096x4096, Model hash: 7d3bdbad51, Model: aZovyaPhotoreal_v1, Denoising strength: 0.75, Ultimate SD upscale upscaler: 4x-UltraSharp, Ultimate SD upscale tile_width: 512, Ultimate SD upscale tile_height: 512, Ultimate SD upscale mask_blur: 8, Ultimate SD upscale padding: 32, ControlNet Enabled: True, ControlNet Preprocessor: tile_resample, ControlNet Model: control_v11f1e_sd15_tile [a371b31b], ControlNet Weight: 1, ControlNet Starting Step: 0, ControlNet Ending Step: 1, ControlNet Resize Mode: Crop and Resize, ControlNet Pixel Perfect: False, ControlNet Control Mode: Balanced, ControlNet Preprocessor Parameters: "(512, 1, 64)", Clip Skip 1,
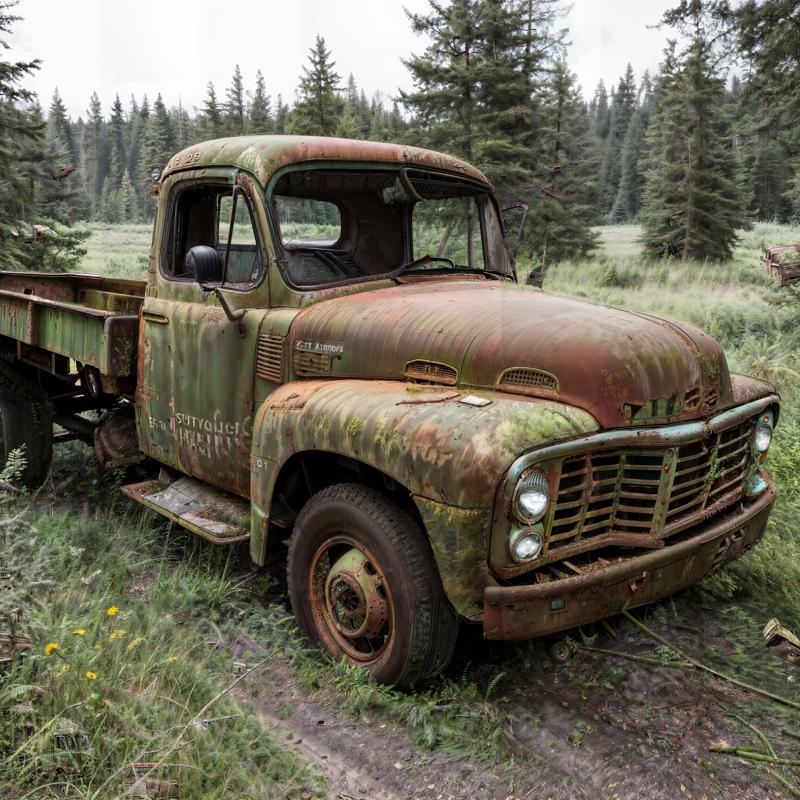
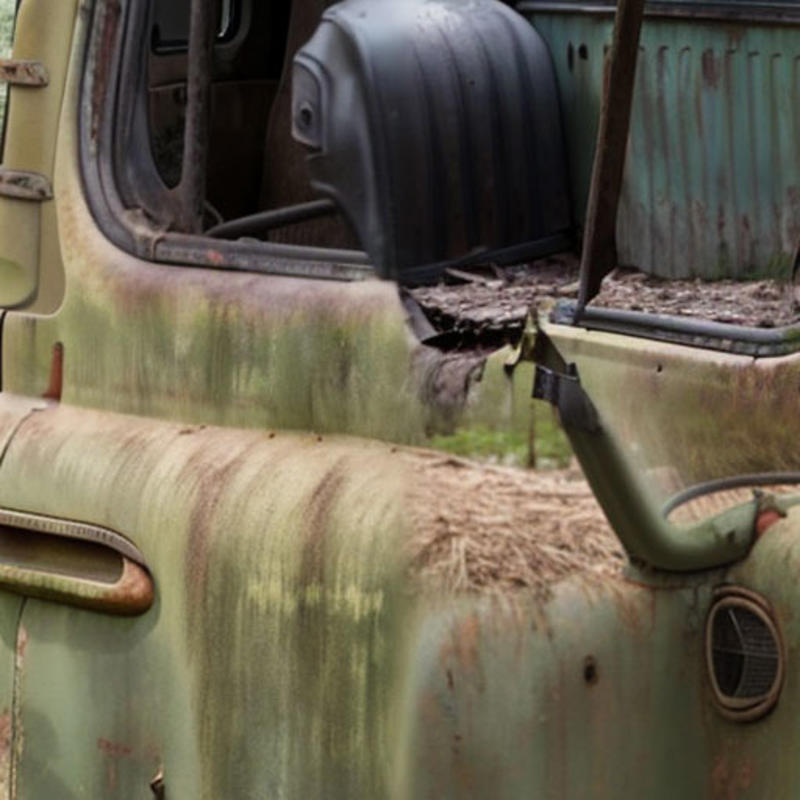
Resulting 4k image (please see gallery images for full resolution)
Resulting 2k image
Resulting 1k image
Origina 512
Notes about 8k upscale.
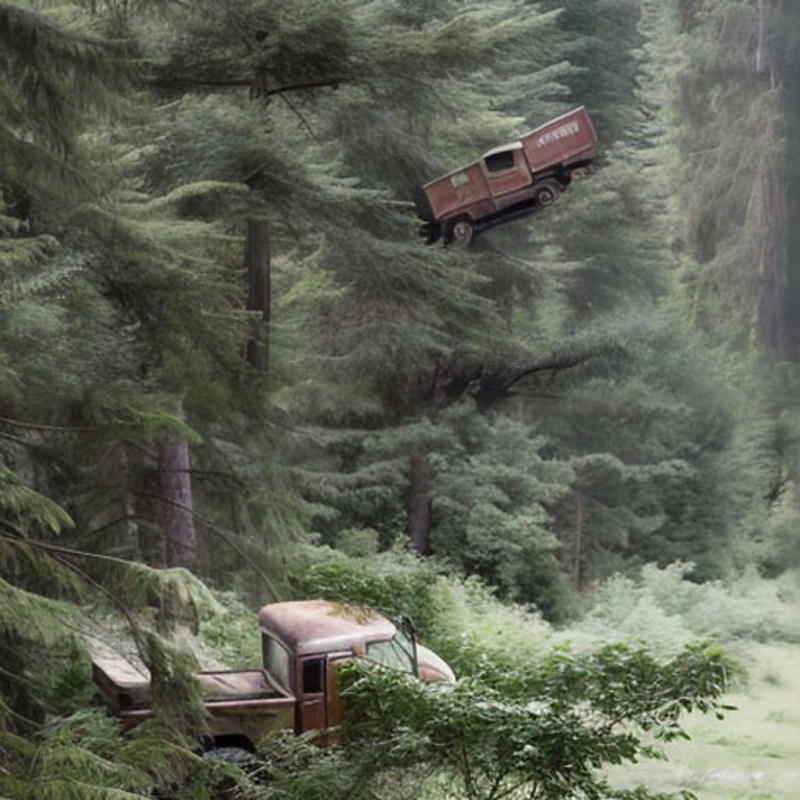
512 to 4096 at 512 tile will make 64 tiles. That is a lot of tiles.
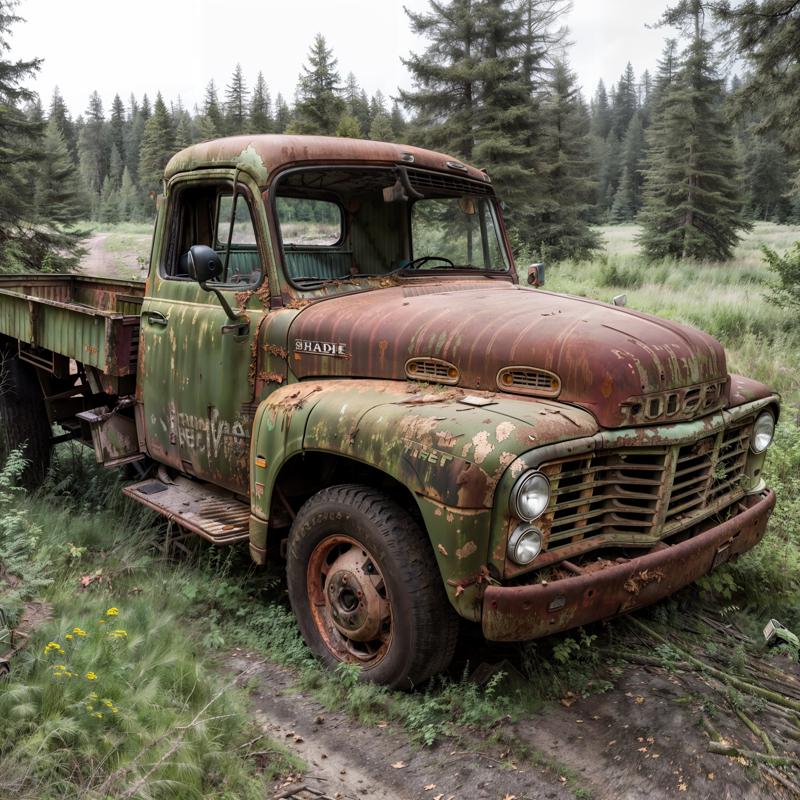
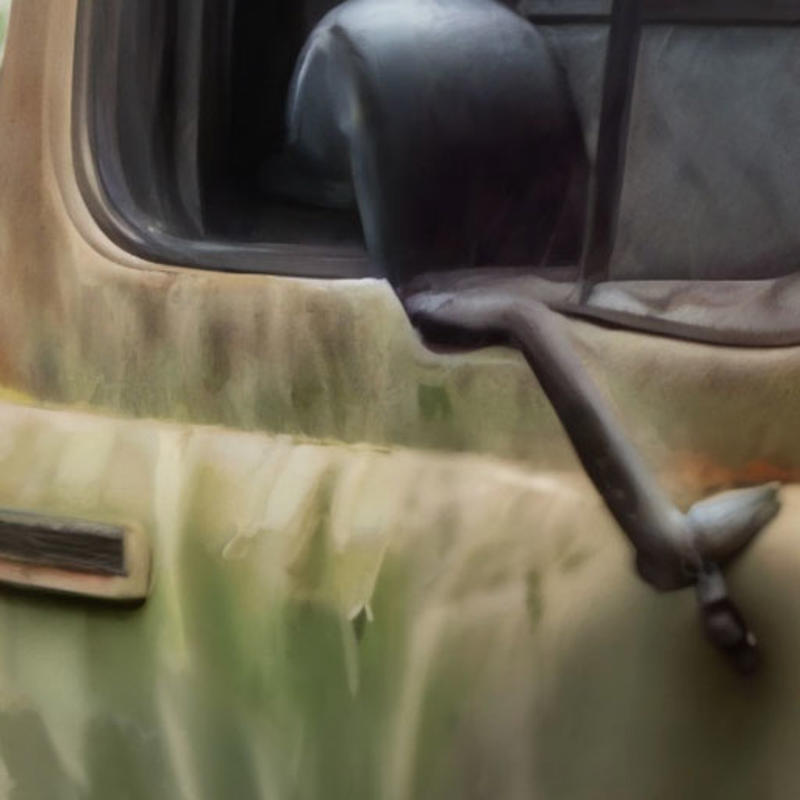
When you have this many tiles it is possible that you will get ghosting. In our 4k example above you can find an "abandoned truck" hidden within various tiles. Below is a crop where two have generated.
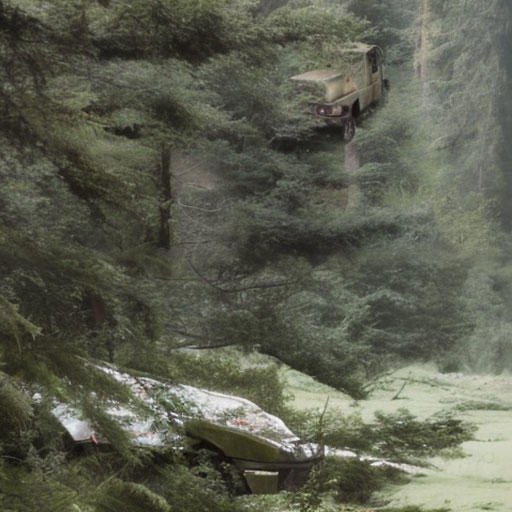
Denoise Fix: You can reduce this with a lower denoise, but you will still have the issue. Lower denoise will decrease the effect, but also at the loss of detail (smoothing). Below is .35 denoise, you can see it is less noticeable now and also a bit smoother.
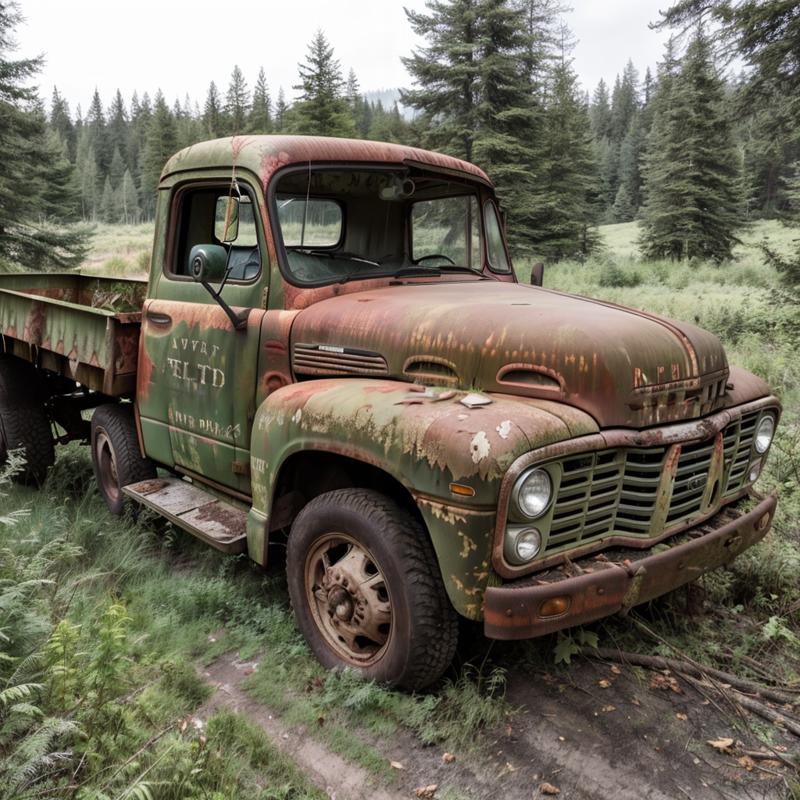
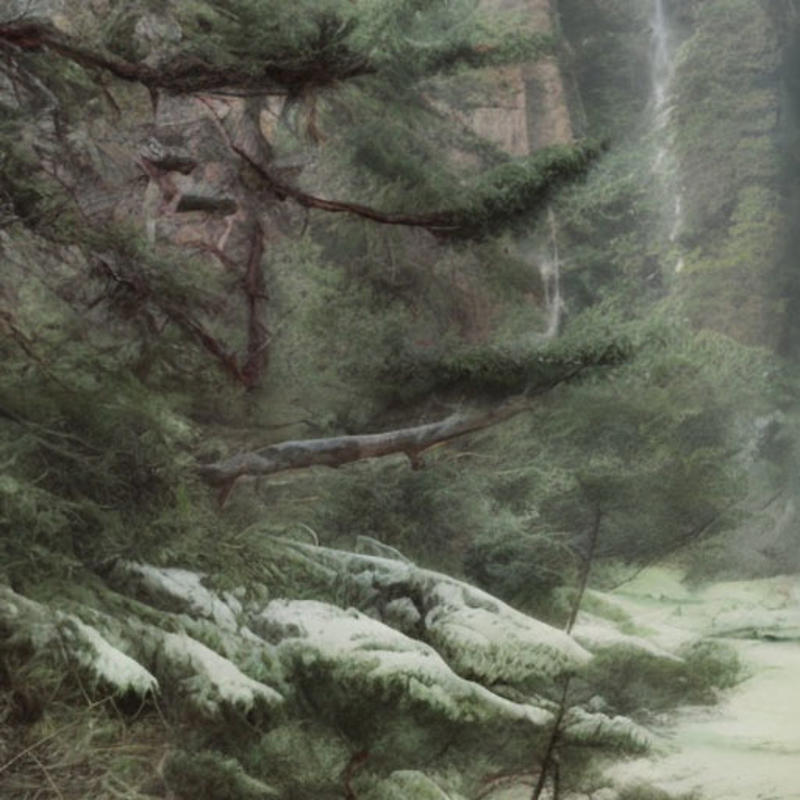
Prompt Fix: You can resolve this another way with a high denoise, and that is to simply clear your prompt. Without the prompt set it will not attempt to redraw the scene within every tile. However, the downside is that you will have considerably less details even at .75 denoise. Here you can see that the ghosting abandoned truck effect is removed entirely.
But, as I mentioned you have much less details without prompt. Here you can see the difference clearly.
4k with prompt
4k without prompt
Negative embeddings not used on example below, but you can include lr to increase details. You can also used words like sharp, detailed, etc, to help, but if you said rusty metal it would start adding rust to the trees and stuff. So you have to be thoughtful about how you modify the prompt.
Larger Tiles Fix: At 1024 tile size (16 tiles) with the prompt set and a high denoise, the problem will be reduced dramatically. The overall detail will also be better with higher tile sizes, but the problem will still persist. You can see that in the crop below it has removed one truck, but made the other more detailed. Overall the final image has probably half as many hidden trucks throughout the tiles, but they are still there. The problem is when you are on a tile that isn't a part of the subject (abandoned truck) it attempts to inject one. At this point you can paint them out, or use a combination of lower denoise and higher tile size along with prompt modification to achieve best results.
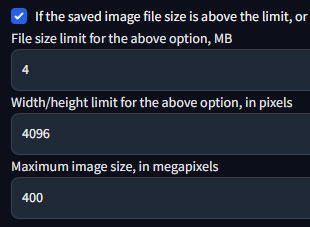
Settings Restriction
In order to render 4096 you will need to enable higher image sizes within your settings.
Settings > Saving images/grids
Width/height limit - 4096 (or 8192 if your crazy)
Maximum megapixels - 400 (not entirely sure how this is measured)
With the checkbox option enabled (save image as downscaled jpg) you can still save the image as png.
Troubleshooting:
Please ensure you have downloaded the right tile model, a version was released previously for ControlNet 1.1 that did not work and so it has been removed. If you downloaded at 1.1 release you will need to update your model. Please verify the version number of your model, this is critical.
If you are having problems please update your GPU drivers, your libraries, A1111 etc.
Reboot your computer.
Try another model or another size.
If you enable Seams Fix in Ultimate SD Upscale please be aware it will produce two images, one with and one without the fix. Inspect both images for comparison.
Try and recreate from my example rather than your own, this way you will know if you have done something wrong.
The further away your generation data is from the ControlNet image the more your image will be smoothed out.
Final notes:
I have also seen tutorials where people upscale 512 to 2048, then take the 2048 and upscale to 4096. I would not do that, and I don't think it is necessary. This will also take much much longer (three to four times as long) than to simply upscale from 512 to 4096. Technically you may get better details this way, however it is not optimal.
If you notice your image is too smoothed out you can run a final detail pass over the 4k render just as you did earlier with a high denoise but set the scale down to 1.
You may want to save various versions of the render with different settings, seams, etc and then mask them together in Photoshop (or whatever).
The zip file contains all the original images in the tutorial along with the generation data.