

(I meant to post this earlier but ran into an issue while testing out the LoRA)
This is a continuation post of my previous article where I talk about my discoveries involving a LoRA using a single image. The aim is mostly minimal effort for now and I will scale up the dataset by img2img and ControlNet reference at a much later time provided that newer zero shot training methods are not released. (At that point, I'll just shift focuses) This article is closer to a musing post to see what works with an incredibly limited dataset rather than a full-blown guide.
This is a fairly intermediate level topic on a very niche subject so it might not be easy for a beginner to understand. I am assuming that you know how to use ControlNet, MultiControlNets, Inpainting,img2img to deal with overfitting, along with the basic settings in the kohya_SS GUI.
This series was inspired by LoRAs made by Eisthol and dobrosketchkun.
Note: dobrosketchkun's LoRA is made from one single specifically while Eisthol appears to have cropped up multiple images.
The LoRA created by this method doesn't seem to be good for a pure txt2img workflow and is more suitable for supplementing an img2img or inpainting based one. Note: This article is just to serve for documenting the things that I have learned and that it may have errors!
Dataset Preparation
While the main dataset only consists of one image, there is still some cleanup work involved before cropping up the images.
First, you will probably want to upscale the image to a 2k or higher resolution so that smaller crop-outs will have a rather high resolution for better detail capture.
Afterwards, you will need to zoom in on the image and check for any colors or artifacts that were left as artifacts from the upscaling process that could confuse the LoRA.
(Optional) Remove the background from the image. A simpler background is easier to caption out unnecessary details and prevent accidental overfitting.
This is mainly to help prevent hallucination and to stop the LoRA from learning concepts that it shouldn't be understanding. While it is possible to use a raw image as is and caption the unintentional artifacts away, I don't recommend relying on captions doing so as that is dependent on your knowledge of prompts and requires more training iterations which will be very time-consuming. You could also try to experiment with learning rates but this will also add more time.
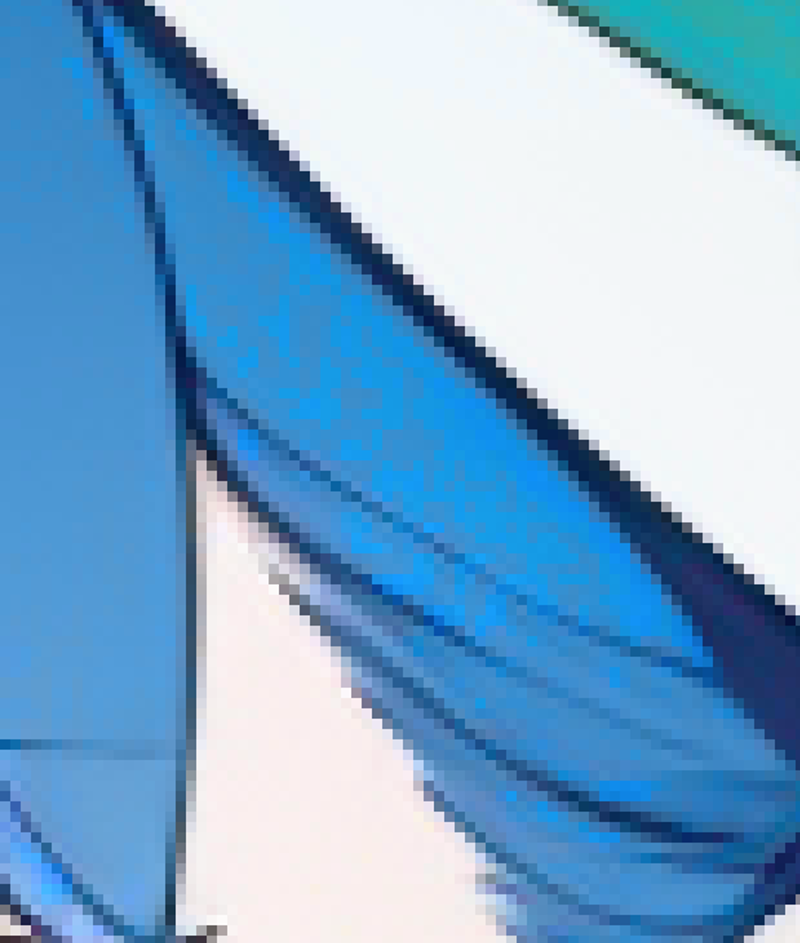
Example of a bad artifact found in my Isabella LoRA.
In the image below, there are varied color pixels of blue which causes the LoRA to hallucinate and believe that my character has "multi-colored hair". Now I was able to remove this artifact by adding multicolored_hair to the relevant image files but this could cause concept overlapping issues if your character actually has multicolored hair.
Personally, I haven't tested out how "clean" the image has to be which is something that I will test at a later time. The Isabella LoRA is currently using the "dirty" or "raw" image. For best results, I would recommend cleaning the image of any stray artifacts.
Creating Close-ups
If there's one thing that I learned from slowly building up the dataset, it's that Stable Diffusion is good at learning outlines but is very bad at capturing details. In order to help capture the details, you'll need to at several close-ups or viewpoints of the image.
Ideally, try to the include:
Full Body
Cowboy shot 3/4 of the image
Upper Body
Lower Body
Face view
Closeup of bangs
Closeup any other detail you want.
Head out of image shot
You can reference the dataset from the Isabella LoRA as an example. One issue that you will possibly encounter is that the LoRA will overfit without head of the image. Regrettably, I'm not sure what the proper keyword is to caption this concept out. Fortunately, it's still possible to overcome this problem with a lower LoRA weight in the prompt settings. Due to the usage of buckets in the kohya_SS GUI, there's no need to resize the crop-ups.
Captioning
Captioning is very important process for increasing the flexibility of your LoRA. Without proper captioning, the LoRA tends to be very overfit and will only produce the same image from the dataset, which is something that we do not want.
I personally don't fully understand how the captioning process works but the general rule of thumb is to try to caption everything but prune all of the detailed related to the character's unique characteristics (aside from the outfit) and physique. Supposedly, during the training process, the LoRA needs to store everything that it learns and it commonly does so by storing them in the keywords provided. Any learned concepts that are not provided in the captions are absorbed into the earlier keywords by default. The general trend is to add a unique word that returns empty noise from a checkpoint to prevent any from of crossover; this is known as a trigger word.
In general, include the following in your image captions depending on the image contents:
Things to Include
Trigger word (this should be a unique name that does not exist in the checkpoint that you plan to use. The trigger word acts as the identifier for your character and should always be the first word in the captioned data)
Class type (1girl,1boy,etc)
Hand pose
Overall Posture
Background
Outfit details
Facial Expression (also include keywords for emote versions such as :D)
Mouth Expression (closed_mouth,open_mouth)
Character Viewpoint (looking at viewer,away from viewer, etc)
Camera Viewpoint (From side,from behind,from_above) (If applicable)
Head_out_of_frame (if head is not in the image)
close-up (if the image is a cropped out)
colors of any specific accessories
Things to exclude/prune (exclude things relating to your character such as physique and skin color)
hair color
hair length
bangs
eye color
chest size
You can reference to the Isabella LoRA's training set for exact details.
General Tips:
Use WD1.4 tagger to help with finding odd words
Img2Img deepbooru interrogate can return different results
Ideally, need to be excessively detailed when it comes to captioning
Artstyle isn't exactly needed from my testing (I haven't fully tested this when it comes to turning a character using a realism checkpoint but it won't stop anime substyles bleeding)
(Substyles are pastal, pseudorealistic, screencap, illustrative, etc)
Dataset Repeats and Classname
From what I noticed by looking at the metadata from other LoRAs, the trend seem to be using very low repeat counts of 5-20 along with occasionally using weighted repeats for datasets. I haven't tested using weighted repeats for specific images yet so I can't give answer to how well they perform in this particular setting. Personally, I have started using low repeats of 5-10 for my LoRAs as of late. I have tried using 100 repeats for this use case but the LoRA tends to be overtrained by the third epoch.
To specify the number of repeats that your LoRA will use, you will need to use a special naming convention for your folder.
X_classname
where X is the number of repeats and classname is a special identifier for the character. In general, the classname should be things like 1girl,1boy but the metadata from a lot of LoRA makers seem to imply it's popular to use a similar name as your character or something random. The classname can also function as a trigger word. Your dataset of cropped images should be included in this folder.
Regularization Images Dataset
Regularization Images are a subject that I haven't seen too many in depth posts on. They are typically used to help correct the output of a model and to help guide it. At the current moment, I haven't fully explored regularization images so I can only offer my limited understanding of them.
Regularization Images can help alleviate overfitting by supplying its dataset to the LoRA which allows the character to be easily rotated or posable
The regularization images should not contain anything that looks like your actual character or uses anything that they might wear. When the regularization images and the dataset are very similar, the LoRA will prefer to learn the concepts from the regularization images and will not learn a thing about your character. This implies that you need to be fairly selective regarding regularization images
Regularization images appear to be fairly lenient as my regularization dataset only contains AI generated artwork, and in some of the images, the faces are distorted. I have included my regularization images in the training data for Isabella.
My process for regularization Images
Using dynamic prompts create a batch of 60 images of the subject type. In my case since my character is a girl, I will be creating 60 images of a girl.
The wildcards should include things that cause the environment setting to be varied,camera angle,and facial expression. You can check out Not4Talent for a guide to create regularization images. My specific settings are bit different as some of the wildcards from Not4Talent didn't work with my model.
Caption the regularization images using the WD14 utility found in kohya_SS
Remove anything overly complex. The aim of my dataset was a generic looking girl. In my case, I pruned the images with odd back cutouts and cleavage cutouts.
Place into a folder called "1_girl" I am assuming since we don't want the the LoRA to learn the regularization images, it's best to keep the repeats for the regularization images as low as possible. (I haven't fully experiment with this). Classname here is the general "girl" keyword as this is the concept I want the LoRa to be corrected with.
This is what I used specifically but it will vary with each model. (My personal mix model has a strong bias towards younger looking characters so I used 1woman here)
Prompts Used to generate the regularization images:
Positive
1woman,solo,clothes, {{expression_wildcard}},{{camera_wildcard}}, {{indoors|outdoors}}Negative:
duplicated, disfugured, deformed, poorly drawn, low quality eyes, border, comic, lowres, bad anatomy, bad hands, text, error, missing fingers, extra digit, fewer digits, cropped, (worst quality, low quality:1.4),normal quality, jpeg artifacts, signature, watermark, username, blurry, artist name, pixels, censored, verybadimagenegative_v1.3, nsfw,EasyNegativeV2,loli,loliface,small breasts, Downsides
Eyeshape tends to underfit and prefers the checkpoint's styling for eyes instead
Doesn't prevent all overfitting. My Isabella LoRA tends to strongly always prefer making both eyes visible in a side_view.
Difficult to add custom outfits in a non-frontal pose. LoRA tends to underfit in these scenarios.
Folder Structure
What my folder structure looks like:
image
---> 5_isabella (main dataset)
log (optional)
model (where the LoRA are created)
reg
---> 1_girl (regularization dataset)
Kohya_SS Training Settings
For my training purposes, I used the kohya_SS GUI.
Epoches
With 5-10 Repeats, I usually try to go with 10 epoches. I usually start noticing the LoRA results around between the 5-10 epoches.
Base Model:
I used the NovelAI model for my training due to the existing experiments where the oldest common style ancestor provides the best model capability.
Learning Rates and Settings:
I'm not an expert on this so these are the things that I have observed.
Optimizer: Adam8Wbit
Batch Size: 1
Mixed Precision: fp16
Saved Precision: fp16
These settings are more of an issue with my GPU. I wasn't able to test out other optimizer and got out of memory errors or produced a LoRA with NaNtensor.
Schedulers:
Constant - This tends to provide more consistent details for the character but I ran into a problem with it
Cosine - Another popular scheduler;
Cosine with Restarts: Popular scheduler among LoRA makers; it didn't work well for me with my dataset. It appeared to struggle with capturing the common details.
(Unverified) - It looks like constant is better for lower image dataset while the cosine schedulers are better for larger datasets
Learning Rates:
Left mostly at default values:
LR: 0.001
Text: 0.0005
Unet: 0.001
LR Warmup - 5
I tried increasing the learning rates but ran into NaNtensor errors. Lowering the training rate made it harder for the LoRA to learn the details but seems worthwhile with doing retraining tests. I tried doing a retraining but I think I did something wrong with it. Something I need to explore at another time. I haven't toyed with the LR Warmup setting yet so I can't explain what it does ,and I just left it on the default value.
Block Weight Adjustment
Down_Lr : 1.0, 0, 0, 0, 0, 0, 0, 1.0, 1.0, 1.0, 1.0, 1.0
up_lr: 0, 1.0, 1.0, 1.0, 1.0, 1.0, 0, 0, 0, 0, 1.0, 1.0
middle_lr: 0
I adjusted the LoRA block weights according to the OUTD preset found on the LoRA block weight extension. This helps with overfitting but I should try to experiment more without having it enabled as I haven't found too many other LoRAs with the block weight adjusted. This is potentially a topic with stopping style bleed but it's something I need to research more. Just a warning that this can cause the LoRA to not work well with some models.
Network Rank/Alpha
This setting helps with enabling more room to store the weights so that the LoRA is able to be more expressive and capture more detail. Unfortunately, with Block Weight tuned, I wasn't able to get a 128/128 LoRA to work and produced only latent noise. I am currently using 16/16 without any problems right now. I tried 32/32 before it was hard to notice an improvement. Isabella's design is rather simple so I will need to try and create a character with more complex detail to see if there is an improvement.
Augmentation Settings
Color Augmentation
This setting adds color variations to the LoRA during the training process. I have noticed that it helps with reducing color artifacting issues or "colorburn".
Flip Augmentation
This setting adds flipped images during the training process. Noticable improvement that it helped reduce colorburning issues. I used to have it enabled for V1 and V2 for Isabella but turned it off due to symmetry issues. The issue still persists with it disabled but the character is more symmetrical correct with the setting off.
Additional Settings
Keep N Tokens: 2
Skip Clip:2
Shuffle Captions: Enabled
Keep N tokens keeps the a "nth amount" of tokens fixed in place if the shuffle captions is enabled. I haven't played around with too much these settings but it's to my understanding that this helps with getting the LoRA more flexible with the other captions while keeping the strength of the trigger word. Skip CLIP 2 is the general recommended setting for anime-based models/LoRAs.
Noise Offset
I haven't toyed around with this setting yet and will do so at a later time. I have Original - 0.1 noise set from a previous tutorial. It's supposed to help with image variation during training to my current knowledge. I believe I am probably wrong about this.
Image Resolution
I have mine kept at 512x512. Higher values only help if images in the dataset are higher than 512x512. It can improve quality but it was rather hard for me to judge.
Prompt Testing
Since the LoRA here is mostly focused on inpainting, my goal is to see if it can retain vital basic character details consistently enough over a batch of 10 images. Looking for exact color fidelity is not important here. Every image does not need to be perfect but it needs to capture some aspect where I could use controlnet, photobashing, and inpainting techniques later to complete the image.
Working with overfitted LoRAs is another art process by itself and isn't something that I will be explaining here. It's fairly complex and I don't know all of the tricks yet. Some of the more easier methods is to run an img2img at a lower LoRA strength or use the LoRA block weight extension. I am fairly certain the LoRA is going to be overfit so with my limited knowledge, I usually work with 0.6 ~ 0.8 weights for testing with the OUTD preset disabled/enabled.
General Outfit
My Isabella character has the following characteristics for her outfit:
white capelet with two green stripes
A white hat with a green bow
black corset with green laces and a green back bow
Long white frilled skirt with two green stripes
Long sleeves
Blue wrist cuffs with three stripes
Boots with green laces
The color generally doesn't matter as you can fix this by manual edits or inpainting so the main goal is to see if the LoRA can at least make the basic shapes.
Custom Outfits
Testing for custom outfits is somewhat optional. For the ease of use with inpainting, the main goal here is to get a skimpy or slim outfit where you can easily capture the overall body line for easier editing with ControlNet. If you're already used to ControlNet, then using a generic posing doll or references is enough to change the outfit without relying on a LoRA. This section still might be useful if you need the proportions to match better with your character or just hate using posing tools.
Getting custom outfits to work can be fairly tricky. Originally, I opted for a process where I could reliable change my character outfits but that occasionally ended up with worse results for the original outfit. Currently, my process for custom outfits is to see if I am able to remove details that I consider unnecessary for the character while keeping the critical aspects.
My critical aspects:
Character Hair color and Length
Eye Color
General Eye shape
Hairline
Minor accessories such as earrings or jewelries
Aspects not necessary for changing outfits:
Hat
Bow
Clothing
I recommend using some clothing to check for outfit overfitting and that some models have a stronger bias towards NSFW so it might be hard to see the overfitting. It's a good idea to test several sub-style models at once with XYZ plot. It's not necessary to aim for perfect fidelity here due to limited dataset but best to try for good enough.
Rather than having the LoRA easily swappable for outfits, I think that it is probably better to have the LoRA easier to setup with multi-controlnet inpainting for outfit swaps. (I am referring to an extension of tsound97's method by studiomasaki of using [Inpaint+only / Reference_only/ pix2pix/canny controlnets together).
Choosing the epoch
Ideally, pick the epoch that fits your needs the best. I ended up using the 10th epoch as that captured the wrist cuffs the best. This was something that I was struggling with for quite some time.
Overfitting Problems
Problems at the end of my LoRA that I haven't found out how to fix without using any of the mentioned inpainting techniques.
Eye Position is overfit
Wrong symmetry of the character hairline
Style bleeding from the original image
Other Things:
Single Image LoRA guide by Plum
a simpler method to train a LoRA on a single image. It didn't quite work for me so your mileage may vary.
Conclusion
It's a fairly naive implementation of a LoRA but it works well enough for a quick inpainting setup. It appears that in order for single image LoRA to work, the key seems to undertrain it so that it does not overfit quickly. Like with any other LoRA, there is always of the option of using loopbacks to help improve it later on which is a subject for a later time. I learned quite a lot by messing around with the settings but I'm starting to hit some walls. I "should" only have to two more possible version improvements left before I start moving onto a character design that is more complex. That's it from me for now, thanks for reading and maybe this was helpful.