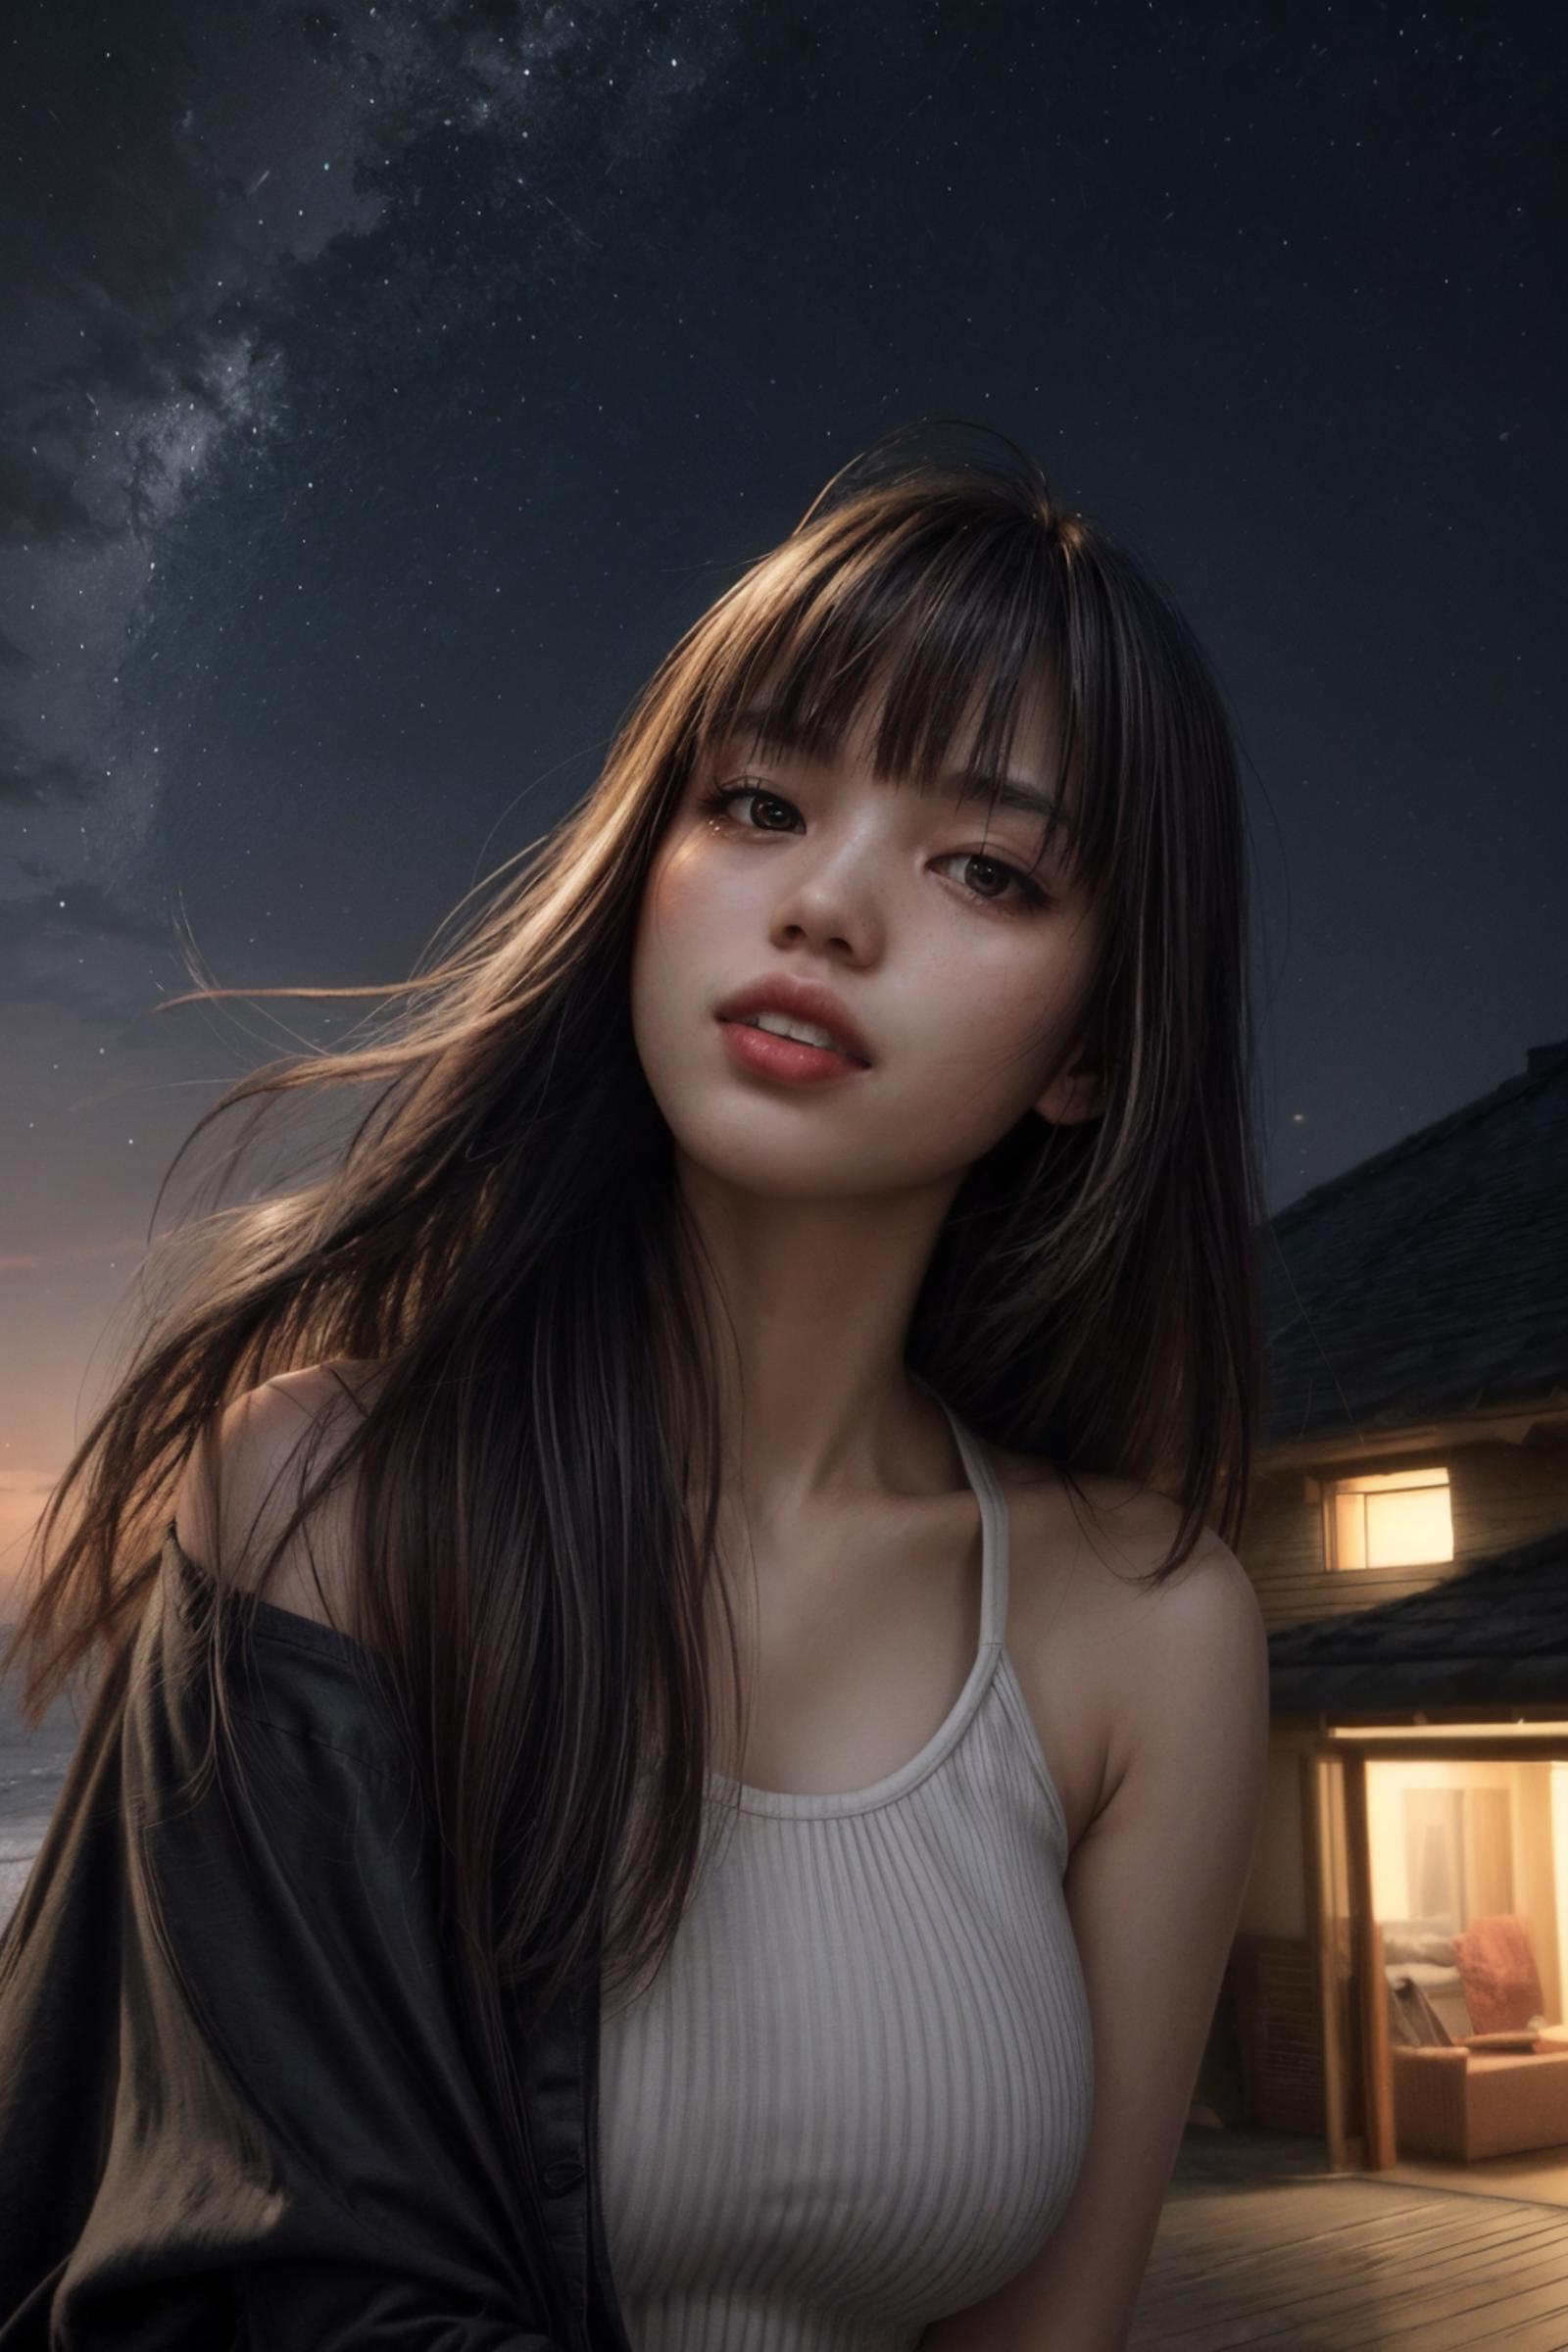
Welcome back to my little corner of the SD Jungle.
I'm happy to have you here.
If you are new to the series I would suggest you read Part 1: Extensions, Configurations, and 1st Wave Generations. You will need the extensions and configurations listed in that article to follow along here.
What You Will Need:
If you're not new here than you have the extensions and are ready to go, aside from:
Two LoRa Models, a few Negative Embeddings, and a few more new ADetailer models.
Detail Tweaker LoRa by CyberAlchemist (Style LoRa)
HairDetailer by 2vXpSwA7 (Style LoRa)
Put LoRa Models in '\webui\models\Lora'
BadDream by Lykon (Negative Embedding)
Bad-Hands-5 by Samael1976 (Negative Embedding)
Beyond Negative Embedding by Operation Nova (Negative Embedding)
Boring_e621 by FoodDesert (Negative Embedding)
Put Embeddings in '\webui\embeddings'
deepfashion2_yolo8s-seg by Bing-su (ADetailer Model)
face_yolov8m by Bing-su (ADetailer Model)
person_yolov8m by Bing-su (ADetailer Model)
Put ADetailer Models in '\webui\models\adetailer'
Download these if you'd like to follow along:
DreamShaper by Lykon (Checkpoint)
Put Checkpoints in '\webui\models\Stable-diffusion'
Project_Pinay Pinay 1 by DogFace (LoRa Character Model)
THE FOLLOWING IS A COMPLETELY OPTIONAL EXTENSION:
Config Presets by Zyin055
This extension allows you to save presets in Automatic1111. I use this to save my config settings in Dynamic Threshold (CFG Scaling Fix) [DynThres], as well as my "Default" generation parameters and a number of prompt 'Templates'
I have included a .txt file in the attachments that you can use to setup the extension to save DynThres settings as they are not available out of the box. It also allows you to save your Positive and Negative Prompts to your presets.
I have also included a .json file that will add my 'CivitAI_Default' Preset to your preset list.
Just replace the files with the ones you downloaded in the Config Presets extension directory '\webui\extensions\Config-Presets', Reload or Run the UI, and you should be ready to go.
Section 1 - The Game Plan:
In my last article we used ADetailer to do some pretty basic enhancements and detail additions to a, purposely, basic image. This time around we are going to be working with a higher level of detail.
We will:
Add/Use Additional Tabs and models in ADetailer.
Introduce a couple of LoRa Models to "cheat" and reduce token use.
Introduce Negative Prompts to add more control to our generation.
Use Negative Embeddings to cut down on time spent crafting Negative Prompts.
Exciting stuff I know! Let's get started!
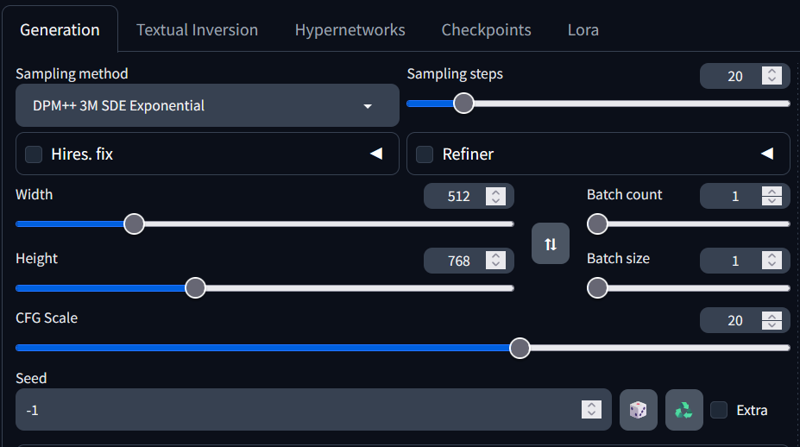
Lets make sure we have all of our parameters and configurations in sync. If you installed the Config Presets Extension just select the CivitAI_Default Preset from the Drop Down.

If you're not using the extension just look below.
Generation Parameters:
DynThres Configuration:
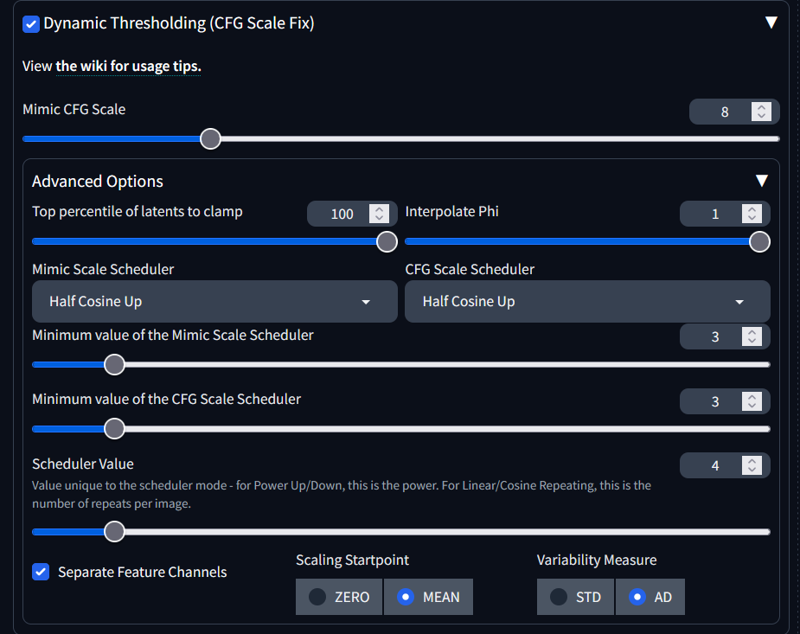
Now we need to make two changes to our generation parameters.
Steps: 40
Seed: 2502509802
We are all setup and ready to go!
Section 2 - Initial Prompt and Generation:
As with all things; We need a starting point. Something to mold. In this case a prompt. Let's write a semi-complex prompt with some detailed keywords and strings.
| 8k, Highly_Intricate_Detail, High_Res, UHD, Fuji_Film_XT3, Sharp_Focus, Tack_Focus, Award_Winning, Trending_on_ArtStation, Professional_Photography, Cinematic_Photography, Life_Like, Real_Life, True_to_Life, Absolute_Reality, |
| <lora:Perfect_Pinay_av3:0.75>, Perfect Pinay, Southeast_Asian, Filipina, Dark_Brown_Tan_Skin, Voluptuous_Black_Hair, Face_Framing_Bangs, |
| Sexy_Shy_Wanting_Expression, Mouth_Slightly_Open, Suggestive_Corner_Grin, |
| Tanks_Top, Tight_Cargo_Pants, |
| Lush_Colorful_Philippines_Jungle_Pathway, Exotic_Colorful_Flora, Flowers, Vines, Trees, Rolling_Fog, Lingering_Mist, |
| Golden_Hour, Ray_Tracing, Crepuscular_Lighting, Deep_Shadows, Reflective_Surfaces, |
There we go! The prompt is split into 6 categories:
Quality
Character Traits
Expression
Clothing
Scene
Lighting & Effects
This will make it Easier for you to find specific lines when we add a few things and add weight to keyword strings in the next couple of steps.
Now let's hit that Generate Button (Ctrl+Enter):
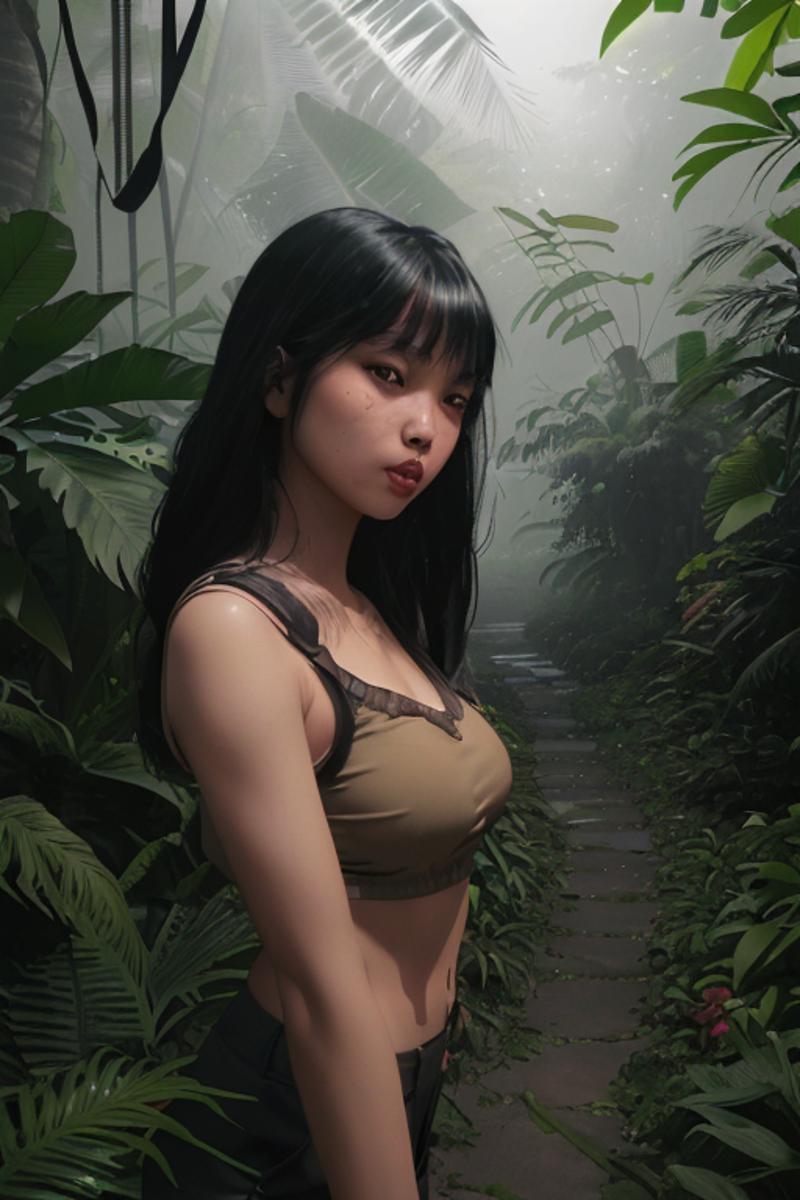
Oh the humanity! What a rough image! My poor LoRa!
In all seriousness this is actually a really good starting point and it's "rough edges" is the reasons I choose this seed for our little "walk through the jungle". So let's get to work making this zero a hero!
Section 3 - Negative Embeddings:
Negative prompting is the SD way of saying, "No, you don't do that!".
In the past Negative prompting required you to write lengthy strings of keywords to tell the Checkpoint what you don't want to see. While you can still do that, if you want to torture yourself, there are now Textual Inversions; Or, as they're more commonly known, Positive and Negative Embeddings.
Embeddings are, essentially, long strings of keywords compiled into a single keyword.
Some Embeddings can/should be weighted and others don't need to be. This is usually specified in the creators description of the Embedding so always read to ensure you're using their creation as intended.
We have 4 Negative Embeddings to add to our negative prompt. 3 we can add "As-Is" and 1 requires that we weight it.
Let's add the Negative Prompt.
Negative Prompt:
(Beyondv4-neg:1.5), bad-hands-5, BadDream, boring_e621_v4,Notice we have weighted the "Beyondv4-neg' Embedding to 1.5.
Ok! With our Negative prompt added; Let's hit that Generate Button (Ctrl+Enter):
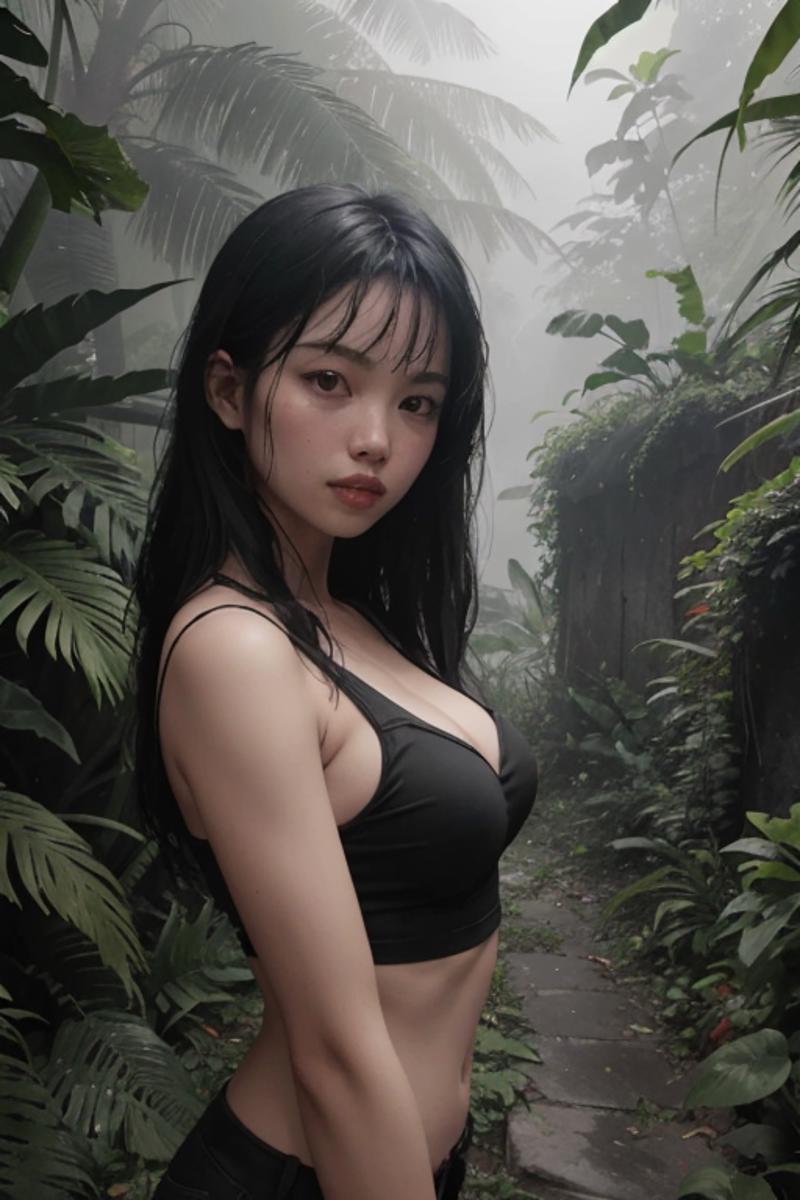
Well would you look at that! The image has been vastly improved and all we did was add 4 simple Embeddings to the Negative Prompt. Pretty cool right!?
Next we are going to add some LoRa Style Models to 'cheat' while saving on token use.
Section 4 - LoRa Style Models and Prompt Weighting:
I am, of course, joking when I say that we are cheating by using these LoRa. Just like AI, the LoRa is a tool that you can use if you choose to. In our case we are going to use them to vastly improve the amount of detail in our generation to save on time and token use. After all, we are already sitting at 208 tokens and LoRa Models cost nothing.
Let's add the 'Detail Tweaker LoRa' First.
When I add these LoRa, I like to put them where they make sense to me. So for this one it make sense to add it to our 'Quality' category. I'm going to place it right after the 'High_Res' Keyword and set it's weight to 1.
The Modified Prompt:
| 8k, Highly_Intricate_Detail, High_Res, <lora:add_detail:1>, UHD, Fuji_Film_XT3, Sharp_Focus, Tack_Focus, Award_Winning, Trending_on_ArtStation, Professional_Photography, Cinematic_Photography, Life_Like, Real_Life, True_to_Life, Absolute_Reality, |
| <lora:Perfect_Pinay_av3:0.75>, Perfect Pinay, Southeast_Asian, Filipina, Dark_Brown_Tan_Skin, Voluptuous_Black_Hair, Face_Framing_Bangs, |
| Sexy_Shy_Wanting_Expression, Mouth_Slightly_Open, Suggestive_Corner_Grin, |
| Tanks_Top, Tight_Cargo_Pants, |
| Lush_Colorful_Philippines_Jungle_Pathway, Exotic_Colorful_Flora, Flowers, Vines, Trees, Rolling_Fog, Lingering_Mist, |
| Golden_Hour, Ray_Tracing, Crepuscular_Lighting, Deep_Shadows, Reflective_Surfaces, |
Great. Now let's see what wonders await us and hit that Generate Button (Ctrl+Enter):
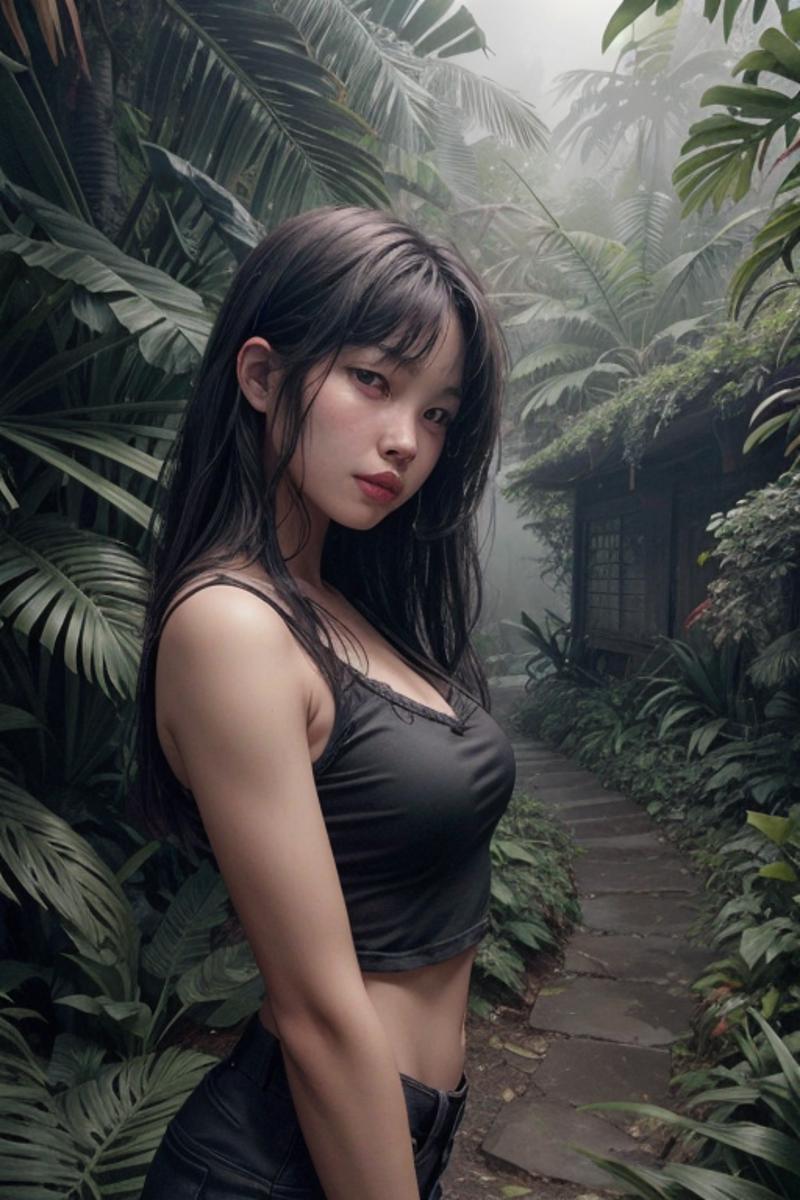
Cool beans! That added a lot of detail! Including that cool little house with the overgrowth! Gonna do my best to preserve that!
Next let's add the 'HairDetailer' Style LoRa.
Again, I like to add things where they make sense. So we will add this one to our 'Character Traits' Category and place it after the 'Voluptuous_Black_Hair' Keyword string and set it's weight to 1.
The Modified Prompt:
| 8k, Highly_Intricate_Detail, High_Res, <lora:add_detail:1>, UHD, Fuji_Film_XT3, Sharp_Focus, Tack_Focus, Award_Winning, Trending_on_ArtStation, Professional_Photography, Cinematic_Photography, Life_Like, Real_Life, True_to_Life, Absolute_Reality, |
| <lora:Perfect_Pinay_av3:0.75>, Perfect Pinay, Southeast_Asian, Filipina, Dark_Brown_Tan_Skin, Voluptuous_Black_Hair, <lora:hairdetailer:1>, Face_Framing_Bangs, |
| Sexy_Shy_Wanting_Expression, Mouth_Slightly_Open, Suggestive_Corner_Grin, |
| Tanks_Top, Tight_Cargo_Pants, |
| Lush_Colorful_Philippines_Jungle_Pathway, Exotic_Colorful_Flora, Flowers, Vines, Trees, Rolling_Fog, Lingering_Mist, |
| Golden_Hour, Ray_Tracing, Crepuscular_Lighting, Deep_Shadows, Reflective_Surfaces, |
And there we have it! You know the drill. Generate! (Ctrl+Enter):
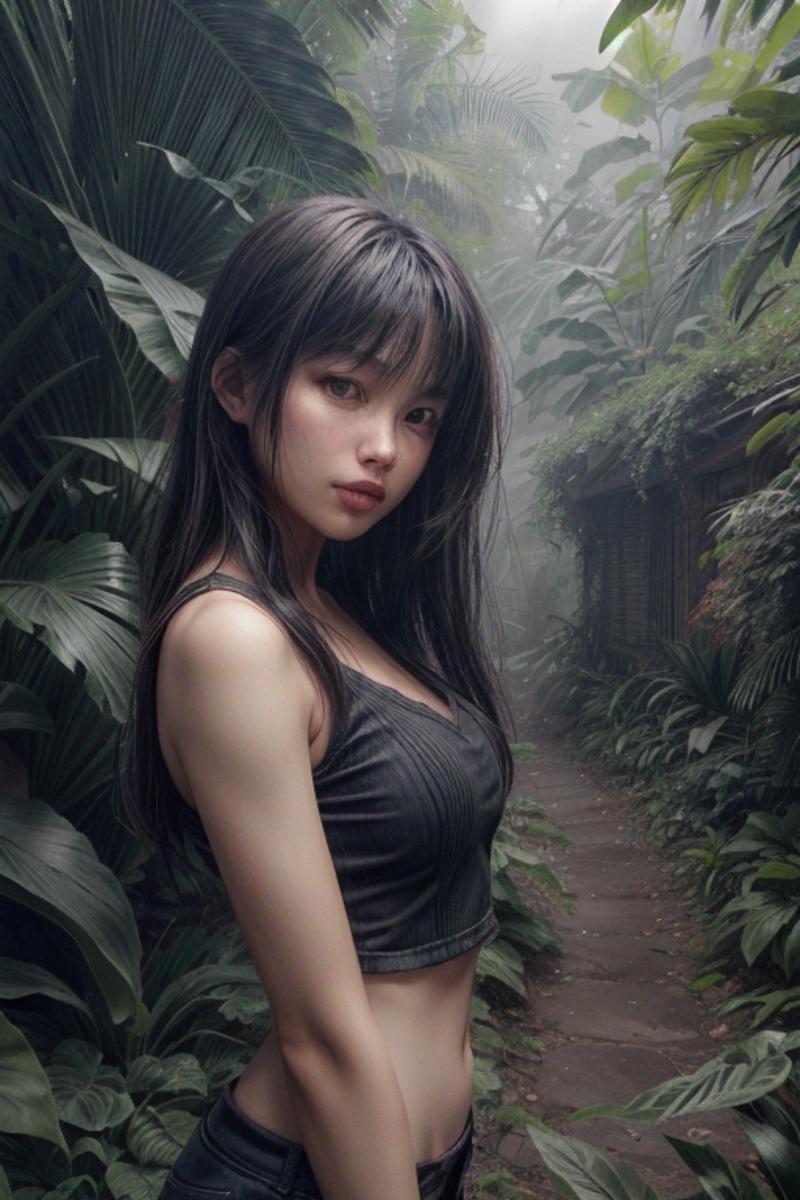
Awesome! I really like what this LoRa does to the hair! You can adjust the weight for varying results, but I tend to keep it at 1 for the fine detail it adds. We also still have our little house! Yay!
Now that we have those two LoRa Added let's do some weighting to our Prompt to bring some of those details we want to the foreground.
The Final Modified Prompt:
| 8k, Highly_Intricate_Detail, High_Res, <lora:add_detail:1>, UHD, Fuji_Film_XT3, Sharp_Focus, Tack_Focus, Award_Winning, Trending_on_ArtStation, Professional_Photography, Cinematic_Photography, Life_Like, Real_Life, True_to_Life, Absolute_Reality, |
| <lora:Perfect_Pinay_av3:0.75>, Perfect Pinay, Southeast_Asian, Filipina, (Dark_Brown_Tan_Skin:1.5), Voluptuous_Black_Hair, <lora:hairdetailer:1>, (Face_Framing_Bangs:1.3), |
| (Sexy_Shy_Wanting_Expression:1.4), (Mouth_Slightly_Open:1.4), (Suggestive_Corner_Grin:1.4), |
| (Tanks_Top:1.2), (Tight_Cargo_Pants:1.2), |
| (Lush_Colorful_Philippines_Jungle_Pathway:1.1), (Exotic_Colorful_Flora:1.4), (Flowers:1.5), (Vines:1.2), (Trees:1.2), (Rolling_Fog:1.3), (Lingering_Mist:1.4), |
| (Golden_Hour:1.4), (Ray_Tracing:1.4), (Crepuscular_Lighting:1.5), (Deep_Shadows:1.4), (Reflective_Surfaces:1.4), |
Take a moment to read through the Prompt. I have added weight to a lot of the Keywords and strings. We aren't going to get everything we want, but weighting will help give us more than a little.
Let's see what wonders await us! Generate! (Ctrl+Enter):
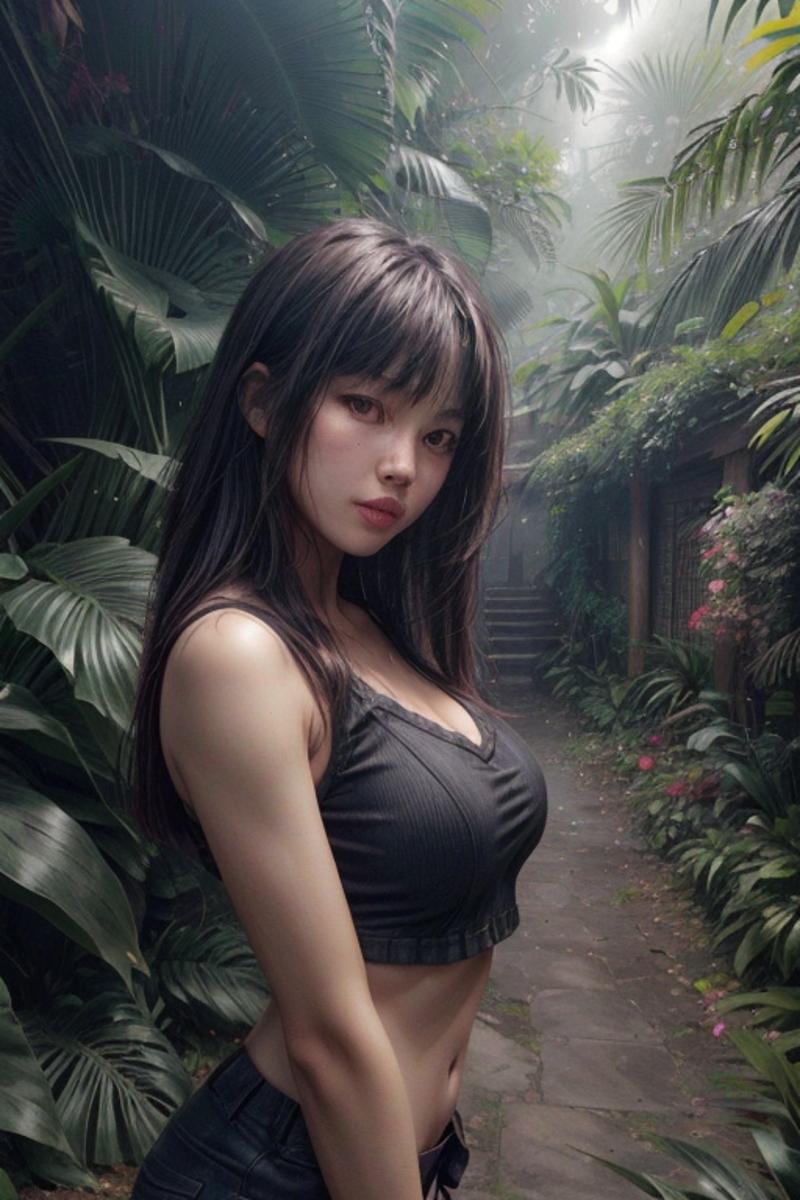
Cool! Not only did it keep my little house; It added more color to the flowers and foliage that I wanted. We also got that cool staircase at the end of the path and more light reflection off the flora!
Now that we have all that taken care of; Let's work on the center piece. Lord knows it could use it.
Section 5 - ADetailer Redux:
In the last article we worked with 2 Tabs and two models. This time we are going to add two more tabs and also use some additional models to focus on more aspects of the Character.
Adding More Tabs:
To add more Tabs to the ADetailer interface select the 'Settings' tab and scroll down until you get to the 'Uncategorized' Section.
Select 'ADetailer' and scroll back to the top of the page.


From here you'll want to Move the 'Max Models' Slider to 4.
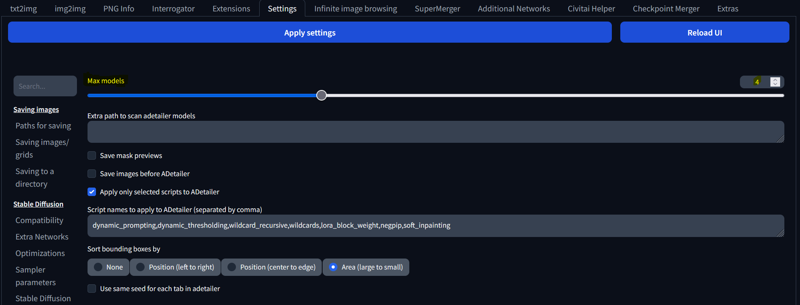
Click 'Apply Settings' and then 'Reload UI'.
Once reloaded you should be able to restore your prompts by pressing the blue arrow under the Generate Button.
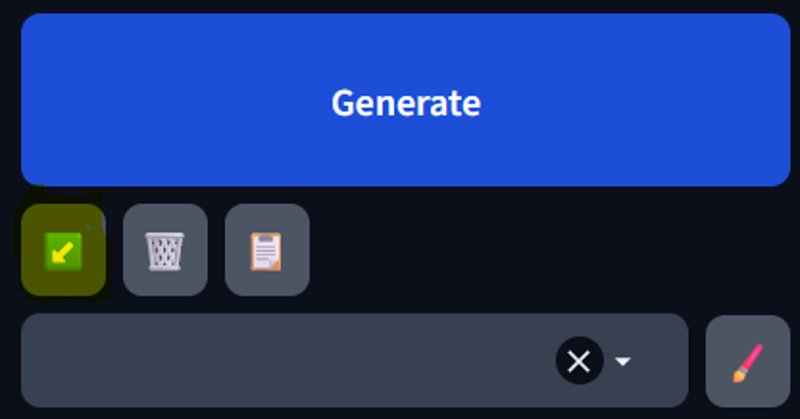
If not than:
Prompt:
| 8k, Highly_Intricate_Detail, High_Res, <lora:add_detail:1>, UHD, Fuji_Film_XT3, Sharp_Focus, Tack_Focus, Award_Winning, Trending_on_ArtStation, Professional_Photography, Cinematic_Photography, Life_Like, Real_Life, True_to_Life, Absolute_Reality, |
| <lora:Perfect_Pinay_av3:0.75>, Perfect Pinay, Southeast_Asian, Filipina, (Dark_Brown_Tan_Skin:1.5), Voluptuous_Black_Hair, <lora:hairdetailer:1>, (Face_Framing_Bangs:1.3), |
| (Sexy_Shy_Wanting_Expression:1.4), (Mouth_Slightly_Open:1.4), (Suggestive_Corner_Grin:1.4), |
| (Tanks_Top:1.2), (Tight_Cargo_Pants:1.2), |
| (Lush_Colorful_Philippines_Jungle_Pathway:1.1), (Exotic_Colorful_Flora:1.4), (Flowers:1.5), (Vines:1.2), (Trees:1.2), (Rolling_Fog:1.3), (Lingering_Mist:1.4), |
| (Golden_Hour:1.4), (Ray_Tracing:1.4), (Crepuscular_Lighting:1.5), (Deep_Shadows:1.4), (Reflective_Surfaces:1.4), |
Negative Prompt:
(Beyondv4-neg:1.5), bad-hands-5, BadDream, boring_e621_v4,Seed:
2502509802Now, with that taken care of let's take a look at ADetailer. You should see this:
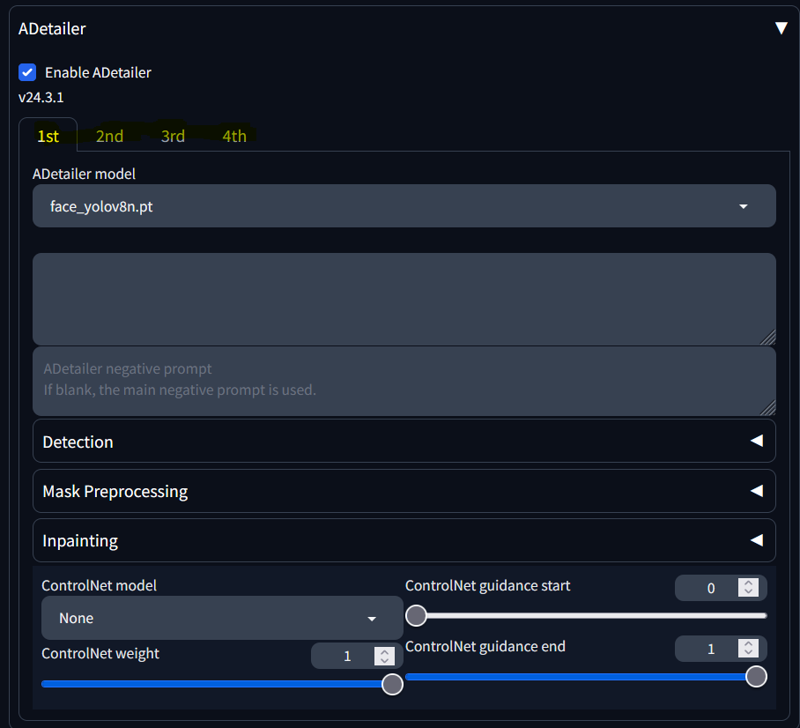
When I am using this many tabs (sometimes more) I follow an order of operation.
World
Person
Hands
Feet
Clothes
Face
Eyes
In this case we will be using numbers 2, 5, 6,and 7 in that order.
1st Tab:
Use the drop down to select the 'person_yolov8m-seg' model.
Let's add a prompt to tell ADetailer what we want it to do.
The 1st Prompt:
| <lora:Perfect_Pinay_av3:0.75>, Perfect Pinay, Southeast_Asian, Filipina, (Dark_Brown_Tan_Skin:1.5), Voluptuous_Black_Hair, <lora:hairdetailer:1>, (Face_Framing_Bangs:1.3), (Sexy_Shy_Wanting_Expression:1.4), (Mouth_Slightly_Open:1.4), (Suggestive_Corner_Grin:1.4), (Golden_Hour:1.4), (Ray_Tracing:1.4), (Crepuscular_Lighting:1.5), (Deep_Shadows:1.4), (Reflective_Surfaces:1.4), <lora:add_detail:1>, |
Notice that I have simply pulled parts of the vanilla prompt and used them here. Think of the Person as the canvas and the 1st Tab is the base coat. Not much need for fine details here. We just want to set a good foundation.
Non-the-less let's hit that Generation Button (Ctrl+Enter) to see what happens!:
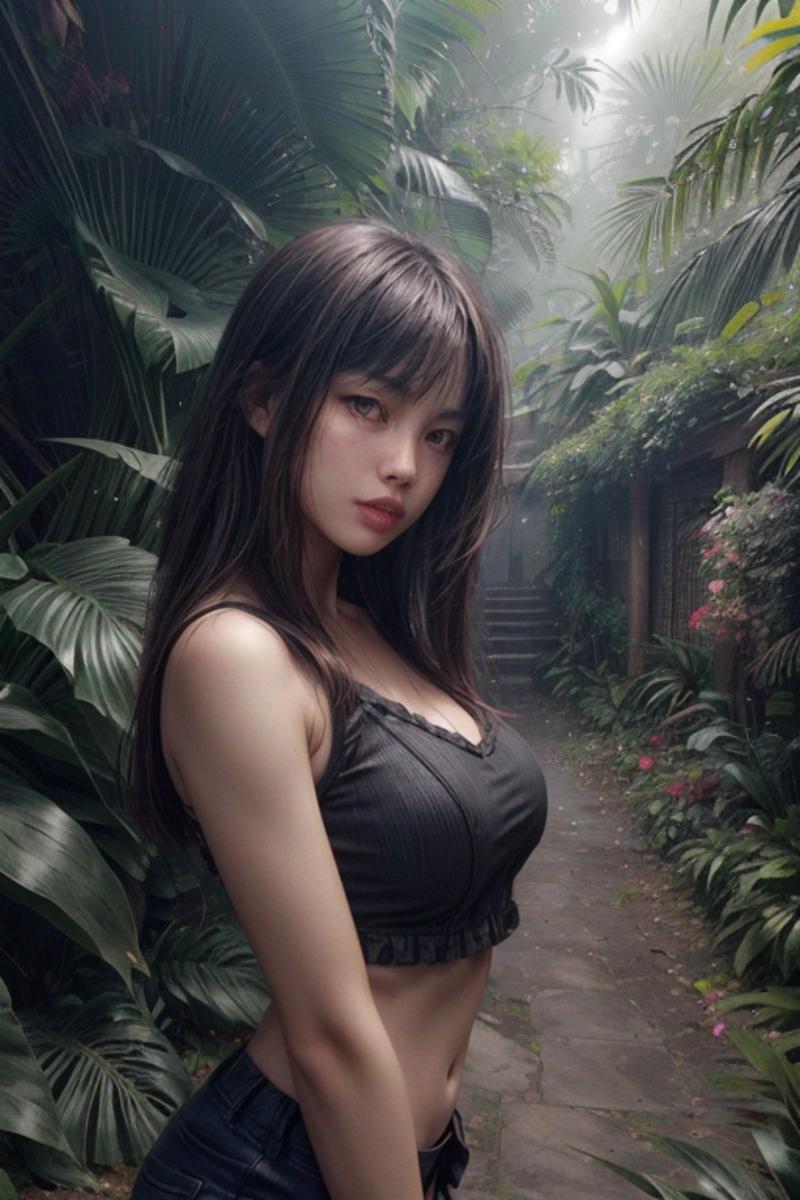
At first it doesn't look like it did much. If you look at the images side-by-side, however, you'll see that there has been a considerable amount of detail added as well as some major refinements to the Character. This is a great setup for what comes next.
2nd Tab:
Select the 2nd Tab and use the dropdown to select the 'deepfashion2_yolov8s-seg' model.
We will again add a prompt, but this time we will give it a few additional instructions for what we would like to see.
The 2nd Prompt:
| (Tanks_Top:1.2), (Tight_Cargo_Pants:1.2), (Soft_Texture:1.4), (Slightly_Damp:1.3), (Matte_Finish:1.2), (Intricate_Detail:1.4), <lora:add_detail:1>, (Golden_Hour:1.4), (Ray_Tracing:1.4), (Crepuscular_Lighting:1.5), (Deep_Shadows:1.4), (Reflective_Surfaces:1.4), |Read the Prompt. We have added some directions in reference to texture, finish, detail, and finally we told it we want the clothes to be a little damp. We are in the Philippine Jungle after all!
Let's hit the Generate Button (Ctrl+Enter) and see what we get!:
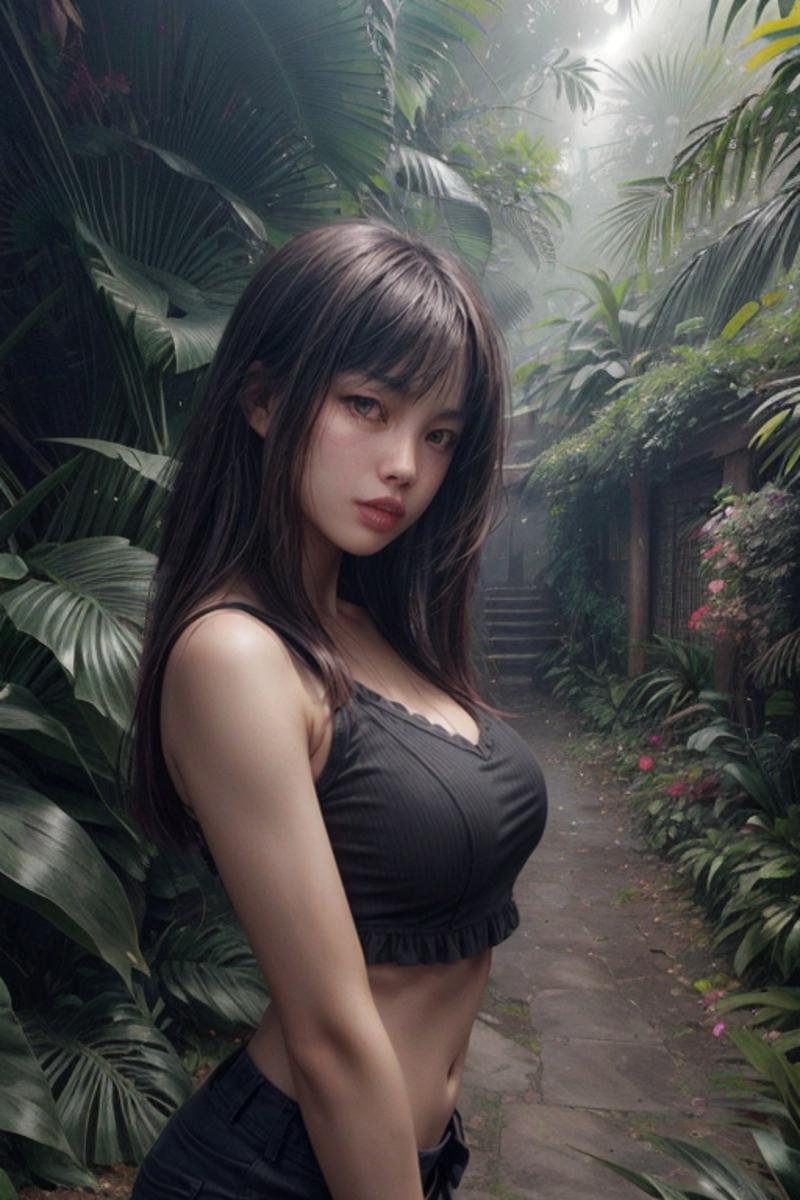
As you can see, it really cleaned things up and gave us a much better "fit" on the Characters clothing. We didn't get the level of dampness we were looking for but it's still an acceptable result.
On to the 3rd Tab.
3rd Tab:
Use the dropdown to select the 'face_yolov8m' model.
This is arguably the most important phase of the ADetailer portion when using a LoRa Character Model, so we want to make sure we are giving it good instructions. Lets craft a prompt to feed it.
The 3rd Prompt:
| <lora:Perfect_Pinay_av3:0.75>, Perfect Pinay, Southeast_Asian, Filipina, (Dark_Brown_Tan_Skin:1.5), (Face_Framing_Bangs:1.3), (Sexy_Shy_Wanting_Expression:1.7), (Mouth_Slightly_Open:1.7), (Suggestive_Corner_Grin:1.7), (Golden_Hour:1.4), (Ray_Tracing:1.4), (Crepuscular_Lighting:1.5), (Deep_Shadows:1.4), (Reflective_Surfaces:1.4), <lora:add_detail:1>, (Depth:1.3), |I've, once again, pulled multiple lines form the base prompt and added them here. The only additions I've made is 'Depth' and adjusting weights of the keywords. Remember, as I stated in Part 1, you want to weight equal to or higher in ADetailer prompts. This will help ensure you get the results you are looking for.
Let's Generate! (Ctrl+Enter):
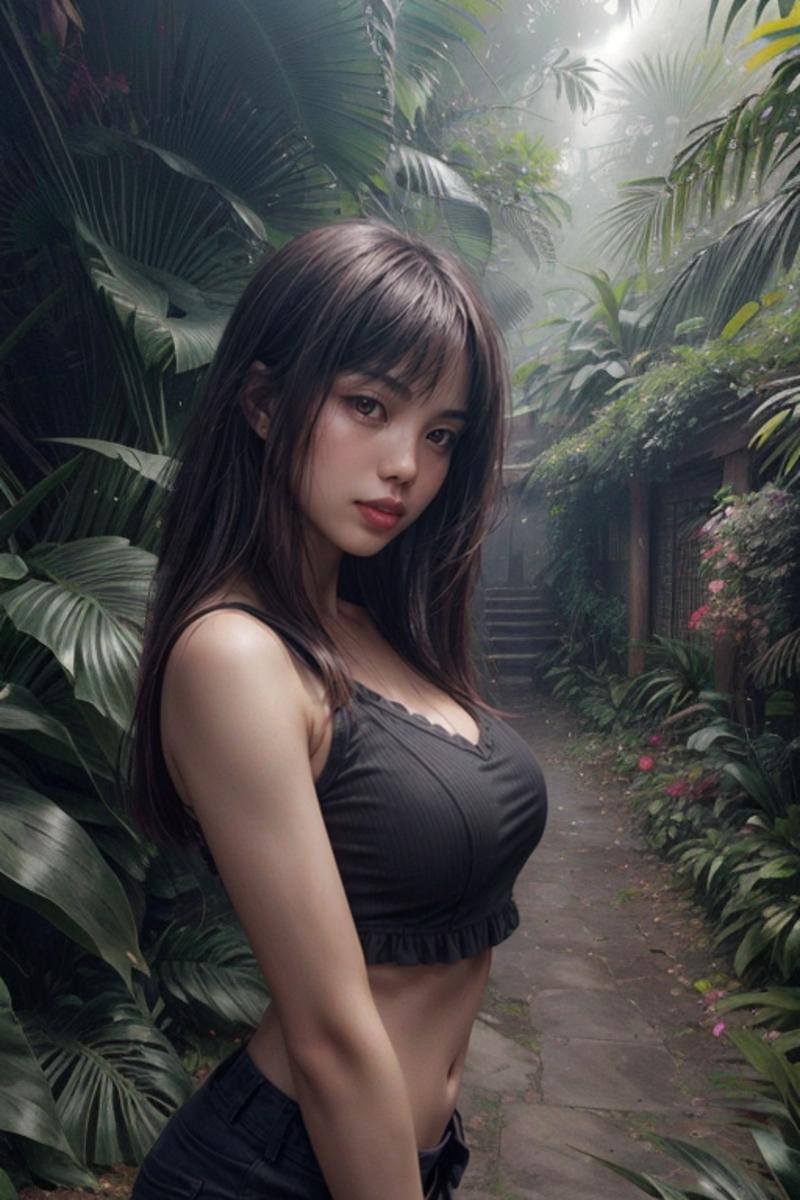
Wow. I never get over how well this extension does it's job. We have finally got a nice clean attractive face! The expression we were going for is there but quite subdued, however.
If it's something we really want we can take care of it in inpainting later. For now, and for the purposes of this article, this is fine.
the 4th, and final, Tab is next.
4th Tab:
It's time for those eyes! Now I don't know if you noticed, I certainly didn't until just this moment, but I didn't give the vanilla prompt any keywords in regards to the eyes! Silly me.
No worries though. We can take care of it now with our ADetailer prompt and apply a higher weight. Later on we can also give instructions during upscaling that can add more detail as well.
For now let's craft a prompt that will at least get us a good preliminary result.
The 4th Prompt:
| (Highly_Detailed_Light_Brown_Eyes:1.4), (Sexy_Shy_Wanting_Expression:1.4), (Golden_Hour:1.4), (Ray_Tracing:1.4), (Crepuscular_Lighting:1.5), (Deep_Shadows:1.4), (Reflective_Surfaces:1.4), (Depth:1.3), <lora:add_detail:1>, |OK. Let See what we get. We shouldn't expect too much. Generate! (Ctrl+Enter):
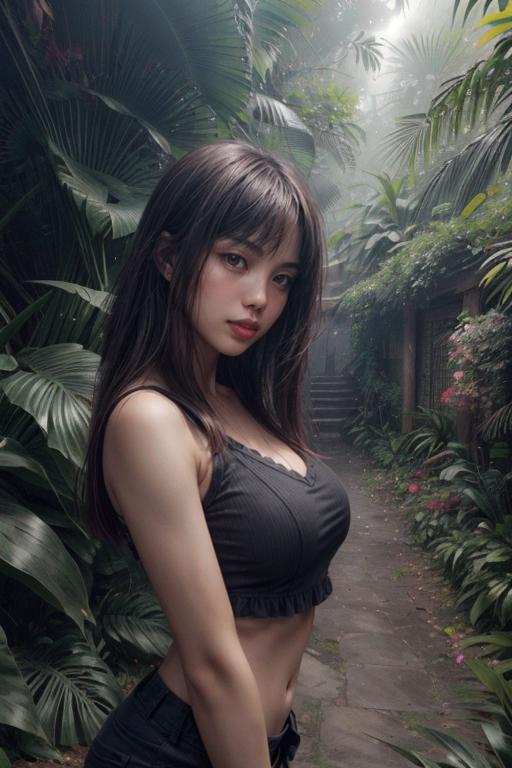
Huh! That actually went better than I expected it to! Upscaling will need to do some heavy lifting, but this is a decent result!
Section 6 - Conclusion:
And there you have it! That is the entire Generation portion of my Workflow.
While this went pretty quickly here, remember:
I prepared all of this prior to writing this article. In reality, this generation took me about 6 hours from initial generation, to tweaking weights, to ADetailer Prompting, to tweaking those weights.
I can't even tell you how many times I had to tweak the weights just to keep that house and the stairs in the picture without sacrificing other elements..
Point being, this is a process. Even with LoRa Models, Styles, Embeddings, Extensions, etc. The important thing, at least for me, is to have fun with it.
I hope you learned something or, at the very least, found it interesting.
In the next article we will use 'Ultimate SD Upscale' to, you guessed it, upscale our generation and also add the final touches of detail in the process. I will also show you my process for "Post Processing" using GIMP.
Thanks for the read! Until next time!


