
Deforum with HarroweD tutorial series
DWH #1 - Creating your first animation with Deforum - in 1 click!
DWH #2 - Animating your own images with Deforum!
DWH #3 - How to schedule your animation parameters to change during the render!
Hey CivitAI, I'm HarroweD, and today I will be showing you how to start animating with Deforum! I am consistently blown away by the incredible art this community makes, and always wish that I could see how amazing it would be animated. I hope with this series of tutorials I can introduce more of you to the wonderful world of AI animation, and see more of you turn your beaituful art into even more beautiful animations!
But HarroweD, why do I give a sh*t?
That's a fair question, with subjective answers, but enough of them for it to be worth it for anyone interested in AI Art. Obviously first and foremost, the ability to animate your art opens up infinite new ways to be creative, which is always a good thing. There's also tons of advantages in creating these types of media, like having more outlets to share your work (compared to still images) like YouTube, TikTok, etc You can make your frames into GIFs, to use on CivitAI or anywhere else. A huge one for me was the ability to incorporate music (which is coming in a following tutorial). It even gives you the best ways to try/test/experiment with anything Stable Diffusion has to offer,by way of "Scheduling". In Deforum you can schedule just about any property, meaning you can set them to change on any frame during the render. So if 5 new checkpoints came out today, you could make a 1000 frame animation that schedules all 5 of them for 200 frames each, and be able to see their output relative to eachothers all in one animation. Ever want to find out what the hell the differences are between samplers? You could literally schedule all of them into one animation and find out. Step count? CFG? LoRAs? Same thing.
Hopefully you're convinced, so as it says on the tin, let's create your first animation with basically a click of your mouse! (OK, maybe like 2. or 3)
The reason this is possible is because Deforum comes with default settings in all of the properties that will create a short animation without having to change anything. It may not seem like such a huge or helpful step, but even weeks into using Deforum, I still feel like all my animations are just further mofifications I've made to the default render.
Requirements:
Stable Diffusion 1.5
Automatic 1111
Deforum Extension
If you have any trouble with installation, just paste the ReadMe/Documentation/Installlation Guide as well as your specific setup (Windows, Mac, Linux, Anything relevant) into ChatGPT and have it walk you through step by step. This works for just about everything.
(Note - There is the option of using Deforum through the Google Colab notebook as well, but I will be using the a11 ext for the purposes of this tutorial.)
Once you've started up a11 with Deforum installed, click the Deforum tab, and we will walk through only the settings we need for our first animation.
Also make sure to select your desired checkpoint to render with in the top left of the a11 UI.
(Please ignore the property values/settings displayed in the screenshots, they are not meant to be used for this tutorial render. Unless directed otherwise, we will be leaving all properties with their default values.)
Run Tab
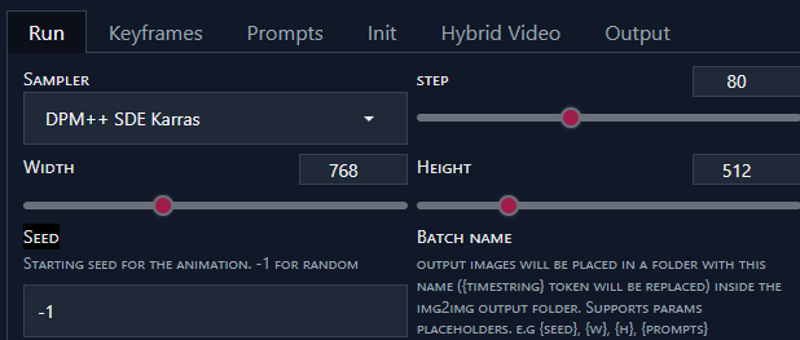
Here you set the sampler, step count, dimensions, and seed (as well as a couple other settings) For our purposes, all of the default values are fine, however I won't be mad at you if you want to increase the step count slightly. As for the seed, unless you've got a specific seed to enter, then having -1 as the value with randomly select a seed every render.
Keyframe Tab
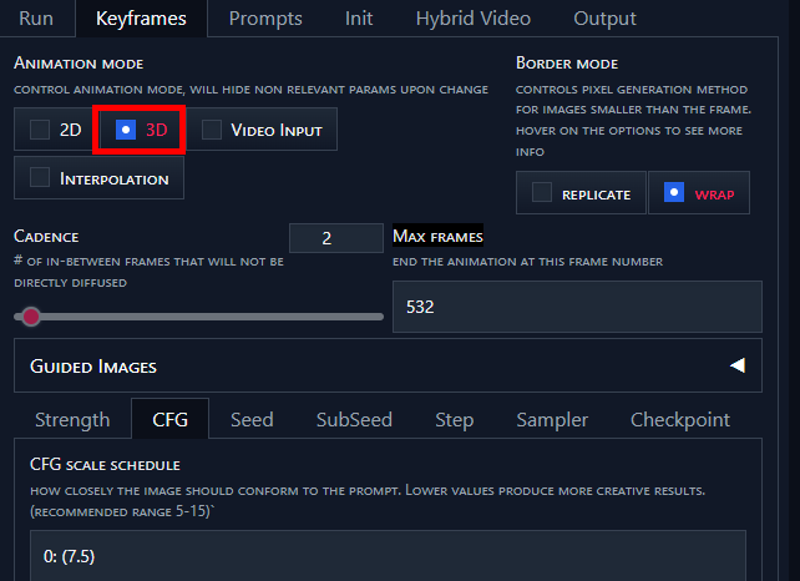
Alright take a breath, I know there's a lot of stuff going on here. Where it says Animation Mode, I believe 2D will be selected for you automatically. This will be one of the only setting we'll change, just because 3D animation is WAY cooler, so select the 3D radio bubble.
Cadence determines how many frames are rendered in between each diffusion. So a cadence of 2, which is what we can use for our animation, means that every other frame is diffused. Eventually you can play around with this number in relation to your FPS, as that's what controls the "smoothness" of the animation.
Max Frames is the length of the animation, which we can leave default. Below are your render paramters, where you can put either values or scheduled values for Strength, CFG, Seed, etc. Again we can leave all of these default values. Below are the animation properties for Motion, Noice, Coherence, etc. Feel free to check out what parameters are available to you and their descriptions, but we'll save those for later too.
Prompts Tab
Here is were you will enter in the prompt schedule for the animation. You're given 3 boxes, the top is for the prompt schedule itself, which must be in valid JSON format, as the default example demonstrates. Below are you global prompts, which will be applied before and after each individual prompt at render (Positive at the beginning, negative at the end). You can leave the default prompts here as well, but nobody will get hurt if you feel like tossin' a little flavor in there.
Output Tab
Since the Init and Hybrid Video tabs don't apply to our needs, we can jump right on down to Output. An important thing to remember here (as well as with your dimensions from the run tab) is that you want to render as slow and as small as you need to, and then upscale/interpolate AFTER. Otherwise you'll be stuck with 6hr renders for 1000 frames. Personally I render in something like 768x512 at 24fps, interpolate to 28fps, and upscale to 1536x1024. For out example you can leave the 15fps if you'd like. Below that, you can choose whether you want to keep the frames after the render, automatically upscale, automatically interpolate, etc. We can ignore this for now as well, although personally I have the images deleted one the render is done. The animations take up plenty room on their own!Now is where the magic happens, as it's time to do our click. Press the giant button to the right that says "GENERATE" on it, and boom. After a bit of loading, you should see the initial frame of your animation rendering in the preview (granted you have previewing on in the settings). During the render, the frames will be created in the img2img output folder in the a11 directory, according to whatever you set as the batch name in the Run rab. Once completed, this is where the animation itself will be placed after stitching the frames. And there you have it, your first animation! I don't care what everyone says about you, I knew you could do it all along! Next comes making changes to the animation and seeing what they do, until you've got enough of a handle on it to create things on purpose. In the following tutorials we will get into things like generating all of your property schedules, like prompts or 3D motion params, with AI, and also how to map animation properties around audio so that you can sync to music. Hope to see you there!
