Do you want to be able to have generative AI models produce nearly anything in exchange for a little extra effort? Do all of the different options seem bewilderingly complex? Are your AI generated pieces boring and you'd like to spice them up?
Then this article is for you!
Note that an inpainting tool can replicate txt2img and img2img, and all three modes fill different roles. You should always use whatever tools work best for you, the point I'm going to make here is that these tools (txt2img, img2img, inpainting, basic image editing, and model training) are the most fundamental and everything else is a bonus. If you master these tools, you'll master generative art.
This article is part of a series and it's more about the big picture. I'll link the practical recipe article here after I write it, but you really should read this article to understand what's going on.
I use Automatic1111, Krita, and kohya_ss for image generation, image editing, and (LoRA) training respectively. I recommend all three of these tools, and all three are free and open source, but use what works for you. You'll need a decent GPU, though note that continuing work (such as reForge) has reduced the hardware requirements dramatically. I recommend reForge over vanilla Automatic1111 nowadays, regardless of the GPU resources available to you, and if you have lower GPU specs reForge may open up the possibility of local generation to you for the first time.
I'll also use ComfyUI to generate the previews of intermediate steps. ComfyUI is more powerful than Automatic1111 but I prefer the Automatic1111 UI for day to day use.
The Black Box View
First, we need to talk about a couple of technical details that underpin these methods.
You may have heard of AI models referred to as a "black box", this just means that even the software developers that designed these models don't understand every detail of how they work. We can treat any system as a black box, even if it is known how it works, we just have to decide where to put the box.
Lets start by treating the whole system as a black box to get a big picture view. At the highest level what is a generative AI model doing? Even if we don't know what's going on inside we do know what's going in (inputs) and coming out (outputs).
There are three big inputs and one output:
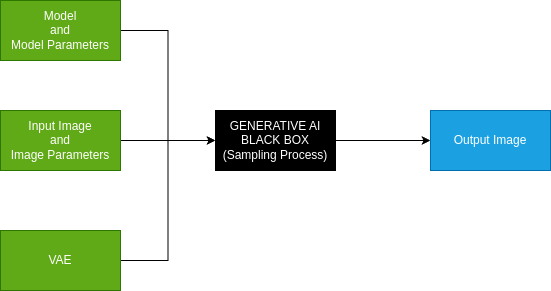
These inputs are the same regardless of how you're using generative AI. As we'll get to later, txt2img has a default image since the user isn't providing it.
The VAE
I'm going to start with the VAE because it's not the focus of this article. The VAE is simply a bridge between the other two inputs, it converts a pixel-based image into a (lower resolution) latent image format that the model works with and back again. VAEs have a lot in common with upscalers in that they're doing a fairly mechanical process and you can make a good general purpose VAE, but you can also specialize them somewhat to perform better on specific types of images like illustrations or photos. Unlike upscalers, which convert from one pixel-based image to another, VAEs are model architecture dependent and you'll need one for each model architecture you use (ex. SD1.5 and SDXL VAEs are incompatible). However, they are not model-specific and can be used across an entire architecture (ex. SDXL, Pony, and Illustrious can all use the same VAEs, as well as all the various finetunes).
Generally speaking, you can find a good VAE or small set of VAEs and use them all the time. The standard VAEs that come with the model architecture are fine. A VAE is usually included with the model file and it may have been corrupted by poor model training, so watch out for that, it usually results in weird, washed out colors or burn effects. You can tell your software which VAE to use.
On The VAE Resolution Reduction Issue
Before I move on, I want to underscore the fact that VAEs substantially reduce the effective resolution of the image. This is the main reason why generative AI models struggle with very fine details (ex. hands, small facial details), because it is not seeing the full details of these features, but the VAE is also essential for model performance. Just keep in mind that the model will not see the same level of detail that you do at a given resolution.
There's two solutions to this issue, you can use even higher resolutions or you can zoom into regions to make the fine details into medium-scale details. Both of these techniques apply to both image generation and model/LoRA training, though how they work is slightly different in the two contexts.
Using a higher resolution is pretty straightforward in both cases, but going too far will cause poor performance because (at least for Stable Diffusion) the base models are tuned to specific resolutions. For Stable Diffusion models I recommend only going around 1.5x larger than their natural resolution (measured by pixel count). This also uses more resources in both cases, so may not be possible depending on your GPU specs. If you are training, I strongly recommend including a second standard resolution copy of each high resolution image in your training dataset with identical captioning for best results (resolution augmentation/invariance, the same captioning should produce the same result at different resolutions).
To zoom in on an area to add detail, in the case of generating an image use inpainting with the "only masked" region selected and use a standard resolution (the result will be scaled to your current working image). This is a powerful technique, but your model needs to support this to get the best results, though you can use most models/prompts at lower denoising strength. We'll revisit this technique later in the article. Also, if you are using Automatic1111 then you can automate this process using the adetailer plugin, but this is not an essential tool.
During training, you can provide cropped, high resolution images of specific details, ideally with a trigger word (ex. "close up", "hand focus") that allows you to tell the model you are zooming in to do detail work, which you can then use during inpainting. I've also found models perform better in general with this additional high resolution data since it learns what the full resolution details look like and this transfers to generations with less detail on the region, but since the VAE is doing the final steps it can only learn so much.
Don't be afraid to upscale images during training, after all the VAE is used in the training process too and will reduce the effective training resolution, so you're allowing your model to see something closer to the full image by upscaling it (at least, assuming you do a decent job upscaling your image, you should select your upscaler carefully and verify the results).
The Model
The next input is the model and the model parameters, most importantly including the prompt.
The model is a massive collection of numbers that encode a ton of information. It is by far the largest input, weighing in at multiple GB in size. However, it won't put its full power to bear on any given generation because most of the model's information is on stuff that you aren't using at any given time.
For instance, the base SDXL model and close finetunes know how to generate a fairly accurate image of a 747-400 aircraft (down to the specific model):
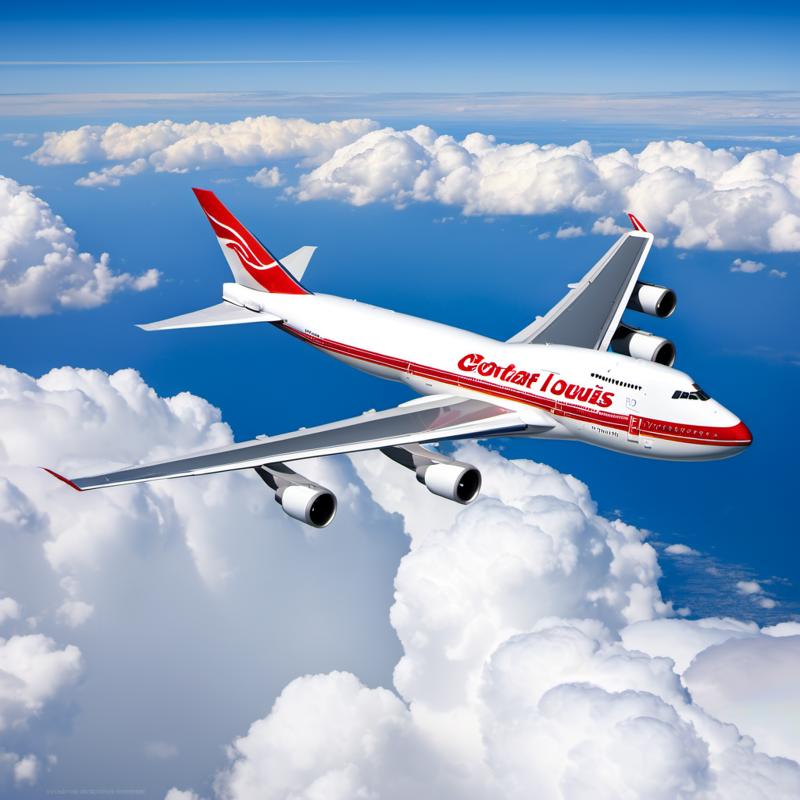
This extremely specific model capability will almost never come up, but the model contains it within its vast storehouse of general information.
Also, since the model packs so much information into a limited space by reusing the same weights across several concepts, it likely can't use more than a fraction of the total data stored within it at any given time. This is fine though, the important thing is that the information is available when needed, not that it be used all the time.
To determine which parts of the model to use, you need to use the prompt to control it. The longer your prompt and more trained captions you use, the more of your model you will be using, increasing the influence of the model. I've written a longer article on prompting/captions so go read that for more details on prompting.
A key takeaway from that article relevant to this article is that the prompt is a pretty weak input. Even a detailed prompt is perhaps a few hundred bytes up to a few kilobytes, which is then compressed back down into a fixed-size guidance vector for the model. It's an important input because it leverages the immense power of your model, but you really don't have all that much control over what it produces. You should embrace this lack of control, because exerting control through the latent image and the model (via training) will give you much better results, which is what this article is about.
Quick side note: The prompting control of a model like Flux is much better than Stable Diffusion, but it doesn't really change the fundamental situation. Prompts are inherently information poor and rely on the model's training to produce accurate results. Also, the pursuit of greater general prompt control is driving models towards massive resource consumption. You can get good results even with relatively small models if they are trained on what you need.
Changing the model to suit your needs (via training) is an essential tool, which I'll cover more near the end of this article, but it's definitely a more difficult process than editing an image, so it's usually easier to just change the input image than the model. Model training is most useful either to consistently produce some desired output (ex. a consistent character) or when the model simply can't produce what you need and you find yourself fighting against it.
Another often overlooked downside is that every model parameter (including the prompt) is model-specific. This means that you'll have to build up model-specific knowledge for each model you use, and everything might be different when you go to another model. This is a major downside, which contrasts with the model-independent image input.
Other model parameters (like CFG Scale) are interesting and often impactful, but they contain very little information and their impact is relatively simple, basically a dial that turns up and down a specific effect. I won't go into them in this article, there's plenty of good information on them already and you should experiment with them to see what they do.
As a rule of thumb you should always select the best model you have the resources to run. Since models require model-specific knowledge, you'll want to select a model family that you can train as your standard and find specific finetunes for specific roles. That said, as we'll get to later, you can use other models for one-off purposes, so you could use Flux just to handle text even if you're mostly using SDXL models, or if you're mostly using Pony you can use a regular SDXL finetune to generate specific objects that Pony has forgotten.
LoRAs
An important side note about models is that LoRAs (and all the related technologies) are just further model training that have been compressed and are made available as a difference patch. If you take the exact base model the LoRA was trained on and add the LoRA at a 1.0 weight, then you'll get the further trained model at the end of the LoRA's training process.
So when you use a LoRA you're just adding it onto your base model. That's it. Doing this technically makes the model into a different model, but most LoRAs are not heavily trained so retain heavy compatibility with their parent model and related finetunes.
LoRAs are a crucial technology for generative art because they allow further training to be cheap and easy, as well as allowing for model composition. If you haven't done any model training before, you should start with LoRAs because they have lower resource requirements and are good enough for most people's needs.
The Image
The last input is the (latent) image and the image parameters. The image the natural language of image models and is an extremely powerful input.
The main input parameters are the input image, the image height and width, and the denoising strength (100% for txt2img).
Even if you are using txt2img, you are using an input image, it's this one:
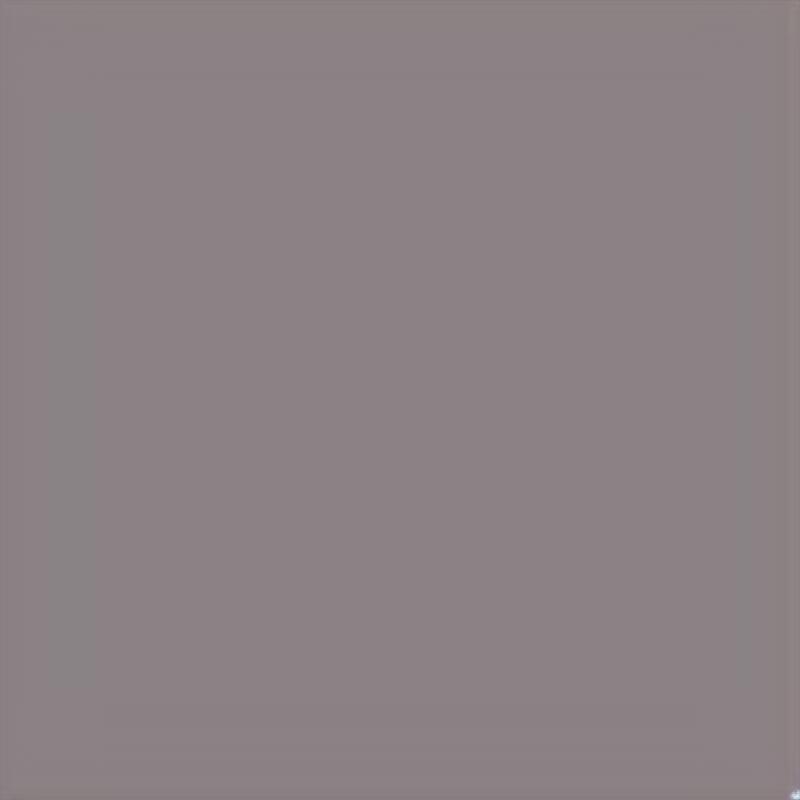
This gray rectangle is the soul of your txt2img generations and is the primary reason they're often described as boring.
Don't get me wrong, there are good reasons for this gray rectangle to be an excellent choice for this purpose. It's mathematically perfectly balanced and will not bias your generation in any way when the 100% noise of a denoising strength of 1.0 is added to it. It makes txt2img great for model/prompt calibration, since you can see the precise model bias. However, if you are only making calibration images then you're really limiting yourself.
img2img takes an arbitrary input image and a denoising strength. Inpainting also takes in a mask to preserve parts of the image and a couple of additional inpainting parameters. I'll cover these in more detail later. You can replicate all three modes with inpainting (cover the entire image with the mask for img2img and use the gray rectangle at 100% denoising strength for txt2img) so txt2img and img2img are just convenient presets.
The image is a very powerful input, a 1024x1024 image has 3MB of information compared to perhaps 500 bytes of data in a long, single chunk prompt, so in this example there is approximately 6000 times more data in the input image than the input prompt. A picture truly is worth a thousand words. That said, the input image does not actually get to exert its full influence because of the need to introduce noise for a generative model to work.
How much information remains depends on the denoising strength, which gives the percentage of noise to add to the input image. At a low denoising strength (little noise added) the image can be a completely overpowering input, overriding all the others completely. At a high enough denoising strength, the input image can be barely any influence at all. Finding the appropriate balance between image and model for your needs is a key technique for generative art.
Using the image to control your generations is pretty much all upsides:
The image is arbitrarily powerful, so you can balance it carefully to get the results you want
An image is the output, so you can chain the output image into the input of another generation run, opening up all sorts of techniques
The image is model independent, so you can freely port it between different models/LoRAs, prompts, parameters, etc. gaining the benefits of each without having to get them to work together
The image can be edited by traditional image editing software, so it's easy to make direct changes
Basic drawing and image editing is a skill available even to children, so even if you "can't draw" you can still do the kind of stuff you'll need, and you can learn more as you go
You'll be speaking to the model in the language of images, which it understands more deeply than text prompts
A picture is worth a thousand words, a simple sketch is often far more expressive than even a detailed prompt
A main point of this article is that the image is the most valuable input and you should be using the image, and if you aren't then you're throwing away most of the potential value you could be getting from generative art.
That said, I won't go as far as saying you ONLY need the image. To get truly good results you need your image and model to work together, and if you find yourself fighting with your model you aren't benefiting from it, hence the need for some prompting knowledge (covered in detail in the other article) and the inclusion of model (LoRA) training as one of the three things you need.
I'm just saying that you'll gain far more benefit from improving your image-oriented skills than your prompt engineering skills. A quick sketch or some quick and dirty photobashing will serve you far better than spending time crafting the perfect prompt.
Bringing It All Together
These inputs, the model & prompt, the image, and the VAE, come together to produce a new output image derived from the mixture of all three.
At this point, it's important to review why we're doing this process, what's the point of all this?
Well, if you already had the image you wanted then there wouldn't be much point in running this, you'd already have the image and wouldn't need to run anything.
Therefore, the point here is to transform your current (input) image into another (output) image using your model (controlled by the prompt and with the VAE playing a supporting role). Perhaps your current image is that gray txt2img rectangle and you want something on that blank canvas. Perhaps you want your current image to be different in some way: a different style, correcting an error, adding something new, etc. The point is that your image isn't what you want it to be, so you are transforming it, regardless of whether the change is dramatic or subtle.
Image Chaining
Since the image is both input and output, you can chain them together and each image represents a potential checkpoint in the wider process of transformation.
Perhaps you can't get the final result you want in one generation run, but if you produce a new image that's closer to what you want then you can hold onto that new image and preserve that progress towards your goal. Then over a chain of several image generation runs, which may use different models, prompts, inpainting masks, and other parameters, you can reach your goal and produce what you want.
You can also go back to any existing checkpoint if you're dissatisfied with the results or just want to explore a different path.
You can also use any other image transforming process to augment generative AI, such as direct image editing or using standalone upscaler models. As powerful as generative AI is, it's not always the best approach to making a transformation. You should always use the best tool for the job, whether it's AI or a traditional editing tool.
Image Chain Guidance
When chaining images, you shouldn't always take the first result. It often happens that the first image you generate is good enough, but if you generate several examples and pick the best from the bunch then you can get much better results, and it'll give you more choice in the direction you take. You can avoid problems you'd otherwise have to fix simply by not selecting them out of a lineup.
As a rule of thumb, you should usually be able to get a decent result within about 4 generation attempts. If it takes more than 12 attempts to get a decent result, it's usually better to change something about your inputs, usually either editing the image or changing the prompt. You can always take more rolls of the dice, and the more you take the more likely you'll get even better results, but it's usually better to take a decent result and refine from there than to keep trying for perfect result.
I usually generate 4 images at a time and use the best out of 4, or if I'm dissatisfied with all of them then repeat with another 4 (or go straight to tinkering with the inputs).
One more important note at this juncture is that color is one of the most crucial aspects of evaluating an effective input image, and getting the right colors will help more than just about anything else. For instance, my dragon character has blue skin and given an input image with normal human skin colors the model struggles to generate this character accurately. As I'll cover later, it's often a good move to sketch in the right colors even if it's very rough. That said, the model understands image content to some extent and can pick up that a visible subject is, say, a human and transform their colors based on a prompt (if a high enough denoising strength is used).
Example
Let's jump into it and do an example. Each image has the metadata attached if you'd like to see the specific details. Also keep in mind that I made a batch of 4 each time and am only showing the best of 4 (except when I do a manual process or upscale).
Let's make an image of a detailed cartoon woman walking down a path at a park.
I'm going to start with the excellent Pony Realism model to make the composition more realistic before converting it to a cartoon. We'll start with txt2img, so the first image in the chain is the gray square, which produces this:
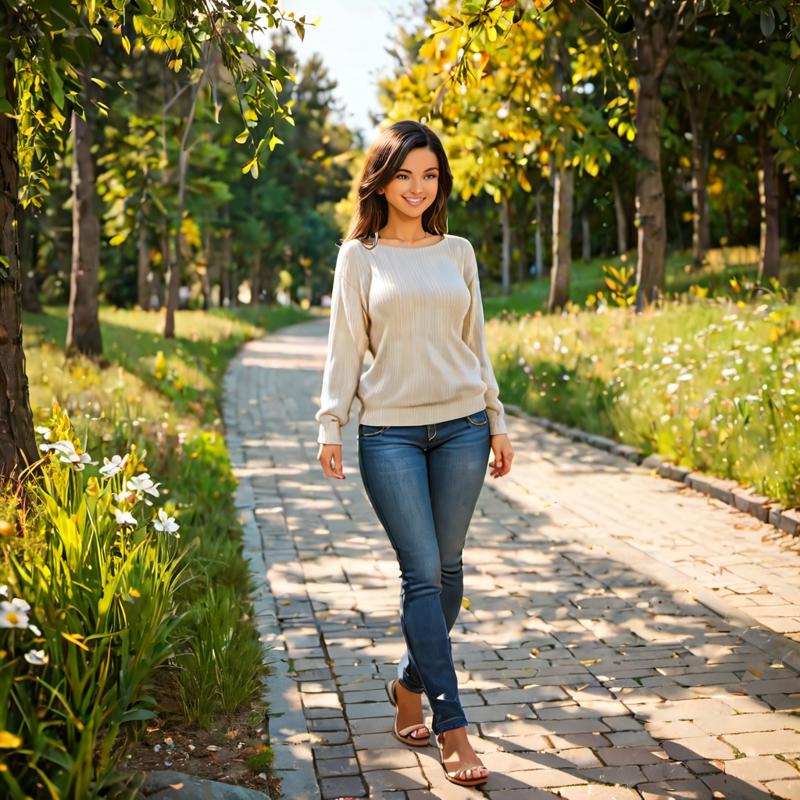
Let's add a black handbag, I sketched one in manually:
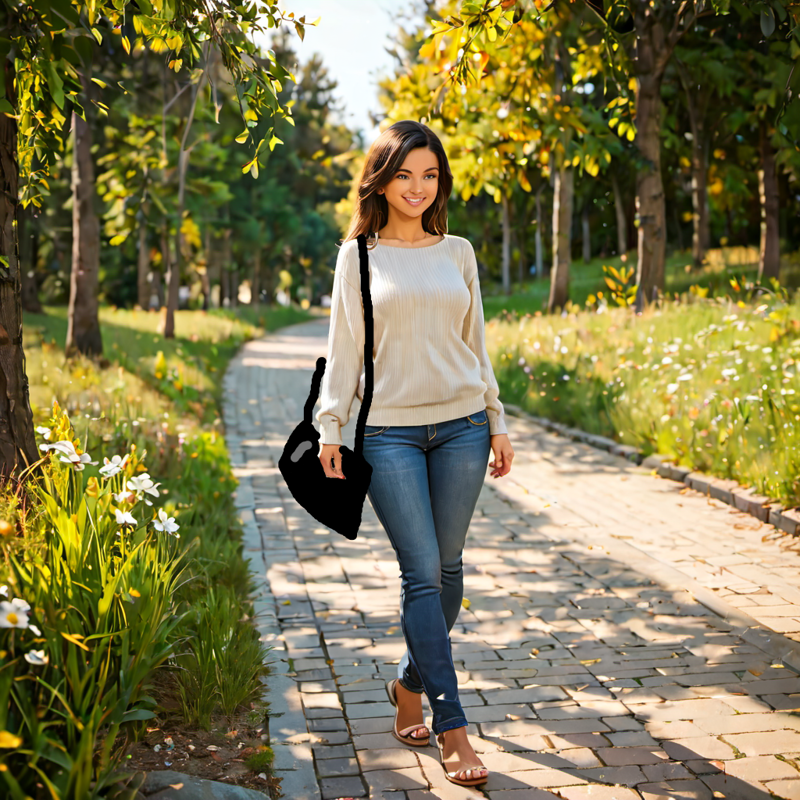
Now lets make the bag realistic (img2img at 0.6 denoising strength, added bag and strap to captioning):
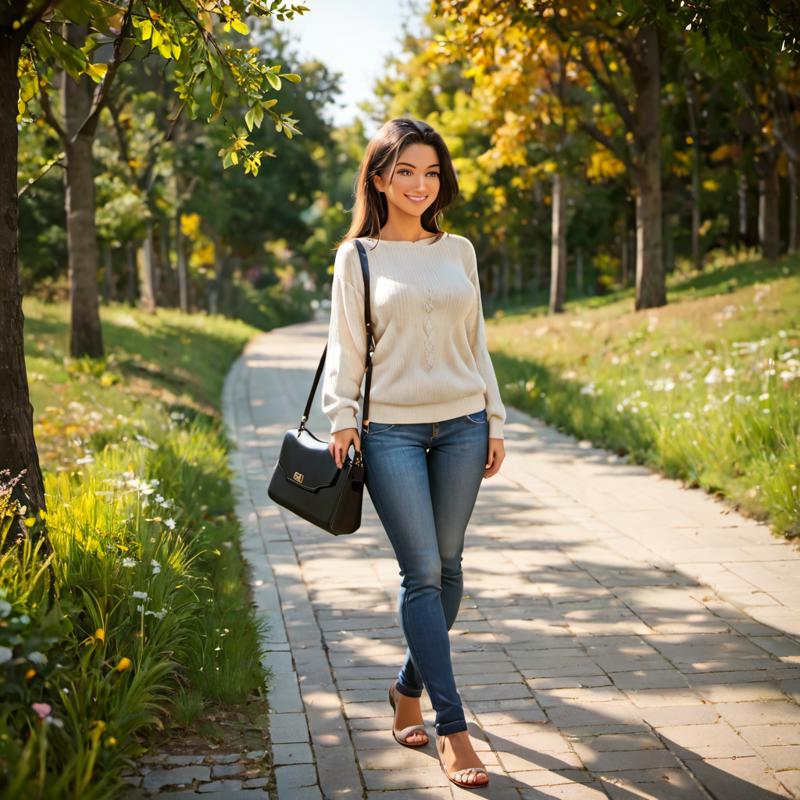
Next lets change to RandomCartoon to make this into a cartoon (img2img at denoising strength 0.5):
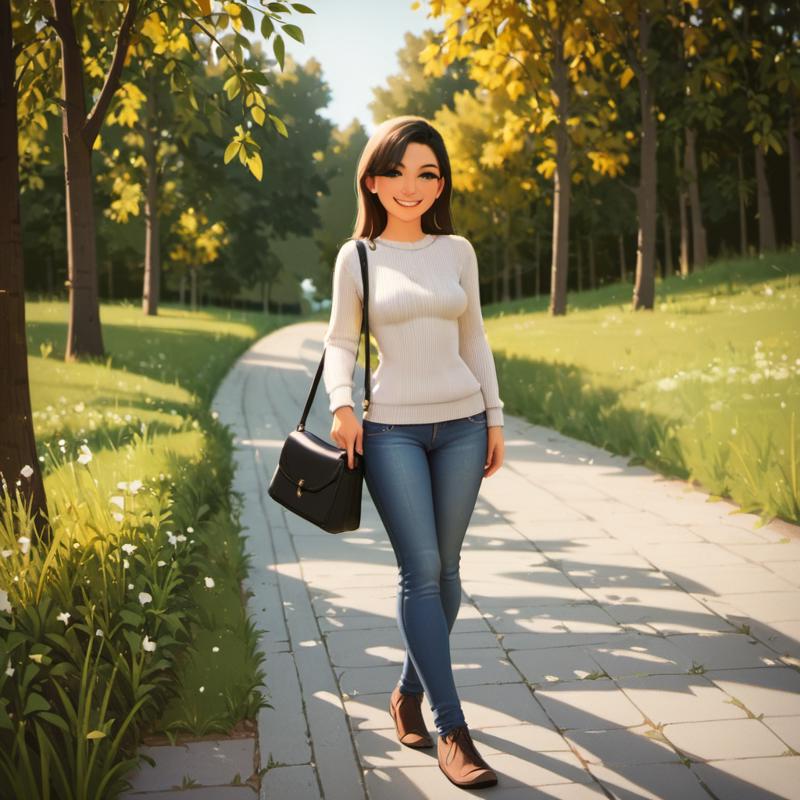
I'm happy with the overall composition, so let's upscale by 1.5x using R-ESRGAN 4x+ Anime6B which makes it larger and reduces realistic detail further:
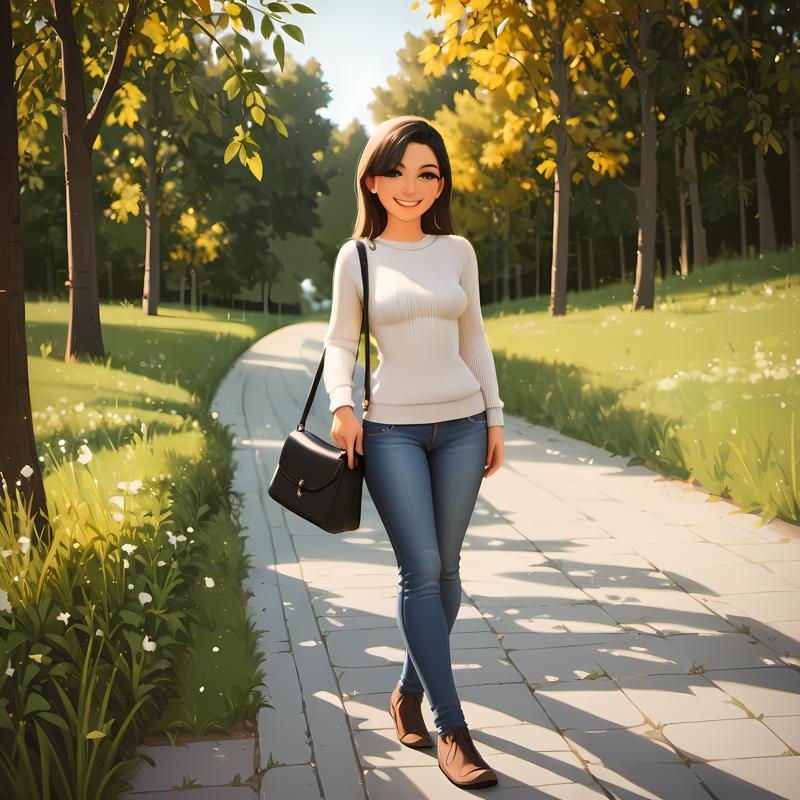
Next we'll do a pass at the new higher resolution to add more cartoon-like detail (img2img at denoising strength 0.5):
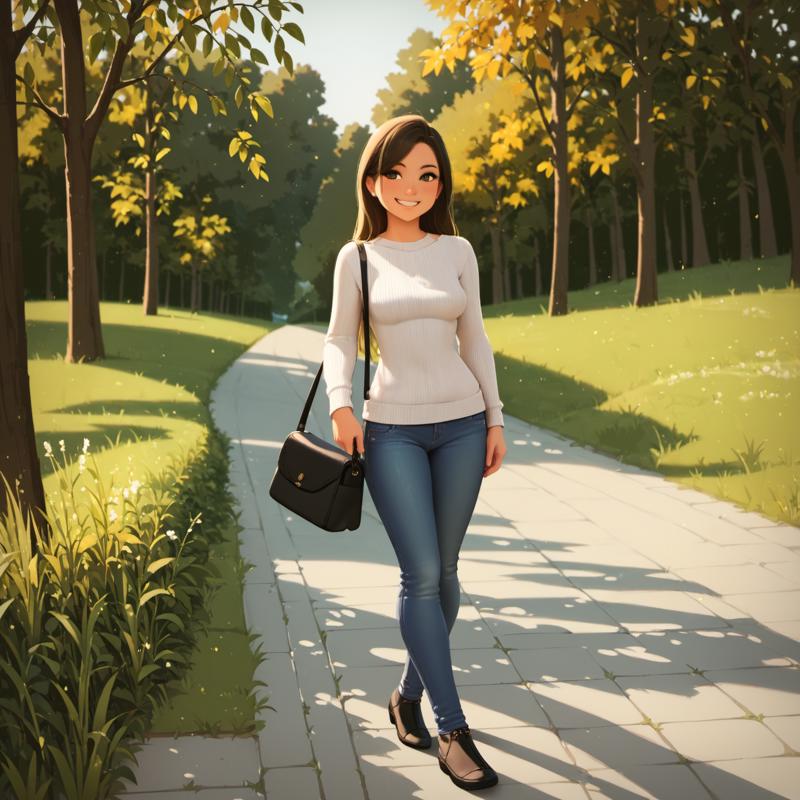
That's good enough except some details, so I'll fix the strap and her hand, staring by manually sketching in the missing part of the strap:
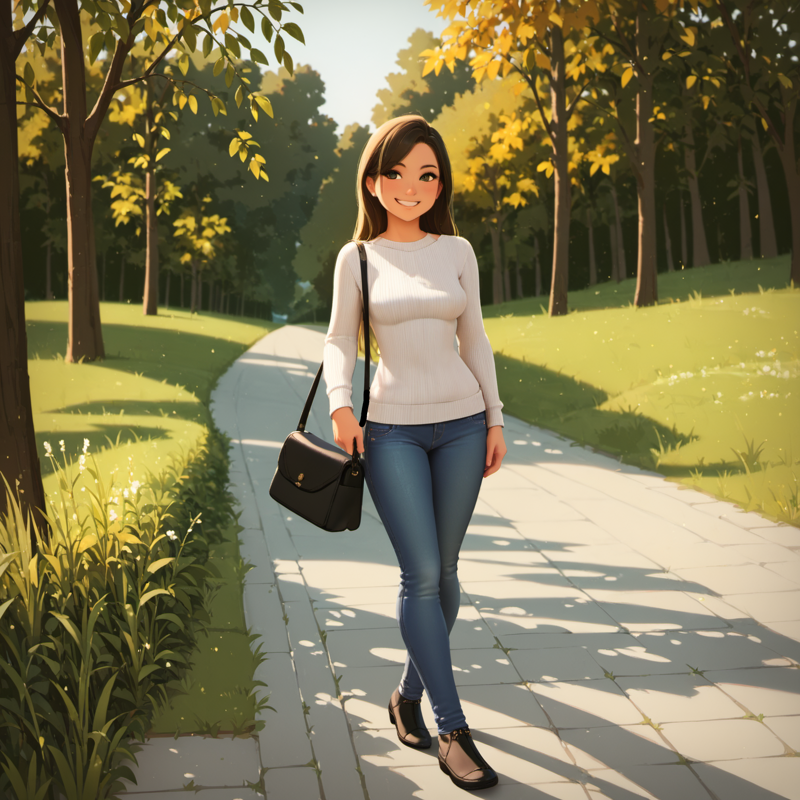
Next we inpaint the strap and her hand with a hand-specific prompt (inpainting at 0.5 denoising strength, 1536x1536 resolution):
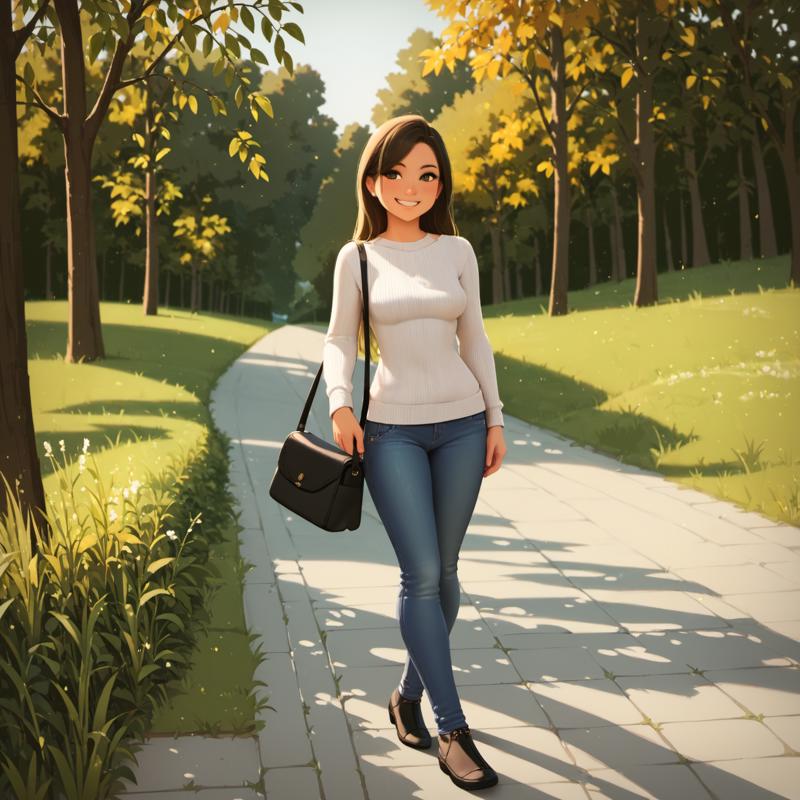
That could be good enough for a final result, but I'm going to inpaint her face to add more detail with a face-specific prompt (inpainting at 0.5 denoising strength, 1536x1536 resolution):
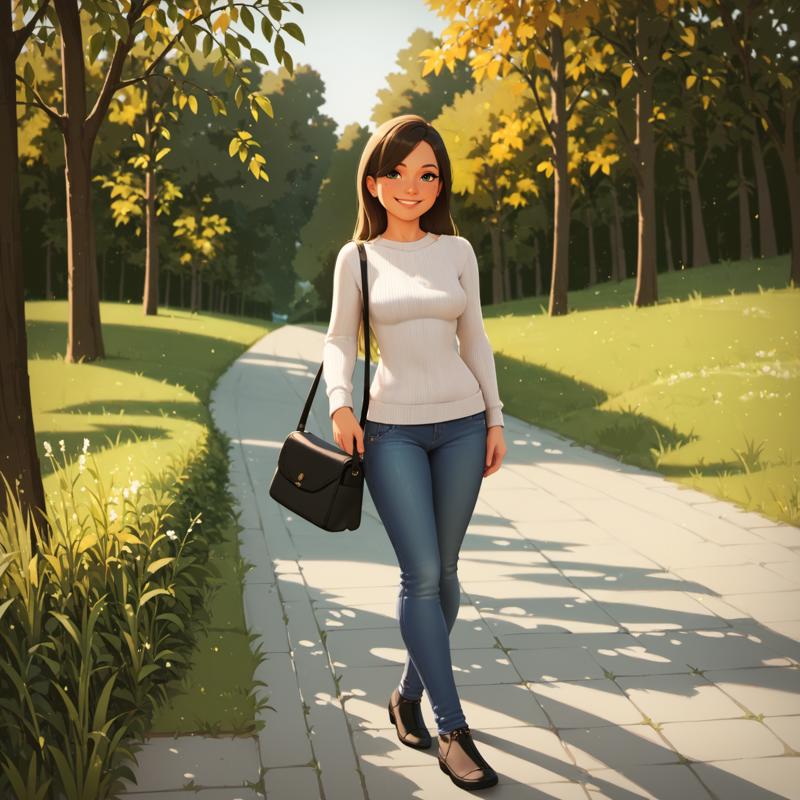
There we go, that's a decent finished piece so I published it here.
Sampling
Hopefully at this point I've sold you on the fundamental importance of using the input image and chaining together a series image generations. Let's get into some more detail on how to use this effectively, which requires one last bit of technical background.
Thus far we've been looking at the generative AI sampling process as a complete black box, but to understand how to use the input image really effectively, we need to open the hood and look at a few more known architectural details.
The core process that animates the model and produces the output image from these inputs is called sampling (you might also hear it called "inference", which is a generic term that also covers this case, but I'm going to use sampling for this article).
The fundamental idea that led to generative AI was that we could train a deep learning neural network model by taking the "ground truth" of our training data images and progressively adding noise over several steps until there was no image left, and then have the model reverse that process, going from total noise to a finished image.
Sampling is the process of going from noise to image over a schedule of steps. These are controlled by some of the model parameters (or I guess more accurately sampling parameters):
The Sampling Method (a.k.a. The Sampler) - This determines the precise process used, with Euler being the mathematically obvious approach and other samplers being variations.
Samplers can be broadly classified into convergent (like Euler) that produce the same result each time, and ancestral/SDE which inject randomness during the process.
I prefer convergent samplers, which are readily repeatable and typically differ in their efficiency rather than being fundamentally different from one another, but this is a personal preference and isn't that important.
The Schedule Type - This determines the "shape" of the schedule, with uniform being a slow, linear approach that removes the same amount of noise at each step, and with others speeding up and slowing down at different steps.
The Sampling Steps - This determines the number of steps that will be taken. Note that this isn't automatically adjusted to fit when the sampling is done, so you'll have to find the ideal number of steps yourself. More steps usually means better quality but more compute time, with diminishing returns after a certain optimal point.
To give an idea of what this process looks like, here's some examples stopped at various steps in the sampling process. Be aware that these images show the result after being run through the VAE decoding, since we can't directly visualize the latent image.
First here's an example of a txt2img generation. It started from the gray square, then had pure noise added to it. After 1 step out of 30:
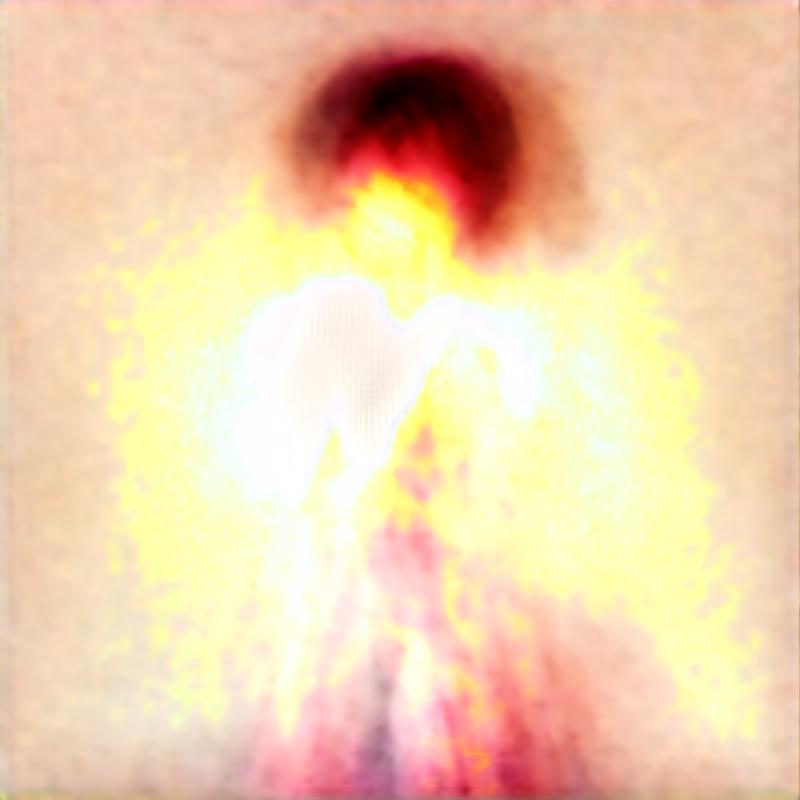
6 Steps out of 30:
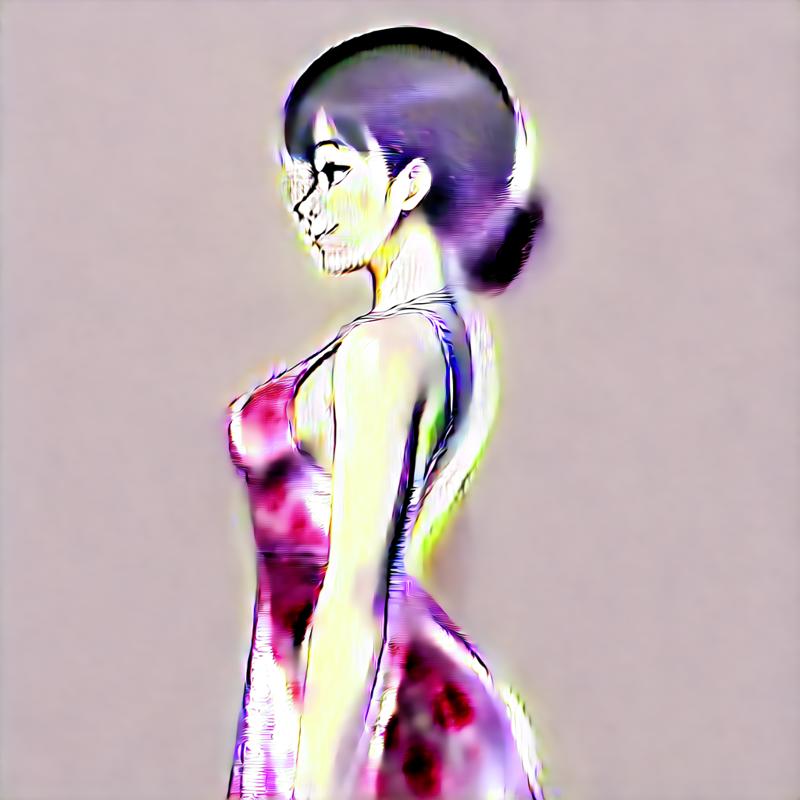
15 Steps out of 30:
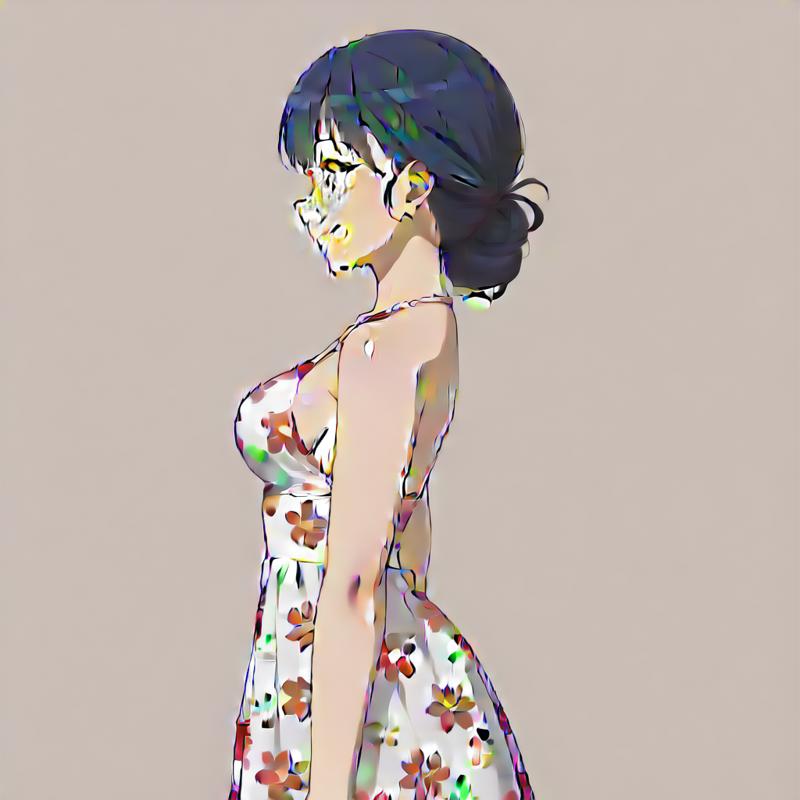
30 Steps out of 30 (Completed Image):
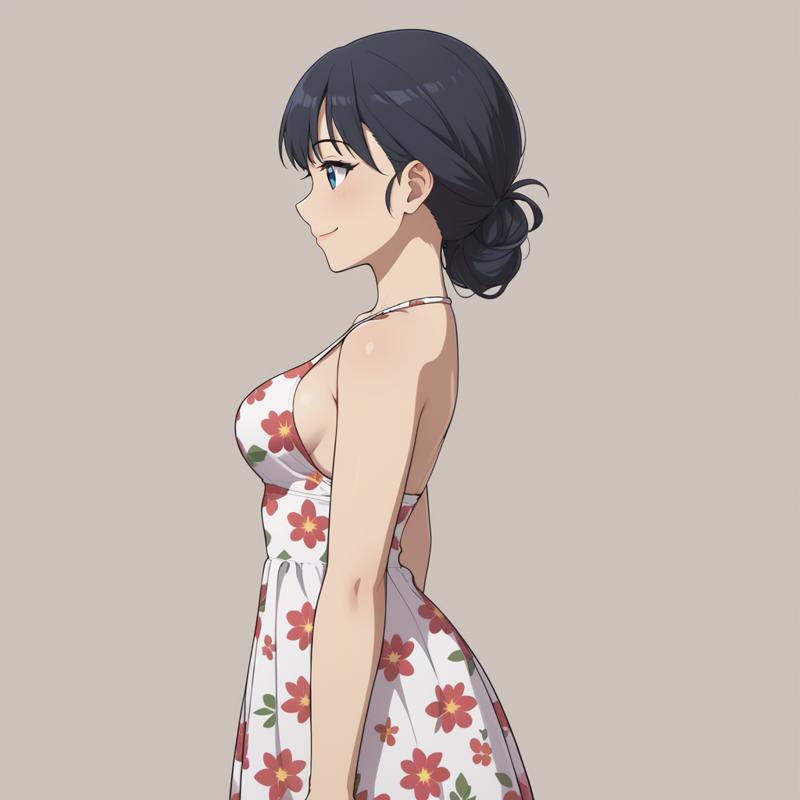
You can see that it quickly lays down the main composition and then works on progressively smaller and smaller details.
Denoising Strength
So, why do these details matter? Because the key denoising strength image parameter is intimately tied to the sampling steps and the exact effect you'll get is dependent on the sampler and schedule.
It turns out this stepping process is useful for controlling the resulting generation, because you can introduce any intermediate answer you want as long as you add an appropriate amount of noise and continue the process from there. img2img and inpainting allow you to do this and select the appropriate step (and noise) with the denoising strength.
Denoising strength ranges from 0% (0.0) up to 100% (1.0). It controls both the amount of noise added to the image and the step we start on. So for instance, a denoising strength of 80% (0.8) will add 80% noise to an image and start on the step 20% of the way through the process, so if we have 20 steps then it will skip the first 4 steps (20%) and complete the remaining 16 steps (80%).
0.8 Denoising Example
Here's an example, first we have the input image:
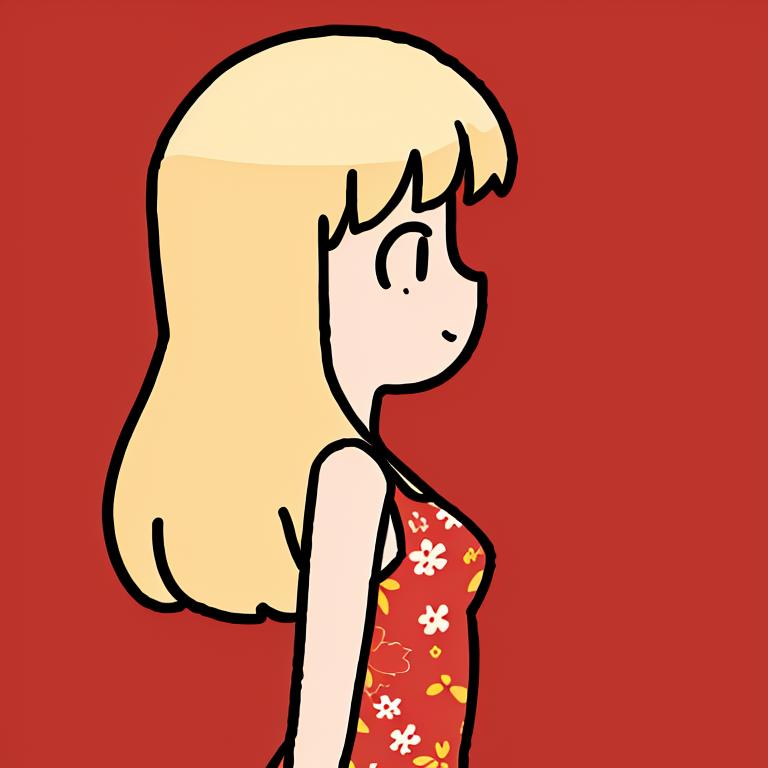
After 80% noise is added (0.8 denoising strength):
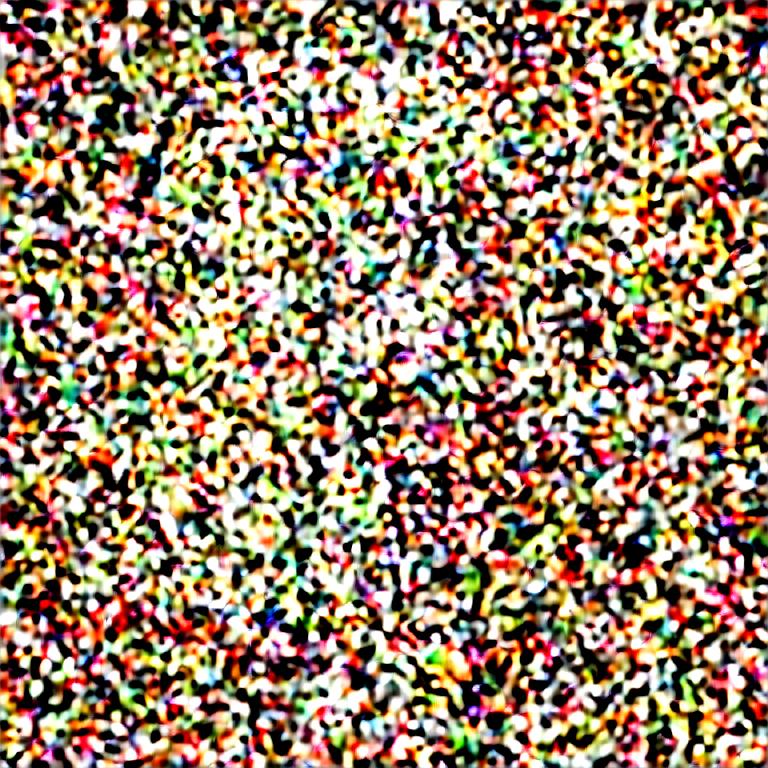
While the image is pretty messed up by this level of noise, if you zoom way out and look at a thumbnail you can faintly make out the original image...that is, if you know what you're looking for.
Here it is after just one step:
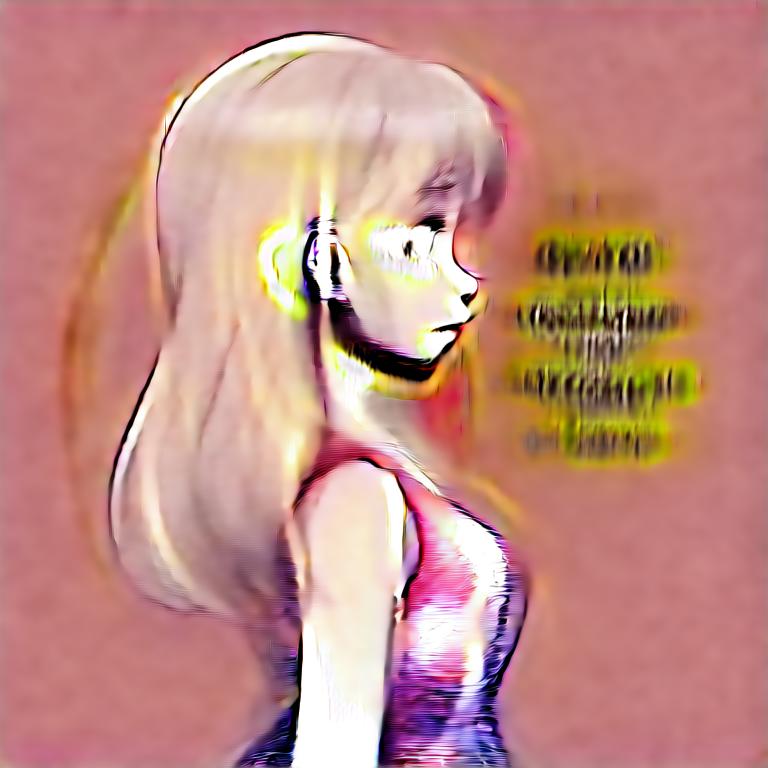
You can see that the basic structure of the image is already recovered, though there are definitely some substantial difference and there is the weird blob of text that wasn't in the original.
After one more step:
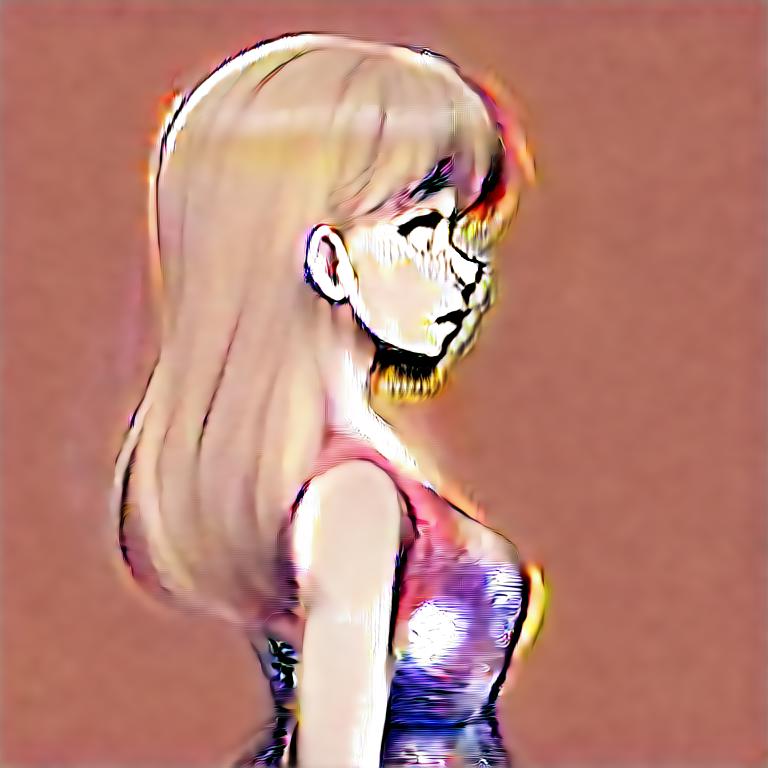
From here on out it converges pretty mundanely to the final result:
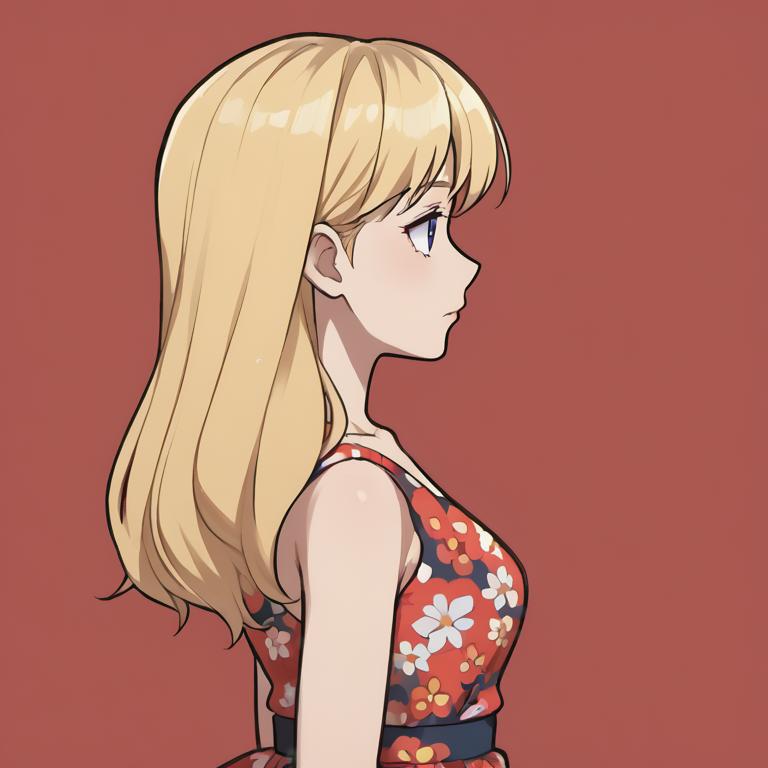
0.5 Denoising Example
Going back to the input image for another example:
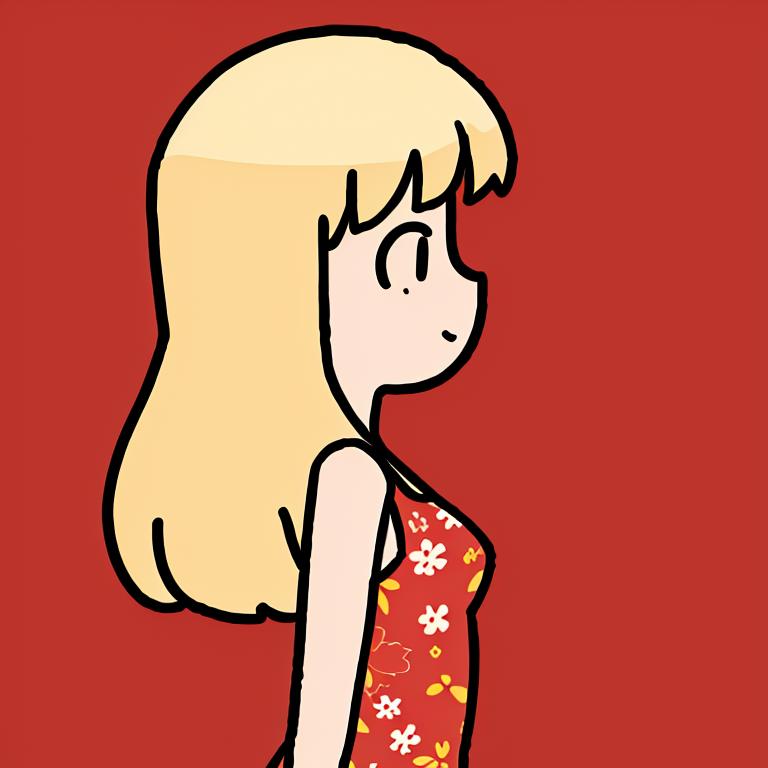
Here's what that looks like after 50% noise (0.5 denoising strength) has been added:
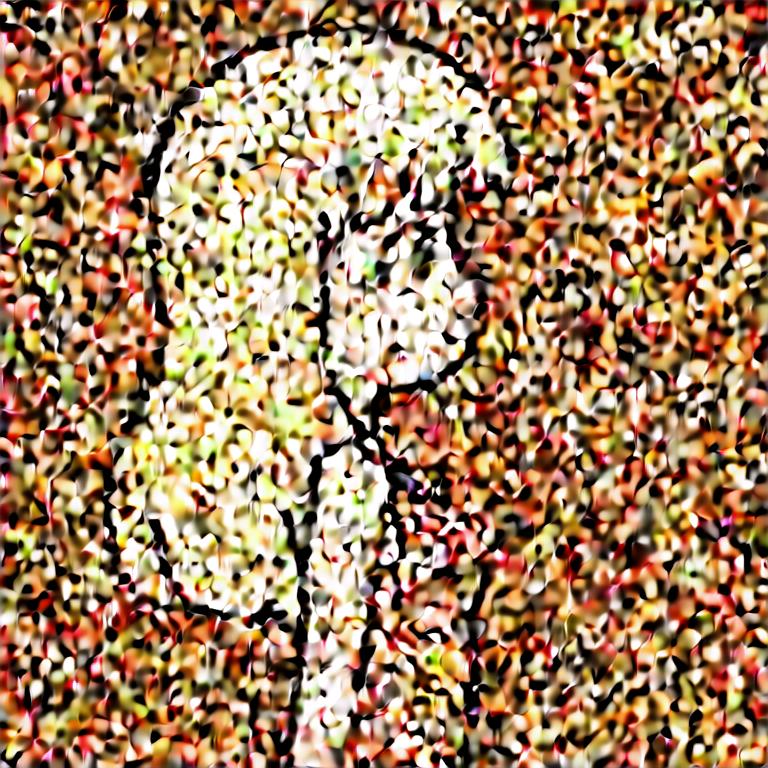
You can still clearly see the original image, even though the noise is pretty heavy.
Here's after one step:
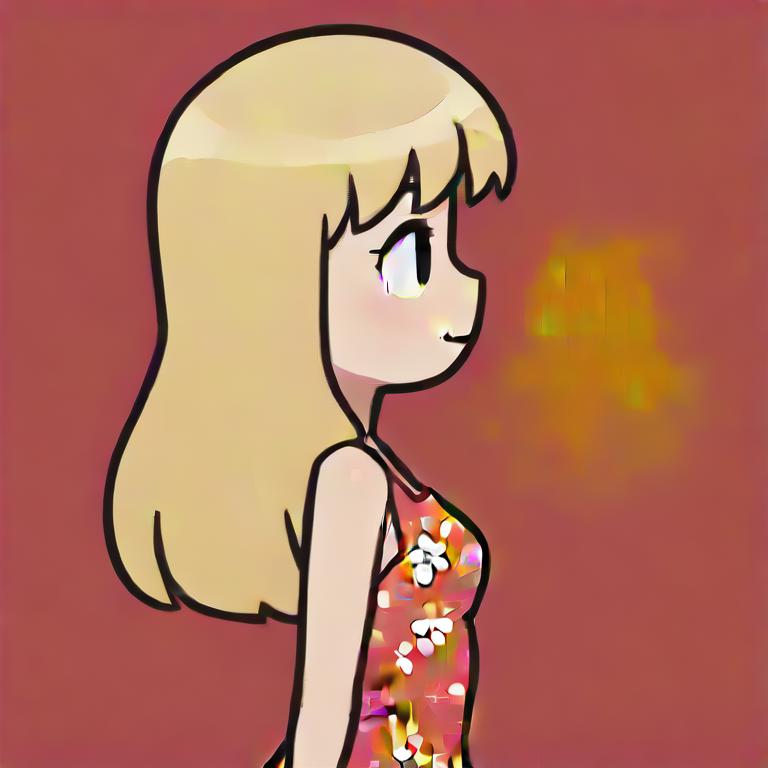
I find it interesting that the model REALLY wanted to put some text in there, but ultimately did not.
Here's the final result:
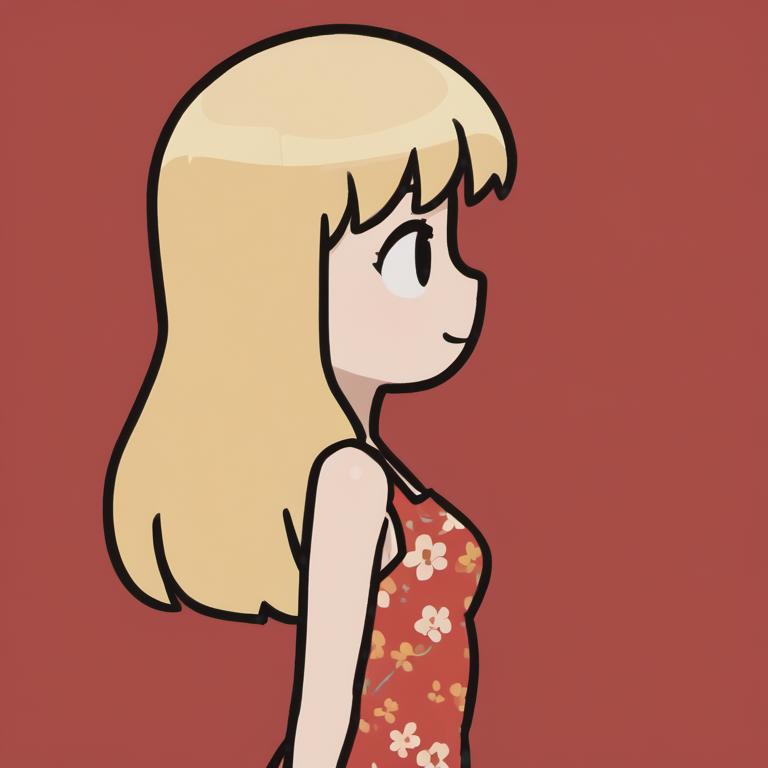
It's also important to note that despite the presentation as an arbitrary percentage, denoising strength is actually a discrete value. You are selecting a specific step and jump from one step to the next. Many other floating point parameters (ex. LoRA/prompt weights) are finely graded and can be pushed to extreme levels of delicate balancing points, but denoising strength is not. So if you are using 20 steps then you must go up by 5% (0.05) to get to the next step, and if you need a value in between these two you are out of luck (unless you increase the step count, but this is likely going to have a larger impact and is resource hungry).
Analogy 1: Artistic Freedom
A handy (but highly anthropomorphic) way to think of denoising strength is that it's the level of artistic freedom you're giving to the AI model when it's altering your image.
At 0% you give it zero freedom, so it'll hand you back the input image, so that's not very useful. At 100% you are giving it complete freedom, so it will disregard your input image and do what it wants (while still following your prompt).
Obviously, in order to get value out of your input image you want something between these two extremes. Unlike many parameters, there's not an ideal level of freedom to give the AI, because you need different levels for different purposes. If you want a drastic transformation with heavy input from well-trained model skills, then a high denoising strength is more appropriate. If you want a subtle transformation, then a low denoising strength is more appropriate.
At the end of the day, the most appropriate denoising strength for a specific run is heavily dependent on a lot of contextual factors, including the model and prompt, the input image, the desired output, and more. You'll need to practice with this and build an intuition for it, and you'll often find yourself tweaking this one parameter up and down even once you understand it well. It's an art.
Analogy 2: Model Power vs Image Information
If the "artistic freedom" analogy is too hand-wavy for you, I've got two more technical analogies with each shed some insight into what's going on. It's still an art, and you'll still have to build and use an intuitive sense of the correct value for a given purpose, but these additional analogies are at least informative and can help guide your intuition.
Each sampling step is inherently different from the others and the model is engaging different parts of its knowledge at each step.
This is a bold claim and is in no way built into the architecture of these models, it's a result of their training and part of the "black box" that we genuinely don't understand. So why am I claiming it confidently?
There's two ways to prove it: theoretically and experimentally.
Let's start with the theoretical rationale. Consider that the situations at the first and last step are incredibly different. The first step is entirely noise, there is no information in the image. What could the model possibly build on? The last step is almost no noise, and the model is awash in vast amounts of information about the image. As the model works by removing noise, it doesn't have very much power to make change but it has very detailed information about what's going on in the image to build upon. The mode of operation between these two situations couldn't be more different, and thus will operate differently between these two steps.
Really the situation at every step is different, as every step removes noise (and thus reduces model power) by definition, and in doing so every step adds image information, causing the two opposing forces to flip over the course of the process. While I'm sure there are commonalities between the operation of nearby steps, each step causes the model to act differently as the situation is now different.
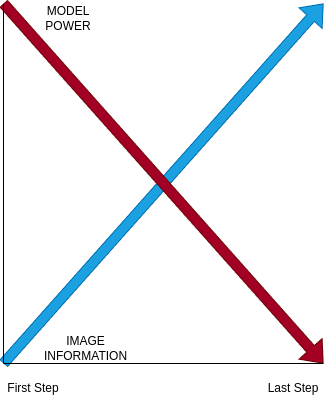
If you think about how the first few steps must operate, they have little to no information about the image, so they can only do one thing: INJECT BIAS. That's right, these steps are almost purely about bias injection, and so their value to the creative process is pretty low, right up there with the gray rectangle of txt2img. This realization led me to write my better randomness article, which advocates for skipping these steps even if you are using some other source of randomness.
You can see what I mean in the earlier example where I captured the first step of the process, here's the first five steps of that generation:
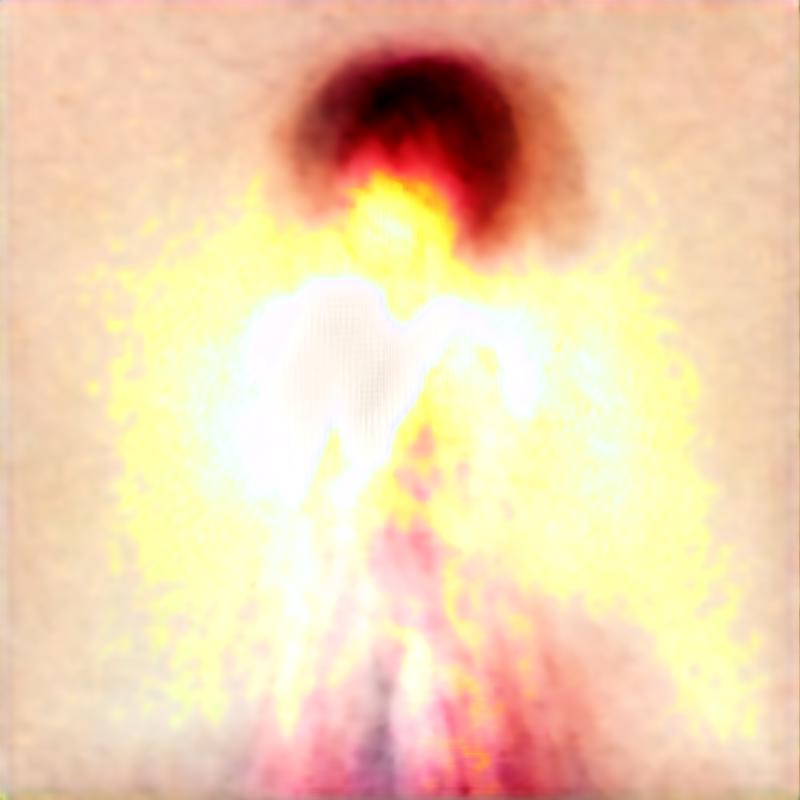
This first step in particular is really just putting down blobs of color where features that match the prompt are the most likely to appear. Her hair is a black blob at head height, her dress is a wide blotch near the bottom. The rest of it is just various light colors in the middle, since there's so many possibilities at this step.
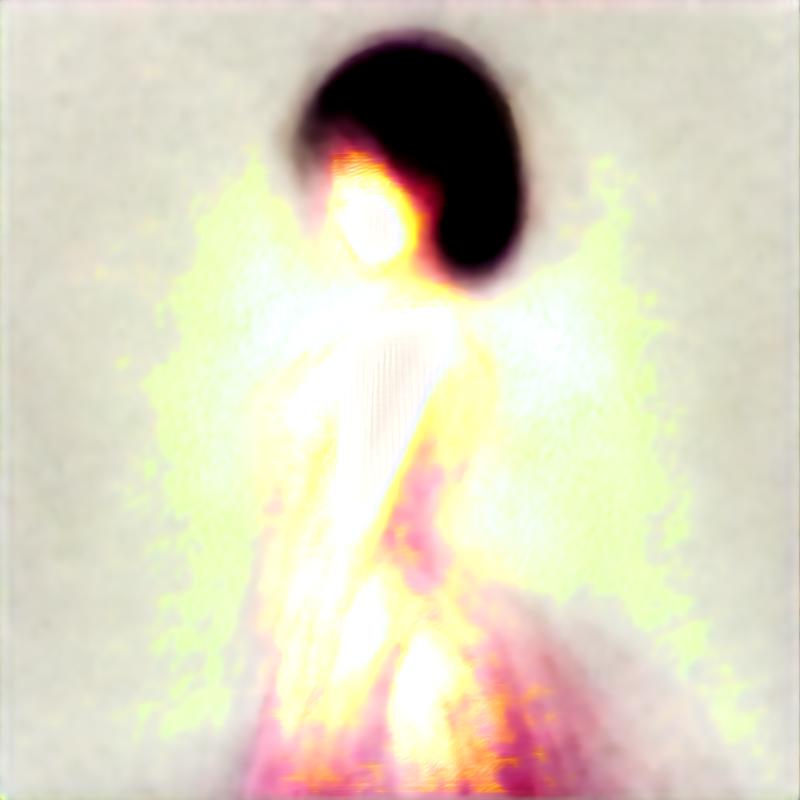
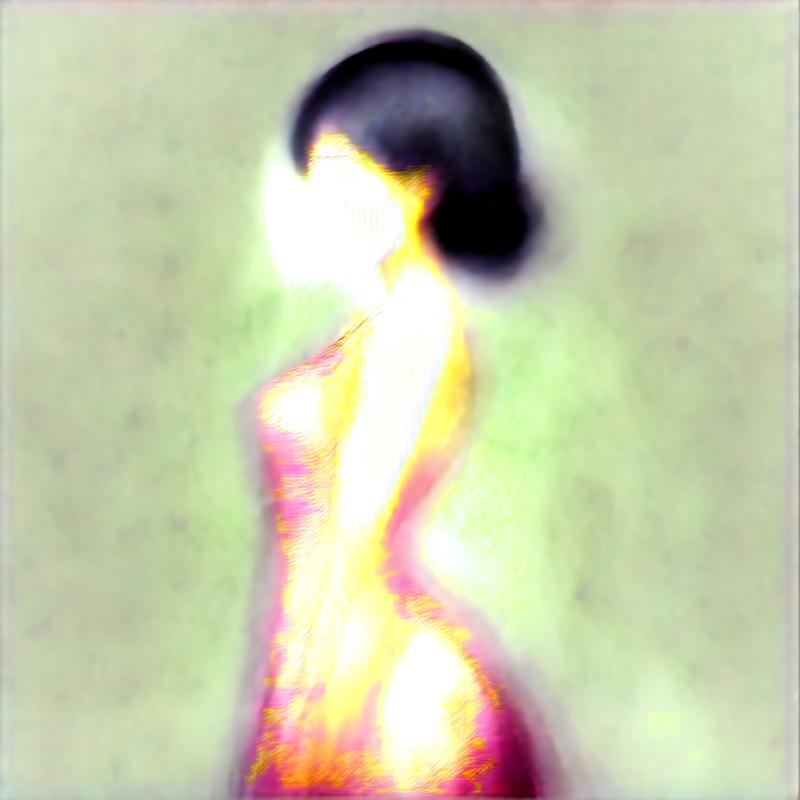
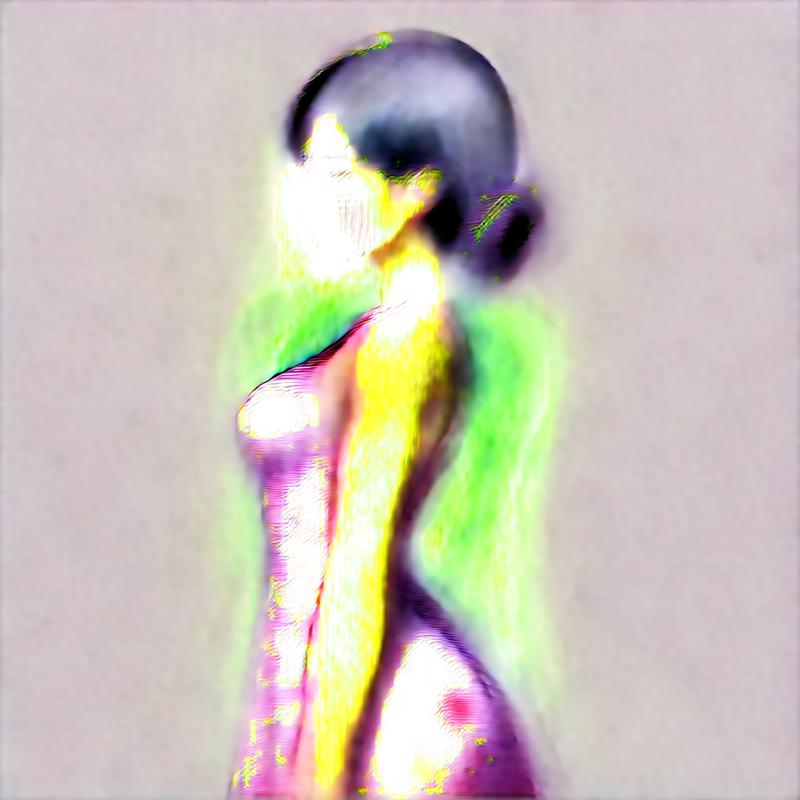
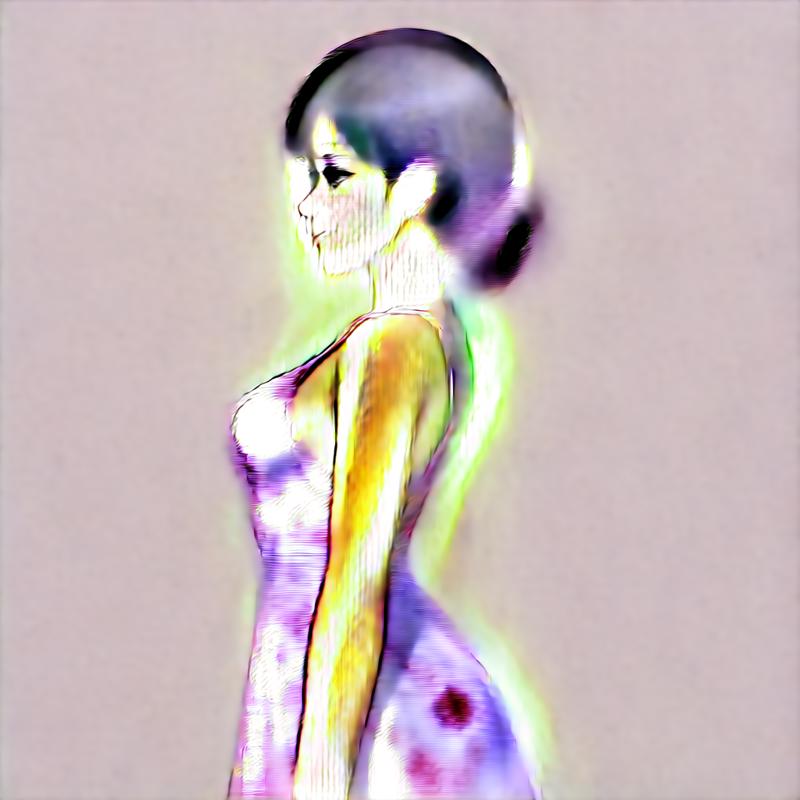
Then as more information emerges about the specifics, it begins to consolidate around recognizable features and fill in necessary details more and more.
Similarly, the last few steps also have relatively little creative value. Don't get me wrong, they're important for creating a good quality image but the model doesn't have enough power to really influence anything at these late stages of the process.
The really important steps (and thus denoising strengths) are in the middle. There's an early-middle region (perhaps around 0.8, it depends) that uses the huge remaining bank of model power to create huge changes and will make images loosely inspired by the input image. There's a middle region (often around 0.7 or 0.6) where there's a balance between model power and the influence of the input image, leading to a wide range of effects. Finally, there's a late middle region (often around 0.5 or 0.4) where only conservative changes are still possible but this is often ideal for more subtle changes like style transfer. Below this middle region, there tends to not be enough model power left to make a useful transformation.
Note that strengths as high as 1.0 can be useful because color balance and very large scale, high contrast image structures can survive even 100% noise. The mid-gray rectangle is used as the default base image because it's perfectly balanced, so if you fed it a black rectangle instead the resulting noise would be biased towards darker colors. Similarly, extremely large, high contrast features like a large red circle on a white or black background will also survive even 100% noise.
Here's an example of the same image (that is, same parameters, seed, etc.) generated at 100% denoising strength using a gray, then black, then white, then red, and finally red circle on a black background:
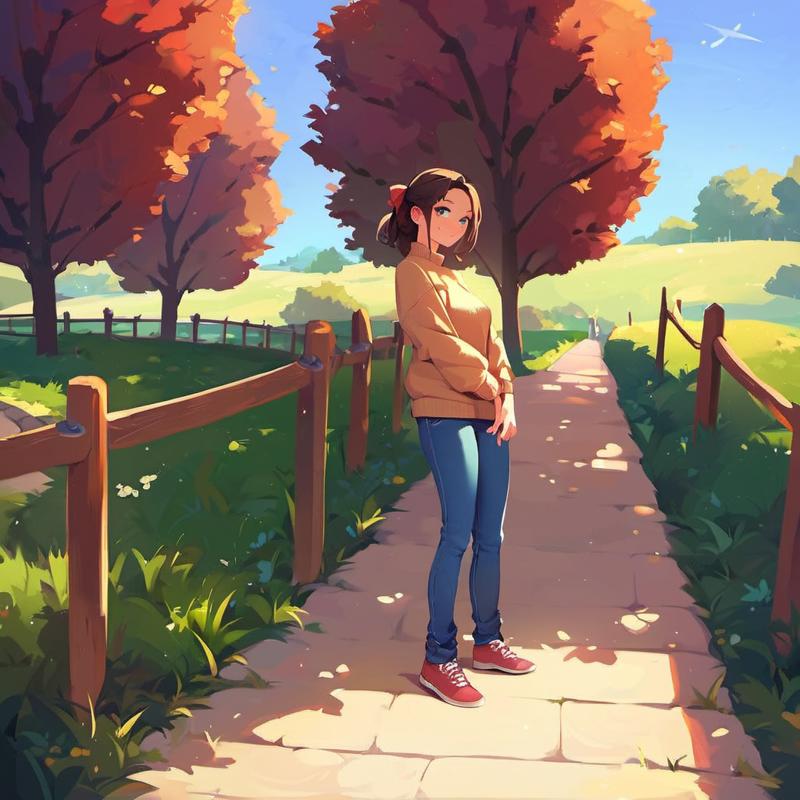
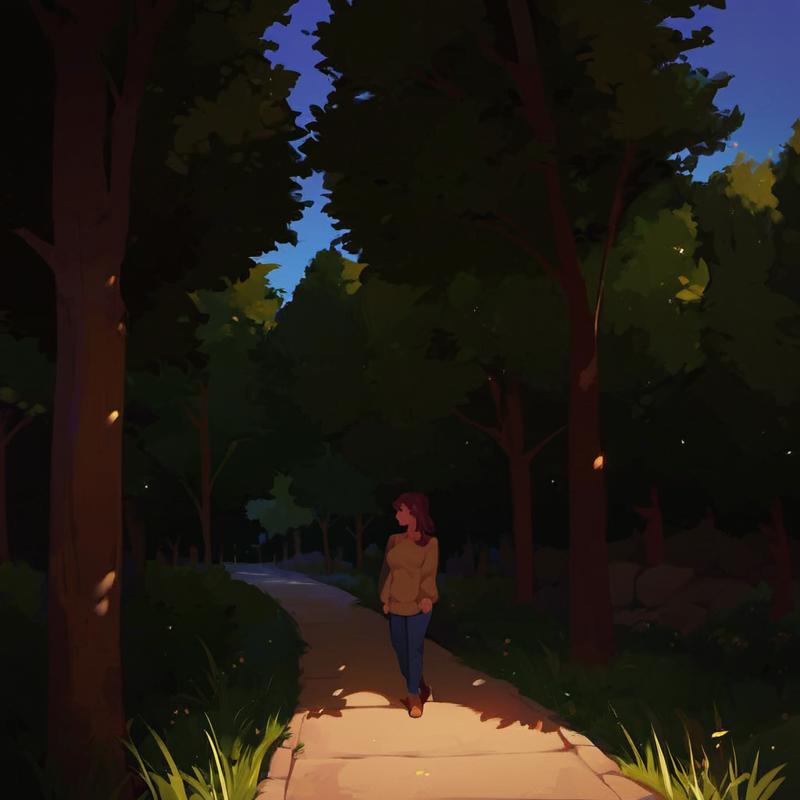
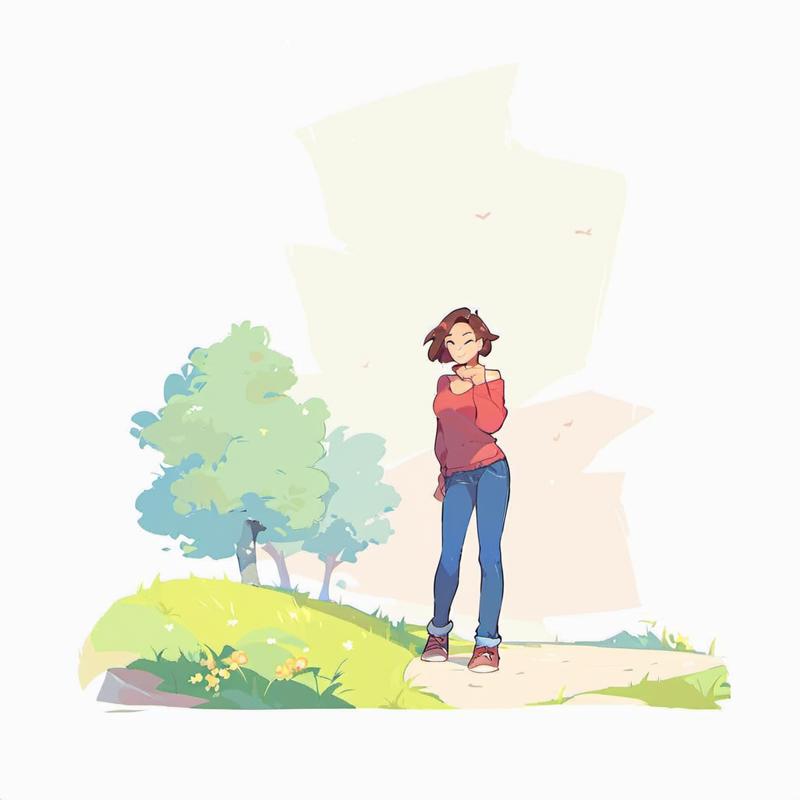
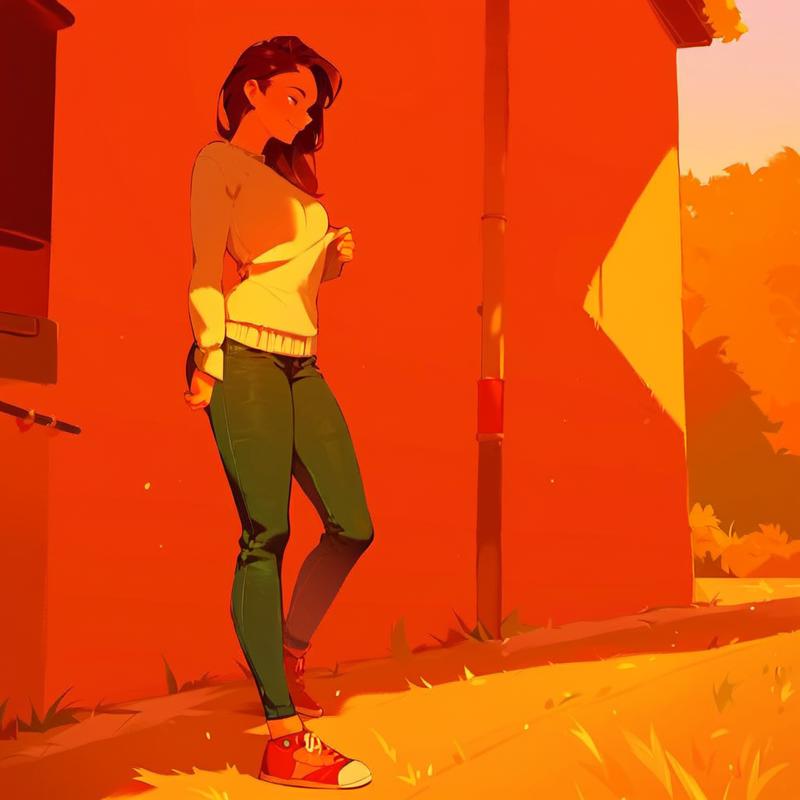
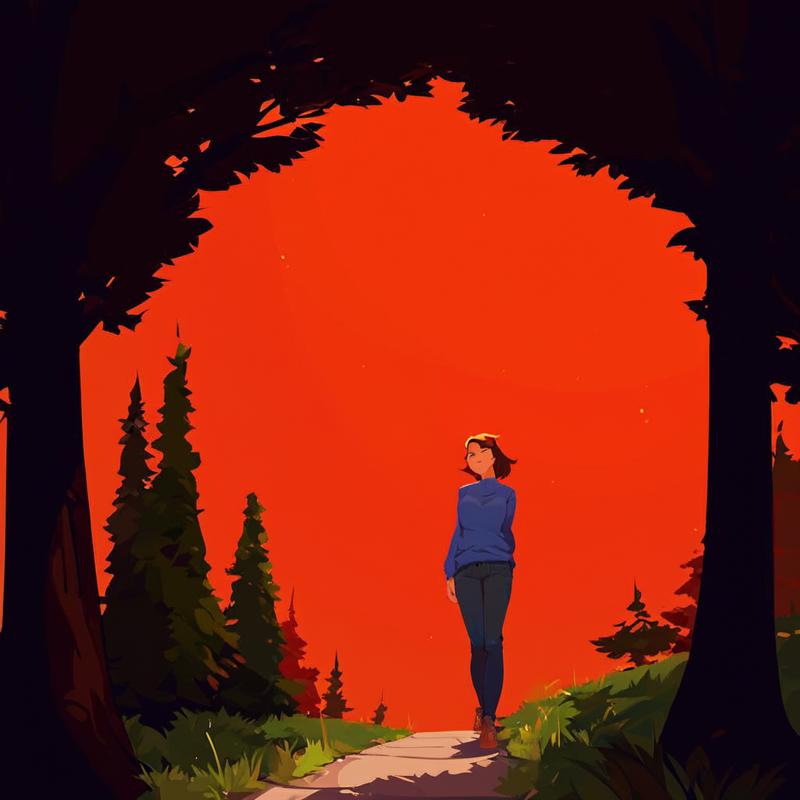
This brings us to our last analogy (and the experimental proof that each step operates differently)...
Analogy 3: Scale/Frequency
Experimental evidence suggests that the model is more precisely operating at different scales (or inversely, frequencies) at each step, going from high scales/low frequencies in early steps to fine scales/high frequencies at later steps. It tends to preserve low frequency (large scale) structures which are below the step's operating frequency (that is, once they're too big they aren't being operated on anymore and stay stable) while (slowly?) erasing high frequency (fine scale) structures (most likely because it "doesn't care" about these structures at the given step, as the later steps will fill them in).
The structures at the step's operating frequency are intelligently transformed according to the model's training and prompt (as well as all the other parameters).
Here's my experimental evidence, let's go back to the example input image from before:
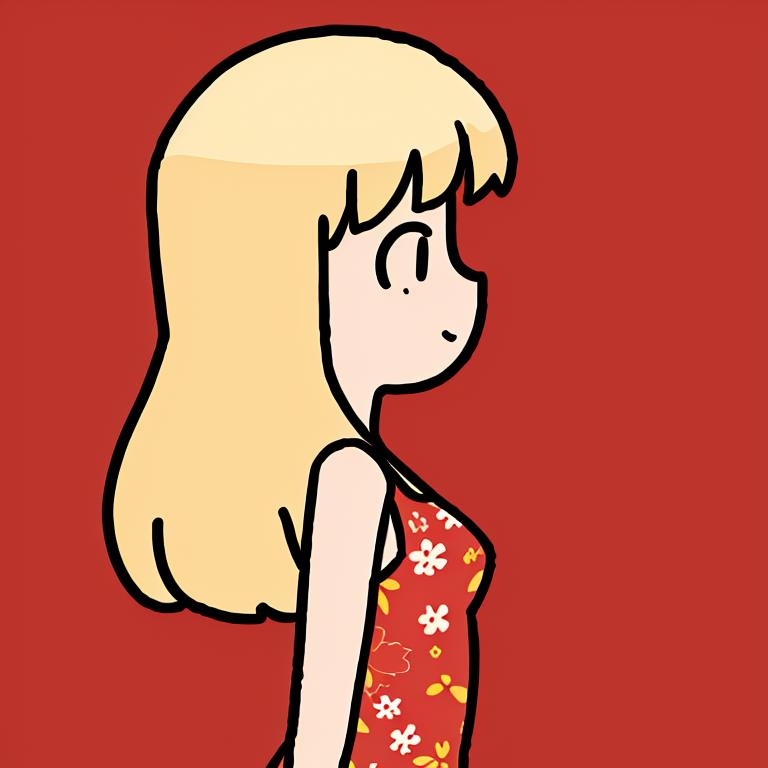
What happens if you add the noise for a given step but start on the wrong step?
These experiments are similar to the 0.5 denoising case from before but skip steps in the middle.
Start 0 Steps Too Late (Reference Result):
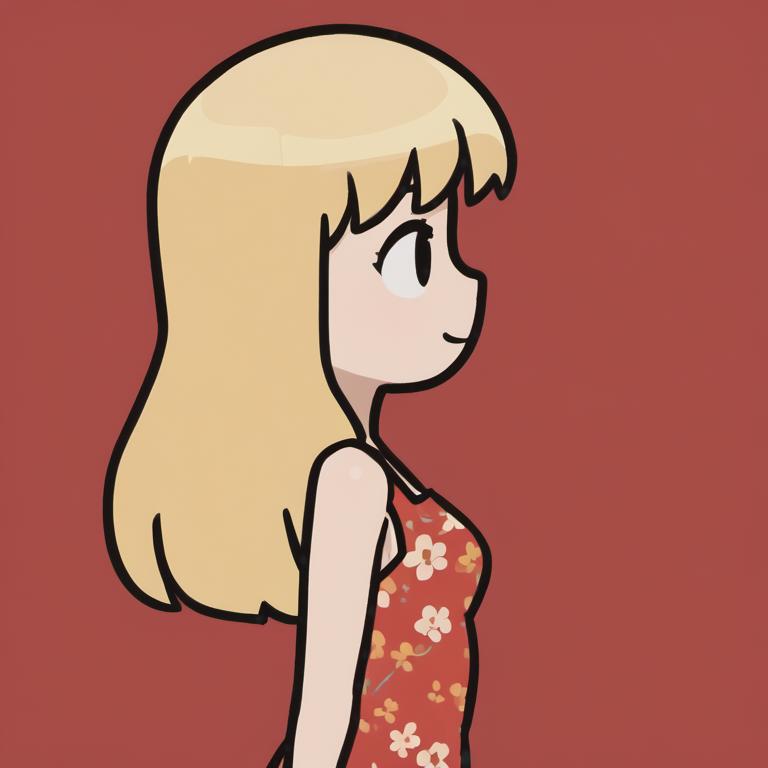
Start 1 Step Too Late:
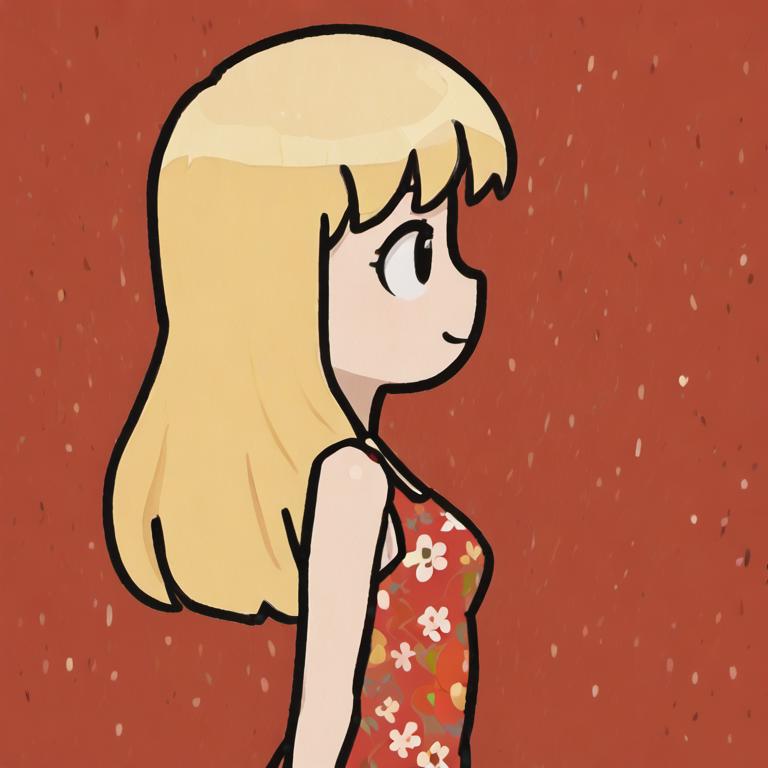
Start 2 Steps Too Late:
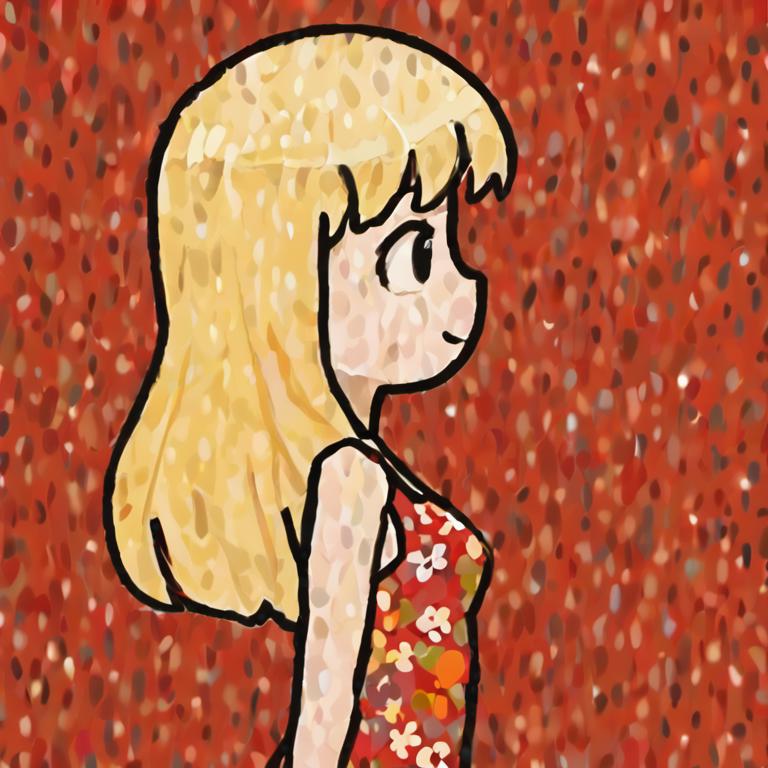
Start 3 Steps Too Late:
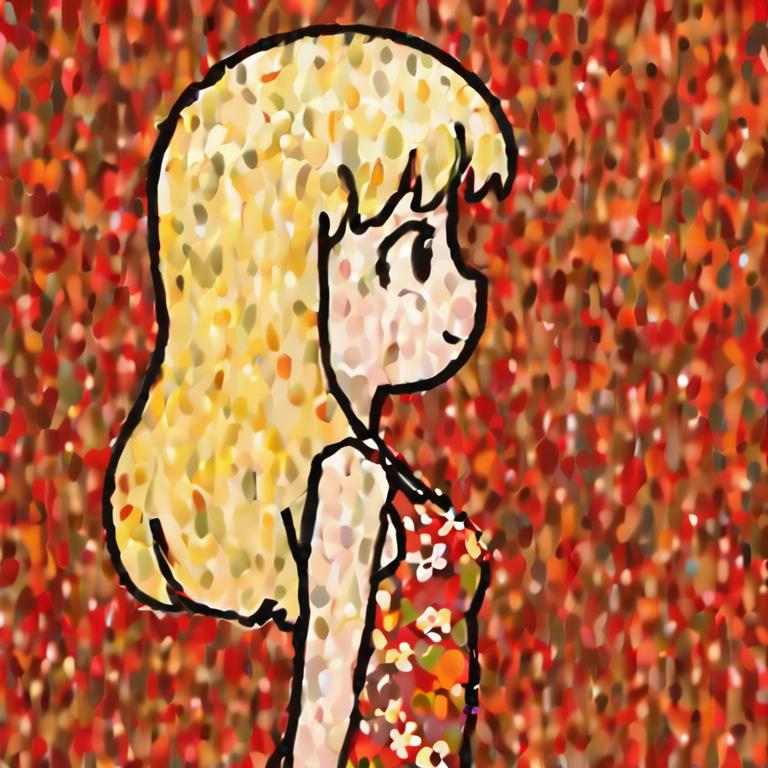
This stucco-like pattern is the noise:
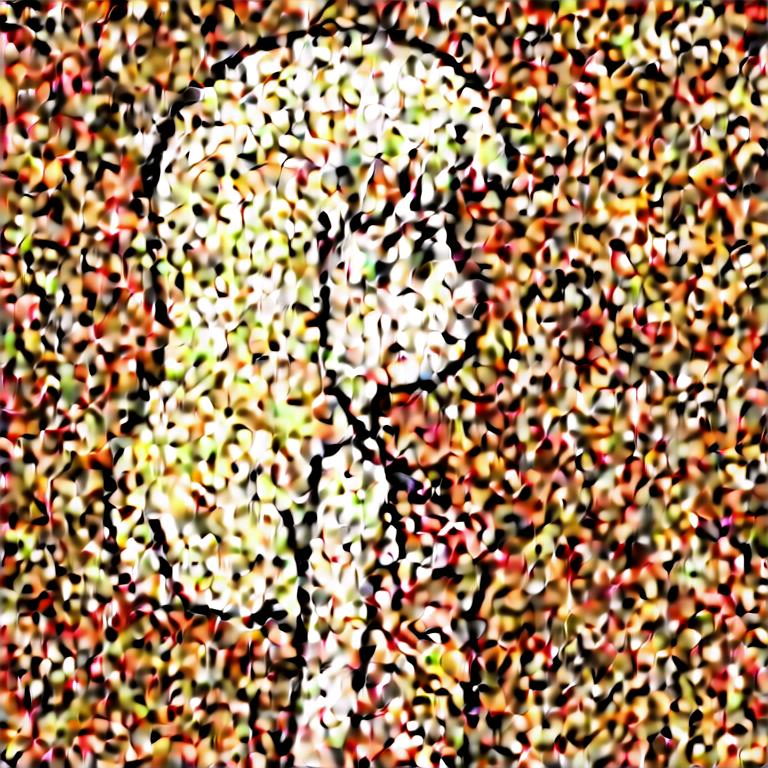
The later steps do not completely fix the noise anymore because it's too low frequency and they aren't operating on this frequency.
Going in the opposite direction and running more steps than necessary is less dramatic, but eventually it destroys the input image's structure.
Input image:
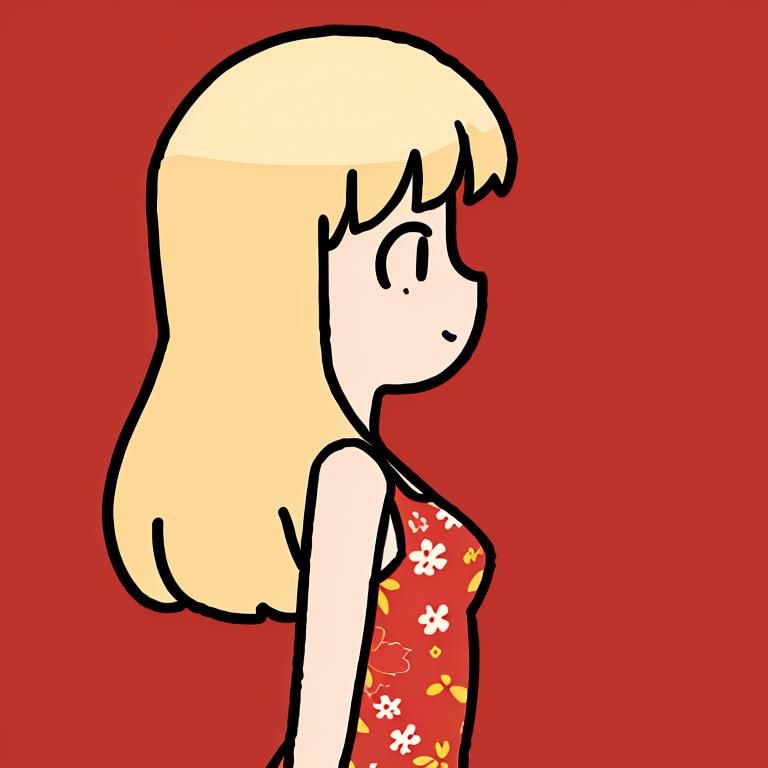
On schedule (Reference Result):
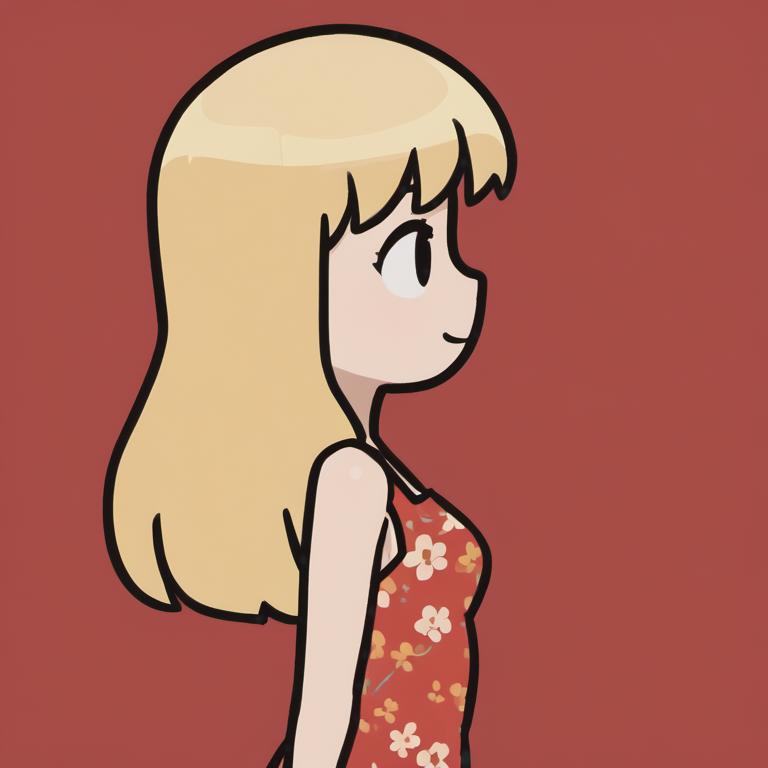
Started 2 steps too early:
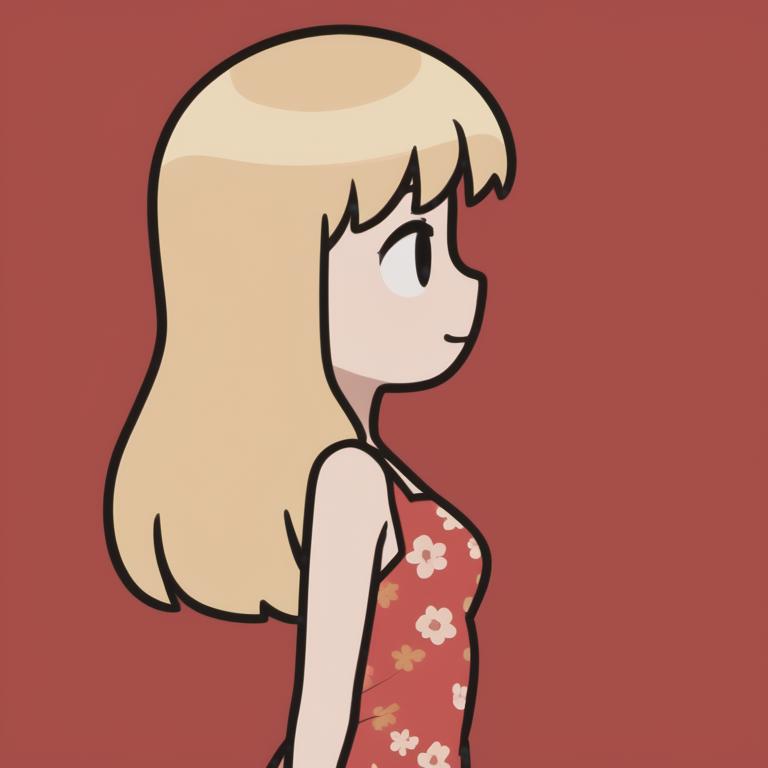
Started 4 steps too early:
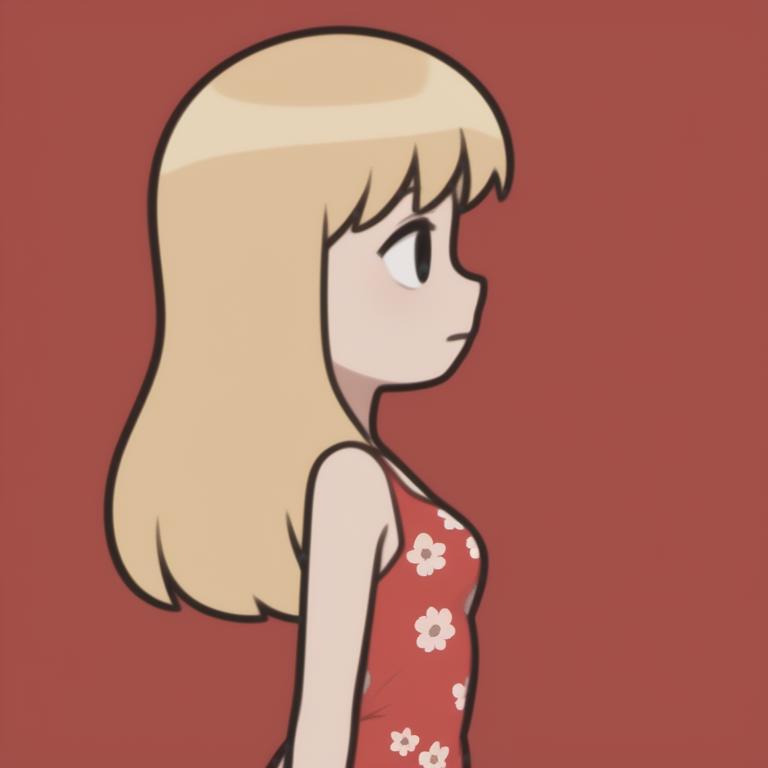
Started 8 steps too early:
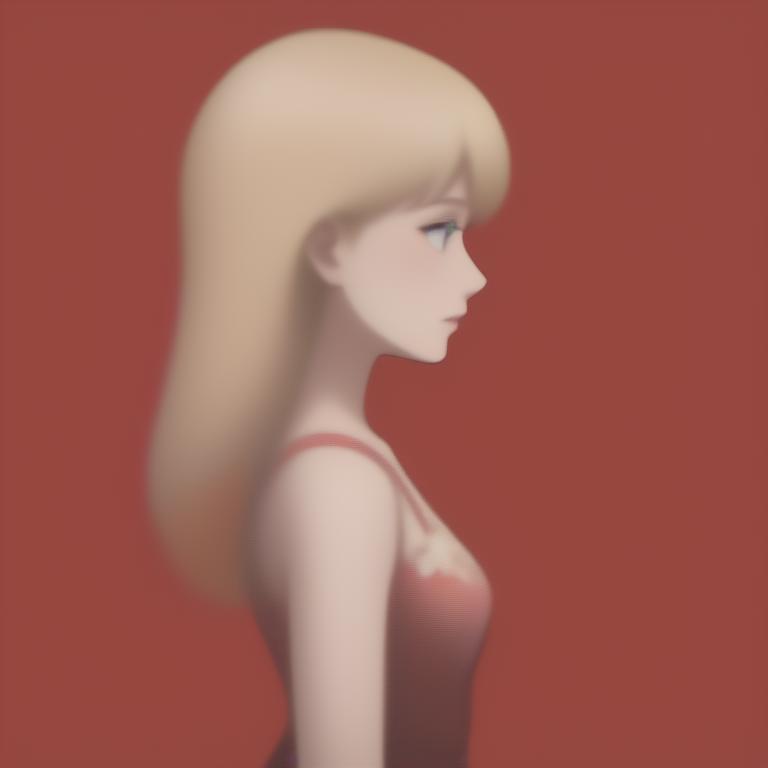
Started at beginning of schedule:
It's hard to tell just from these results whether the model is working over a wide range of scales and it's mostly the largest scales that it stops operating on, or if it simply doesn't cause too much damage to finer structures over a small number of steps, since the fine structure is usually destroyed by the noise before, or perhaps even that this effect is simply because there's supposed to be noise here and there isn't so it just can't do as much (that is, there's effectively less model power).
Regardless though, the basic idea that the steps operate starting at large scales and each following step operates at progressively smaller scales until they are complete is supported by these results. More experimentation is needed to understand it better.
Image Chaining 2: Chain Harder
I went into all this material on sampling and steps not because it's informative when it comes to choosing a denoising strength to transform your image, which is one of the main decisions you'll need to make at any given image chain step.
As a general rule, you'll want to start with higher denoising strengths and tighten it down to lower and lower denoising strengths as you get closer to your objective. So, you should initially focus on getting large scale features correct (ex. overall composition) and move towards smaller and smaller details.
Try this out for yourself and figure out what works for you and your models. There's no replacement for practicing these techniques for yourself.
I plan on writing another article that frames all of this in an easy to follow recipe, so I will link it here when I'm done writing it.
Image Convergence
There's one more hugely important effect that you need to know about, as it is both a problem and something you can exploit.
It's called image convergence and it's the tendency for the same model and prompt to have less and less impact on your image as you chain it through repeatedly at the same denoising strength (or lower).
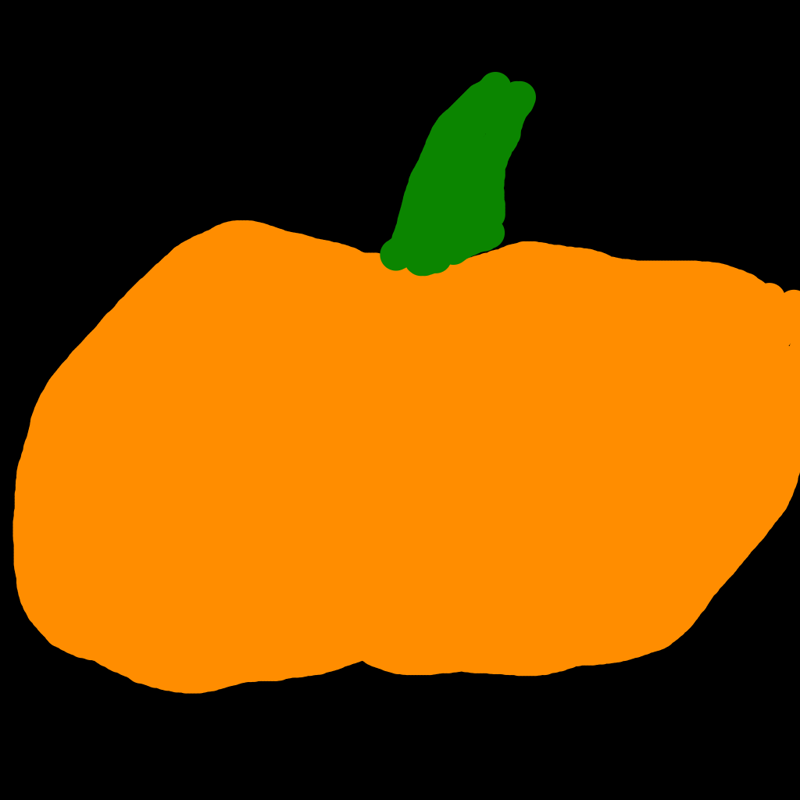
For example, here's a basic sketch of a pumpkin I made, and an image chain run repeatedly at 0.8 denoising strength:
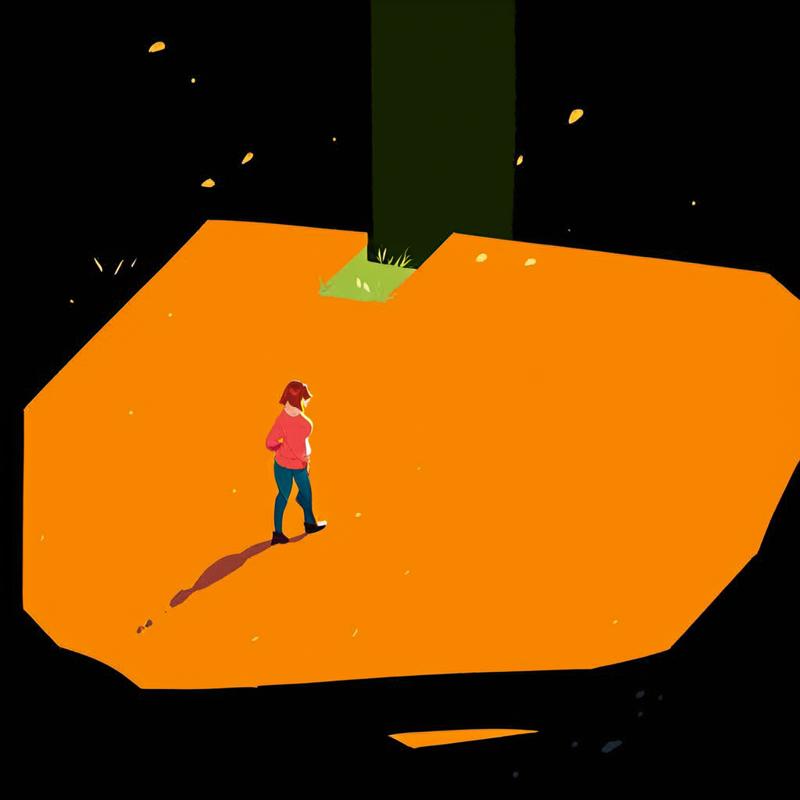
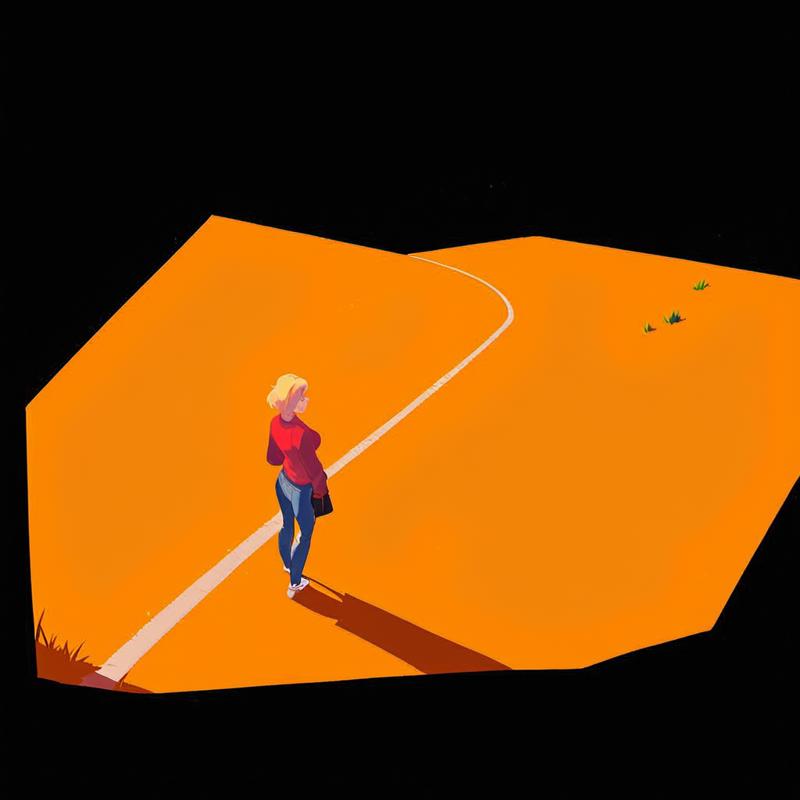
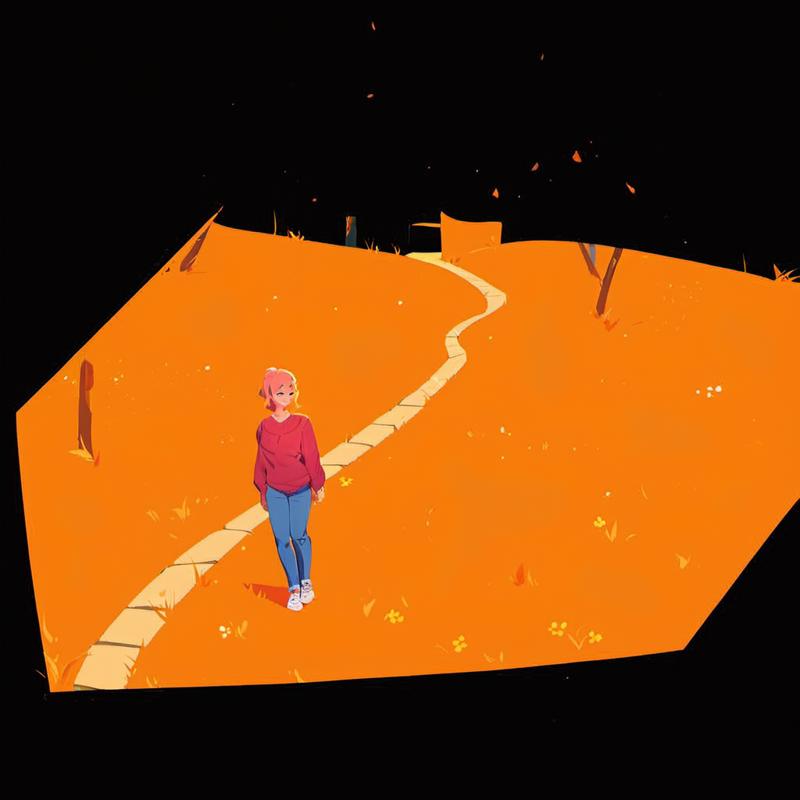
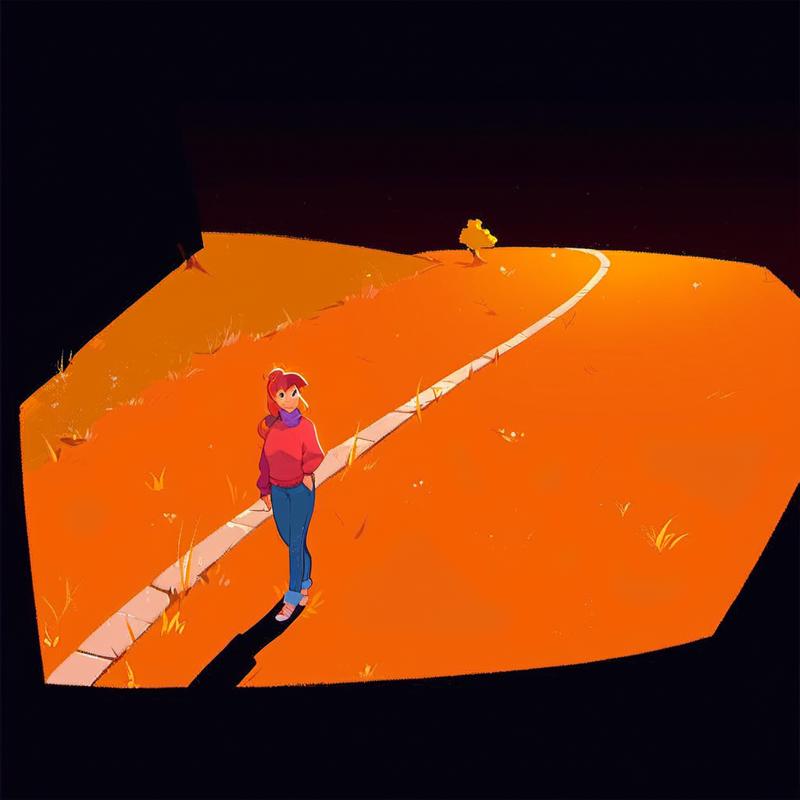
Even at this high denoising strength, most of the images after this point are variations on this one with the last major element change that often comes up is the black region becoming a dark tree-line:
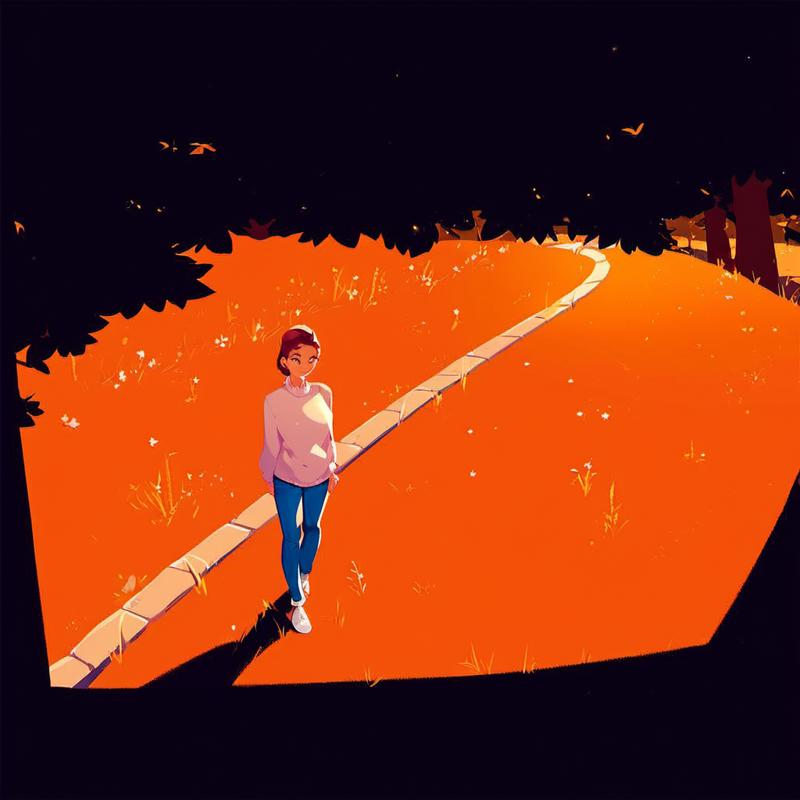
This all might seem reasonable, but what happens if we start over?
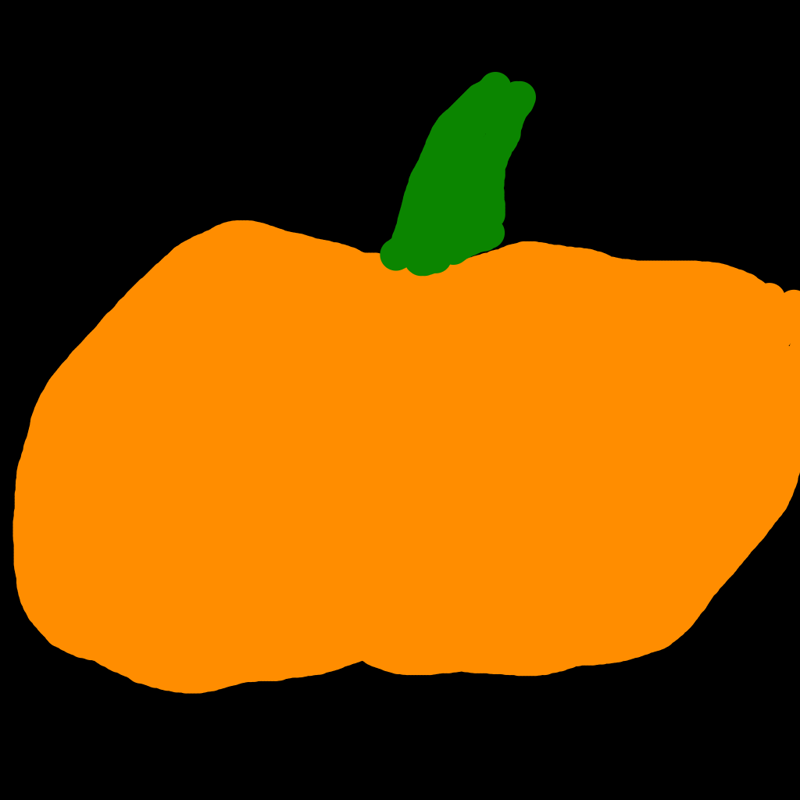
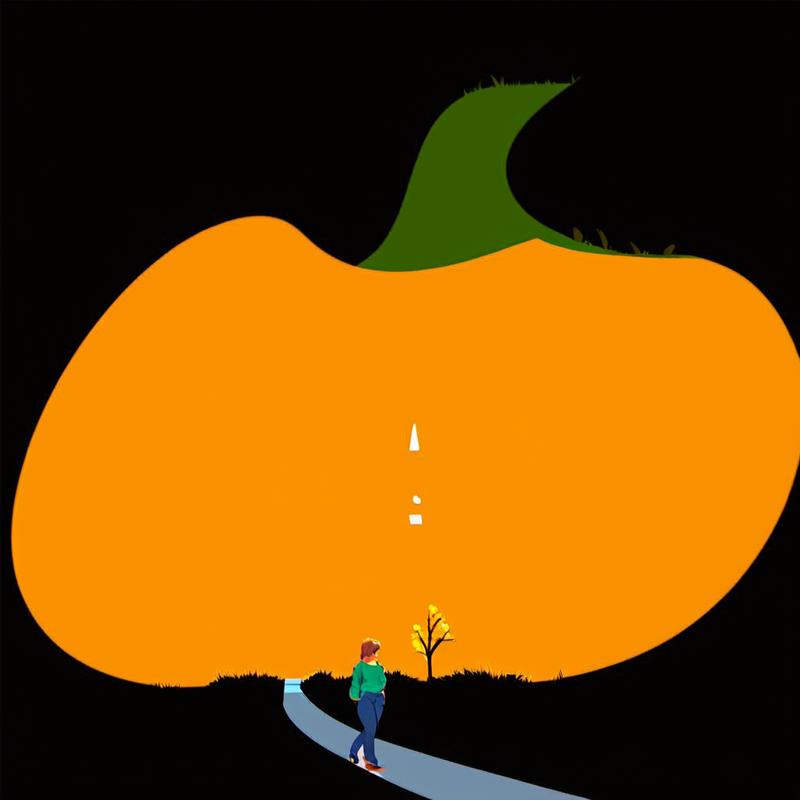
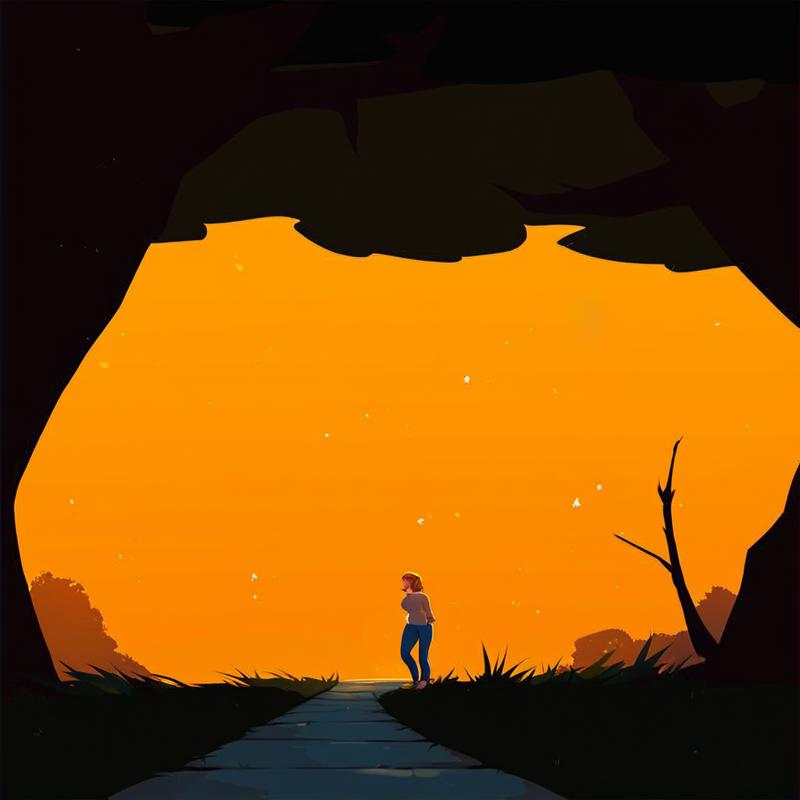
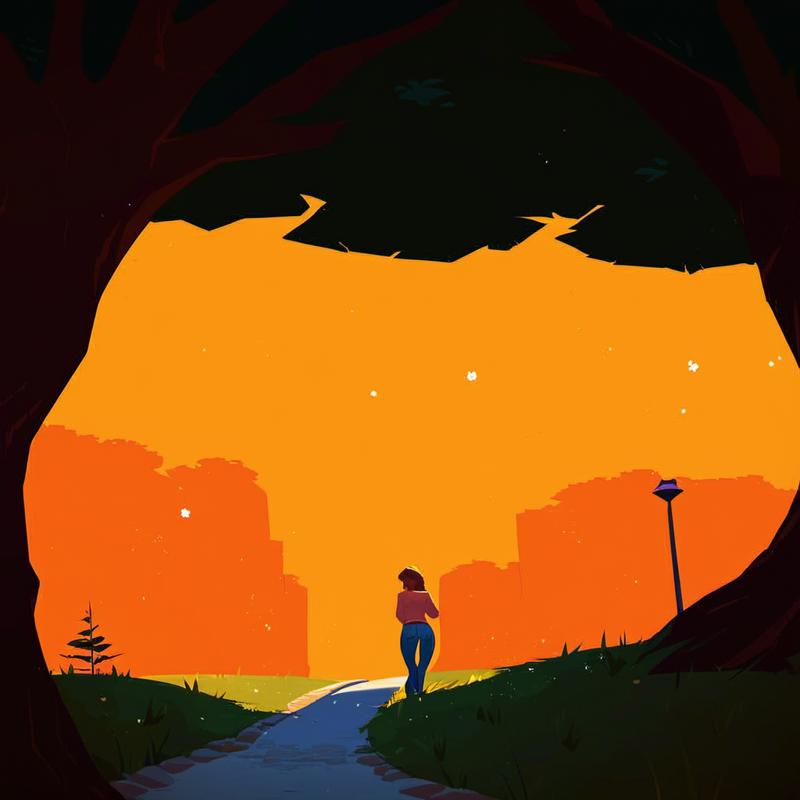
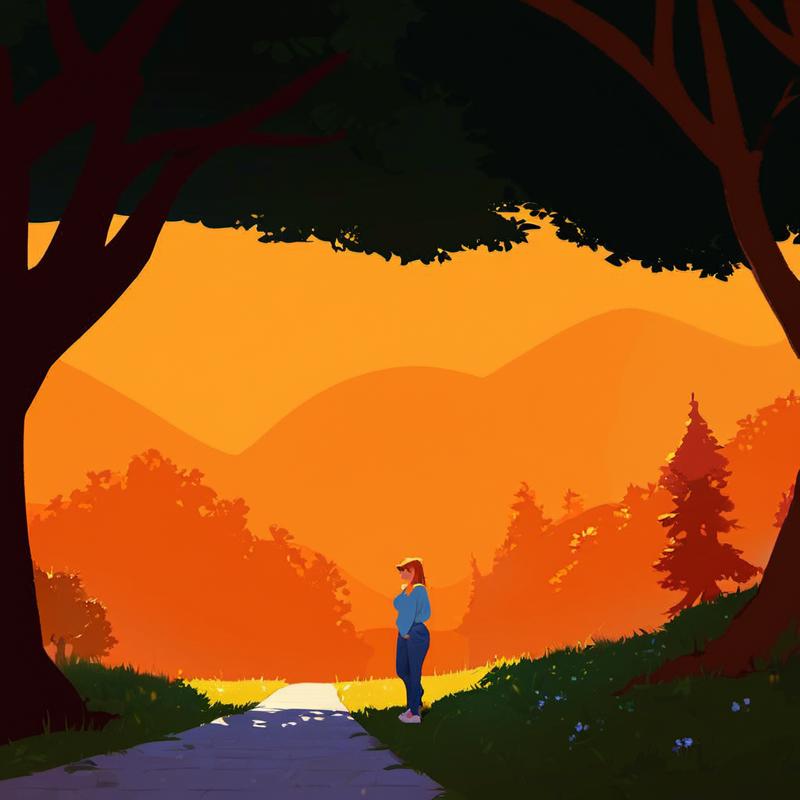
It's very different with the whole orientation of the scene being very different, and these different compositional elements come up consistently across the board.
Here's one more example:
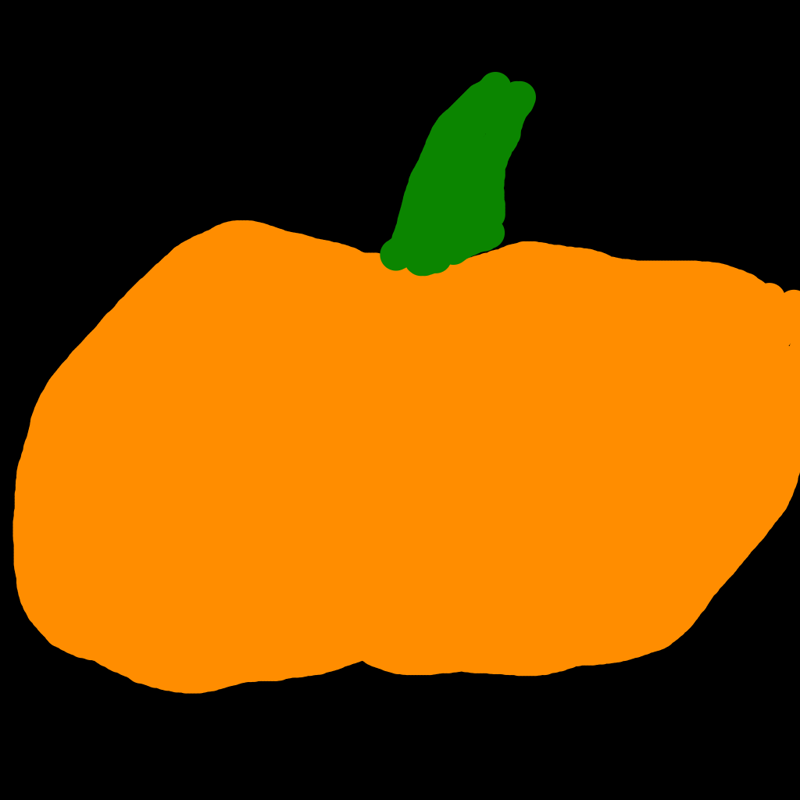
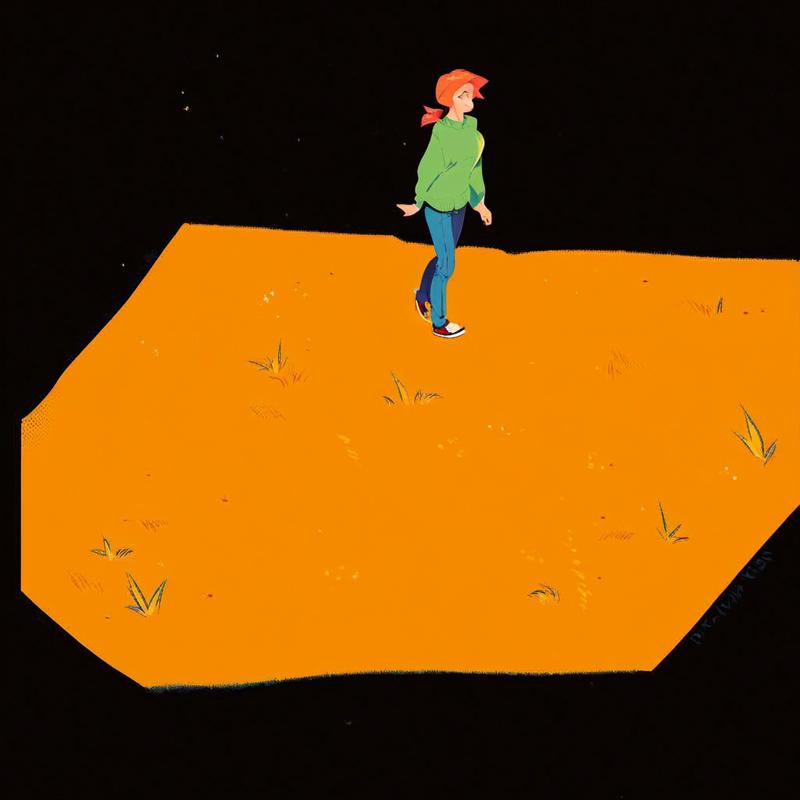
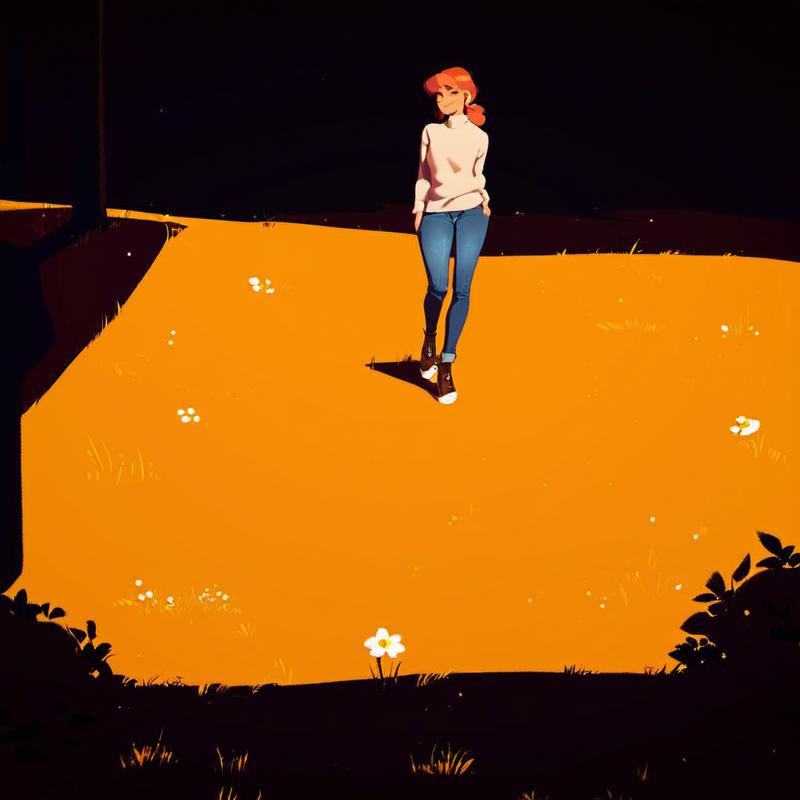
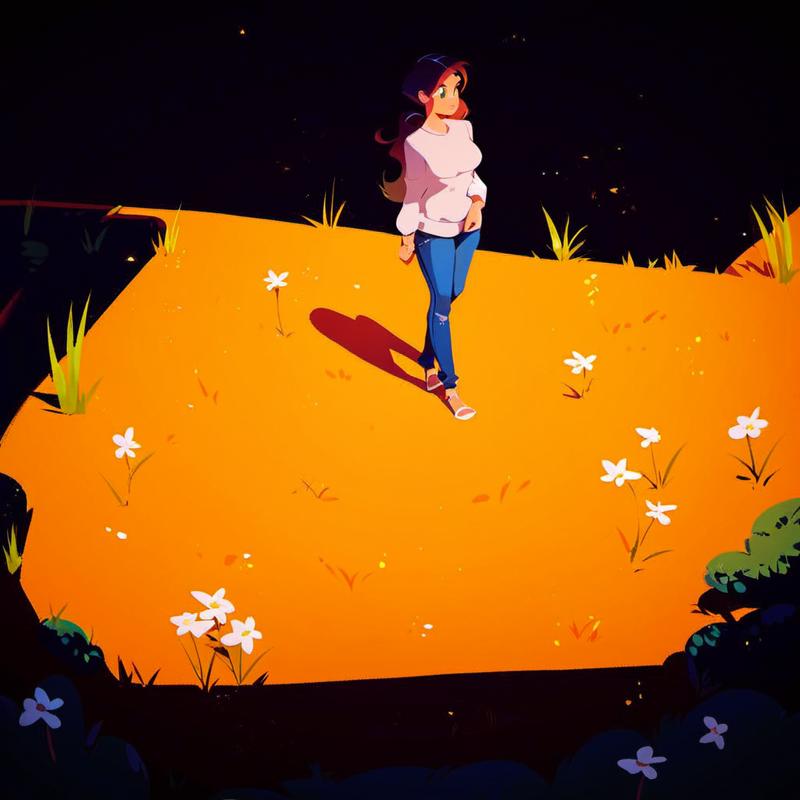
Anyway, you get the idea. When starting from my sketch there's all these very different paths it could go down, but as the image chain gets longer the results tend to converge on the path chosen early and the outputs become more and more similar to each other.
So, why is my sketch different from these later images? Well, it's clearly different because the chained images have been operated on the model repeatedly, while my sketch has no influence from the model (since I drew it by hand).
Side note: I don't mean to imply that there's something special/magical about human-made drawings. Other models (or even just different prompts) can produce the same effect as my sketch.
What's going on is that the model is progressively adding more and more of its own touch to each image in the chain. As a result it understands the input better (in the above example, it can tell which orientation the image is supposed to be in between the second chain (from side) and the other two chains (from above)) and the model also has less and less reason to change the image, since it's already what it would have done in the first place.
There will always be some amount of change thanks to the random noise damaging the information in the input image, but it makes the changes less and less substantial as it converges.
This effect has two sides to it: it's an obstacle to novelty and it's something we can exploit for various purposes.
Image Convergence and Novelty
On one hand, it presents a problem in that you can't keep chaining images and getting novel results. At the very least, novelty will slow way down after convergence, requiring lots of work to get genuinely new results.
Solving this problem is pretty easy if you know about it though, you simply need to make a change in order to break out. You can change the prompt, use a different model (including just changing LoRAs or even just their weights), make an edit to the input image, etc. The more dramatic the change, the more likely you'll break out and go down another path, so there's a good chance that smaller adjustments won't be enough and you'll need to be more dramatic (and we'll exploit this stability of nearby parameters in just a moment). You can also increase the denoising strength to break out of convergence, but not decrease it.
Using Image Convergence
On the other hand, image convergence is really useful too.
First of all, the image progressively adding more and more of its influence is inherently useful. If you review the example chains above you can see that the images are becoming more detailed and resembling the prompt more and more, rather than the pumpkin sketch it started out as. This is particularly useful for relatively low denoising strengths, since you can preserve the original composition while delicately transforming the image in some way, so over multiple steps you can make delicate changes that would otherwise be impossible (or at least very unlikely). Even better, as you progress your image will become more and more robust, requiring less and less delicacy.
Let's do a variation on the pumpkin example above, I use a slightly different prompt that mentions pumpkin and pumpkin carving, and I added some features to the sketch because a pure orange field is hard to get features to appear spontaneously on at a low denoising strength. Here's the new sketch:
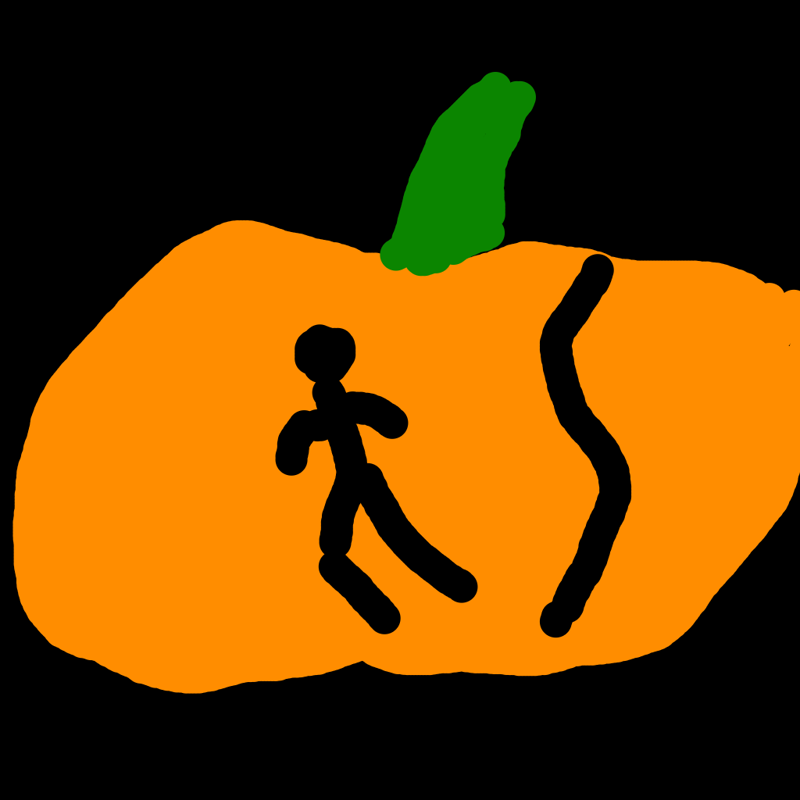
First, lets go in with a high denoising strength of 0.8 as before to see what happens:
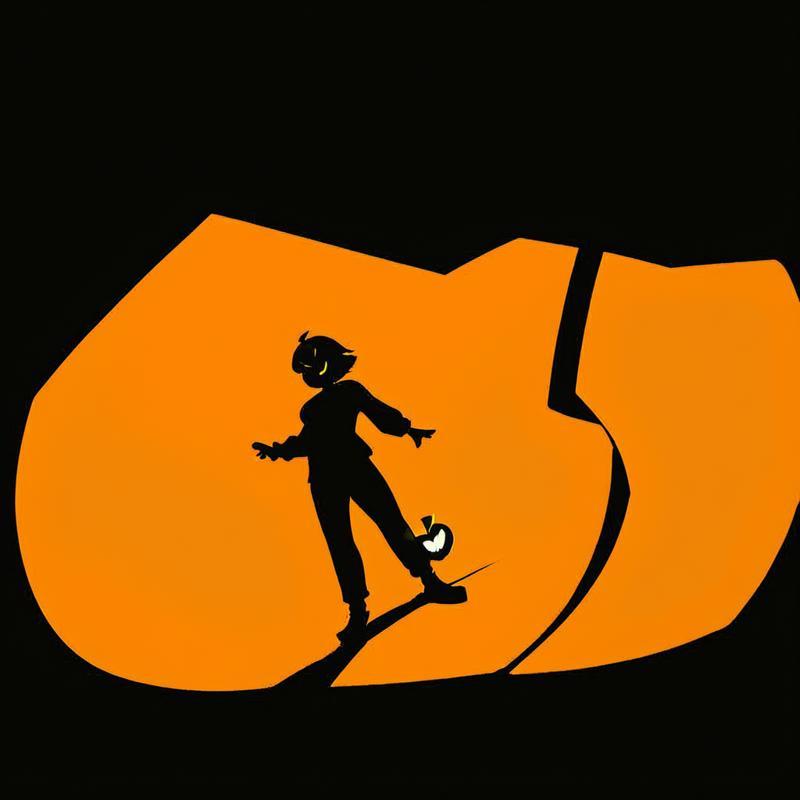
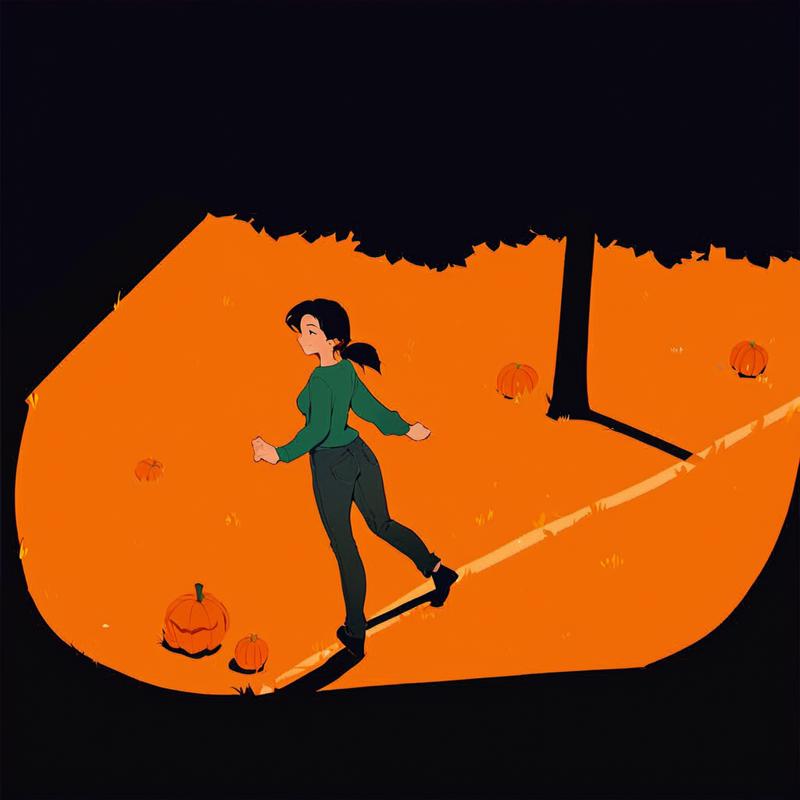
While the results are nice, even after just two steps it's already gone substantially off the rails when compared to the original.
However, the situation is very different when we use the much lower strength of 0.6:
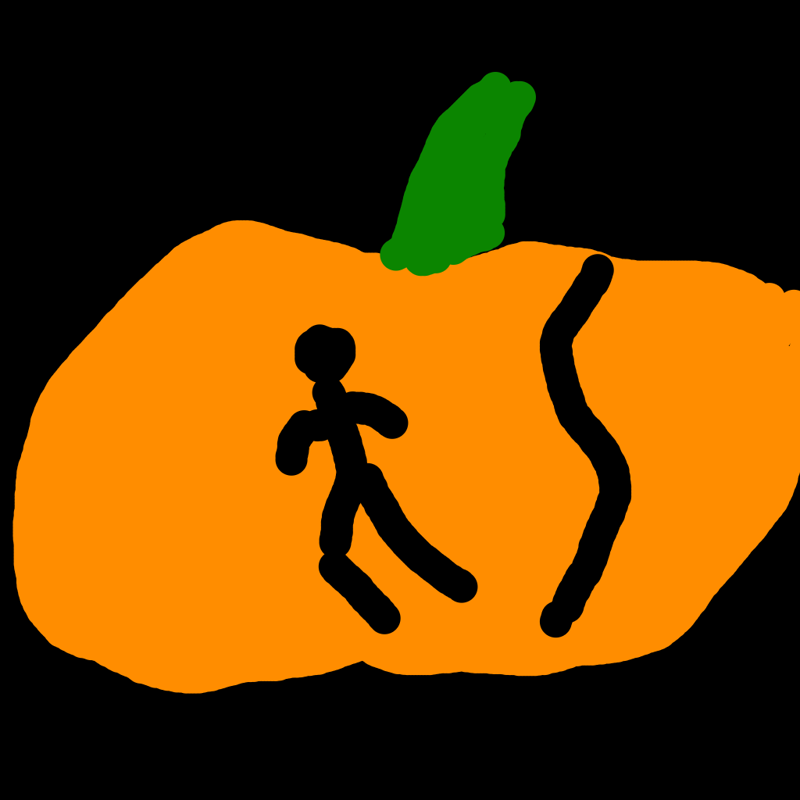
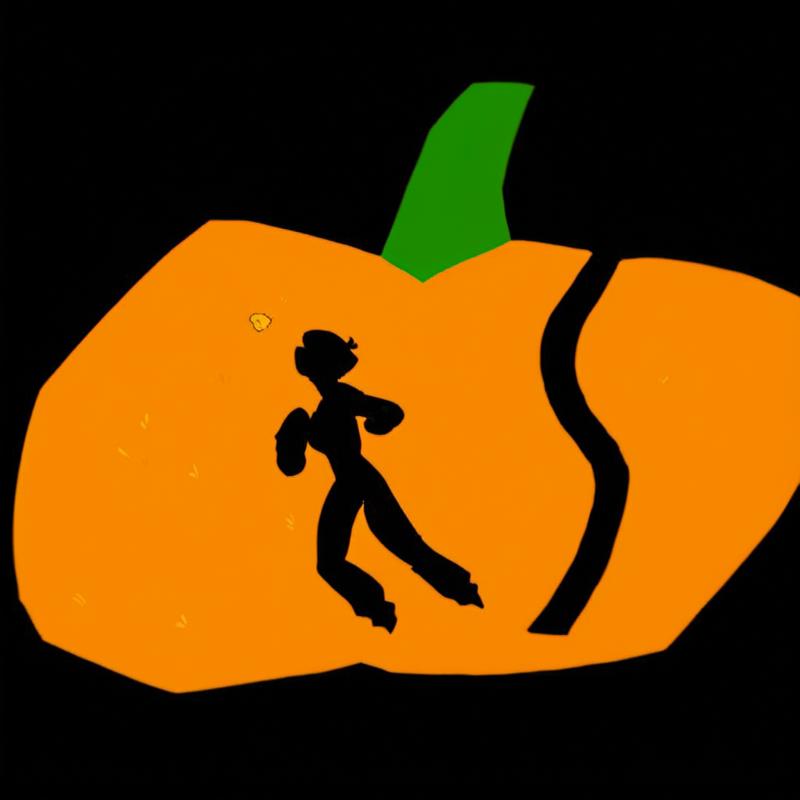
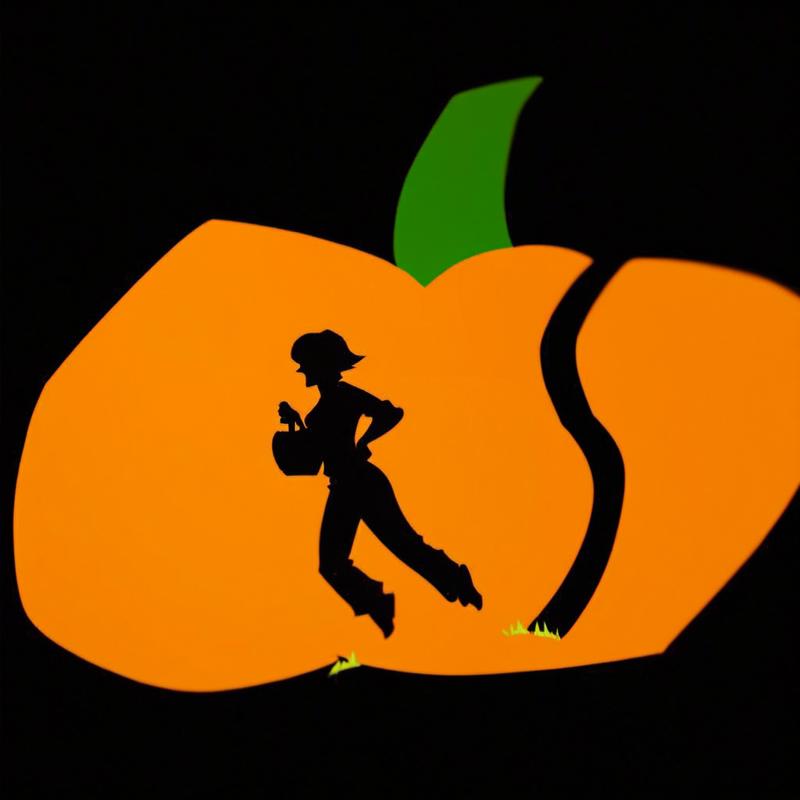
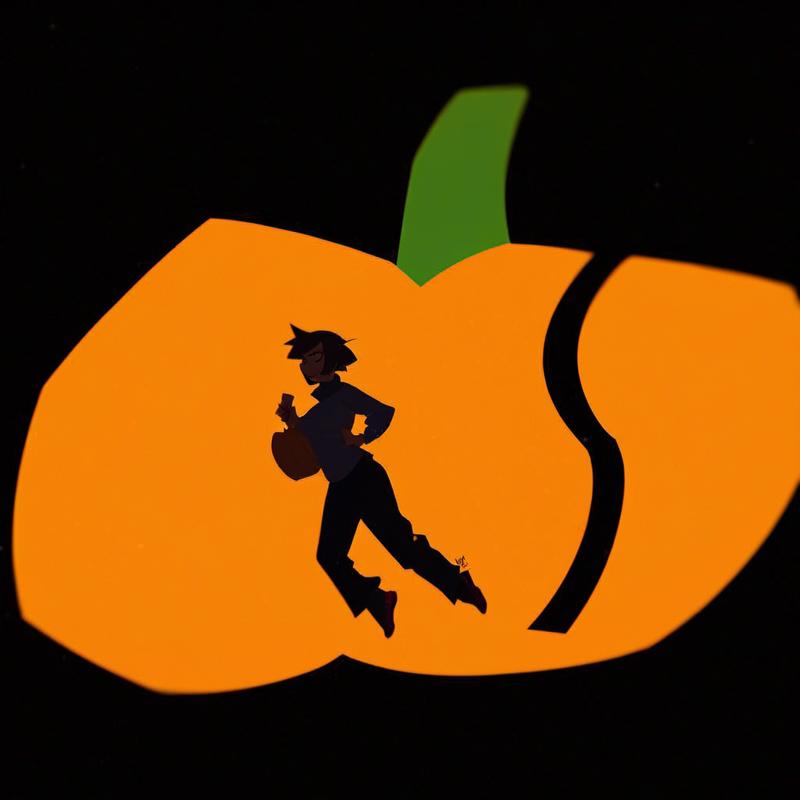
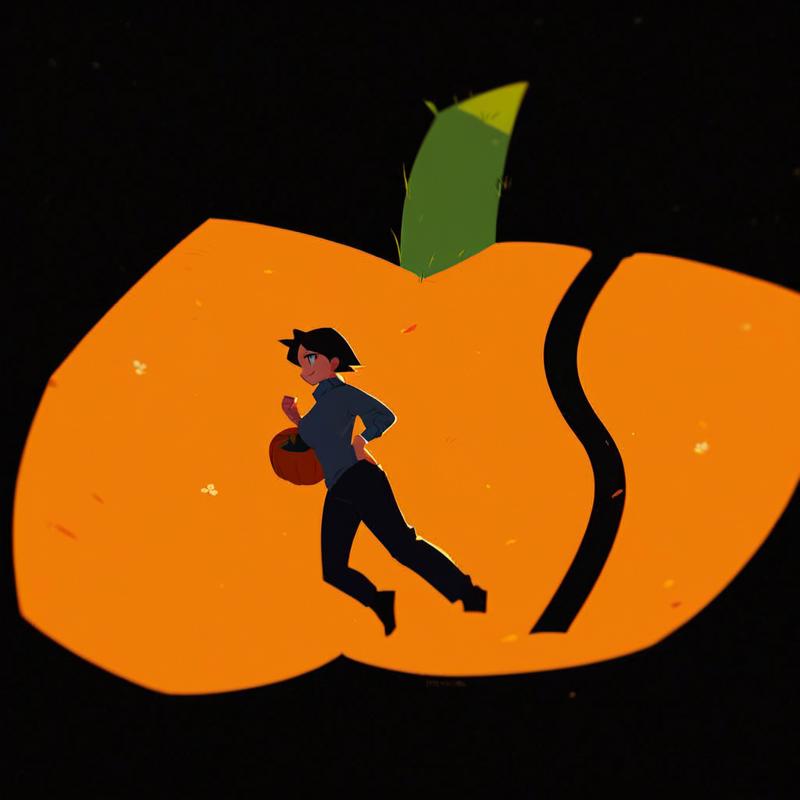
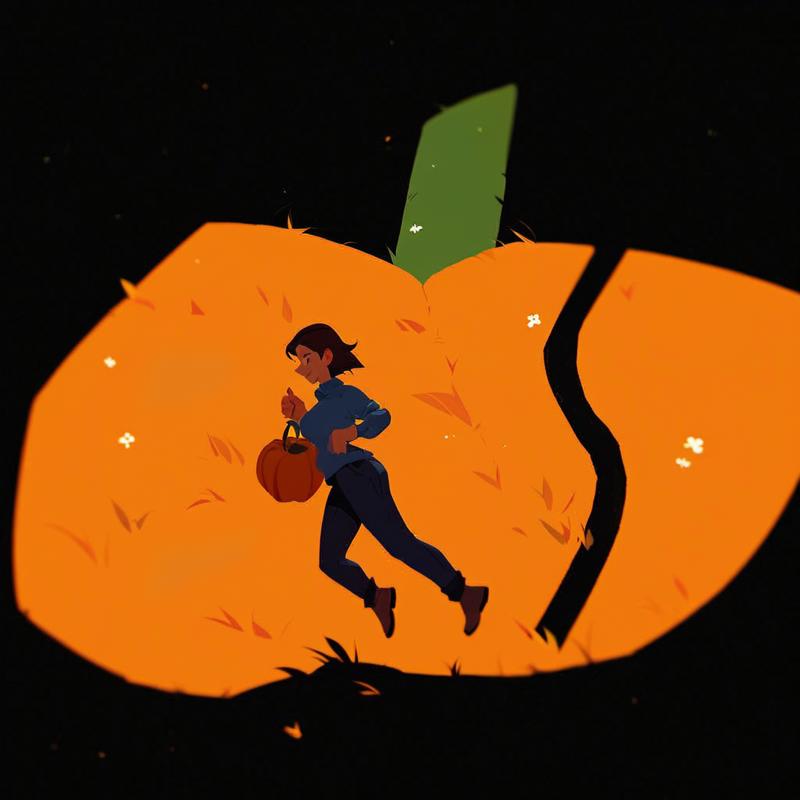
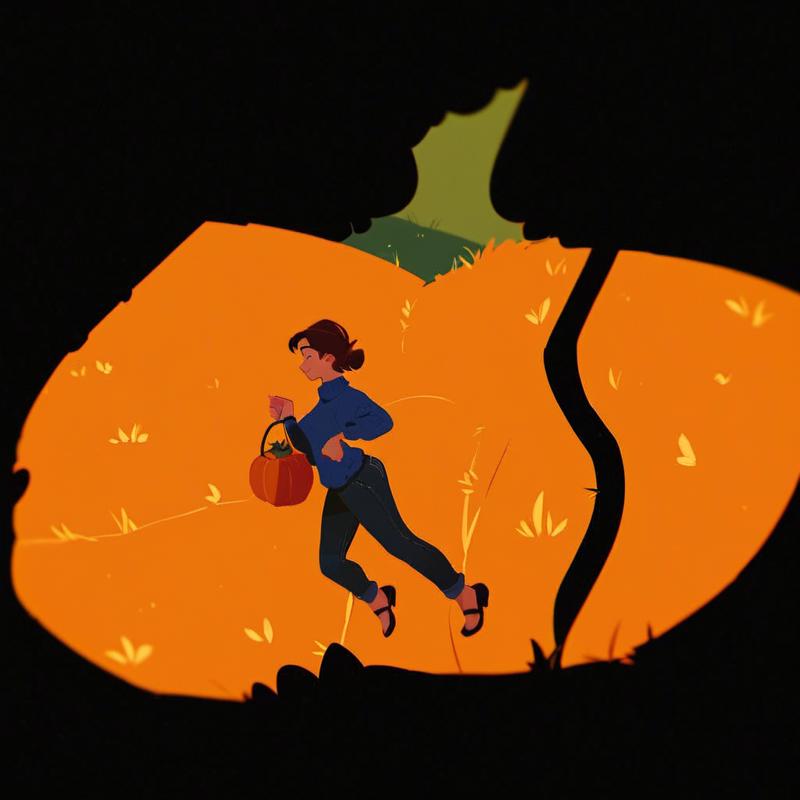
You can see how it ever so slowly is adding more and more detail from the model, while still preserving features from the original sketch like the pumpkin stem which is usually immediately removed at higher denoising strengths. You can use this effect to make all sorts of interesting pieces that would never be possible with the brute force of high denoising strength.
Image Convergence From Below
A variation on this technique is "image convergence from below". Normally, when you increase the denoising strength after convergence at a lower denoising strength, it'll break out of convergence by allowing the next image to randomly "bounce out" and escape the convergence rut it got into. However, since the frequencies overlap somewhat, by converging at a given denoising strength you can make the convergence effect strong enough to keep it in convergence at a slightly higher denoising strength. This lets you make more drastic changes while keeping key features of the original.
Here's an example extending the above, increasing the denoising strength to 0.7:
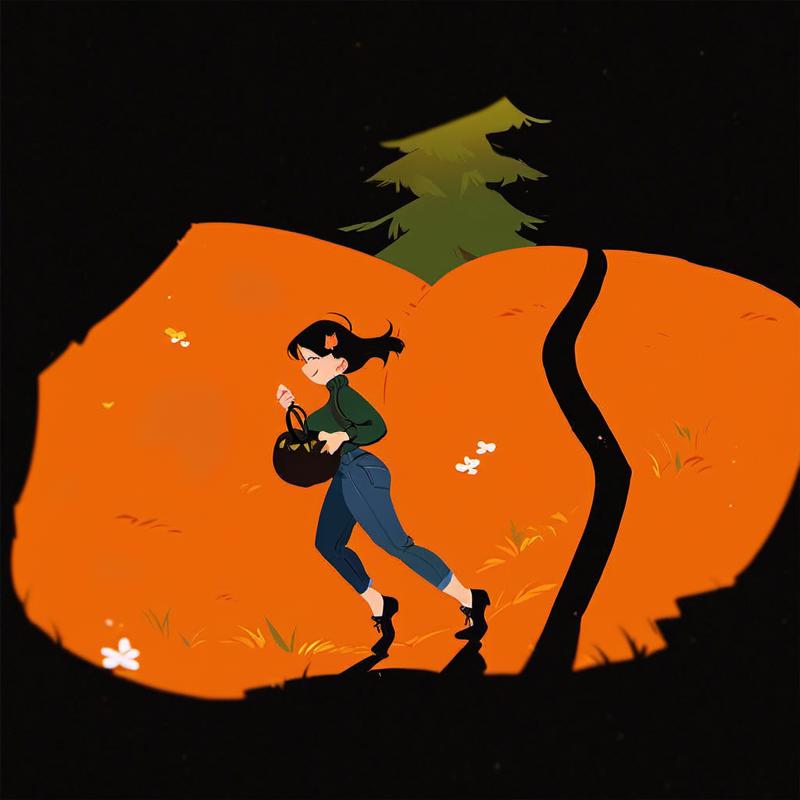
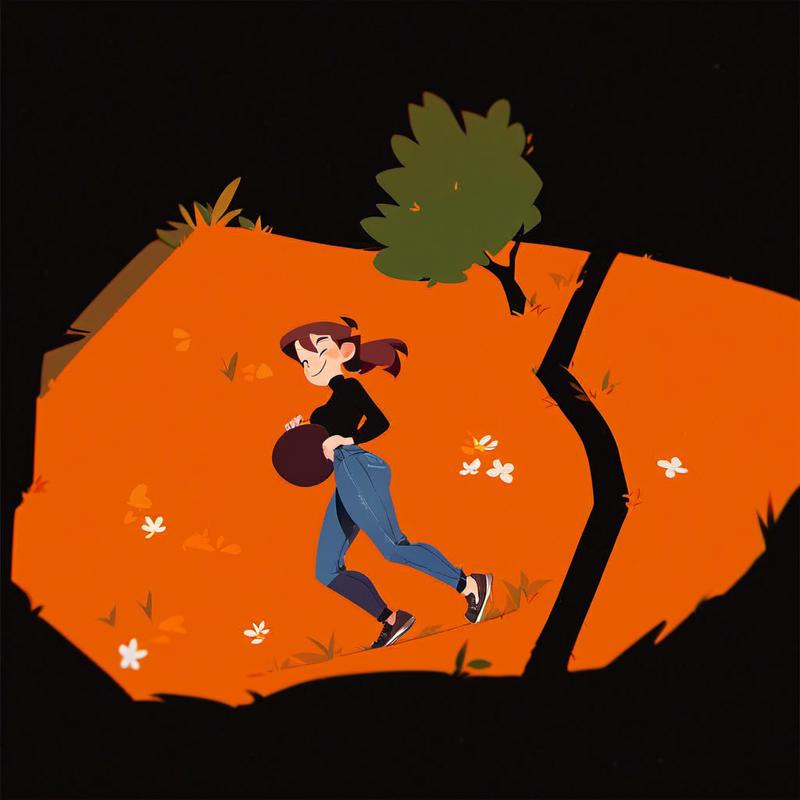
Then from here amping it up to 0.8:
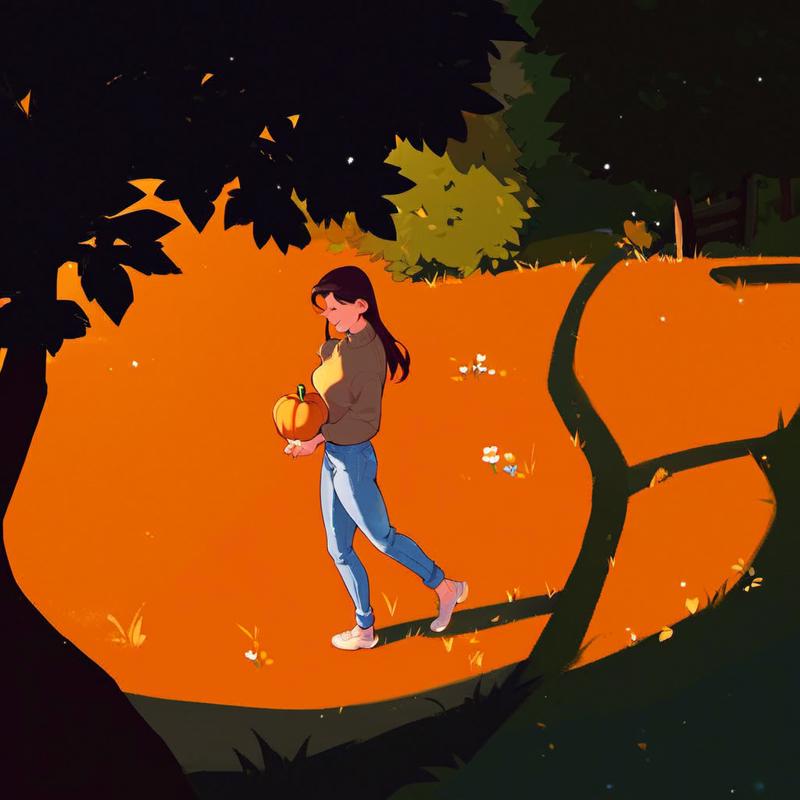
You can see that features that normally get removed immediately at high denoising strength (like the stem) continue to persist once the input image has undergone convergence at a lower strength. This isn't shown in the examples here, but at 0.7 there was nearly 100% retention of the major features, but even with further convergence done at 0.7, by 0.8 only around half of the outputs retained the major features.
This "convergence from below" effect is most prominent at lower levels of denoising strength (<0.7). The effect seems to get absolutely weaker as denoising strength increases. There's also possibly a "wall" that can't be passed beyond. More experimentation is needed.
Image Convergence From Above
There's also the symmetric "image convergence from above". Since you don't break out of convergence when you reduce the denoising strength, you can safely reduce the denoising strength without worrying about getting out of some convergence you like and even start a more specific convergence at that lower denoising strength.
For instance, let's go back to the end of this chain at 0.6:
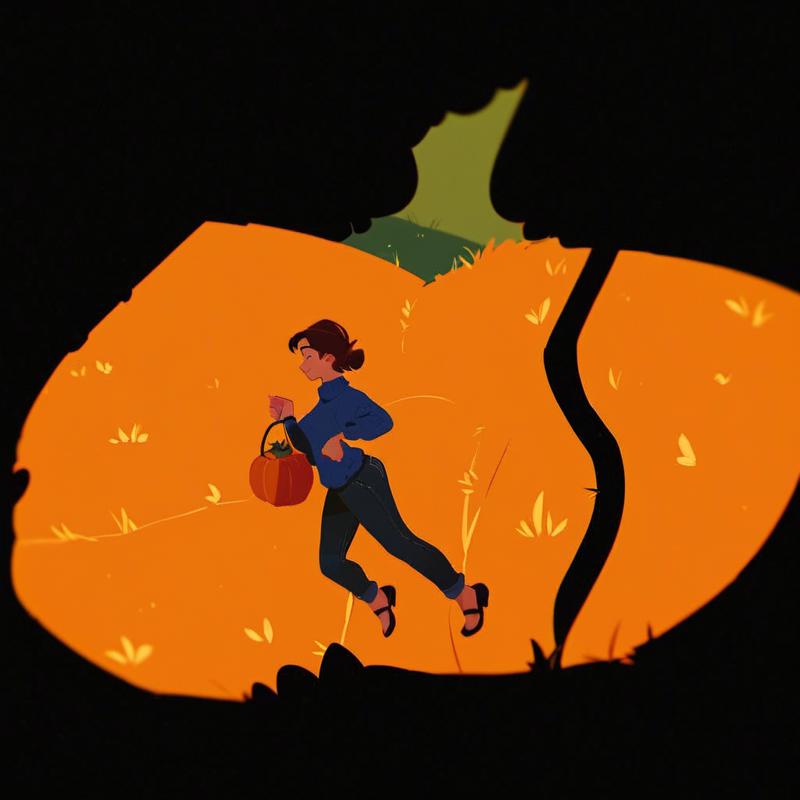
If we go down to 0.5 and chain it 3 times we get this result:
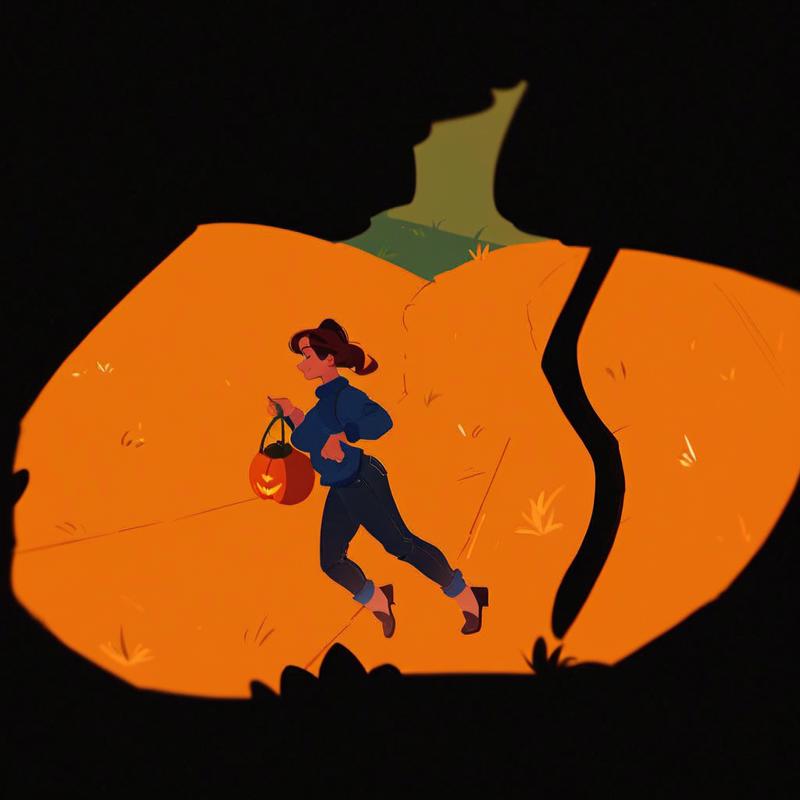
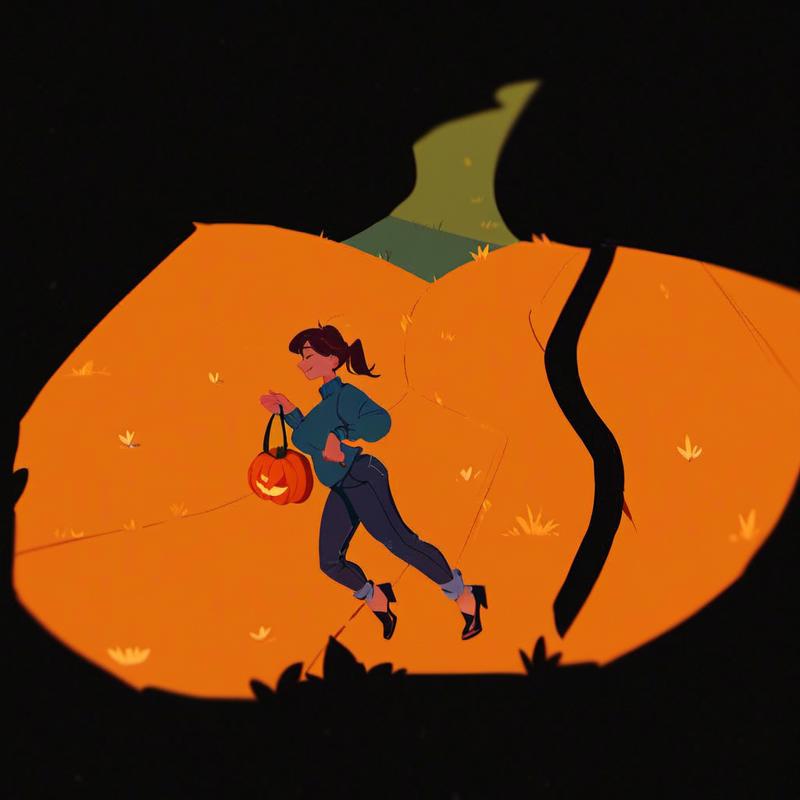
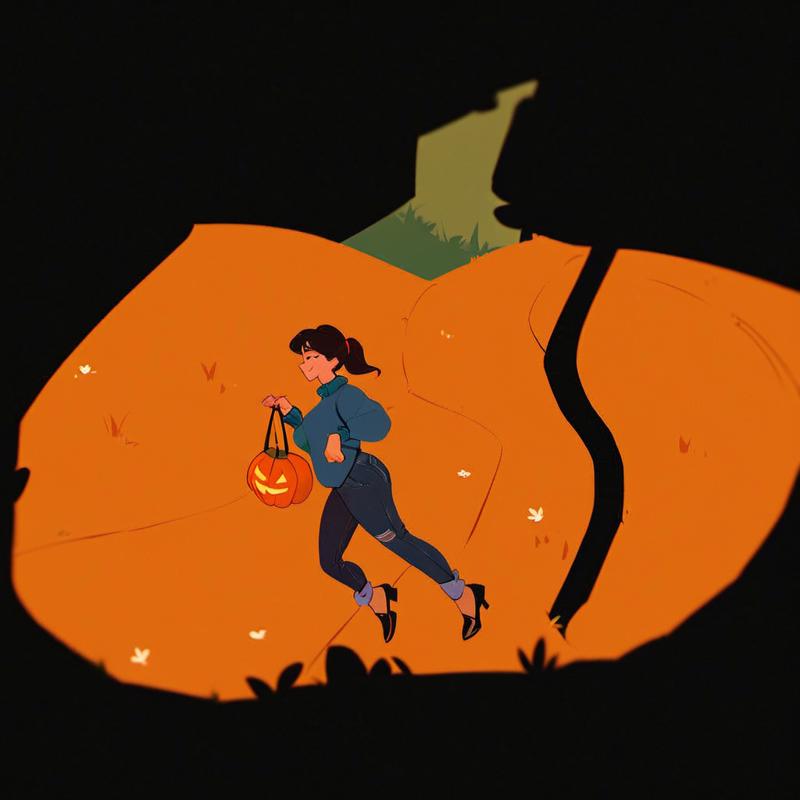
You can see that the larger details are extremely stable (though there were some options to go in slightly different directions) while the smaller details continue to evolve and converge. This means that chaining at higher strengths a few times before going to a lower strength can lead to good results.
Image Templates
One last related technique is to use convergence to make an image template for your model to produce similar outputs. As mentioned earlier, convergence makes nearby parameters/prompts more stable too, so you can use a converged image with a different prompt (or other parameters) to be more likely to make something more like it without getting totally stuck.
So for example, let's take the most recent image just above and change the prompt so the character has long blonde hair, and use a denoising strength of 0.6 (0.5 is too low to change the hair color):
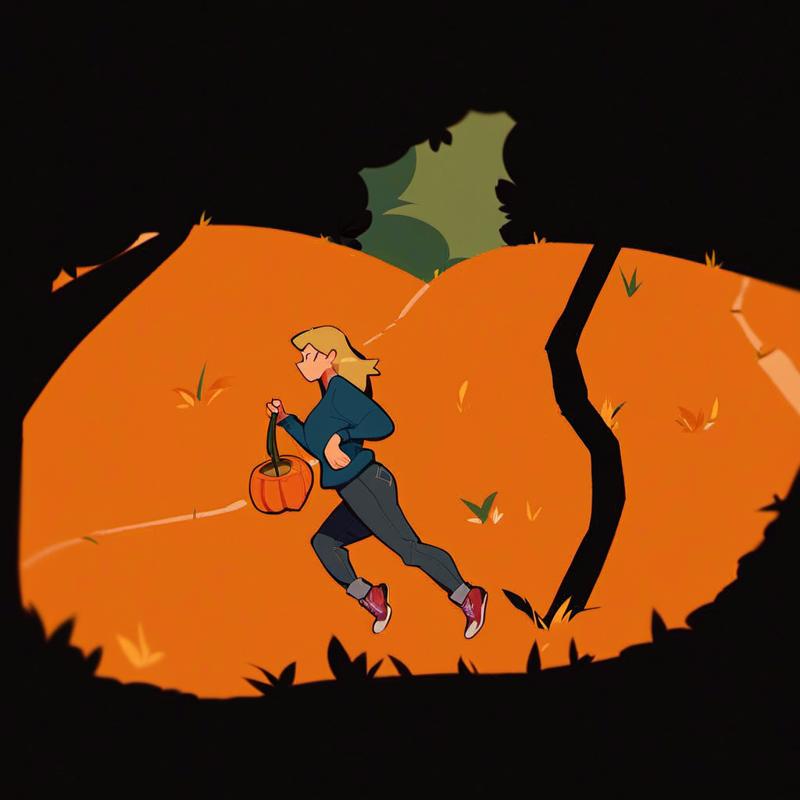
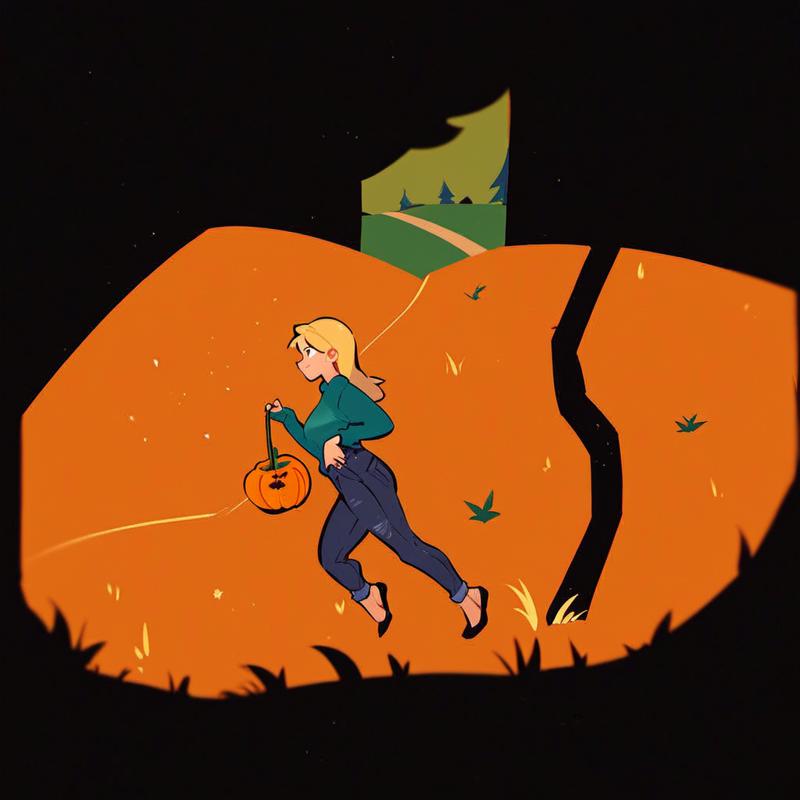
This can be a handy technique since it's so easy to do, but don't expect good performance. It's easier to break out of convergence than it is to make similar generations. If you need to create a reliable template from an image, you should train a single image LoRA on the image instead.
Inpainting
Most of the material in this article is applicable across both img2img and inpainting (and often txt2img as well). However, img2img isn't enough on its own, especially in the light of image convergence, since the entire image will morph and converge if we keep chaining it to fix details.
Fortunately, inpainting solves this problem by pinning some of the image in place (the context region) using an image mask and only transforming a portion (the inpainting region) of the entire image. After all, in our quest to transform our image to the desired state we don't want to transform areas of the image that are already in the desired state.
SIDE NOTE: Canvas Zoom is one of the few nearly essential Automatic1111 plugins, it adds a canvas zoom feature and some keyboard shortcuts that make inpainting much easier. It's a built-in plugin for reForge for this reason. Also, while we're on the subject of tool-specific tips, don't forget that you can upload a mask if needed. Oh, and if you're using Automatic1111 (including reForge) make sure to set up image previews on each step, this will help dramatically to see what's going on.
Inpainting Parameters
Most of the inpainting parameters (available in Automatic1111) only need situational changes from these sensible defaults:
Mask mode - Inpaint masked, alter the part you masked (if you want the opposite, choose inpaint not masked)
Masked content - Original content, don't do anything to the masked content, noise is added anyway (you can do any of the other options better manually)
Resize mode - Crop and resize, if relevant it will crop to preserve the aspect ratio (just resize if you want to squish rather than crop, or you can pick any setting if there's no aspect ratio change)
Mask blur/Soft inpainting - 4(?). This controls the size of the border between the inpainting region and the context region, so if you use 4 then a 4 pixel border around the inpainting region will be inpainted less strongly, it also extends into the inpainting region by 4 pixels so the full border is 8 pixels thick. This is actually a parameter I haven't played around with much, so maybe there are better settings but 4 seems to work fine. It should also be noted that like the only masked padding parameter below, 4 pixels may be huge or tiny for a given size.
That leaves the following inpainting parameters that regularly matter:
Inpaint area - This switches between two radically different modes of operation
Whole Image - This works essentially like img2img but only the mask changes and the rest of the image stays static. In particular, image resolution is interpreted as the whole image size and you will resize the entire image if you don't use the same image resolution as the original image.
Only masked - This mode cuts out the mask and a context window around the mask, then it resizes it to the provided image resolution (the working image resolution), runs the generation on the working image, resizes the working result back to fit into the original image, and pastes the resized results into the original image in the exact same spot. The final output image will always be the same size as the original image and include all the content from the original image with only the inpaint area altered.
Only masked padding, pixels (aka context window size) - This controls the context window size in only masked mode. For instance, if you use 32 pixels then it will select 32 pixels in all 4 directions around the mask, consuming 64 pixels in each direction. This is blocked by the image borders, in which case it just gets context up to the image border. Interior regions are always completely included.
It's very important to note that an absolute pixel size can be huge or tiny depending on the mask. If only 1 pixel is being inpainted with 32 pixels context, then the context will be 64 times larger than the inpainting area. If 1024x1024 pixels are being inpainted with 32 pixels context then the context will be a slim 12% the size of the inpainting area. Make sure to adjust based on the mask (and working image) size.
In addition, the amount of context that's appropriate is very dependent on your model and what you're trying to accomplish. So this a parameter you'll be changing a lot.
I think about it in terms of Whole Image Inpainting, Wide Context Inpainting, and Detailed Inpainting.
Whole Image Inpainting
Whole image inpainting is when you use whole image inpaint area, and it's mostly useful for attempting a redo on some portion of an image that was otherwise what you wanted but that didn't come out right in one area. If your model is usually pretty good at the detail in question, then redoing just that part might work.
It's also the likely to work with models that don't have training to support inpainting properly or with prompts not using the inpainting features of the model. So, it really is the way to go for a low effort redo of some portion.
Side note: Some models are explicit inpainting models. This isn't actually necessary, any model can be trained to do inpainting. When I talk about inpainting support here I just mean that you can tell the model to focus on some detail, not that it has to be an inpainting model, though of course an inpainting model will perform well at inpainting.
I won't go into too much detail on whole image inpainting because it's actually a pretty weak option and is usually outperformed by wide context inpainting, but if even the widest context isn't cutting it then the whole image certainly will. The main benefit is convenience.
Wide Context Inpainting
Wide context inpainting is when you use whole image inpaint area with a relatively large context window.
By adding a lot of context, you are ensuring that the image being worked on is similar to what your model is trained to operate on. This is particularly important if you don't tailor your prompt to your inpainting task (or if your model doesn't have a caption to indicate the proper kind of close up detail work you need). It can also be useful if the model needs to see some context to really understand the image and get the details right.
The trade-off is that by adding a large context window you are removing working inpainting area that could be used to improve the detail of the results. If your model can accurately render a close up of a detailed area it will perform better, even if it needs to downscale the results at the end (though speaking of, it's better to upscale the whole image before inpainting so you can keep high resolution detail when it's downscaled).
Compared to whole image inpainting:
You have more flexibility about working image resolution, if your model is better at some other resolution (ex. 1024x1024) than the image's resolution (either due to having a different aspect ratio or being much larger) then you can operate at the ideal resolution for your model to increase performance
This also means you can upscale to overall image dramatically and keep fine details you inpaint in, I recommend working at either 1.5x or 3x scale after you have a good base image that only needs further inpainting work
By focusing on a subset of the image to focus on, you pretty much always can give more working area (and thus detail) to the result than if you inpainted the whole image
However, note that since you also have more working image flexibility, you may end up having to upscale the result if the working image is smaller than the area of the image you are inpainting, but this will only happen if your working image resolution is smaller than the entire image (and the issue is usually not concerning even if this is the case, just be aware that a poor choice on a large image could reduce the resolution of the inpainted area)
In practice, wide context inpainting is best thought of similarly to whole image inpainting: you want to redo a portion of an image (possibly with a bit more detail). The wide context should allow the model to perform well even without proper model/prompt support, so it's pretty convenient too.
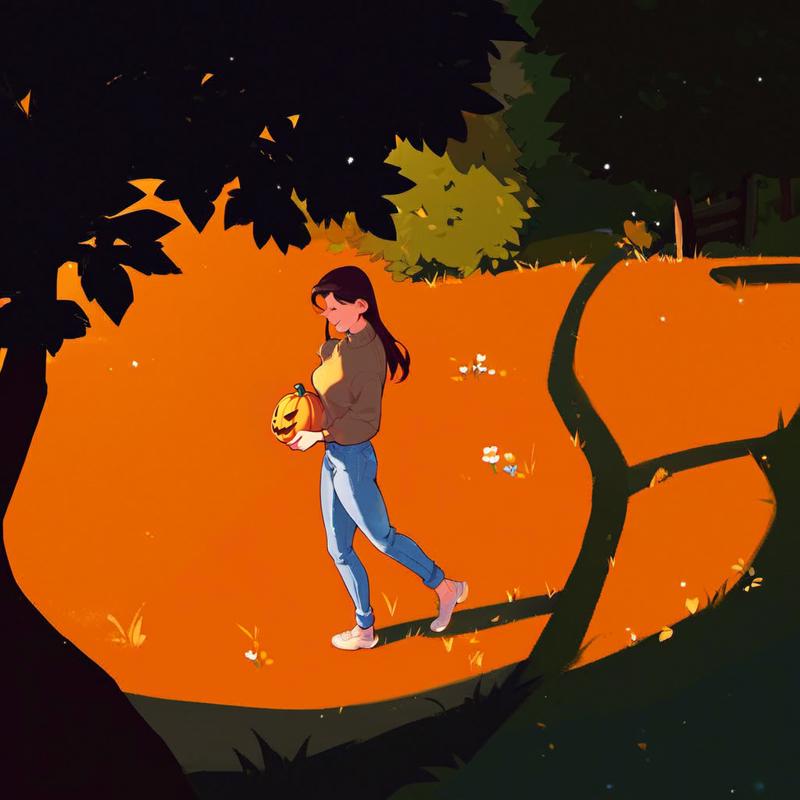
The other practical reason to do wide context inpainting is if you try detailed inpainting and there's not enough context. Perhaps it's messing up anatomy because it doesn't know what direction a character's arms are coming from, so by widening the window to include that context you can help it produce better results. For instance, starting from this one:
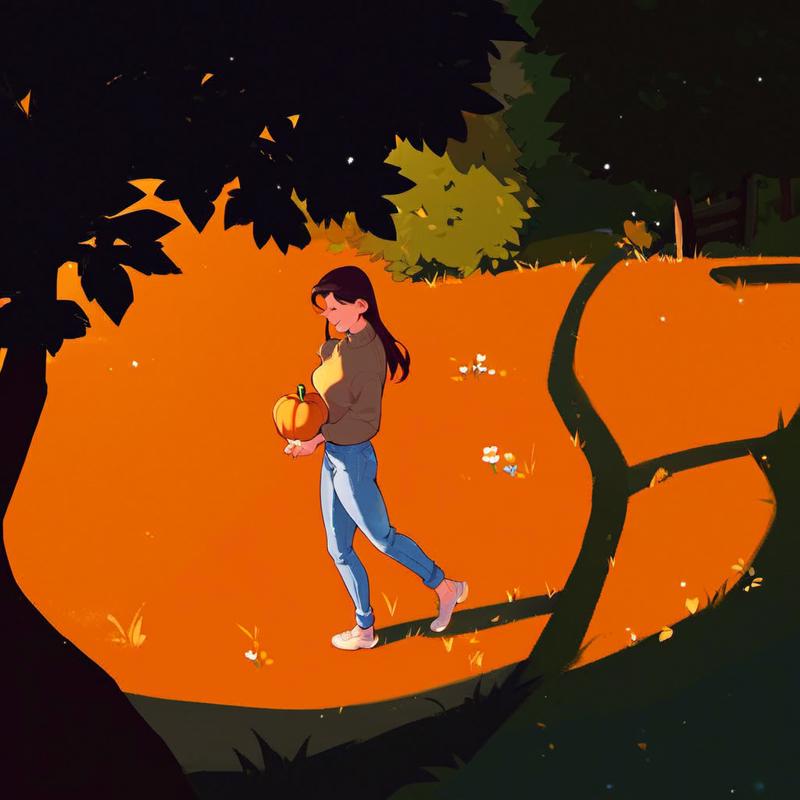
When trying to make a carved pumpkin with a small context window it produced:
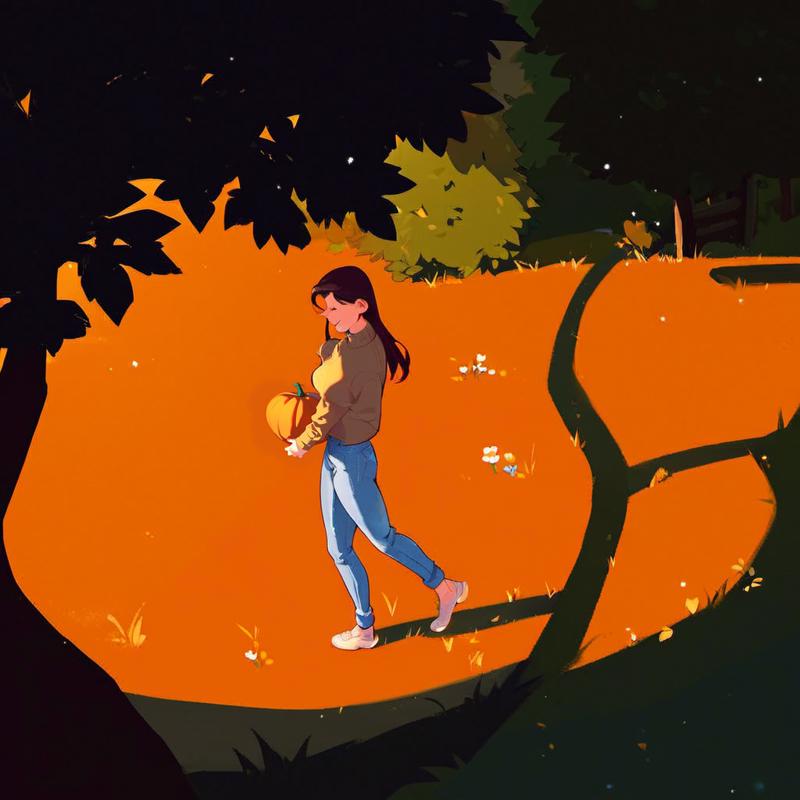
When trying to make a carved pumpkin with a wide context window it produced:
One last thing to mention is the single pixel mask hack: if you can't get enough context just by increasing the context window size (or perhaps you want to extend it only in some specific direction), then simply put one pixel in the mask in the area you want to include in the context window. Since interior regions are always fully included as context, this will cover the entire region between your main mask and the pixel, and single pixel masks usually don't have enough impact to be noticeable (especially if placed strategically).
Detailed Inpainting
Detailed inpainting is when you use whole image inpaint area with a relatively small context window.
This gives relatively little context to the model but a potentially huge working area, which means that if it's set up correctly it can produce vastly more detailed results. Even if it has to downscale the result, it's downscaling a high quality result that will be much better than a normal resolution result.
The challenge is setting this up for success, because a lot can go wrong.
The first issue is that your model might not support detailed inpainting at all. If you think about it, you're generating a cropped, detailed, close up of some part of your image rather than a complete piece. If your model can't give good results of this kind in txt2img or img2img, either because it doesn't have an appropriate caption to zoom in on the detail or because it produces garbage results, then it won't work for detailed inpainting. Though like most image-guided generation, a good base image can often provide the guidance the model needs, but if the model just doesn't "get it" then it'll be better to give it wider context to give it something more like what it's used to than to fight with the model (or of course, you can train your model to do what you need).
Another issue that's a complete showstopper is when some context being visible is necessary. If you need it, make sure widen the context window to include it.
Next is to ensure the prompt is appropriate to the visible working image. It will always perform better if you tailor the prompt to the working image, but at lower denoising strength you can usually get away with keeping a prompt that includes details outside the context window. It's usually just a matter of cutting out no longer visible parts of the image, though you may also want to put in new (ex. "close up", "hand focus" or something related to what you want to change) or more specific details (ex. mentioning "hand" or "ear" when you didn't mention these little details before, you might mention a specific hand position, etc.). If your model produces an entire character where their head or hand should be, that's a good sign that your model/prompt is inappropriate (and also your denoising strength is too high).
PONY-SPECIFIC TIP: score_9 and similar captions really mess up hands despite really improving overall image quality. Try removing them from detailed inpainting involving hands, or really all inpainting involving hands. If the style doesn't match, consider blending it back in with a low denoising strength after you get the anatomy right.
Lastly, ensure all the other little details are in order:
The working image resolution should be an ideal one for your model, you don't have to stick to the original image's resolution
Do any necessary image sketching to guide the generation better (more detail on this later)
Denoising strength is important to get right (as usual), you might need to tweak this
If it's not working and there's not some more obvious reason, then the thing most likely to fix it is to increase the context window (and/or mask size) until it works and just accept the quality loss.
High Denoising Strength Inpainting
Inpainting with low denoising strength is pretty straightforward, as your input image will strongly guide the results, making it easy to get decent results even with sloppy work. The problem is that often if you're inpainting some region it's because the image has a problem.
Sometimes when you try high denoising strength though, you find out that rather than creating new image content that is congruent with the context, the model is actually more or less ignoring everything and doing its own thing within the inpainting region.
This is most commonly due to the issues with the model or prompt I mentioned earlier. Try out your prompt in txt2img and see if it's making anything like the working image. Figure out what details are causing the issue and change the prompt.
Increasing the context window may also help, or it might make the inpainting region small and some element you want to inpaint in consistently not appear in the inpainting region.
You might also have a model bias problem, wherein the model wants to produce a detail even when it's not mentioned, such as inserting a human character in every scene. Sometimes putting the appropriate caption in the negative prompt is enough, but if it's bad enough you'll need to include enough context that it sees the subject it wants to include so bad.
Another possible issue is that the input image is misleading your generation, this is less important with high denoising strength but can still be an issue.
Sketching in rough (but correct) details on your input image can go a long way, and might allow you to reduce the denoising strength too.
Lastly, it's expected that high denoising strength inpainting will mess up your background. If background fidelity is important then separate the foreground and background and work on them separately (or use very precise inpainting masks).
Regional Prompting
You don't need a special regional prompting tool/plugin, because inpainting is already a regional prompting tool!
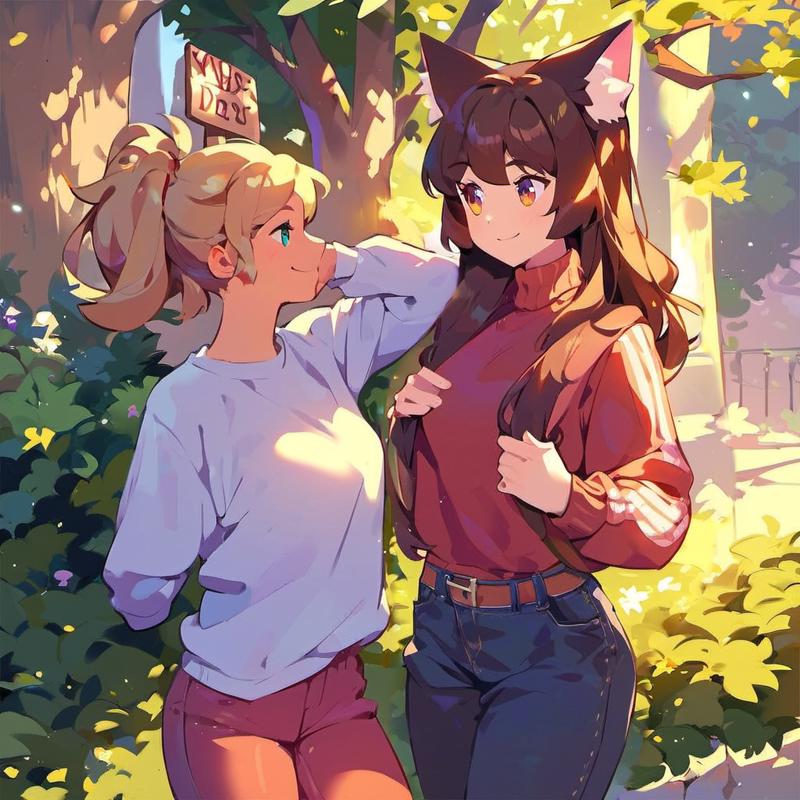
There's a couple ways to do this, but lets start with an example. Here's a base image made using txt2img with the prompt (score_9, score_8_up, score_7_up, 2girls, sweaters, pants, smile, looking at one another, outdoors, trees, sunny):
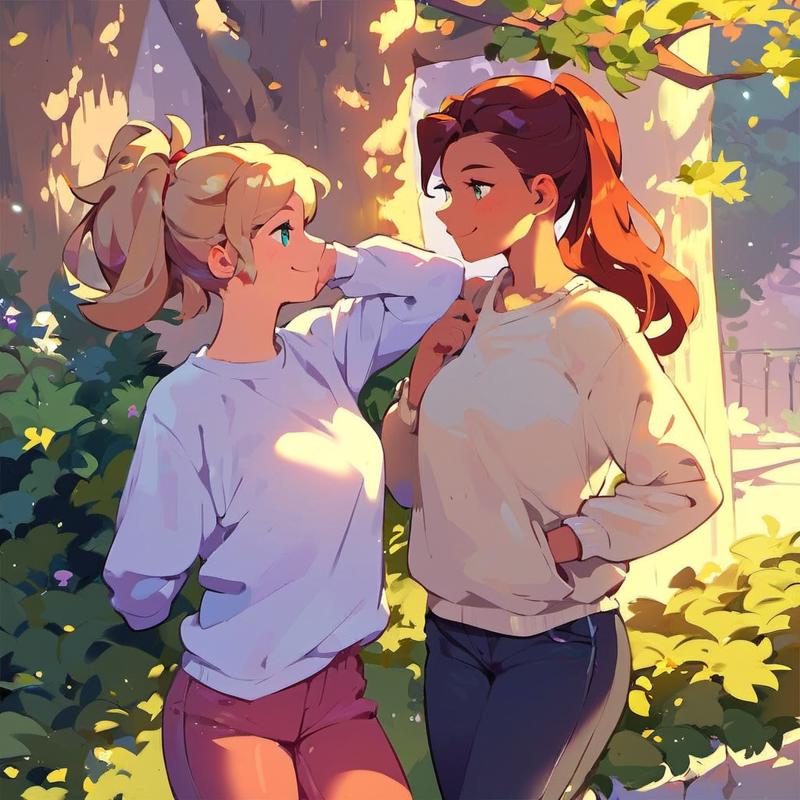
Now lets say the woman on the right should be a catgirl with a red sweater, then we'll amend that to the prompt (score_9, score_8_up, score_7_up, 2girls, sweaters, pants, smile, looking at one another, outdoors, trees, sunny, red sweater, brown hair, catgirl) and mask the woman on the right and generate at 0.8 denoising:
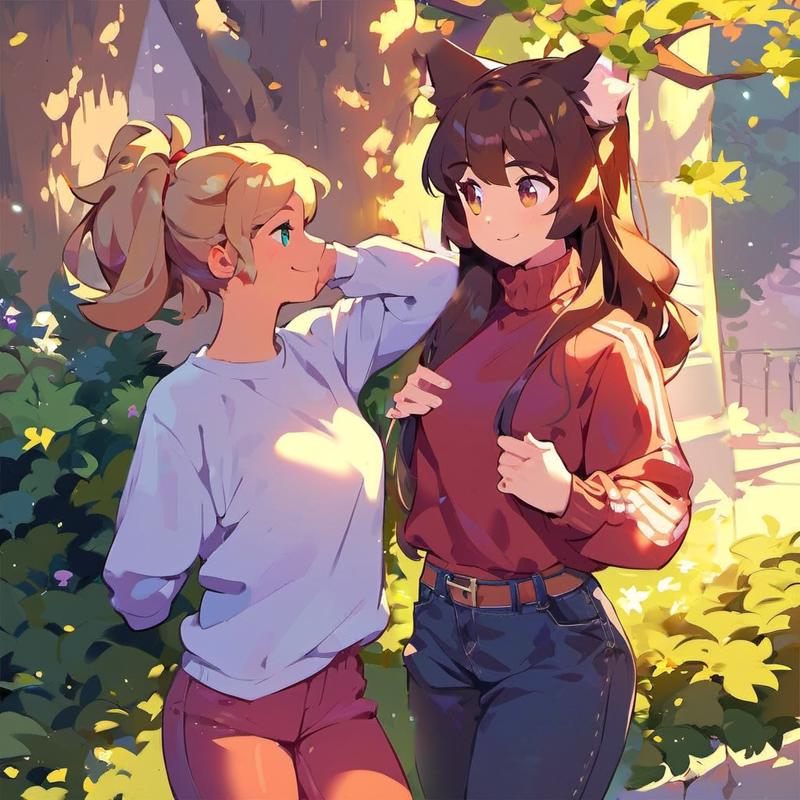
Hmm, that's better but her ears got clipped off, as well as some of her pants. A useful technique to know about is that if you get a clipped result like this one (or if you accidentally destroyed the background in a specific region) then you can re-run with the same seed and a different mask to get "the other parts" (or preserve a part you now know you want preserved):
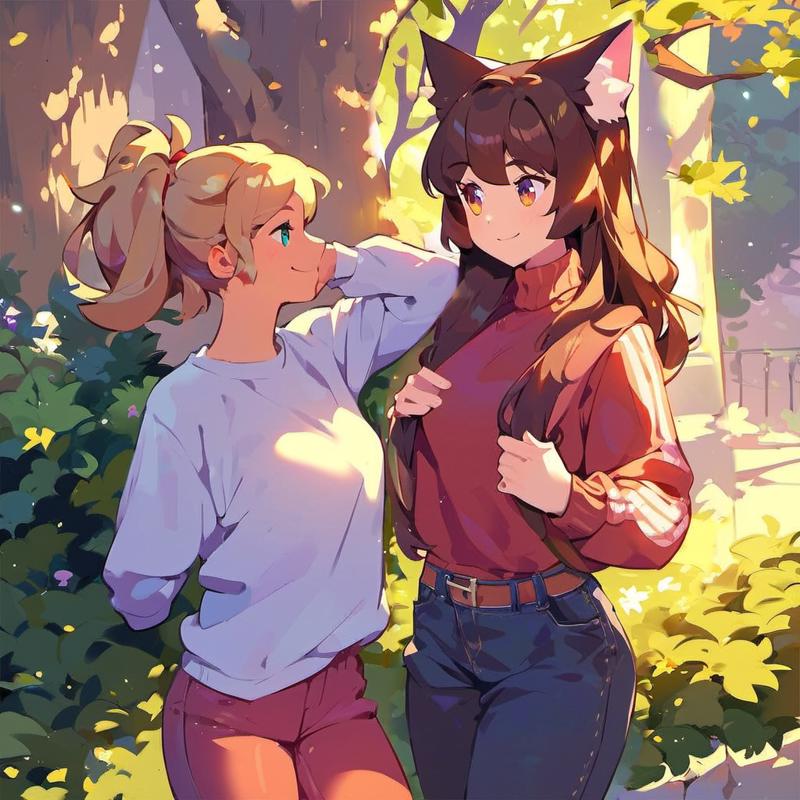
Now we'll give the other woman red hair and a more intricate sweater. We have to take out the details about the catgirl character, and put in the new details we want (score_9, score_8_up, score_7_up, 2girls, sweaters, pants, smile, looking at one another, outdoors, trees, sunny, red hair, white sweater, cabled sweater, intricate detail) and run it at denoising strength 0.8:
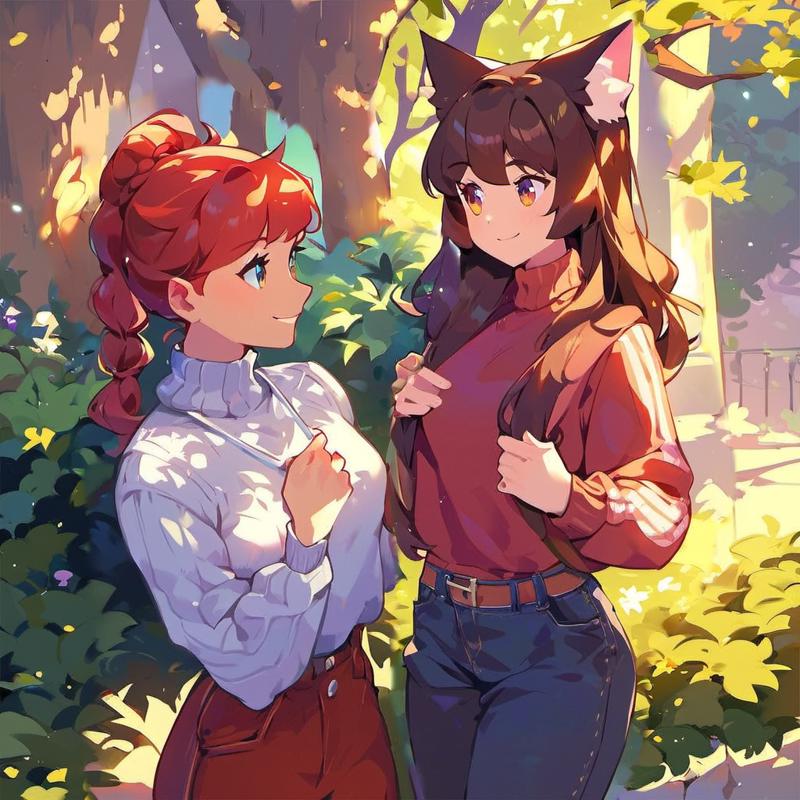
This one needs more work inpainting some details and blending to finish up, but it's a good start.
The point is that we were able to use inpainting to regionally prompt the two characters in detail separately, without them blending together. This is especially important when using two different character LoRAs, since each LoRA can be deployed independently in each region.
There's a lot more you can do here than just keeping characters distinct, since you can basically do any kind of regional prompting. The sky's the limit, just make sure the underlying image is sorta like what you want (ex. if you are making an image with a light and dark half then make sure the base image has the right colors). This is why I made a base image with two characters to start with, even though I used such a high denoising strength that it didn't track the original very closely. Basically, I used the base image to indicate "there's two characters, one in each half" to the model and give it a rough idea of what else to generate.
If you want to follow your original more closely but also need to make some changes, you'll need to use a lower denoising strength and very likely use some basic image editing/sketching, which we'll revisit shortly.
Making New Elements
Making new elements rather than following elements already present in the base image can be a difficult task, but there's a couple of approaches.
You can edit a gray txt2img blob (or any other color you want) into the region you want to regenerate and hit it with denoising strength 1.0. A common problem with this is that at such a high denoising strength it can be difficult to get the model to pay much attention to your provided context. That said, this can be a good option in some cases, especially if you're covering wide regions, but it's usually not a good approach.
I'm gonna go ahead and do it anyway to illustrate the problems and why the sketching/photobashing solutions we'll do later are so much better.
Let's say we start with this one and want to add a sign on the tree, so we'll edit in a gray blob to restart that area of the image:
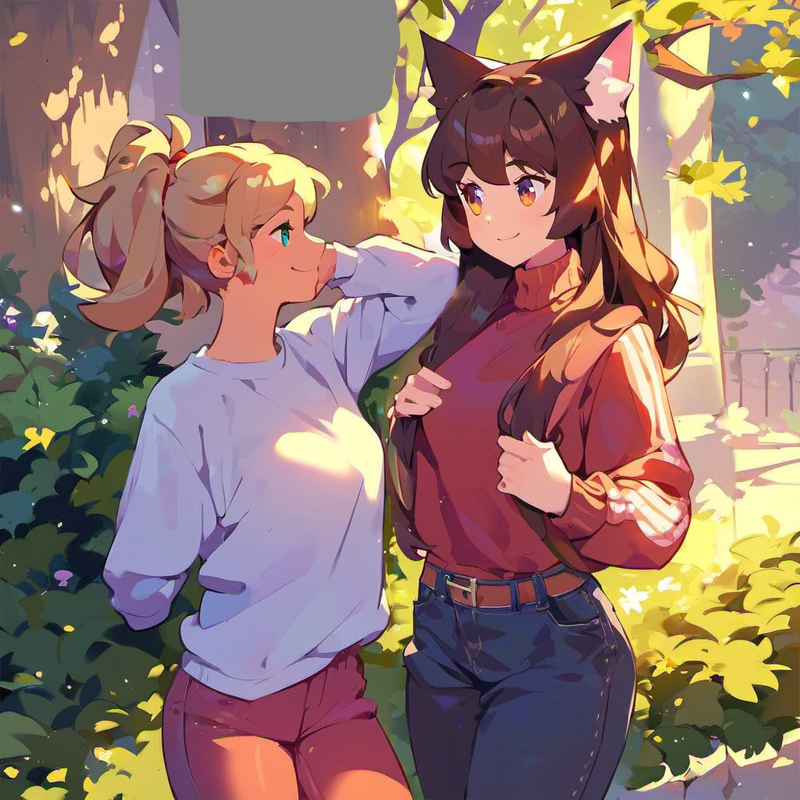
Here's two results at denoising strength 1.0, the prompt "score_9, score_8_up, score_7_up, tree, wooden sign" and a fairly wide context window:
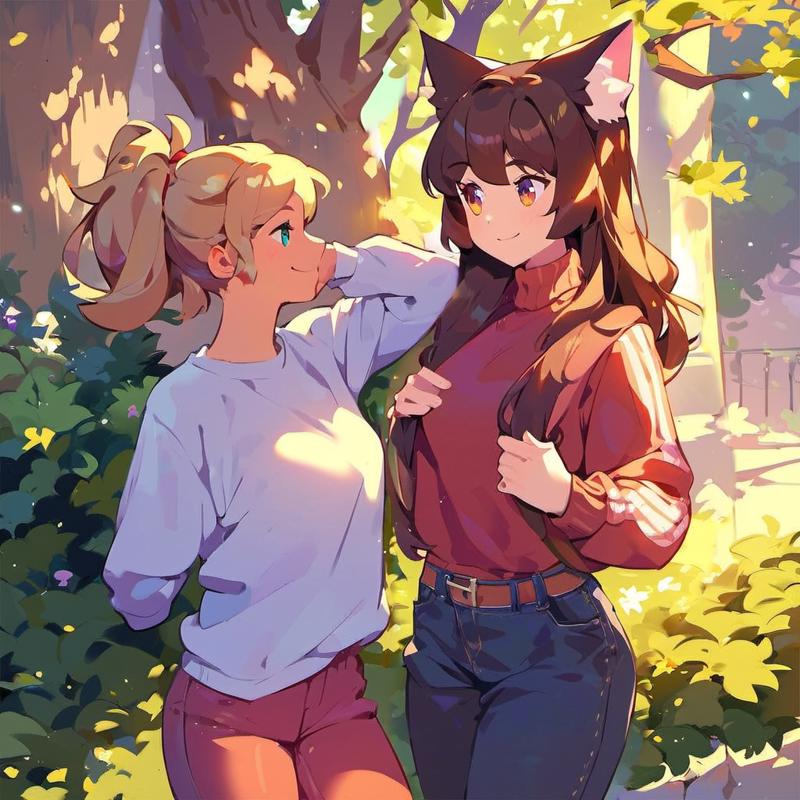
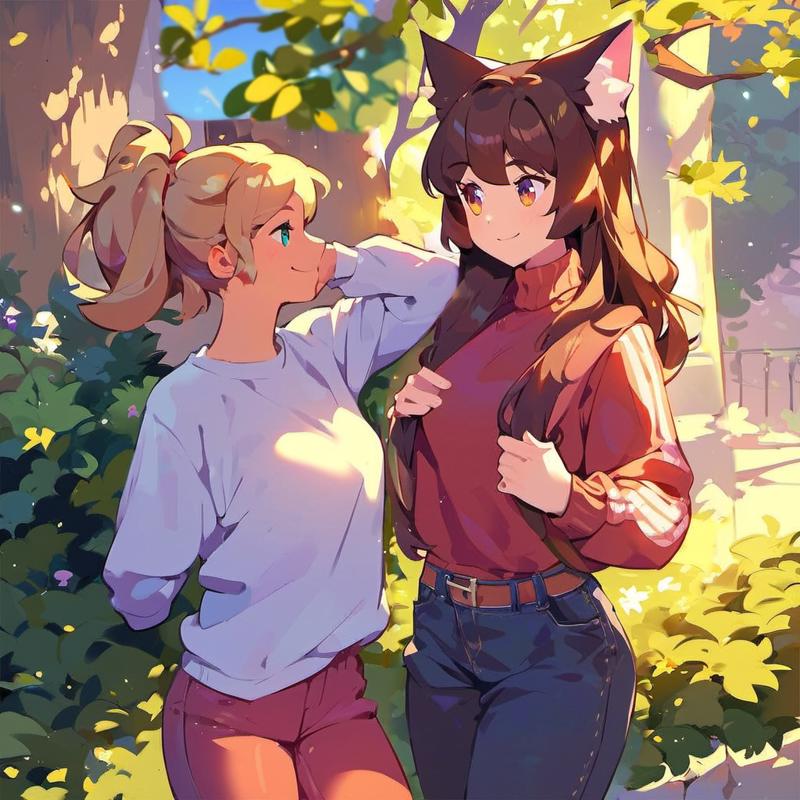
It successfully generated new elements in both cases (you can't tell we painted over a gray blob, and the results look similar to the rest of the image), but the sign we wanted is nowhere in sight and the second example meshes badly with the rest of the image, so what's going on?
Well, lets repeat the second example with a wider inpainting area:
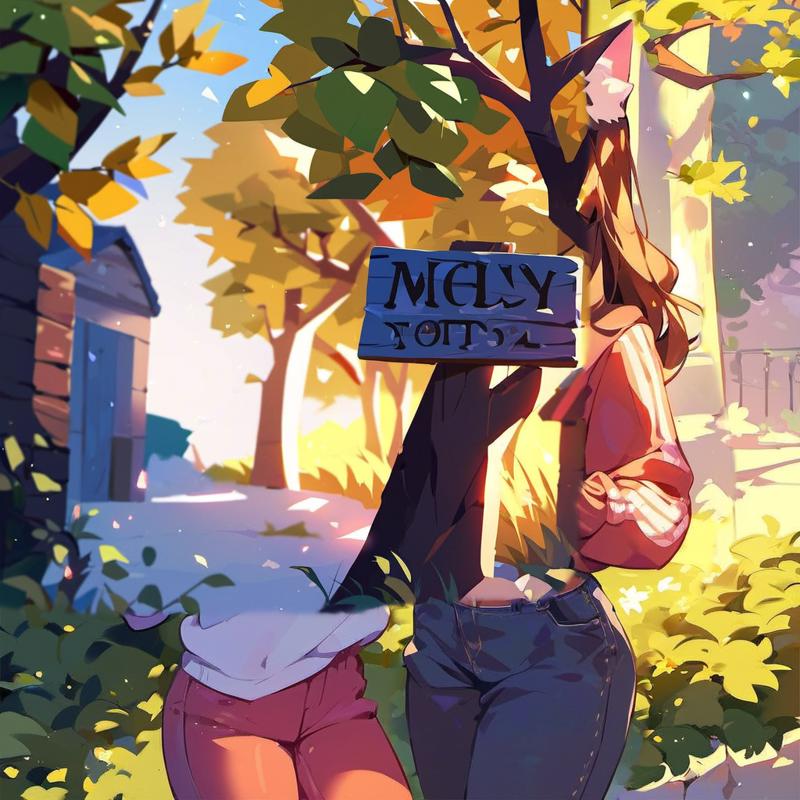
It's not exactly the same because widening the mask made the context window change again and we're now inpainting over areas that were not blanked out, but the region that was visible before is reasonably similar. This example makes it clear though that the model "wants" to place the sign outside of the inpainted region, so it doesn't appear in our inpainting region (except by luck, and even then it's likely to be partially cut off and may not make sense).
Another way to think about it is that there's not a "nucleation site" for the sign to appear in the inpainting area, and it's unlikely for one to form spontaneously, especially if anything in the context window catches the model's attention or the context implies that other necessary elements must be in the inpainting region, like the tree in this case.
The more your inpainting area covers, the more likely you'll get a good result from this approach but this leads to a catch-22 where a critically low amount of outside context combined with massive model power means you'll likely get a result that doesn't match the rest of your image at all. Here's what that looks like in this case:
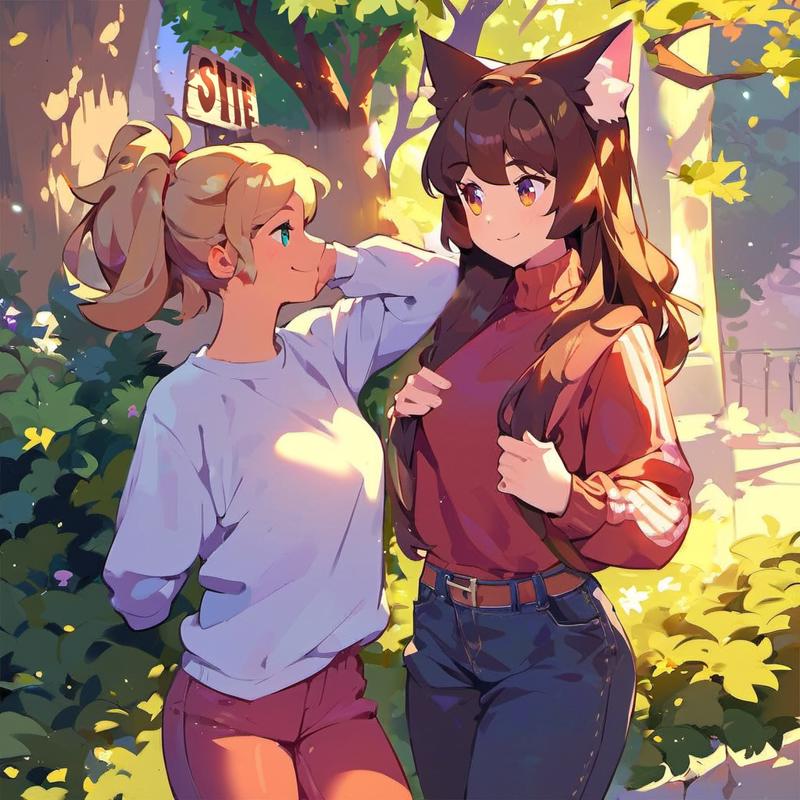
You can fix this up with manual effort of course, spend a few rounds blasting it with high denoising strength and blending it in. However, a much better approach is to do some image editing. That is, instead of trying to force it to appear out of nothing, you can inpaint sketch in your new element or generate what you want separately and photobash it in. We'll revisit these options shortly.
Blending
If you get a good inpainting result that doesn't mesh well or messes up other parts of the existing image, don't worry too much because you can fix it with more inpainting/editing or blend it in.
The most common issue is that your newly inpainted content has a visible halo or discolored patch around it. To fix this, lower the denoising strength (possibly very low, like 0.4) and consider expanding your inpainting area to assist with this process, then run the inpainting again. It should preserve the content while blending it in better so it doesn't look inpainted.
Here's a relatively extreme example of fixing up the poor context sign in the most recent image with 2 progressively wider rounds at 0.5 denoising strength:
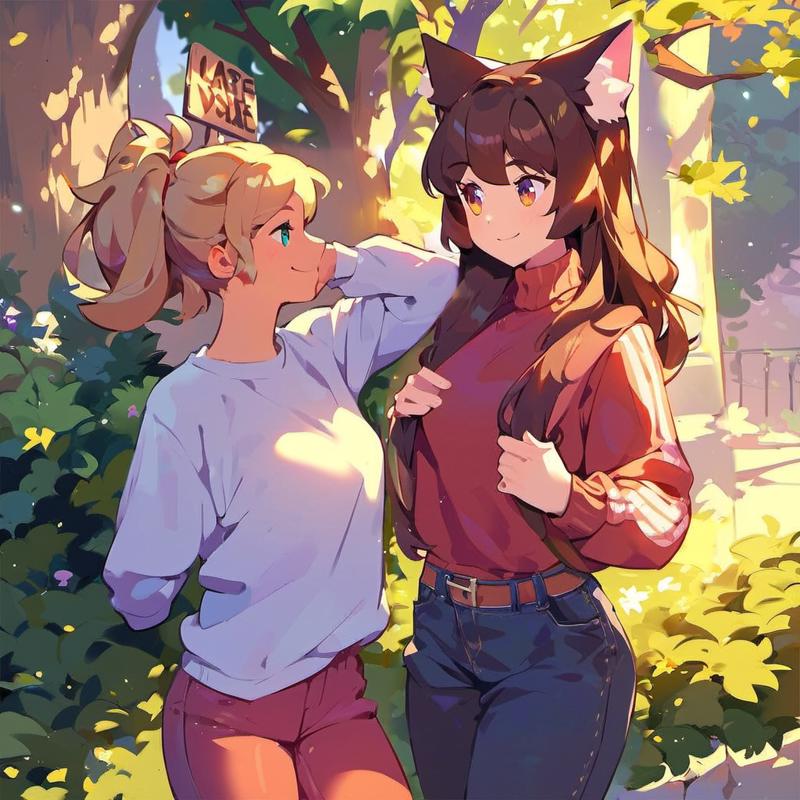
While I would have just started over with a better approach, it does show the power of blending that even really bad results can be made to look like they fit in. It also didn't mess up the characters despite them getting into the inpainting region (though if you look carefully there are some subtle changes).
If this doesn't work you might need to adjust your prompt or make some direct editing to fix defects.
In the worst case, if the damage is too difficult to repair then don't be afraid to go back to before you did the inpainting and try something else.
Also, don't forget that you can work on a piece with a simple background and then copy it into a finished piece. You'll likely need to apply blending here too, putting a mask around the pasted in object (or even using img2img to blend across the board), but a single round of blending without real defects to clean up is usually pretty easy. If you're spending a lot of time fixing and blending backgrounds then making the foreground and background separately and combining them at the end can help a lot.
Image Editing
Inpainting is also not enough on its own, and some basic image editing can make a huge difference (as evidenced by how often I mentioned it in the previous section).
Inpaint Sketch
Included in Automatic1111 is an inpaint sketch feature. I don't use the feature itself often because it seems like the mask and the sketch are pinned together, when what you really want most of the time is a wider mask than your sketch, but the idea is very useful. Instead of using the inpaint sketch feature, I simply download my file, load it into Krita (image editing software), edit it, and return it to the AI software for further transformation.
You can just roughly sketch in what you're looking for and the AI will fill in the details. You don't need good artistic skills to make this work, though of course they help. What is important is knowing what your sketch should look like to be effective.
In this context, a sketch isn't a black and white pencil drawing (unless that's what you want to produce). Instead it's a low-detail rendering with the correct colors. Another way to think about it is if you zoom WAY out (how far depends on denoising strength you plan to employ) then it should look vaguely correct.
Let's do some examples trying to sketch in a wooden sign on the tree.
First of all, let's consider what happens if we take "sketch" too literally and insert a black and white sketch.
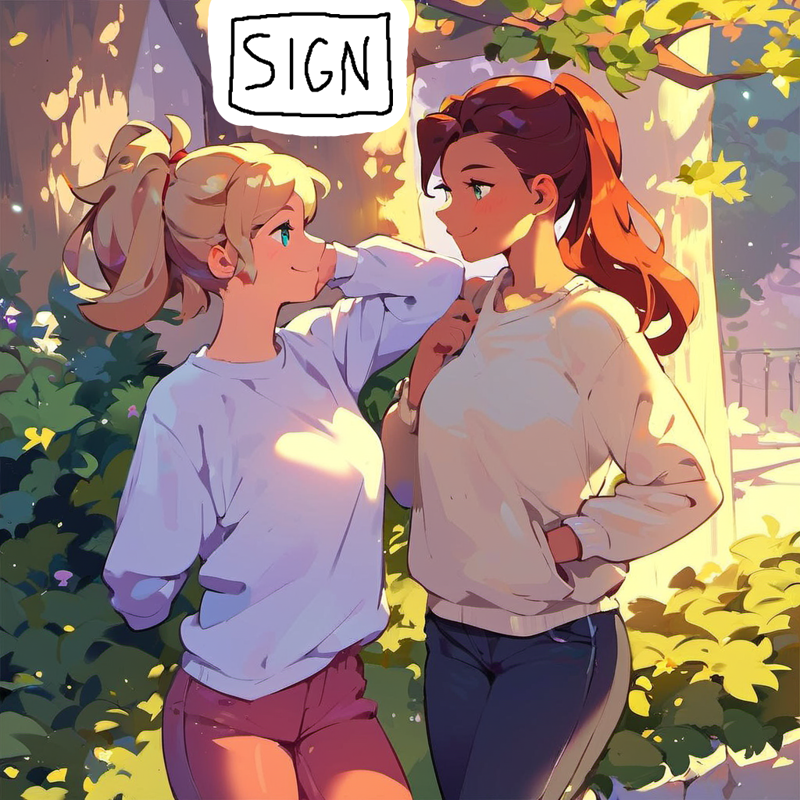
Here's the best result I was able to get:
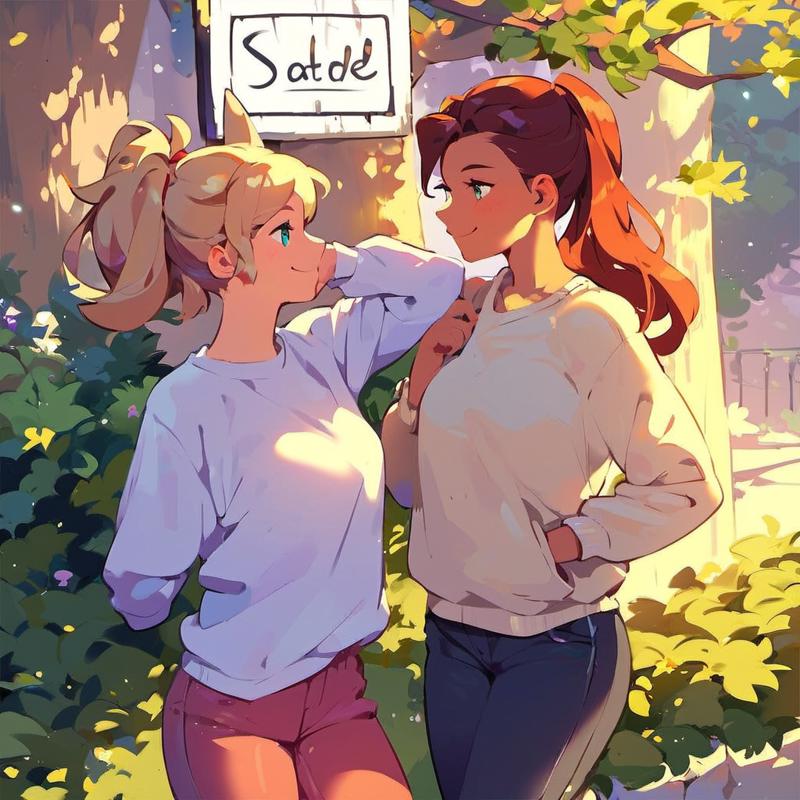
Most of the others attempts either didn't change it enough to look like a sign in the actual environment, or for higher denoising strengths it just stopped making signs and just made disembodied blonde catgirl ears:
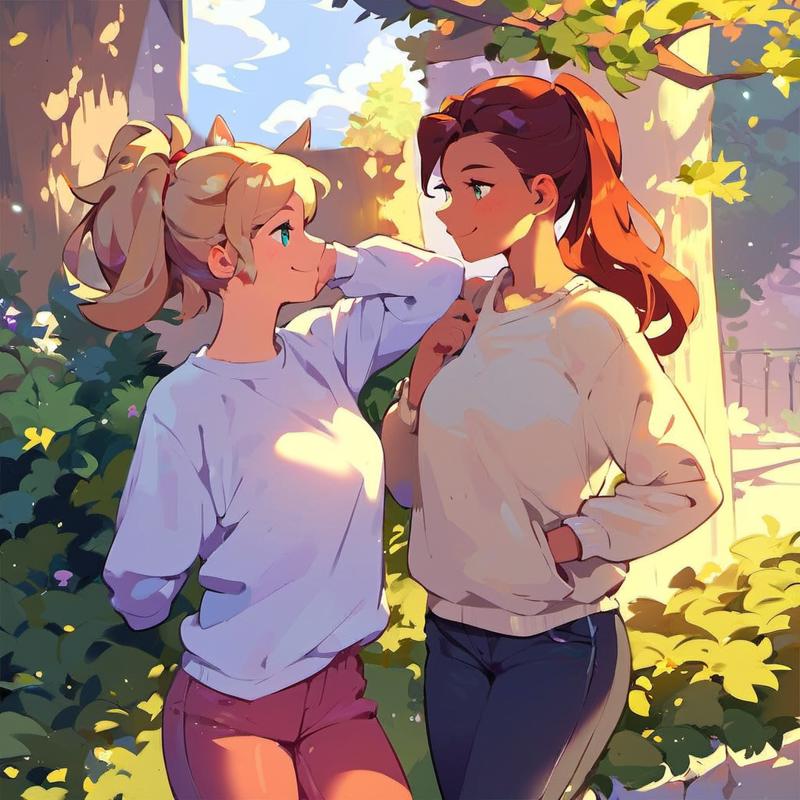
So what we really want to do is sketch in something that has the right colors and basic shapes that we want, like this:
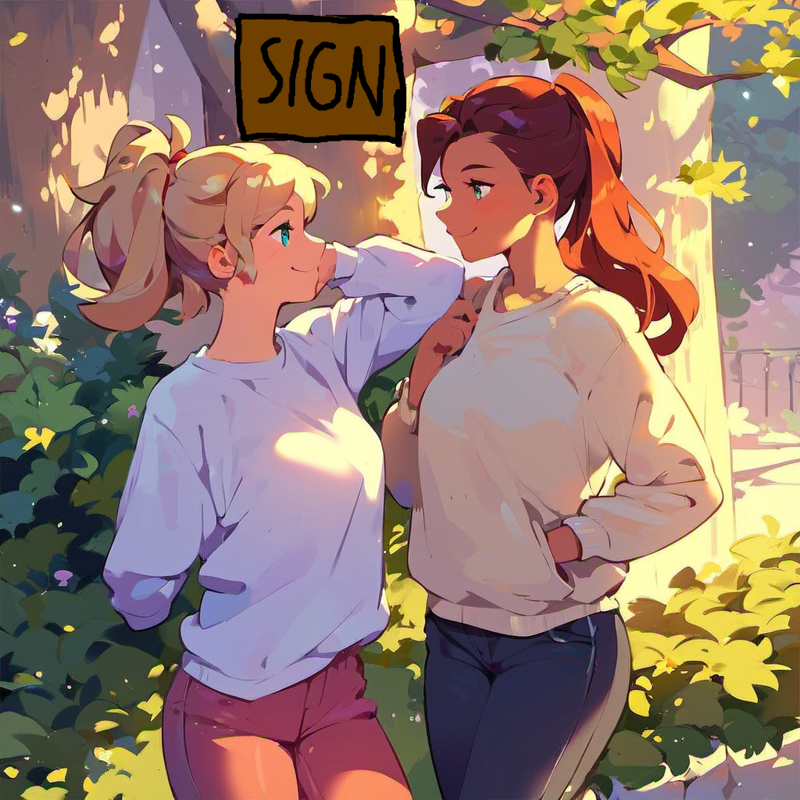
After playing around with various parameters (most notably denoising strength, high values still ignore the sign though they usually at least get the tree since the colors now match) I got this one using denoising strength 0.6:
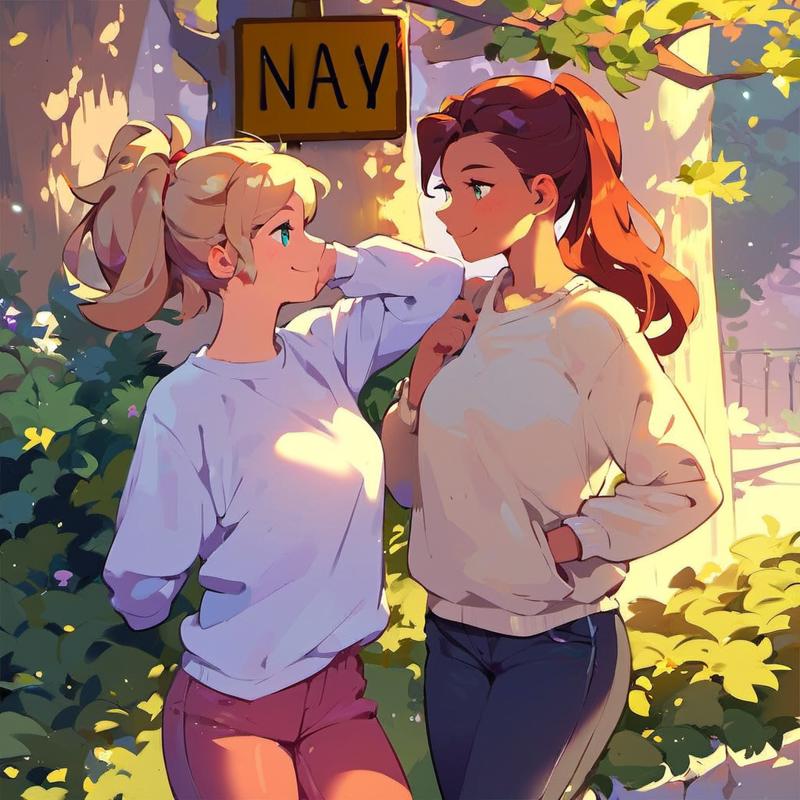
Since Pony is pretty bad at text (and I didn't mention the specific text in the prompt) it changed the text content, but the rest of it is pretty good, much closer to what I want. So, I painted the text I wanted back over this version of the image again:
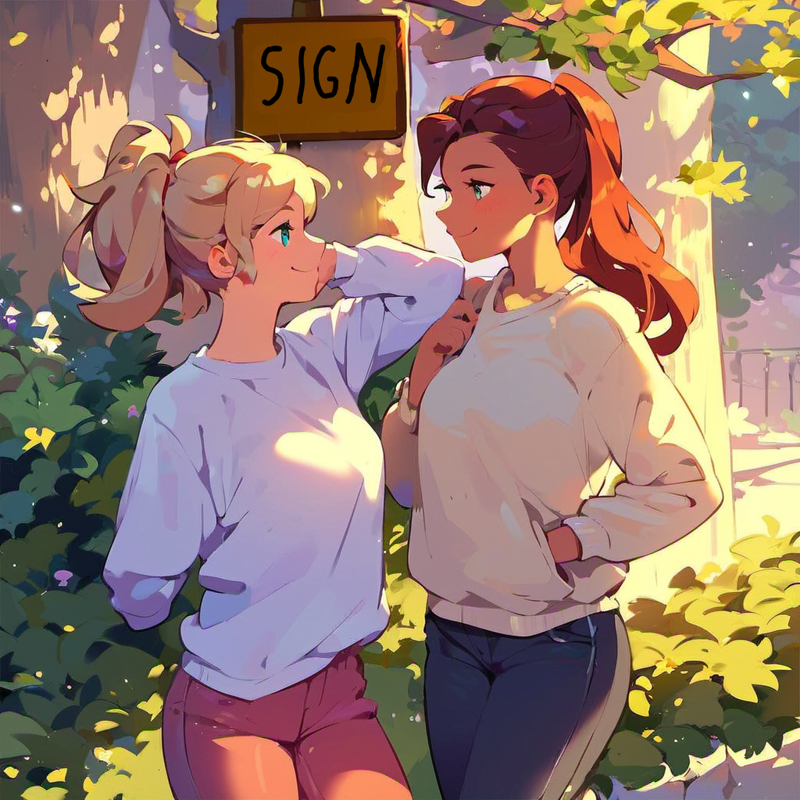
Then I re-ran the process at 0.5 denoising strength:
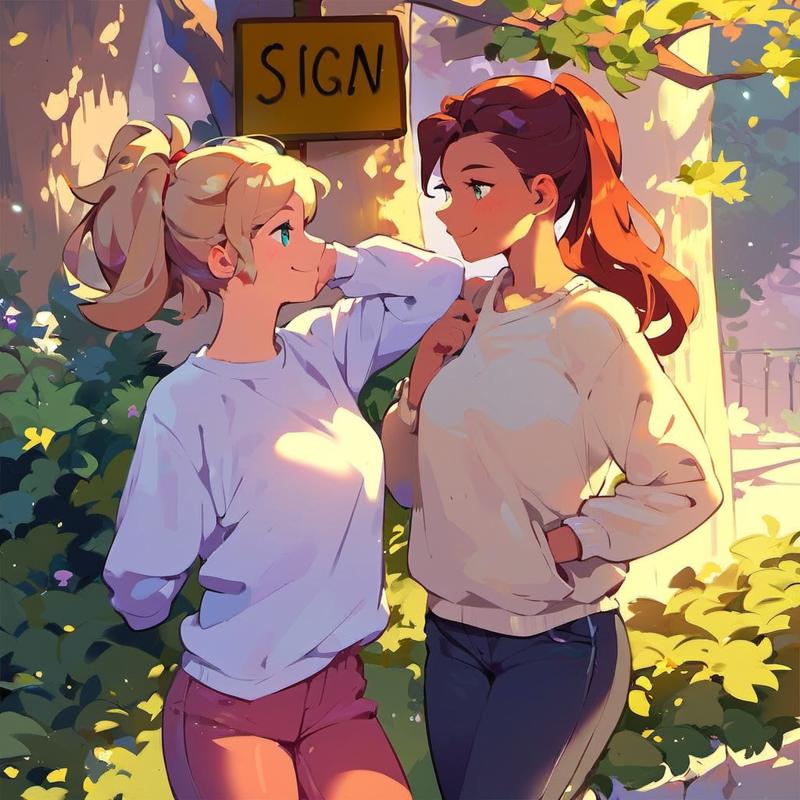
That's good enough, at the very least this new element of the sign can be further developed now that it's in the base image.
Sketching has a wide array of uses. You can add new elements as shown above. Note also that I used it to correct a defect (the changing text) and simultaneously forced an element to persist even when the model wanted to change it. You can delete unwanted elements too.
Just remember that basic sketching isn't too demanding, just get the colors in the right regions and the AI will patch it up.
Simple Shading
While putting down the basic colors is usually enough, especially if you chain the image a few times to add more detail, it's useful to learn how to very basic shading. For instance, consider this example of drawing a red ball.
Let's start from a pure red circle:

After hitting it with 100% we still have it looking like this:
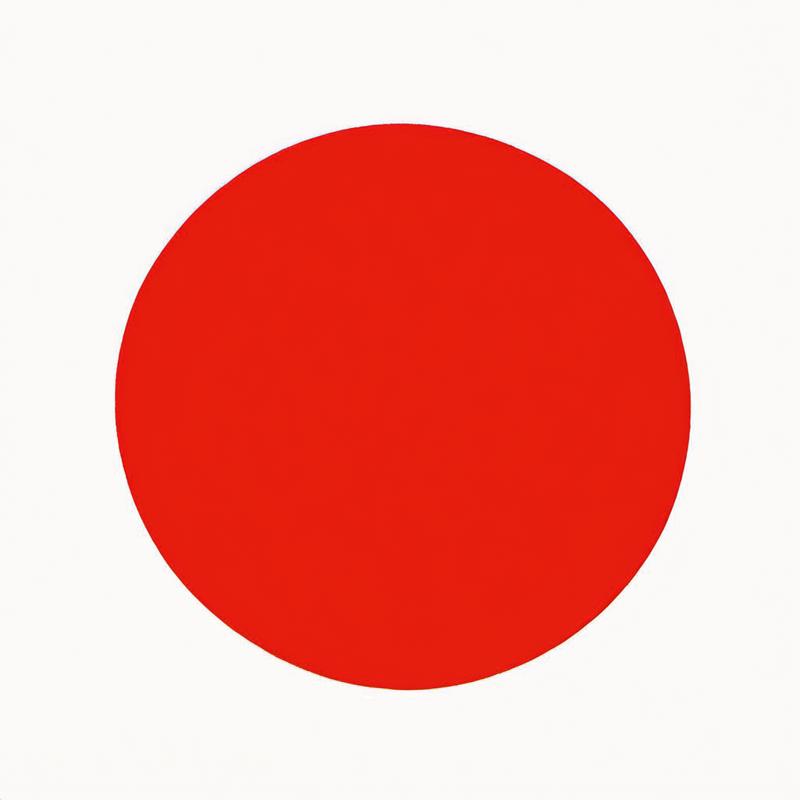
It has subtly changed though, darkening it and adding some shading that the human eye can't easily see. After another round at 100% we get some visible results:
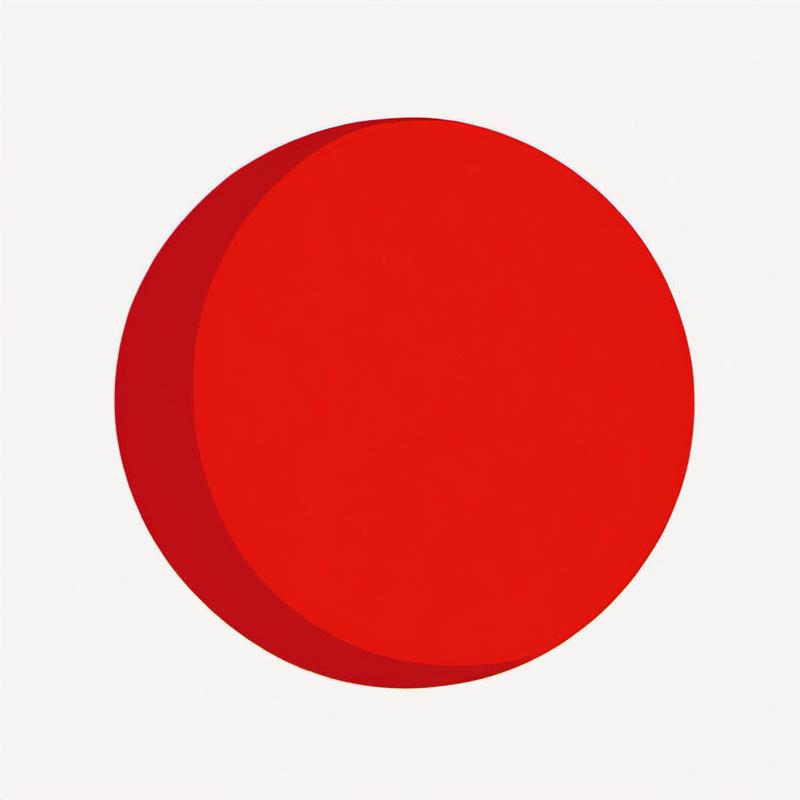
While it's promising that we can eventually get results from just a red circle let's contrast it with the results if there's even some really poor shading put into the initial sketch:

After hitting this with 100% denoising we get:
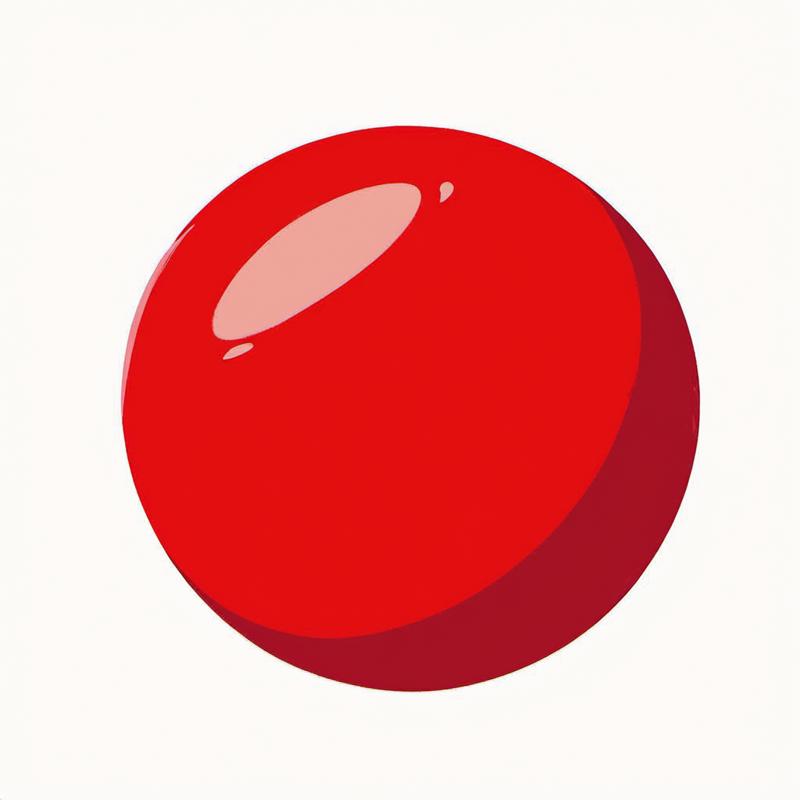
Much better already, but what if we do it again?
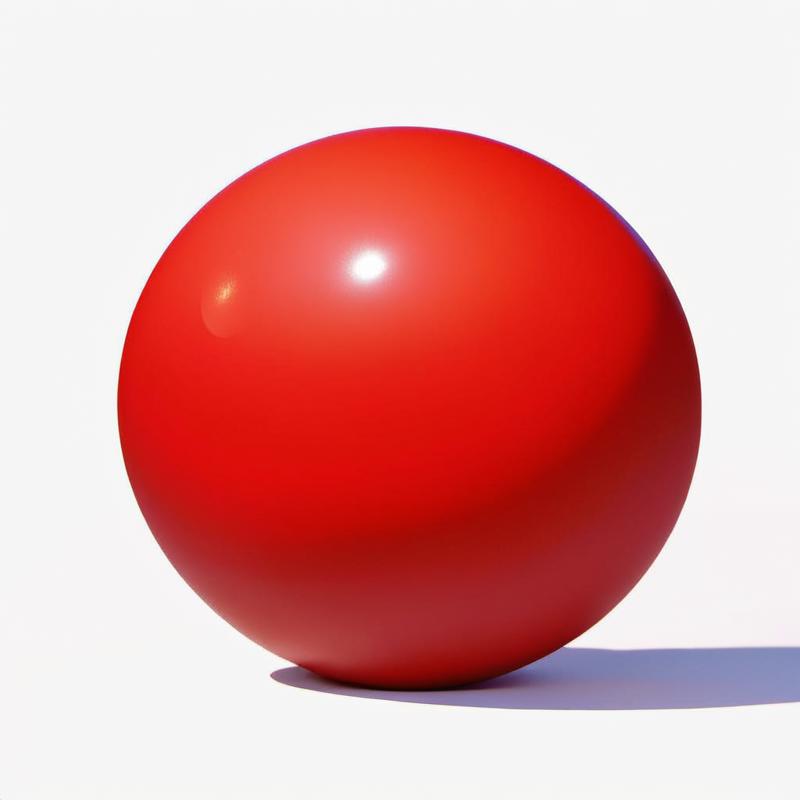
The point is while you don't need good art skills, learning some really basic techniques can save you a LOT of time and give better results (and if you already have art skills then you'll be able to get great results quickly).
Lastly, note that despite the name, you can use these sketching techniques in img2img as well. The red ball examples were img2img chains.
Editing Colors
One thing that commonly comes up is editing colors to make prompting easier and reduce the necessary denoising strength.
In the example where I prompted in a catgirl with a red sweater, I used a high denoising strength of 0.8 which dramatically changed the character, getting rid of details from the original like the woman having her hands in her sweater pockets. If I want to keep those details I need to use a lower denoising strength, but then it won't be enough to flip the sweater color from white to red. The solution to this conundrum is to edit the colors.
Here's the original again:
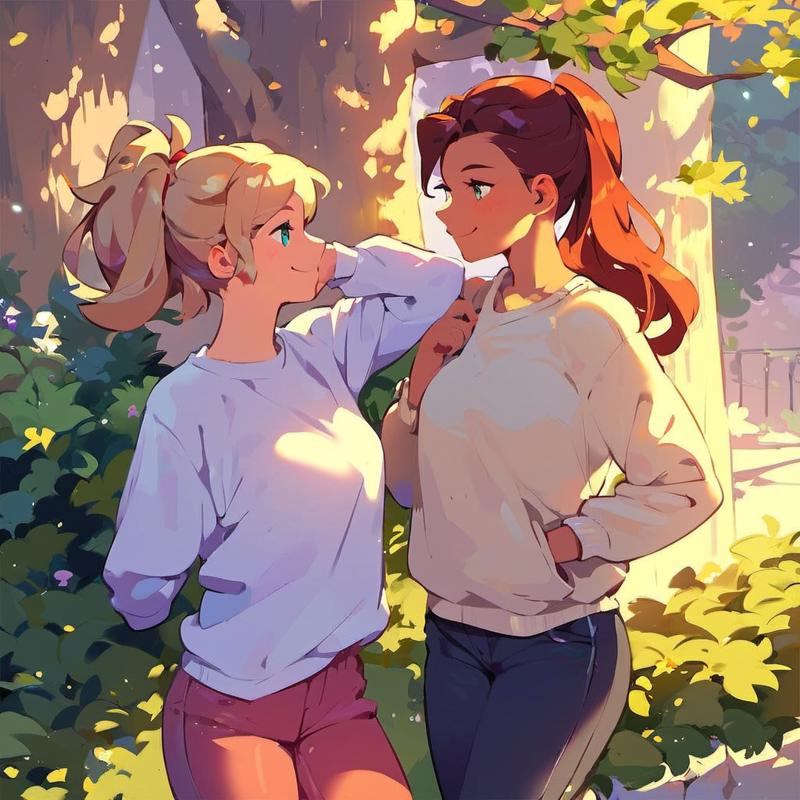
You can flood fill or paint over regions with the desired color, or even use other techniques like changing the hue of a region. Whatever works best. In this case I flood filled the sweater and sketched in the catgirl ears:
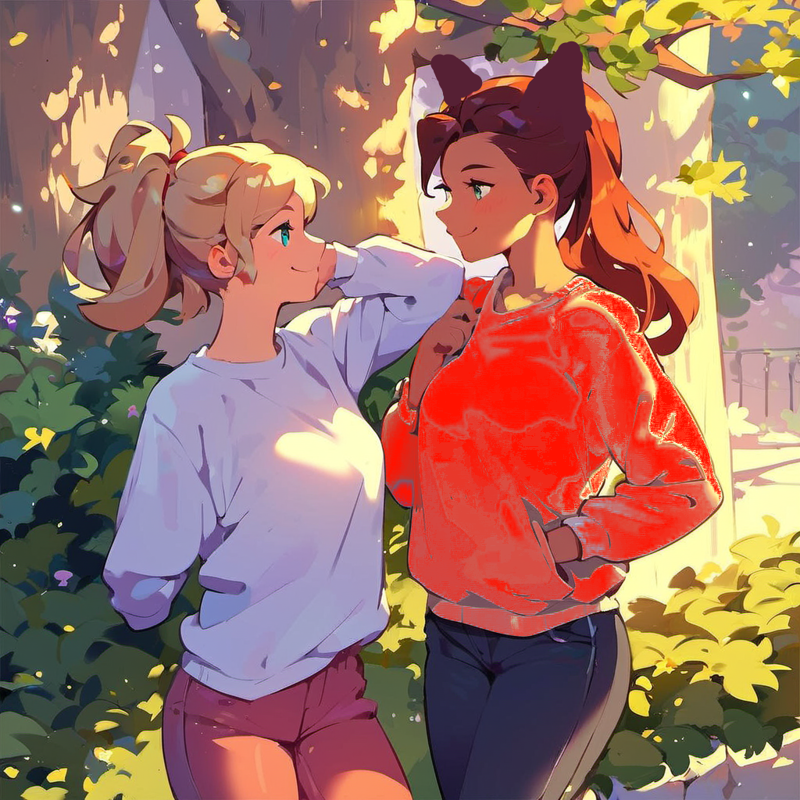
Then running it through at 0.6 gives this result:
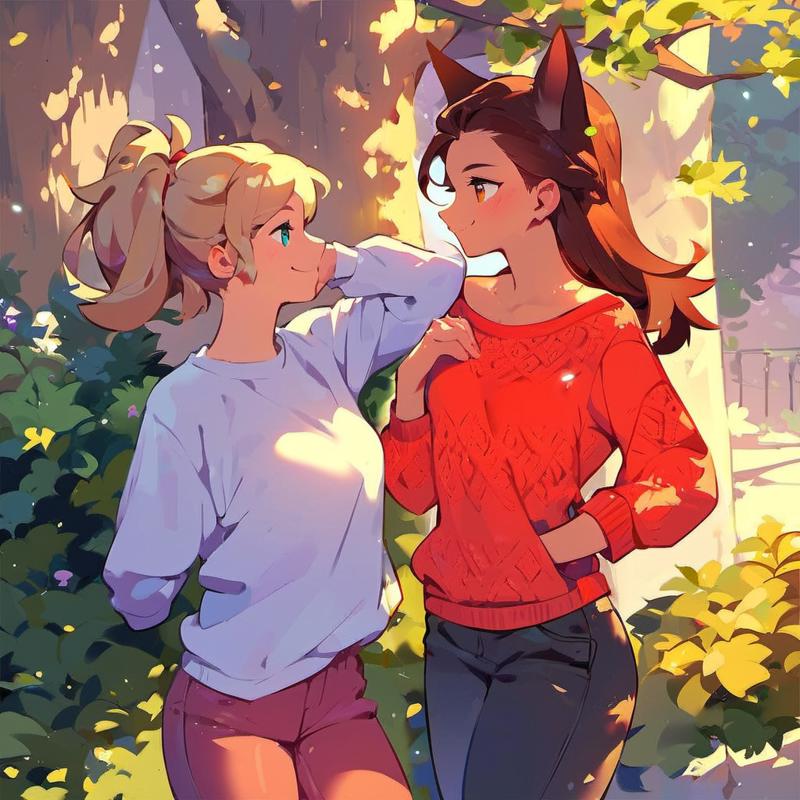
This is much closer to the original piece while also getting all the new elements I asked for (catgirl with brown hair, red sweater).
An interesting side note is that the new sweater is more detailed because it contains some noise from the poor flood fill job. Sometimes this can work out well, but if not then you have options to remove the noise. If it's possible, the best option is usually to do a better job on the color change so as not to introduce the noise in the first place. If you want to move forward though, I recommend upscaling the piece and downscaling it again. Another option is to just keep working on the piece, as models tend to reduce noise. You can also smooth it out manually or use a model that smooths out the results more aggressively.
Also, for comparison here's the result if we don't alter the colors:
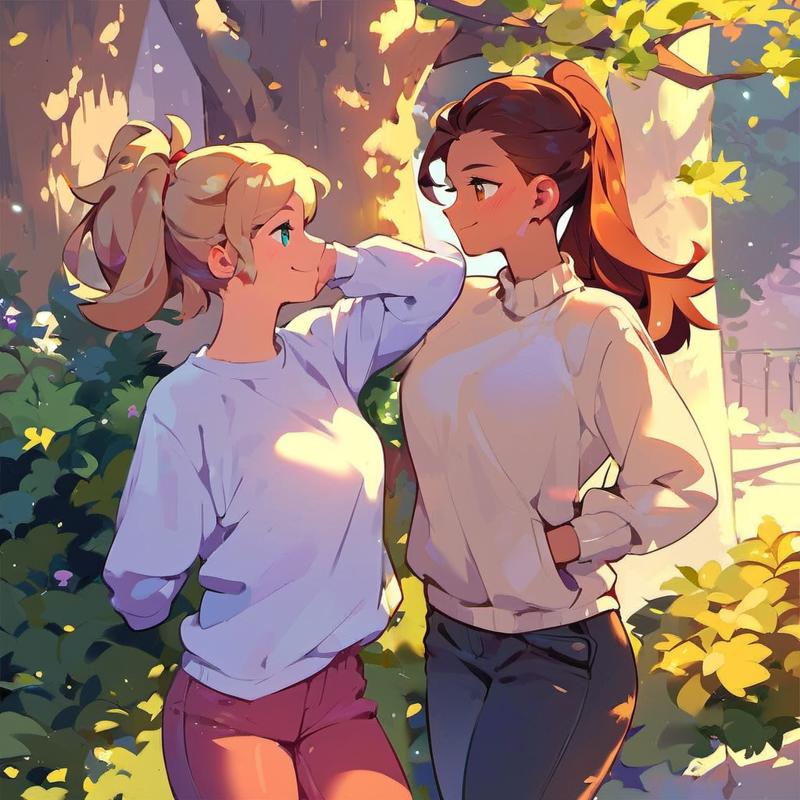
There's basically no change, and we certainly don't get a red sweater.
Photobashing (and Other Copy-Paste Techniques)
Another powerful technique is photobashing, which is when you take some existing image and paste part of it into another image. You can make an input image that is a collage of other pieces.
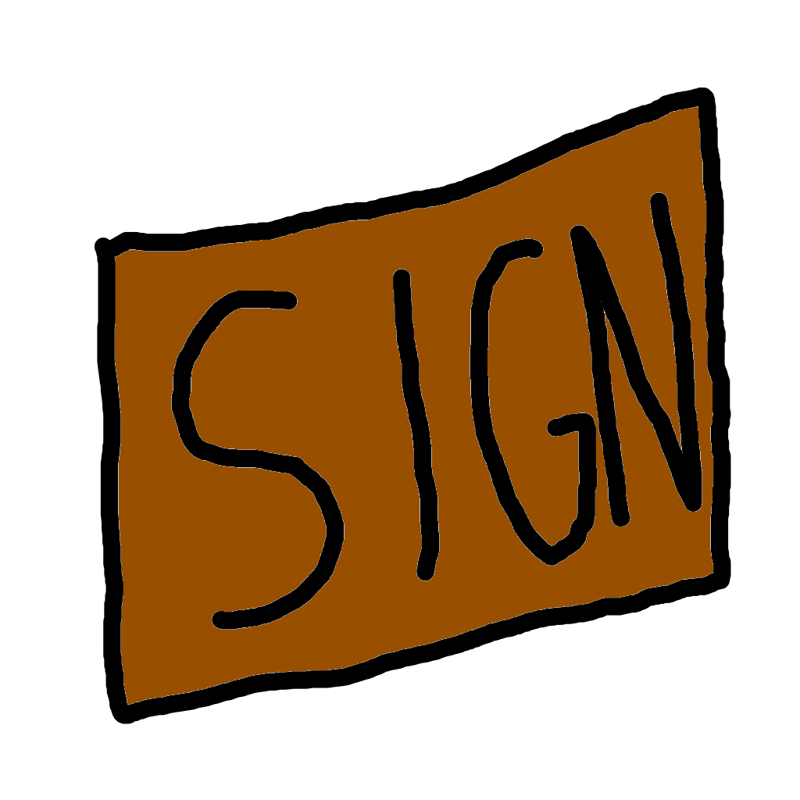
Let's add the sign using this technique instead of creating it in place. We'll start with an entirely new image starting with this sketch:
After hitting this with 90% denoising strength we get:
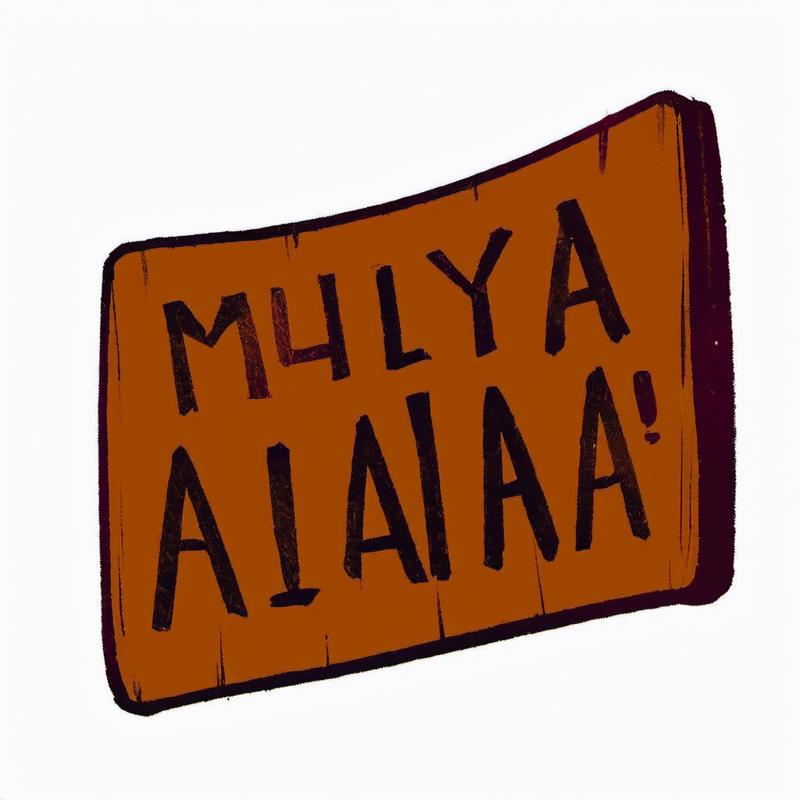
Pretty good, but we lost the text we wanted, but that's ok. I just erased it and sketched it back in:
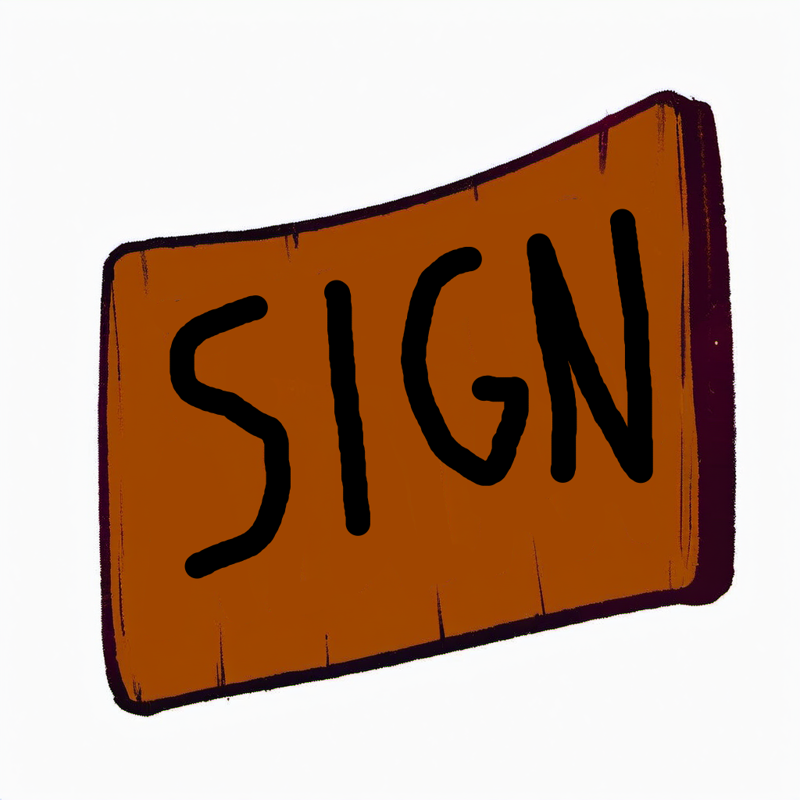
Running it through at 70% denoising gave this:
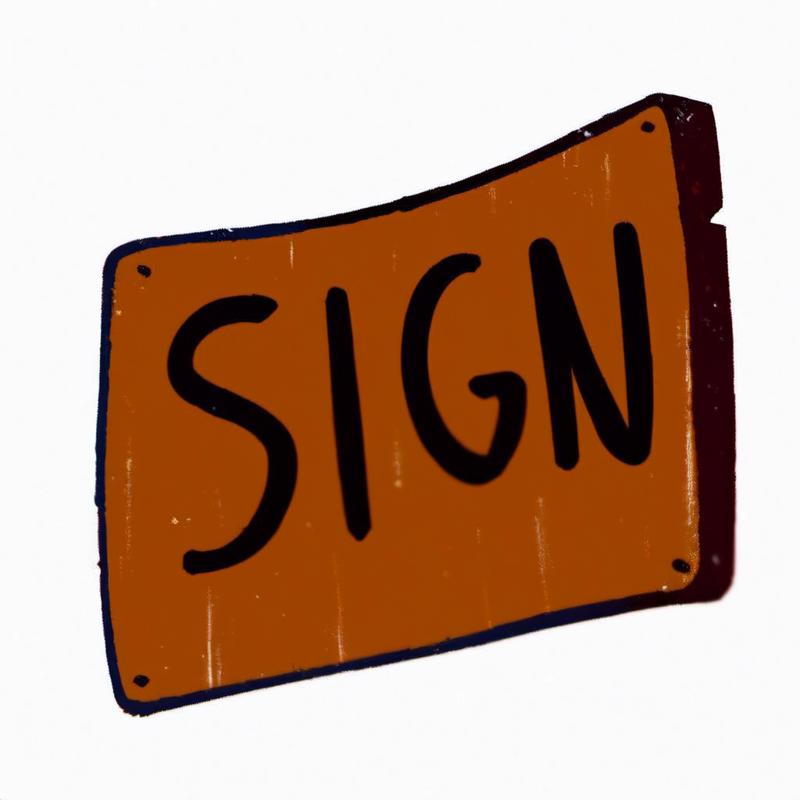
Next I select the white background and photobash it into the image I want to actually put the sign into:
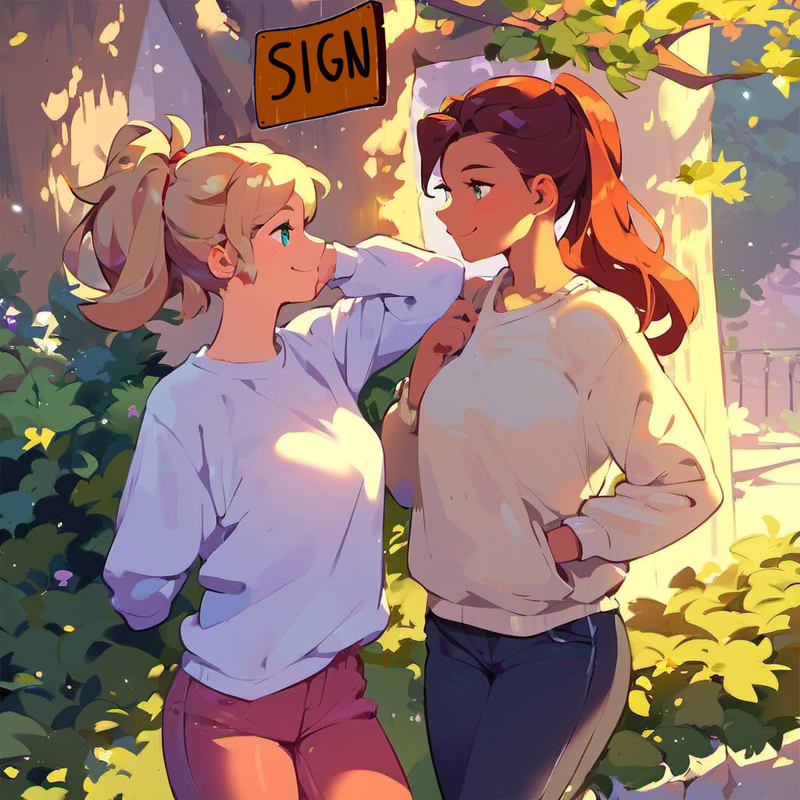
It's pretty obvious that it's been photobashed in, but that's no problem as we're about to blend it in. We also want it to conform to the lighting and shading of the image anyway so we need to do some inpainting work on it anyway. Here's after one round at 50% denoising:
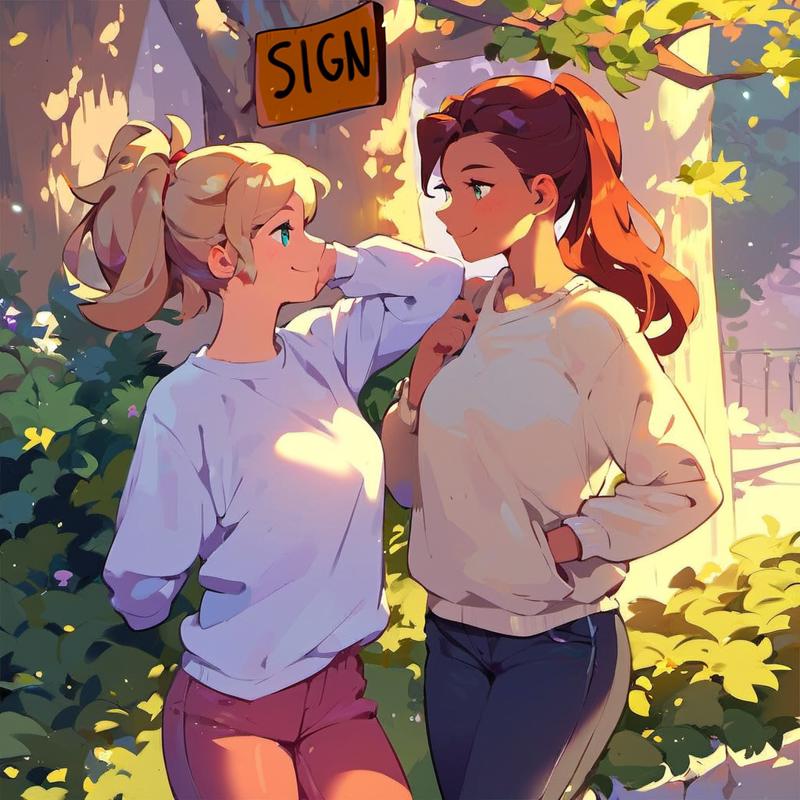
and here's after a second round at 0.5 denoising:
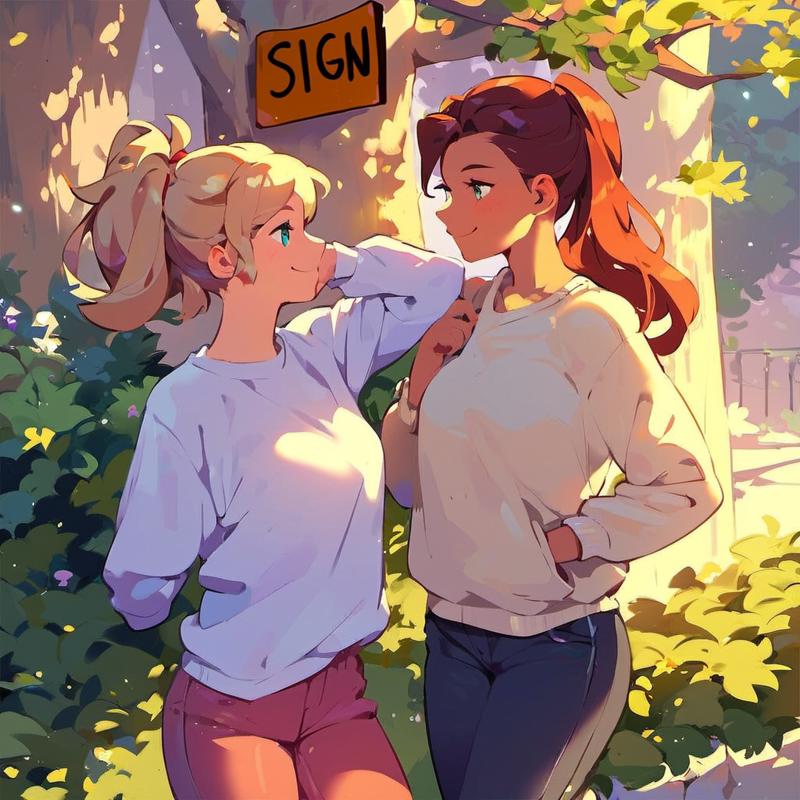
That's good enough, we can develop further from here.
One quick note is to remember that while I started from a sketch in this example, you could start from a txt2img generated image instead. You can generate pieces individually and compose them together even if you aren't doing any manual editing (other than the actual photobashing).
There's a lot you can do with photobashing. You can add new elements. You can do more intensive work outside of the main image on some piece and return it to the original piece when you're done. You can make a bunch of elements separately and collage them together. You can make a consistent background you preserve and paste your finished elements onto. If you're working on a huge piece, it's often faster to work on a smaller sub-piece. You can bank template images and paste them in as a starting point. This is a very powerful technique and there's so much you can do with it.
Common Techniques and Problems
This section is on a couple of techniques and solutions to common problems that don't fit into the main narrative of the article but are valuable enough to be in this core article.
Use A Simple Background
I mentioned earlier using a simple background for a foreground subject allows you to easily cut them out and paste them into another image, which makes it easier to develop the character independently of a background, which is especially useful if the background fidelity is important and you can't just mess it up with random inpainting.
It's also pretty easy to blend in a character created externally to a finished piece. Just be careful with details like lighting/shading and making sure the character is properly occluded by foreground elements that should be in front of them, is casting appropriate shadows, etc.
However, using a simple background during development has one more huge upside: the character is much less likely to spontaneously grow into a simple background which helps constrain them and keep their overall shape, and may also permit stronger denoising strengths to be used effectively.
As an example, here's a sketch I made of a man in a motorcycle helmet with a simple background:
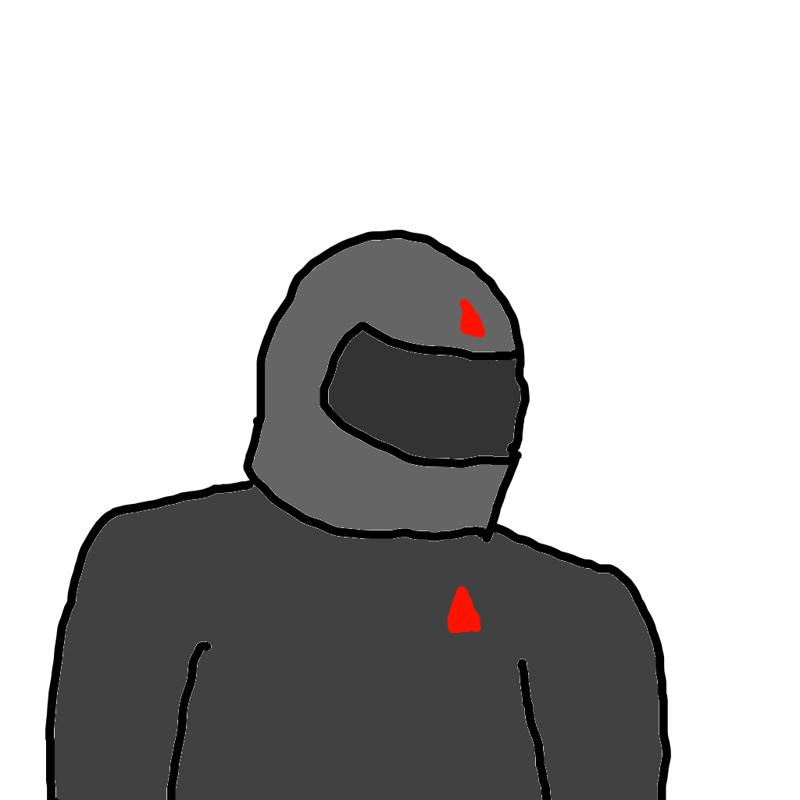
Here's a generation at 100% denoising strength:
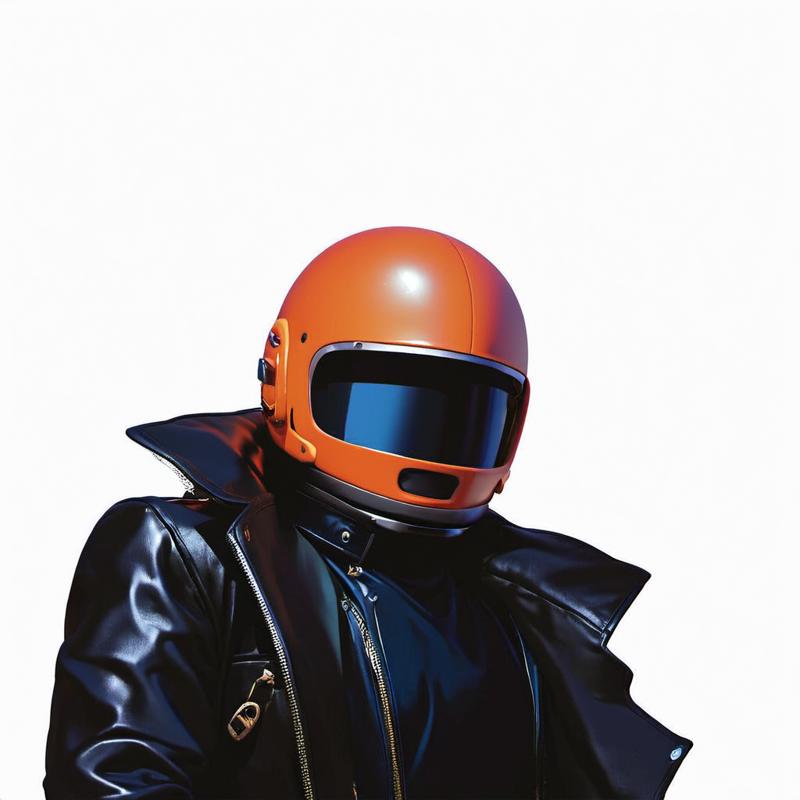
Even at 100% denoising, about half of the results were similar to the original. In comparison, lets put the sketch on this background:
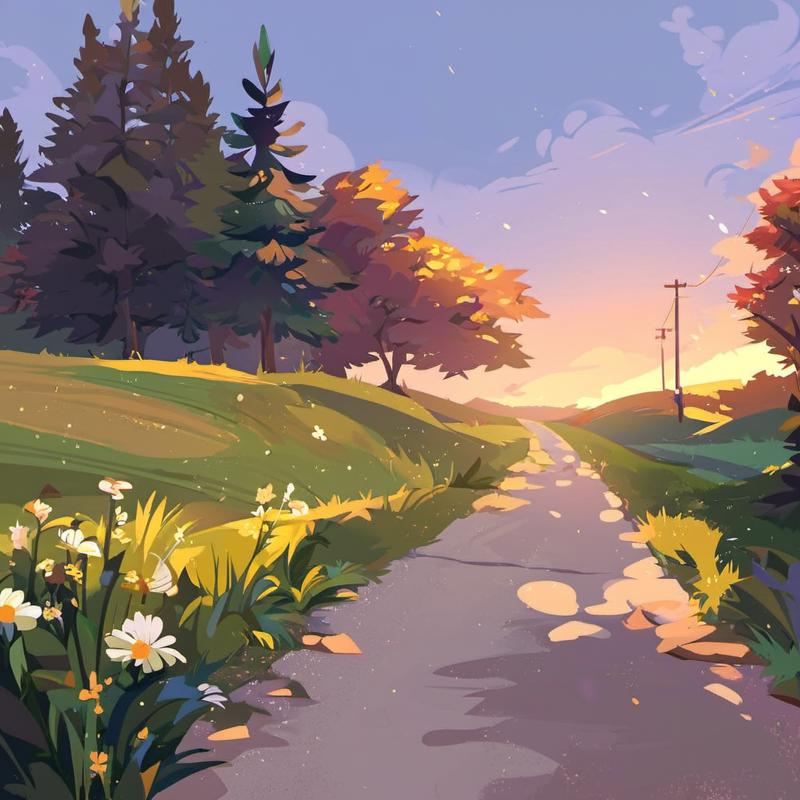
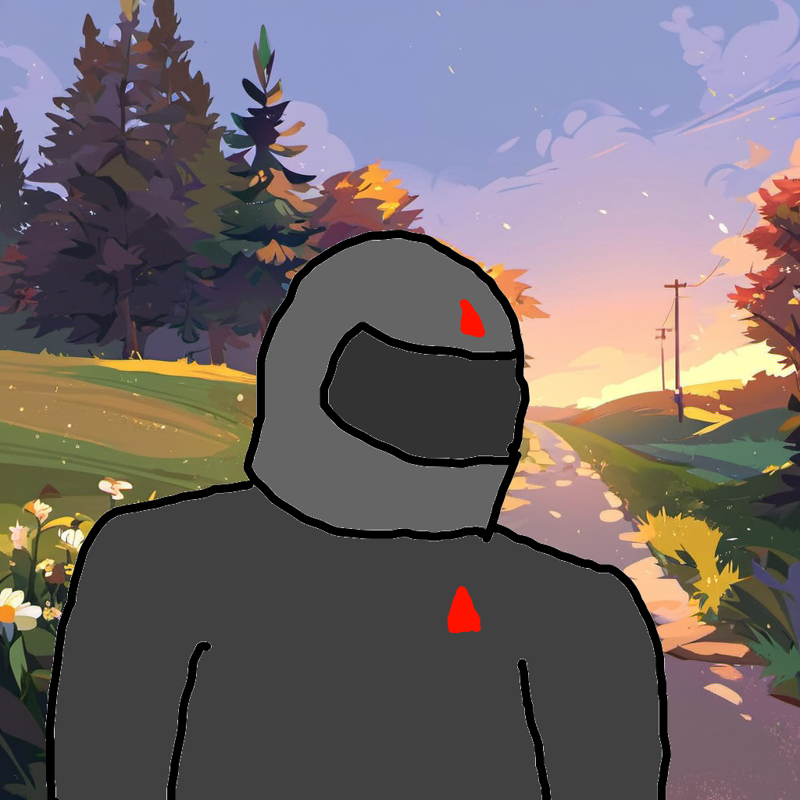
Now running it at 100% denoising gives no similar results. Here's one of the more similar ones:
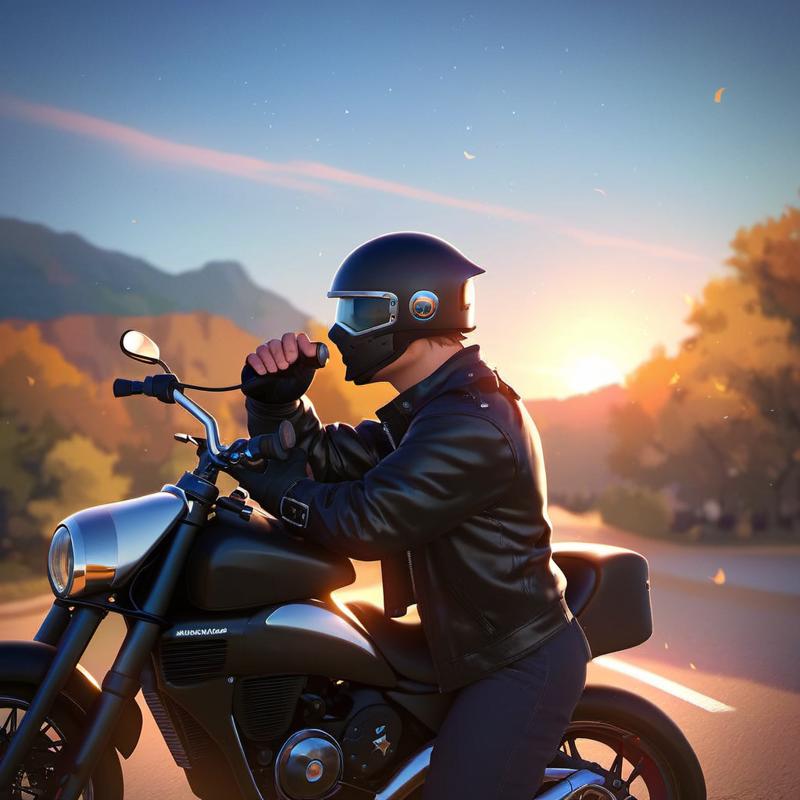
This effect of a simple background constraining the bounds of your subject is extremely valuable and it's nice that it makes it easier to cut out and photobash too.
Upscaling and Downscaling
Upscaling could easily fill a whole article, but there's pretty good general purpose upscaling models out there. I recommend R-ESRGAN 4x+ Anime6B for cartoons and anime, and Remacri for photos or just general purpose. I've had good results with SwinIR, though it's resource intensive. Definitely try out a few and find what works well for your specific use case.
Upscaling by 1.5x ideal (ex. 1024x1024 -> 1536x1536 for SDXL) and then doing a low denoising pass (0.4-0.5 denoising) can inject a lot of detail and fix some problems. Hi-res fix automates this process.
There's a script in Automatic1111 called SD Upscale, which adds detail in a tiled fashion. When done in this tiled fashion, it's usually pretty safe to operate at 0.4 denoising strength up to 3x ideal scale (so, 2x if already at 1.5x). It can help improve across the board quality easily, though watch out for seams and other issues. You might also consider simplifying your prompt, so it follows the image content more closely. Alternatively, you can manually inpaint tiles on an upscaled image with specially tailored prompts if quality is super important, but this is a labor intensive process.
An interesting technique I discovered is that if you upscale with one of the better upscalers and then downscale back to where you started, it will look the same but wipe out many kinds of small-scale AI artifacts. Try it out and you'll see what I mean, just make sure to look at the before and after at full resolution. It may also increase quality/sharpness, though this is usually pretty modest and can potentially backfire, so verify you got a good result.
In some cases, you might also have noise get into your images when you do manual edits. Upscaling and then downscaling can also eliminate that noise.
Drawing on a Larger Canvas
I mentioned drawing on a large canvas (ex. 3072x3072) earlier in the context of upscaling so you can keep higher inpainted detail. You have a very high resolution main image and you work on it purely with only masked inpainting (since it's too high resolution to use with img2img or whole image inpainting).
In addition to working on an upscaled image, you can also draw on any sized canvas for any reason. You could make a huge resolution comic/manga page and fill in the page using lots of inpainting. There are other articles with tips for doing this.
If you find your large page is unwieldy to work with, remember also that you can manually crop out portions to work on before returning them to the big page. I recommend keeping notes of their intended coordinates on the page.
You can also make elements or panels entirely outside of the big page and then paste them in when they're ready.
One last note is that if your large piece is something like what the model produces (ex. it's an upscale of something you generated at normal scale) then you can downscale it back down and work on it when you need to. It's not ideal to do this as you can lose detail information but if you need to return it to a size that's workable by your model then it will usually upscale back up again pretty reasonably, and you may even find undesirable artifacts were eliminated by this process. Just make sure to check it did more good than harm.
This isn't applicable if your image is some complicated thing your model would never produce normally or if it's a massive resolution with tiny details, in these cases the model won't be able to cope with it and you'll lose too much detail in the process, better to use other techniques.
Adding Detail Via Inpainting
Most of the time when you inpaint, it's meant to correct a problem or make some major transformation of the image. However, you can add a lot of detail and make the image look much better by inpainting an already decent detail at a high resolution.
As an example, here's a txt2img generation using my Grace Heiden model:
Here's the same image after detailed inpainting on the face to add face detail:
Even though the resolution of the final image wasn't increased, the results are substantially better.
You should usually consider doing this, though remember that it might not always provide a better result than the original, especially since the original was already good enough, so check your results against the original and don't be afraid to go back. A nebulous goal like "adding detail" is much more likely to lead to a result which isn't as good or at best is change for its own sake, so be more critical than normal about these changes. At the same time it can make a huge difference too, as shown in the above example, so definitely consider it and try it out.
As mentioned earlier, adetailer automates this process, so check that out if you want this done automatically. I just do it manually though.
Shading Mismatch
Occasionally, you might find that inpainting a piece that wasn't produced by your model leaves unmistakable traces, due to the shading being different. Simply fix this by doing a low denoising pass (0.4?) to get the piece to match up and then the changes won't stand out.
If this doesn't work, also try the upscale and downscale trick mentioned above.
Model Training
At this point, some of you may be thinking "why do we need anything other than inpainting and image editing?" It's actually true that this is all you need, but that's because image editing alone is already all you really need. Before we had generative AI you could already make anything you wanted purely through sufficiently detailed image editing.
Regardless of whether you want to develop these low-level art skills (maybe we should call artists with these skills "hardcore artists"?) or possibly even have them in your toolkit already, model training can make your life massively easier by leveraging the incredible power of the model.
Model/LoRA training could easily take several articles to dive into, so I won't bother in this article, it's long enough as it is. The important points for this article are that model training is an essential skill for AI art and that it's not as hard as it looks (nor as hardware expensive, though definitely out of reach for many in this regard).
If your model (or some pre-made LoRA that already exists) already has been trained on what you want, then great, just use that. However, the model/LoRA you need doesn't exist and if you find yourself fighting with your model to generate something accurately, then model training is the tool you should reach for (at least, after searching for an existing caption or LoRA). You usually just need some quick and easy LoRA training.
As a quick example, if you use vanilla Pony and ask for "servers" it will generally make something like a restaurant (or perhaps a school/office, it's an undertained caption):
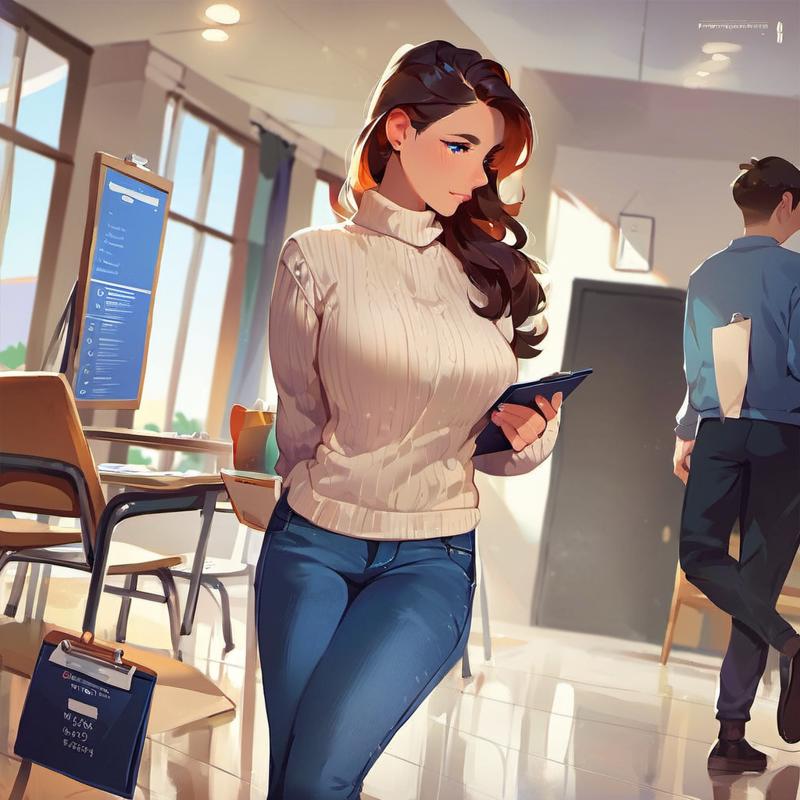
You can force computer servers to exist through careful editing, but the model will want to turn them into doors or lockers (or if you mention "computers" in the prompt then desktop PCs).
However, if you use my server room LoRA then it will accurately render computer servers with little effort.
Here's a low-medium denoising strength chain (0.6):
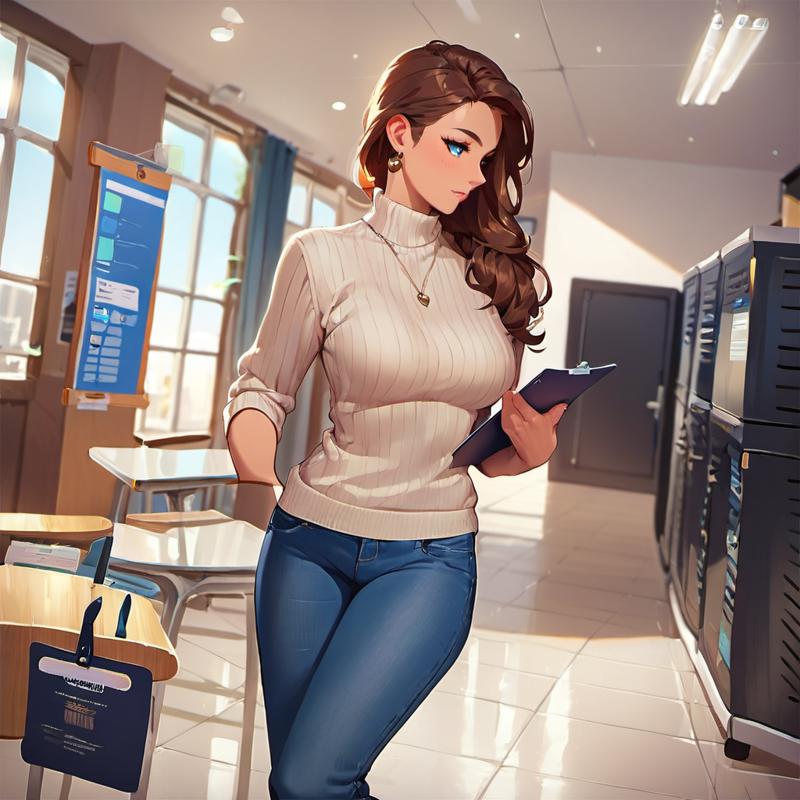
Alternatively, here's two independent single-step high denoising strength results (0.8):
Going back to vanilla Pony from this last one quickly makes the servers into lockers or even removes them entirely. Here's a 0.8 denoising strength chain:
If you don't want your servers to look like school lockers, you'll be constantly fighting with the model to prevent this.
Here's another example where it just outright removed the servers in one step:
Don't fight with the model, there's little point and you're basically going to be drawing it from scratch to make it happen. At best the model can assist with shading/lighting/style of stuff it doesn't understand at a low denoising strength.
Probably the main use case for model training that will come up eventually is the when you inevitably need to generate a character consistently. For more or less any general topic you can find something trained in the base models or on Civitai. Maybe not for your favorite model, but some model. However, when you have some character of your own design (or from an external specification you have to meet) then you aren't going to find that character in a pre-made model. You're gonna have to make it yourself (or convince someone who knows how to make it for you), so you might as well just learn how to do it. It's a non-technical skill to get the dataset together and the training part can be reduced to a push button process. Go read this article for most of what you need to know. I also post training data for most of my models as examples.
One last thing is that model training really does open up lots of possibilities. I mentioned earlier in the article that you can make a single image LoRA that encapsulates a template image much better than using the image directly, which is very handy. You can also bootstrap something you want to make by drawing some sketches, you'd be surprised what kind of loosey-goosey stuff works when you caption sketches of vaguely what you want as "sketch" during training.
On ControlNet
Depending on your background, you might be wondering why I didn't include or talk about ControlNet. That's because you don't need ControlNet. I don't use it. I used to but I didn't find it valuable enough to keep using, especially with the limitations it has.
I like ControlNet as a technology, and it has a lot of potential. Here's the thing though, it's very widely misunderstood. ControlNet models are basically LoRAs and should be treated as such. Individual ControlNet models aren't nearly on the same level as something like inpainting, which is a fundamental part of the technology.
More specifically, ControlNet models are LoRAs with data triples instead of pairs. Normal LoRAs are trained on (output) image and caption pairs but ControlNet models additionally have a (input) conditioning image. There's a bunch more architecture to make this work, but really that's basically it.
I initially assumed that ControlNet was something way more than a LoRA (and I know that it's a common assumption), but this notion suddenly crashed into oblivion when I tried generating characters with long pointy ears and high weight ControlNet model would only draw normal human ears. The standard SD1.5 OpenPose model was heavily biased and would not co-exist peacefully with the character I was working on. This isn't surprising once you know they're basically super-LoRAs, but it was eye-opening at the time.
This is why ControlNet models have struggled so hard to be relevant in the SDXL/Pony/Illustrious space. SD1.5 is so poor at learning and the original ControlNet models are so well put together that the same ControlNet models basically work well across all of SD1.5. SDXL models actually learn and diverge substantially during training, so you can't make one ControlNet model to rule them all in SDXL, it's just not happening.
I do think there's lots of neat possibilities for training specialized ControlNet models, but we need to think of them like LoRAs. They need to be trained for fairly specific purposes and on representative data of their actual final use to be effective, and we need a toolkit of many different models, not just a few do-it-all models.
End Cap
Follow me on Civitai and AI Pub (Mastodon). I post new material to both locations from time to time, so if you're interested in seeing my progress on later articles or my artwork then definitely check it out.
Make sure to read my other articles, they have similar levels of detail to this one.
Thank you for reading my article!


