First of all this was originally a guide I created as requested by a discord Channel(it has changed quite a bit), it is also posted in rentry(That one is out of date.) This guide is relatively low granularity and is mostly focused towards character Lora/Lycoris creation, it is also geared towards training at 512x512 and SD 1.5, my video card is too crappy for SDXL training. Ask in the comments if any part needs clarification. I will try to respond(If I know the answer :P) and add it to the guide. Lycoris creation follows all the same steps as lora creation but differs in the selection of training parameters, so the differences will be in the baking section.
Edit(20250512): Updated some of my scripts that i use during dataset preparation can be found here https://civitai.com/models/82080/powershell-scripts-misc-scripts-for-dataset-operations
Mostly stuff to remove borders, square things, change to png, turn pseudo grayscale into true grayscale, remove alpha channel, turn into true monochrome mostly for lineart that is a bit faded. Alpha channel remover. A poor mans duplicate image finder using tags. And a couple scripts to rename png/txt pairs to numeric.
Edit(20250428): Was fixing a V1 Lora which turned into a V3 So i decided to put to paper the methodology i follow to fix triggers. The addition is in the Troubleshooting and FAQ section
Making a Lora is like baking a cake.
Lots of preparation and then letting it bake. If you didn't properly make the preparations, it will probably be inedible.
I tried to organize the guide in the same order as the required steps to train a LORA but if you are confused in the order, try the checklist at the bottom and then look up the details as required in the relevant sections.
I am making this guide for offline creation, you can also use google collab but I have no experience with that.
Introduction
A good way to visualize training is as the set of sliders when creating a character in a game, if we move a slider we may increase the size of the nose of the roundness of the eyes. They of course are much more complex, for example we can suppose that "round eyes" means that sliders a=5 b=10 and c=15 then maybe closed eyes means a=2, b =7, c=1 and d=8. We can consider a model as just a huge collection of of these sliders.
Then what is a LORA? when we ask for something "new" the model just go "What? I have no sliders for that!" That is what a LORA is we just stick some more new sliders with tape to the model and tweak some of the preexisting ones to values we prefer.
When we train a lora what we are doing is basically generate all those sliders and their values, what our captioning does is divide the resulting sliders between each of the tags. The model does this by several means:
Previous experience: For example If a tag is a type of clothing worn by a human in the lower part of the body, for example "skirt" the model will check what it knows about skirts and assign the corresponding set of sliders to it. This includes colors, shapes and relative locations.
Word similarity: If the tag is for example skirt_suit it will check the individual concepts and try to interpolate. This is the main cause of bleedover(concept overlap) in my opinion.
Comparison: It two images are largely the same and one has a "blue object" and the other doesn't and the image with the "blue object" has an extra tag, the extra sliders will be assigned to it. So now the new tag = "blue object".
Location: For example the pattern of a dress occupies the same physical space in the image as the dress concept.
Order: The first tags from left to right will get sliders first. This is were the caption ordering options work on (Keep tokens, shuffle captions, drop captions and caption warmup) .
Reminder: Whatever sliders are not taken up by other tags will be evenly distributed in whatever tags remain(I suspect this is done in increasing order depending of current amount of sliders[which would be zero for new triggers] and then by location ), hopefully our new triggers(so remember to try to always put your triggers at the beginning of the captions).
Magic: I mean the above ones are the ones i have discerned, it could use may other ways.
Some people seem to be under the impression that what you caption is not being trained, that is completely false, it is just that adding a "red glove" to the concept of a "red glove" nets you a "red glove". For it not to be trained is what regularization images are for. Take for example the "red glove" from before, the model says I know what a red glove is" The training images says I want to change what a red glove is! and the regularization images says I agree with the model! This causes the changes to sliders representing the red glove to not change very much.
Anyway! Now that you have a basic mental image just take captioning as a Venn diagram. You must add, remove and tweak the tags so the sliders obtained from the training go to where you want. You can do all kind of shenanigans like duplicating datasets and tagging them differently so SD understands you better. Say I have an image with a girl with a red blouse and a black skirt, and i want to train her and her outfit. But! I only have one image and when I tag her as character1, outfit1 both triggers do exactly the same! OF course it does, SD has no idea of what you are talking about other than some interference from the model via word similarity.
What to do? Easy! Duplicate your image and tag both images with character1, then one with outfit1 and the other with the parts of the outfit. That way SD should understand that the part that is not the outfit is your character and that the outfit is equal to the individual parts. Just like a Venn diagram!
Of course this starts getting complex the bigger the dataset and the stuff you wish to train but after some practice you should get the hang of it so carry on and continue baking. If you screw up your lora will tell you!
On the Art-ness of AI art(musing)
If I were to agree with something said by some of anti-AI frothing-from-the-mouth crowd, It would be that AI image creation is unlike drawing or painting. If anything it is much more like cuisine.
There's a lot of parallels from how a cook has to sample what he is making, to how it has to tweak the recipe on the fly depending on the available ingredients quality, to how it can be as technical as any science measuring quantities to the microgram. Some people stick to a recipe other add seasonings on the fly. Some try to make the final result as close as possible to an ideal, some try to make something new and some just try to get an edible meal. Even the coldest most methodical methods of making a model using automated scraping says something about the creator even if he never took a peek at the dataset(They mostly look average).
I must admit some pride, not sure if misplaced or not as i select each image in my dataset to try to get to an ideal, maybe the first time it won't work out but with poking and prodding you can get ever closer to your goal. Even if your goal is getting pretty pictures of busty women!
So have pride in your creations even if they are failures! If you are grinding at your dataset and settings to reach your ideal, is that not art?
===============================================================
Preparations
First you need some indispensable things:
A nvidia videocard with at least 6GB but realistically 8 GB of VRAM. Solutions for ATI cards exist but are not mature yet.
Enough disk space to hold the installations
A working installation of Automatic1111 https://github.com/AUTOMATIC1111/stable-diffusion-webui or another UI.
Some Models (for anime it is recommended to use the NAI family: NAI, AnythingV3.0, AnythingV5.0, AnythingV4.5) I normally use AnythingV4.5
https://huggingface.co/andite/anything-v4.0/blob/main/anything-v4.5-pruned.safetensors(seems it was depublished) Can be found here: AnythingV4.5, (no relationship with anything V3 or V5). Use the pruned safetensor version with the sha256 checksum: 6E430EB51421CE5BF18F04E2DBE90B2CAD437311948BE4EF8C33658A73C86B2AA tagger/caption editor like stable-diffusion-webui-dataset-tag-editor
An upscaler for the inevitable image that is too small yet too precious to leave out of the dataset. I recommend RealESRGAN_x4plus for photorealism, RealESRGAN_x4plusAnime for anime and 2x_MangaScaleV3 for manga.
A collection of images for your character. More is always better and the more varied the poses and zoom level the better. If you are training outfits, you'll get better results if you have some back and side shots even if the character face is not clearly visible, in the worst case scenario some pics of only the outfit might do, just remember to not tag your character in those image if she is not visible.
Kohya’s scripts, a good version for windows can be found at https://github.com/derrian-distro/LoRA_Easy_Training_Scripts, The install method has changed, now you must clone the repository and click the install.bat file. I still prefer this distribution to the original command line one or the full webui ones, as it is a fine mixture between lightweight and easy to use.
===============================================================
Dataset gathering
That’s enough for a start Next begins the tedious part dataset gathering and cleanup:
First of all gather a dataset. You may borrow, steal or beg for images. More than likely you'll have to scrape a booru either manually or using a script, for rarer things you might end up re-watching that old anime you loved when you were a kid and going frame by frame doing screencaps, mpc-hc has a handy feature to save screencaps to png with a right click->file->save Image also you can move forwards and backwards one frame by doing ctrl+left or right arrow. For anime, this guide lists a good amount of places where to dig for images: Useful online tools for Datasets, and where to find data.

An ok scrapping program is grabber, I don't like it that much but we must do with what we have. Sadly it doesn't like sankaku complex and they sometimes have some images not found elsewhere.
Fist set your save folder and image saving convention and click save, in my case i used the md5 checksum.ext with ext being whatever original extention the image had. like this: %md5%.%ext%

Then go to tools->options->save->separate log files->add a separate log file


In that window type name as %md5%, folder as the same folder you put in the previous step, filename as %md5%.txt so it matches your image files and finally %all:includenamespace,excludenamespace=general,unsafe,separator=|% as text file content. Now when you download an image it will download the booru tags. You will need to process the file doing a replace all " " for "_" spaces for dashes and "|" for "," the or symbol for a comma. You might also want to prune most tags containing ":" and a prefix. But otherwise you get human generated tags of dubious quality.
For danbooru, it doesn't work out of the box, to make it work go to Sources->Danbooru->options->headers there type "User-Agent" and "Mozilla/5.0 (Windows NT 10.0; Win64; x64; rv:126.0) Gecko/20100101 Firefox/126.0" the click confirm, that should allow you to see danbooru images.

To search for images simply right click the header and select new tab then do as if you were making a caption but without commas absurdres highres characterA


After you have got you images you can either select them and click save one by one or click get all and go to the downloads tab.

On the download page simply do a ctl+a to select all, give a right click and select download. It will start to download whatever you added beware as it might be a lot so check the sources you want carefully. If a source fails simply manually skip it and select the next one do right click and download and so on.

After gathering your dataset it is good to remove duplicate images an ok program is dupe guru https://dupeguru.voltaicideas.net/, it won't catch everything and it is liable to catch images variations in which only the facial expression or a single clothing item changes.
To use first click the + sign and select your image folder
click pictures mode
click scan.

Afterwards it will give you a result page where you can see matches and percentage of similitude.

From there you can select the filter dupes only, mark all from the mark menu and then right click to decide if you wan to delete them or move them elsewhere.


Get all your images to an useful format that means preferably png but jpg might suffice. You can use the powershell scripts I uploaded to civitai or do it yourself using the steps in the next entry (3) or the script at the bottom.
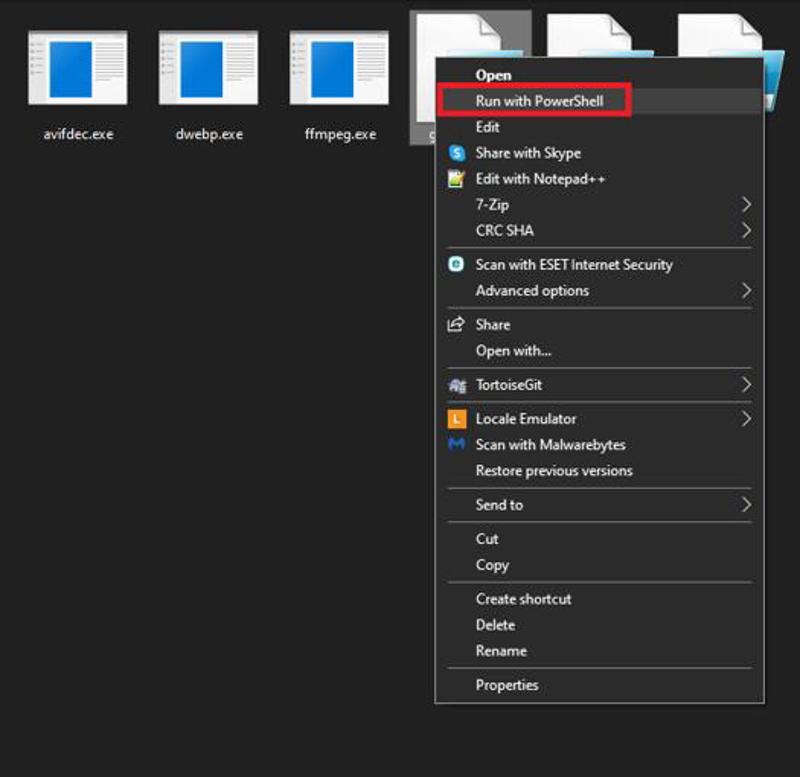
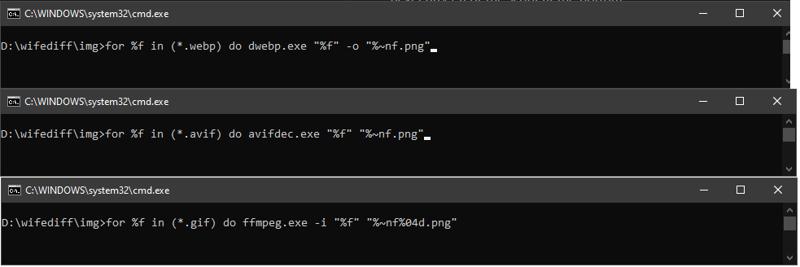
Manual PNG conversion:
For gif i use a crappy spliter open source program or ffmpeg. simply open a cmd windows in the images folder and type:
for %f in (*.gif) do ffmpeg.exe -i "%f" "%~nf%04d.png"For webp I use dwebp straight from the google libraries, dump dwebp from the downloaded zip into your images folder, open cmd in there and run:
for %f in (*.webp) do dwebp.exe "%f" -o "%~nf.png"For avif files, get the latest build of libavif (check the last successful build and get the avifdec.exe file from the artifacts tab) then dump it in the folder and run it the same as for webp:
for %f in (*.avif) do avifdec.exe "%f" "%~nf.png"
Dataset Images sources
Not all images are born equal! Other than resolution and blurriness, the source actually affects the end result.
So we have three approaches on the type of images we should prioritize depending on the type of LORA we are making:
Non-photorealistic 2D characters. For those you should try to collect images in the following order:
High Resolution Colored Fanart/official art: Color fanart is normally higher quality than most stuff. This is simply A grade stuff.
High Resolution monochrome Fanart/official art: This includes doujins, lineart and original manga. While overloading the model with monochrome stuff might make it more susceptible to produce monochrome. SD is superb at learning from monochrome and lineart giving you more detail, less blurriness and in general superior results.
Settei/Concept art: These are incredible as they often offer rotations and variations of faces and outfits. Search them in google as "settei" and you should often find a couple of repositories. These might often require some cleaning and or upscaling as they often have annotations of colors and body parts shapes.
Low Resolution monochrome Fanart/official art: monochrome art can be more easily upscaled and loses less detail when you do so.
High resolution screencaps: Screen captures are the bottom of the barrel of the good sources. Leaving aside budget constrains by animators who sometimes cheap out on intermediate frames, the homogeneity of the images can be somewhat destructive which is strange when compared with manga which seems to elevate the results instead. Beware: 80s and 90s Anime seems to train much faster, so either pad your dataset with fanart or lower steps to roughly 1/3 the normal value. This also applies to low res screencaps.
3D art: Beware if you are trying to do a pure 2D model. Adding any 3D art will pull it towards 2.5 or stylized 3D.
Low Resolution Colored Fanart/official art: This stuff will almost always need some cleaning, filtering and maybe upscaling. In the worst cases it will need img2img to fix.
AI generated Images: These ones can either go op or down in this list depending on their quality. Remember to go with a fine comb through them for not easily seen deformities and artifacts. Ai images are not bad but they can hide strange things that a human artist won't do, like a sneaky extra hand while distracting you with pretty "eyes". For more complex artifacting and "textures". There are countless ESRGAN filters in https://openmodeldb.info/ that might help, some I have used are: 1x_JPEGDestroyerV2_96000G, 1x_NoiseToner-Poisson-Detailed_108000_G, 1x_GainRESV3_Aggro and 1x_DitherDeleterV3-Smooth-[32]_115000_G.
Low resolution screencaps: We are approaching the "Oh God why?" territory. These will almost always need some extra preprocessing to be usable and in general will be a drag on the model quality. Don't be ashamed of using them! As the song goes "We do what we must because we can!" A reality of training LORAs is that most of the time you will be dealing with limited datasets in some way or another.
Anime figures photos: These ones will pull the model to a 2.5D or 3D. They are not bad per se but beware of that if that is not your objective.
Cosplay online stores images: Oh boy now it starts going downhill. If you need to do an outfit you might end up digging here, the sample images most often look horrid. Remember to clean them up, filter them and upscale them. Ah they also always have water marks so clean up that too. Make sure to tag them as mannequin and no_humans and remove 1girl or 1boy.
Cosplay images: Almost hitting the very bottom of the barrel. I don't recommend to use real people for non photorealistic stuff. If it is for an outfit i would recommend to lop off the head and tag it as head_out_of_frame.
Superdeformed/chibi: These ones are a coin toss if they will help or screw things. I recommend against them unless used merely for outfits and if you do use them make sure to tag them appropriately.
Non-photorealistic 3D characters. For those you should the exact same thing as for 2D but using mostly 3D stuff as any 2D stuff will pull the model towards a 2.5D Style
Photorealistic: Don't worry just get the highest resolution images you can which aren't blurry or have weird artifacts.
===============================================================
Dataset Regularization
The next fun step is image regularization. Thankfully bucketing allows LORA training scripts to autosort images into size buckets, automatically downscales them then uses matrix magic to ignore their shape. But! don't think yourself free of work. Images still need to be filtered for problematic anatomy, cluttered-ness, blurriness, annoying text and watermarks, etc. Cropped to remove empty space and trash. Cleaned to remove watermarks and other annoyances. And upscaled if they run afoul of being smaller than the training resolution. Finally then sorted by concept/outfit/whatever to start actually planing your LORA. So as mentioned before the main tasks of this section are filtering, resizing, processing and sorting. Also added Mask making to this section, masks are optional for masked loss training or future transparency training.
Filtering
Unless you are making a huge LORA which accounts for style then remove from your images dataset any that might clash with the others, for example chibi or Superdeformed versions of the characters. This can be accounted for by specific tagging but that can lead to a huge inflation of the time required to prepare the LORA.
Exclude any images that have too many elements or are cluttered, for example group photos, gangbang scenes where too many people appear.
Exclude images with watermarks or text in awkward places where it can’t be photoshopped out o cleaned via lama or inpaint.
Exclude images with deformed hands, limbs or poses that make no sense at first glance.
Exclude images in which the faces are too blurry, they might be useful for outfits if you crop the head though.
If you are making an anime style LORA, doujins, manga and lineart are great training sources as SD seems to pick the characteristic very easily and clearly. You will need to balance them with color images though or it will always try to generate in monochrome (Up to 50% shouldn't cause any issues, I have managed reliable results training with up to a 80%+ black and white using monochrome and grayscale in the negatives prompting.)
Resizing
Cropping: If you are using Bucketing then cropping other than to remove padding is not necessary! None the less remember to crop your images to remove any type of empty space as every pixel matters. Also remember that with bucketing your image will be downsized until its WidthxLength < training resolution squared 512x512(262,144) pixels for SD 1.5 or 1024x1024(1,048,576) for SDXL/pony. I have created a powershell script that does a downscale to the expected bucket size. Use it to check if any of your images needs to be cropped or removed from the dataset in case of it loosing too much detail during the training-script bucketing downscale process.
For manual cropping this is what you are looking for, simply use your preferred image editor and crop as tightly as possible around the subject you wish to train.

For images padded in single color backgrounds, I have had good success using image magick. It checks the color of the corners and applies some level of tolerance, eating the rows or columns depending on their color until they fail the check. I have added some images of the before and after running the command. Just install it, select a value for the tolerances(named fuzz, in my case I chose 20%) go to the folder where your images are, open a cmd window and type:
for %f in (*.png) do magick "%f" -fuzz 20% -trim "Cropped_%~nf.png"

Downscaling is mostly superfluous in the age of bucketing but! Remember the images are downscaled anyway! So be mindful of the loss of detail specially in fullbody high res images:
If you opt for downscaling, one downscaling technique is to pass images though a script which will simply resize them either though cropping or resizing and filling the empty space with white. IF you have more than enough images probably more than 250. This is the way to go and not an issue. Simply review the images and dump any that didn’t make the cut.
As I mentioned, I have created a powershell script that does a downscale to the expected bucket size. This will not change the shape of the image and will only downscale it until the image fits in a valid bucket. This is specially useful to check if an image lost too much detail as the training scripts do the exact same process. Other use is to decrease processing time. Training scripts first do a downscale to bucket and then a further downscale into latents. The first downscale takes time which would consume resources and time specially on training sites, collabs and rented gpus, so doing a downscale to bucket locally may save you a couple of bucks.
If training solely on square images, this can be accomplished in A1111 in the Extras>autosized and autofocal crop options.
If you on the other hand are in a limited image budget, Doing some downscaling/cropping can be beneficial as you can get subimages at different distances from a big fullbody high resolution image. I would recommend doing this manually. Windows paint3d is adequate if not a good option. Just go to the canvas tab and move the limits of your image. For example suppose you have a highrez fullbody image of a character. You can use the original to get 1 image(full_body). Do a cut at the waist and do a shot for a 2nd image(Upper_body). Then make a cut at the chest for a 3rd image with a mugshot only(portrait). Optionally you can also do a 4th crop from the thighs for a cowboy shot. Very very optionally you can do a crop of only the face(close-up). All 3(or 5) will be treated as different images as they are downscaled differently by the bucketing algorithm. I don't recommend doing this always but only for very limited datasets.
If using bucketing:

If using resize to square(mostly obsolete):

To simplify things a bit i have created a script(It's also as text at the bottom of the guide) which makes images square by padding them. It is useful to preprocess crappy (sub 512x512 resolution) images before feeding them to an upscaler(for those that require a fixed aspect ratio). Just copy the code into a text file and rename it to something.ps1 then right click it and click run with powershell. This is mostly outdated and was useful before kohya implemented bucketing for Embeddings.
Upscaling: Not all images are born high rez so this is important enough to have it's own section. Upscaling should probably be the last process you run on your images so the section is further below.
Image processing and cleaning
Ok so you have some clean-ish images or not so clean ones that you can’t get yourself to scrap. The next "fun" part is manual cleaning. Do a scrub image by image trying to crop, paint over or delete any extra elements. The objective is that only the target character remains in your image (If you character is interacting with another for example having sex, it is best to crop the other character mostly out of the image). Try to delete or fix watermarks, speech bubbles and sfx text. Resize images, passing low res images through an upscaler(see next section) or img2img to upscale them. I have noticed blurring other characters faces in the faceless_male or faceless_female tag style works wonders to reduce contamination. Random anecdote: In my Ranma-chan V1 LORA if you invoke 1boy you will basically get a perfect male Ranma with reddish hair as all males in the dataset are faceless.

That is just an example of faceless, realistically if you were trying to train Misato, what you want is this(Though I don't really like that image too much and i wouldn't add it to my dataset, but for demonstration purposes it works):

Img2Img: Don't be afraid to pass an extremely crappy image into img2img to try to get it less blurry or crappy. Synthetic datasets are a thing so don't feel any shame from using a partial or fully synthetic one. That's the way some original characters LORAs are made. Keep in mind this, if you already made a LORA and it ended up crappy... Use it! Using a lora from a character to fix poor images of said character is a thing and it gives great results. Just make sure the resulting image is what you want and remember any defects will be trained into your next LORA (that means hands, so use images where they are hidden or you'll have to manually fix them.) When you are doing this, make sure you interrogate the image with a good tagger, deepdanboru is awful when images are blurry(it always detects it as mosaic censorship and penises). Try to add any missing tags by hand and remember to add blurry and whatever you don't want into the negatives. I would recommend to keep denoise low .1~.3 and to iterate on the image until you feel comfortable with it. The objective is for it to be clear not for it to become pretty.
To remove backgrounds you can use stable-diffusion-webui-rembg install it from the extension tabs and will appear at the bottom of the extra tab. I don't like it. Haven't had a single good success with it. Instead i recommend transparent-background which is a lot less user friendly but seems to give me better results. I recommend you reuse your a1111 installation and put it there as it already has all requirements. Just open a power shell or cmd in stable-diffusion-webui\venv\Scripts and execute either Activate.ps1 or Activate.bat depending on if you used ps or cmd. Then install it using: pip install transparent-background After it is installed run it by typing: transparent-background --source "D:\inputDir\sourceimage.png" --dest "D:\outputDir\" --type white
This particular command will fill the background with white you can also use rgb [255, 0, 0] and a couple extra options just check the wiki part of the github page https://github.com/plemeri/transparent-background
Image cleaning 2: Lama & the masochistic art of cleaning manga, fanart and doujins
As I mentioned before, manga, doujins and lineart are just the superior training media, it seems the lack of those pesky colors makes SD gush with delight. SD just seem to have a perverse proclivity of working better on stuff that is hard to obtain or clean.
As always the elephants in the room are trice: SFX, speech bubbles and watermarks. Unless you are reaaaaaaaallly bored. You will need something to semi automate the task least you find yourself copying and pasting screentones to cover up a deleted SFX(been there, done that).
The solution? https://huggingface.co/spaces/Sanster/Lama-Cleaner-lama the Lama cleaner, it is crappy and slow but serviceable. I will add the steps to reuse your A1111 environment to install it locally because it is faster and less likely someone is stealing your perverse doujins.
Do remember that for the A1111 version, they recommend a denoise strength of .4. Honestly to the me the stand alone local version is faster, gives me better results and is a bit more friendly.
A1111 extension install:
Go to extensions tabs.
Install controlnet If you haven't already.
Either click get all available extensions and select lama in the filter or select get from URL and paste https://github.com/light-and-ray/sd-webui-lama-cleaner-masked-content.git
Install and reset your UI.
Go to inpaint in img2img and select lama cleaner and only masked, use the cursor to mask what you want gone and click generate. They seem to recommend a denoise of .4

It seems lama cleaner is now also available from the extras tabs with less parameters. Make sure to add the image above and then select create canvas so the image is copied for you to paint the mask.
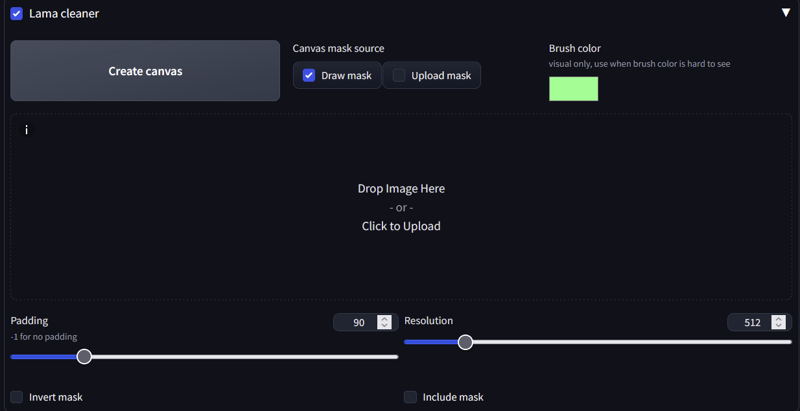
Local "stand alone" install:
First enable your a1111 venv by shift+right click on your stable-diffusion-webui\venv\Scripts folder and selecting open power shell window here. and typing ".\activate"
Alternatively simply create an empty venv using typing python -m venv c:\path\to\myenv in a command window, beware it will download torch and everything else.Install Lama cleaner by typing pip install lama-cleaner
This should screw up your a1111 install, but worry not!
Type: pip install -U Werkzeug
Type: pip install -U transformers --pre
Type: pip install -U diffusers --pre
Type: pip install -U tokenizers --pre
Type pip install -U flask --pre
Done, everything should be back to normal, ignore complains about incompatibilities in lama-cleaner as I have tested the last versions of those dependencies and they work fine with each other.
Launch it using: lama-cleaner --model=lama --device=cuda --port=8080 You can also use --device=cpu it is slower but not overly so.
open it in port 8080 or whatever you used http://127.0.0.1:8080
Just drag the cursor to paint a mask, the moment you release it, it will start processing.
Try to keep the mask as skintight as possible to what you want to delete unless it is surrounded by a homogeneous background.
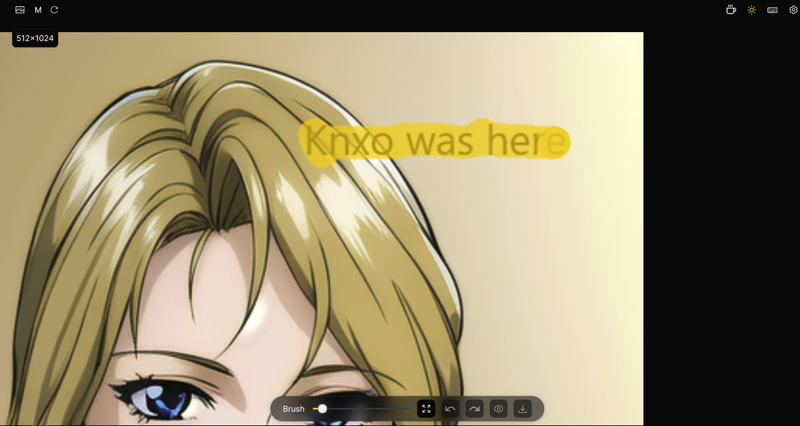
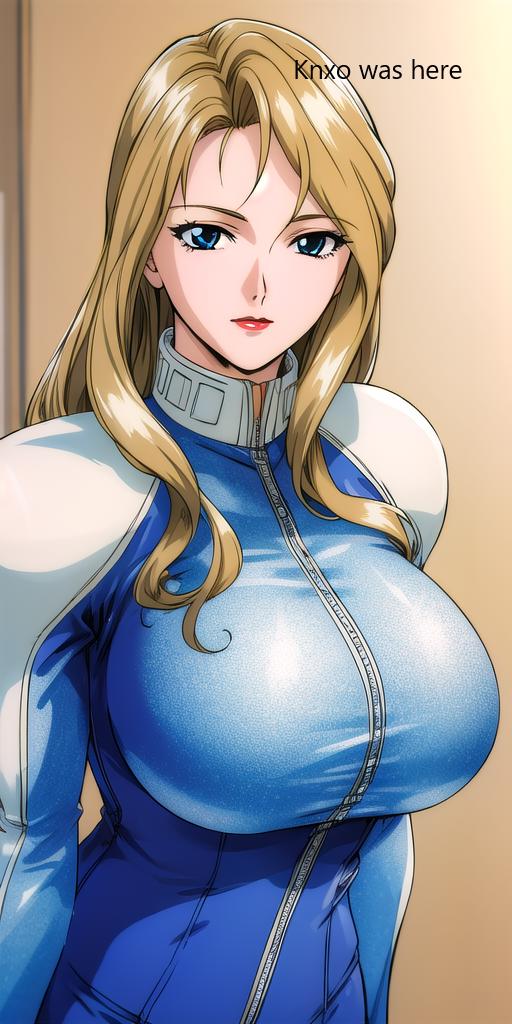
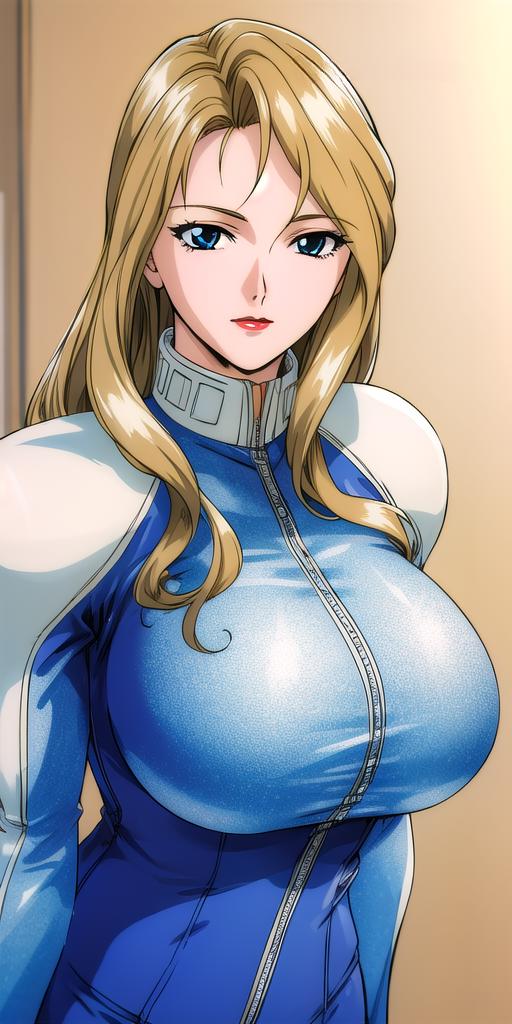
Now the juicy part Recommendations:
Pre-crop your images to only display the expected part. Smaller images will decrease the processing time of lama and help you focus on what sfx, speech bubbles or watermarks you want deleted.
Beware of stuff at the edges of the masking area as those will be used as part of the filling. So if you have a random black pixel it may turn into a whole line. I would recommend to denoise your image and maybe remove JPEG artifacts as that will prevent the image from having too much random pixels that can become artifacts.
Forget about big speech bubbles, if you can't tell what should be behind them, Lama won't be able either. Instead turn speech bubbles into spoken_heart. SD seems to perfectly know what those are and will perfectly ignore them if they are correctly tagged during captioning. The shape doesn't matter SD seems ok with classic, square, spiky or thought spoken_heart bubbles. The tag is "spoken_heart" If you somehow missed it.

Arms, legs and hair are easier to recover, fingers, clothing patterns or complex shadows are not and you may need to either fix them yourself or crop them.
Lama is great at predicting lines, replace an empty space between two unconnected seemingly continuous lines and it will fill the rest. You can also use this to restore janky lines.
You can erase stuff near the area you are restoring so Lama won't follow the pattern of that section. For example you might need to delete the background near hair so Lama follows the pattern of the hair instead of the background.
Lama is poor at properly recreating screen tones, if it is close enough just forget about it. From my tests SD doesn't seem to pay too much attention to the pattern of the screentone as long as the average tone is correct.
Semitransparent overlays or big transparent watermarks require to be restored by small steps from the uncovered area and is all in all a pain. You may just want to manually fix them instead.
You poked around and you found a manga specific model in the options? Yeah that one seems to be slightly full of fail.
Transparency/Alpha and you
At this point you might say "transparency? Great! now i won't train that useless background!" Wrong! SD hates transparency, in the best case nothing will happen, in the worst cases either kohya will simply ignore the images or you will get weird distortions in the backgrounds as SD tries to simulate the cut edges.
So what to do? image magick once again comes to the rescue.
Make sure image magic is installed
Gather your images with transparency(or simply run this on all of them it will just take longer.)
Run the following command:
for %f in (*.png) do magick "%f" -background white -alpha remove -alpha off "RemovedAlpha_%~nf.png"
Resizing 2: Upscaling electric boogaloo
There are 3 common types of Upscaling, Animated, Lineart and Photorealistic. As I mostly do Anime character LORAs I have most experience of the first two as those cover anime, manga, doujins and fanart.
I also recommend to pass your images through this Script it will sort your originals by bucket and create a preview downscale to the expected bucket resolution. More importantly it will tell you which images need to be upscaled to properly fill their bucket. I recommend to to this early in the process as it sorts the images in subfolders by bucket.
Anime:
For low res upscaling, my current preferred anime scaler is https://github.com/xinntao/Real-ESRGAN/blob/master/docs/anime_model.md (RealESRGAN_x4plus_anime_6B). I have had good results for low res shit to 512. Just drop the model inside the A1111 model\ESRGAN folder and use it from the extras tab. Alternatively, I have found a good anime scaler that is a windows ready application https://github.com/lltcggie/waifu2x-caffe/releases Just download the zip file and run waifu2x-caffe.exe Then You can select multiple images and upscale them to 512x512. For low res screen caps or old images i recommend the "Photography, Anime" model. You can apply the denoise before or after depending on how crappy your original image is.

Some extra scalers and filters can be found in the wiki. https://openmodeldb.info/ 1x_NoiseToner-Poisson-Detailed_108000_G works fine to reduce some graininess and artifacts on low quality images. As the 1x indicates this are not scalers and probably should be user as a secondary filter in the extra tabs or just by themselves without upscaling.
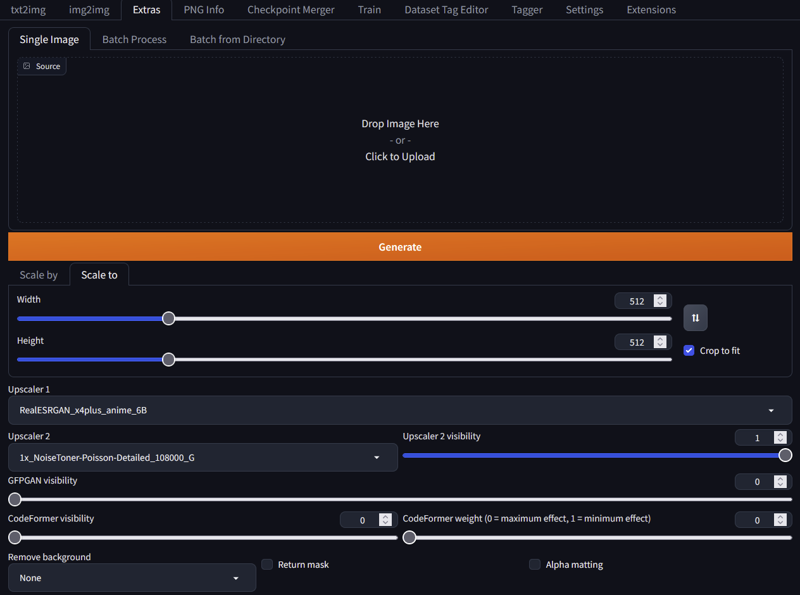
Img2img: for img2img upscale of anime screenshots the best you can do is use a failed LORA of the character in question and use it in the prompt at low weight when doing SD upscale. You don't have one? Well then... if the images are less than 10, just pass them through an autotagger, clean any strange tag, add the default positives and negatives and img2img them using SD upscale. I recommend .1 denoising strength. Don't worry about the shape of the image when using the SD upscale the dimensions ratio is maintained. Beware with eyes and hands as you may have to do several gens to get good images without too much distortion.

For bulk img2igm, unless you plan to curate the prompts, simply go to batch in img2img, set the directories and use the settings above and simply use a generic prompt like 1girl and let it churn. You can set it to do a batch of 16 and pick the best gens.
Manga:
For manga(specially old manga) we have some couple extra enemies
jpeg compression: This looks like distortions near lines.
screen-tone/dithering: Manga and doujins as they are printed media are often colored using ink patterns instead of true grayscale. If you use a bad upscaler it can either eat all the dithering turning it to real grayscale or worse, only eating it partially leaving you a mixed mess.
For upscailing I had the best luck using 2x_MangaScaleV3 It's only downside is that it can change some grayscale into screentones. If your image has almost no screentones then DAT_X4(default in a1111) seems to do an ok job. For some pre filtering in case the images are specially crap, I had some luck filtering using 1x_JPEGDestroyerV2_96000G It can be used together with 1x_NoiseToner-Poisson-Detailed_108000_G It seems to have done it's job without eating the dithering pattern too much.
Below is an example going from unusable to a "maybe" using 2x_mangascaleV3 the small one is the original.

Photorealistic or 3D:
Not much experience with it but when i need something i normally use RealESRGAN_x4plus which seem serviceable enough.
Mask making
So all your dataset image have the same annoying background or a lot of objects that annoy you? Well the solution to that is masked loss training. Basically the training will somewhat ignore the loss of the masked areas of a supplied mask. Tools to automatically create mask would probably boil down to transparent-background or REMBG. I don't really have much faith in REMBG so I will instead add a workflow for transparent-background
First we must install transparent-background so either make a new venv or reuse you a1111 environment and install transparent-background using pip
pip install transparent-backgroundNext, while still in your venv you must run transparent background as follows:
transparent-background --source "D:\dataset" --dest "D:\dataset_mask" --type mapThis will generate the mask of your images with the suffix "_map" next we must remove the suffix, just open powershell in the mask files and run the following command:
get-childitem *.png | foreach { rename-item $_ $_.Name.Replace("_map", "") }Now all your mask files should have the same names as their originals. Lastly before using your masked images to do masked loss training, check the masks, grayscale mask in which you can see bits of your character are not good as well as masks that are completely black.
The following masks are bad:
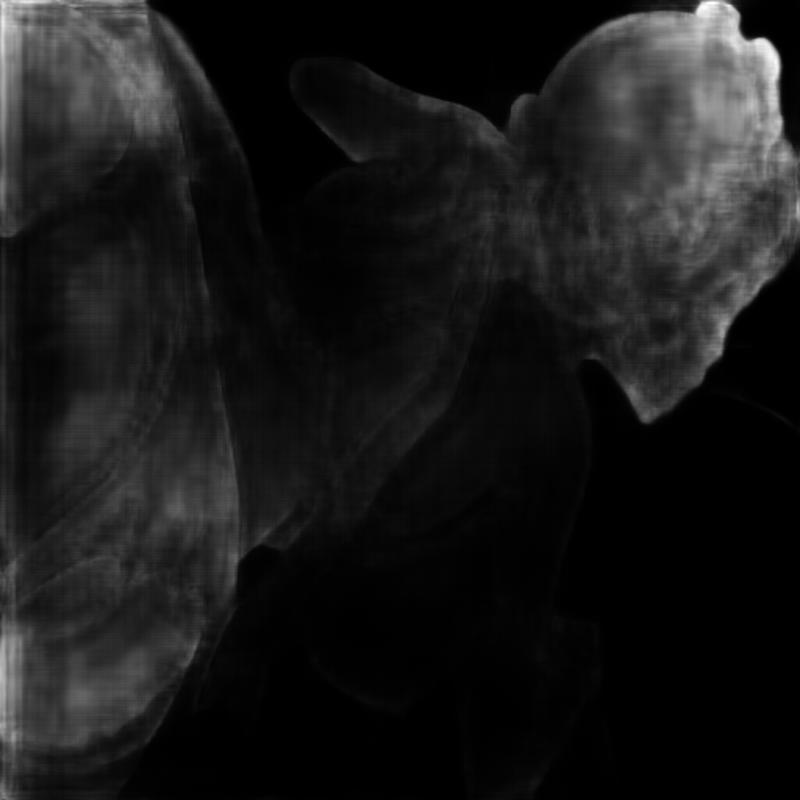
This is what a good mask must look like:
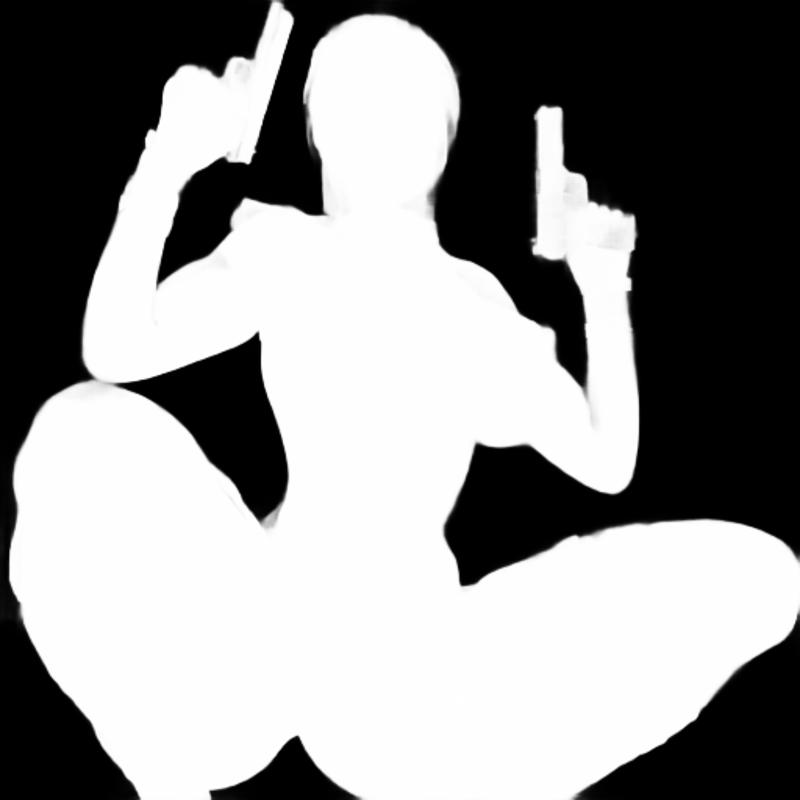
Remember, you do masked loss training by folder so remove from your folder the images whose masks didn't take and simply put them into another folder with masked loss disabled. (currently iffy but should be fixed at some point.)
Sorting
So All your images are pristine and they are all either 512x512 or they have more than 262,144 total pixels. Some are smaller? Go back and upscale them! Ready? Well next step is sorting, simply make some folders and literally sort your images. I normally sort them by outfit and by quality.
Normally you will want to give less repeats to low quality images and you will need to know how many images you have per outfit to see if they are enough to either train it, dump it into misc or go hunt for more images below rocks in the badlands.
Now that you have some semblance of order in to your dataset you can continue to the planning stage.
===============================================================
Planning
Some people would say the planing phase should be done before collecting the dataset. Those people would soon crash face first with reality. The reality of LORA making depends entirely on the existence of a dataset. Even if you decide to use a synthetic dataset, to do any real work you have to make the damn thing first. Regardless, you have a dataset of whatever it is your heart desires. Most Loras fall into 2 or 3 Archetypes: Styles, Concepts or Characters. A character is a type of concept but is so ubiquitous that it can be a category by itself. Now apart from those categories we have a quasi LORA type the LECO.
LORAS
Loras can change due to the tagging style and this directly reflect how the concept is invoked and be separated in 3 main categories, for this explanation a concept can be either a character, a situation, an object or a style:
Fluid: In this route you leave all tags in the captioning. Thus everything about the concept is mutable and the trigger acts as bridge between the concepts. The prompting in this case using a character as an example will look like this: CharaA, log_hair, blue_eyes, long_legs, thick_thighs, red_shirt etc. The problem with this approach is in reproducibility as to make the character look as close as possible will require a very large prompt describing it in detail with tags. This style, to me requires to have access to the tags summary of the training to be the most useful. Surprisingly for the end user this is perfect for beginners or for experts. For beginners because they don't really care as long as the character looks similarlish and for experts because with time you get a feeling of what tags might be missing to reproduce a character if you don't have access to the tag summary or the dataset.
Semi static: In this route you partially prune the captions so the trigger will always reproduce the concept you want and the end user can customize the the remaining tags. Once again this example is of a character. The prompting will look like: CharaA, large_breasts, thick_thighs, Outfit1, high_heels. In this case characteristics like hair style, color as well as eye color are deleted or pruned and folded into CharaA leaving only things like breast size and other body body characteristics as editable. For this example, parts of the outfit are also deleted and folded into the Outfit1 trigger only leaving the shoes editable. This style is most useful for intermediate users as they can focus on the overall composition knowing the character will always be faithful to a degree.
An example of pruning is like this:
Unprunned: 1girl, ascot, closed_mouth, frilled_ascot, frilled_skirt, frills, green_hair, long_sleeves, looking_at_viewer, one-hour_drawing_challenge, open_mouth, plaid, plaid_skirt, plaid_vest, red_skirt, red_vest, shirt, short_hair, simple_background, skirt, solo, umbrella, vest, white_shirt, yellow_ascot, yellow_background
Pruned: CharaA, Outfit1, closed_mouth, looking_at_viewer, open_mouth, simple_background, solo, umbrella, yellow_background
The rationale is simple: CharaA will absob concepts like 1girl which represent the character, while Outfit1 will absorb the concepts of the clothing. Be mindful that for the model to learn the different between CharaA and Outfit1, the trigger must appear in different images so the model learns that they are in fact different concepts. For example the character dressed in a different outfit will teach the model that Outfit1 only represent the outfit as CharaA appears in images that have different outfits.
Recommendations:
For character outfits, never fold shoes(high_heel, boots, footwear) tags into the outfits. This often causes a bias towards fullbody shots as the model tries to display the full body including the top and the shoes, it can also cause partially cropped heads.
For characters, never prune breast size. People get awfully defensive when they can't change breast size.
For styles remember to prune inherent things to the style for example if black and white prune monochrome or if the art is very "dark" then prune tags like night, shadow, sunset, etc.
Static: If you prune all tags relating to the concept you get this. It will fight any change you try to make. For example for a character someone will accuse you of something for not making x bodypart editable. I always make the boobs in my loras editable and I still get complains of this type. The prompting will look like: CharaA. Well not this extreme, you still can still force some changes. What you are doing is essentially turning the whole character, outfit and all into a single concept and it will be reproduced as such.
Characters
So you decided to make a character. Hopefully you already decided which approach to take and hopefully it was the semi static one, or if lazy the fluid one will do.
As can be easily surmised only the first and second routes are useful. The Semi static path requires much more experience on what to prune and what to keep in the captioning. Check the captioning section's Advanced triggers for more details on this. Surprisingly most creators seems to stick to the fluid style, I am not sure if end users prefer it, it is due to laziness or they never felt the need to experiment with captioning to do more complex things.
Anyway you decided your poison, now comes the outfits.
If you are using a Fluid approach just make sure you have a good enough representation of the outfit in the dataset anything from 8 to 50 images will do, just leave them in there. After you finish training try to recreate the outfit via prompting and attach it to the notes when you publish...
If you are using a semi static approach you may want or need to train individual outfits as sub concepts. I would say I try to add all representative outfits but in reality I mostly add sexy ones. Here is where you start compromising as you will inevitably end up short on images. So... add the ugly ones. You know which ones. Those that didn't make the cut. Just touch them up with photoshop or img2img. I have honestly ended up digging on cosplay outfits auctions for that low res image of an outfit in a mannequin. As I mentioned in the beginning the dataset is everything and any planing is dependent on the dataset.
Anyway as i mentioned, when selecting an outfit to train You would need at the very least 8 images with as varied angles as possible. Don't expecting anything good for a complex outfit unless you have more 20+ images. 8 is the very minimum and you will probably need some help from the model, so in this case it is best to construct the outfit triggers in the following way Color1_item2_Color2_Item2...ColorN_ItemN. It is possible to add other descriptors in the trigger like Yellow_short_Kimono in this case being made of two tokens yellow and short_kimono. If it were for example sleeveless and with an obi I would likely put it as Yellow_short_Kimono_Obi_Sleeveless. I am not sure how much the order affect the efficacy of the model contamination(contribution in this case) But I try to sort them in decreasing visibility order. with modifiers that can not be directly attached to the outfit at the very end. So I would put sleeveless, halterneck, highleg, detached_sleeves, etc at the end.
Character Packs
So you decided you want to make a character pack? If you are using a fluid character captioning style then you better pray you don't have two blonde characters. The simple truth is that doing this increases bleedover. If your characters faces are similar and their hair colors and styles are different enough, this is doable, but I have never seen an outstanding character pack done in this way. Don't misunderstand me, they don't look bad or wrong, well when they are done correctly. They look bland as the extra characters pulls the LORA a bit towards a happy medium due to the shared tags. But if you like a "bland" style that is perfectly fine! At this point there's probably hundreds of "Genshin impact style" lookalike LORAs and they are thriving! How is that possible? I haven't the foggiest. If I may borrow the words of some of the artists that like to criticize us people who use AI, I would say they are "pretty but a bit soulless". Then again I am old and I have seen hand-drawn anime from the 80s.
Moving along... If you are using a semi static captioning style, just basically make one dataset for each character, mash it together and train it. Due to the pruning there should be no concept overlap, This will minimize bleedover. Sounds easy? It is! only issue is that it is the same work as doing two different LORAs and will take twice the training time.
So now you are wondering why bother? Well there's two main reasons:
To decrease the amount of LORAS. Why have dozens of LORAs if you can have one per series! Honestly this makes sense from an end user's perspective but from a creator's perspective it only adds more failure points, because you may have gotten 5 characters right but the sixth may look like ass. Remember! Unless you are being paid for it, making the end user's life easier at your expense is completely optional, and if you are being paid, you should only make their life "a bit" easier so they keep requiring your services in the future. :P On the other hand if you are a bit OCD and want to have your LORAS organized like that, then I guess it is time well spent.
The real reason, So you can have two or more characters in the same image at the same time! This can be done with multiple LORAs, but they will inevitably have style and weights conflicts. This can only be mitigated by using a dreambooth model or a LORA with both characters. If you are thinking NSFW you are completely correct! But also a simple couple walking hand to hand(which some people consider the most perverse form of NSFW.)
For this you necessarily need the two characters be captioned in a semi static way, otherwise when you try to prompt the characters SD will not know which attributes to assign to each one. For example if you have a "1boy, red_hair, muscles" and "1girl, black_hair, large_breasts" SD is liable to do whatever it wants(either making a single person or distribute the traits randomly). If on the other hand you have "CharacterA, CharacterB" it becomes much harder for SD to fuck up. One consideration is that SD doesn't manage multiple characters very well so it is essential to add a 3rd group of images to the dataset with both characters in the same image.
In other words, for best result the workflow should be as follows. You need a 3 distinct groups of images Character A , Character B and character A+B, each one with their respective trigger. I would recommend at least 50+ images of each. Second of all you will need to do extensive tag pruning for group A and B in the semi static style as if you were making 2 different character LORAs making sure SD clearly knows which attributes belongs to who. Afterwards the A+B group must be tagged with the 3 triggers, making sure to prune any tags alluding to the number of people. Basically what you will be doing is stuffing two character loras and a concept lora(the concept being two people) into one single lora. So at the end just merge the 3 datasets, add some tweaks for extra outfits(if any) and that's it. Even after all that the lora may require you to use 2girls. 2boys or "1boy, 1girl" for it to make the correct amount of persons. SD is annoying like that.
Styles
Styles is pretty much what it sounds like, an artist's style. What you try to capture is the overall ambience, body proportions of characters, architecture and drawing style(if not photo realistic) of an artist. For example if you check my LORAS or at least their sample images you would notice I favor a more somber style, a bit more mature factions and big tits(no way around it I am jaded enough to know I am an irredeemable pervert) If you collected all my datasets and sample images and merged them into a LORA you would get a KNXO style I guess.
I don't really like training styles as I find it a bit disrespectful specially if the artist is still alive. I have only done one Style/character combo LORA as that particular doujin artist vowed to stop drawing said character after being pressured by the studio who now owns the rights of the franchise. Regardless, if you like an artist's style so much you can't help yourself, just send a kudos to the artist and do whatever you want. I am not your mother.
Theoretically style is the simplest LORA type to train, just use a big, clean and properly tagged dataset. If you are training a style you will need as many varied pictures as possible. For this type of training, captions are treated differently,
There are 2 Common approaches to tagging styles:
Contemporary approach: Try to be as specific as possible in your tags tagging as much as possible. Add the trigger and eliminate the tags that are associated to the style. For example Retro style, a specific background always used by the artist, a perspective you wish to keep and tags like that. The rationale is distributing all concepts to their correct tag leaving the nebulous style as the odd concept out assigning it to the trigger.
Old approach: what you want to do is either delete all tags from the caption files, only leaving the trigger and let the LORA take over when it is invoked. The rationally being to simply dump everything into trigger creating a bias in the unet towards the style.
Essentially the approaches are distilling the style vs overloading other concepts. AFAIK both techniques work. I haven't done enough experiments to do a 1 to 1 comparison. But in pure darwinistic terms, the first solution is more widely used today so I guess it is superior(?).
Remember and can't emphasize it enough, clean your dataset as best as possible, for example if you use manga or doujins then clean the sfx and other annoyances as they will affect the final product(unless they are part of the esthetic you want of course).
Concepts
Concepts... First of all you are shit out of luck. Training a concept is 50% art and 50% luck. First make sure to clean up your images as good as possible to remove most extraneous elements. Try to pick images that are simple and obvious about what is happening. Try to pick images that are as different as possible and only share the concept you want. For Tagging you need to add your trigger and eliminate all tags which touch your concept, leaving the others alone.
Some people will say adding a concept is just like training a character, that is true to an extent for physical objects concepts. In any other instance... Oh! boy are they wrong! SD was mainly trained to draw people and it really knows it's stuff, fingers and hands aside. It also knows common objects, common being the keyword. If SD has no idea of what you are training you will have to basically sear it into the model using unholy fire. On the other extreme if it is a variation of something it can already do, it will likely burn like gunpowder. Here are some examples
A good example for the first case would be an anthill, a bacteria or a randomly repeating pattern. One would think, "well I just need a bunch of example images as varied as possible". Nope, If SD doesn't understand it, you will need to increase the LR, reps and epochs. In my particular case I ended up needing 14 epochs using prodigy, so the LR was probably up the wazoo. I had to use a huge dataset with a bunch of repeats. I think it was 186 images 15 repeat for 14 epochs. Also using keep token on my trigger and using caption shuffle. As I said i had to basically sear it into the LORA. This particular case would be a good candidate for regularization images to decrease the contamination towards the model, I evaded using them by making the dataset more varied. The result was mediocre in my opinion, though people seem to like it as it does what it is supposed to.
For the second case I did a variation of a pose/clothing combo. (Don't look for it if you have virginal eyes). Problem being, it is a variation of a common concept. It is actually possible to do (with extremely little reliability) by just using prompting, also I wanted to be as style neutral as possible for it to easily mix. Long story short, any amount of repetitions caused it to either overbake or be extremely style affecting. The only solution i found was these settings: Dim 1 alpha 1 at 8 epoch 284 unique images with 1 repetition. The low dim and alpha made it less likely to affect the style, the unique images acted like reg images pulling the style in many directions cancelling it a bit and the low reps kept overcooking under control. I ended up doing two variations one with adamw and one with Prodigy. The prodigy being more consistent but more style heavy despite my best efforts. The AdamW much more neutral but a bit flaky.
TLDR: Use low alpha and dim for generalized concepts and poses you wish to be flexible. Use a dataset as big and varied as possible. If the concept is alien to SD sear it with fire, and if it is already seared with fire touch it with a feather.
LECO or Sliders
LECO can be consider a type of Demi LORA in fact they share the same file structure and can be invoked as a normal LORA. Despite being identical to LORA in most ways LECO are trained in a completely different way without using images. To train LECO you need at least 8GB of VRAM. Currently there are two scripts able to train LECO:
https://github.com/p1atdev/LECO: Older implementation mostly focused on adding or removing concepts.
https://github.com/ostris/ai-toolkit: More modern implementation focused on creating sliders.
For training I used Ai Toolkit, beware the project is not very mature so it is constantly changing. I will add instructions using a specific version of it that i know is working and will need some tweaks.
The following instructions are for a windows install using cuda 121. Make sure you have git for windows https://gitforwindows.org/ installed.
First open powershell in an empty folder and do the following steps:
git clone https://github.com/ostris/ai-toolkit.git
git checkout 561914d8e62c5f2502475ff36c064d0e0ec5a614
cd ai-toolkit
git submodule update --init --recursive
python -m venv venv
.\venv\Scripts\activate
Afterwards download the attached ai toolkit zip file on the right, it has a clone of my currently working environment using cuda 121 and torch 2.2.1. Overwrite the requirements file as well as the file within the folder(it has a cast to integer fix).
Then Run:
pip install -r requirements.txtIt should take a while while it downloads everything. In the meanwhile download train_slider.example.yml in the right and it is time to edit it.
Realistically the only values you need to edit are:
Name: The name of the LECO
LR: Learning rate was recommended as 2e-4, that was too high better set it to 1e-4 or a bit lower.
Hyperparameters: Optimizer, denoising, scheduler, all work fine, the LECO burnt well before the 500 steps so that's ok too.
steps: Had some weirdness rounding to 500, the last epoch wasn't generated so add 1 to the max just in case. I defaulted to 501
dtype(Train): if your videocard supports it use bf16, if not use FP32, FP16 causes NAN loss errors making the LECO unusable.
dtype(Save): always leave it as float16 for compatibility.
name_or_path: The path to your model use "/" for the folder structure, if you use the other one it will crash.
modeltypes:set V2 and Vpred if SD2.0, xl if XL or leave them false if on SD1.5.
max_step_saves_to_keep: This is the amount of epochs you wish to keep, if you put less than the total amount the older ones will be deleted.
prompts: the --m part is the strength of the LECO, recommend the following values so you can see the progress: -2, -1,-.5,-.1,0,.1,.5,1,2. they should look like this:
- "1girl. skirt, standing --m -2"resolutions: 512 for SD1.5 768 for 2 and 1024 for XL.
target_class: The concept you wish to modify for example skirt or 1girl
positive: The maximum extent of the concept, for example for a skirt it would be long_skirt
negative: The minimum extent of the concept, for a skirt it would be microskirt, but in my case that was not enough as that concept is not very well trained in my model so i had to help it by including other concepts related to it, it ended up being: "microskirt,lowleg_skirt,underbutt,thighs,panties,pantyshot,underwear"
metadata: Just put your name and web address, you don't want them to say they belong to KNXO
So you finished filling up your config file and installing all the requirements? Then in powershell with the venv open and in the ai-toolkit folder, type:
python run.py path2ConfigFile/train_slider.example.yml Then supposing everything went fine it will start training. LECO train a lot slower than LORA and require more VRAM, on the other hand they support resume, you can just stop the training and start it again as needed. AItools spits the progress and Epoch in the output folder so check the progress there.
To know a LECO is done check the sample images, if the extremes have stopped changing then it is overcooked. For example the following images are step 50 weight 2 and step 100 weight 1. Not only is it obvious both are the same but the second one has a blue artifact in her left shoulder. So in this case the epoch of step 50 is the one i want(The recommended LR 2e-4 was really stupidly high).
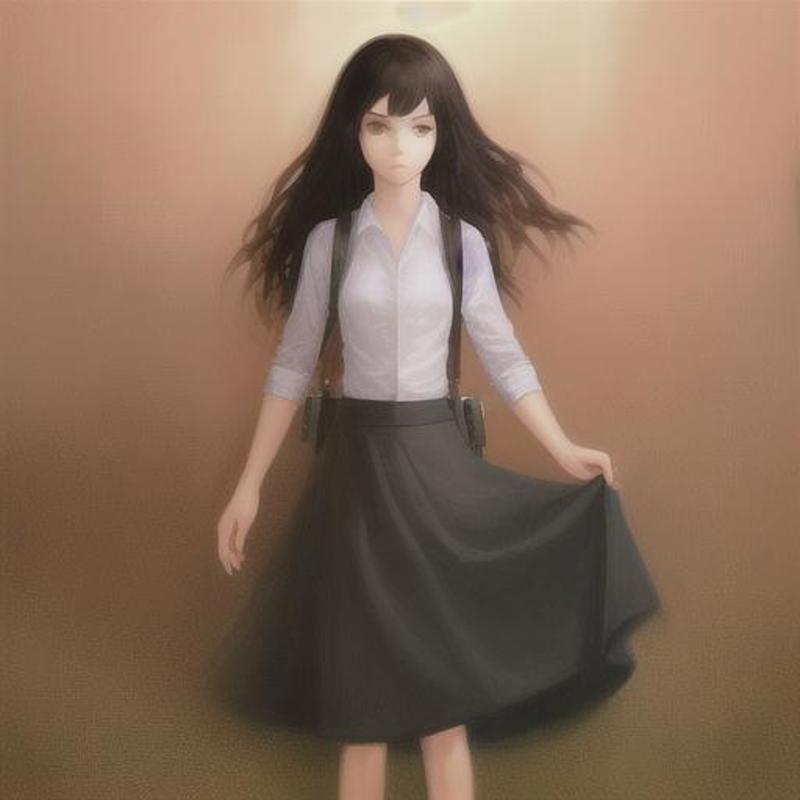
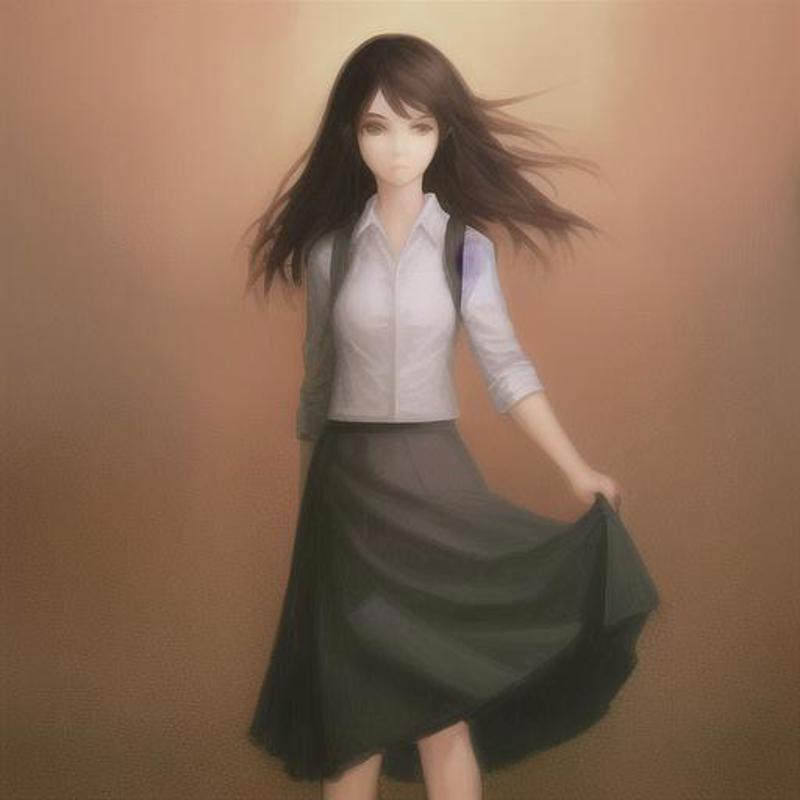
So you decided which epoch looks best, then simply test it like any other LORA. Congratulations you have made your first pseudo LORA. LECO difficulty most comes from actually setting the environment and finding good tags for both extremes of the concept.
Masked Training
Is your dataset full of images with the same or a problematic backgrounds? Maybe too much clutter? Well Masked training may or may not be a solution! The pros of this approach is that the training is simply more concrete, reducing extraneous factors. The con? You have to make masks, hopefully good quality masks. Unless you are a masochist and want to manually create the mask of each one of your images you will need something to generate them and it will likely be either transparent background or REMBG. Go check the mask making section for how to do it with transparent background.
As far as I know Masked loss training works the same as normal training but when saving the weights, the masked zones are dampened or ignored depending on the opacity of the mask. Is simple words the black part in the mask is ignored.
From my tests Masked training works slightly better than for example training with a white background, it is not a massive improvement by any means but it works good enough. For it to truly be valuable it needs a couple of conditions:
The dataset is mask making program friendly:
Images must be as solid as possible blurry images, monochrome, lineart and anything that is too fuzzy will likely fail to produce a good mask.
The dataset has something you "really" don't wish to train and it can't be cropped out:
This applies for example the if dataset has repetitive or problematic backgrounds.
Problematic items or backgrounds aren't properly tagged.
If they are ignored it doesn't matter too much if they are poorly tagged.
So if your dataset is properly cropped and tagged, the gains will be minimal.
Anyway to do mask training simply create the masks for your images and make sure they have the same name as your originals then simply enable the option to use it and set the masks folder, then proceed to train as usual.
I saw no particular dampening in the learning rate nor performance overhead. They might exist but they are manageable. All in all Masked training is just another situational tool for training.
Block Training
First of all I am not an expert at block training as i find it to be a step too far. Anyway let's begin with the obvious. SD is made from a text encoder(or several) and a Unet. For our purposes lets focus on the unet and just establish that a SD1.5 LORA has 17 blocks and a Locon has 26. The difference in blocks only means that the remaining 9 blocks are zeros in a LORA. So a lora is 17 blocks plus 9 zero blocks and a Locon is 26 blocks with values. For SDXL it is 12 and 20 blocks for it's Unet. We will use the full LOCON notation as it is what most programs use. I will also use examples for SD1.5 using the 26 values.
Available LOCON blocks:
SD1.5:BASE,IN00,IN01,IN02,IN03,IN04,IN05,IN06,IN07,IN08,IN09,IN10,IN11,M00,OUT00,OUT01,OUT02,OUT03,OUT04,OUT05,OUT06,OUT07,OUT08,OUT09,OUT10,OUT11
SDXL:BASE,IN00,IN01,IN02,IN03,IN04,IN05,IN06,IN07,IN08,M00,OUT00,OUT01,OUT02,OUT03,OUT04,OUT05,OUT06,OUT07,OUT08
Block training is a bit more experimental and an iterative process. I don't normally use it as at some point you have to say good enough and move on. None the less if you are a perfectionist this might help you. Beware you can spend the rest of your life tweaking it to perfection. Also you will need to know how to analyze your LORA to see which blocks to increase of decrease, that is a bit out of the scope of this training guide.
Now lets dispel the myth. As far as I know any table claiming that X block equates to Y body part is lying. While some relations exist they are too variable to make a general assessment. The equivalences are dataset dependent and using empiric tables may or may not give you good results. So You would think "Then Block training is Useless!" well yes and no. Uninformed block training using one of those equivalence table is useless, when you have an idea of what needs to be changed then we have some tangible progress.
Also you must consider that while Kohya supports Block training, Lycoris seemingly does not. So it is limited to LORA and OG Kohya's LOCON(not the more modern Lycoris implementation).
There are two ways to do "proper" block training:
The first method is an iterative one:
First train a lora as normal.
Use an extension like https://github.com/hako-mikan/sd-webui-lora-block-weight to see which blocks can be lowered or increased to produce better images or reduce overfitting.
After installing it you can prompt like this <lora:Lora1:0.7:0.7:lbw=1,1,1,1,1,1,1,1,1,1,1,1,0,0,0,0,0,0,0,0,0,0,0,0,0,0> or <lora:Lora1:0.7:0.7:lbw=XYZ> the first to manually input the block value the XYZ one to make a plot for comparison. Do take note the 0.7 values are the weight of the Unet and text encoder which the extension takes as separate values.
Retrain using the same dataset and parameters but using what you learnt to tweak the block weights.

In this case, block weights is just a multiplier and the easier to edit. Dims and alpha will affect detail and learning rate respectively. So if you want a block reinforced you can increase the weight multiplier or alpha, If you want some more detail increase the dim slightly. I would recommend to stick to the multiplier or in special cases alpha but i am not your mother.
Rinse and repeat adjusting things.
The second approach doesn't involve training but a post training modification:
First follow the first three steps as before.
Install the following extension: https://github.com/hako-mikan/sd-webui-supermerger.git
Go to supermerger lora tab and merge the lora against itself. As far as i know at alpha .5 it should average the weights so leave it at default and merge the lora against itself with the reduced or increased block weights. I get the feeling a stand alone tool should exist for it. Alas I don't know one.

should look like this:
Lora_1:1:.5,0,0,0,0,0,0,0,0,0,0,0,0,0,0,0,0,0,0,0,0,0,0,0,0,0,0,Lora_1:1:.5,0,0,0,0,0,0,0,0,0,0,0,0,0,0,0,0,0,0,0,0,0,0,0,0,0,0
The example above should mix Lora_1 against itself setting all blocks to 0 except the Base block that should be now set at .5 weight. If instead one had the Base block set to 1 and the second set to .5 the result would have the block set at .75 (might be wrong so don't quote me on it.).
Planning Conclusion
Finally, manage your expectations. A character LORA is good when you can make it produce the likeness of the character you desire. An object concept LORA is the same. But how do you measure the success of a pose? One could say that as long as the pose is explicitly the same(basically overbake it on purpose) then mission accomplished! But you could also add that the pose lora plays well with other LORAs, that it be style neutral or that it has enough view angle variations while still being the same pose. To me the concept LORA I made were multi week projects that left me slightly burnt out and a bit distraught as every improvement only highlighted the shortcomings of the LORA. So remember this, if you are getting tired of it and the LORA more or less works, Say "fuck it!" and dump it into the wild and let the end users use it and suffer. Forget about it, The users will wine and complain about the shortcomings but that will give you an idea of what really needs to be fixed. So just forget about it and come back to it when the feeling of failure has faded and you can and want to sink more time into it, now with some real feedback on what to fix.
===============================================================
Folders
So All your images are neat, 512x512 or a couple of buckets. The next step is the Folder structure, images must be inside a folder with the following format X_Name where X is the amount of times the image will be processed. You’ll end with a path like this train\10_DBZStart where inside the train folder is the folder containing the images. Regularization images use the same structure. You can have many folders, all are treated the same and allow you to keep things tidy if you are training multiple concepts like different outfits for a character. It also allows you to add higher processing repetitions to high quality images or maybe a tagged outfit with very few images. For now just set everything to 10 repetitions, you will need to tweak these number after you finish sorting your images into the folders.
In the example below I tagged 6 outfits, the misc folder has well misc outfits without enough images to be viable. I adjusted the repetitions depending on the amount of images inside each folder to try to keep them balanced. Check the Repetitions and Epochs section to adjust them.
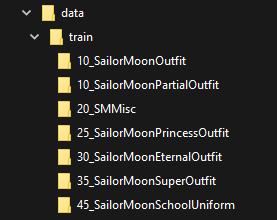
So after you finish the structure it is time to sort your images into their corresponding folders. I recommend that if the shot is above the heart, to dump it into misc as it won't provide much info for the outfit, those partial outfits in misc should be tagged with their partial visible parts rather than the outfit they belong to. That is unless they have a special part not visible in the lower part of the outfit, in this case leave them as is and treat them as normal part of the outfit and just be cautious of not overloading the outfit with mugshots. Random suggestion: For outfits, adding a couple of full body headless(to make the character unrecognizable) shots tagged with "1girl, outfitname, etc" do wonders to separate the concept of the outfit from the character.
===============================================================
Repetitions and Epochs
Setting Repetitions and Epochs can be an issue of what came first the chicken or the egg. The most important factors are the Dim, alpha, optimizer, the learning rate and the amount of epochs and the repetitions. Everyone has their own recipes for fine tuning. Some are better some are worse.
Mine is as generic as it can be and it normally gives good results when generating at around .7 weight. I have updated this part as ip noise gamma and min snr gamma options seem to considerably decrease the amount of steps needed. For prodigy to 2000 to 3000 total steps for SD1.5 and 1500 to 2500 for SDXL.
Remember kohya based training scripts calculate the amount of steps by dividing them by the batch size. When I talk about steps i am talking about the total ones without dividing by the batch size.
Now what does steps per epoch actually means? It is just the amount of repeats times the amount of images in a folder. Suppose I am making a character LORA with 3 outfits. I have 100 outfit1 images, 50 outfit2, 10 outfit3.
I would set the folders repetitions to be:
3_outfit1 = 3 reps * 100 img =300 steps per epoch
6_outfit2 = 6 reps * 50 img =300 steps per epoch
30_outfit3 = 30 reps * 10 img =300 steps per epoch
Remember you are also training the main concept when doing this, in the case above this results in the character being trained 900 steps. So be careful not to overcook it(or overfit it). The more overlapping concepts you add the higher the risk of overcooking the lora.
This can be mitigated by removing the relation between the character and the outfit. Take for example outfit1 from above, I could take 50 of the images and remove the character tag and replace it for the original description tags(hair color, eye color, etc). that way when outfit1 is being trained character is not. Another alternative that somewhat works is using scale normalization that "flattens" values that shoot too high beyond the rest limiting overcooking a bit. Using the prodigy Prodigy optimizer also makes thing less prone to overcook. Finally when everything else fails, the usage of regularization images can help mitigate this issue take the example above, You split the outfit images tagging half with the character trigger and the other half with the individual tags. Using regularization images with those tags will return them to "a base state" of the model allowing you to continue training them without overfitting them thus effectively only training the outfit trigger.
Warning: Don't use Scale normalization with prodigy as they are not compatible.
For the main concept (character in the example) I would recommend to keep it below (6000 steps in adamW or 3000 for prodigy) per total before you need to start tweaking the dataset to keep it down and prevent it from burning.
Remember these are all approximations and if you have 10 more images for one outfit you can leave it be. If your Lora is a bit overcooked, most of the time it can be compensated by lowering the weight when generating. If your LORA starts deepfrying images at less than .5 weight i would definitely retrain, it will still be usable but the usability range becomes too narrow. There's also a rebase script around to change the weight so you could theoretically set .5 to become 1.1 thus increasing the usability range.
Recipe
I use 8 epochs, Dim 32, Alpha 16 Prodigy with a learning rate of 1 with 300 steps per epoch per concept and 100 steps per sub-concept(normally outfits). Alternatively use Dim 32, AdamW with a learning rate of .0001. and double the quantities of steps for prodigy. (Don't add decimals always round down) It got overcooked? Lower the repetitions/learning rate or in adamw enable normalization.
WARNING: Using screencaps while not bad per se is more prone to overbaking due to the homogeneity of the datasets, I have found this to be a problem specially with old anime, when captioning you will notice it normally gets the retro, 80s style and 90s tags. In this case for prodigy they seem to train absurdly faster and do a good job with 1000~2000 total steps rather than the common 2000~3000.
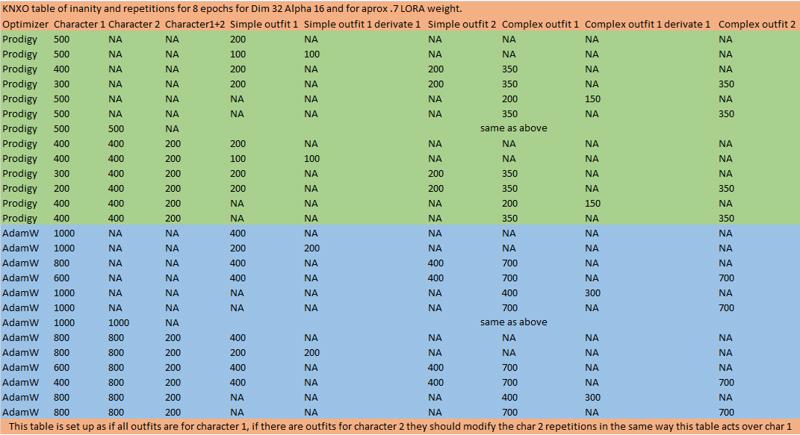
KNXO's shitty repetitions table
Below I add a crappy hard to read table, I'll probably attach it a bit larger to the right in the downloads as a zip file. Each row being an scenario and the NA value meaning that it is unneeded. For example the first row is for a simple one character one outfit lora. This is for dim 32 alpha 16.
*By simple outfit i mean it: shirt, pants, skirts without frills or weird patterns.
*The character column represents a misc folder full of random images of the character in untrainable outfits(too few images of the outfit or trained outfits missing too many of it's parts) and face shots(as well as nudes). It is good for the LORA to have a baseline shape of the character separate from it's outfits. In this folder outfits should be tagged naturally ie in pieces as the autotagger normally does without pruning the individual parts.
*The outfit columns represent folders with complete and clear view of the outfit and tagged as such. These images may or may not also be tagged with the character trigger if it applies(for example: mannequins wearing the outfit should not be tagged with the character trigger, only with the outfit trigger).
If your desired scenario is not explicitly there, then interpolate it, for example if you have a two character lora with 3 outfits per character, just apply the scenario 3 for both characters(ie reduce the character reps of both to 400). The table essentially explains more or less the required repetitions for a 1 or 2 character LORA with up to 4 outfits(2 complex and 2 simple ones) It also allows for the substitution of a base outfit plus a derivative outfit, for example an outfit with a variant with a scarf or a jacket or something simple like that.
Beware this table is completely baseless empiric drivel from my part, that it has worked for me is mere coincidence and add to it that it still needs some tweaking in a per case basis, but i mostly stick to it These values gravitate towards the high end so you may end up choosing epochs earlier than the last one. If i were to guess your best bet would be epoch 5 or 6.
Beware2: Older anime seems to need roughly 1/3 of the training steps that contemporary anime because "reasons"(I am not exactly sure but it likely due to NAI's original dataset).
Beware 3: ip noise gamma and min snr gamma options seem to considerably decrease the amount of steps needed. So try mutiplying the values by 3/5 like 500*3/5=300 steps.
Beware 4 for sdxl try mutiplying the values by 1/2 500*1/2=250 steps.
===============================================================
Captioning
So all your images are clean and in nice 512x512 size, the next step is captioning. Captioning can be as deep as a puddle or as deep as the Marianas trench. Captioning(adding tags) and pruning(deleting tags) are the way we create triggers, a trigger is a custom tag which has absorbed (for lack of a better word) the concepts of pruned tags. For anime characters it is recommended to use deepboru WD1.4 vit-v2 which uses danbooru style tagging. The best way i have found is to use diffusion-webui-dataset-tag-editor(look for it at extensions) for A1111 which includes a tag manager and waifu diffusion tagger.
Go to the stable-diffusion-webui-dataset-tag-editor's A1111 tab and select a tagger in the dataset load settings, select use tagger if empty. Then simply load the directory of your images and after everything finishes tagging simply click save. I recommend to select two of the WD1.4 taggers, it will create duplicate tags but then you can go to batch edit captions->remove->remove duplicates and get maximum tag coverage.
Alternatively Go to A1111 in the Train->preprocess images tab and tick use deepbooru for captions and process them. I strongly advice against using stock deepbooru, whenever it encounters blurry images or mist it sees penises or sex as blurriness is a common form of censor. You can easily notice when deepbooru went insane as the produced caption files are over 1kb. Do yourself a favor and Just use the dataset editor.


An ok tool that might help as a preliminary step is https://github.com/Particle1904/DatasetHelpers, honestly it sucks a bit, but it has two very useful options, redundancy removal and tag consolidation, both in the Process tags tab, just select your dataset folder after tagging it, check both options and click process. This will consolidate some tag for example shirt, white_shit into only white_shirt and tags like white_dress and turtleneck_dress into white_turtleneck_dress. It is not very good but it will reduce the amount of tags you will need to check and prune.
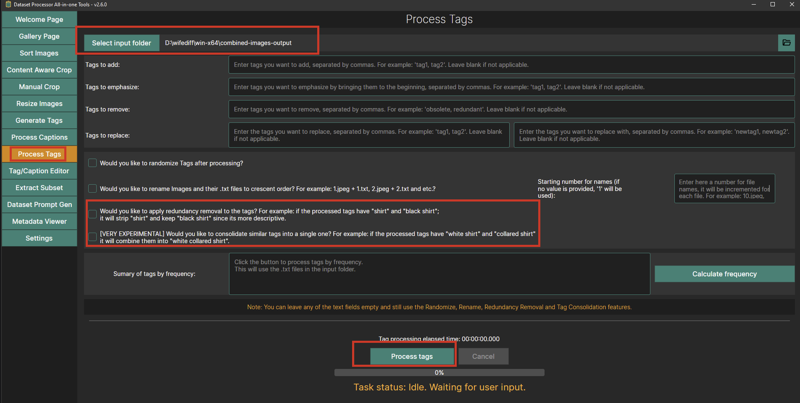
Tagging Styles
While creating your dataset you will be forced to answer an important question Blip or Danbooru?
Blip: Supposedly based on natural language(It makes my brain hurt for some reason) Blip style captioning is the standard on which SD has been trained. It seems to suck ass. I don't like it, my brain don't like it for some reason. Blip is only used in photorealistic models in SD1.5 and in most models in SDXL. A Blip caption Looks like this: "A woman with green eyes and brown hair walking in the forest wearing a green dress eating a burrito with (salsa)"
Danbooru: Danbooru style captioning is based in the Booru tagging system and implemented in all NAI derivatives and mixes which accounts for most SD1.5 non photorealistic models. It commonly appears in the following form "1girl, green_eyes, brown_hair, walking, forest, green_dress, eating, burrito, (sauce)". This tagging style is named after the site, as in https://danbooru.donmai.us/. Whenever you have doubt on the meaning of a tag you can navigate to danbooru, search for the tag and open it's wiki.
Take for example the following, search for the tag "road" when we open it's wiki we will see the exact definition as well as derivative tags like street, sidewalk or alley as well as the amount of times the image has been used(13K).


In Practice what this means is that the concept is trained to some degree in NAI based models and mixes. The amount of times the tag appears in danbooru actually correlates to the strength of the training(as NAI was directly trained on Danbooru data). So any concept below 500 coincidences are a bit iffy. Keep that in mind when captioning as sometimes it makes more sense to use a generic tag instead of the proper one, for example "road" appears 13k times while "dirt_road" only does so 395 times. In this particular case using dirt_road shouldn't be problematic as "dirt_road" contains "road" anyway and SD is able to see the association.
Anyway just remember to consult danbooru when you need to help captioning something or pruning tags, Another great example is Tiara vs circlet. Most taggers will spit out both. But! A Tiara goes on top of the head and is more crown like while a circlet goes in the forehead! Sailor Moon was wrong all along! She had a moon circlet instead of a moon tiara! While this may seem a bit inconsequential every error in the tagging will negatively affect the LORA bit by bit creating a snowball effect.
Cleaning
Caption cleaning: Before starting the Trigger selection it is best to do some tag cleaning(make sure to ignore tags that will be folded into triggers as those will likely be pruned). Superfluous tags are best served in the following ways:
Delete: For useless tags like meme, parody, sailor_moon_redraw_challenge_(meme), shiny_skin, uncensored(I make an effort to always prune uncensored as I want my loras to remember that is the default state). Also for mistaken identities in case your character is identified as another character or an object is miss identified.
Consolidate: For generic tags for example "bow" is best dealt by replacing it with it's color + part equivalent like black_back_bow or red_bowtie and deleting the associated individual tags. This mostly applies to hair, clothes, backgrounds and the "holding" tag.
Split: Also for generic tags, for example "armor" is best split into pauldron, gorget, breastplate, etc. Jewelry, makeup and underwear are common offenders.
Synonyms: One version should be chosen and the other consolidated for example "circlet" and "tiara" most taggers will pick up both.
Evaluate: These can boost or corrupt the training concept. For example if you are training a character and it is recognized. If the model response is mild when generating an image of it, then it can be used as the character trigger to boost it. If on the other hand it is already strongly trained it will likely cause your LORA to overcook. So either use them as triggers or delete them. You don't have to worry if they just happen to exist in your dataset and you are not training for them (for example if you are training Gotham city architecture and it recognizes batman).
Triggers Selection
Now you must decide which tags you are going to use as a trigger for your LORA. There's 4 types of "contamination" your trigger can get from the the model:
Negative contamination: Take for example you wish to make a Lora for Bulma in her DBZ costume. So you choose the tag “Bulma_DBZ”. Wrong! If your character is unknown there is no issue but if you choose a famous character like bulma you will get style contamination from the word “Bulma” and the word “DBZ”. In the case of Bulma, her style is so deeply trained in most anime models that it will likely overcook your LORA simply by being associated to it. Remember that underscores, dashes and hyphens are equivalent to spaces for the danbooru notation and even if partial you might get some bleed over due to tangentially invoking their concepts.
Noise: If when you pass your trigger trough your model it produces something different every time then that means the trigger is "free" or untrained in the model and it is perfect to use for your lora if you want to minimize outside interference.
Positive contamination: On the other hand this contamination can be beneficial specially for outfits. Take for example the following trigger Green_Turtleneck_Shirt_Blue_Skirt, as it is not completely concatenated it will get a bit of contamination from each one of the words forming it. This can be very useful to boost triggers for outfits in which you only have a few images. Just make sure to pass it trough you model and that it produces something similar to what you are trying to train.
Deliberate contamination: This is a technique I found to deal with similar outfits. It seems to work better with the prodigy optimizer, but it can be used with adamw with lower success. It consists on using similar concepts to build upon more complex similar ones. A good example is a school uniform with seasonal variance or the sailor senshi uniforms which have small changes in the sleeves and brooches. Let's take for example the school uniform, the summer variant is a white shirt, a grey skirt and a bowtie. The fall one is the same plus a sweater vest. The winter one uses a cardigan. And finally a formal version has a grey blazer. If you try to train all four variants as is, you will get it overcooked. My solution? use the contamination of a simpler version for the next outfit. In this case make a "base" outfit: School_uniform_White_shirt_Grey_skirt_bowtie. Then use the contamination from that to make the other ones: School_uniform_White_shirt_Grey_skirt_bowtie_Sweater_vest, School_uniform_White_shirt_Grey_skirt_bowtie_Cardigan and School_uniform_White_shirt_Grey_skirt_bowtie_Grey_blazer. Remember to reduce the repetitions, if normally you would use 500 steps per each of the 4 triggers it is a good idea to half it if you are sharing for two triggers or divide it by 3 if you are making more. In this case with one parent and 3 children I think i used 200 repetitions per epoch for 8 epochs per each one of the four concepts. You can see the resulting Lora(Orihime Inoue from bleach) here.
In summary: before you assign a tag for a trigger, run it trough A1111 and check it returns noise or it lightly boosts your needs. In the Negative contamination example I could concatenate it to BulmaDBZ or what I did which was to use the romanji spelling Buruma. An alternative way to reduce this problem is the usage of regularization images but I will speak about them later.
Pruning
The next part is tag pruning either use tag editor or manually go to the folder in which the A1111 tagger tagged your images. You must remove any tags in which your character was recognized if you are not using that as a trigger. For ease of usage i recommend to prune all character trait tags(long hair, lipstick, hair color, eye color, hair style) except breast size(If you make her boobs static people will complain they are too big or too small, believe me it is a thing.), the LORA will be stiffer but a lot easier to use as it won't require auxiliary tags to produce your character. I do the pruning using either the tagger replace function, bulk remove or manually using notepad++ search->find in files option and doing a replace, for example “Bulma, ” in exchange for “”. Remember to clean up erroneous or superfluous tags, Using the tag editor this task is easy just give a glance to the tag list and check the most outlandish ones and click on them, the tab will filter the images and show the offending ones, then you can delete or change the tag to an appropriate one.
Below I add an example of how to prune using bulk remove, in this case I am working in a folder I already separated by concept(an outfit) and i am doing two triggers, a character trigger and an outfit trigger. The character trigger exists in other folders so I can freely prune it's tags like 1girl or long hair. I also prune individual parts of her outfit so they are absorbed by the outfit trigger like uniform, military, detached sleeves etc.
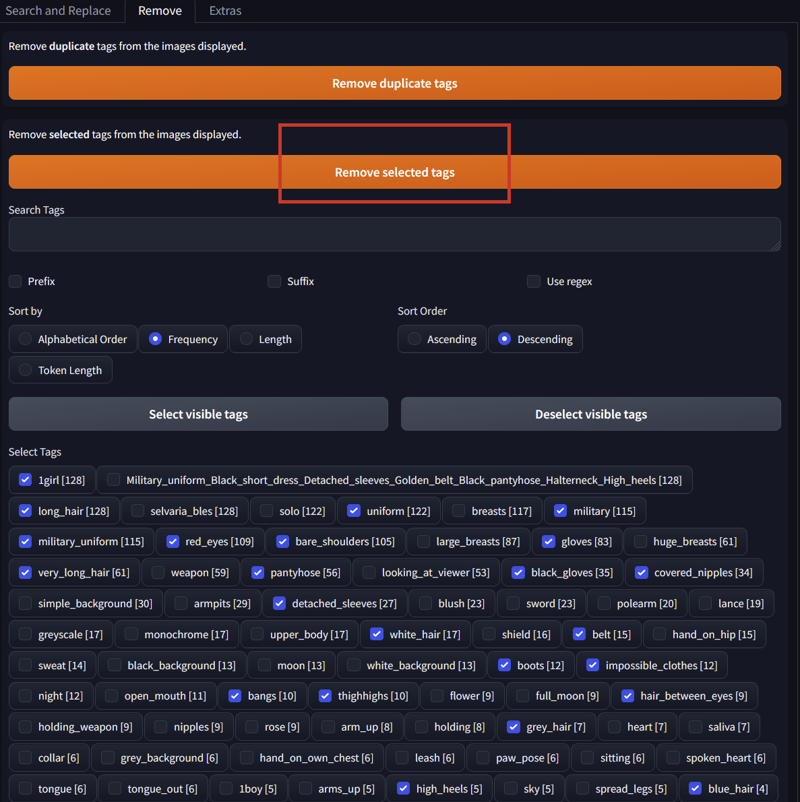
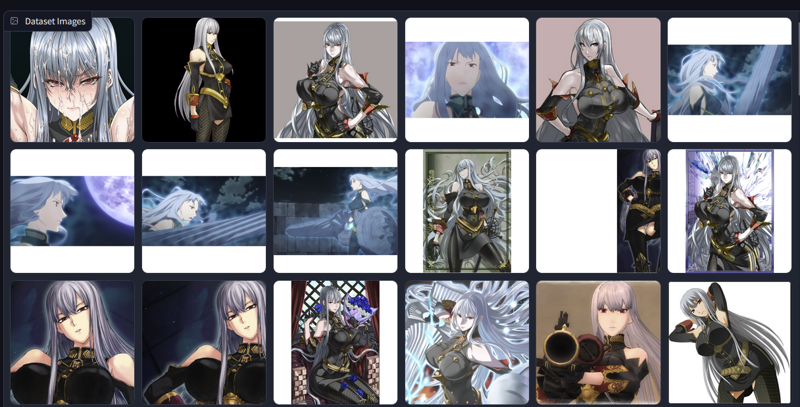
Trigger Implementation
The implementation of a trigger is as simple as adding a new tag to the captions. Of course with it's simplicity comes a bulk of complications. And triggers can be separated in levels by the effort required:
Level 0 Triggerless: Just do nothing. This will result in a lora in which you need to input each and every characteristic of what you are trying to display. It will be extremely flexible but unreliable. This one is part of the fluid style LORA and will require access to the dataset and tag summary to truly know what the lora is capable of doing. TLDR simple to make hard to use.
Level 1 Fluid Triggers AKA The lazy route: just don't prune any of the tags and just add the trigger tag to all the images. The benefit of the lazy route is that the user will be able to change pretty much anything of the appearance of the character. The downside is that if the user only uses the trigger, the character will only vaguely resemble itself(as the trigger only absorbed a small part of all the other concepts) and will require extra support tags like eye color and hair style to fully match it's correct self. TLDR simple to make unreliable to use.
Level 2 Static Triggers AKA The "Rigid" way: is to add the trigger tag to all images and then prune all intrinsic characteristics of the character like eye color, hair style (ponytail, bangs , etc), skin color, notable physical characteristics, maybe some hair ornaments or tattoos. The benefit is that the character will appear pretty much as expected when using the trigger. On the other hand it will fight the users if they want to change hair or eye color. TLDR normal difficulty to make and easy to use but very stiff.
Level 3 Semi static triggers AKA The custom("Fancy") way: relies on knowing exactly what to prune, and requires more than passing familiarity with the character or concept in question. For example if a character can change her hair color then don't prune it. If the character hairstyles are iconic then add a trigger for each one! The character uses a particular style for a particular dress? Just prune that hairstyle whenever it appears in combination to the outfit to fold the hairstyle into it. Also, In my case I never prune breast size as people will begin to complain: "Why are Misato's boobs so large!" To which you will inevitably have to reply "just prompt her with small_breasts!" or "Big boobs are big because they are filled with the dreams and hopes of mankind!" This last method is obviously the best. TLDR moderate difficulty relatively easy to use and flexible IE. this is what you want.
Level 4 Multi trigger: same as above but with more fun and venn diagrams!
The following are the most common type of triggers:
Character: For theses you must remove eye color, hair color, makeup(and lipstick if it is common in the character), specific parts of the anatomy(for example Rikka Takarada from ssss.gridman is known for her thick thighs.). Never prune breast size. People really do get angry at no being able to change boob size.
Outfits: For tagging specific wardrobe combinations, a specific hairstyle or weapon, you will want to remove all tags for the individual parts of her costume or item in question. For example if some character uses a red dress, red high heels and a yellow choker. You must delete these individual tags and replace the whole of them for a customized “OutfitName” tag.
Poses: These are more common as it's own type of LORA. Prune anything related to your pose, If WD didn't pick anything able to pruned you will have to lean on comparison and repetition to make SD understand your pose. What do i mean? You need as many images as possible where the only difference is your pose existing or not preferable as simple as possible so your pose is prominent and clear.
Situations: Same as poses and it includes settings(like a school). Simply delete anything related to the situation picked up by WD. Training a situation mostly rely on repetition. For example I remember someone doing a cheating lora. Basically a couple kissing and a man entering the room surprised. What would you do? Beat the shit out of both? Erm no... while cathartic it would led you to jail and you would never finish your lora! First let's analyze what makes the scene: 3 persons, 2 kissing, 1 surprised and that's it. So delete 2boys, multiple_boys, kissing, 1girl, door, breaking_and_entering... etc. You get the idea. So break down the situation you want to it's simplest form and prune that. Then rely on repetition and comparison so your lora learns what is and isn't your situation.
Objects: For unknown objects(Unknown to SD) You have to rely entirely on comparison. Your images must be as simple as possible and if possible have the object in isolation. Basically so SD says I know all that except that thingy! I have an empty tag so it must mean that thingy is that tag!. Take for example the keystaff(basically a huge key shaped staff) from Elhazard or from Sailor moon. How would you train it? Simple! add some images with the character with the staff, some without and some of the staff itself. Theoretically if you are lucky SD should learn what exactly is a keystaff and even a bit on how it is used.
In the following sections we will focus on level 4 as if you manage to understand them you should be able to create any of the lower levels.
Adding a trigger
So anyway after you deleted any problematic tags it is time to insert your triggers. To do so in the tag editor go to batch edit captions->search and replace, make sure the upper text box is empty and put your tag in the textbox below and click apply. This will add the tag to all caption files. You should check the prepend additional tags checkbox to make sure the tags will be added at the very beginning.
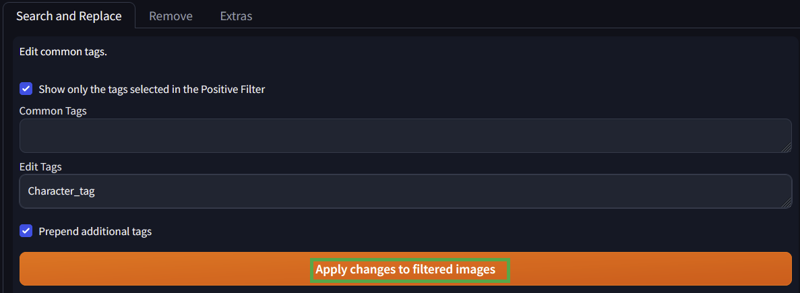
Afterward you need to sort in descending order. Beware that your trigger might no end up as the first one, as after frequency, the triggers are added by alphabetical order. This can be an issue If you are using caption drop, warmup or shuffle during the baking process. In that case first sort and then append the trigger.
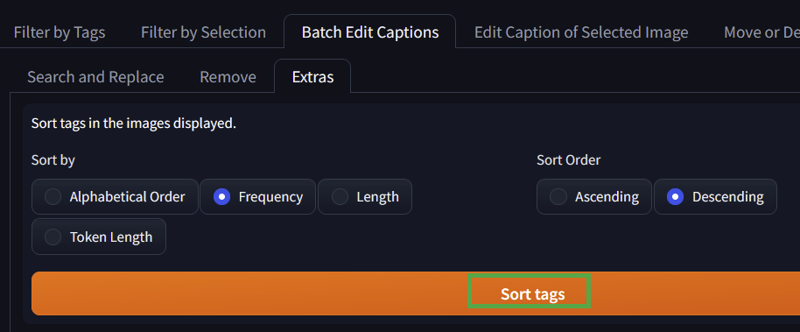
An alternative windows native way to do this is to select the folder with the captions and do ctl+shift+right click and select open a powershell window here. There you can run the following command:
foreach ($File in Get-ChildItem *.txt) {"Tag1, tag2, " + (Get-Content $File.fullname) | Set-Content $File.fullname}
In the command you need to change "Tag1, tag2, " for your trigger tag or tags. The command will insert the new tags at the beginning of every caption file. I prefer this approach even when using the tag editor as it will undoubtedly insert my trigger as the first tag in all files, it might be superstition (or maybe not) but i like it that way.
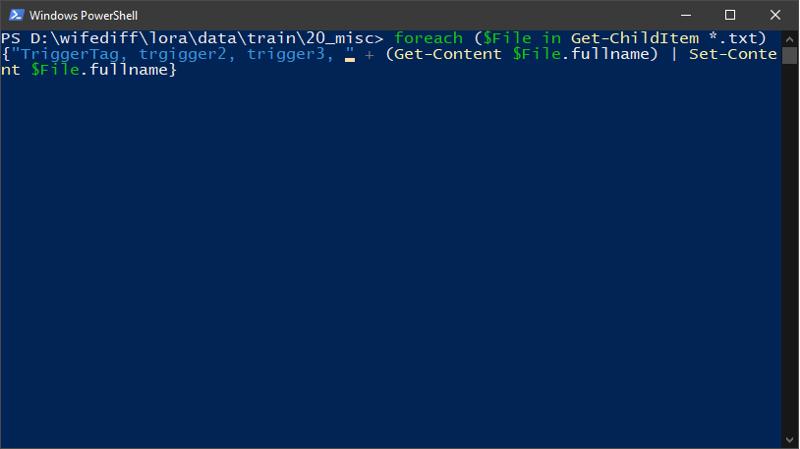
Multi trigger LORAs or how i learnt to stop worrying and love Venn diagrams
Multi trigger LORAs are basically just Venn diagrams in which you must puzzle the combinations of triggers, tags and pruning to make SD understand what every one of your triggers mean.
Example 1 and 2:
You have 1 groups of images of a character. Sadly you character is using the same outfit in every image.
Suppose you want to trigger for CharacterDress and character. As all the images have the dress, you prune the character characteristics and delete the dress tag, then you add both triggers to all images. The result is that both triggers do exactly the same. Look at the first example in the image below. This result is subpar as the 3 pruned concepts are divided between the 2 new triggers and the only saving grace would be that the character dress trigger contains the word "dress" which would push it towards it taking the clothing role.
Note: The only way to properly tag a single outfit is: if you have a good amount of images 80+, take the ones in which the outfit is best represented, split them and tag the outfit trigger there pruning the related tags, the remaining images leave unpruned, adding the character trigger to both, it will likely end up heavily biased to make that outfit but it should be somewhat controllable. If on the other hand you don't have enough images to split them, then simply duplicate them, tag both with the character trigger, prune one set and add the outfit trigger and leave the other unpruned and without the outfit trigger.
The next example would be If you have at least 2 outfits appearing in your dataset, thus dividing it into two groups(left and right), in this case we must make sure to account for overlap, for example if both outfits have a ribbon, it is likely the character trigger will get the concept of ribbon instead of the individual outfits so it would be best to no prune ribbon. Anyway it is a game of math, if A is the character trigger and B and C are outfits. We first assign the outfit triggers to its corresponding group so we add B to the left one and C to the right one. Both group share the character trigger "A" so that one is added to both.
Now SD knows that anything pruned in group "right" that is unpruned in group "left" must belong to concept C. The opposite is also true, anything pruned in group "left" that is unpruned in group "right" must belong to concept B. By the same logic concept "A" exists in both groups so concepts that are pruned in both groups belong to "A".
.
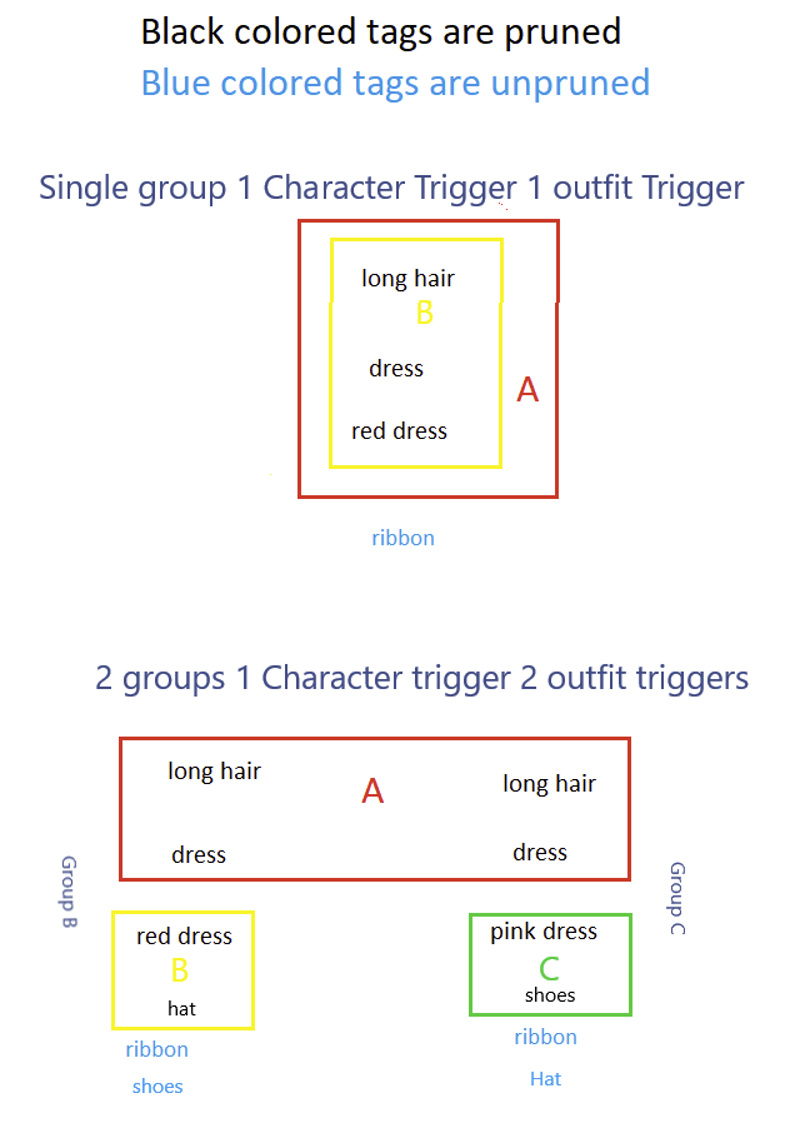
Example 3:
In this case you have a bigger dataset, group 1 of images has the character and a specific red dress, the group 2 contains the same character and a pink dress, group 3 contains also the same character but with many dresses of different colors with to few images individually to make their own group.
Suppose you want to trigger for Outfit1, Outfit2 and character. As all the images have a dress, you prune the character characteristics and delete dress tags in group 1 and 2, then you add the character trigger to all images and the Outfit tags to their respective group. The result is that since group 3 doesn't have it's dress tag pruned, the Lora knows dress is not part of the character trigger, as for Outfit triggers there is no problem with them as they have no overlap.
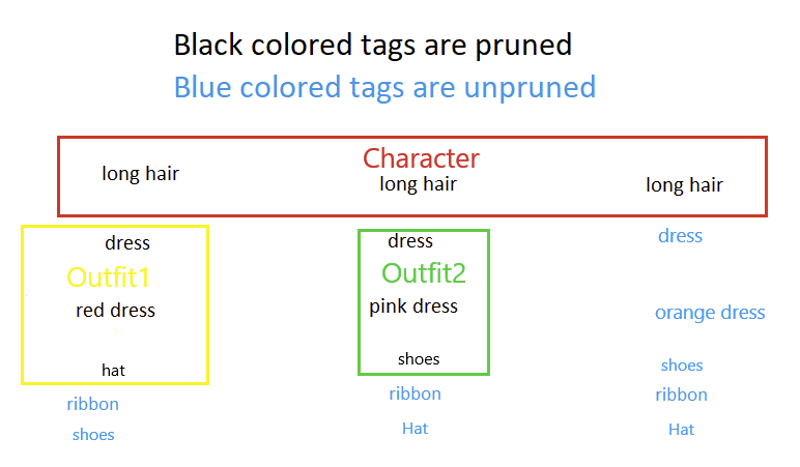
Example 4:
In this case we have 3 groups of images all of the same character, group 1 has a pink dress and a katana, group 2 a blue dress and the same katana and group 3 a red dress.
Suppose you want to trigger for ChDress1, ChDress2, ChDress3, CharacterSword and character. All the images have a dress so you prune the character characteristics and delete all dress tags, then you add the character trigger to all images and the characterdress tags to their respective group. You also add the sword trigger to the images it applies. The result is that since all groups had their dress tag pruned, the Lora thinks dress is part of the character trigger, the chdress triggers will be diluted and they might not trigger as strongly as they should, thankfully color and other hidden-ish tags will also make a difference but the result will be a bit watered down than if you had perfect concept separation. The character will also have a tendency to appear in a dress regardless of the color. As for the CharacterSword trigger, since it appears in a well defined subset of images it should trigger properly. A fix for this situation is commonly a misc group of images with unpruned tags to clearly teach the lora that those ribbons, dresses, accessories, etc are not part of the Character trigger.
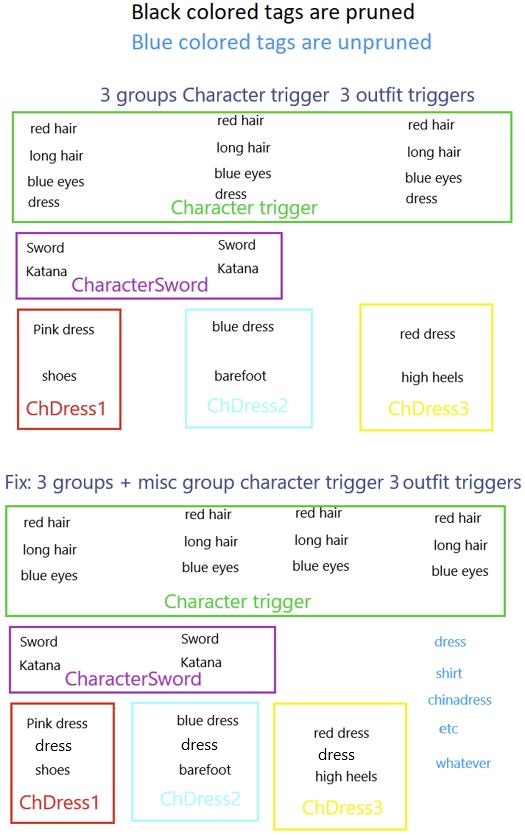
Multi trigger LORAs can quickly escalate in complexity depending on the amount of triggers you are creating, it also requires a lager dataset with hopefully clearly delimited boundaries. Also it might require some repetitions tweaking(See the Folders section) to boost the training of triggers with less images. For example if you have 20 images of outfitA, 10 of OutfitB and 5 of outfitC, it would be best to sort them in folders as 10_OutfitA, 20_outfitB and 40_OutfitC that way all will get approximately the same weight in the training (20*10=10*20=5*40).
===============================================================
Regularization images
So you now have all your images neatly sorted and you wonder what the heck are regularization images. Well regularization images are like negative prompts but not really, they pull your model back to a "neutral" state. Either way unless you really need them ignore them. Normally they are not used in LORAs as there is no need to restore the model, as you can simply lower the LORA weight or simply deactivate it. There's some methods to creating them as well as some theoretical uses listed below.
What are Reg images
As far as I know Regularization images are treated internally by the training scripts the exact same way as normal training images but without loss penalties. That is the training tools are simply removing filters and thrusting that you know what you are doing. It is like saying 1x1=1. In other words if your reg images were made by the model, any extra information should be minimal and introduced by the random seed.
So for example we want to teach out model the concept A and we have 2 images, one with the concepts A and B and a regularization image with concept B. On every repetition of the first image the model learns a bit of A and it's B concept is modified slightly. On every repetition of the reg image, the new A concept in the model is untouched and the modified B concept is stamped full weight with the B concept of the reg image theoretically returning it to as close to the original as possible. Below I try to explain it more abstractly.
As far as I understand it Consider the model as M, L is the LORA. L consists of NC and MC where NC are new concepts and MC are modified concepts from the model. Finally we have R from the regularization images, R is part of Model as it was created by images inherent to the model. If done right, R is also hopefully the part of M that is being overwritten by the MC part of the LORA.
Without regularization images
L = M + NC + MC - M = NC + MC
With regularization images
L = M + (NC + MC) - M - R
but we tried to make R equivalent to MC thus
L = M + NC - M = NC
Now a more concrete example We have a dataset that teaches 1girl, red_hair and character1, the model already knows red_hair and 1girl, but they are different from the dataset thus they are not bold. The regularization images contain 1girl and red_hair from the model.
M= 1girl, red_hair, etc
NC= character1
MC=1girl, red_hair
R= 1girl, red_hair
Without Regularization images
L =1girl, red_hair, etc + character1 + 1girl, red_hair - 1girl, red_hair, etc
L= character1 + 1girl, red_hair
With regularization images
L =1girl, red_hair, etc + character1 + 1girl, red_hair - 1girl, red_hair, etc - 1girl, red_hair
L=character1 + 1girl, red_hair - 1girl, red_hair
L=character1 + remains of (1girl, red_hair - 1girl, red_hair)
It is up to luck to what point "1girl, red_hair - 1girl, red_hair" cancel each other or mix but it should be closer to the originals of the model regardless.
There is obviously a true mathematical way do describe this, this is just a way to try to dumb it down.
Reg images Uses
To me they only have three realistic uses:
The primary use is for style neutralization, suppose you want to train a pose. You get all your images nice and pretty and then train it. The concept is very well represented and works fine except it all looks to be cyberpunk style. After all you used just cyberpunk images to train it. That's what reg images are for, if the reg images are correctly made and tagged they will force all concepts other than your triggers closer to the original model hopefully getting rid of the style.
Mitigate the bleed over from your trigger. Suppose I want to train a character called Mona_Taco The result will be contaminated with images from the Monalisa and tacos. So you can go to A1111 and generate a bunch of images with the prompt Taco and Mona and dump them into your regularization folder with their appropriate captioning. Now your Lora Will know That Mona_Taco has nothing to do with the Mona Lisa nor Tacos. Alternatively simply use a different tag or concatenate it, MonaTaco will probably work fine by itself without the extra steps. I would still recommend to simply use a meaningless word that returns noise.
For dreambooth they are simply a necessity otherwise your model instead of being fine tuned and learning new things, it will simply turn into a different model. This is not bad per se, but that is not normally the objective of a dreambooth model.
How to make Reg images
As far as I know there are several opinions on how to create reg images. I will only list 2 The dreambooth method and my own weird ramblings.
Dreambooth: dreambooth models are often "captioned" simply using a class and a subclass in the folder structure for example 10_SailorMoon_1girl. As expected the 10 are the repetitions, SailorMoon is the trigger and 1girl is the class. To create the required reg images you must generate the same amount of images as there are inside the folder, they must be generated by the model used to train and created with the class, that is to say 1girl.
So If you have 100 images in the sailor moon folder you need to make 100 images with the prompt: 1girl
KNXO adhoc: This is the method i use to make my reg images in case i ever need them.
First of all rename your images by number. Here is a batch rename called power rename made by Microsoft https://github.com/microsoft/PowerToys/releases/tag/v0.76.1
First select all your images and right click selecting power rename from the menu.
These setting should pad your dataset to 3 digits(000.png ... 999.png)

caption your images as normal triggers and all.
Open a cmd window and navigate to the folder your images and captions are stored.
Run:
FOR %f IN (*.txt) DO type %f >> newfile.txt & echo. >> newfile.txtYou should get a big file with a prompt in every row.
Do a replace all to remove your triggers or concepts your don't want to be regulated for example "Trigger1, " to ""
Select the model you will be using to train in A1111 and select prompts from file or textbox in the script section.
copy and paste the content of your file into A1111 you can also click the upload button and browse for it.

Generate the images. They should be in the same order as your original ones due to the naming conversion.
Copy your reg images to a folder, and rename them the same as above, hopefully the order is maintained.
Make a copy of your original caption files and paste them in your reg images folders
Remove your triggers and not regulated tags from the reg images captions. I recommend to use either the dataset tag editor in A1111 or the search in files function of notepad++
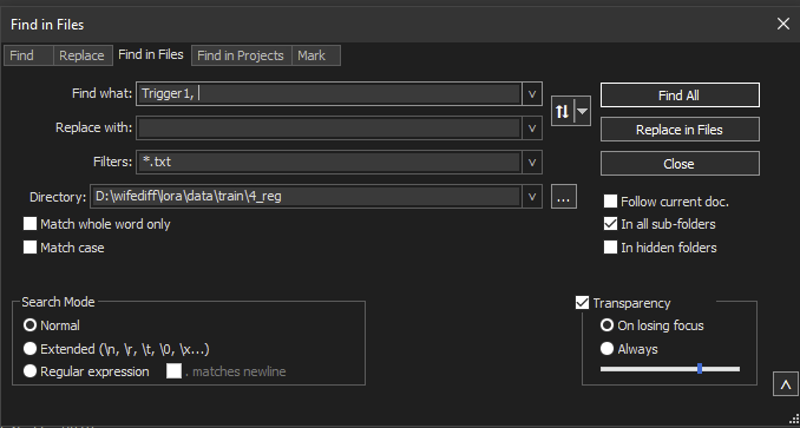
Finally review the regimages for aberrations and manually rerun the ones that didn't pass muster. Remember that reg images are trained as normal images so bad hands and corruption will also be trained back into the model.
===============================================================
Baking The LORA/LyCORIS
Now the step you’ve been waiting for: the baking. Honestly the default option will work fine 99% of time. You might wish to lower the learning rate for style. But anyway for a Lora you must open the run.bat from LoRA_Easy_Training_Scripts. I recommend to never start training immediately but to save the training TOML file and review it first. The pop up version of the script seems to have been replaced by a proper UI so give it a pull if you still have the run_popup.bat.
General Args:
Select a base model: Put the model you wish to train with. I recommend one of the NAI (The original or one of the "Any" or "AOM" originals or mixes) family for Anime. I like AnythingV4.5, (no relationship with anything V3 or V5). The pruned safetensor version with the checksum 6E430EB51421CE5BF18F04E2DBE90B2CAD437311948BE4EF8C33658A73C86B2A. There was a lot of drama because the author used the naming schema of the other anything models. Let me be honest, I simply like it's quasi 2.5D style(closer to 2D than to 2.5D), I find it better than V3 or V5 and it has better NSFW support.
External VAE: in case the VAE of your model is bad, corrupt or low quality. Supposedly some VAE give slight gains in color and clarity but it is not really necessary and the gains seems to be marginal unless your training model is compromised somehow. It only used at the beginning of the training to turn your training images into latents(and maybe for the sample images). If you are using an external vae i recomend to use a neutral one like clearvae.
SD2 Model: No. The NAI family is based on 1.5
Gradient checkpointing: VRAM saving measure will increase per iteration time between 30~100% so expect training time to take twice as expected. Currently seems the only way to train DORA models on 8Gb of VRAM.
Gradient Accumulation: Simulate bigger batch sizes to dampen Learning Rate(to try to learn more details).
Seed: Just put your lucky number.
Clip skip: has to do with the text encoder layer if i remember correctly, most anime models use 2. Some people actually call it "the NAI curse" as it originated from their model. Most photo realistic models use 1.
Prior loss weight: no idea just leave it at 1
Training precision: choose fp16 should be the most compatible.
Batch size: Amount of images per batch depends on your vram, at 8 GB you can do 2 or 1 if you are using image flipping, so just select 1 unless your character is asymmetric(single pigtail, eyepatch, side ponytail, etc). The Prodigy optimizer uses more VRAM than AdamW so beware you might need to lower the batch size.
Token length: is literally the max word size for the tags, I have seen people using clip("A giant burrito eating a human in an urban environment") style strings in danbooru style tagging, don't be that person. I recommend long triggers only when you need to tap on positive contamination from the base model, specially for complex clothing that don't make much sense or the model struggles with colors or parts of it, like this: red_skirt_blue_sweater_gray_thighhighs_green_highheels. (Doing this should help stabilize the output, if you had used a generic trigger, it is a coin toss if the model will choose the correct colors for the outfit.)
Max training time: depends on your dataset. I Normally use 8 epochs for 10 repetitions(X_Name becomes 10_Name) for 100 to 400 images. Or between 8000 and 32000 steps(This is not for multiple concepts). This is for adamW, for prodigy just cut it in half. For a single concept you need between 1500 steps and 3000 for prodigy and twice for adamw.
Xformers: To use the xformers library to lower VRAM consumption. I actually had some training speed increase with the last version to xformers, to install enter venv and do "pip install -U --pre xformers"
SDPA: Alternative to xformers, works about the same for me.
Cache latents: cache the images into vram to keep vram usage stable.
To disk: Caches the processed images latents into disk to save vram(might slow down things).
Keep tokens separator: alternative to the keep tokens option in the data subsets section, instead of selecting a number of tags, they instead are separated by a special character. It seems the suggested one is |||. So a caption like "CharaA, OutfitB, ||| red_eyes, black_hair, blue_dress" Will keep "CharaA, OutfitB," statics and will apply selected options like caption drop out or shuffle to the other ones. I think token warm up would act upon "CharaA, OutfitB,".
Comments: Remember to put your Triggers in the comment field. If someone finds your LORA in the wild they will be able to check the metadata and use it. Don't Be that person who leaves his orphaned LORAS around with no one being able to use them.


Data subsets:
Images folder dir: Select your images folder, the ones with the X_name format, the number of repeats should auto populate. To add more folders click add data subset at the top.
flip augment: If your character is symmetric remember to enable flip augment.
Keep token: it makes the set amount of tokens(comma delimited tags counted from left to right.) static so they are not affected by shuffle captions, caption drop and i am pretty sure also warmup. TLDR Set it on if you if you added any other "captions" option captions. Remember the first tags in the file are processed first and absorb concepts first. For example if you set it to two and use the following caption "1girl, 1boy, long_hair, huge_breasts, from_behind", the first two parameters "1girl, 1boy" will remain static and the rest will be shuffled, dropped or slowly added.
shuffle captions: Does what it says in the can, it is useful as the captions absorb concepts in order from left to right so if you shuffle theoretically the captions will learn slightly different things in each repeat. Not really necessary unless you have an extremely homogeneous dataset.
Caption extension: the default is to store it as common txt files. I have yet to see a different one.
Regularization images: I explained above, the common answer is don't use them but if you do toggle the folder as a regularization folder in here.
Random crop: This one is old I think it is an alternative to bucketing and does a mosaic of a bigger image to process it. Not sure if it applies the caption equally to every mosaic. Mutually exclusive with cache latents.
color augment: I think this one tweaks the saturation values to better sample the images don't quote on that. Mutually exclusive with cache latents
Face crop: As far as I know it acts as an augment making a crop focused on the character face. It used to be mutually exclusive with cache latents(not sure now). Not sure about its reliability.
Caption drop out: I think this one begins dropping the captions from right to left. Might be useful for style to prevent individual tags from burning as everything is slowly concentrated on the first tag(leftmost) which should be the trigger. Should be used with keep token.
Masked image Dir: This option is only activated when selecting maked training in optimizer args tab. The images inside this folder must match the name and quantity of the images in the folder above.
Token Warmup: opposite of caption drop out. It begins training more and more tags as time passes. This one I think is in their order in the caption files from left to right.
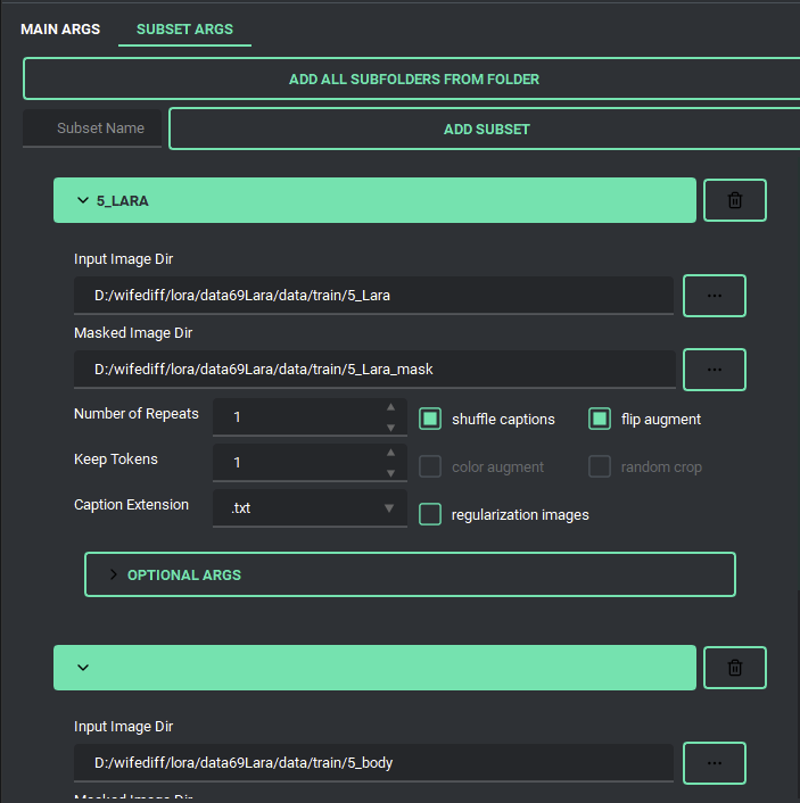
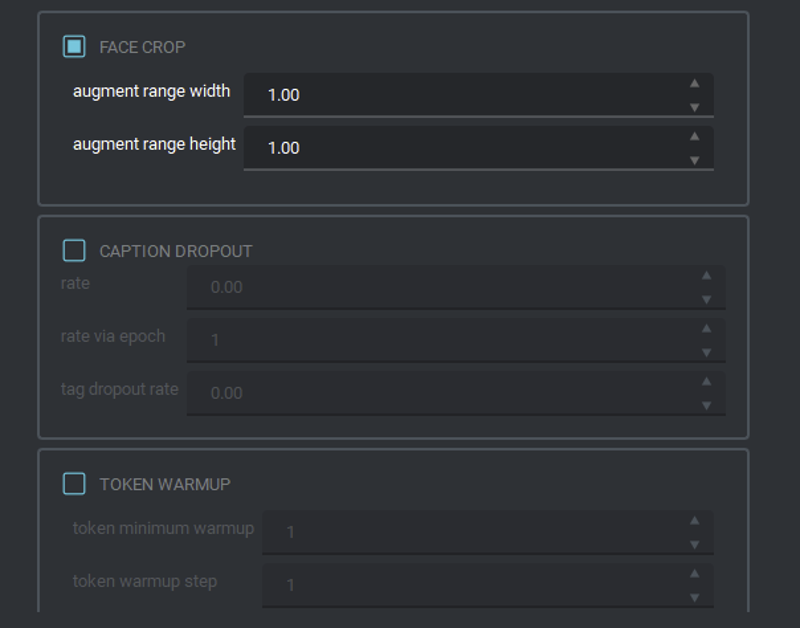
Network args:
Type: here you can choose the type of LORA. LyCORIS require some extra scripts and take longer to train. Pick lora unless your card is fast and have the scripts needed to use Lycoris. Here's some details I know about LORa and from lycoris(might be wrong)
Lora: The normal one we all know and love.
Dora: Option to split the direction and magnitude in the vectors during the training. Seems to give slightly better results than LOCON but requires at least around 40% more vram. for 1.5 if you are training using 8GB of Vram you will need to activate Gradient checkpointing with it's associated speed penalty. For SDXL 12GB might not be enough but I havent confirmed yet.
Dora is applicable to LOCON, LOHa and LOKR and is currently available in the dev branches of derrians Easy trainins scripts and bmaltais Kohya ss.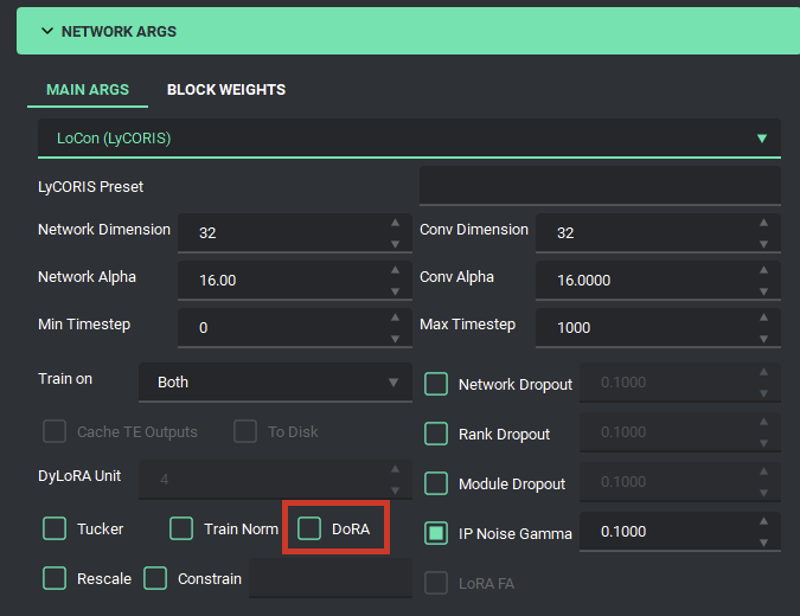
Locon(Lycoris): it picks up more detail and that may be a good thing in intricate objects but keep in mind the quality of your dataset as it will also pick up the noise and artifacts more strongly. Has a slight edge on multi outfit loras as the extra details help it differentiate the outfits limiting bleedover a bit(very slight improvement).
Locon(Kohya): Older implementation of LOCON. I would expect it to be a bit worse but i haven't tried it.
Loha: smaller file sizes, seems to produce some variability in style(sharper? gothic?) that some people like.
Lokr: similar to Loha in smaller sizes uses a different algorithm.
IA3: smaller sizes, faster training and extreme style pick up. As it trains only a subset of the values a lora does, it is small and fast to train. It does fine with half of a lora steps, making it 200~300 steps per epoch for Prodigy and 500ish for adamW(I have only tested for prodigy). I tested the compatibility with other models and it is not as bad as claimed. All in all I don't like it as a final product, but for prototyping and debugging the dataset seems to be a great option due to how quick it is to train. Here are my results using prodigy https://civitai.com/models/155849/iori-yoshizuki-ia3-experiment-version-is As can be seen it strongly picked up the dataset style being mostly monochrome and colored doujins. I honestly like the LOCON and LORA results better as they absorb more of the base model filling any gaps.
Dylora: dynamic LORA is the same as normal LORa but it trains several levels of dim and alpha. Should be slower to train but the end LORA should allow you to use the lora as if you had trained the same lora multiple times with different parameters instead of solid ones. Thus making you able to pick the perfect combination.
Diag-OFT: A new "type" of LORA. Quality is between an IA3 and a normal LORA. Training takes about 1.5X the time per iteration than a normal LORA but it only needs about 170 steps per epoch per concept for 8 epochs to train. making it comparable to IA3. It's claim to fame it's it robustness against burning up which holds out. I overtrained it by 3 whole epochs without negative effects. Here are the results of my test: https://civitai.com/models/277342/iori-yoshizuki-diag-oft-experiment-version-is
Current Recommendations:
LoRA: Dim 32 alpha 16.
LoCON: either Dim 32 alpha 16 conv dim 32 and conv alpha 16 OR Dim 32 alpha 16 conv dim 16 and conv alpha 8. Don't go over conv dim 64 and conv alpha 32
LoHA: Dim 32 alpha 16 should work? Don't go higher than dim 32
LoKR: Very similar to LOHA Dim 32 alpha 16 should work? Don't go higher than dim 32. According to the repos it might need some tweaking in the learning rate so try between 5e-5 to 8e-5 (.00005 to .00009)
IA3: Dim 32 alpha 16 should work. Need higher learning rate currently recommended is 5e-3 to 1e-2 (.0005 to .001) with adamw. Prodigy works fine at LR=1(tested).
Dylora: For Dylora the higher the better (they should always be divisible by 4) but also increases the training time. So dim=64, alpha=32 seems like a good compromise speedwise. The steps are configurable in the dylora unit value, the common value is 4 dim/ alpha so after training you could generate 64/32, 60/32, 64/28...4/4. Obviously Dylora take a lot longer to train or everyone would be using them for the extra flexibility.
Diag-OFT: Dim 2 or 1 set alpha and conv values to the same as they shouldn't be used anyway.
Network dimension: Has to do with the amount of information included in the LORA. As far as I know 32 is the current standard, I normally up it to a max of 128 depending on the amount of characters end outfit triggers in my loras. For a single character LORA 32 should be ok.
Network Alpha: Should have something to do with variability(not quite sure), rule of thumb use half the Dimension value.
Train on: Both, almost always choose both. Unet only, only trains on the images while text encoder trains only on the text tags.
conv settings: conv are for LOCON, I would recommend the same values as dim and alpha as long as dim is equal or under 64, if you are using higher values the max you should set set conv dim and conv alpha is to 64 and 32.
Dylora unit: it's the division of the dim and alpha available, If you use dim 16 and unit 4, you get to have a lora that can produce images as if you had dim16, dim12, dim8 and dim 4 loras.
Dropouts: Just to drop parameters randomly to increase variability.
Network Dropout: Supposedly make the network more resilient to unknown unexpected data. Sadly at normal usage it just gave slightly worse results. Maybe it would work better with a more distant relative of the training model?
Ip Noise Gamma: Supposedly good to be set at .1, theoretically speeds up convergence and image quality. I trained two equal models with only that setting changed and they look pretty similar to me. I had expected the one with ING enabled to burn out due to the earlier convergence but nope. So maybe turn it on? At worst it seems to do nothing.
LoRA FA: As far as i understand it it takes some lessons from IA3 reducing the number of parameters and freezing some weights to make it smaller memory and computation-wise. Is it worth it? It wasn't for IA3. At this point I haven't seen anywhere any claim that it decreases training time and increases end product quality, most of what i have read just says it is "almost" as good as a normal LORA, so i haven't tested it as i just don't think it is worth it.
Block Weights: For if you want to add more granularity to the training phases. I haven't the foggiest as to what would be an optimum configuration for best quality (if there even is one) as the dataset has a huge impact. Here's a guide from bdsqlsz, it is the only one i know for block training.
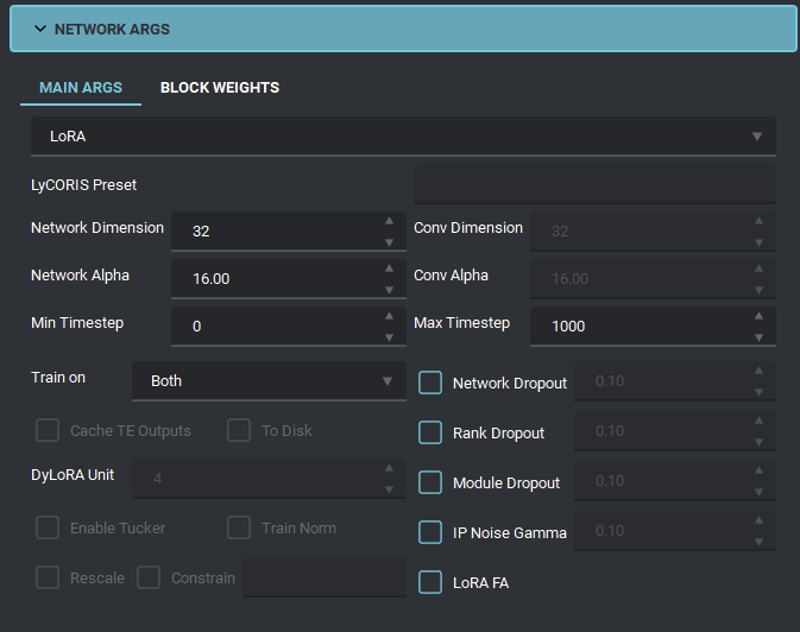
Optimizer settings:
Optimizer: I currently recommend either Prodigy, AdamW or adamW8bit. If your Lora is in no risk of burning, I recommend to stick with AdamW. If on the other hard you are getting borderline due to dataset issues, Prodigy is the way to go to limit overbaking. For prodigy I would recommend to per keep total outfit repetitions to a maximum of 500 steps(Ie. 50 images 10 repetitions or 100 images 5 repetitions) per epoch as it uses a more aggressive learning rate. The quality levels between AdamW and prodigy seems about equal, in the linked image I compare adamW Lora vs adamW Locon vs prodigy Lora vs prodigy Locon and i have a hard time discerning if one of them is objectively better. Thus I have pretty much switched full time to prodigy as even though it takes some 25% longer per step, this is offset by only requiring half the steps per epoch than adamW which actually produces some considerable gains in training time. You may want to check the Prodigy Scheduler example TOML if you plan to use it.
AdamW: Training bread and butter and golden standard. It works fine at about 1000 steps per epoch per concept trigger.
Prodigy: Best adaptative optimizer, slower per step than Adam but it only requires half the steps per epoch(500) actually making it save some training time. It is like DAdapt but seems to actually deliver. It is an adaptative optimizer making it unnecessary to finetune the learning rate. I originally tried it due to a lora I was training that was getting too much contamination from the model making it overcook. I tried this vs normal vs normal with lowered training rate vs normal with reduced repetitions vs using normalization. I got the best result with Prodigy followed by AdamW using normalization and simple adamW at the very bottom. So I guess the hype is real. Prodigy requires to add extra optimizer args in the tab2, remember to first click add optimizer arg. These are the recommended args:
weight_decay = "0.01"
decouple = "True"
use_bias_correction = "True"
safeguard_warmup = "True"
d_coef = "2" can also be set to 1 for a less agressive training but requiring more training steps.
Scheduler: annealed cosine
It should look as below:


Dadapt: These optimizers try to calculate the optimal learning rate. I did some "unsuccessful" tests with DAdaptAdam, it worked but i just didn't like the results. This might change is the future when more test are done. These optimizers use very high learning rates that are calculated down on the fly. For my tests I used the repo recommendations: learning rate= 1 with constant scheduler and weight decay=1. Some other people recommend LR=.5 and WD= .1 to .8. This optimizer also took 25% longer training time. So I don't recommend it... yet. The idea of not needing to finetune the learning rate is alluring so hopefully they will work better in the future with some tweaking. DAdaptAdam also requires to add an extra optimizer arg in the tab2, remember to first click add optimizer arg. The first input should be "decouple" and the value should be set as "True"
Learning rate: For adam it is ok at default(.0001), lower it for style(.00001-.00009) for Prodigy it should be 1
Text encoder and Unet Learning rates: this are if you don't want a global one. I think if Unet is too high you get deep fried and if TE is too high you get gibberish(deformed).
Learning rate schedulers: Technically important as they manipulate the learning rate. In practice? Just select "cosine with restart" for adamW and for prodigy "annealed cosine with warmup restarts" gave me good results. I have seen some comparison and those produce fine results.
Loss Type:
L2 Loss is the default loss we all know and love, it tends to slope downwards as the model is trained having some valleys which often indicate the best epochs.
Huber loss on the other hand remains mostly static during the training process, it acts like a high minimum SRN gamma eating some detail and in exchange making the output much more stable. While not mutually exclusive I would recommend to use one or the other.
I Would recommend using Huber loss only to beginners as it makes the training process much more forgiving while producing slightly inferior results than a clean high quality dataset would produce with L2. In other words it works better than L2 with a low quality dataset and prevents overfitting while making things look slightly bland. AFAIK Huber loss implements L2 Loss as the beginning and end of the training and L1 smooth loss at the extremes also comes in 3 varieties:SNR: which eats details depending on how noisy the dataset is. Supposedly this one works the best.
Exponential: It increases what it eats when getting closer to convergence. allowing more detail at the beginning of the training.
Constant: well constant.
Smooth L1: This loss tries to "average" thus catching slight less details.
TLDR: Huber loss might be best for new users, bad datasets and likely photorealistic(as photorealistic images normally have less variation).
Num restarts: Set it to 1 restart for cosine with restarts. Some people recommend 3. YMMV.
Warm up ratio: for if you want a learning rate slow increase at the beginning. I don't use it, and it might be incompatible with some schedulers.
Minimum SNR gamma: seems to filter some noise. I do seem to get a bit less noisy images when using it. If you use it, set it at 5. The image will begin loosing detail at higher levels, maximum recommended is 10.
Scale weight: As far as i know it tries to level the values of the new weight introduced by the lora to it's average value reducing peaks and valleys. Haven't tested it but might be good to reduce style, It might also kill special traits. Probably should be set to 1. This one works I don't like it but it works, best used in combination with lowered learning rate or fewer repetitions. DON'T USE IT WITH PRODIGY
Weight decay and beta: A far as i understand weight decay dampens the strength of a concept to normalize it, while beta is the expected normalization value. Some stuff i read mentions to decrease weight decay on big datasets and increase it on small ones. But i always leave it as is. Weight decay for prodigy should be lower, .01 works fine.
Masked loss: Allows to load masks for the dataset images making the training to ignore the loss in the masked areas. This helps with repetitive backgrounds or extraneous objects. turning on this option enables inputting a masked images directory in the dataset section.


Saving args: Just make a new folder and put your stuff there
output folder: where you want to save your stuff
Output Name: Currently crashes if you don't enable it and give it a name.
Save precision: set it to fp16 as it is the most standard
Save as: safetensors, really this option shouldn't even be available by now.
Save frequency: depends on the amount of epoch you are training. I normally train at 8 epochs at medium repetition so each epoch is fine i will get 8 files. If you on the other hand train high epochs low repetition then you should change it to every 2 o or 10 or whatever you need.
Save ratio: I think it is the maximum number of allowed saved epochs.
save only last: same as last one just in case you fear your training will be interrupted and want to keep just a couple of earlier epochs.
Save state: literally saves a memory dump of the training process so it can be resumed later, useful in cases of disaster like a power outage or hardware/software failure. Or maybe a naughty cat typing ctl+c or alt+f4.
Resume state: the path of the save state you are resuming training from.
Save tag occurrence: YES! That stuff is useful for when you are creating stuff to get an idea of the available tags for your character in that particular lora.
Save TOML file: Yes, I always recommend to give it a glance before training to see you didn't fuck up.
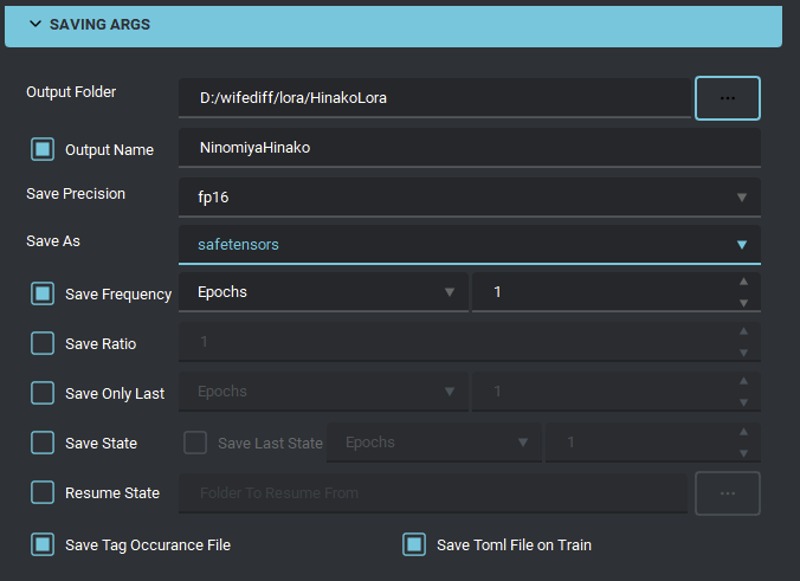
Bucketing: As far as I know the less buckets the better, for example if you have a minimum of 256 and a maximum of 1024 and 64 steps in between you can have a maximum of 12 buckets ((1024-256)/64=12) per side, with the complementary side sizes that do not exceed the max total pixel of the training resolution 262144 (512*512) resulting in 47 potential buckets in total. In the image below are the valid combinations for 512 training, your image will be slotted in the biggest bucket it fits after being downsized. For example a 1920x1080 image it will be reduced until it fits the biggest bucket with a 16:9ish aspect ratio, so they will likely be resized to 640x360 (1920/3 and 1080/3) and slotted into bucket 640x384 as it is a good fit. I have also created a script that downscales the same way that bucketing does, use it to see if any of your images needs to be cropped or discarded.

It is highly recommended to choose 4 or 5 buckets and resize your images to those resolutions as having too many buckets has been linked to getting blurry images.As you can see the training accepts images that go out of the stated max resolution in one side. The bucketing algo seems to do some matrix magic to process all the pixels as long the total count is below the max of 262144(for 512 training), instead of say making the biggest side 512 and shrinking the smaller side further.
Minimum Bucket resolution: minimum side resolution allowed for an image
Maximum bucket resolution: not sure if maximum resolution or if maximum resolution of the smaller side. It is likely the former.
bucket resolution steps: size increases between buckets.
Don't upscale images: does what it say in the tin, it won't upscale the image to it's nearest bucket and will instead pad it with white or Alpha(transparency).

Noise Offset: Literally, it just adds noise in case the images of the dataset are too similar. It can either increase training quality or... add noise.
Type: Normal homogeneous noise or pyramidal(starts low, ramps up and goes down)
Noise offset value: Amount of noise to add. The default seems to be .1. I don't normally add noise
Pyramid iterations: I guess a sawblade pattern of x iterations.
Pyramid discount: Think this is the slope of the pyramid.

Sampler Args: parameters for test images that will be produced every epoch. I don't normally enable it as this will slow things somewhat.
Sample, steps and prompt: If you don't know why did you read until this point of the guide? If you don't know go check a basic SD generation guide.
Logging Args: For analyzing the training with some tools. Honestly, at this point i suspect that if you screwed up, you would be best served by checking your dataset and tags than spending time researching and knowing that you need to lower your alpha by .000001. Useful for trying to find better parameters combinations not so much to troubleshoot that lora that keeps turning out ugly.
Settings: pretty much logging style and folders where to save.
Tensorboard is installed by default with the easy training scripts so you can run it from the venv in there.
There's Jiweji's guide in Civitai for a deeper explanation.
Batch training: You need to save the individual TOML Files, then load one by one, give each a name and click add to queue. When you add all the trainings just click start training.

I attached a TOML file of one of my trainings, you can load it and just edit the folders if you want. Remember to turn on or off the flip augment as needed.

Finally let it cook. It is like a cake if you peek, it will deflate. If you use the computer too much it might mysteriously lower it’s speed and take twice as long. So just step away go touch grass, stare directly at the sun. Scream at the neighbor kids to get off your lawn.
Finally your Lora finished baking. Try it a 1 weight or do an xyz graph with several weights. If it craps out too early go to a previous epoch. Congratulation you either finished or you screwed up.
===============================================================
Troubleshooting and FAQ
Troubleshooting and the road to a V2
Ok You trained your LORA except it is not what you want "Failure" is normally shaped in the following ways:
Underfit: If the model doesn't look like it should but it is not distorted, it is likely underfit. First try increasing the lora weight, in case nothing changes, either check your parameters or increase repetitions and training time.
General Overfit: Everything looks horrible and distorted after applying the common negative and negative embeddings. The solution? Lower the Lora weight until it looks fine. If the sweet spot is above .6 consider re-basing it or simply note it in the usage instruction. The perfect value not being a cute nice 1.0 is not a real problem despite what some people like to say.
Partial overfit: Now this one is a real problem, it normally comes in tree varieties:
Main concept overfit: This is common when training a character with many outfits. Or in other words when the main concept appears in most of the dataset(or all the dataset) leaving subconcepts undertrained. there are a couple ways to diminish this problem:
subconcept trigger tuning: see the trigger tuning full section below.
subconcept pruning: this one is viable in the case you have a subconcept for example a dress and you have very few images thus use high repeats. In short simply stop trying to train it, just give up and dump it into a misc/character/primaryConcept folder with a repeat value of 1.
Main concept dataset diversification: So you have a limited set of high repeats subconcepts like 10_concept1, 10_concept2, 10_concept3. In this case, as long as it is available, adding more fuel to the fire actually controls the fire. Adding an extra 1_mainconcept folder with many example of it not related to the concepts you wish to train help reduce overfiting a lot. For example suppose those 3 folder contain a character using 3 common outfits, the main concept folder will have images of the character with other outfits, naked or with portrait shots not showing the body.
Recursive Dataset Normalization: This works like using regularization images but without the training dampening. Simply generate images in the V1 lora at lower weights and using the training model. It is important to use the same model. These images should be then filtered for artifacts, I recommend an a JPEG artifacts filter and a Poisson noise filtering(1x_NoiseToner-Poisson-Detailed_108000_G and 1x_JPEGDestroyerV2_96000G) this will remove some of the artifacting and graininess of SD. Now simply add these curated images to the dataset for your V2. I have had great success using this on mono-source dataset like screencaps, it forces the model towards an average of what would be expected when training, in essence pushing the model towards the original model values while also speeding up the training as they do contain the essence of the concepts you are training. Do be careful to curate them as best as possible to not add garbage.
Repetitions tweaking: Simple repetitions tweaking is always an option, simply revise them down as much as you can without loosing your subconcepts.
Subconcept overfit: If you have many repetitions and the concept is solid then simply lower the repetitions. If you start loosing similarity faster than it is overfit then you will likely need to use the following:
Recursive Dataset Normalization: as explained above, try generating that concept with the minimum weight in your V1 LORA that will allow the subconcept to be recognizable. It can sometimes be a bit of a luck situation. In essence it means to pad that folder with generated images.
subconcept trigger tuning: see the trigger tuning full section below.
Subconcept overfit with bleeding: This is for cases when the concept and subconcept appears in all images of the dataset. this can be mitigated the following way:
Subconcept trigger tuning: see the trigger tuning full section below.
Subconcept equivalence creation: This technique relies on partial matches. suppose subconcept1 can be split in subconcepts A, b and c. For example a character always uses red jacket, blue pants and boots. Instead of training the dataset as if the character were always using the same outfit let's say outfit1 we instead split the dataset where the best images of outfit1 remain tagged as outfit1 while partial ones don't receive that tag and instead get tagged by the individual parts like red jacket, blue pants and boots. This way the model learns not only that the individual parts are equivalent to outfit1 but that the character trigger or main concept is also separate from them. In case you in a very small image budget, you can duplicate the images and cut the repetitions to 1/2 using the other 1/2 of the repetitions for the ones with the alternative tagging. It is not the best solution but it is a solution.
Trigger tuning
So You have your V1 and your training model loaded. It is time to Experiment. Try variations of your trigger, for example suppose you are using black_shirt_white_skirt as trigger. But the skirt is too long and it is missing the long sleeves.
With your V1 Lora loaded and with your trigger try concatenating it with more descriptive tags for example:
Suppose the following usage:
<lora:LORAV1:0.7> 1girl, black_shirt_white_skirt
Our goal being to fix the length of the skirt and the sleeves thus you can try tweaking the trigger like this:
<lora:LORAV1:0.7> 1girl, black_shirt_white_skirt_miniskirt_long_sleeves
or
<lora:LORAV1:0.7> 1girl, black_shirt_long_sleeves_white_skirt_miniskirt
Generate a couple times switching the order of the parameters trying to get closer to the goal. Normally undesired correlations pop up when testing the "improved" trigger on the V1 lora, so be sure to be on the lookout for that type of weirdness on your test generations. Once you are close enough, STOP!
We are not trying to recreate the outfit exactly via the modified trigger as that will only get us ever closer and require help from the RNG. Instead take this modified trigger and change the captions in the dataset to then train a V2. With the "Positive contamination" the concept will reach convergence faster with less repetitions needed and will be more accurate. As for the mechanism for positive contamination is called that because by concatenating pre-trained tags you are leaning on "bleeding" trying to tap on correct already trained attributes for the new composite trigger. Do remember to reduce the repetitions a bit as the training will converge faster as it already has a idea of what it should be doing.
FAQ
My lora looks like a Picasso!: Either you are training a Picasso or more likely you overtrained your lora. If you are testing it at 1 strength lower the weight until it looks normal. In most cases the relationship between epoch and weight is between linear and logarithmic so if it looks ok at .5 weight i would go for for an epoch between .5 and .75 of the total epochs you trained. For example if you trained 8 epochs I would try 5 or 6. If using tensorboard the recommended epoch seems to be the last with a steady downward loss before it spikes up. Obviously the other alternative is to lower the training repetitions.
My character looks like a generic genshin impact character!: Either you are training a genshin impact character or more likely you likely used too few repetitions, either increase the lora weight or do a retrain with increased repetitions.
Two of my Outfits look the same!: this due to bleedover between concepts. That's why i recommend to create the outfit triggers as Color1_Item1_Color2_item2 and so on so SD learns the color/outfit piece relationship. Other than this creating a LOCON instead of a LORA and Using the prodigy optimizer help with concept separation.
I created a lora and nothing changes!: If the training finished quickly it is best to check if the training script is actually pointing to the correct image folders. If it took time, then the next would be to check if the tagger created the captions txt files correctly and they have tags inside. Next would be comparing with the lora enabled vs disabled with the same prompt, If they are exactly the same then something is wrong with the LORA file or the script used to train, check if a1111 or whatever is being used to test the lora if it is giving an error for the lora. If it the outputs are just extremely similar then it is likely either that the trigger was not correctly applied or the learning rate or another parameter was set up wrongly.
The face of my character is blurry or distorted!: I have seen this case for many new lora makers. Remember that even if you use a beautiful 4k full body image it will be shrunk down until it's total pixels match 512x512 so if it is a fullbody image it is likely to lose most of the face details. solution? Crop it and use it as both a full body image and a mugshot, I would actually recommend to actually turn it into 4 different images: one full-body, one cowboy shot, one above the chest and one face portrait.
All outfit look like outfitA!: Bleedover. Sadly sometimes one outfit is so prevalent in a dataset that it becomes part of the character. Only solution would be to scavenge for more neutral images and lower the repetition for images containing that outfit. Remember you can use your newly created somewhat crappy lora to increase the size of your dataset and make a couple of images with different outfits even if it is hard.
I am being driven insane my character doesn't look right! My pose lora contaminates the style and my style lora has watermarks!: First of all breathe. Sadly the answer to it all is to increase the size of the dataset and clean it up properly. For style contamination the other route would be reg images but they will inflate the training time. So grind away. As I mentioned somewhere above if it is mostly ok just publish it and let the end user suffer, they will give you some feedback if only to complain. Sometimes the only thing needed to make a lora work properly is a specific negative that when identified can tell you what to remove or tweak from the dataset.
===============================================================
Check List
Prepare your training environment.
Gather dataset.
Remove duplicates.
Filter dataset (Remove low quality, bad anatomy, clashing style and thing you just don't like)
Roughly sort dataset by expected triggers (For example by outfits) and the rest into a general folder.
Dig for more images for categories with too few images(You might need to fix some of the discarded ones of step 2 or even make your own) or give up and discard the category dumping it into your general folder.
Regularize your dataset(Optionally also use a filter to remove JPG artifacting).
Pre-crop images by removing extra elements or excessive background.
Clean up the images removing watermarks, sfx and random objects that don't add anything useful.
(Optional) Do a final crop, creating a duplicated sub image from High resolution images to pad your dataset. For example cropping the face of a high resolution full body image to add to the dataset.
(Optional) Create extra images to pad your dataset(be extra critical of generated images).
Remove alpha/transparency from your images.
Upscale your dataset until all images have more pixels than TrainingRes^2.
Sort images into their final folders.
Caption images.
Preprocess captions(remove duplicates/ use automatic tag consolidation)
Filter captions for miss-captioning and bad tags.
Add triggers.
Prune captions to consolidate the triggers.
Balance training repetitions editing the name of the folders.
Set your training parameters.
Bake the LORA.
Test the last few epochs using an XYZ plot.
Pick the epoch you like the most.
Congratulate yourself or jump back to step 3.
===============================================================
Glossary
AdamW: Optimizer.
Adaptive Optimizer: An optimizer that automatically calculates the learning rate.
Baking: Activating the training process which mostly means waiting for the result.
Batch size: amount of images which will be trained in each iteration. higher batch sizes dampen learning rate and averages what is learnt from the images smoothing the results a bit. The max batch size depends on the amount of VRAM you have it is a good practice to set it a high as your card will allow it to increase training efficiency. The LR dampening is NOT linear so you don't double the LR when you double the batch size. I would recommend to multiply your learning rate by 1.2 every time you double your batchsize, but you need to calibrate it yourself as there are just too many factors that might affect it.
Bleeding: phenomenon where different concepts in a prompt unintentionally merge or overlap in the generated image. A good example is cowboy_shot. In poorly trained models this will generate cowboy related items as well as the character perspective(mid thighs ups)
Bmailtais: Maintainer of kohya UI https://github.com/bmaltais/kohya_ss
Booru tags: Descriptive notation used to describe images used in Booru sites like https://danbooru.donmai.us/wiki_pages/tag_groups
Bucket: Bucketing is an algorithm that allows training with non square images.
Captioning: Adding text to a text file with the same name as it's corresponding image, describing the image.
Captions: Text describing an image.
Collab: network implementation of a training script. Named after google collab.
Convergence: point when the loss stabilizes or no further gains in the training are obtained. In simpler words the point where the output quality stop rising and begin decreasing.
Danbooru: A image board site architecture which has a well established set of tags to describe images. The SD1.5 NAI model was trained on a danbooru dataset.
Decay: Rate of downward change of the LR.
Derrian distro: Maintainer of Easy training scripts: https://github.com/derrian-distro/LoRA_Easy_Training_Scripts
Easy training scripts: Common training UI by Derrian Distro implementing Kohya's scripts and Lycoris.
Epoch: Arbitrary amount of steps in which you make a snapshot of the model for testing. Normally the optimizers do at least one revolution of their scheduling algorithm per epoch.
Finetuning: Extra training for a pre-trained model to add new functionality or change a part of it as desired.
Hyperparameters: Training parameters like learning rate, Dim, alpha, etc.
Image Magick: Batch image editing open source program https://imagemagick.org/index.php
Kohya: Most commonly used training scripts, they power Bmaltais Kohya_ss UI as well as Derrian Distro's Lora easy trainign scripts.
Kohya_ss: common training UI by Bmaltais implementing Kohya's scripts and Lycoris.
Latent: Extremely downscaled representation of an image, it is decoded by the VAE.
Learning Rate: The learning rate or LR is the rate at which the model is trained, to high a training rate cause NaN loss errors, reduced the amount of details learnt and increasing the chance of the model overbaking.
LORA: small auxiliary model that adds or edits weights for a main model. Bacially allows you to add or change a part of the main model without having to finetune it.
Loss: Related to accuracy, is a measure on how well your model represent the dataset. Loss normally decreases with time as the model is trained until it reached a minimum then increases as the model overfits. Don't trust extremely low loss, it normally means a problem with the dataset or things going weird. Also you don't always want the lowest point as that might make the model inflexible. SD commonly use L2 loss, other types include huber loss and scheduled huber loss.
Lycoris: Library which implements some more exotic "Loras" like Locon, Dora, Ia^3, OFT, etc.
Magic: Either image magick or something i don't have the skill to explain.
Mask: greyscale image with the white area indicating a valid zone and the black area indicating that it must be ignored.
NAI: Basically the foundational model for all SD1.5 anime models.
NaN Loss: Common error due to a problem with the hyperparameters or the dataset. Results in an unusable LORA.
Optimizer: algorithm that manipulates the Learning Rate.
Overbaking: overfitting.
Overfitting: Status in which the model tries to recreate the training data at the expense prompt. A symptom of overfitting is caricaturization in which the main traits seem to be boosted exaggeratedly. For example an overtrained lipstick concept will look bigger redder and deformed.
Pony: SDXL model trained into anime and furry art and capable of using booru style tags.
Prodigy: An adaptative optimizer.
Pruning: removing a tag from a caption.
Regularization images: Images used to dampen the learning rate of the specific concept they contain.
Repetitions: Number of times an image is processed per epoch.
RNG: Random Number generator(GOD). The supreme, often infuriating, deity of chance. In its scientific form, it's a process generating unpredictable numbers with defined probabilities. In practice, especially within the realm of gacha or SD, it's the unseen hand that decides whether you pull that coveted character or image.
Safetensor: Common output format for LORA. Most other formats have been deprecated due to security concerns.
SD: stable diffusion.
Scheduler: Algorithm to manipulate the LR of the optimizer to try to reach the optimum level.
SNR: Signal to noise ratio. As the name implies it give the relation between the desired level of a signal and the background noise. For SD purposes think of it as what you wish to train vs unwanted image detail.
Steps: Times an image is processed. Some training tools divide the REAL amount of steps by the batch size, don't do that it's confusing.
Tagging: Synonym of Captioning. Often used to explicitly denote the usage of Booru tags to describe the images.
Tensorboard: Logging library to check the LR/Loss behavior when training.
Text encoder: The TE contains a clip model that interfaces with the Unet to turn your prompt into an actual image.
Trigger: User defined word to represent what is being trained which is added during training to the Text encoder.
Underfitting: the opposite of overfitting. Technically most useful models are slightly underfit but will appear blurry or not represent the prompt if they are underfit to a large degree.
Unet: The network used by SD which is made of several blocks each representing some characteristics of an image. It takes noise and the input of the TE and generates a Latent.
VAE: Variational autoencoder , it is a model used to encode and decode Latents into images.
XYZ plot: Common script in a1111 to create an image grid by variating several values.
===============================================================
Utility script
Below are some powershell scripts (I also uploaded them to civitai in their .ps1 form) useful to change the file extensions to png and to square and fill the empty space with white. The script can be edited to only change the format. Remember to paste it into a file with the .ps1 extension and run it via left click.
If you have downloaded and put ffmpeg.exe, dwebp.exe and avifdec.exe in the images folder you can add the following lines at the beginning of the script below to also support those file types.
#change gif to png
Get-ChildItem -Recurse -Include *.gif | Foreach-Object{

$newName=($_.FullName -replace '.gif',"%04d_from_gif.png")
 .\ffmpeg -i $_.FullName $newName 2>&1 | out-null

}

#change webp to png
Get-ChildItem -Recurse -Include *.webp | Foreach-Object{

$newName=($_.FullName -replace '.webp',"_from_webp.png")

 .\dwebp.exe $_.FullName $newName
}

#change avif to png
Get-ChildItem -Recurse -Include *.avif | Foreach-Object{

$newName=($_.FullName -replace '.avif',"_from_avif.png")

 .\avifdec.exe $_.FullName $newName
}
The powershell script below convert images into png files and makes them square adding white padding. They can then be fed to an upscaler or other resizer to make them the correct resolution.
Note: you can delete everything below "#From here it is to square and fill the images" and use the script to only change the format of the image files.
#change jpg to png
Get-ChildItem -Recurse -Include *.jpg | Foreach-Object{

$newName=($_.FullName -replace '.jpg',"_from_jpg.png")
[void][System.Reflection.Assembly]::LoadWithPartialName("System.Drawing")
$bmp = new-object System.Drawing.Bitmap($_.FullName)
$bmp.Save($newName, "png")

}

#change jpeg to png
Get-ChildItem -Recurse -Include *.jpeg | Foreach-Object{

$newName=($_.FullName -replace '.jpeg',"_from_jpeg.png")
[void][System.Reflection.Assembly]::LoadWithPartialName("System.Drawing")
$bmp = new-object System.Drawing.Bitmap($_.FullName)
$bmp.Save($newName, "png")

}

#change bmp to png
Get-ChildItem -Recurse -Include *.bmp | Foreach-Object{

$newName=($_.FullName -replace '.bmp',"_from_bmp.png")
[void][System.Reflection.Assembly]::LoadWithPartialName("System.Drawing")
$bmp = new-object System.Drawing.Bitmap($_.FullName)
$bmp.Save($newName, "png")

}


#From here it is to square and fill the images.
$cnt=0
Get-ChildItem -Recurse -Include *.png | Foreach-Object{

$newName=$PSScriptRoot+"\resized"+$cnt.ToString().PadLeft(6,'0')+".png"
[void][System.Reflection.Assembly]::LoadWithPartialName("System.Drawing")
$bmp = [System.Drawing.Image]::FromFile($_.FullName)


if($bmp.Width -le $bmp.Height)
{
$canvasWidth = $bmp.Height
$canvasHeight = $bmp.Height
$OffsetX= [int] ($canvasWidth/2 - $bmp.Width/2)
$OffsetY=0
}
else
{
$canvasWidth = $bmp.Width
$canvasHeight = $bmp.Width
$OffsetX=0
$OffsetY=[int] ($canvasWidth/2 - $bmp.Height/2)
}


#Encoder parameter for image quality
$myEncoder = [System.Drawing.Imaging.Encoder]::Quality
$encoderParams = New-Object System.Drawing.Imaging.EncoderParameters(1)
$encoderParams.Param[0] = New-Object System.Drawing.Imaging.EncoderParameter($myEncoder, 100)
# get codec
$myImageCodecInfo = [System.Drawing.Imaging.ImageCodecInfo]::GetImageEncoders()|where {$_.MimeType -eq 'image/jpeg'}


#create resized bitmap

$bmpResized = New-Object System.Drawing.Bitmap($canvasWidth, $canvasHeight)
$graph = [System.Drawing.Graphics]::FromImage($bmpResized)

$graph.Clear([System.Drawing.Color]::White)
$graph.DrawImage($bmp,$OffsetX,$OffsetY , $bmp.Width, $bmp.Height)

#save to file
$bmpResized.Save($newName,$myImageCodecInfo, $($encoderParams))
$graph.Dispose()
$bmpResized.Dispose()
$bmp.Dispose()

$cnt++

   }
