This is the first article in a series:
Simple Composition Tricks to Instantly Improve AI Images with Prompts
More Simple Composition Tricks to Instantly Improve AI Images Using Prompts
Intermediate Composition Tricks to Instantly Improve AI Images Using Prompts
Intermediate Emotional & Narrative Composition Techniques for AI Images Using Prompts
Simple Composition Tricks to Instantly Improve AI Images with Prompts: Camera Angles Edition
Simple Composition Tricks to Instantly Improve AI Images with Prompts: Perspective Edition
Simple Composition Tricks to Instantly Improve AI Images with Prompts: Color & Mood Edition
Simple Composition Tricks to Instantly Improve AI Images with Prompts – Light & Shadow Edition
Simple Composition Tricks to Instantly Improve AI Images with Prompts: Texture & Detail Edition
Modern AI image generators can compose a scene more artistically if you guide them with the right words. By adding classic art and photography composition techniques into your text prompts, you can instantly get more dynamic and professional-looking results – no extra tools needed 1 . This guide will show you how to use ten proven composition tricks (like the Rule of Thirds, Leading Lines, and more) in prompts that work across Hi-Dream models, Flux models, and Stability AI’s Stable Diffusion family. The tips are beginner-friendly, in plain language, and focus on prompt-only enhancements (no ControlNet, no special extensions). Let’s dive in!
1. Rule of Thirds
What it is: The Rule of Thirds is a classic guideline that suggests dividing an image with two horizontal and two vertical lines (making a 3×3 grid) and placing important elements along those lines or their intersections 2 . Instead of centering your subject, this creates a more dynamic, interesting balance. For example, a horizon might sit along the lower third line, or a subject might appear at a left or right intersection (“power point”) of the grid . This adds tension and interest compared to a dead-center subject.
How to prompt it: Simply include phrases like “rule of thirds composition” or describe the subject’s position off-center. This nudges the AI to arrange the scene with the subject away from the middle. Newer models (like Hi-Dream and SDXL) are quite good at following this hint (Hi-Dream was designed for strong prompt adherence 4 ), but older models might still default to centering if not given details. You can reinforce it by specifying which third of the frame the subject should occupy (left, right, top or bottom).
• Prompt Tips: To ensure the effect, mention a specific placement. For example: “subject on the right third of the image, background extending in the left two-thirds”. Combining Rule of Thirds with a described background or environment often yields better depth and context (e.g. a path or horizon line in another third of the frame).
Example Prompt (Rule of Thirds):
"a portrait photo of a traveler on a beach at sunset, rule of thirds composition, the person standing on the left side of frame, wide open sea and sky on the right, cinematic lighting"
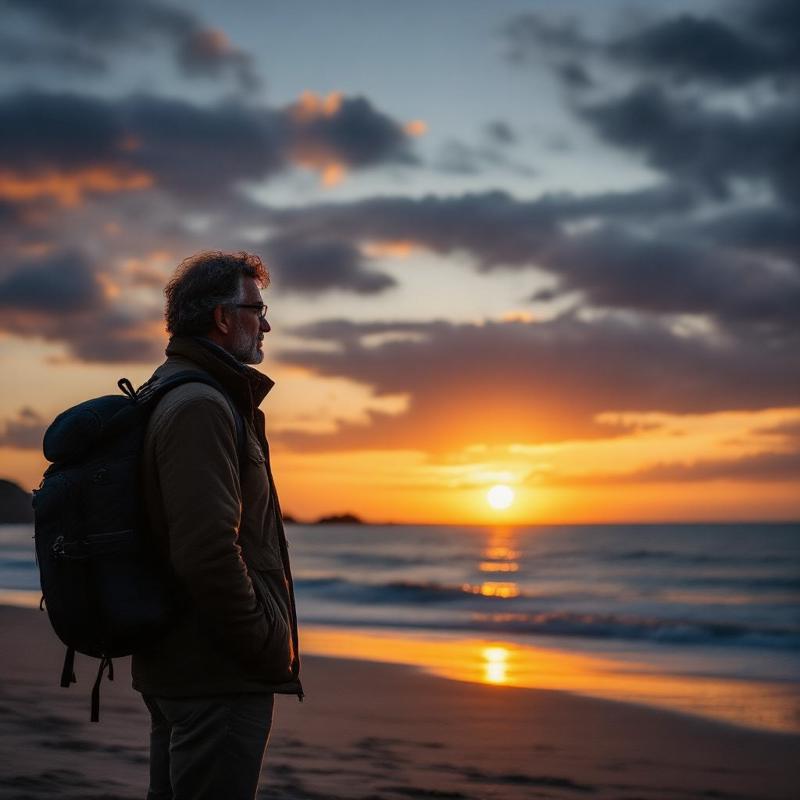
In this example, adding “rule of thirds composition, ... on the left side of frame” tells the AI to position the subject off-center. The result is likely a photo where the traveler is off to one side and the expansive sky/ocean fills the rest, which feels more cinematic and engaging than a centered pose. If your first try still looks centered, try a higher resolution or more steps – with the prompt above, models like Stable Diffusion often comply by moving the subject to the side.
2. Leading Lines
What it is: Leading lines are visual elements (like roads, rails, rivers, or beams of light) that lead the viewer’s eye toward the main subject.
In photography, they create depth and guide focus, making the image more immersive 6 . For instance, imagine a winding road in the foreground that draws your gaze into the scene towards a subject in the distance – your eye “follows” the line.
**How to prompt it:** Include the term “leading lines” and/or describe a specific line element in the scene. The AI will interpret this as a cue to compose the image with some lines converging toward the focal point 8 . It helps to mention what the lines are (e.g. “a road leading to a cottage” or “perspective lines of a hallway”). This way, even if the model doesn’t explicitly “know” how to create leading lines, it will draw the described object which naturally forms the lines.
- Prompt Tips: Use words like “leading to” or “leading toward” to connect a foreground element to the subject. For example: “a long pier on the lake leading toward a boat” sets up a literal leading line. You can also simply say
*“leading lines composition”* and many models will incorporate some linear elements (like rays of light or paths) to guide the eye 9 . If using Flux-dev or Hi-Dream, you might find they handle abstract prompts like “leading lines” quite well thanks to their training, but adding concrete details works universally.
Example Prompt (Leading Lines):
"ultrawide landscape photograph of a lone tree on a hill at sunrise, leading lines composition – a winding dirt path in the foreground leads the eye to the tree, soft morning light, high detail "
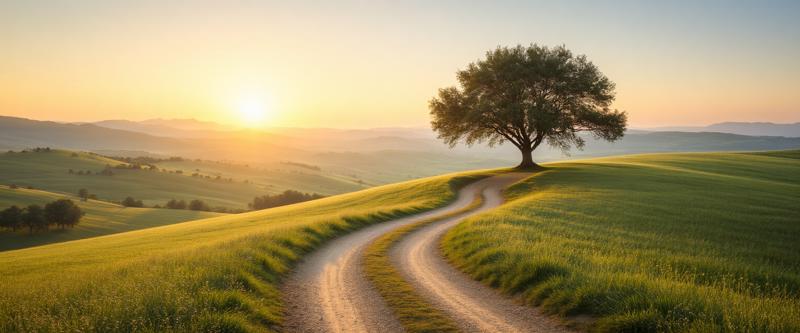
This prompt explicitly describes a winding path as a leading line. The model should produce an image where the path starts near the bottom (foreground) and guides your eyes up the hill to the lone tree (subject). The phrase “leading lines composition” reinforces the idea 8 . In practice, Stable Diffusion and HiDream will likely place the path as a strong visual line toward the tree. The result has a sense of depth and intention – the viewer’s attention naturally flows along the path to the subject, just as planned.
3. Symmetry & Asymmetry
What it is: Symmetrical composition means both sides of the image are balanced or mirrored, giving a sense of stability and order 10 11 . A classic example is a front-on shot of a building where the left and right halves are nearly identical. This formal balance can feel calm and authoritative (think of Wes Anderson’s perfectly centered shots – they use symmetry for a signature look 12 ). Asymmetrical composition, on the other hand, places elements of unequal weight across the frame, yet still achieves a pleasing balance 13 . Asymmetry often feels more dynamic and natural – for example, a subject on one side balanced by a lesser element or empty space on the other. Using asymmetry usually involves the Rule of Thirds or lots of negative space to keep things visually appealing 14 15 .
How to prompt it: For symmetry, you can literally add “symmetrical composition” or describe a centered, mirrored scene. Phrases like “perfectly centered”, “mirror image reflection” or “symmetrical layout” help the AI understand you want balance. Stable Diffusion and Flux both recognize “symmetrical” from training data (e.g. many Wes Anderson style prompts explicitly say “symmetrical composition” 16 ). For asymmetry, you might not use the word “asymmetrical” itself (the AI might not always get that), but instead rely on Rule of Thirds or descriptions like “off-center subject with a balancing object”. Essentially, prompt as we did in Rule of Thirds (which is a form of asymmetrical balance 15 ). You can also mention negative space (next section) as a way to create asymmetry.
• Prompt Tips (Symmetry): Emphasize centering and mirroring. e.g. “symmetrical scene, subject perfectly centered, reflective water creating a mirror image”. Architectural or interior scenes respond well to “symmetrical composition” – the AI will often align pillars, windows, etc. evenly. If one side comes out odd, try phrasing “perfect symmetry” or use a reference (like “Wes Anderson style symmetry”).
• Prompt Tips (Asymmetry): Use Rule of Thirds language or explicitly mention one side is heavier. e.g. “an off-center portrait – main subject on the right, small object on the left for balance”. The AI will then distribute elements unevenly but not jarringly. Asymmetrical balance can also be achieved by contrasting a detailed subject on one side with empty space on the other.
Example Prompt (Symmetrical):
"Wes Anderson inspired interior shot of a grand hotel lobby, symmetrical composition, camera centered, identical arches and chandeliers on both sides, subject standing perfectly center, balanced and formal"
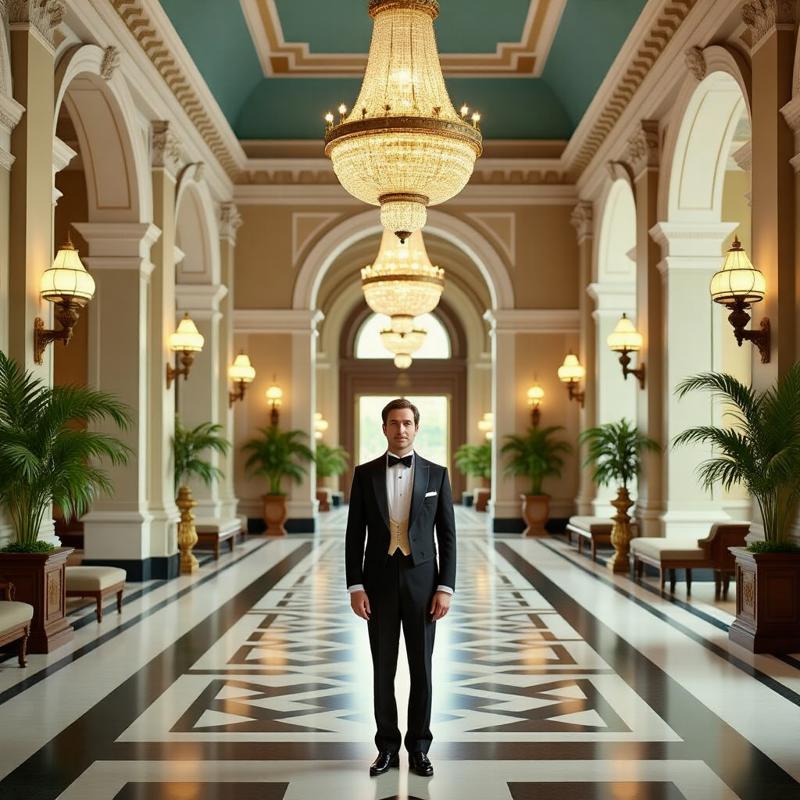
This tells the AI to create a very balanced, mirrored scene. We explicitly say “symmetrical composition” and describe identical elements on each side. A model like Stable Diffusion will likely produce a front-on view of a lobby where furnishings and decor line up evenly, and the subject is dead-center 12 16 . The result feels orderly and intentional.
Example Prompt (Asymmetrical):
"candid street photo of a cyclist against a city skyline, rule of thirds framing (cyclist in lower left), vast open sky occupies the rest, dynamic and unbalanced in a pleasing way"
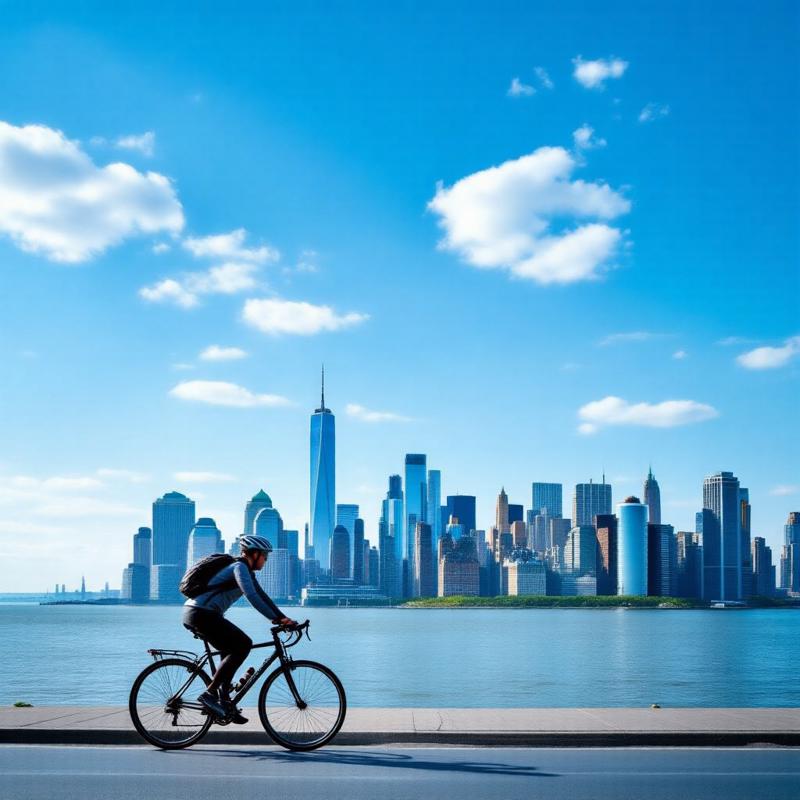
Here we achieved asymmetry by using a rule-of-thirds style placement and mentioning the “vast open sky” as counterweight. The cyclist is one side, the empty sky is another – a deliberate imbalance. The prompt doesn’t use the word “asymmetrical” but conveys it through positioning and negative space. The AI should yield an image where the cyclist is in the lower left, and a lot of sky on the right/top gives breathing room. This kind of asymmetrical balance adds interest and a sense of scale 14 15 .
4. Negative Space
What it is: Negative space refers to the empty or plain areas around your subject. Using a lot of negative space can make an image feel minimalist, serene, or emphasize how small the subject is relative to its surroundings. In art and photography, negative space creates breathing room and draws attention to the main subject by contrast – nothing else is cluttering the frame 17 . Think of a lone tree against a vast empty sky: the blank sky is the negative space that actually highlights the tree.
How to prompt it: Include terms like “negative space”, “empty background”, “vast empty sky”, “minimalist background” or “plain backdrop”. These cues tell the model to leave portions of the image uncomplicated and free of distractions 17 . You can also specify a color or type of negative space (e.g. “white studio backdrop” for a product shot). All the AI models (Hi-Dream, Flux, SD) understand common language, so simply saying “lots of negative space” or “minimal composition” often works. However, it may help to mention the specific area of emptiness (sky, wall, background, etc.), because AI needs to know where not to put detail.
• Prompt Tips: Pair the subject with an empty environment. For example: “a single tree on a hill, surrounded by empty sky” or “portrait on a plain white background with plenty of negative space”. If the AI adds unwanted objects, try reinforcing emptiness: adjectives like “vast, empty, open, plain, blank” can be used. Also consider using depth of field blur to simplify background (discussed later). Negative space is great in Flux’s community mixes for getting that artsy minimalist look – they will leave a lot of blank area if asked, which makes the subject pop 18 .
Example Prompt (Negative Space):
"minimalist photograph of a small red boat on a calm ocean, vast negative space — wide expanse of clear blue water and sky around the boat, very simple composition, emphasis on solitude"

In this prompt, phrases like “vast negative space” and describing the expanse of clear water and sky signal the model to keep most of the frame empty around the subject. The result should have the tiny red boat isolated in a huge field of blue, creating a peaceful, uncluttered image 18 . The emptiness amplifies the significance of the boat. Stable Diffusion and Hi-Dream both respond well to “minimalist” cues – you’ll likely get an image that’s striking in its simplicity, with the boat immediately drawing the eye against the blank background.
5. Depth & Layering (Foreground, Middle, Background)
What it is: Adding depth to an AI image means making it look three-dimensional and rich, rather than flat. A key photography trick for depth is layering: include a foreground, a middle ground, and a background in the scene 19 . Each layer adds a sense of distance. For example, a classic landscape might have some flowers or rocks close to the camera (foreground), the main subject or scene in mid-distance (middle ground), and mountains or sky far away (background) 20 . When an image has multiple layers, the viewer’s eye can travel from front to back, which feels engaging and realistic 21 .
How to prompt it: Explicitly mention elements for different depths. Use words like “foreground”, “background”, or phrases like “in the distance” or “close-up”. For instance: “wildflowers in the foreground, a cabin in the mid distance, mountains in the background.” This directly instructs the AI to arrange content on three planes, creating layered depth. You can also specify depth of field (sharp front, blurry back, or vice versa) if you want focus effects, but simply listing layers works well. Many diffusion models have been trained on image captions that include foreground/background notes, so they often understand this structure.
- Prompt Tips: List the layers in one prompt sentence, roughly from nearest to farthest. Example: “In the *foreground**, a wooden fence; in the middle, a farmhouse; background, rolling hills under a blue sky.”* This way, the AI almost paints the scene in three parts. Using commas or semicolons to separate layers can help clarity. If the model tends to mash everything together, try adding “distance” keywords (e.g. “distant mountains”). Also, combining layering with leading lines or rule of thirds can supercharge the composition – e.g. placing foreground on a lower third and background on upper third for harmony 22 . Hi-Dream and SDXL, being advanced, often produce nice depth by default, but this prompt technique guarantees a more narrative landscape
Example Prompt (Depth & Layers):
"cinematic landscape shot: wildflowers in the foreground, a tranquil lake and cottage in the middle ground, snowy mountains in the distant background, sunset sky above, high depth and detail"
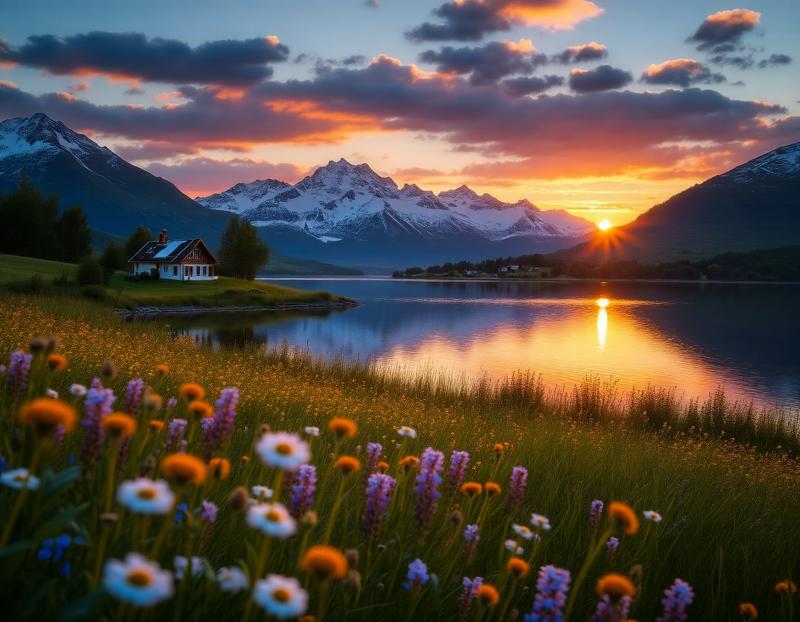
This prompt clearly spells out three layers: flowers up close, a lake+cottage mid, mountains far. A stable diffusion model will interpret those cues and try to place each element at different depths in the image. The outcome should have a real sense of distance – you might see big blurred flowers at the bottom (close to “camera”), the cottage sharp in the mid-frame, and hazy mountains far away. The note “high depth and detail” reinforces we want a deep, layered look. By engaging foreground, middle, and background, the image becomes more complex and interesting 19 . You’ll notice your eyes move from the flowers to the cottage to the mountains, which is exactly the point of layering.
6. Dutch Angle (Tilted Camera)
What it is: A Dutch angle (or Dutch tilt) is a camera shot where the horizon is tilted at an angle rather than straight. This diagonal composition creates a sense of tension, unease, or dynamism 23 . It’s a trick often used in films during dramatic or disorienting scenes. In a Dutch angle image, nothing is level; the world looks a bit “off balance,” which can make even a static subject feel more exciting or ominous.
How to prompt it: Use phrases like “Dutch angle”, “Dutch tilt”, or simply “tilted camera” in your prompt. For example: “dutch angle shot of a city street” or “portrait photo at a tilted camera angle”. This tells the AI to rotate the composition. All the models in question understand basic film/photography terms, but the Dutch angle might not be as common as “wide-angle” or “close-up,” so sometimes you might need to emphasize it.
If one phrasing doesn’t work, reword: e.g. “camera tilted to one side for a dramatic effect”. In some interfaces, people even weight it like (dutch angle:1.2) to force it, but in plain prompts it usually works by description.
• Prompt Tips: Pair the Dutch angle with the mood you want. Because a tilt can imply disorientation, it works great for action, horror, or surreal scenes. For example: “dutch angle shot of a detective running down an alley, dramatic shadows” sets a tense mood. You can also mention degree of tilt if needed (e.g. “camera tilted 30 degrees”). If the result is too subtle, try stronger language like “skewed horizon” or add “off-kilter composition”. Conversely, if a model over-does it and you get something weird, you might tone it down by removing the term. Generally, Stable Diffusion and Hi-Dream handle a simple “Dutch angle” request well – they’ll tilt the scene a bit, as per examples in many prompt collections 24 .
Example Prompt (Dutch Angle):
"dramatic movie still of a superhero landing on a rooftop at night, Dutch angle shot, camera slightly tilted for a dynamic effect, skewed city skyline in background, intense atmosphere"
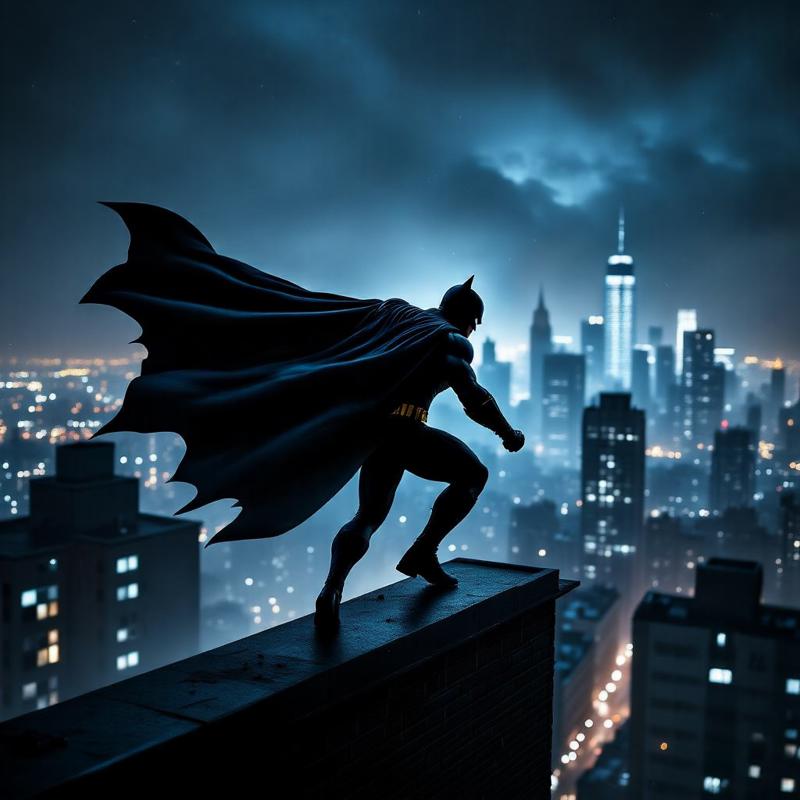
Here “Dutch angle shot” and “camera slightly tilted” explicitly instruct the AI to cant the frame. The expected result is an image where the rooftop and skyline are at a noticeable angle rather than level. This diagonal composition injects energy – as if the viewer themselves is tilting their head – fitting – fitting the dramatic superhero moment. The sense of disorientation from the Dutch tilt makes the scene feel more urgent and cinematic 23 . In practice, the models should deliver a tilted perspective; if not, upping the emphasis or trying synonyms like “canted angle” can help. But usually just including Dutch angle does the trick, instantly making the image more edgy.
7. Framing Within the Frame
What it is: Framing within the frame means using elements in the scene to create a secondary frame around your subject. Imagine looking at a subject through something: a window, an archway, tree branches forming a border, etc.
Those elements act like a picture frame, drawing focus to what’s inside them.
This technique adds depth and context, and it naturally guides the viewer’s eye to the framed subject 25 . It’s like giving the image a frame inside the image.
**How to prompt it:** Include words like “framed by” or “view through” in your prompt. For example: “portrait of a person *framed by** an ornate window”* or “distant castle *seen through** an arch of trees”*. By describing the foreground object that creates the frame (window, arch, doorway, branches, etc.), you tell the AI to put something around the edges of the composition with the subject in the middle of it 25 . Another approach: literally say “frame within a frame” – some models might understand this concept, but it’s safer to be descriptive. Hi-Dream and Flux models, being quite advanced, will often cleverly use the described object as a framing device if you phrase it clearly.
- Prompt Tips: Think of common natural frames: windows, doors, arches, tunnels, foliage, shadows. Add them to your prompt in a way that they surround the subject. E.g. “the couple is framed by the silhouette of a heart-shaped arch” or “the fox peeks through the frame of autumn leaves”. Using “through” is powerful: “a view *through** a porthole”* implicitly creates a circular frame. Make sure to mention the subject so it’s clear what’s being framed. If results show the frame but not the subject well, specify the subject is inside or beyond the frame (e.g. “seen through” as above). This technique works consistently across Stable Diffusion and others, because it’s very much like describing a scenario – the AI sets up the shot with a natural frame in front.
Example Prompt (Frame Within Frame):
"photograph of an ancient temple entrance, framed by lush jungle vines and leaves in the foreground, the temple ruins visible through the archway, mystical lighting"
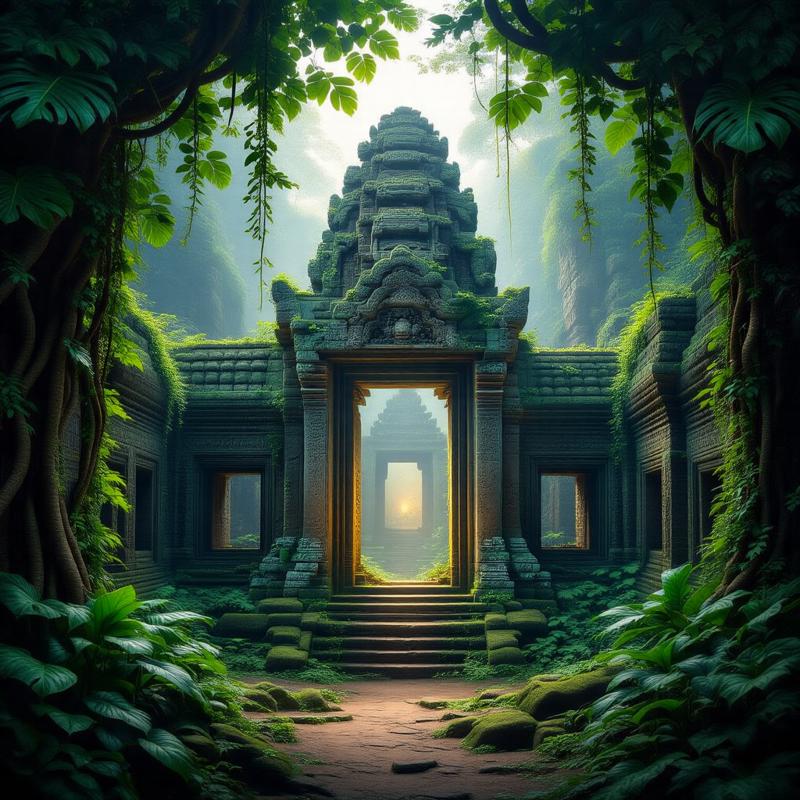
This prompt creates a mental image of standing in a jungle looking through hanging vines (the frame) at a temple entrance (the subject) beyond. The phrase “framed by lush jungle vines... visible through the archway” explicitly instructs the model to put foliage in the foreground forming a frame around the temple 25 . The result should have a sense of peering in – as a viewer, you feel like you’re behind bushes looking at the temple. The foreground frame adds depth and a bit of mystery, drawing your eyes inward. It’s a simple prompt tweak that makes the composition more compelling than a plain shot of the temple. All the target models should handle this well; such spatial relationships (“through an archway”) are commonly seen in training data.
8. Bokeh & Depth of Field (Background Blur)
What it is: Bokeh refers to the quality of the out-of-focus blur in a photo’s background (or foreground) when using a shallow depth of field 26 . In simpler terms, it’s that nice blurry background effect where lights turn into soft circles. Depth of field is the range of distance in focus; a shallow depth of field means only the subject is sharp and everything else is blurred. Photographers use this to make the subject pop out clearly from the background. In AI images, adding bokeh or background blur can give a very professional, DSLR-like look and direct all attention to the subject.
How to prompt it: Use phrases such as “shallow depth of field”, “blurred background”, “bokeh background”, “f/1.4” (simulating a wide aperture), or “background out of focus”. Stable Diffusion and similar models have been trained on tons of images with these tags, so they respond well. For instance: “portrait photo, 85mm lens, shallow depth of field, bokeh background” will likely yield a sharp subject and creamy blurred backdrop 27 . You can also mention “bokeh lights” if you want those aesthetic round light orbs. Keep in mind, “depth of field” by itself might be interpreted as wanting deep focus, so be sure to specify shallow or blurred for the effect.
• Prompt Tips: Including a camera lens and aperture can strengthen the effect (e.g. “shot on 50mm, f/ 1.8” means shallow focus). Even without technical details, simply saying “subject in sharp focus, background blurred” is clear. For example: “macro photo of a ladybug on a leaf, extremely shallow depth of field, background blurred into smooth bokeh”. If the model sometimes gives an image that’s fully in focus, try increasing emphasis on blur: “background completely blurred” or adding “bokeh effect”. Hi-Dream’s Full model, Stable Diffusion 2.1+, and SDXL are particularly good at fine focus details – they will create realistic lens blur when asked 27 . This technique is great for portraits, nature close-ups, or any time you want a clean separation between subject and backdrop.
Example Prompt (Bokeh Background):
"sharp close-up portrait of a golden retriever dog, shallow depth of field, the dog’s face is in crisp focus while the background is a creamy bokeh blur, soft natural lighting, 85mm DSLR photo"
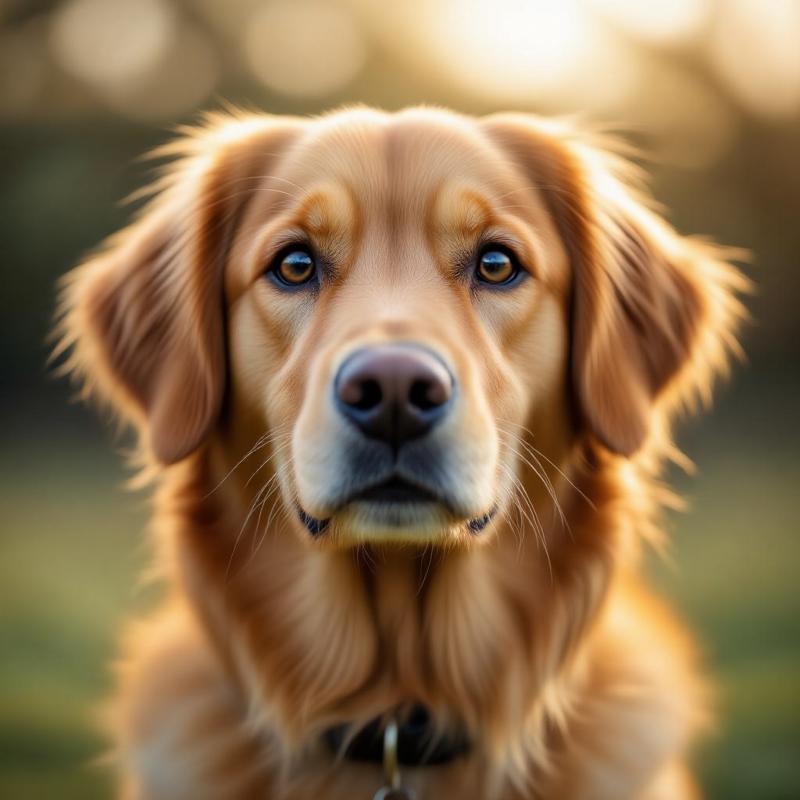
This prompt packs in several hints: “shallow depth of field” and explicitly stating the background is a blur of bokeh. The mention of 85mm DSLR also nudges the model toward a real camera look. The expected output is an image where the dog’s face is tack-sharp and everything behind it is smoothly blurred out 27 . You’ll likely see that pleasing bokeh effect, especially in any points of light in the background. The blur isolates the subject, making the dog really stand out. This works consistently – Stable Diffusion 1.5, 2.1, SDXL or Hi-Dream will all interpret these terms to apply a lens-like blur. It’s an instant way to add realism and focus to your AI-generated images, just by tweaking the prompt.
9. Golden Ratio / Spiral Composition
What it is:** The Golden Ratio is a classical proportion (approximately 1:1.618) that many artists and architects consider naturally harmonious. One way it’s applied in composition is through the golden spiral (also known as the Fibonacci spiral) 28 . This is a spiral that grows outward according to the golden ratio. Placing your subject and other elements along this spiral path can create a very aesthetically pleasing flow to the image. In practice, using the golden ratio in photography might mean the composition isn’t an even 1/3 grid, but slightly off – a bit more space on one side than the other, following that 1:1.618 ratio. The golden spiral essentially draws the viewer’s eye through the scene in a gentle curve 29
How to prompt it: You can actually try adding “golden ratio composition” or “Fibonacci spiral composition” to your prompt. These are somewhat niche terms, but advanced models (especially those oriented toward art, like community mixes of Flux or SDXL) have likely seen them in training. For example: *“abstract painting with golden ratio composition”* was used in Stable Diffusion 3.5 prompt guides 30. Another method is to mimic it descriptively: ensure your prompt implies a spiral or flow. For instance: “a spiral arrangement of objects leading to the focal point” or “composition follows a gentle curve”. However, simply saying “golden spiral composition” is a straightforward way; it cues the AI to aim for that kind of balanced but not overly symmetric layout 31. Mark this technique as a bit experimental – it’s less guaranteed than rule of thirds, but when it works, it yields beautifully balanced images.
- Prompt Tips: Combine golden ratio with subject placement. You might say: *“golden ratio composition (subject near a Fibonacci spiral point)”* in a parenthetical. Or use it in lists of styles: e.g. “dynamic, golden spiral composition, cinematic lighting.” It often helps to have something that naturally curves in the image to illustrate the spiral – like a winding road, a curved shoreline, or a spiral staircase. Mention that if possible, e.g. “a staircase curling in a golden spiral around the subject”. If models struggle, don’t worry – the rule of thirds gives a similar effect and is easier to achieve. But many prompt enthusiasts have reported that including “golden ratio” does subtly change the balance of the image (centers the subject less, gives more breathing room in that 1.618:1 manner) 32 . Feel free to try both terms: “golden ratio” and “golden spiral”. Each model might respond a bit differently, but neither will harm the output – at worst it ignores it, at best you get a nicely composed scene.
Example Prompt (Golden Ratio):
"surreal illustration of a seashell and flowers arranged in a spiral pattern, golden ratio composition, elements following a gentle fibonacci spiral, soft pastel colors, whimsical atmosphere"
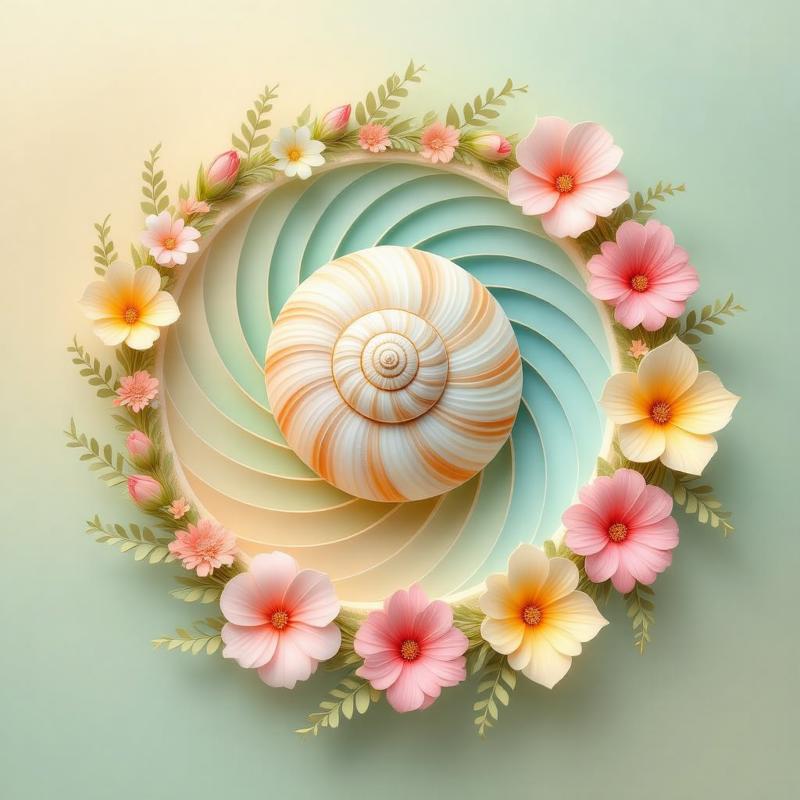
This prompt explicitly requests a composition following a spiral. By saying “golden ratio composition” and that elements follow a Fibonacci spiral, we instruct the AI to lay out the seashell and flowers in a curling formation. Ideally, the resulting image will have a spiral flow – perhaps the seashell at the center of a spiral of petals or vines. The golden ratio cue should make the overall spacing feel harmonious 28 . This is harder to visualize than rule of thirds, but you might notice the subject isn’t simply shoved to one corner; instead, objects might curve around it pleasingly. If you compare with and without the term, the with golden ratio version often has a more artful balance (according to anecdotal tests 31 ). All supported models can attempt this, though highly literal ones like some Stable Diffusion 1.5 checkpoints might not “get it” every time. It’s a subtle trick – when it works, you get an image that leads the eye around in a very satisfying way 29 .
10. High & Low Camera Angles
What it is: Changing the camera angle dramatically changes the story an image tells. A high-angle shot is taken from above the subject, looking down. This can make the subject appear smaller, vulnerable, or simply show more of the ground or context around them 33 . Think of a bird’s-eye view or a drone shot – that’s an extreme high angle. A low-angle shot is taken from below, looking up at the subject. This tends to make the subject look larger-than-life, powerful, or heroic 34 (imagine a photo of a tall building or person from ground level; they loom over the viewer). Using high or low angles adds drama and perspective to your image that a normal eye-level shot may lack.
How to prompt it: Add “high-angle” or “low-angle” (or even “worm’s eye view” for very low, “bird’s eye view” for very high) to your prompt. For example: “low-angle photo of a skyscraper” or “high-angle view of a bustling market”. You can also phrase it as “taken from above” or “from ground level”. These models are quite good at understanding camera perspective prompts 5 . In fact, the Stockimg AI guide explicitly suggests prompts like “eye-level, low-angle, close-up” to control perspective . So if you say “high-angle shot”, expect the AI to render the scene as if the camera is up high. Conversely, “from ground perspective” yields a low angle. You can mix this with other composition terms: e.g. “low-angle, rule of thirds portrait” (for a subject seen from below and off-center).
• Prompt Tips: Low-angle works great for making subjects imposing: “low-angle shot of a medieval knight on horseback against the sky” – the knight will look towering. High-angle is excellent for scenes where you want a lot of context visible (landscapes, cityscapes, group scenes): “high-angle photo of a street food market, looking down at the crowd”. For extreme angles, use the bird’s-eye or worm’s-eye phrases. If the result isn’t as extreme as you like, try adding more context like “from a drone” (for high angle) or “from ground level looking up”. Another tip: mention the effect on the subject – e.g. “seen from above, the children appear small” helps emphasize a high angle’s effect. All three model families (Hi-Dream, Flux, Stability) interpret these angle prompts similarly; differences might be in detail quality, but compositionally they’ll obey the angle. It’s a direct way to make an image more storytelling – angle suggests the viewer’s position relative to the subject.
Example Prompt (Low & High Angle):
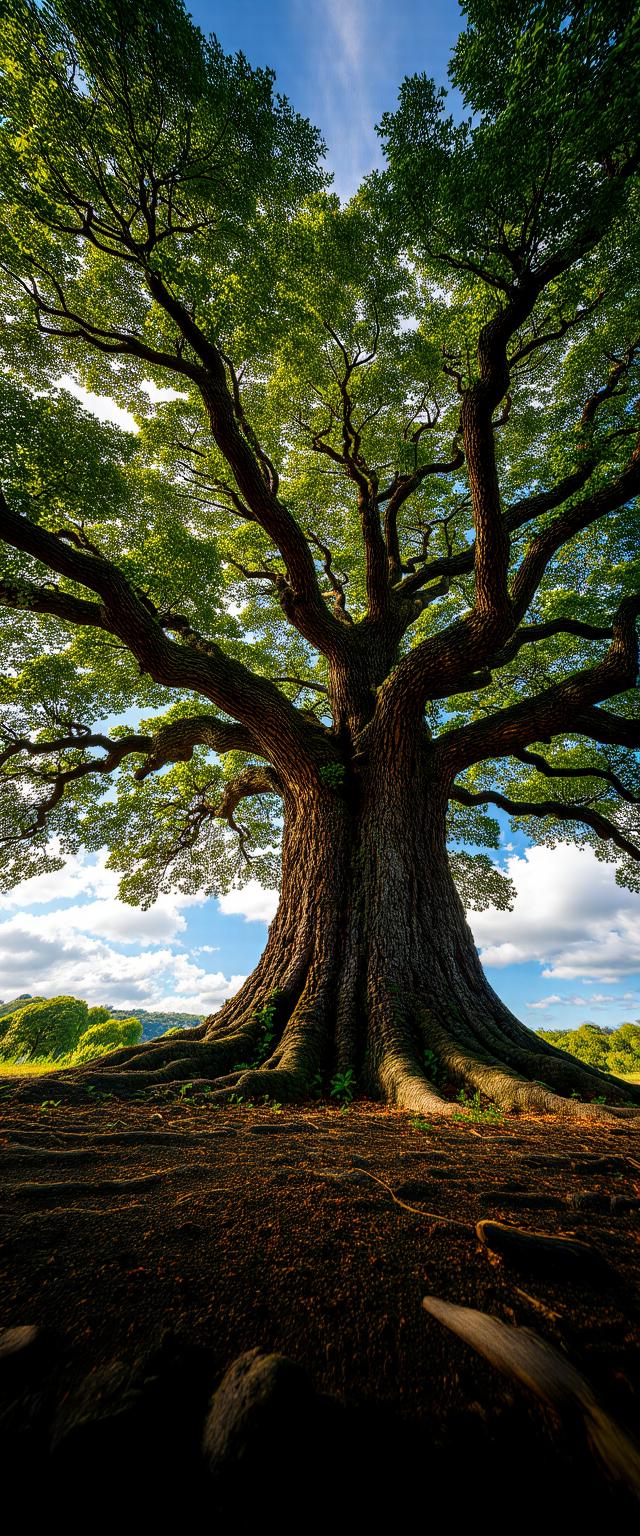
1. "low-angle shot of an ancient oak tree, camera at ground level looking up, the tree appears giant against the sky, epic perspective"
2. "high-angle view of a bustling medieval town square, seen from above (bird’s eye view), tiny figures and market stalls below, lots of detail"
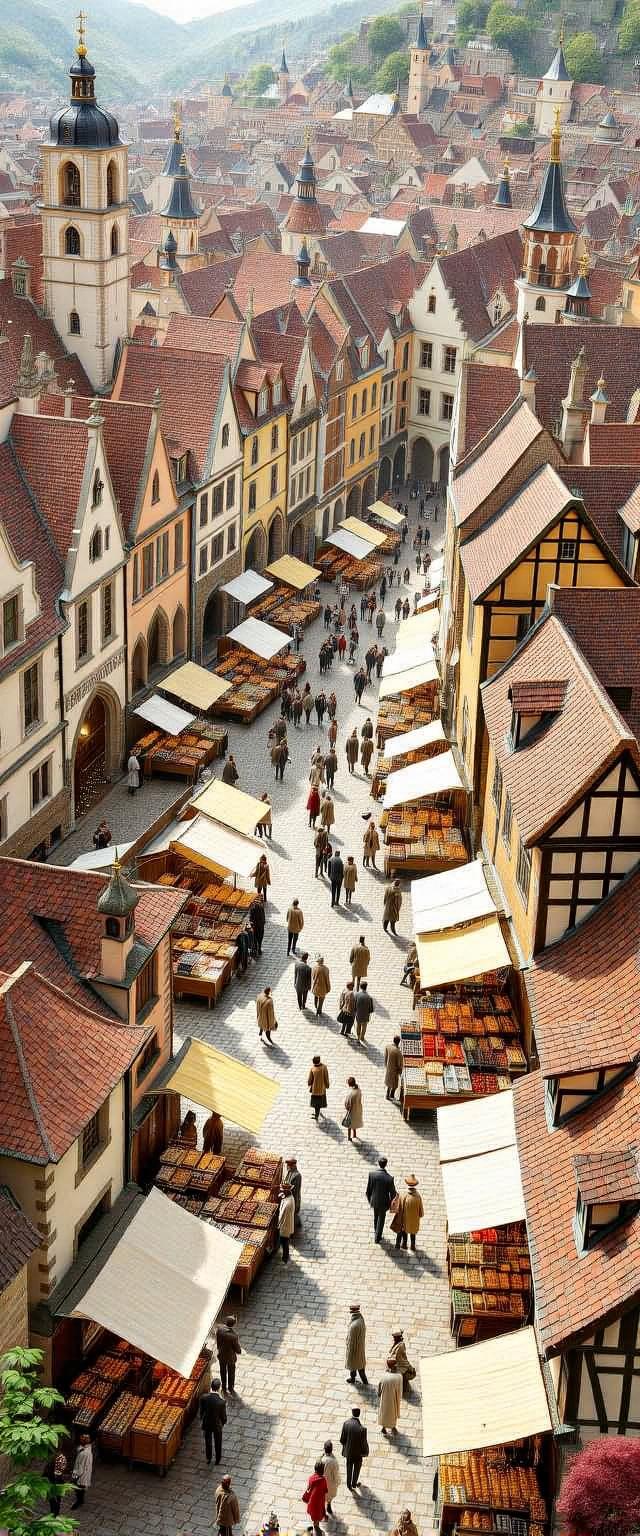
In example 1, the low-angle keywords (“camera at ground level looking up”) will likely produce an image where the viewer is almost on the ground, and the oak tree looms upward, perhaps with a foreshortened trunk and the canopy dominating the sky. The tree will feel majestic and powerful, because we prompted it from a worm’s-eye perspective 34 . In example 2, the high-angle description (“seen from above, bird’s eye view”) should result in a top-down perspective of the town square – like a shot from a drone or a tower. The people and stalls will look small and spread out, conveying a lot of context. Together, these show how simply changing a few words in the prompt can drastically alter the composition. You get either an ant’s perspective or an eagle’s, each telling a different story. Try these angles with different subjects – you’ll find they instantly make your AI images feel more intentional and creative.
Conclusion:
By weaving in these composition terms and descriptions into your prompts, you can guide AI image models to produce art that follows time-tested visual principles. The key is to describe the image as if you’re a photographer or director setting up the shot: talk about framing, angles, focus, and layout. Models like Hi-Dream and Flux (and Stable Diffusion variants) are sophisticated enough to pick up on these cues and adjust the generated image accordingly 1 5 . Remember to keep the language simple and clear (the AI isn’t a mind-reader but it does understand phrases like “off-center” or “blurred background”). Feel free to mix and match techniques once you’re comfortable – many great prompts use multiple composition tricks together (e.g. “a low-angle, rule-of-thirds shot with leading lines and bokeh” all in one!). With these tips, even beginners can get more artistic, well-composed images out of text-to-image generators – all by just tweaking the prompt. Happy creating!
Sources: The above guide is based on well-known art composition rules and proven prompt techniques from photography experts and AI practitioners . Each composition concept (rule of thirds, leading lines, etc.) is grounded in art theory and has been successfully used in AI image generation as documented in tutorials and community examples.
1 8 All Camera Position Prompts in AI Image Generation - PopAi
https://www.popai.pro/resources/all-camera-position-prompts-in-ai-image-generation/
2
3 Rule of thirds - Wikipedia
https://en.wikipedia.org/wiki/Rule_of_thirds
4 HiDream: The Unfiltered Image Generation you need
https://www.stablediffusiontutorials.com/2025/04/hidream-model.html
5 9 27 Advanced Prompt Techniques: Getting Hyper-Realistic Results from Your AI Photo Generator
6 7 17 18 19 20 21 22 25 Foreground, Middle Ground, and Background in Photography
https://www.slrlounge.com/foreground-middle-ground-and-background-in-photography/
10 11 13 14 15 Symmetrical vs. Asymmetrical Balance in Smartphone Photography — Smartphone
Photography Training https://www.smartphonephotographytraining.com/composition/symmetrical-asymmetrical-balance
12 16 The Best 25 Stable Diffusion Prompts for Wes Anderson https://openart.ai/blog/post/stable-diffusion-prompts-for-wes-anderson
23 33 34 Prompt Style: Camera Shots and Angles - ARTSMART AI
https://artsmart.ai/docs/camera-shots-and-angles/
24 Best Stable Diffusion Camera Prompts List with Examples https://www.aiarty.com/stable-diffusion-prompts/stable-diffusion-camera-prompts.htm
26 Bokeh - Wikipedia
https://en.wikipedia.org/wiki/Bokeh
28 32 Golden ratio photography composition explained | Digital Camera World
https://www.digitalcameraworld.com/tutorials/golden-ratio-photography-composition-explained
29 What Is the Golden Spiral And How To Use It? - Life Pixel https://www.lifepixel.com/photo-tutorials/what-is-the-golden-spiral-and-how-to-use-it
30 31 Stable Diffusion 3.5: Your Complete Guide to Creating Amazing AI Art for Free | by Zeng | Medium https://zengwt.medium.com/stable-diffusion-3-5-your-complete-guide-to-creating-amazing-ai-art-for-free-f16af45e9d28


