This is the second article in a series:
Simple Composition Tricks to Instantly Improve AI Images with Prompts
More Simple Composition Tricks to Instantly Improve AI Images Using Prompts
Intermediate Composition Tricks to Instantly Improve AI Images Using Prompts
Intermediate Emotional & Narrative Composition Techniques for AI Images Using Prompts
Simple Composition Tricks to Instantly Improve AI Images with Prompts: Camera Angles Edition
Simple Composition Tricks to Instantly Improve AI Images with Prompts: Perspective Edition
Simple Composition Tricks to Instantly Improve AI Images with Prompts: Color & Mood Edition
Simple Composition Tricks to Instantly Improve AI Images with Prompts – Light & Shadow Edition
Simple Composition Tricks to Instantly Improve AI Images with Prompts: Texture & Detail Edition
Creating beautiful AI-generated images isn’t just about the subject or style – it’s also about composition. How you frame and arrange elements in the image can make a huge difference in visual impact. The good news is you can apply classic photography composition techniques directly in your text prompts to guide AI image models. In this guide, we’ll cover a set of simple yet powerful composition tricks – from centered framing to using negative space – that work across Hi-Dream models, Flux models, and Stability AI’s Stable Diffusion (1.5, 2.1, SDXL, SD3). These techniques are well-known in photography and art, so they’re reliable and not just speculative prompt magic. By adding a few keywords or phrases to your prompt, you can instantly level up your AI images with better layouts and focus. Let’s dive in!
Centered Composition (Dead-Center Framing)
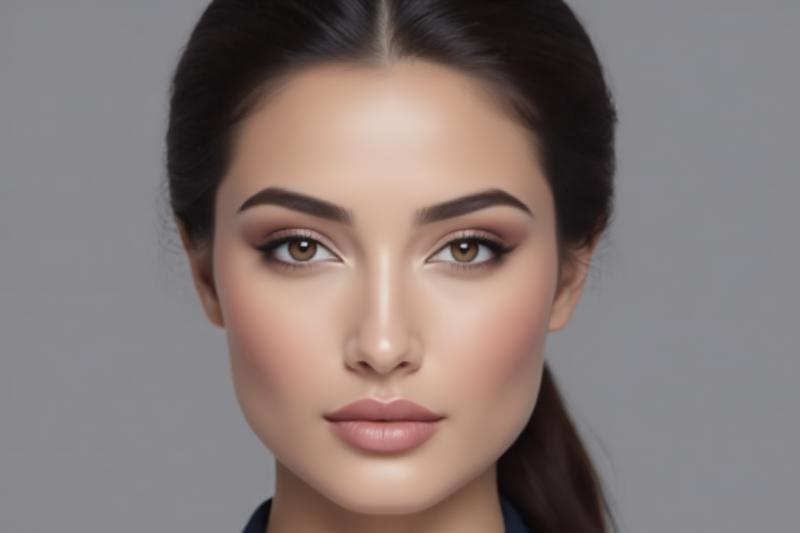
What it is: Centered composition means placing your main subject right in the middle of the frame. This “dead-center” framing often creates a sense of balance and draws the viewer’s eye immediately to the subject. It works especially well when the scene is symmetrical or the subject itself is strong enough to stand alone 1 . Unlike the usual “rule of thirds” advice (which favors off-center subjects), centered shots can be very striking when used in the right situations – for example, a perfectly symmetrical building facade or a portrait looking straight on.
How to prompt it: Simply include words in your prompt that indicate centering or symmetry. For example, “A symmetrical portrait of a woman, perfectly centered in the frame with a plain backdrop”. Phrases like “centered composition” or “subject centered” also cue the AI. This works well because the models have seen many images where the subject is in the middle, and symmetrical scenes are perfect for a centered composition 1 . By being explicit, you ensure the AI doesn’t try to be artsy and offset the subject – you’ll get that balanced, formal look you want.
Why it works (AI perspective): AI image models often tend to center subjects by default, so you’re aligning with their natural bias. Hi-Dream and Flux models, in particular, have high prompt adherence, meaning if you say “centered,” they will likely really center the subject. Centering gives a clean, simple composition that all models can handle easily. It’s great for things like front-facing portraits, single objects, or any scene where you want a strong focus right in the middle without distractions. Also, if your image has symmetry (like a reflection or a mandala), a centered prompt will emphasize that symmetry – the AI will mirror elements evenly on each side, which can be very visually pleasing.
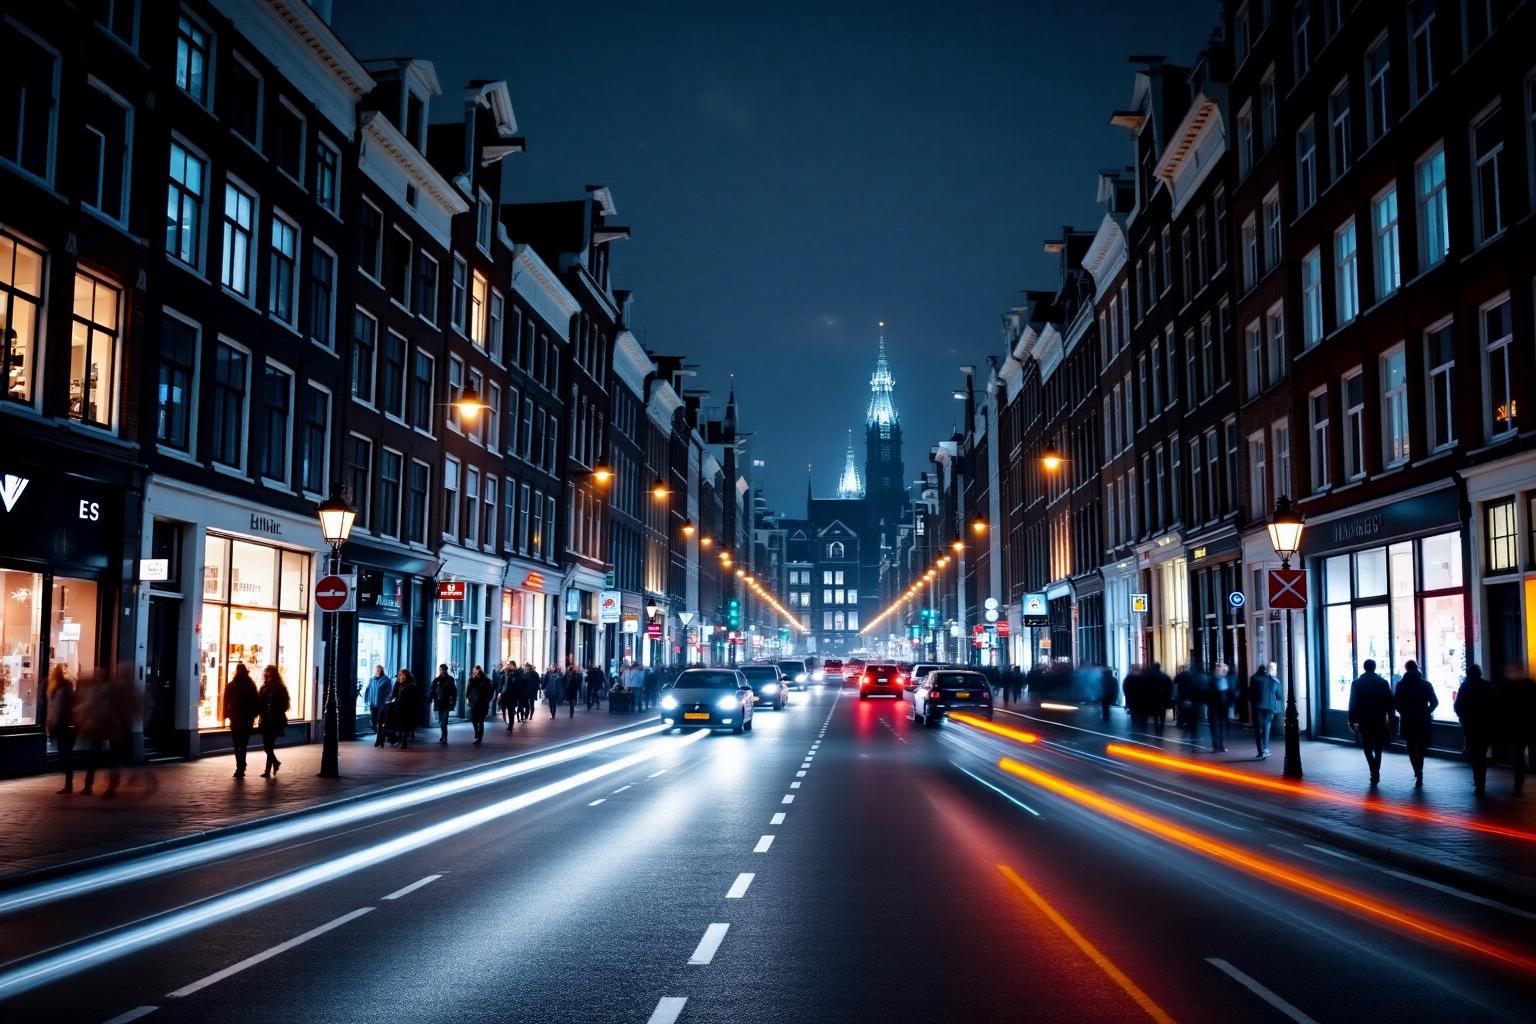
Tips: Centered composition is a fantastic starting point for beginners because it’s straightforward. Use it for subjects that are symmetrical or solitary. Architecture and roads, for instance, often look great centered .
If you’re using a square aspect ratio, centered subjects look even more balanced. Just remember, while centered framing is simple, it can sometimes be static – so for variety, don’t forget to try other techniques like we’ll discuss below.
Minimalism (Simple, Clean Composition)

What it is: Minimalist composition is all about simplicity and cleanliness. In a minimalist image, less is more. You might have a single subject and almost nothing else in the frame – lots of open space, plain backgrounds, and very few details. This technique strips an image down to the essentials, which can make the result look elegant and modern. In photography, using an uncomplicated background and only one or two elements in the scene prevents distraction and puts all the attention on the subject.
How to prompt it: Include terms that convey simplicity and emptiness. For example, “A minimalist photo of a single red balloon against a solid white background, with plenty of open space.” Words and phrases to try: “minimalist composition,” “simple background,” “clean composition,” “no clutter,” or “lots of empty space.” By telling the AI you want a simple or minimalist scene, you’re instructing it to leave out extraneous details. The AI has been trained on many minimalist images (think of all those art photos of one object on a blank background), so it understands this concept – it will focus on one subject and make the rest plain.
Why it works (AI perspective): Stable Diffusion and related models respond well to “minimalist” as a style cue – it’s a term often found in image captions and art descriptions. When you ask for minimalism, the model will try to remove clutter and avoid filling every inch with stuff. This leads to images that have a lot of negative space (which we’ll talk more about later) and a clear focal point. Simplicity is a powerful compositional tool that helps the viewer (or the AI) concentrate on the main subject. Hi-Dream and Flux models, being very detail-oriented with prompts, will likely give you exactly the simple scene you describe, without the model “hallucinating” extra objects. This can also reduce weird artifacts – fewer elements means fewer chances for the AI to mess something up.
Tips: When prompting minimalism, it can help to explicitly state what should not be there, if you’re getting unwanted details. For instance, “minimalist, no people, empty background” can ensure the AI doesn’t add stray figures or buildings. All the major model families can create beautiful minimalistic images – you might get a slightly different aesthetic (e.g. Stable Diffusion 1.5 might give a more photographic minimalism, while SDXL might produce a more polished, higher-res simplicity), but the core idea works everywhere. Minimalism is great for emphasizing color and form: one tip is to mention a single bold color or a specific shape in your prompt to make the simple composition really pop (e.g. “a minimalist scene of a yellow umbrella on an empty beach”). Keep it simple and let the model do the rest!
Diagonal Composition (Dynamic Angles)
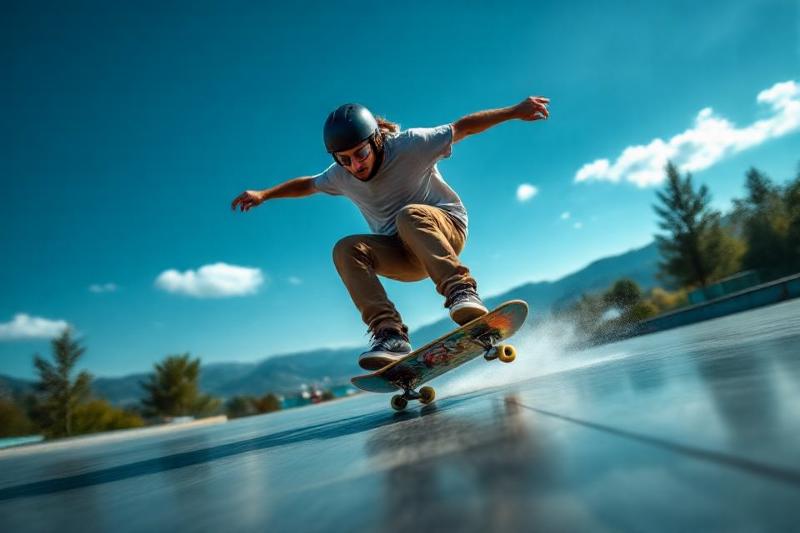
What it is: Diagonal composition means arranging the elements or the camera angle along a slant/ diagonal rather than straight up-and-down. In practice, this often looks like a photo taken at a tilt (sometimes called a Dutch angle), or a scene where leading lines run from one corner of the frame to the opposite corner. Diagonals in an image inject a sense of movement and energy – they create what photographers call dynamic tension 3 . This is because horizontal and vertical lines feel stable to our eyes, while a diagonal feels like it could tip or it’s in motion . Think of a person leaning forward or a car on a winding road – diagonals make the viewer subconsciously feel excitement or instability in a good way.
How to prompt it: To get a diagonal composition, you can mention the angle or use terms that imply tilt. For example, “A dynamic action shot of a skateboarder, captured at a slanted angle so the horizon is diagonal”. Another example: “cinematic Dutch angle view of a city street at night”. Useful phrases include “tilted camera,” “diagonal composition,” “shot at a steep angle,” or describing elements like “a road running from the bottom left to the top right of the image.” By adding these descriptions, you encourage the AI to rotate the scene or subject slightly. The result is an image that isn’t aligned to the standard horizontal/vertical grid, instantly making it feel more lively.
Why it works (AI perspective): AI models have learned from countless images with creative angles – from sports photography to film stills – so they understand when you ask for a diagonal or tilted perspective. Including something like “Dutch angle” is actually a known cinematic term, and Stable Diffusion (especially newer versions and fine-tuned models) do recognize it, often responding with a composition where the horizon is tilted. By requesting diagonal lines or a subject positioned along a diagonal, the model will often compose the scene accordingly, giving the picture a sense of motion. As photography guides note, diagonals add visual tension and dynamism 3 , and an AI image can capture that same feeling if you prompt for it.
In models like Flux and Hi-Dream, which have strong interpretative abilities, you might see very accurate results: e.g. if you say “a diagonal beam of light across the image,” these models will place a beam from one side to another as instructed. Stable Diffusion models might sometimes need a nudge (or slightly different wording) if a simple “diagonal composition” phrase doesn’t click – so don’t hesitate to rephrase if needed (e.g. “the scene is tilted to one side” or “camera angle is 45 degrees”).
Tips: Use diagonal composition prompts for scenes that you want to feel energetic, dramatic, or unconventional. It works great for action scenes (sports, dance, fast-moving subjects) because the tilt emphasizes motion. Also, landscapes or architecture shots can become more artsy with a diagonal tilt (for example, tilting a shot of a building can make it appear more abstract). If the AI’s first attempt isn’t diagonal enough, try increasing the emphasis: e.g. “dramatic diagonal angle” or add “with a strong sense of motion.” And remember, you can combine this with other cues: “a minimalist photo of a tree, shot at a diagonal angle” could give you a lone tree on a slope, which is both simple and dynamic. Experimentation is key, but once you see that cool angled result, you’ll love the added tension it brings.
Repetition & Patterns

What it is: Repetition and patterns in composition involve using multiple similar elements in the frame, creating a visually satisfying motif. Our eyes naturally love patterns – they feel harmonious and organized 4 . This could be anything: a row of identical lamp posts lining a street, geometric patterns on a wall, or repeating natural forms like a cluster of similar leaves or shells. When you use repetition, you create rhythm in the image. Sometimes the pattern itself is the subject, and other times you might have a pattern with one element breaking it, which is another striking technique (though here we’ll focus on the straightforward use of patterns).
How to prompt it: To incorporate patterns or repetition, clearly ask for multiple elements and, if possible, specify the arrangement. For example: “A photograph of a hallway with an endless pattern of arches receding into the distance.” Or “top view of a lotus pond with repeating circular lily pads forming a pattern on the water.” Phrases that help: “repeating pattern of…”, “rows of…”, “grid of…”, “motif of…”, or simply plural nouns with a descriptor like “identical” (e.g. “identical lanterns hanging across the street”). By doing this, you signal the AI that it shouldn’t just draw one object, but many of them, arranged in some regular way. The model then tries to fulfill that – generating several similar items and spacing them out as described.
Why it works (AI perspective): Image models know what patterns are, because their training data includes lots of images with deliberate repetition (think of stock photos of patterns, architectural shots, etc.). When you prompt for a pattern, the AI strives to create that harmony and visual rhythm that comes from repetition 4 . For instance, if you say “a pattern of triangles on a quilt”, the model will attempt to fill the image with triangle shapes in a quilt-like arrangement. Hi-Dream and Flux, with their powerful prompt adherence, might even produce very clean, regular patterns if the prompt is clear. Stable Diffusion might sometimes introduce slight variations (because it’s not truly copy-pasting the same object, but rather generating each instance), yet that can still look good as a “texture.” The key is that repeating elements draw the viewer’s eye along the image and suggest harmony 4 , and the AI can emulate that effect.
Tips: Be specific about what is repeating. If you just say “a pattern” without context, the AI might not know what kind of pattern you mean. Instead, mention the object or shape: “pattern of red and white tiles”, “repeating arches”, “rows of trees”, etc. If you want a break in the pattern for artistic effect, you can also prompt that (e.g. “a pattern of white eggs with one brown egg breaking the pattern”), but that’s a more advanced idea. Generally, sticking to straightforward repetition is easiest. Also, consider using the word “symmetry” or “geometric” if you want a very orderly pattern. All model families can do patterns, but results might vary: SDXL might give very crisp, detailed patterns, while some older models might be a bit messier and require a higher prompt weight on the pattern description. If the pattern isn’t coming out clearly, try simplifying the prompt (it might have gotten confused). For example, instead of a complex scene with patterns, first try just “a pattern of X on Y”. Once you get the hang of it, you can incorporate patterns into more complex prompts to add that pleasing repetition in backgrounds or across the scene.
Negative vs. Positive Space Balance (Balanced Simplicity)

What it is: Every image has positive space (the subjects or objects in the frame) and negative space (the empty or unoccupied areas around those subjects). Balancing negative and positive space means intentionally leaving emptiness in the composition so that the subject has “room to breathe.” Rather than filling the frame completely, you might position one small subject and leave the rest blank – this contrast can be very eye-catching. Using a lot of negative space creates a sense of simplicity and emphasis: an object surrounded by empty space instantly draws focus, and the emptiness itself becomes a compositional element 5 . Think of a lone tree against a vast sky, or a person on a wide empty beach – the emptiness around them highlights the subject and can evoke emotions like loneliness, peace, or scale.
How to prompt it: The key is to mention the emptiness and possibly the placement of the subject. For example: “A single hot air balloon in the bottom left corner of the image, surrounded by a vast expanse of clear blue sky.” Here we explicitly say where the subject is (bottom left) and that the rest is open sky (negative space). Other prompt phrases: “lots of empty space,” “vast empty background,” “plenty of negative space,” “blank background,” “open sky,” etc. You can also direct where to leave the space: “subject on the left with empty space on the right,” or “tiny figure amid a large empty field.” By specifying this, you’re telling the AI not to clutter the whole image with content. Leaving a lot of empty (negative) space around your subject can be very attractive and creates a simple, striking look 5 .
Why it works (AI perspective): Normally, image models might try to fill the frame with something because most training images have backgrounds or multiple elements. However, they have also been trained on minimalist and professional photos where negative space is used creatively. When you emphasize emptiness in the prompt, the model will allocate pixels to plain areas (like sky, water, solid color) instead of adding more objects. This results in the main subject standing out clearly. According to photography principles, giving the subject “space to breathe” helps focus attention on it and adds simplicity 6 . The AI picks up on that: for instance, if you say “isolated” or “against empty background,” it will often center on one subject and make the rest homogeneous. Hi-Dream, being a modern model with excellent understanding, tends to respect instructions about spacing pretty well – it might even nail a composition where the subject occupies, say, one third of the frame and the rest is empty sky. Stable Diffusion 1.5, in contrast, sometimes might get “nervous” about too much empty space and try to put clouds or additional objects to fill it. If that happens, you may have to reinforce the idea of emptiness (or use a bit of negative prompt for unwanted stuff). Overall, though, all models can achieve a nice balance of negative space if asked clearly.
Tips: A good trick is to use aspect ratio to your advantage. For example, a wide landscape orientation image is great for placing a subject at one side and leaving the rest empty. In your prompt you might not control aspect ratio (depends on your generation settings), but you can mention “wide angle” or similar to hint at it. Also, combine this with minimalist language: “a simple, empty background” or “vast blank space around the subject” reinforces the concept. Be prepared for some trial and error – as a user, you might notice the AI occasionally puts something random in the void (like an extra bird in the sky or a rock on the empty ground). If that happens, try rephrasing or specifying “no other objects” in the prompt. The more advanced models (and newer Stable Diffusion versions) have improved in this regard and understand that negative space means nothingness. In fact, photographers often use the rule of thirds to place a subject off-center when using negative space, so you can even mention something like “subject at the right third of the image, rest is empty” to mimic that technique. Balanced use of negative space can make your AI images look artistic and intentional, so it’s a wonderful technique to practice once you get comfortable with basic prompts.
Below are a few advanced composition techniques that you can also experiment with. These are a bit more specialized, but if you have the prompt space and want to push creativity, give them a try! They follow the same idea: you describe the composition layout in the prompt, and the AI will attempt to comply.
Experimental Techniques (Advanced Compositions)
Radial Composition (Circular/Radiating Layouts)
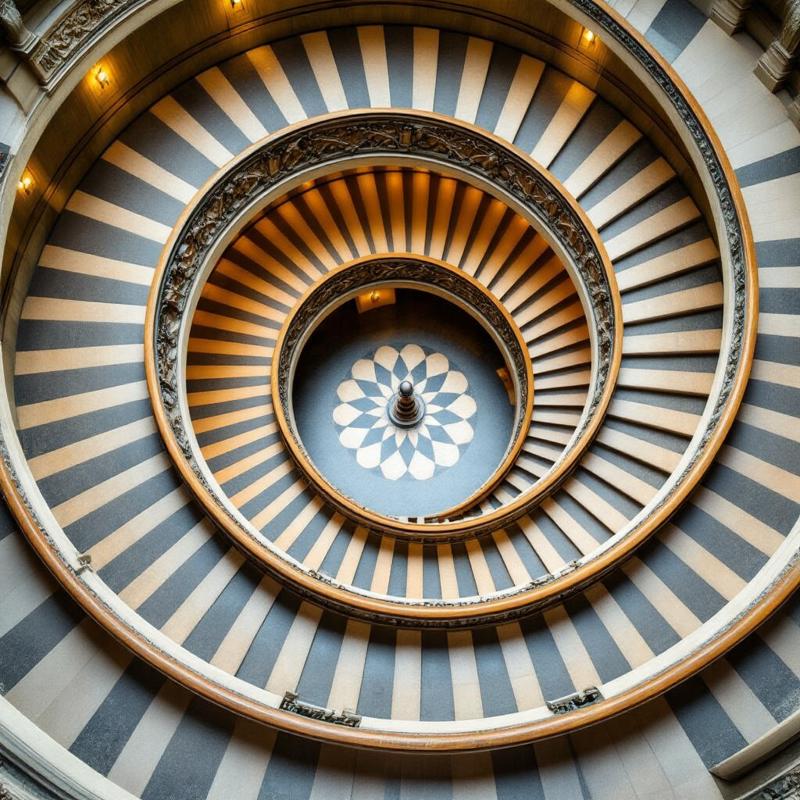
What it is: Radial composition arranges elements in a circular fashion or radiating out from a central point. Imagine the spokes of a wheel, the petals of a daisy, or a spiral staircase – everything emanates from the center. In a radial layout, your eye is drawn toward the center (or sometimes outwards from it), and it gives a sense of wholeness and flow. Essentially, radial composition means imagery that radiates outward from a particular point 7 . This can create a strong focal point in the middle and often a satisfying symmetry all around. It’s a less common technique but very impactful for certain subjects (like mandalas or anything circular).
How to prompt it: Use words that describe circular arrangement or radiating lines. For example: “A topdown photo of a spiral staircase forming a perfect circle in the frame (radial composition).” Another prompt might be, “Fireworks bursting in the night sky, radiating outward from the center of the image.” Key phrases: “radiating from the center,” “circular pattern,” “concentric circles,” “around a central point,” or even explicitly “radial composition.” By including these, you instruct the AI to organize the image elements around the middle. If you mention something like a spiral or mandala, the model will naturally produce a radial design because those concepts are inherently radial.
Why it works (AI perspective): AI models are quite good at symmetry and circular shapes (many logos, mandalas, or kaleidoscope-like images are in the training set). When you ask for a composition that is radial, you tap into the model’s ability to create symmetric patterns. Lines or shapes that spread out from the center will draw the viewer’s eye and create a sense of movement and depth 8 . For instance, describing “clouds swirling around a central moon” will likely give a circular motion around the moon. Models like SDXL or Hi-Dream might excel at the fine details of a radial pattern (like intricate mandala details) if you ask for it, whereas simpler models might just ensure the overall layout is circular. Either way, the resulting image tends to feel balanced and immersive, as the radial symmetry provides flow in all directions.
Tips: Radial compositions work great for things like abstract designs, flowers, architecture (domes and spiral staircases), or any scenario where you can position multiple elements around a center. If the AI isn’t strongly showing the radial effect, try emphasizing it: e.g. “circular symmetrical arrangement” or mention specific radial elements (“eight rays of light radiating from the sun in the center”). You can even combine radial with centered composition – often the center of a radial design is the centered subject (for example, “an overhead shot of a circular fountain with paths radiating outward” gives both centered focal point and radial lines). Because this is a bit more conceptual, you might need a few generations to get it just right, but when it works, it produces stunning, eye-catching images that feel very polished. And don’t worry – HiDream, Flux, and Stable Diffusion all can handle radial patterns with the right prompt; it’s a universal design principle, not software-specific.
Triangular Composition (Subjects Arranged in a Triangle)
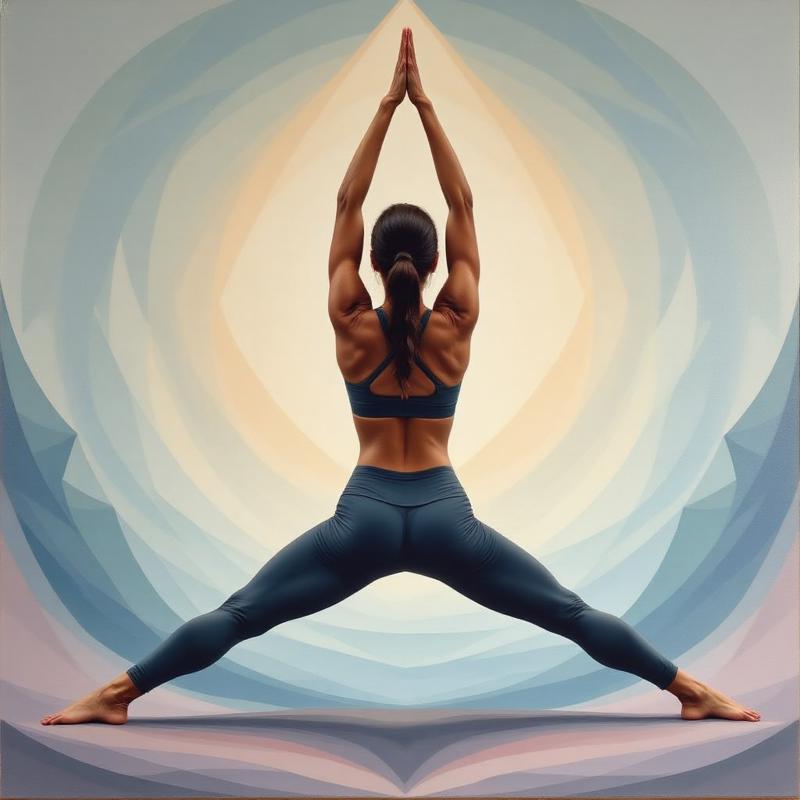
What it is: Triangular composition involves placing subjects or key elements so that they form a triangle shape within the image. This could be literally three separate subjects that, if you drew lines between them, make a triangle. Or it could be one subject posed triangularly (like a person with arms spread wide, making their body shape like a triangle). Triangles are a classic in art composition because they convey stability and strength 9 . Our brains subconsciously associate the triangle shape with a solid foundation (think of pyramids or a tripod stance) . In photography, group portraits often use a triangle arrangement (one person higher, two lower, etc.), and many famous paintings (like the Mona Lisa) utilize an implied triangle to give a harmonious structure.
How to prompt it: If you have multiple subjects, mention the number three or the idea of a triangle. For example: “A portrait of three friends arranged in a triangle composition – two standing side by side and one sitting centered in front.” This suggests two at the back (the base of a triangle) and one in front (the apex). Another example: “Three mountains in the landscape, forming a triangular arrangement in the frame.” You can also do it with one subject by describing their pose or shape: “A yoga pose with arms raised and feet apart, creating a triangle shape with the body.” Phrases to use: “triangular composition,” “triangle formation,” “arranged as a triangle,” “pyramid composition.” The AI will try to distribute the elements to roughly three points. It might not be geometrically perfect, but it often captures the idea (e.g., one element higher and centered, two lower on the sides).
Why it works (AI perspective): When you specify three subjects or a triangle arrangement, the model recognizes you want a balanced grouping. Three is a convenient number for the AI to handle – it knows what three of something looks like. By hinting at positions (like one centered and two off to the sides), you’re giving the model a template to follow. The result, ideally, is an image where your main points of interest aren’t all in one line or one clump, but spaced out in a triangular fashion. This usually feels pleasing and balanced to the viewer, even if they can’t pinpoint why. As mentioned in art theory, triangles spread out visual weight evenly and imply strength 9 , and the AI’s output will often reflect that stable feel. All the model families can do this, but you might find that some (e.g. older SD) occasionally struggle to place things exactly (“left” and “right” can confuse it sometimes). If so, try a simpler approach: describe the scene such that one item is in foreground and two in background, or one is bigger and two smaller – that often leads to a triangle composition without explicitly saying it. Hi-Dream’s stronger language understanding might directly get “triangular composition” and produce a nicely arranged scene. In any case, it’s a neat trick to make groupings of subjects look intentionally composed rather than random.
Tips: Use triangular composition for group photos (people, animals, or objects) to avoid a boring straight line of subjects. It’s also great in still life (imagine three pieces of fruit forming a triangle on a table) or landscapes (three peaks or trees at triangular points). If you have a single subject, you can simulate a triangle by using the environment – e.g. “a lone tree on a hill framed by two clouds above on either side” gives three elements (two clouds and the tree) that could form a triangle in the sky. Always look for or specify three key points. And remember, triangles don’t have to be upright – an inverted triangle (one point at bottom, two at top) can be dynamic too. Feel free to experiment with where you place that triangle in the frame (centered, or offset combined with negative space). Once you see the nicely balanced result, you’ll appreciate how this classical technique can make your AI images feel composed like a Renaissance painting or a professional photo.
Asymmetrical Balance with Negative Space (Advanced Off-Center Layouts)

What it is: This technique takes the idea of negative space and balance a step further. Asymmetrical balance means your composition is not mirrored or equal on both sides, yet it still feels stable in terms of visual weight. Using negative space to achieve this is common: you might have one larger or attentiongrabbing subject on one side, and empty space on the other side balancing it out 10 . It’s “informal” balance – nothing is centered or symmetrical, but the image doesn’t feel lopsided. This approach is advanced because it requires understanding how different elements (or emptiness) counteract each other in a frame. For example, a dark, heavy object on the left can be balanced by a lighter, wide open space on the right. The result often conveys a modern, artful look, and can evoke emotion or storytelling (like a small subject alone in a big world, off to the side).
How to prompt it: You’ll want to describe an off-center placement and mention the empty space explicitly. For instance: “A photo of a surfer placed on the far right of the frame, with the vast ocean stretching out to the left as empty space.” This tells the AI: subject on right, nothing else of significance on the left. Another example: “A bird sitting on a low branch in the bottom left corner, with clear blue sky filling the rest of the image.” Phrases to use include “off to the side,” “on the left third” (or right third), “uneven composition,” “asymmetrically balanced,” etc., alongside notes about the empty area (“blank sky,” “empty road,” “open water”). Essentially, you are painting a mental picture for the AI that one side has the subject, the other side should remain largely empty.
Why it works (AI perspective): While centered composition is straightforward, asymmetrical layouts are a bit trickier for AI, but definitely doable. The models have seen many photographs following the rule of thirds – which is exactly an asymmetrical balance guideline – so they do have a concept of subjects offcenter. By specifying negative space on one side, you give the model permission to leave a lot of the frame blank there. Negative space can counterbalance a visually heavy part of the frame 10 , meaning the AI doesn’t need to put another object to “even it out” – the emptiness is the balance. Modern models like SDXL or Hi-Dream are quite adept at this, often producing a nice composition where, say, a person is clearly on one side and the other side is just simple background. Less advanced models might occasionally try to sneak something into the empty space (because they think the image looks “empty”), but reinforcing the prompt with words like empty, blank, open, clear will usually guide them. When it works, you get an image that feels artistic and intentional, like a magazine photo or a painting, because the composition has a clear focus and lots of breathing room without being symmetrical.
Tips: Asymmetrical balance is about subtlety. Often, using the rule of thirds in your description is an easy shortcut: e.g. “subject at the left third of the image” is a classic way photographers ensure asymmetrical composition. You can literally say that in your prompt and many AI models will understand (they might not place it perfectly at exactly one-third, but they’ll get “off-center”). Also, consider the “visual weight” of your subject – if it’s something visually heavy (like a bold colored object or a person close-up), you can balance it with even more empty space. If it’s a lighter subject (like a small faint object), you might not need as much empty area opposite it. You don’t have to compute this, just keep it in mind when describing: a small subject might be balanced by a gently textured emptiness (like slight clouds), whereas a large subject might need a completely blank area on the other side to not overpower the scene. With practice, you’ll start feeling how to word it.
One more tip: combine this with other techniques for a real pro composition. For example, you could do an asymmetrical layout and a diagonal: “a lone cyclist in the bottom right, road stretching diagonally to the top left with nothing but road and sky” – here you have diagonal leading line and off-center subject with negative space. AI models can juggle multiple instructions like this, especially the newer ones, resulting in quite complex compositions that still look awesome. Don’t be afraid to try layering these tricks once you understand each one.
Wrapping Up: By now, you’ve got a toolbox of composition tricks – centered focus, minimalism, dynamic diagonals, pleasing patterns, and clever use of negative space (plus some advanced ideas like radial and triangular setups). All of these can be achieved just by wording your prompts thoughtfully. The beauty is that these methods are rooted in real art and photography principles, so they tend to produce genuinely nicer images, not just random prompt superstition. Whether you’re using Hi-Dream’s latest model, a Flux variant, or Stability AI’s diffusion models, you can apply these tips. The models may have slight differences (for example, some might follow the prompt instructions more to the letter), but the concepts hold true across the board because they’re based on how visuals naturally work.
Finally, remember that composition is as much an art as a science. Use these guidelines as a starting point, but feel free to experiment and even break the “rules” once you understand them. AI image generation is a creative process – combining your imagination with these time-tested composition techniques will instantly boost the quality of your results. So, in your next prompt, think not just about what you want to see, but how it’s arranged in the frame. Happy prompting, and enjoy seeing your AI creations transform with these simple composition tweaks!
Sources:
1. PetaPixel – 28 Composition Techniques That Will Improve Your Photos 1 3 4 5
2. Digital Photography School – Radial Composition in Photography 7 8
3. The School of Photography – Composition in Photography – Using Triangles 9
4. Adorama 42West – Asymmetrical Balance in Photography: How to Use It 10
1 2 3 4 5 6 28 Composition Techniques That Will Improve Your Photos | PetaPixel https://petapixel.com/photography-composition-techniques/
7 8 How to Use Radial Composition in Photography to Create Awesome Images!
9 Composition in Photography - Using Triangles — The School of Photography - Courses, Tutorials &
Books
https://www.theschoolofphotography.com/tutorials/composition-in-photography-using-triangles? srsltid=AfmBOorSpi9N_XO2yIQnAkaXKBQIc4YSNtABUf9yWNWiMg1xKcNSujEU 10 Asymmetrical Balance in Photography: How to Use it - 42West https://www.adorama.com/alc/what-is-asymmetrical-balance-in-photography/


