This is the fifth article in a series:
Simple Composition Tricks to Instantly Improve AI Images with Prompts
More Simple Composition Tricks to Instantly Improve AI Images Using Prompts
Intermediate Composition Tricks to Instantly Improve AI Images Using Prompts
Intermediate Emotional & Narrative Composition Techniques for AI Images Using Prompts
Simple Composition Tricks to Instantly Improve AI Images with Prompts: Camera Angles Edition
Simple Composition Tricks to Instantly Improve AI Images with Prompts: Perspective Edition
Simple Composition Tricks to Instantly Improve AI Images with Prompts: Color & Mood Edition
Simple Composition Tricks to Instantly Improve AI Images with Prompts – Light & Shadow Edition
Simple Composition Tricks to Instantly Improve AI Images with Prompts: Texture & Detail Edition
Simple Composition Tricks to Instantly Improve AI Images with Prompts: Camera Angles Edition
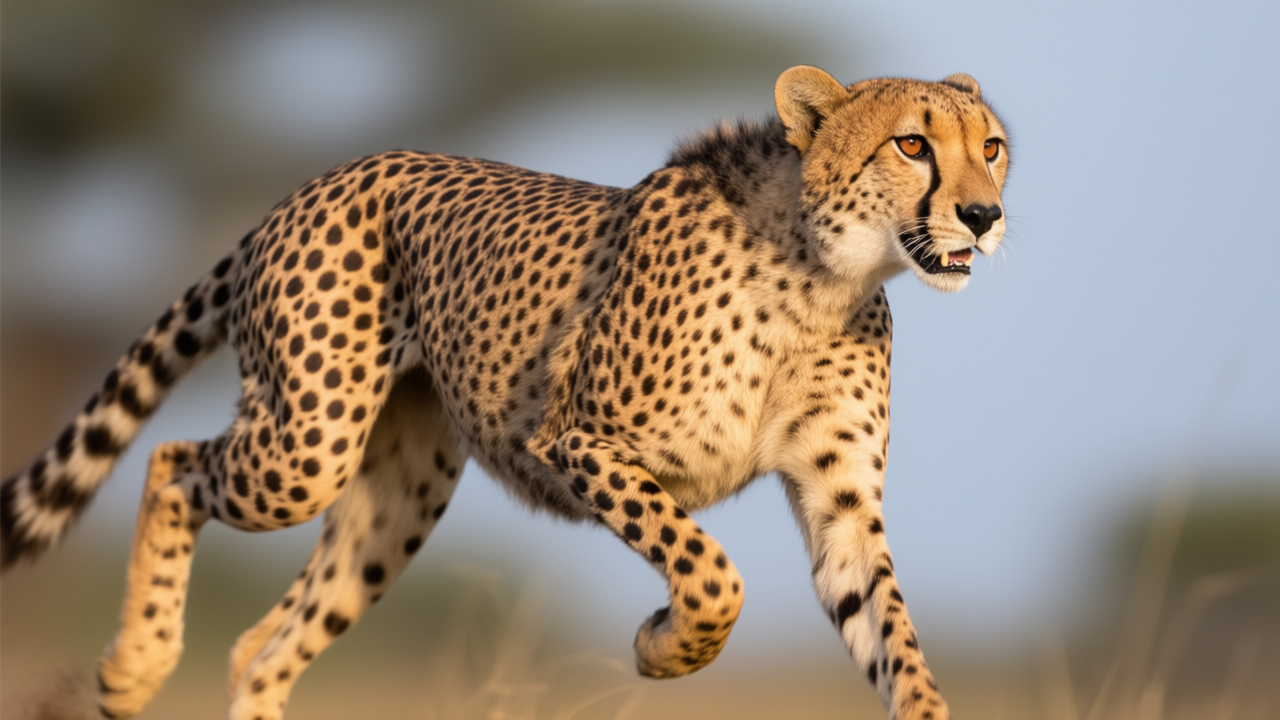
Modern AI image generators can create much more dynamic and storytelling images if you guide them with the right camera angles in your text prompts. In photography and filmmaking, the angle of the camera dramatically affects how the scene feels – and the same goes for AI art. By adding classic camera angle cues (the kinds of shots used in movies and photos) into your prompts, you can instantly change the mood, perspective, and focus of the generated image. This guide will introduce the most important camera angles in plain, beginner-friendly language, grouped into five categories:
· Vertical Position / Height (whether the camera is high, low, or eye-level)
· Horizontal Position / Placement (where the camera is around the subject – front, side, over-the-shoulder, etc.)
· Framing & Subject Size (how close or wide the shot is, from close-ups to wide shots)
· Motion / Movement Simulation (words that mimic camera moves like pan, tilt, or tracking in a single image)
· Specialty & Stylized Angles (creative angles and tricks like Dutch tilt, POV, or fisheye that add unique style)
For each angle, we’ll cover a simple definition, the emotional impact it has on a viewer, when to use it for the best storytelling effect, and give a prompt example (or two) showing how you can incorporate that angle into a text prompt. By the end, you’ll also see how to mix angles together for creative results, understand how angles differ from perspective, and get a quick-reference list of angle keywords for your prompts. The tone here is friendly and practical – no heavy film theory, just useful tips and examples you can copy. Let’s dive in and level up your AI image prompts with some cinematic angle magic!
Vertical Position / Height
Vertical position refers to the camera’s height relative to the subject: whether the camera is looking from above, below, or at eye-level. Changing the height of the camera can dramatically change how the subject appears to the viewer. High angles tend to make subjects look smaller or more vulnerable, while low angles make them look larger or more powerful[1][2]. Let’s explore the key vertical angles:
Eye-Level Shot
Definition: An eye-level shot places the camera at the same height as the subject’s eyes. In other words, it’s a straight-on view at normal standing height, as if you (the viewer) are right there looking at the scene at a natural level[3]. This is the most common, neutral camera angle in both photography and daily life.
Emotional Impact: Eye-level shots feel familiar and relatable. Since you’re viewing the subject as you normally would in real life, it doesn’t add any strong dramatic effect. The subject appears on equal footing with the viewer. This angle conveys neutrality, honesty, or directness – you’re seeing things at a normal perspective, which can make the image feel truthful or candid.
When to Use It: Use an eye-level angle when you want a natural, undistorted view of your subject – for example, a standard portrait or a straightforward scene where the goal is to let the viewer feel as if they’re present at the scene. It’s great for everyday situations, documentaries, or any image that should feel neutral and balanced in mood. It doesn’t exaggerate power or vulnerability, so it’s a good default if you don’t want to subconsciously influence how the subject is perceived.
Prompt Example:
a photo taken at eye level of a friendly golden retriever sitting on a porch, the camera at the dog’s eye height, natural perspective, warm lighting
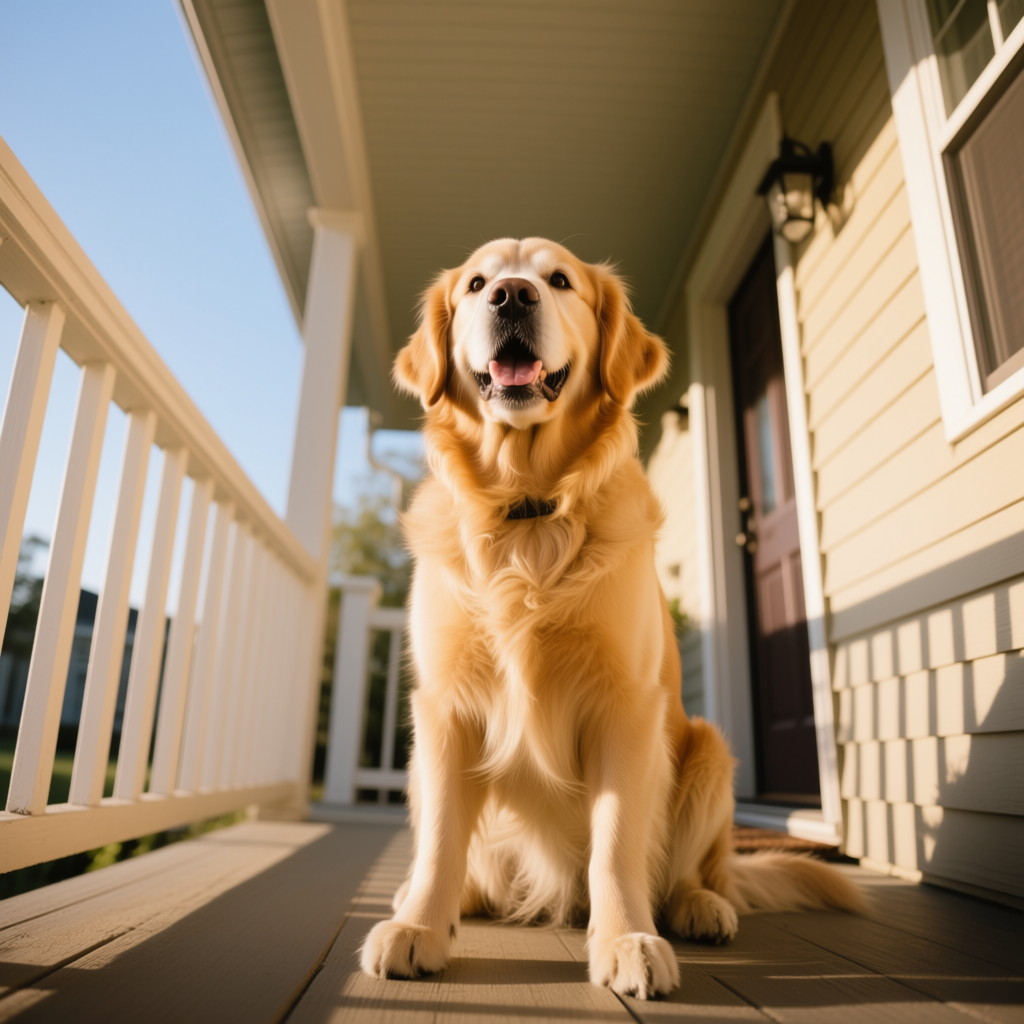
(This prompt uses “eye level” to tell the AI to place the camera at the dog’s height. The result would feel like you’re kneeling in front of the dog – a comforting, equal perspective.)
High Angle Shot
Definition: A high angle shot means the camera is positioned above the subject, looking down at it[1]. This could be a slightly high angle (just a bit above eye-level) or a very high angle (way above, looking almost straight down). For example, imagine standing on a balcony and photographing people on the street below – that’s a high angle view.
Emotional Impact: High angles tend to make the subject look smaller, weaker, or more vulnerable[1][2]. Because we’re looking down on the subject, it can create a feeling that the viewer has some power or insight that the subject doesn’t. The mood can be one of overlooking, vulnerability, or insignificance – the subject might seem less imposing or at a disadvantage. On the plus side, high angles can also feel more informative (since you see more of the surrounding context or ground).
When to Use It: Use a high angle when you want to diminish the subject or show a large area around them. It’s great for scenes where a character is in danger or weak (to make them look small in their environment), or for showing wider context like a landscape or crowd from above. For example, a high-angle shot of a child in a vast room can emphasize the child’s smallness. In storytelling, high angles often set a tone of empathy or observation, letting us see the bigger picture around a subject.
Prompt Example:
high-angle view of a busy street food market, taken from above, crowds of people and colorful stalls below, the people appear small and scattered, vibrant atmosphere
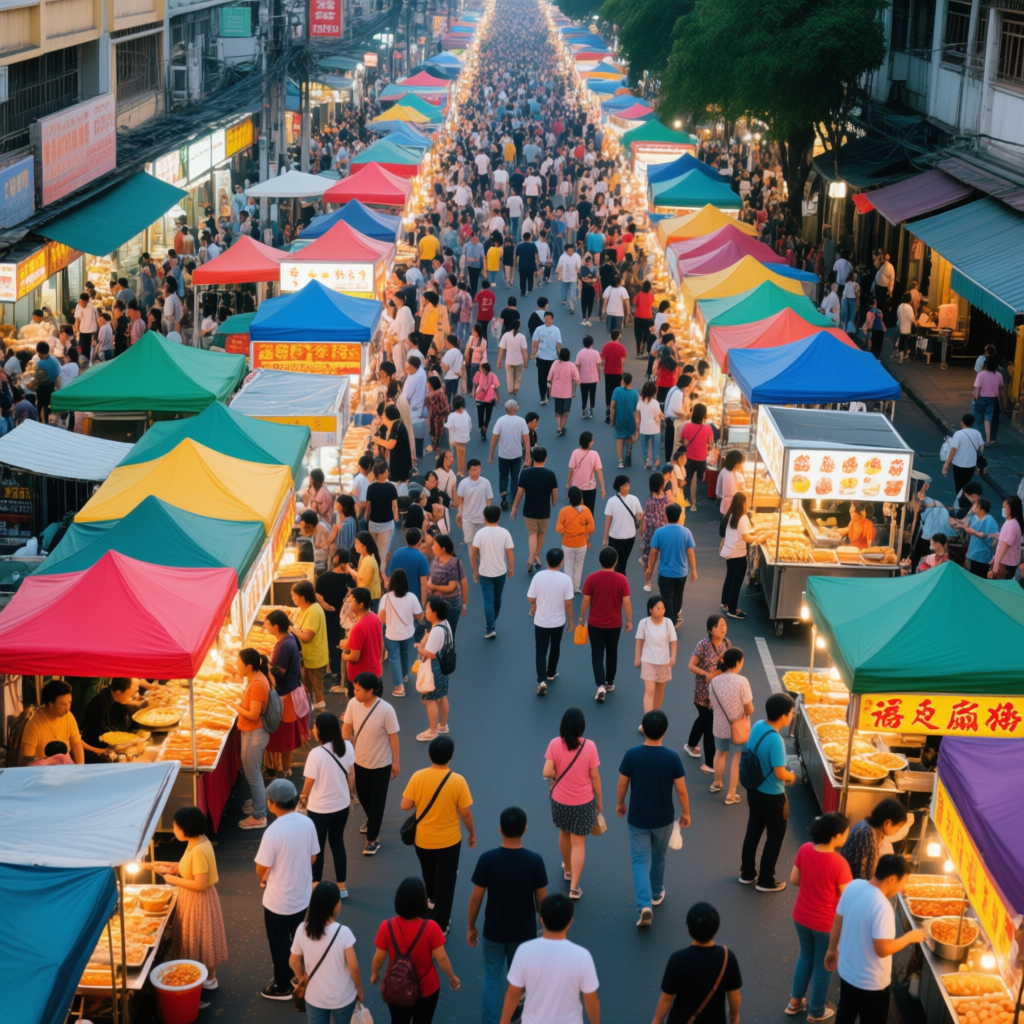
(In this prompt, “high-angle view” tells the AI the camera is up high looking down. The result would likely show a broad view of the market with lots of context, making the people look smaller in the frame – capturing the bustling scene from a bird’s perspective.)
Bird’s-Eye View
Definition: A bird’s-eye view is an extreme high angle shot – essentially, viewing the scene as a bird would from the sky. The camera is placed very high above, often directly overhead or close to it, so that you see the tops of objects and a broad area of the scene. Think of a city as seen from a drone or a map-like view of a landscape. It’s similar to an overhead shot (and sometimes the terms are used interchangeably), but “bird’s-eye” generally implies a wide, far-ranging view from high up.
Emotional Impact: A bird’s-eye view can make the viewer feel powerful or omniscient (all-seeing), since you’re literally looking down on everything like a bird or god. It often causes subjects to appear tiny or insignificant in the grand scheme. This angle can evoke feelings of freedom and perspective (soaring above) or sometimes detachment – we’re removed from the immediate action, observing from afar. It can also create a sense of wonder when showing large-scale patterns or landscapes (like looking down at winding rivers or city grids).
When to Use It: Use a bird’s-eye view when you want to show a big picture or establish the setting from above. It’s perfect for maps, landscapes, cityscapes, or battle scenes where understanding the layout is important. In storytelling, a bird’s-eye can serve as an establishing shot (opening a scene by showing the location from above) or to make characters seem small within a vast environment. It’s also great for artistic shots, like a complex pattern on the ground or a stylistic top-down composition (e.g., people forming shapes that can only be seen from overhead).
Prompt Example:
bird’s-eye view photograph of a dense forest in autumn, looking straight down at the treetops, a patchwork of red, orange, and yellow foliage, tiny winding paths visible between the trees
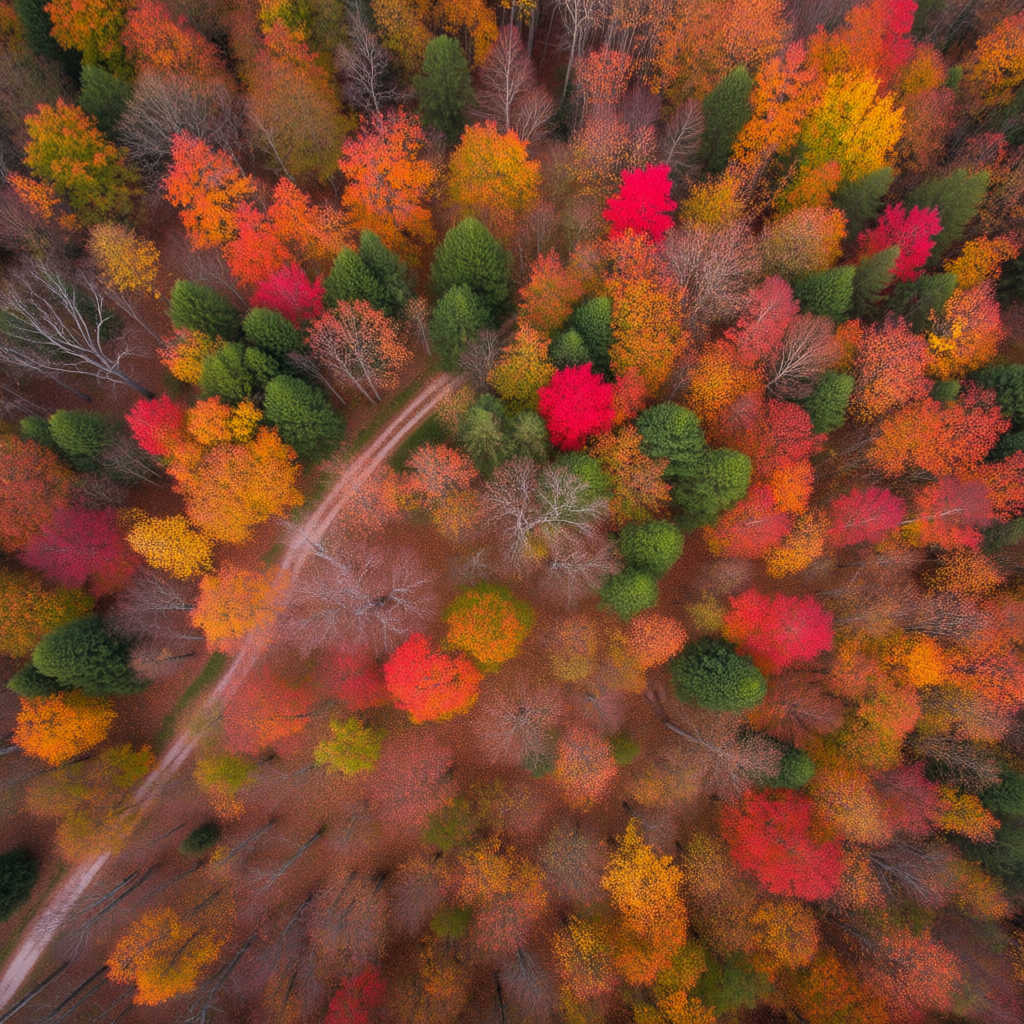
(This prompt uses “bird’s-eye view” and “looking straight down” to get a top-down perspective. The image would likely resemble an aerial photo or drone shot, emphasizing the colorful tree canopy and making any ground details very small – giving a sweeping overview of the forest.)
Overhead (God’s Eye) Shot
Definition: An overhead shot (also known as a God’s eye view) is a specific type of bird’s-eye angle where the camera is directly above the subject, pointing straight down at 90 degrees. It’s as if the camera is hovering right over the scene, looking down like an omniscient “god.” Unlike a general bird’s-eye (which could be angled or just broadly high up), an overhead shot is usually perfectly top-down, often centered on the subject or scene below.
Emotional Impact: Overhead shots feel omniscient and sometimes abstract. They can make the scene look like a layout or blueprint, which might feel a bit detached or clinical. However, when used creatively, they give a unique perspective that we don’t normally see with our own eyes. A person viewed from directly above can seem powerless or fated, as if watched by a higher power, or it can simply highlight patterns and symmetry in the scene. The term “God’s eye view” implies the viewer is all-seeing, which can add a feeling of fate or destiny (common in thriller or dramatic scenes where a character is being watched from above).
When to Use It: Use an overhead shot when you want to create a stylish, unusual view or highlight patterns and geometry in a scene. It’s great for showcasing choreography or layouts – for example, a group of dancers forming a shape, or a lone character lying on a patterned floor seen from above. Overhead angles are also effective in showing relationships in space (who is close to whom, paths people take, etc.) in a single frame. In AI prompts, phrases like “overhead shot” or “view from directly above” will encourage the AI to compose the image top-down. This angle works well for giving a fresh perspective on everyday scenes (like a dinner table setting, a person swimming, or traffic at an intersection) by making them look like a flat design from above.
Prompt Example:
overhead shot of a zen garden, camera directly above the scene, showing concentric patterns in the raked sand and a solitary rock in the center, minimalist composition

(Here “overhead shot” and “camera directly above” tell the AI to position the viewpoint at 90 degrees down. The generated image would likely show the garden as if looking straight down, emphasizing the patterns in the sand and arrangement of elements – a perspective that feels almost like a blueprint or a mandala.)
Low Angle Shot
Definition: A low angle shot means the camera is positioned below the subject, looking up at it[4]. Imagine placing the camera near the ground and pointing it upward toward a person or building. Even a slight low angle (just below eye-level) can count, but often we mean a pronounced low angle (looking sharply up). A classic example is photographing a tall tree from the base, or a person from the level of their feet looking up.
Emotional Impact: Low angles tend to make the subject look large, powerful, or imposing[4][5]. Because the viewer is literally “beneath” the subject in viewpoint, it can convey that the subject has dominance or heroism – they tower over the viewer. The feeling can be awe, intimidation, or respect. For characters, a low angle can give them a heroic stature (think of a superhero shot from below) or, if the subject is something scary, it makes it look extra menacing (looming above you). Low angles add drama and a sense that the subject is important or threatening depending on context.
When to Use It: Use a low angle when you want the subject to appear powerful, grand, or larger-than-life. This is perfect for heroes, leaders, monuments, skyscrapers, or tall trees – anything you want to emphasize height or strength on. In storytelling, low shots are common for triumphant moments (the victor stands tall) or to make villains look intimidating. Even in portrait prompts, adding “low-angle” can give a simple subject a more epic vibe. It’s also useful in nature or architecture prompts – e.g. a low-angle shot of a cathedral interior can highlight how towering and majestic it is. Essentially, if you want the viewer to feel small in front of the subject, a low angle will do that.
Prompt Example:
low-angle photo of an ancient oak tree, camera at ground level looking up at the towering branches, the tree appears giant against the sky, epic perspective
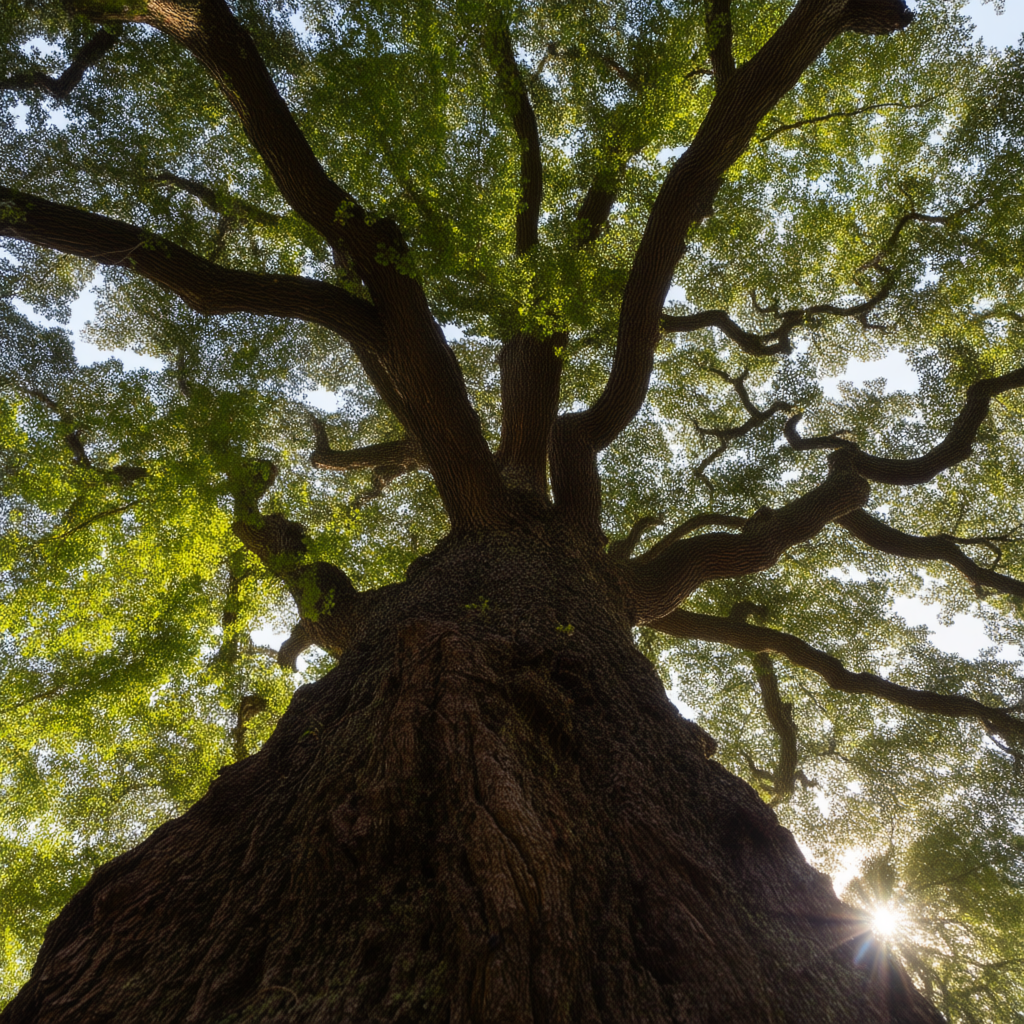
(This prompt uses “low-angle” and “ground level looking up” to ensure the AI takes a worm’s-eye perspective. The resulting image would make the oak tree look massive and majestic, with the trunk and branches stretching upward dominating the frame – a powerful feeling because of the low angle.)
Worm’s-Eye View
Definition: A worm’s-eye view is an extremely low angle shot – as if you’re a worm looking up from the ground. The camera is placed very low, at or even below ground level, and pointed up. This often means you might see things like the underside of objects, or a very steep upward angle that includes the sky. It’s essentially the opposite of a bird’s-eye view. For example, lying on your belly and looking up at a person or object above you gives a worm’s-eye perspective.
Emotional Impact: A worm’s-eye view makes the subject look extraordinarily tall, dominant, or looming, even more so than a standard low angle. It can also create a sense of wonder (everything looks huge and the world looks different from down low) or unease (if used in a dramatic scene, it can feel like the viewer is in a prone or vulnerable position while something towers above). This angle emphasizes vertical scale – everyday objects take on an epic quality when seen from the ground up. It can exaggerate perspective, often making foreground objects look massive. The emotional tone could be awe-struck (looking up at something beautiful like skyscrapers or trees from the ground) or overwhelmed (feeling tiny under something).
When to Use It: Use a worm’s-eye view for maximum emphasis on height and power of the subject, or to show a childlike perspective (since children often look up at everything). It’s great for skyscrapers, trees, statues, or characters meant to appear formidable. In a fantasy or heroic context, it can make castles or giants look even more imposing. It’s also useful for creative shots like looking up from the ground in a forest (to see a canopy and sky) or even abstract shots (imagine a worm’s-eye of table legs and chairs in a room – making a mundane scene look unusual). Prompting with “worm’s eye view” or “from ground perspective” will tell the AI you want that extreme low angle. It’s a fun way to make the viewer feel small in a world of giant things or to capture an insect’s perspective.
Prompt Example:
worm’s-eye view of a city street at night, looking up from the pavement at towering neon-lit buildings and signs, pedestrians’ legs and silhouettes looming above, dramatic lighting
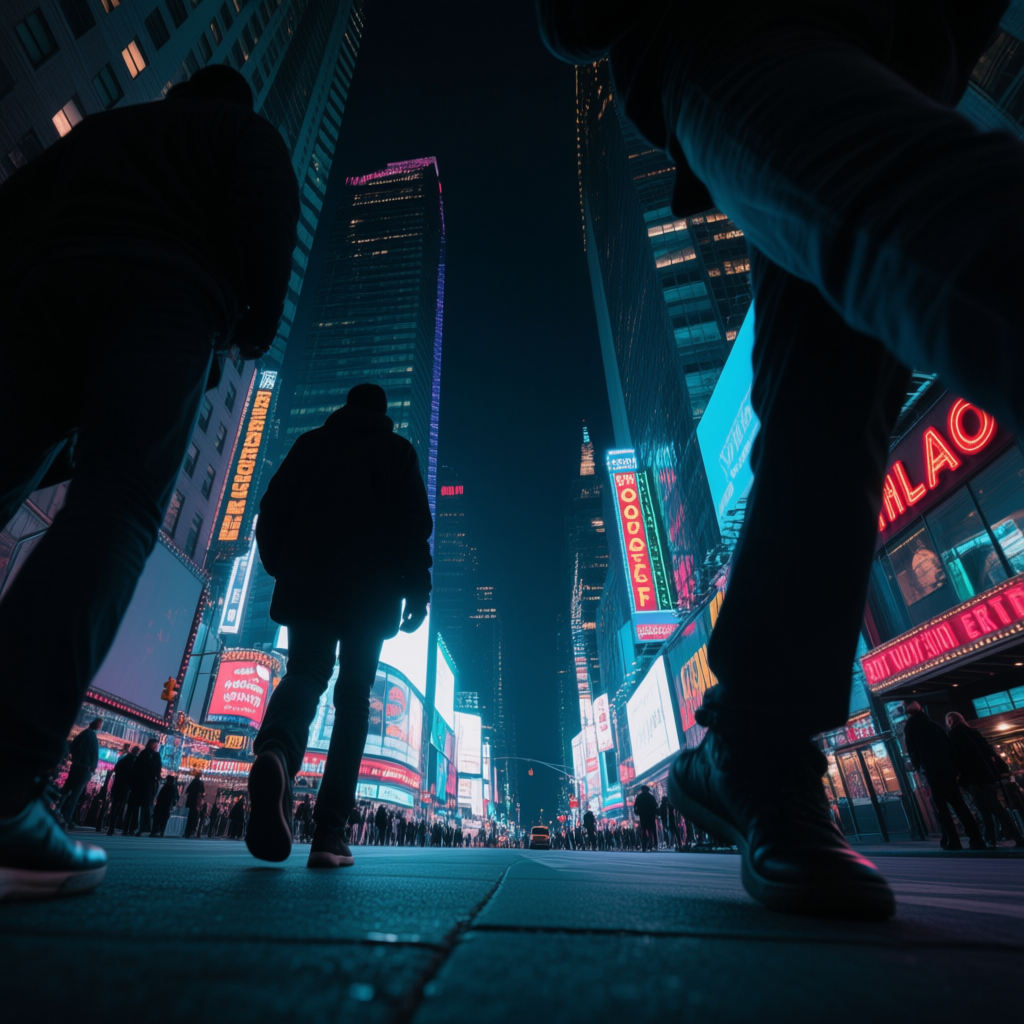
(In this prompt, “worm’s-eye view” signals an extreme low angle. The AI would likely compose the image so the ground is very close, the buildings and people soar upward, and you mostly see the underside of things. The effect would be a dramatic, vertigo-inducing city scene where the viewer feels tiny at street level amidst skyscrapers.)
Horizontal Position / Placement
Horizontal position refers to where the camera is placed around the subject on the horizontal plane – in front of them, to the side, behind them, etc. This changes what side or angle of the subject we see. It’s like walking around your subject to find different views. For example, do we see their face head-on, in profile, or from over their shoulder? By specifying this in prompts, you guide the AI on which side or aspect of the subject to show. Each horizontal angle has its storytelling uses: a front view is direct, a profile can be elegant or distant, an over-the-shoulder puts us into a scene, and a back view can feel mysterious. Let’s break down the main positions:
Front View
Definition: A front view means the camera is directly in front of the subject, facing them. The subject is looking toward the camera (or at least their front side is toward the camera). Think of a standard passport photo or someone facing a camera head-on – that’s a front view. In terms of the image, you mostly see the subject’s full face or front side, symmetrically.
Emotional Impact: A front view feels direct and engaging, as if the subject is confronting or communicating with the viewer. It can create a sense of connection if the subject is looking at the camera (almost like eye contact in an image). If the subject isn’t looking at camera but we see them frontally, it still feels like we have the clearest, most recognizable view of them. The mood can vary: front views are often used for portraits (honest, straightforward) or for presenting something head-on. They don’t inherently add mystery or drama through angle – it’s a very transparent and open perspective.
When to Use It: Use a front view when you want a clear, head-on depiction of the subject – for instance, character portraits, fashion shots, or anytime you want the viewer to see the subject’s full face or front detail. In storytelling, a front angle is good for introducing a main character (we see them clearly) or for scenes meant to feel face-to-face. It’s also useful for symmetry (e.g. a building’s facade straight on). If you imagine instructing the AI, you might use phrases like “frontal view of…” or simply describe the subject facing the camera. It’s straightforward, giving the image a familiar perspective as if we’re a person standing right in front of the subject.
Prompt Example:
front view portrait of a medieval knight standing in a castle hall, facing the camera, showing the intricate armor details on his chest, confident posture, dramatic lighting from the front
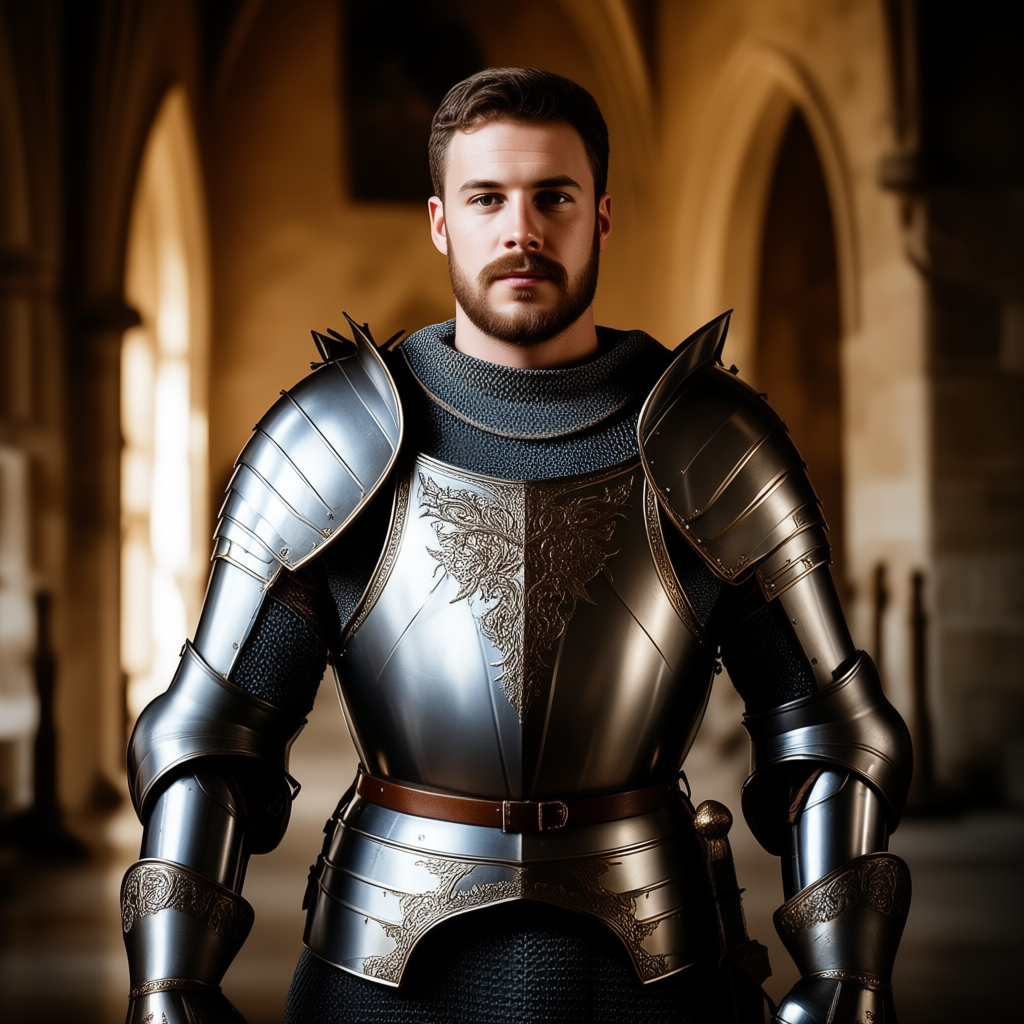
(“Front view” in this prompt ensures the AI presents the knight facing us. The result would show the knight’s full armor and face head-on, creating a direct connection and showcasing details that a side or angled view might hide.)
Three-Quarter View
Definition: A three-quarter view means the subject is turned about 45 degrees away from the camera, between a full front view and a full profile view. We see most of the front and a bit of the side of the face or body. For example, if someone is standing not quite facing the camera but slightly angled, showing one cheek and a bit of their side, that’s a 3/4 view of their face and body. It’s very common in portrait photography because it shows depth (both eyes visible, but some facial outline).
Emotional Impact: A three-quarter view often feels dynamic yet still intimate. It’s less confronting than a full front view (since the subject is not squarely facing you), but more engaging than a strict profile. It can be flattering for portraits – adding depth and dimension to the subject’s features. The viewer gets a sense of volume and form, seeing the front and side. Emotionally, it can come across as friendly but not too direct. It might also introduce a tiny bit of mystery or sophistication, because you’re not seeing everything straight on (the subject isn’t completely “on display” as with front view), yet you’re still seeing their face mostly.
When to Use It: Use a three-quarter view for portraits and character shots to add a natural feel and depth. It’s a go-to angle for painting and photography when you want to avoid the flatness of a front view but still showcase the subject’s face. In prompts, you can say “three-quarter view” or even describe, e.g. “the subject turned slightly to the side”. This angle is great for showing off clothing or body shape too, as it gives a hint of profile. For example, a car is often nicely shown in a 3/4 view (so you see the front and a bit of the side) – it provides more context than just head-on. In storytelling, a character in three-quarter can appear approachable without “staring down the camera”. It’s a balanced perspective that keeps things visually interesting.
Prompt Example:
three-quarter view of a classic sports car parked on a street, the camera showing the front and side of the car, sunlight reflecting off the hood, detailed chrome grille and side curves
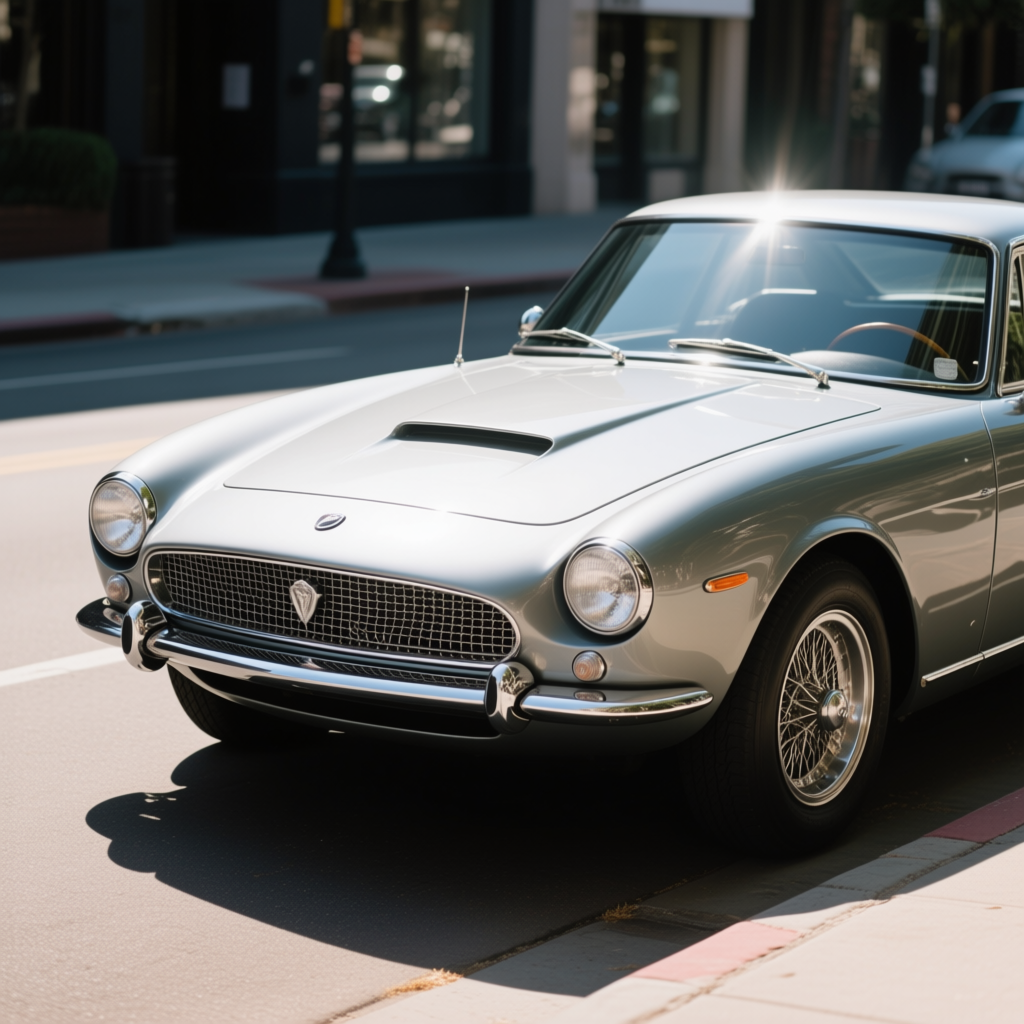
(Using “three-quarter view” here tells the AI to show the car at an angle, not just directly head-on. The expected image would let us see both the front and a good portion of the car’s side, which is often the most appealing way to display a vehicle. It adds depth and allows multiple features (headlights, side doors) to be visible at once.)
Profile Shot (Side View)
Definition: A profile shot means the camera is directly to the side of the subject, capturing them in profile. For a person, this means we see only the side of their face (one eye, the outline of nose/lips, etc.)[6]. Their profile is like the silhouette of their side. In general, a “side view” of any object means we see it from one side straight-on. So a profile of a person or animal is the pure side-on view, and similarly a side view of a building would show its side wall fully.
Emotional Impact: Profile shots can feel detached, formal, or contemplative. Since the subject isn’t facing us at all (we’re looking at their side), there’s a sense of observation – like we’re witnessing them without direct engagement. This can lend a feeling of privacy or introspection (imagine someone staring off to the side and we see their profile – it’s like we’re quietly watching their moment). Profiles can also appear elegant and timeless (think of classic cameo portraits or coins with profile faces). However, because we don’t see both eyes, it’s less emotionally engaging than a frontal view; it’s more about shape, form, and the outline of the subject. In some contexts, a side view might also emphasize distance or coldness (the subject isn’t “looking” at us at all).
When to Use It: Use a profile/side shot when you want to focus on the outline or shape of the subject, or to create a sense of aloofness or formality. It’s great for showing a person’s distinctive silhouette or features (like a sharp nose or a dramatic hairstyle in profile). Profile portraits are often used for artistic effect or when the subject is looking at something out of frame (so we, as viewers, wonder what’s over there). In prompts, you might say “side profile of a woman” or “in profile” to get this effect. It’s also useful for action shots where you want to show motion across the frame (like a runner from the side) – it emphasizes movement from left to right. Additionally, side views are common for diagrams or showcasing the side design of objects (a side view of an airplane, for instance). Storywise, profile angles can imply the subject is not directly interacting with the viewer, which can be used intentionally for mood.
Prompt Example:
profile shot of an elegant ballerina against a dark background, captured in mid-pose from the side, her face and body in perfect side view, soft rim lighting outlining her figure
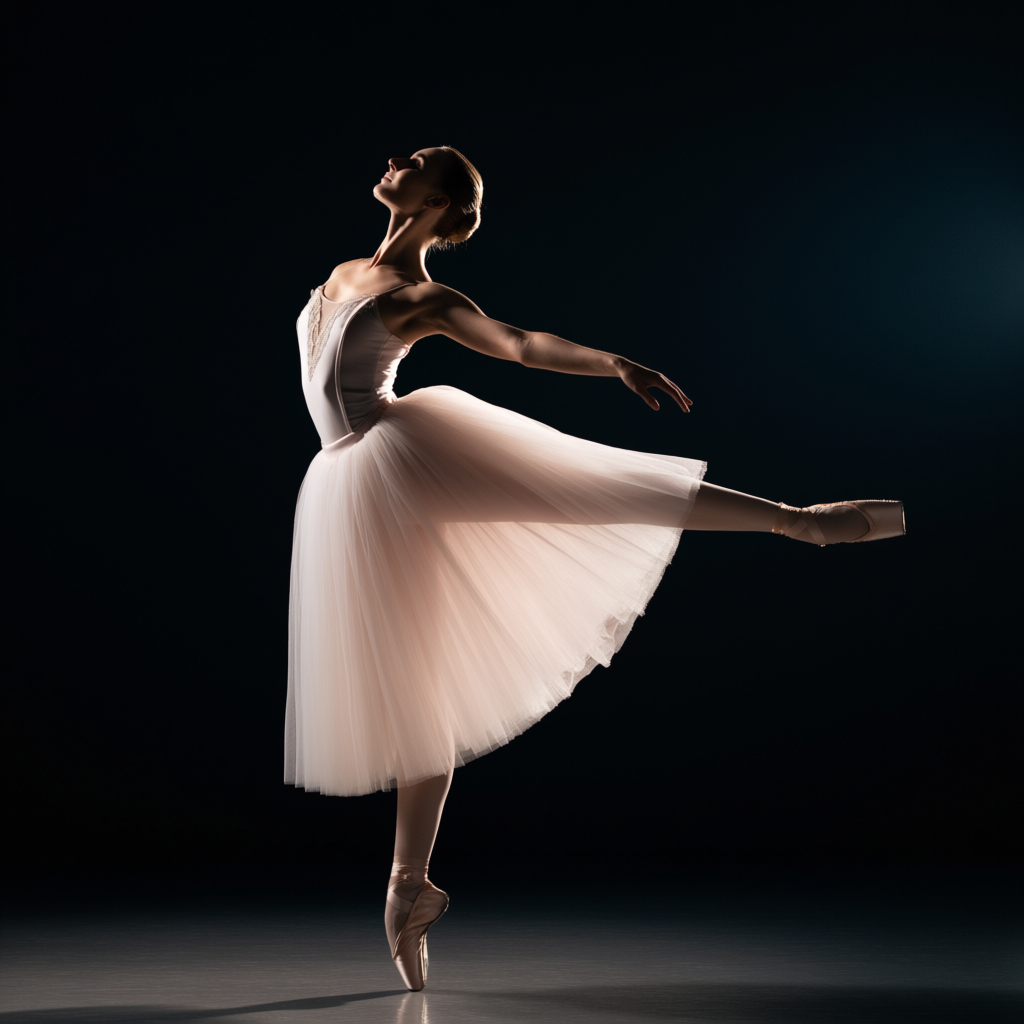
(“Profile shot” here ensures the AI renders the ballerina strictly from the side. The resulting image would highlight the outline of her pose and face. The feeling is artistic and slightly distant, as we see her form and concentration in profile, rather than engaging with the camera.)
Side Angle (Lateral View)
Definition: Side angle is a broader term meaning the camera is positioned to the side of the subject or scene, rather than front or back. It’s similar to a profile, but we use “side angle” especially when talking about observing an entire scene or action from the side. For example, imagine watching a theater play from the wings – you see the actors from the side. Or a classic “side-scrolling” video game view. A lateral view might show how things align in depth (like seeing several people lined up from the side). Essentially, it’s a viewpoint where we are looking across the scene from one side.
Emotional Impact: A side angle can make the viewer feel like a bystander or observer watching the action from the sidelines. It can emphasize movement or direction – for instance, if someone is running left-to-right, a side view captures that motion clearly (with the subject moving across the frame). It sometimes feels a bit more objective or surveillance-like because it’s not the typical angle we interact with people (we usually face them, not stand directly to their side). If used creatively, a lateral view can also highlight depth – elements closer vs farther from the camera along that side perspective.
When to Use It: Use a side angle when you want to showcase movement or the relationship of multiple subjects in profile. For example, a side angle of a train emphasizes its length as it moves, or a side angle of two people sitting on a bench can show them in profile interacting. It’s also useful for technical or educational images (like showing the side view of an object to reveal details not visible from front). In prompts, you might phrase it as “viewed from the side” or simply describe the scene such that the subject is sideways to the camera. A side angle can make an image feel like a candid glimpse of something ongoing (since the subjects might not be looking at us at all). If you combine a side angle with motion blur, you can simulate a tracking shot where the camera moves alongside the subject. Overall, it’s a less common but interesting perspective to include for variety.
Prompt Example:
side angle view of a sprinter racing on a track, captured from the side as they dash left to right, motion blur on the background to emphasize speed, muscles highlighted in the sunlight
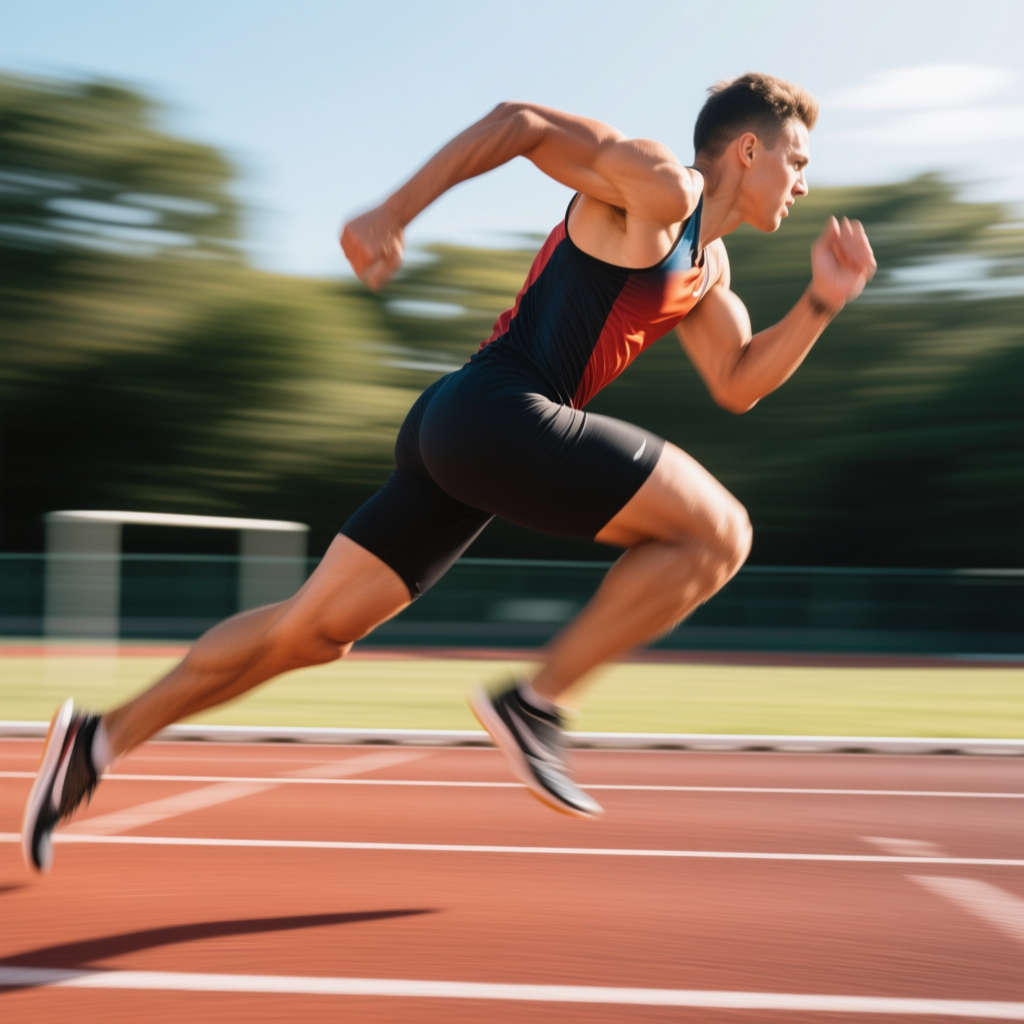
(This prompt’s “side angle view” places the “camera” beside the track. The AI would likely produce an image of the runner in profile mid-stride. We included a hint of motion blur to really sell the idea of movement. The side perspective underscores the sprinter’s forward motion and form.)
Back View (Shot from Behind)
Definition: A back shot or back view means the camera is behind the subject, looking at their back. The subject is facing away from the camera. In the image, you primarily see their back, and possibly what lies ahead of them. For instance, a photograph of someone from behind as they look out over a valley – we see their back and whatever they’re looking at.
Emotional Impact: A back view often conveys a sense of mystery, solitude, or contemplation. Since we cannot see the subject’s face, it creates a slight distance – we’re not reading their expression, instead we’re almost joining them in looking at whatever they face. This angle can make the viewer feel like a silent follower or companion to the subject. It’s great for evoking curiosity (we wonder what the person is thinking or what their face shows) and can feel intimate in a different way – as if we’re seeing a private moment from just behind them. Sometimes back shots are used to make the audience identify with the subject (like you’re standing right behind them, seeing what they see), which can be immersive. Other times it highlights loneliness (a lone figure with their back turned).
When to Use It: Use a back view when you want to emphasize the scenery or situation in front of the subject rather than the subject’s identity or emotions. It’s common in travel or adventure scenes – e.g., an explorer from behind looking at a landscape, which lets the viewer project themselves into the explorer’s shoes. It’s also useful if the subject’s identity is meant to be anonymous or secondary (like a story where the focus is on what they’re gazing at). In prompts, phrases like “from behind” or “back turned to the camera” will achieve this. This angle works well for creating a sense of scale too – e.g., a child seen from behind facing a huge castle emphasizes the castle’s grandeur and the child’s wonder. It’s a powerful storytelling angle to show relationships between a character and their world.
Prompt Example:
shot from behind of a lone traveler standing on a cliff edge, their back to the camera as they face a vast sunset over the ocean, wind blowing through their coat, epic and contemplative mood
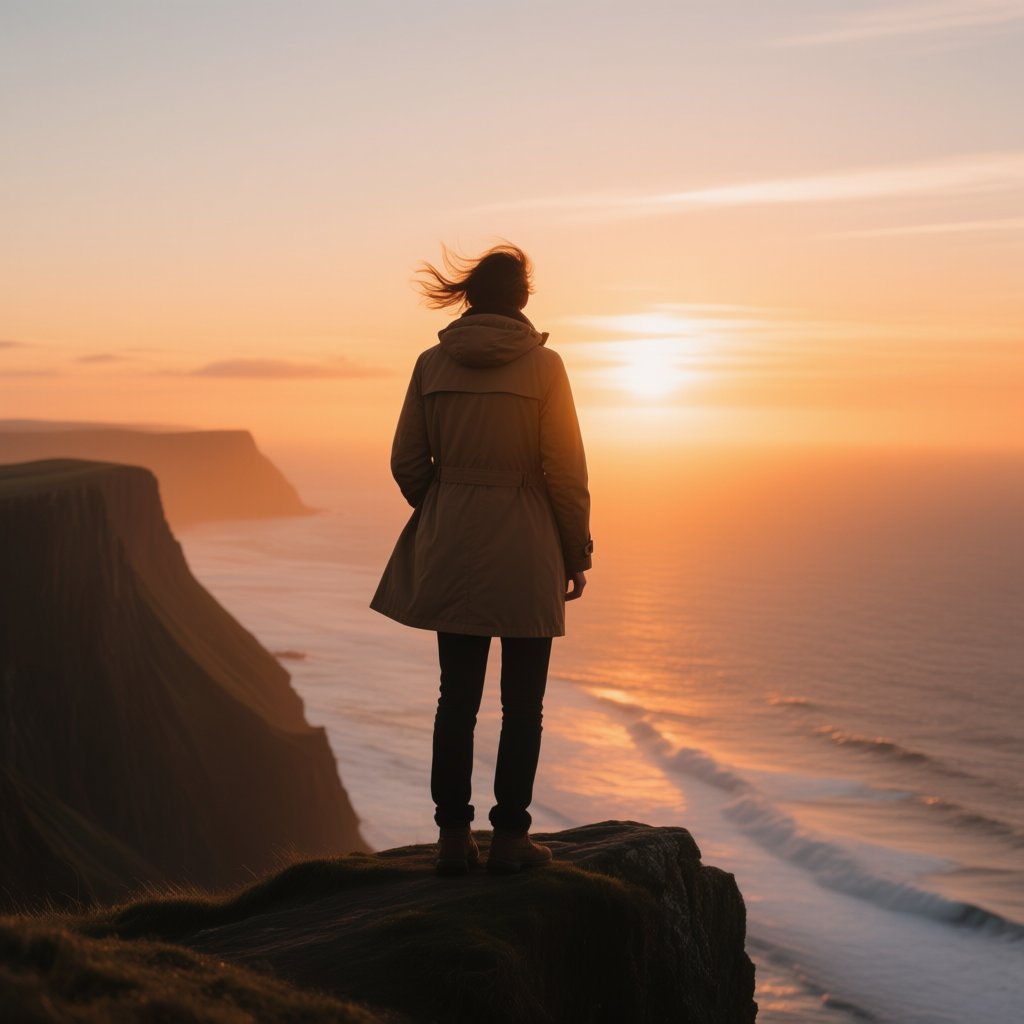
(In this prompt, “shot from behind” clearly instructs the AI that the traveler is facing away from us. The resulting image would likely show the person’s back silhouette against the sunset. The emotional effect is a bit mysterious and reflective – we share the traveler’s viewpoint of the magnificent scene, rather than focusing on the traveler’s facial expression.)
Over-the-Shoulder Shot
Definition: An over-the-shoulder (OTS) shot places the camera just behind one subject’s shoulder, peeking over it, usually to frame another subject or the main scene in front of them[7][8]. In the image, you see a blur or partial view of the shoulder/back of the person who is closest to camera, while the focus is on something beyond that person. This is a common angle in dialogues: you see Person A’s shoulder/head in the foreground and Person B facing them in the midground. Essentially, it’s a hybrid of a back view and a front view – you are behind one character, looking past them.
Emotional Impact: Over-the-shoulder shots create a sense of presence and immersion. It feels like you, the viewer, are literally standing right behind a character, looking at what they see. This builds a feeling of involvement in the scene, almost as if we’re eavesdropping or participating. It also helps establish relationships and perspectives: we see the scene from one character’s point of view (though still observing them). Emotionally, it can make conversations feel more intimate and connected, or make confrontations feel tense (we’re allied with the perspective of one person). It can also generate suspense if used with a hidden or unknown foreground figure (like seeing a scene over the shoulder of someone whose identity we don’t fully see).
When to Use It: Use an over-the-shoulder angle to put the viewer in a scene with multiple characters, especially for conversations or confrontations. It’s perfect for dialogue – e.g., over Detective A’s shoulder while they talk to Suspect B, letting us see B’s face and A’s back. In prompts, you can say “over-the-shoulder of [character] looking at [something]”. This angle works not only for people but also creatively – e.g., “over-the-shoulder of a soldier aiming a weapon” (to show what they’re targeting) or even over the shoulder of a robot or creature to reveal what they observe. It inherently adds depth to an image, because you have a foreground (blurry shoulder) and a focused subject in mid-frame[7]. It’s a great way to guide the viewer’s eye to the main subject while giving context of who is observing. It also establishes a point of view in a narrative sense: we feel aligned with the foreground character. Overall, use OTS when you want the viewer to feel like a participant or observer within the scene rather than an outside onlooker.
Prompt Example:
over-the-shoulder shot of a young wizard reading an ancient book, the camera peering past the wizard’s shoulder at the glowing text on the pages, the wizard’s face in profile as they concentrate, candlelight illuminating the scene
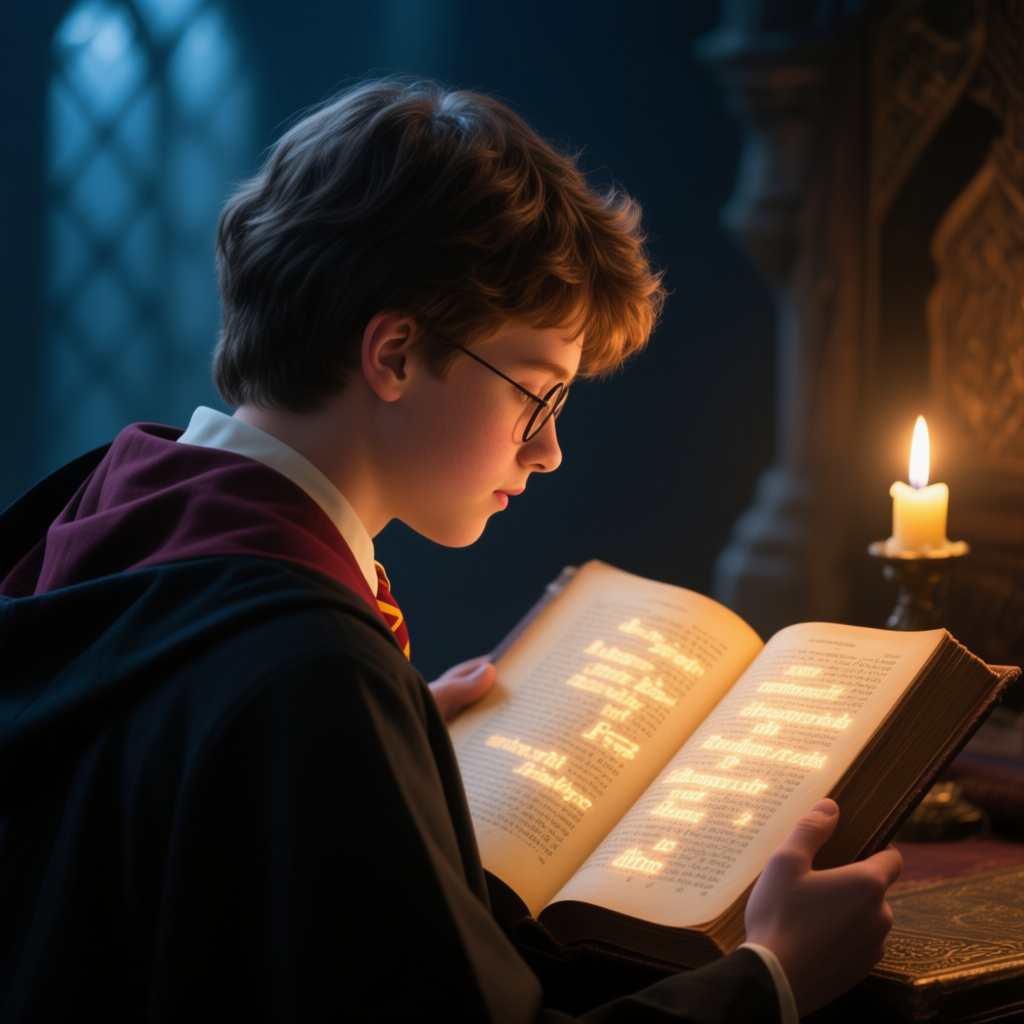
(This prompt’s “over-the-shoulder shot” indicates the perspective is just behind the wizard. The AI would frame it so part of the wizard’s shoulder or side is visible in the foreground, while the main focus is on the book and possibly the wizard’s face in partial profile. It makes the viewer feel as if we are right behind the wizard, sharing in the secret knowledge from the book.)
Reverse Angle Shot
Definition: A reverse angle shot is a term from filmmaking that means showing the opposite viewpoint of the previous shot. Essentially, it’s the “other side” of an interaction or scene[9]. For example, if one shot is over-the-shoulder from behind Character A looking at Character B, the reverse angle would be over-the-shoulder from behind Character B looking back at Character A. In a single image context (since we aren’t literally doing a sequence), asking for a “reverse angle” implies you want to see the scene from the opposite side than a current viewpoint might be. It’s like saying: show me what the other person would see.
Emotional Impact: The concept of a reverse angle is about providing a new perspective or the other side of the story[9]. It can be jarring or enlightening – you’re essentially flipping the viewpoint 180 degrees. In a single image, using a reverse angle can be a bit abstract, but it could be used to reveal something previously unseen (because now we’re seeing the front of the person whose back was turned before, for instance). Emotionally, it often goes hand-in-hand with the over-the-shoulder feeling: together they create a dialogue. A reverse angle alone, if interpreted by AI, might simply give an alternate view that could feel like a continuation or a counterpart to another image. If presented alone, it might feel like the subject is now looking back at where the camera was, which could add a sense of interaction or confrontation (like suddenly we’re on the other side of the table facing them).
When to Use It: In an interactive story or multi-image context, you’d use reverse angle to show both sides of a conversation or scene. In a single prompt, you might use it to indicate you want a perspective flip. For example, you might have one prompt image “over-the-shoulder of A looking at B”, and another prompt “reverse angle showing over-the-shoulder of B looking at A”. If you just have one image, saying “reverse angle shot of X” implies showing the action from the opposite side than usual. It can be an interesting way to get the AI to consider an unconventional viewpoint (maybe revealing background elements that would normally be behind the camera). If you imagine a photographer walking around the subject 180°, that’s the reverse angle from the original spot. Use it when you want to highlight the interaction or show the other side of something. It’s especially relevant if you already have a mental image of one angle and want the other side. In prompts, you can literally say “reverse angle of…” or “from the opposite side, we see…”.
Prompt Example:
reverse angle shot of a film scene: camera positioned behind the audience looking toward a stage, showing the back of a few audience members’ heads and the actors on stage facing the camera, spotlight on the actors
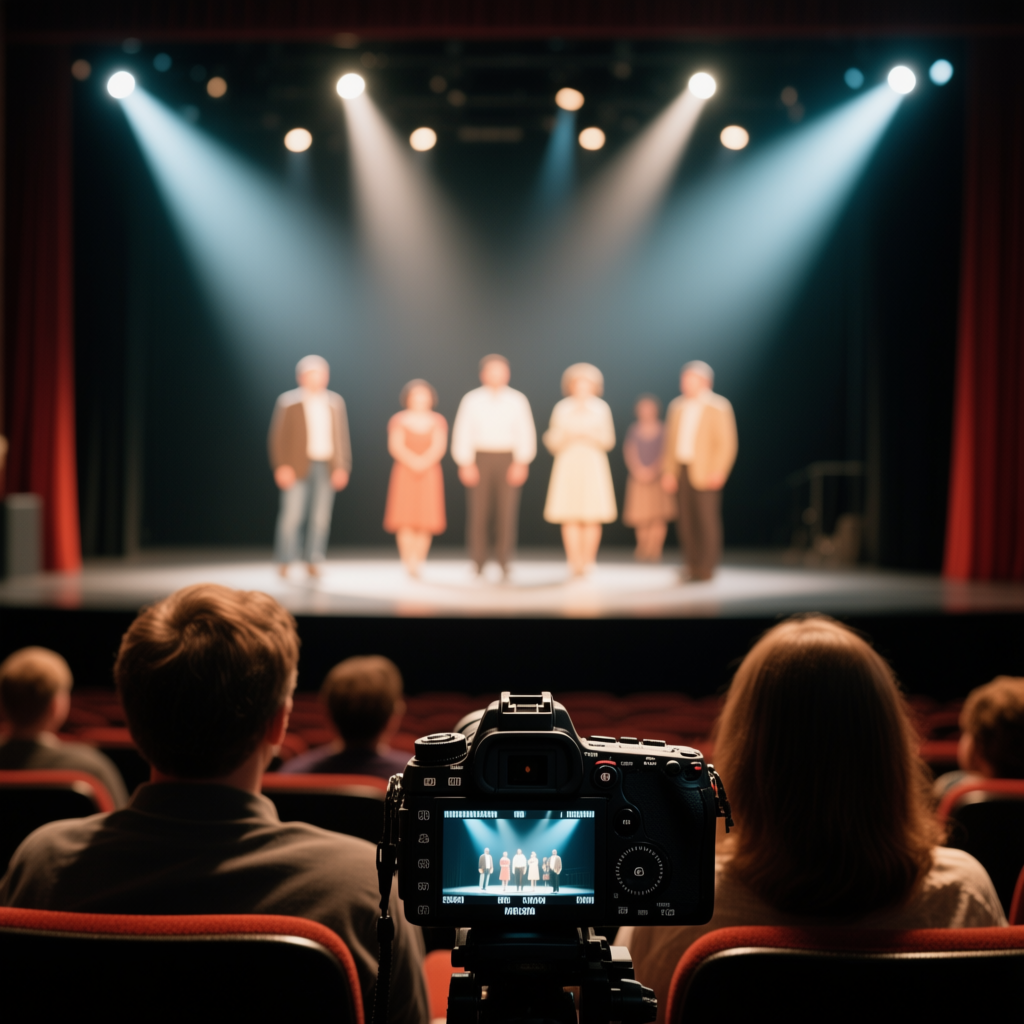
(This prompt uses “reverse angle” creatively – instead of a typical shot facing the stage from the audience, it reverses the view to behind the audience. The AI should produce an image as if the camera is on stage looking back at the crowd, giving an unusual perspective with the performance in foreground facing the camera and the audience’s backs visible. This demonstrates how specifying a reverse angle can flip the usual point of view for a fresh take.)
Framing & Subject Size
Framing and subject size refers to how much of the subject (and scene) is shown in the shot, as well as certain ways to frame the subject within the image. In simpler terms, this is about whether it’s a close-up of someone’s face, a medium shot showing waist-up, a full-body shot, or a wide shot showing the whole environment. Framing choices strongly affect the viewer’s focus and emotional distance from the subject: a close-up feels intimate, a wide shot feels more distant but gives context. We’ll also touch on a couple of framing techniques (like including an object in the foreground) that add depth. These terms are borrowed from film and photography but are very handy for AI prompts to control how zoomed in or out the scene is.
Note: You can mix framing keywords with angle keywords. For example, “a low-angle close-up” or “high-angle wide shot” – this tells the AI both how to angle and how tightly to frame the subject.
Here are the common framing/size types:
Extreme Close-Up (ECU)
Definition: An extreme close-up is a shot that zooms in very tightly on a detail of the subject. It might show only part of a face (like just the eyes or lips) or a small object filling the frame. In human terms, an extreme close-up often crops out everything except an intense detail (for example, a single eye with a tear, or the hands doing something). This is closer than a standard close-up – it’s “zoomed in” to an extreme degree, so that the subject fills the frame completely and little to no background is visible[10].
Emotional Impact: Extreme close-ups feel intense, dramatic, and sometimes uncomfortable. They focus the viewer’s attention on one very specific thing, which can create tension or significance. For instance, seeing just someone’s eyes in terror or excitement can heighten emotion because we pick up all the tiny details (dilated pupils, wrinkles, tears). It can also feel claustrophobic or intimate because you’re literally “in their face” or right up against a detail. ECUs are often used to signal that something is very important or to make the audience notice something they normally wouldn’t (like the tremble of a hand, or a key turning in a lock). They can increase suspense (in thrillers, an extreme close-up might show a bead of sweat or a ticking bomb countdown). Overall, the mood is highly charged – either emotionally (for faces) or narratively (for object details).
When to Use It: Use an extreme close-up prompt when you want to highlight a specific detail or create a strong emotional punch. For example, “extreme close-up of an eye” to show reflection or emotion, or “extreme close-up of a butterfly’s wing” to show texture. In AI prompts, including “extreme close-up” or “ultra close-up” will push the AI to frame the subject very tightly. This is great for emphasizing texture, patterns, or subtle expressions. It’s also useful if your subject is something small that you want to appear large in the image (like a drop of water, an insect, etc.). Be aware that an ECU leaves out context, so it’s best used when the detail itself can tell a story or evoke curiosity. It’s the shot of choice for drama – think of those iconic film moments focusing on a character’s eyes shifting, or a finger on a trigger. In AI art, an extreme close-up can produce very striking portraits or abstract images due to the level of detail.
Prompt Example:
extreme close-up of a person’s eye with vibrant hazel iris, reflections of a city skyline visible in the eye, high detail, cinematic lighting
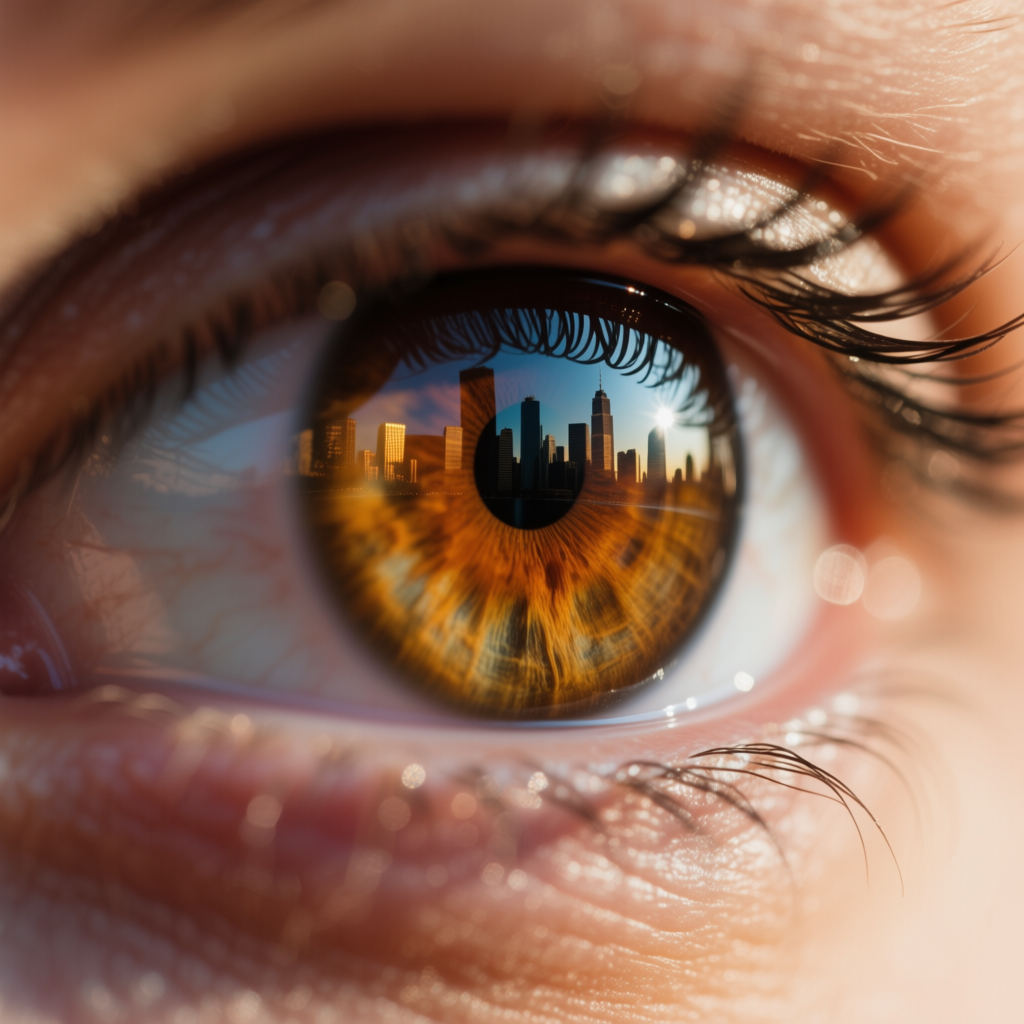
(Here “extreme close-up” directs the AI to focus only on the eye. The resulting image would likely have the eye filling most of the frame, every detail of the iris and eyelashes in focus. This gives an intense, dramatic feel – we’re literally seeing the city reflected in their eye, a very metaphorical and emotional image possible only with such tight framing.)
Close-Up Shot
Definition: A close-up is a tightly framed shot that focuses on a subject’s face or a specific object, filling most of the frame with it[11]. For a person, a close-up usually means we see their head (and maybe shoulders) with little else; the background is minimal. If it’s an object, a close-up means the object nearly fills the image. Essentially, the camera is close to the subject, capturing detail and expressions clearly.
Emotional Impact: Close-ups create a feeling of intimacy and intensity. With a person’s face filling the frame, the viewer can clearly see subtle expressions and emotions[12]. This builds a strong emotional connection or empathy, as we are “up close and personal.” It can also heighten tension or importance – whatever is in a close-up is what the audience must pay attention to. The background or context is largely out of view (often blurred if it’s a photo), so all focus is on the subject. This can make the moment feel significant or dramatic. If the subject is an object (e.g., a close-up of a phone ringing), it tells the viewer “this is important.” With people, close-ups often convey vulnerability or emotion – every little twitch or tear is visible. The mood depends on the expression: could be romantic, sorrowful, fearful, etc., but always magnified by the closeness.
When to Use It: Use a close-up when you want to highlight emotions or details. In character prompts, “close-up portrait” will yield an image focusing on the face (great for showing emotion, makeup details, character features). It’s ideal for faces, flowers, food, or any subject where detail matters. For example, “close-up of a rose” will emphasize the petals and textures intimately. In storytelling, close-ups are used at critical emotional moments – when a character is crying, or making a crucial decision, etc. They’re also common in product or nature photography prompts when you want to capture fine detail (like “close-up of a butterfly on a leaf”). Including “close-up” in your prompt usually ensures the AI doesn’t show the whole body or scene, but zooms in to the subject. This is a powerful way to remove distractions and make the subject the clear focus. It’s especially effective if the subject has expressive features or intricate detail to appreciate.
Prompt Example:
close-up portrait of an elderly woman laughing, her face filling the frame, every wrinkle showing years of stories, soft diffused light, shallow depth of field with a blurred background
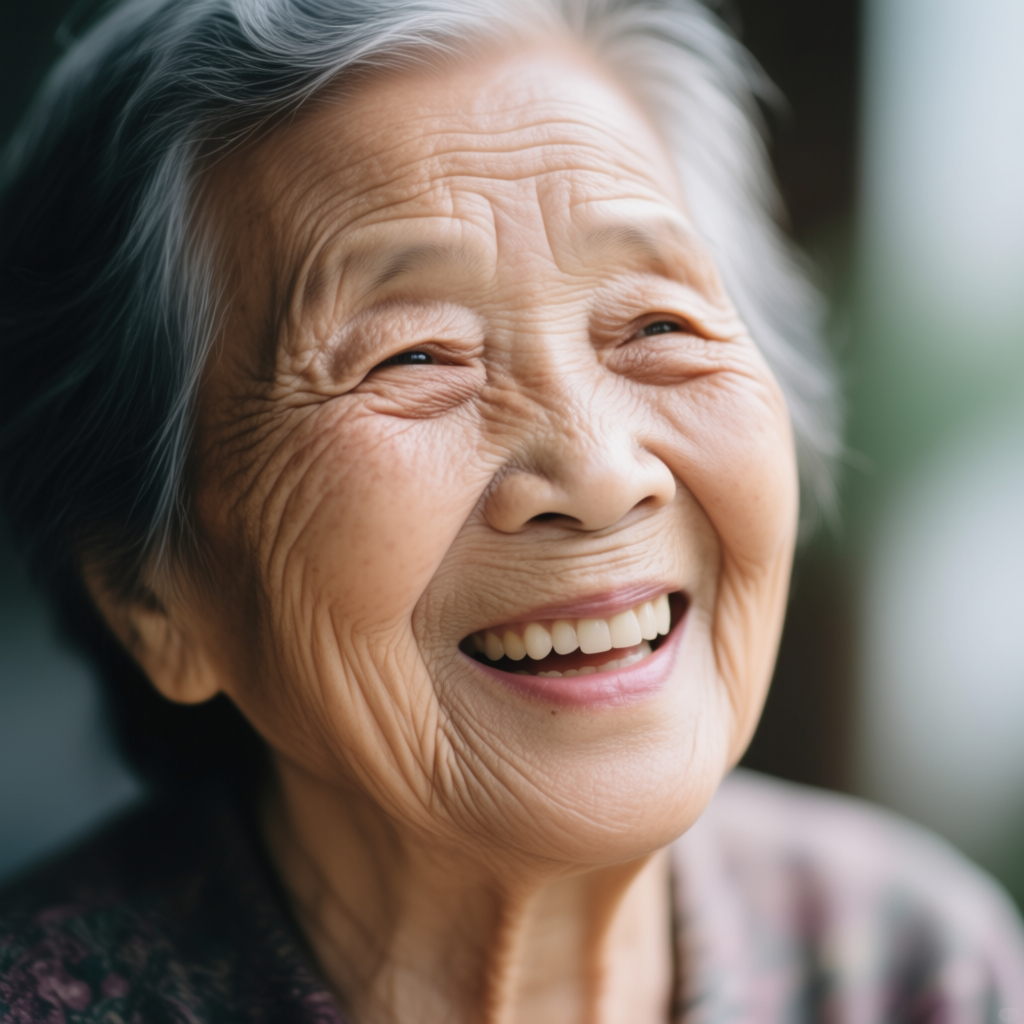
(The prompt “close-up portrait...face filling the frame” instructs the AI to zoom in on the woman’s face. We’d expect an image where her expression is front and center – you can see the joy in her eyes and details of her wrinkles clearly, while the background is out of focus. This creates an intimate, humanizing mood that a wider shot wouldn’t capture as strongly.)
Medium Shot
Definition: A medium shot frames the subject from a moderate distance – typically around the waist up for a person[13][14]. It strikes a balance between close detail and background. For example, if someone is standing, a medium shot might show them from their head down to their hips or waist. In general, it shows enough of the person to see their posture and some surroundings, but it’s closer than a full-body shot. It’s often called a ¾ shot if it’s mid-thigh or knees up[15], but generally “medium” means neither too close nor too far.
Emotional Impact: Medium shots are very neutral and versatile. They allow the viewer to see body language and some context while still being close enough to catch facial expressions, albeit not as detailed as a close-up. The feeling is similar to standing a few feet from someone during a conversation – it’s a natural social distance. This angle often feels comfortable and balanced. It doesn’t carry the intense intimacy of a close-up, but it’s more engaging than a distant shot. You can catch the subject’s gestures, how they interact with their immediate environment, and still recognize emotion. The mood can vary widely; because it’s such a standard framing, it often simply lets the content of the scene speak without the framing itself adding strong bias.
When to Use It: Use a medium shot when you want to show a person (or subject) in context but still prominently. For character prompts, if you say “medium shot of a character” you’ll likely get about waist-up framing – great for showing an outfit or a character holding something, etc., while still seeing face and hands. It’s the go-to for dialogue scenes in film (two people talking are often shot in medium so you see some expression and hand movements). In AI prompts, you might not always use the term “medium shot” explicitly (though you can). You could also specify how much of the body is shown, like “from the waist up.” Medium shots work well for showing interactions (like a person sitting at a table, you’d see them and part of the table setting). They are good for group shots too (a medium two-shot might show two people from the waist up). Essentially, choose medium when you need to balance character and setting – enough background to know where they are (a hint of location), and enough focus on the subject to know who they are and what they’re doing with their upper body. It’s a very natural composition for storytelling.
Prompt Example:
medium shot of a chef in a kitchen, from the waist up, chopping vegetables on a counter, you can see the stove and pots in the background, the chef smiling as they work
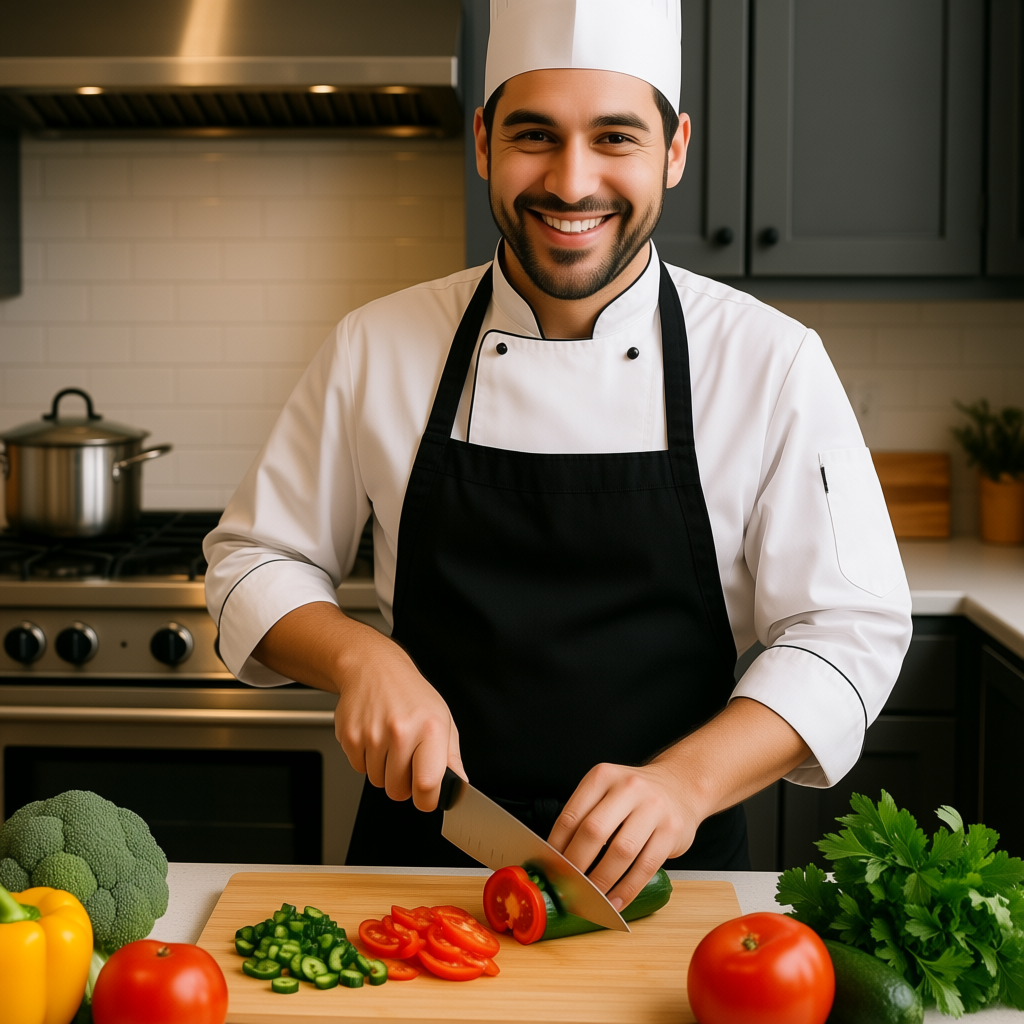
(This prompt implicitly uses medium framing by saying “from the waist up.” The AI should frame the image such that the chef is visible from mid-torso upward. We’ll see the chef’s face and hands working, plus some kitchen environment around them. It’s a balanced view – we get context (it’s a kitchen) and the subject’s action (chopping, smiling) clearly, which is exactly what medium shots are great for.)
(I left that cucumber-tomato thing he's chopping because its wild...LOL.)
Medium Long Shot (3/4 Shot)
Definition: A medium long shot (sometimes called a three-quarter shot or ¾ shot) frames a person roughly from the knees up (or mid-thigh up)[15][16]. It’s a bit wider than a standard medium. This shot includes most of the body but usually not the feet. It was historically called a “cowboy shot” in film because it could capture a cowboy from knees up (showing their holstered guns). Essentially, it’s halfway between a medium shot and a full shot.
Emotional Impact: Medium long shots still allow the audience to see facial expressions (though not as closely as a medium) while getting a better look at the subject’s body language and attire. The effect is that the viewer feels a little more detached than a tight shot, but still connected. Because more of the body is visible, the subject’s pose and stance become part of the storytelling (are they confident, slouched, hiding something behind their back, etc.?). It also introduces more of the environment than a medium shot would, which can either add context or reduce intimacy slightly. The mood can remain character-focused, but now we’re also noticing what’s immediately around them. It’s a classic framing for showcasing a person in their setting without going too far away.
When to Use It: Use a medium long shot when you want to show a character’s body language or costume in detail, while still being close enough to read some facial expression. In prompts, you might specify “3/4 shot” or simply describe the framing: e.g., “a woman standing (knees up) in a field”. Many times, you don’t need to explicitly say it; describing the subject’s pose fully will often result in the AI framing them at least down to the knees. But if you want to be sure, mention “medium long shot” or similar. This shot is great for showing outfits (fashion photography often uses 3/4 shots so you see the model head-to-knee) and for scenes where the lower body action matters (someone reaching into a pocket, or standing in a particular stance). It’s also useful for two-person interactions where you want to see both people fairly fully but still somewhat close. Essentially, it gives a well-rounded view of the subject – you see their face, their posture, and a fair bit of background. Use it for a balanced mix of character and environment, leaning slightly more on the character.
Prompt Example:
medium long shot of a Victorian-era woman standing by a garden gate, framed from about the knees up, showing her elegant dress in detail, she’s holding a parasol, gentle afternoon light
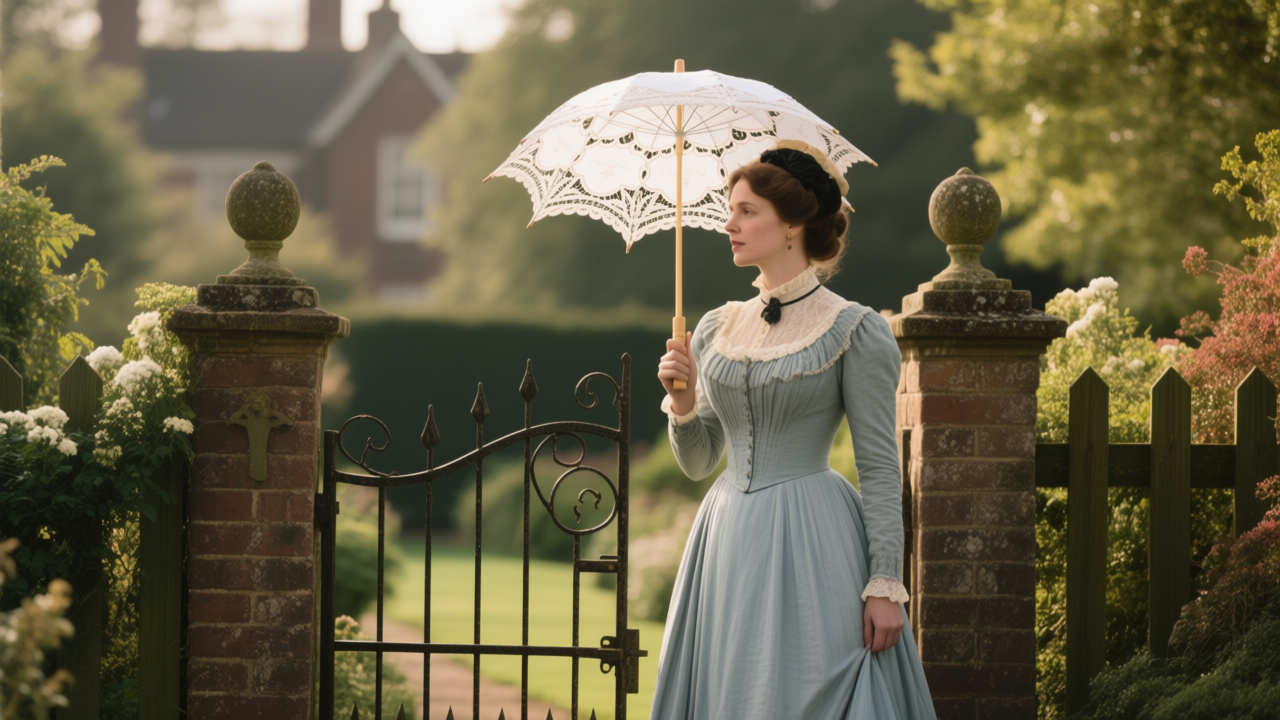
(“Medium long shot… from about the knees up” in this prompt tells the AI to include the woman’s dress and pose more fully. The image would likely show the woman’s figure from knees to head, revealing the style of her gown and parasol, while still being close enough to discern her facial features and the delicate mood. We also get a bit of the garden background, given the slightly wider frame, which helps set the scene.)
Full Shot (Wide Full-Body Shot)
Definition: A full shot (also just called a wide shot or long shot in some contexts[17]) frames the subject’s entire body head-to-toe. If it’s a person, you see them from top to bottom with some space around them. This shot includes the person’s whole form and a good portion of the surroundings. In a full shot of a character, you can see their stance and movements clearly. Essentially, the subject fully fits in the frame with little cropping.
Emotional Impact: Full shots give a sense of context and environment while still keeping the subject as a significant focus. The viewer can observe body language head-to-toe, which can convey a lot (confidence in how someone stands, weariness in their shoulders, etc.). Because the camera is further back compared to close or medium shots, there’s a bit more emotional distance – we’re not as zeroed in on facial emotions, but we get a broader picture of the scenario. The mood can vary widely: a full shot of a solitary person in a big space can emphasize loneliness or freedom (depending on context), whereas a full shot of a group can show relationships through positioning. It’s often used to present action (like a fight or dance) where seeing the whole body movement is important. It tends to feel more objective than an up-close shot, as if we’re watching the scene unfold from a respectful distance.
When to Use It: Use a full shot when you want to show the entire figure of your subject and integrate them into their setting. In prompts, terms like “full body shot” or “wide shot of a person” are useful. You might also simply describe the scene such that a full body would naturally appear (e.g., “a person walking on a beach” – likely the AI will show the whole person small in the environment). Full shots are great for action scenes, group shots, or character introductions with environment. They allow you to showcase costumes/outfits head-to-toe (for fashion or character design). They’re also used for establishing what a character is doing with their whole body – like someone running, dancing, or gesturing largely. If you have a beautiful background you also want to feature along with the character, a full shot helps include both. Essentially, pick a full shot when the relationship between the character and their surroundings or their full physical action is important to visualize.
Prompt Example:
full shot of a samurai in a bamboo forest, the warrior standing in full traditional armor from head to toe, holding a katana, surrounding tall bamboo stalks visible around him, morning fog at his feet
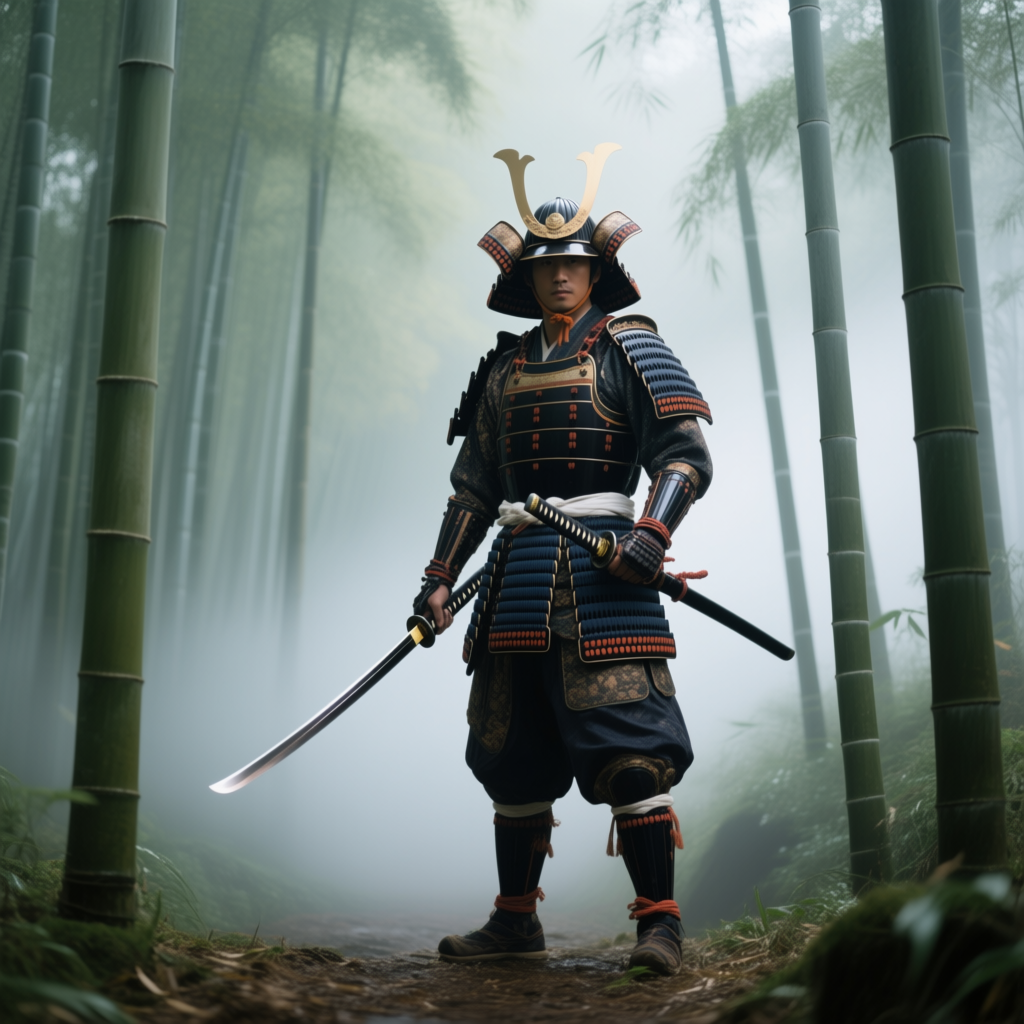
(In this prompt, “full shot... from head to toe” ensures the AI will show the entire samurai’s body in frame. The image will likely capture the samurai’s stance and full attire, set against the bamboo forest context. This wide framing allows the environment (bamboo, fog) to share the scene with the subject, creating an atmosphere. The samurai’s posture and the space around him tell as much of the story as his facial expression would.)
Extreme Wide Shot (Very Wide / Distant Shot)
Definition: An extreme wide shot shows the subject very small in the frame with a vast amount of the surrounding environment visible. Sometimes the subject isn’t even visible at first glance because the camera is so far away. Think of a sweeping landscape where maybe a tiny figure is standing on a hill – that’s an extreme wide. This shot is also called a very long shot or establishing shot when used at the start of a scene to set location (though establishing can be closer too, extreme wide is one form of it).
Emotional Impact: Extreme wide shots emphasize scale, distance, and environment. They can make the subject appear insignificant, lonely, or overwhelmed by the surroundings, or conversely highlight the grandeur of the environment. The viewer’s emotion leans towards awe or contemplation rather than intimacy – we’re observing the scene from afar. These shots often evoke a sense of grandeur or isolation. For instance, a tiny person in a huge desert gives a sense of solitude and the power of nature. There’s also often a calm or epic quality – we’re taking in the big picture, which can feel expansive and sometimes humbling. Since details on the subject are not clear, the emotional tone comes more from the composition and setting: vastness, emptiness, bustling cityscape, etc., depending on what’s shown.
When to Use It: Use an extreme wide shot when the environment or scope is a key part of the story you want to tell. In prompts, you might say “wide shot of [place], with a tiny [subject] in the distance” or explicitly “extreme wide shot”. This is perfect for establishing locations (e.g., “a tiny cottage on a wide mountain range, extreme wide shot” to show the scale of mountains) or for art where the scenery is the star and characters are secondary. It’s also great for conveying loneliness or adventure – the hero against the world. If you have a very detailed background you want the AI to draw out (like a panoramic city or landscape), this framing encourages that. In storytelling, you often see this as the opening shot or a transition shot to give the audience breathing room and context. In AI art, including such a perspective can yield breathtaking scenic images. Just remember, the focus is not on facial expressions or small details, but on the big picture.
Prompt Example:
extreme wide shot of a desert landscape at dusk, an endless expanse of dunes under a purple sky, a tiny silhouette of a camel and rider visible on the horizon, vast and quiet atmosphere
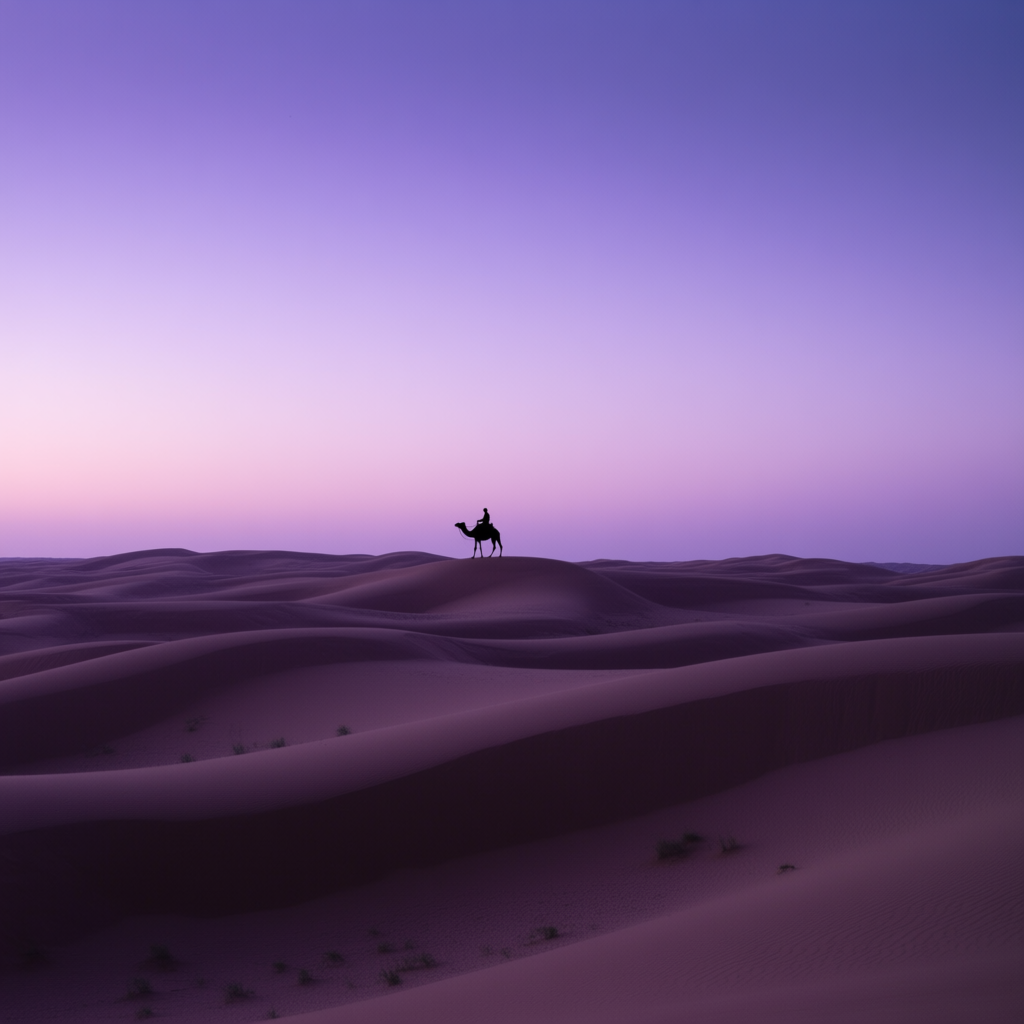
(Here “extreme wide shot” cues the AI to make the dunes and sky the dominant elements, with the camel rider as a very small figure. The expected image would convey the enormity of the desert and the solitude of the lone traveler. The emotional effect is one of awe at the landscape’s scale and perhaps a sense of the traveler’s lonely journey – feelings delivered by the super wide framing.)
Establishing Shot
Definition: An establishing shot is a wide (often very wide) shot used to set the scene and show the setting[18]. It usually comes at the beginning of a scene (in film terms) and tells the viewer where and sometimes when the action is taking place. For example, a broad view of Paris with the Eiffel Tower might establish that the next scene is in Paris. Establishing shots often involve landscapes, city skylines, or building exteriors and include any important context (time of day, weather, scale of location).
Emotional Impact: The establishing shot’s main job is informational – it provides context – but it also sets the tone for the scene. If it shows a bright, bustling city, we feel energized; if it’s a lonely farmhouse in a huge field at twilight, we feel a bit isolated or peaceful, etc. Because establishing shots are typically wide, they share emotional traits with wide shots: a sense of scope and environment. They can create anticipation (e.g., showing a spooky mansion before cutting inside builds a sense of dread) or a comfortable orientation (now we know where we are, which puts us at ease). The mood will depend on the imagery: sunny and colorful for a lighthearted setting, dark and stormy for dramatic, etc. Overall, it’s about giving the audience a base to stand on for the coming narrative.
When to Use It: Use an establishing shot in your prompt when the location itself is significant or you want to highlight the backdrop of your scene. In AI image terms, you might not always need an “establishing shot” unless you’re creating a series, but you can incorporate it as a standalone scenic image. For example, prompting “establishing shot of a medieval city at dawn” will likely give a sweeping view of the city from above or a distance, setting mood and context. If you want your image to focus more on the environment than characters, this concept helps. Also, if you have a small character you want to include just for scale, mention it (like a traveler on a road in a huge valley). Establishing shots are great for world-building – they show the audience the world before zooming into details. In single prompts, you can treat it as a directive to the AI: essentially “give me a wide, illustrative view of this setting.” It’s especially effective for places with distinct landmarks (castle on a hill, space colony, etc.) or for introducing something like “the castle in the misty mountains” as a vivid scene.
Prompt Example:
establishing shot of a futuristic city at sunrise, wide panoramic view showing soaring skyscrapers and flying vehicles, the city waking up with lights flickering off, a river running through the metropolis
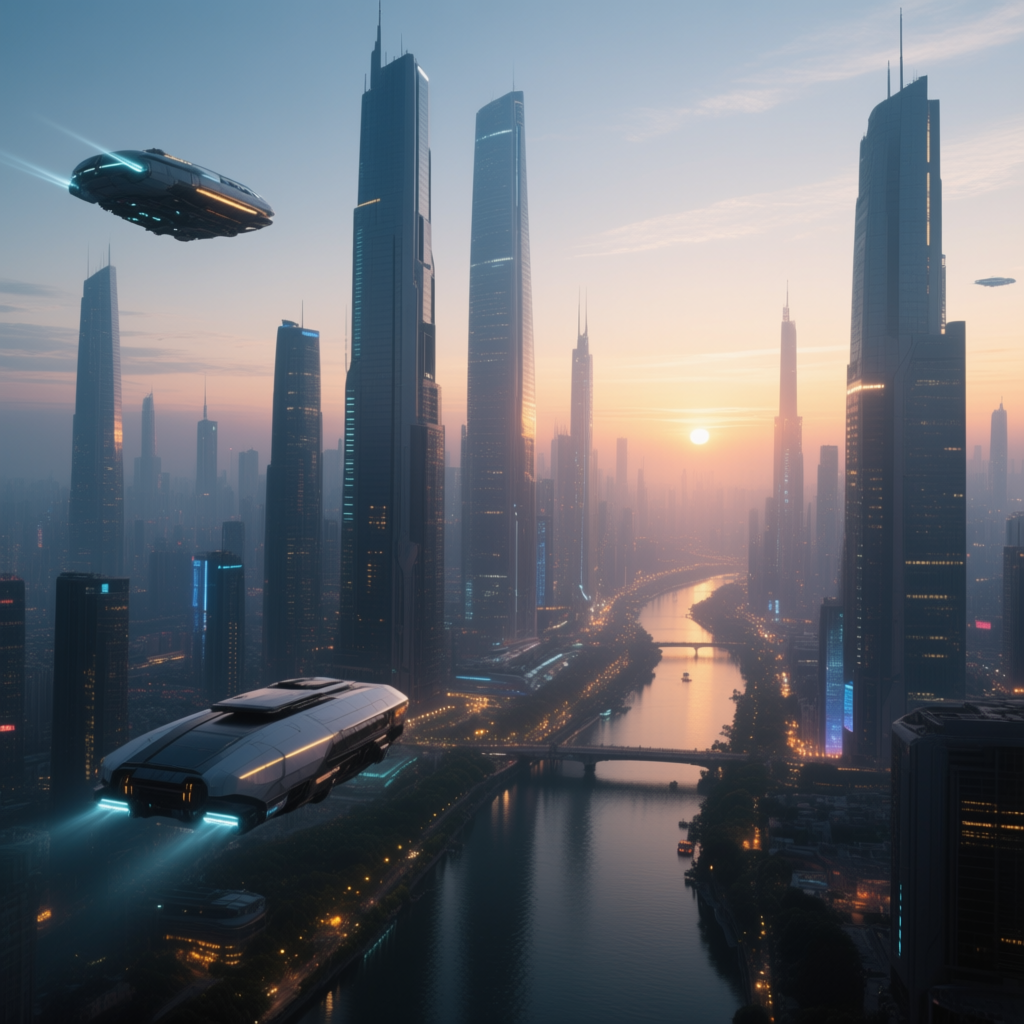
(“Establishing shot” here tells the AI we want a big-picture view of the city. The resulting image would likely be a grand panorama of the futuristic cityscape in early morning light. This sets a tone – maybe hopeful and bustling – and clearly establishes the environment. Even without any close subject, the image can tell a story of time and place. If this were part of a sequence, it’s the opener that answers “where are we?”. In a single image, it stands as an impressive wide scene that invites the viewer’s imagination into that world.)
Motion / Movement Simulation
In photography/film, the camera can move or simulate movement with techniques like panning, tilting, or dollying. In a single AI-generated image, we obviously can’t have actual motion, but we can prompt in ways that simulate a sense of movement or the dynamic feel of a camera move. By including certain keywords, you can get effects like motion blur or a composition that implies the camera’s path. This makes an image feel more dynamic, like a snapshot from a moving camera. Below are common camera movements and how you might approximate them in prompts:
Dolly-In (Push-In)
Definition: A dolly-in is when the camera moves forward toward the subject, like it’s on tracks rolling closer[19]. In cinematography, this brings the audience closer to the subject smoothly (not a zoom, but physical movement). Push-in is another term meaning the same thing – the camera pushes forward. In a single image, we can’t show the movement, but we can simulate the result of a dolly-in: the subject appears larger/more detailed and background perspective might show depth blur.
Emotional Impact: In film, a dolly-in often creates a feeling of intensifying focus or intimacy. It can signal that something important is happening with the subject – we are literally getting closer to them, which can increase tension or emotional connection. In a still image, invoking a “dolly-in” concept would likely yield a composition where the subject is prominent and background has a depth blur (like focusing in). The vibe becomes more personal and urgent – as if the camera (and by extension, the viewer) is moving in to concentrate on something. It can add a sense of drama or importance to the subject.
When to Use It: In prompts, you might not directly say “dolly-in” often, because that’s a bit jargony for a single image. Instead, you could imply it by saying something like “camera close, focused on X” or mention “dynamic push-in perspective on X.” Some AI models might understand “dolly shot” or “push-in” as well. You’d use this when you want the image to convey getting closer to the subject: for instance, to emphasize a character’s reaction or highlight an object. If you also include motion blur on the edges, it can mimic the feel of movement. Essentially, think of it as asking the AI to emphasize the subject in the center and blur or streak the surroundings slightly to imply forward motion. This can make the image feel like a frame from a movie where the camera was moving in at that moment.
Prompt Example:
dynamic push-in shot of a singer on stage reaching toward the camera, background crowd slightly motion-blurred, the singer’s face and hand in sharp focus and larger-than-life
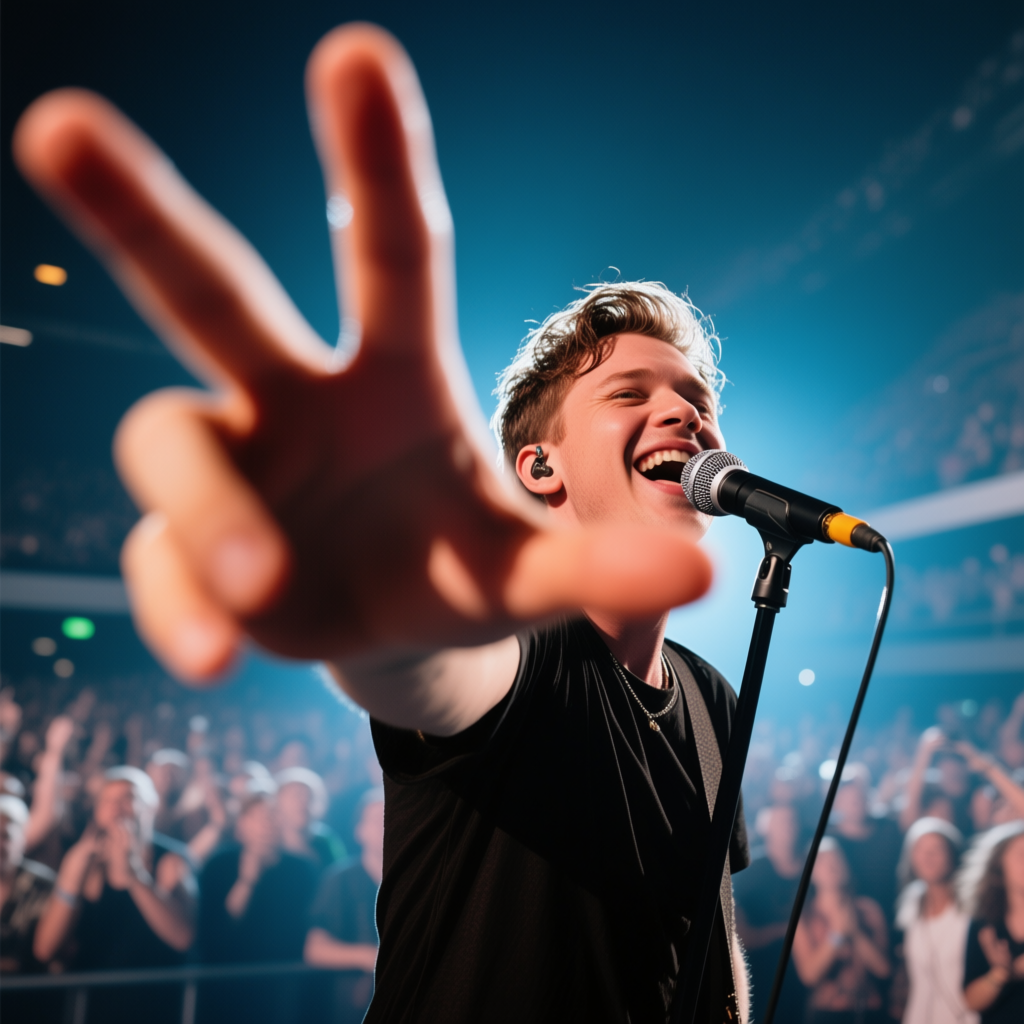
(This prompt uses “push-in shot” to suggest the camera is moving closer to the singer. The AI should interpret that by perhaps making the singer’s hand exaggerated in the foreground (due to perspective) and adding some motion blur to the background as if the camera is rushing forward. The effect would make the performance feel energetic and the connection with the singer more immediate, simulating that dolly-in feeling.)
Dolly-Out (Pull-Back)
Definition: A dolly-out is the opposite of dolly-in: the camera moves backward away from the subject, widening the view. Pull-back is another term for the same action – pulling the camera away. This reveals more of the surroundings or makes the subject smaller in frame. In a single image context, we simulate a dolly-out by framing the subject smaller and including more environment, possibly with a slight outward motion effect (like things slightly blurred outward).
Emotional Impact: A dolly-out in film often creates a feeling of disconnection or revealing context. It can make the subject seem to shrink or become isolated as we pull away, sometimes evoking melancholy or realization (like the character is alone or the world is bigger than they thought). It can also be used to transition from a personal moment to a broader scene, giving a sense of space and relief. In a still image, indicating a pull-back could emphasize scale or solitude – the subject might appear small amidst a larger setting, changing how we feel about them. It tends to reduce intensity compared to a close-up, and can introduce a poignant or observational tone.
When to Use It: In prompts, like with dolly-in, you might not explicitly say “dolly-out” to the AI, but you can phrase it as “camera pulled back to show X” or “subject small in frame, wide perspective.” Use this when you want to show more environment around the subject or to make the subject feel smaller/vulnerable. For example, if you had a dramatic close view and you want another image that “steps back”, you’d go for a pull-back. It’s great for emphasizing how alone someone is in a big world, or for revealing something new in the scene (like pulling back to show the character was surrounded by onlookers or scenery we didn’t see up close). If the AI does recognize “pull-back shot” or similar, it might zoom out the composition. You can also mimic the sense of movement by adding slight motion blur radiating outward (though be cautious – too much might confuse the image). Overall, think of it as instructing the AI to give breathing room and more context in the shot.
Prompt Example:
pull-back shot of a little girl standing in a vast library hall, camera far away showing the towering bookshelves dwarfing her, the girl’s figure small but central, soft light from high windows

(The phrase “pull-back shot” is used to tell the AI we want a withdrawn, wide view. The resulting image should show the immense library interior with the girl as a tiny figure, highlighting the scale. This imparts a sense of awe and a bit of the girl’s vulnerability or wonder. We’ve effectively simulated the camera moving away to reveal the grand setting – the emotional effect is quite different than if we were close-up to the girl.)
Tilt Up
Definition: A tilt up means the camera stays in one place but rotates upward, as if looking from lower to higher. Imagine standing still and nodding your head up to look at something tall – that’s tilting up. In motion, a tilt up often starts at a subject’s feet and ends at their head, or starts at the base of a building and ends at the top, etc. It reveals something above.
Emotional Impact: Tilting up can create a sense of reveal or aspiration. It often conveys awe or hopefulness, especially if you tilt up to sky or a tall structure (the feeling of looking up often correlates with inspiration or relief)[20]. A slow tilt up after a dramatic scene can give a feeling of resolution or wonder (like ending on the sky). A fast tilt up might signal surprise (whip tilt). In a single image, we can’t show the actual tilt motion, but we can set a composition that feels like the camera is angled upwards. This means the image might emphasize vertical lines and have more ground in the lower frame and the subject extending upward. It can make the viewer feel low looking up, which overlaps with a low-angle shot, but specifically implies something is being revealed above.
When to Use It: Use “tilt up” in a prompt (or describe an upward looking perspective) when you want the AI to frame the shot as if looking up at something taller than the frame. For example, “camera tilting up from the hero’s feet to the sky” could yield an image where the hero’s lower body is prominent and the top of the image shows sky. It’s somewhat similar to just asking for a low angle, but “tilt up” emphasizes the vertical motion/ orientation. If you want to show height gradually, you might describe the lower part of scene and upper part differently (the AI then tries to connect them). Including “tilt up” itself is hit or miss in some models, but it might understand it as “the scene is vertical with focus moving upward.” Use it for tall subjects like skyscrapers, trees, characters where you want to highlight from bottom to top. It helps add a feeling of discovery – like the image itself guides the eye upward. Combined with motion blur streaks or a sense of direction, it can be dynamic. Essentially, it’s an instruction to imagine the frame oriented in a way to follow something upwards.
Prompt Example:
tilt-up shot starting at the base of a giant redwood tree and looking up toward the sunlit canopy, the massive trunk in foreground leading the eye upward, rays of sunlight peeking through the leaves at the top
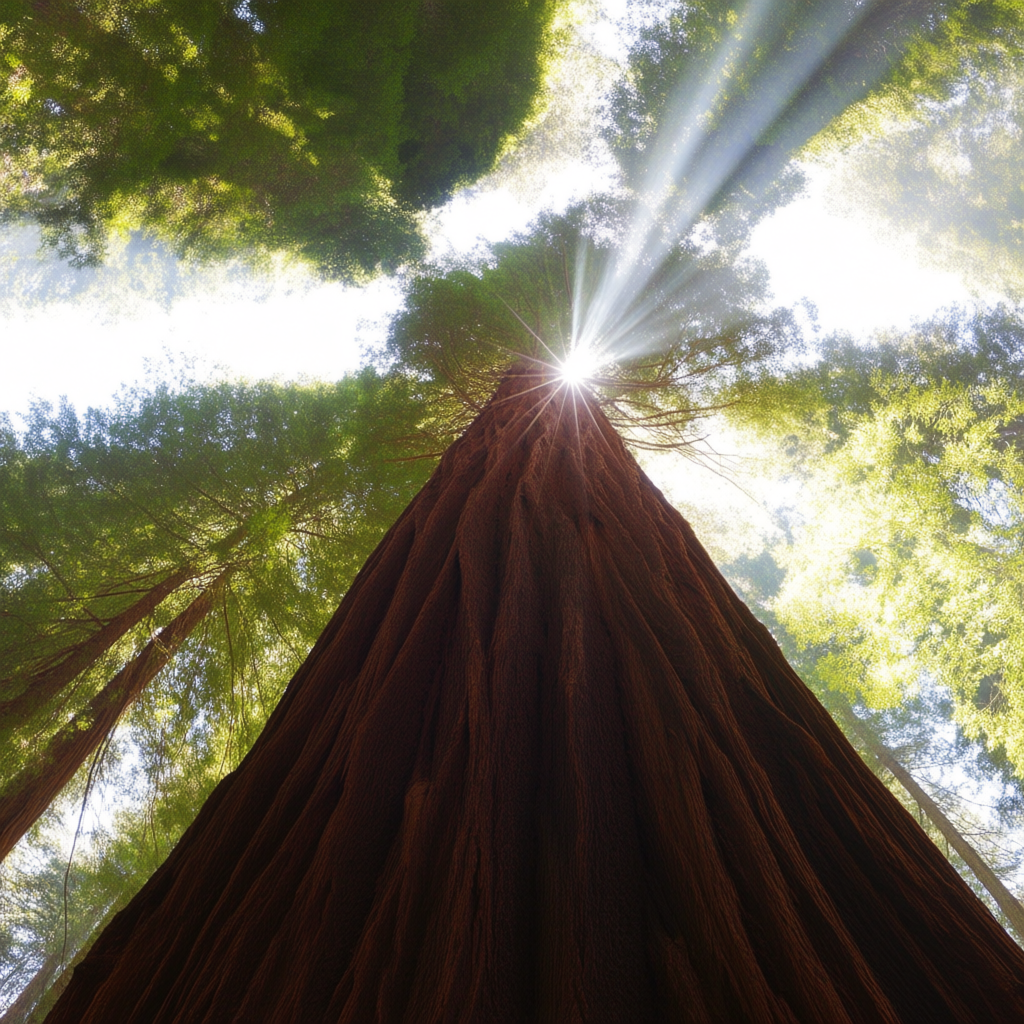
(This prompt explicitly says “tilt-up shot” and describes the upward view from base to canopy. The AI should produce a composition where the trunk dominates the lower part and perspective lines carry the view up to the bright treetop. The feeling will be one of awe at the tree’s height – essentially simulating that experience of tilting your head up to see the top of a giant tree.)
Tilt Down
Definition: A tilt down is the opposite: the camera stays in place but rotates downward, as if looking from higher to lower. Think of standing and looking down at your feet – that’s a tilt down. In film, you might start at a subject’s face and tilt down to what they’re holding, or tilt from a mountain peak down to the base. It reveals what’s below.
Emotional Impact: Tilting down can create a sense of revealing the ground or something hidden below. It might convey dominance or oversight (looking down can make the viewer feel in control or observational). It can also be used to show vulnerability (looking down on a lone subject). A slow tilt down might gradually unveil something like a clue on the floor, adding suspense. In a single image, using an implied tilt down suggests the camera is angled downward. That often overlaps with a high-angle shot (looking down at the subject). It can make us feel a bit more detached or powerful as the viewer (since we’re above the subject), or simply give context by showing what’s at someone’s feet or around them on the ground.
When to Use It: You’d incorporate “tilt down” or an equivalent description to have the AI frame the image as if looking downward from above. For instance, “tilt-down shot from the top of a staircase to the bottom where a cat sits” – the AI might give the perspective from the top step looking down. Essentially, it’s useful for showing what’s below a character or giving a top-down element without going fully overhead. If you want to highlight something at a character’s feet or the ground details, a tilt down approach is great. It’s also a way to make an image more cinematic: e.g. “camera tilted down on the hero kneeling” could accentuate their smallness or the gravity of a moment. Use it to reveal context beneath or to impart that slight feeling of observing from above.
Prompt Example:
tilt-down shot from a balcony onto a bustling marketplace, camera looking down at the crowd and stalls below, vibrant umbrellas and people seen from above, lively atmosphere
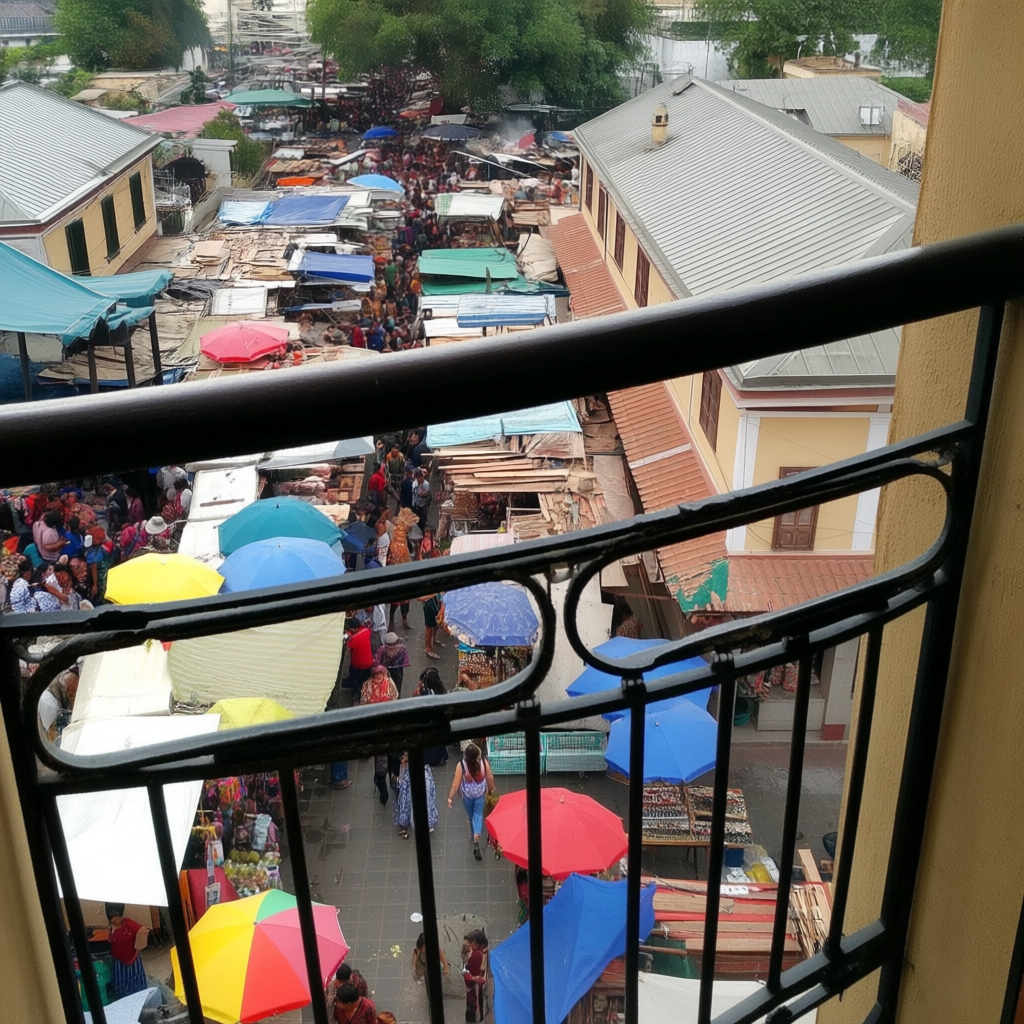
(“Tilt-down shot from a balcony” tells the AI we want the viewpoint of someone up high looking downward. The resulting image would likely show the tops of market stalls and the crowd, as if the viewer is peering over the balcony rail. This gives a clear sense of observing the market from a higher vantage, establishing context and a bit of story (maybe we are in the position of a person about to descend into the market). It’s effectively a high-angle perspective that includes the notion we started looking out and now are looking down.)
Whip Pan
Definition: A whip pan is an extremely fast pan (horizontal camera movement) that creates a strong motion blur[21]. It’s like when you turn your head really quickly – everything blurs in streaks. In film, a whip pan is used to transition between subjects or to convey sudden action, and it usually results in a blurred image between the starting and ending points due to the speed.
Emotional Impact: Whip pans feel energetic, urgent, or chaotic. They can give a sense of surprise or rapid change – often used in action sequences or for quick comedic effect (suddenly panning to something unexpected). The blur itself imparts a feeling of speed. In a single image, we obviously can’t move, but we can include motion blur streaks horizontally to simulate that the camera was moving quickly. That adds a dynamic, frenzied mood, like a snapshot taken mid-swing. It can make the viewer sense that the scene is full of motion or that our attention just got yanked to something else quickly.
When to Use It: In prompts, you might directly say “whip pan shot” or simply incorporate motion blur and directional cues. For example, “a whip-pan style shot of a car speeding by” could cause the AI to blur the background strongly in a horizontal direction. Use this when you want to convey fast motion or sudden focus shift in the image. It’s great for action scenes: a race, a chase, someone turning quickly. Essentially, you’ll be leveraging the AI’s ability to do motion blur. Words like “motion-blurred background” or “streaks” help if “whip pan” isn’t recognized. If the model understands cinematic terms, “whip pan” might cause it to introduce blur and a sense of haste. It’s a neat trick to make a static image feel like a frame out of a high-speed video. Use it sparingly for effect – too much blur and you lose clarity. But done right, it injects excitement and movement into your prompt results.
Prompt Example:
whip-pan shot of a race car drifting around a corner, background and lights streaking in motion blur, the car sharp in focus with smoke trailing from the tires, intense action feeling
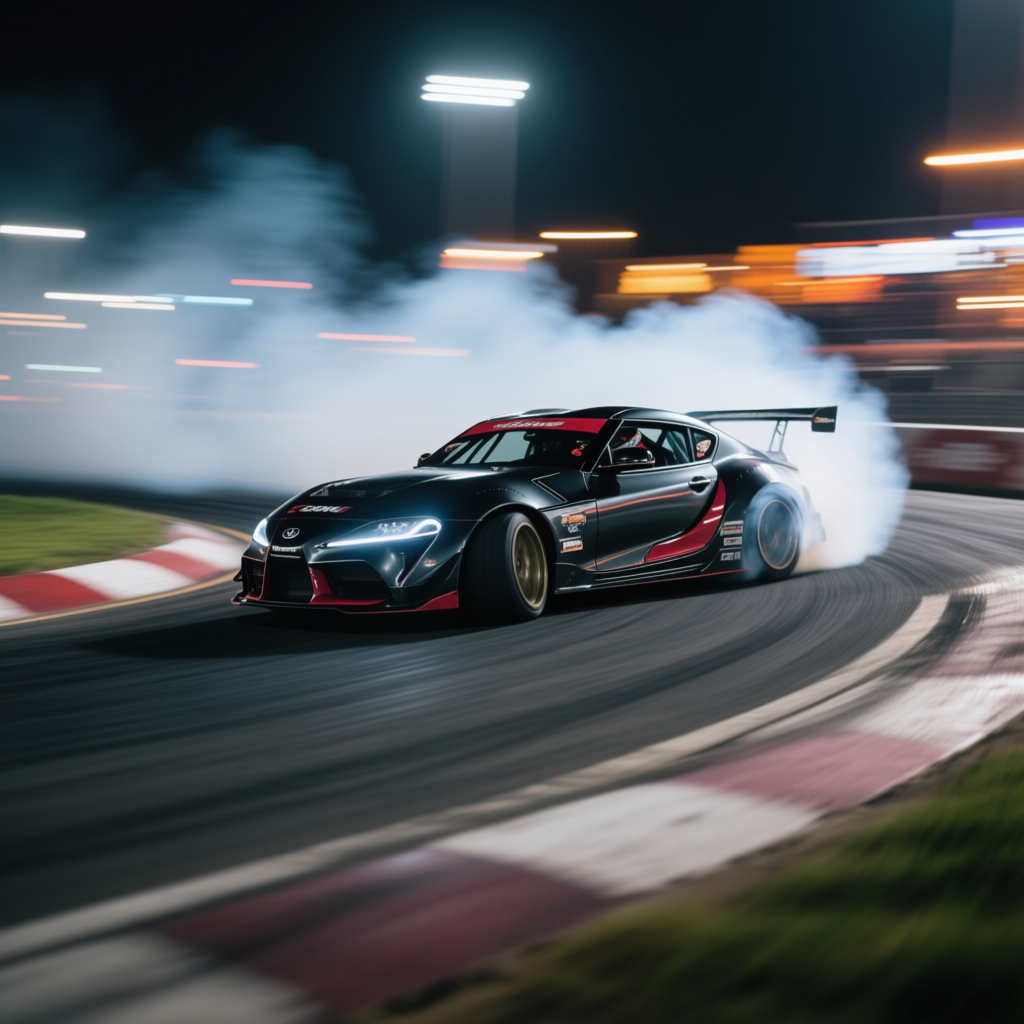
(By saying “whip-pan shot” and describing streaking background, we instruct the AI to simulate a fast pan. The likely image will have the racecar crisp (since that’s our focal point) but everything else might be motion-blurred in the direction of the pan. This gives the impression the camera quickly followed the car’s motion. The viewer can almost feel the speed and hear the screech, even though it’s a still image – a direct result of that whip pan dynamic.)
Tracking Shot
Definition: A tracking shot means the camera moves along with the subject – typically sideways or following behind, keeping the subject in frame as they move[22][23]. Think of a camera on tracks or a car, moving parallel to a running person, so the person stays in view. It’s not rotating (like a pan), but literally translating through space following the action. In photography, there’s a technique of panning with a subject to get a sharp subject and motion-blurred background, which is akin to a tracking feel.
Emotional Impact: Tracking shots immerse the audience in the movement, making us feel like we’re traveling with the subject[24]. It often creates a smooth, continuous sense of motion that can be engaging and exciting. You feel involved in the action rather than watching from a fixed point. In a still image, the way to suggest a tracking shot is usually by having the subject in focus and a directional motion blur in the background (similar to panning blur), indicating movement relative to the camera. This gives a sense of velocity and fluidity. Emotionally, it can make the viewer feel like they are running alongside the subject or chasing them, adding intensity or camaraderie.
When to Use It: Use language in your prompt that implies moving with the subject. The word “tracking” itself might or might not be understood by the AI. You could say “tracking shot of a cyclist – subject in focus, background motion-blurred” to be explicit. Or just describe the effect: “camera following alongside a running wolf, background a blur of forest”. This kind of prompt yields an image where the subject is relatively sharp but the surroundings have streaks, giving that with-the-subject motion. It’s ideal for action scenes where you want to show motion but keep the subject clear (like a person running, a vehicle driving). It essentially conveys that we’re keeping pace with something moving, which is inherently dynamic. It’s also great for showing a journey – e.g., following a character through a setting. In terms of story, it can make the viewer feel like a participant in the chase or journey rather than a distant observer.
Prompt Example:
tracking shot of a wolf sprinting through the woods at dawn, the camera moving alongside it, the wolf is in sharp focus mid-leap, while the forest background blurs into horizontal streaks of green and gold
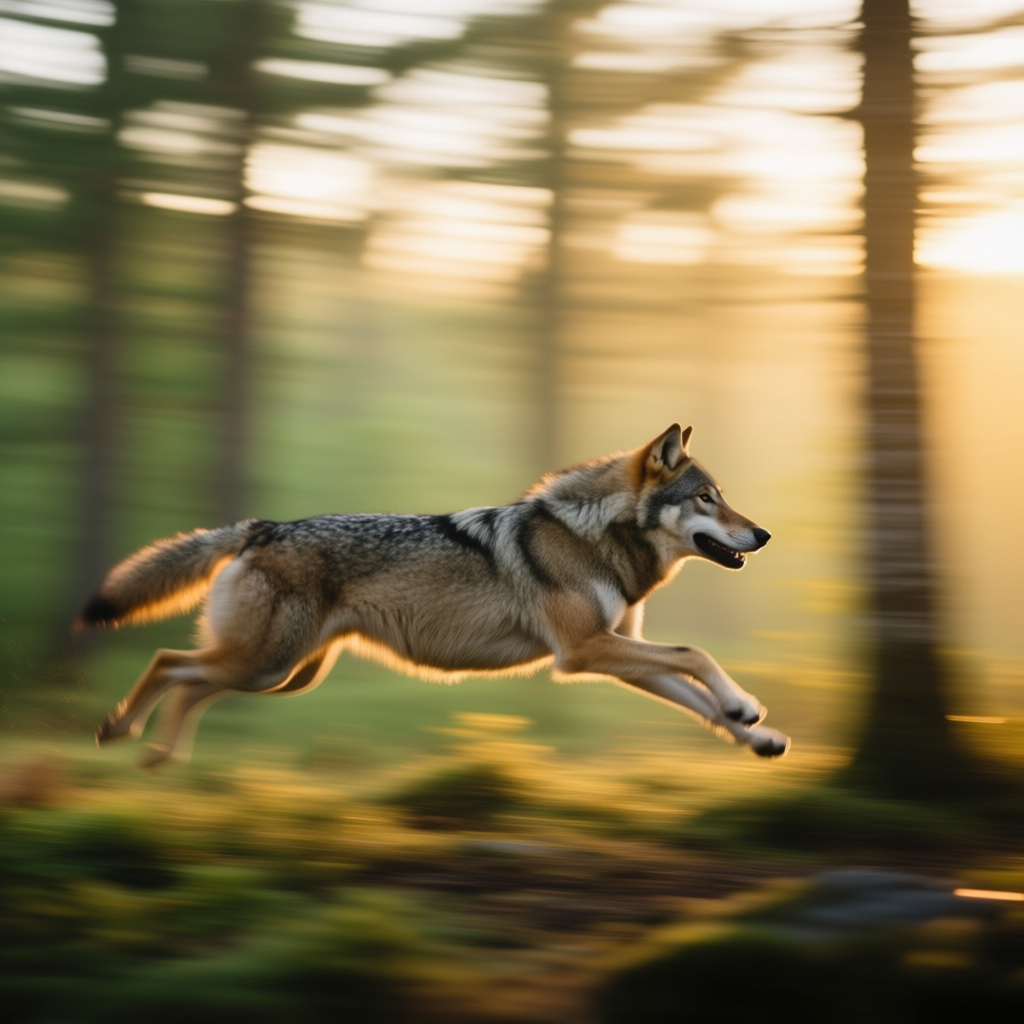
(This prompt describes the effect and even mentions “tracking shot”. The expected outcome is an image where the wolf is clearly defined (since we’re “moving with it”) and the trees and ground are motion-blurred by the lateral movement. This effectively simulates a camera running right next to the wolf. The feeling is exhilarating and immersive – we feel the speed of the wolf and almost run with it, showcasing how a tracking perspective draws us into the action.)
Crane Shot
Definition: A crane shot involves the camera moving upwards or downwards through space, typically on a crane or jib arm[25][26]. This allows the camera to start low and rise high above the scene (or vice versa). It’s not just tilting – the camera is physically lifted or lowered, often giving a sweeping overview. In effect, a crane shot can combine a high-angle perspective shift with motion, sometimes covering a lot of vertical distance.
Emotional Impact: Crane shots are often used to create a sense of grandeur or to reveal context from above. They can start close on a subject and then swoop up to show the big picture, which often gives the audience an “aha, now I see it all” moment – useful for dramatic reveals or the end of a scene. Emotionally, a rising crane can feel uplifting or transcendent (e.g., ending a movie by craning up to the sky) or it can highlight smallness (the subject stays small as we lift away). A descending crane shot can create tension or focus (bringing us down into something). In a single image, to imply a crane movement, we might create a perspective that shows both a close and far view in one frame – tricky, but maybe an image that feels like it’s between a close and wide shot at a bird’s-eye angle. More straightforwardly, you might just treat it as a high angle but mention the sweeping motion to get some creative composition.
When to Use It: Use a crane-style description when you want to show a dramatic vertical perspective or a broad reveal. For example, “crane shot above a wedding ceremony, starting behind a couple and lifting to show the crowd and venue”. In a single frame, the AI might interpret “crane shot” as a kind of stylish wide angle from above or a transitional perspective. You can also specify “camera rising above” or “bird’s-eye moving view” to hint at it. It’s ideal if you want a scene to have both a sense of subject and environment – like a scene that’s not fully top-down but definitely elevated. It gives a cinematic flair – a slight epic quality. If the model understands it, you might even get a slight motion blur in vertical elements if you mention movement, but likely it will just pick an angle. Essentially, it’s like an establishing shot in motion. Use it to emphasize a large setting or to make a subject feel observed from a lofty vantage.
Prompt Example:
crane shot revealing a medieval battlefield at dawn: starting behind a lone knight on a hill and moving upward, showing the vast army camps in the valley below shrouded in mist, the knight’s silhouette in foreground
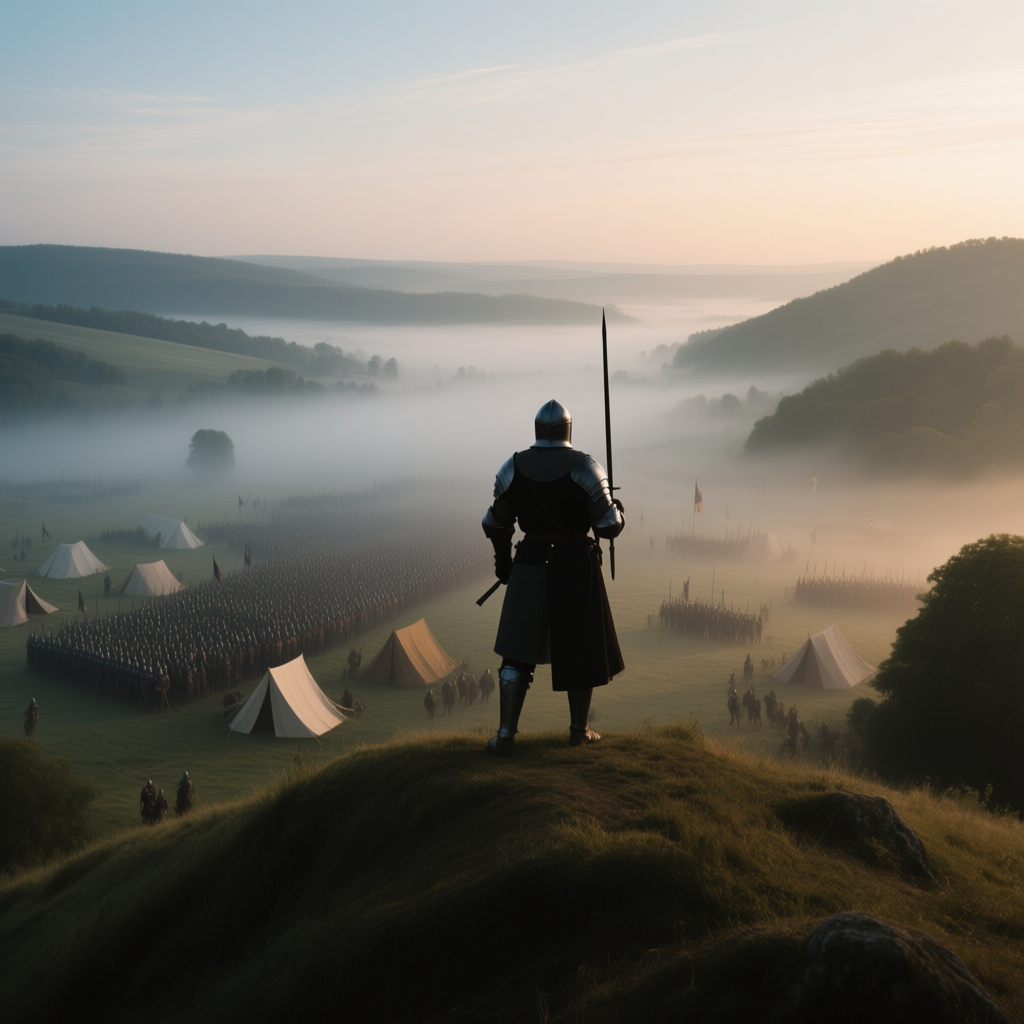
(This prompt outlines the idea of a crane movement (“starting behind... and moving upward”) to encourage the AI to compose an image that has depth: the knight large and close at bottom, and a broad valley view beyond. The likely image is a high-angle wide shot with the knight’s back visible and the huge landscape of camps below. The effect is to connect the personal (the lone knight) with the epic (the whole battlefield) in one frame – a classic use of a crane-like perspective. The mood is grand and foreboding, achieved by essentially “lifting” the camera to take it all in.)
Arc Shot
Definition: An arc shot is when the camera moves in a curved path around the subject. For example, circling around a person while they stand still, or semi-circling during a dynamic moment (like the famous 360° shot around characters). It’s not a stationary rotation (that would be panning in place); rather, the camera actually travels around, keeping focus on the subject, which often stays centered.
Emotional Impact: Arc shots add a lot of energy and focus on the subject, giving a view of them from multiple angles in one fluid motion. They tend to create a feeling of 360-degree importance – like “this character is the center of the world” at that moment. It can make a scene feel dramatic and cinematic, sometimes even dizzying if done fast (used in action or revelation scenes to heighten intensity). In a still image, to suggest an arc motion, one approach is to depict a sort of semi-circular motion blur or multiple angle view combined – though that’s complex. More realistically, you might get the effect by showing a subject with a blurred background that curves, implying the camera moved around. The emotional tone from a single image might be subtle, but if you successfully hint at an arc, it could feel like a frozen moment in a dynamic spin, which is inherently cool and dramatic.
When to Use It: In prompts, “arc shot” might not be directly understood, but you can try phrases like “camera orbiting around the subject” or “360-degree view effect”. Use it when you want to show a subject in a dynamic way with the background in motion. For example, a martial artist doing a kick and you want to imagine the camera swirled around them – you could describe the background as radially blurred around the figure. It’s particularly great for hero moments (think of characters being circled while the music swells) or intense dialogues (cameras arcing around two people to heighten a moment). If the AI can pick up on it, an arc might yield a slightly angled view that isn’t head-on, with maybe some sense of parallax (foreground vs background shift). It’s a bit abstract to convey, but even just using “circling camera” might encourage a composition that’s more 3D-feeling. Essentially, it’s another tool to make an image look like a frame out of a very active scene.
Prompt Example:
arc shot around a superhero standing on a rooftop, the camera sweeping from their side to front, city skyline in background slightly motion-blurred in an arc, cape flowing, dramatic low-angle lighting
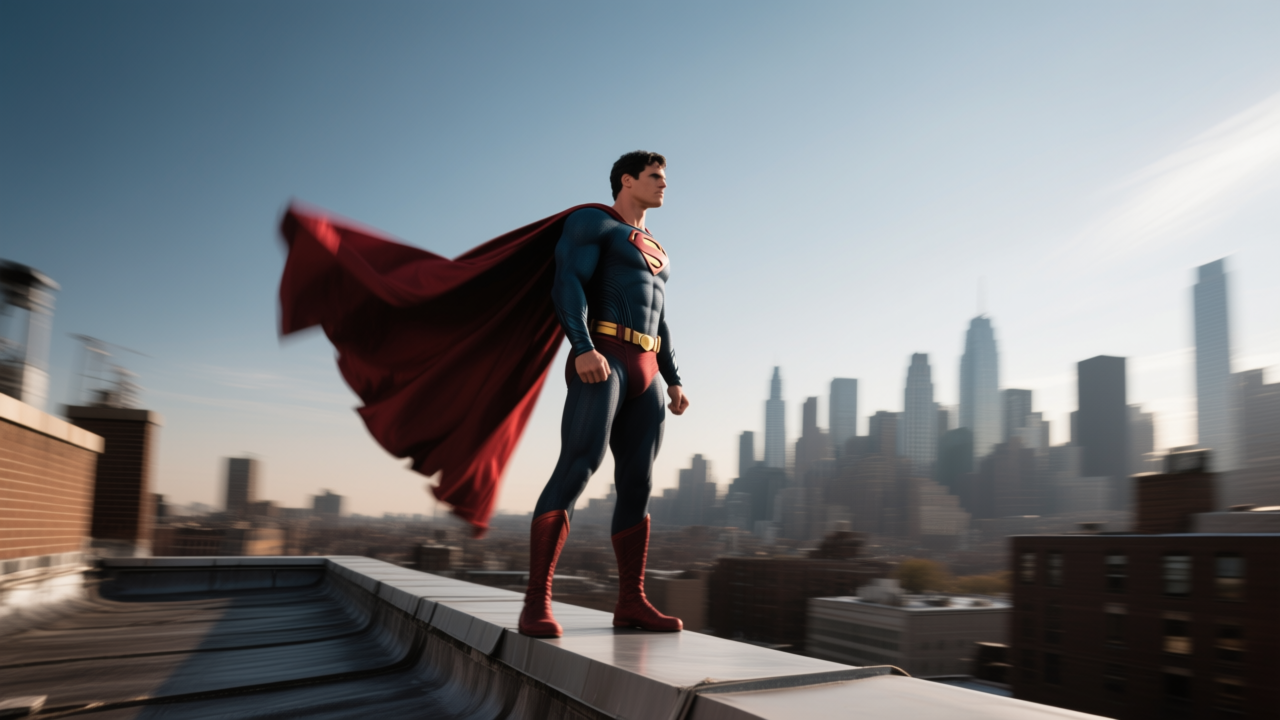
(We’re asking for a somewhat complex effect: “camera sweeping from their side to front” and an arc-blurred skyline. The AI might interpret parts of this. The intended result is the superhero in a powerful pose, and maybe the background has a curved blur suggesting motion around them. Even if the AI just gives a dynamic angle of the hero with a sense of movement in the cape and background, that’s fine – it’ll feel cinematic. The key idea is that the hero is the stable center and everything around hints at motion, capturing that iconic circling shot vibe.)
Simulated Drone Shot
Definition: A drone shot in filmmaking is footage captured by a drone, which often means aerial moving shots that can sweep over landscapes, follow subjects from above, or do dramatic fly-throughs. In a single image context, a “drone shot” usually implies a high, possibly moving vantage point – similar to a bird’s-eye, but I’d say “simulated drone shot” suggests a high angle that might also include perspective of motion (like a drone in mid-flight capturing the scene).
Emotional Impact: Drone shots feel expansive and modern. They often give a sense of exploration and freedom (we’re flying!) and can provide a wow factor by showing scenes from angles humans don’t normally see without aircraft. They can also convey surveillance or voyeurism if it’s following people from above (like being watched by an eye in the sky). In a still image, calling something a drone shot might lead to an image that looks like a crisp aerial photo, possibly with slight motion blur if we imply the drone is moving. The emotional tone is usually impressive, large-scale, and sometimes detached (since it’s high up). It can emphasize patterns in landscapes, the isolation of individuals in a big environment, or just the beauty of geometry from above.
When to Use It: If you want an image that looks like it was taken by a drone, you’d basically get an aerial perspective with maybe a hint of motion if needed. You might not even need to say “simulated drone shot” explicitly; just describing the scene “from a drone’s perspective” or “aerial shot” would work. But since the user specifically listed “simulated drone shot,” perhaps the idea is to instruct how to achieve that look via prompts. Use it for landscapes, cityscapes, large events – e.g., a drone shot of a music festival might show the crowd pattern. It’s also effective for tracking a moving subject from above (like a car on a road – a common drone angle). In prompts, including “drone photo” or “aerial view” often yields images akin to what a drone would capture: wide, high-angle, and often with lots of detail because drones often use wide-angle cameras. So it’s great for when you want detail and expanse together. Essentially, choose this when you want to combine the bird’s-eye vantage with a sense of modern cinematography flair.
Prompt Example:
simulated drone shot of a tropical island coastline at sunrise, camera flying over palm trees and turquoise water, you can see the coral reef beneath the surface, a lone boat creating a wake trail, vibrant and scenic

(This describes an aerial perspective (“drone shot”) with motion (“camera flying over”). The AI should produce something like a high-angle panoramic view of the island and water. We included details like the wake trail of a boat – which implies the drone captured a moving boat leaving that trail. The image would feel like a frame from a travel drone video – expansive, beautiful, and detailed. The emotional impact is one of awe and tranquility, as we see the island from a bird’s (or drone’s) view in lovely lighting.)
Specialty & Stylized Angles
Beyond the standard angles and motions, there are some creative, stylized shots used in visual storytelling to convey specific moods or clever perspectives. These often require a bit of planning to prompt effectively, but they can really make your images stand out. Let’s go through these special angles and how to use them in prompts:
Dutch Angle (Tilted Camera)
Definition: A Dutch angle (also known as Dutch tilt or canted angle) is when the camera is tilted sideways so the horizon is not level[27][28]. Essentially, the shot is intentionally crooked, with vertical lines at an angle. It’s a stylistic choice often used in film noir, horror, etc. For example, instead of a building standing straight, it will slant in the frame.
Emotional Impact: Dutch angles create a sense of unease, disorientation, or tension[27][29]. Because we expect the world to be level, a tilted view subconsciously makes us feel that something is off-kilter. It’s great for conveying drama, psychological unrest, or chaos. The viewer might feel a bit unsettled or dizzy, which is exactly why filmmakers use it – to signal that all is not right. It can also make a composition feel more dynamic or quirky even in non-horror contexts (some action or comic scenes use slight Dutch tilts just for energy).
When to Use It: Use a Dutch angle in prompts when you want the image to feel unsettling, dynamic, or stylized. You might explicitly say “Dutch angle” or “tilted camera”[30]. Many AI models do recognize “Dutch angle” since it’s a known photography term. For example, “portrait of a detective in an alley, Dutch angle” will likely result in a scene where the alley and figure are slanted. This angle works well for mystery, suspense, horror, or surreal scenes – like a haunted house interior might look creepier at a tilt. It’s also useful if you just want a different perspective on a mundane scene to add interest (like a Dutch angle shot of a skateboarder could emphasize motion). When you include it, you usually don’t have to alter much else; the AI will tilt the composition, which inherently adds tension. Combine with appropriate lighting and content for maximum effect (e.g., Dutch angle + dramatic shadows for a spooky vibe).
Prompt Example:
Dutch angle shot of a dimly lit hallway in an old hospital, the frame is tilted, shadows stretching strangely on the walls, gives an unsettling, disoriented mood
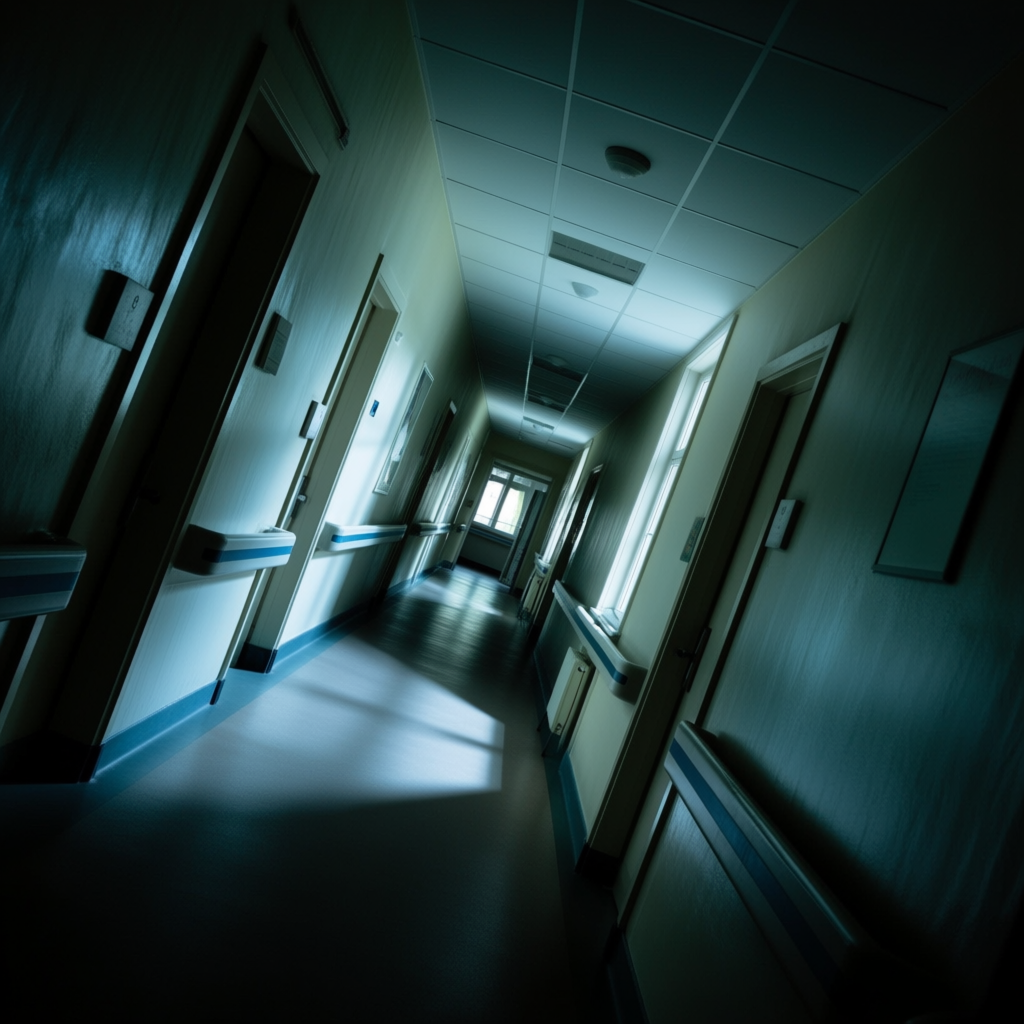
(“Dutch angle shot” tells the AI to tilt the camera. The expected output: the hallway should appear slanted in the image. Coupled with the description of dim lighting and shadows, this tilt will make the scene look extra creepy and off-balance, as if something is very wrong. This is a classic use of Dutch tilt – to make a normal setting like a hallway immediately feel ominous and strange by literally tilting the viewer’s perspective.)
Point-of-View (POV) Shot
Definition: A point-of-view shot is one that shows exactly what a character (or entity) sees[31][32]. The camera is essentially placed at the eye position of a person (or creature), so the image depicts the scene from that character’s perspective. Often you might even see their hands or what they’re holding, but not their own face/body (because you are them). It’s the “through someone’s eyes” shot.
Emotional Impact: POV shots create a strong sense of immersion and identification[32]. The viewer feels like they are in the shoes of that character, experiencing what they experience. This can make emotions more direct – if the POV is of someone scared, seeing a monster from their eyes makes us feel that fear; if it’s a loving gaze, we feel that too. It can also be disorienting or thrilling, depending on context (like a POV of running through a forest gives adrenaline). It often adds intimacy or intensity because it removes the barrier between audience and character.
When to Use It: In prompts, indicate POV by specifying “from [character]'s perspective” or “POV shot”[31]. For example, “POV of a surfer riding a wave” – the AI will likely show the wave and maybe the surfer’s arms or board but not the surfer themselves. It’s great for any scenario you want the viewer to feel part of the action: sports (seeing what the athlete sees), adventures (first-person view climbing a mountain), even character interactions (POV of someone receiving a gift – you’d see the giver handing it toward ‘you’). Another usage is horror: “POV of someone hiding in a closet, peeking out” – very immersive and scary. Or romantic: “POV of person being hugged” – you see the hugger’s face over your shoulder. You often have to imply the body parts that would be in view (“you see hands on the steering wheel” for driving POV). The key is describing the scene such that the camera is inside the action rather than observing from outside. Use this angle to maximize the viewer’s empathy and involvement in the scene.
Prompt Example:
point-of-view shot from a mountain climber halfway up a cliff, you see their gloved hands gripping the rock at the edges of the frame, the vast drop below and valley far beneath, adrenaline-filled perspective
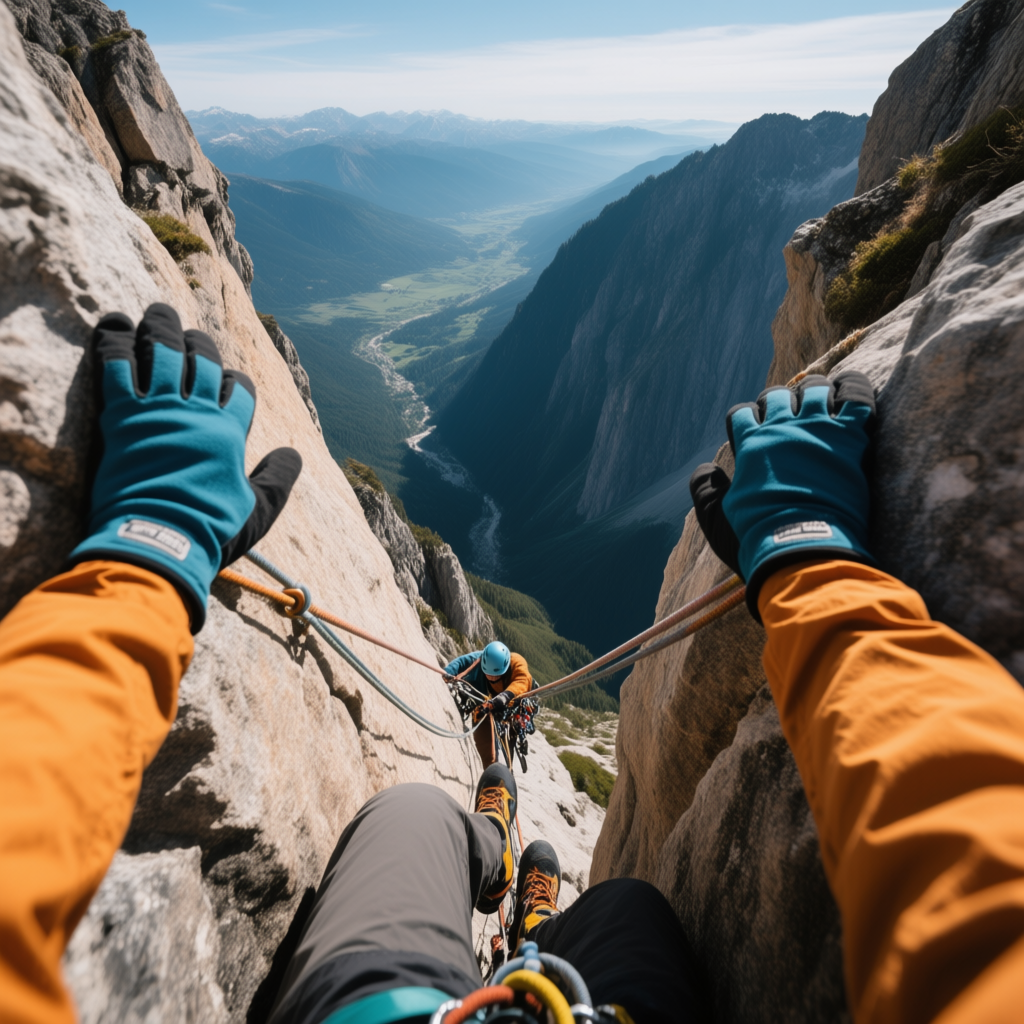
(Here “point-of-view shot” and the description make it clear the camera is the climber’s eyes. The image should show the cliff face and a pair of hands in foreground holding on – plus the dizzying height below. The viewer will likely feel a bit of that vertigo and tension of hanging on, because it mimics actually being there. This illustrates how POV prompts put the audience directly into the scene’s emotion.)
Over-the-Weapon Shot
Definition: Over-the-weapon isn’t a classical term, but by context it implies a shot where you see a weapon in the foreground as if you are the one holding it, aiming at something. Essentially, a first-person shooter game perspective or similar – camera just behind a gun or sword or any weapon. It’s a specific kind of POV shot focusing on a weapon.
Emotional Impact: This angle puts the viewer in a confrontational and active position – it can feel intense, threatening, or empowering depending on scenario. It’s like you’re the one about to take action. If it’s a gun, it gives a sense of tension (we are aiming at a target); if it’s a sword, maybe a feeling of being in battle. It’s immersive like POV, but specifically adds the weapon as a frame of reference, which can amplify a sense of danger or agency.
When to Use It: Use this when you want an action-oriented POV, especially for combat or hunting scenes. In prompts, you might say “POV with a weapon visible” or explicitly “over the gun perspective” etc. For example, “first-person view of aiming a bow and arrow at a target – arrow and bow in foreground”. The AI should then show the arms and bow, with whatever is being aimed at in the distance. This is commonly seen in video games, so many models trained on images might understand phrases like “FPS view” (first-person shooter view), but safer to just describe it directly. It’s great for putting the viewer in an action role – whether it’s a soldier, an archer, or even something like a photographer with a camera (over-the-camera shot, where you see the camera). For our context, “over-the-weapon” likely means guns/swords. It creates a lot of tension because it implies imminent action (we might shoot!). It also tells a story – whoever/whatever is on the other end of the weapon is likely the focus of the story. Use it for dramatic effect in any scenario where that perspective would heighten the intensity.
Prompt Example:
first-person POV of a sci-fi soldier aiming a plasma rifle down a corridor, the rifle and soldier’s hands visible in the bottom corners, an alien creature at the far end of the corridor in the sights, tense atmosphere
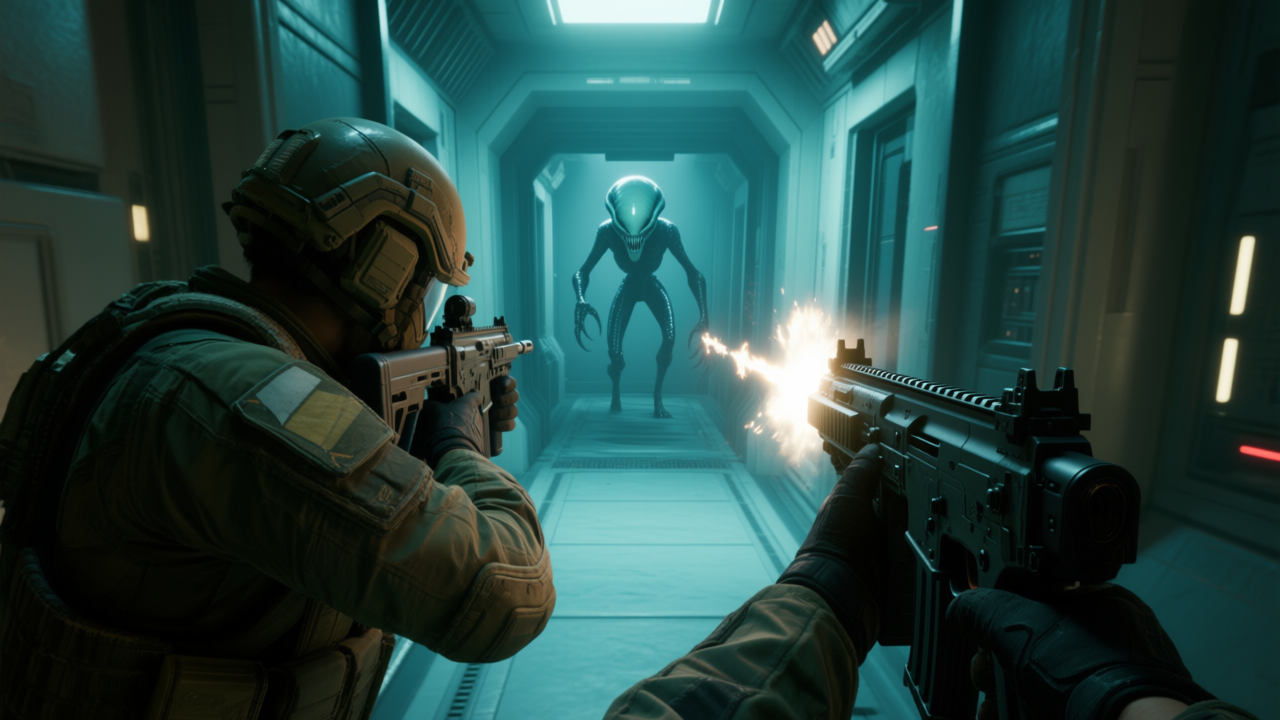
(This describes an “over-the-weapon” style shot: “first-person POV… rifle and hands visible”. The expected image: you see the futuristic gun from the shooter’s perspective and down the hall the target alien. This makes the viewer feel like they are the soldier about to fire, creating a lot of tension and engagement. It’s a clear illustration of using that FPS style perspective to put the viewer in the heat of the moment.)
Reflection Shot
Definition: A reflection shot is a composition where the camera captures the subject via a reflection – for instance, seeing a character’s face in a mirror or a scene reflected in water or glass. In this shot, you are not looking at the subject directly, but at the mirror image of the subject. Common examples: someone looking at themselves in a mirror (camera films the reflection), or seeing the world reflected in someone’s sunglasses.
Emotional Impact: Reflection shots can convey introspection, duality, or a sense of observation. Seeing a character in a mirror often implies they’re contemplating themselves or there’s a hidden side (since we see them but not directly). It can feel artsy and thoughtful, sometimes eerie (like a mirror image doing something different can be a horror trope). It might also give a sense of surprise or revelation (catching something in a reflection that wasn’t obvious). Reflections in water or glass can add a poetic or surreal quality. Overall, it adds depth to the image – literally another layer to look at.
When to Use It: You’d prompt a reflection shot by explicitly describing the reflection scenario. For example, “reflection of a young man in a foggy mirror, with his real silhouette barely visible” or “city skyline reflected in a puddle on the street.” The AI will then focus on that reflected image. This is great for creative portraits (showing someone as they see themselves), mysteries (maybe the reflection reveals something different), or simply to get a cool effect in architecture or landscapes (like mountains reflected in a lake for a symmetric shot). Keep in mind to clarify if you want the actual subject visible or only the reflection. Often in film, the camera literally shoots the mirror so the subject appears within it. In AI terms, if you say “a person looking in a mirror, seen in the reflection,” it should know to do that composition. Use reflection shots for a more conceptual or emotionally layered image – they naturally make the viewer think about perception and reality, which can enrich the storytelling of the picture.
Prompt Example:
reflection shot of a woman’s face in a rainy window at night – we see her thoughtful expression in the glass, with blurred city lights and her hand touching the glass, conveying a mood of nostalgia
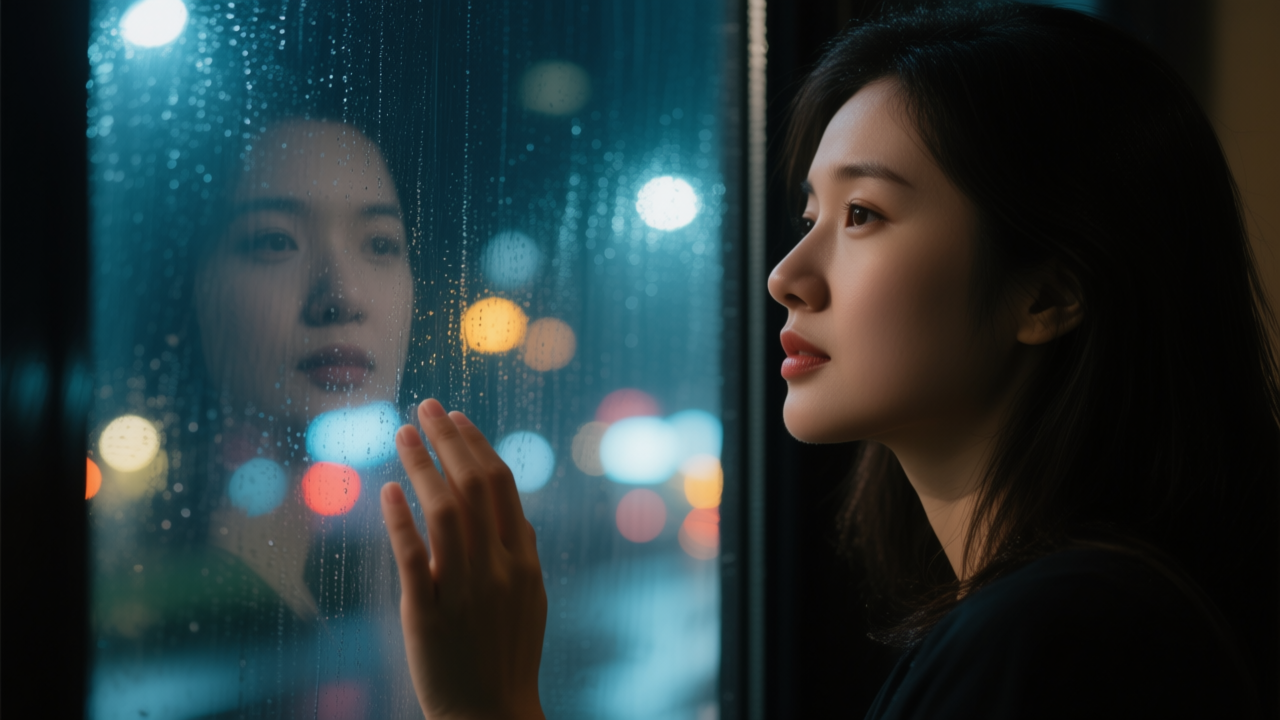
(This prompt specifies we want to see her face in the reflection of a window. The AI should generate an image where the primary view is the window glass showing her face and maybe the city bokeh. Possibly we might faintly see her real profile too, but emphasis on the reflection. The mood is introspective and melancholy, achieved by that device of watching her through a reflection which separates us slightly and adds a layer of meaning – classic use of a reflection shot for emotional impact.)
Split Diopter Look
Definition: A split diopter shot is a technique where both the foreground and background are in sharp focus simultaneously, often achieved with a special half-and-half lens[33]. Visually, it can look almost like two different focus planes in one image – something very close is clear and something far is also clear, while the middle ground may blur or show a slight join line[34][35]. It’s not exactly an angle, but a stylized focus effect. However, since they mention “split diopter look,” we interpret it as the look you get from a split diopter: usually a scene where e.g. an object in the extreme foreground on one side of the frame is crystal clear, and a person in the distant background on the other side is also clear, which is normally not possible with regular depth of field.
Emotional Impact: Split diopter shots create a somewhat unnatural, disconcerting clarity in two separate planes. This often is used to draw attention to two things at once that are both important[36]. It can create tension or a dramatic comparison – like a person eavesdropping in the foreground and the people talking in the background, both visible (one usually on left half, one on right half of frame, to hide the focus split line). The audience’s eye jumps between the two in focus elements, which can create suspense or an uneasy feeling because we’re not used to that look in real life (we normally focus on one depth at a time). It can also just look stylistically cool, adding a sense of depth and duality.
When to Use It: Achieving a true split-focus in AI might be tricky, but you can try by specifying both near and far elements be in focus. For instance, “split-focus shot: a hand holding a locket very close to camera in focus, and in the distance a child on a swing also in focus.” The AI might attempt to do it (some might blur normally though). Another approach is to describe it as “both foreground and background sharp.” Use this when you want to emphasize two subjects – one near, one far – at the same time. Good for scenarios like someone spying (foreground eye through a crack, background conversation visible), or any creative composition where an object in front and scene behind are equally important (like a spider on a web in extreme close-up with a person in background, both clear – creepy effect!). It’s a bit advanced, and not all models might get it, but mentioning it specifically (“split diopter effect” or “dual focus”) could trigger the learned concept[33]. This is definitely a specialty look, used in thrillers and such (Brian De Palma films are famous for it). In summary: use it to show simultaneous importance or connectedness of two different depth elements in one shot.
Prompt Example:
split-diopter style shot – in the extreme foreground on the left, a revolver on a table is in sharp focus; in the distant background on the right, a detective peeks through a door, also in sharp focus, middle ground softly blurred, tense atmosphere
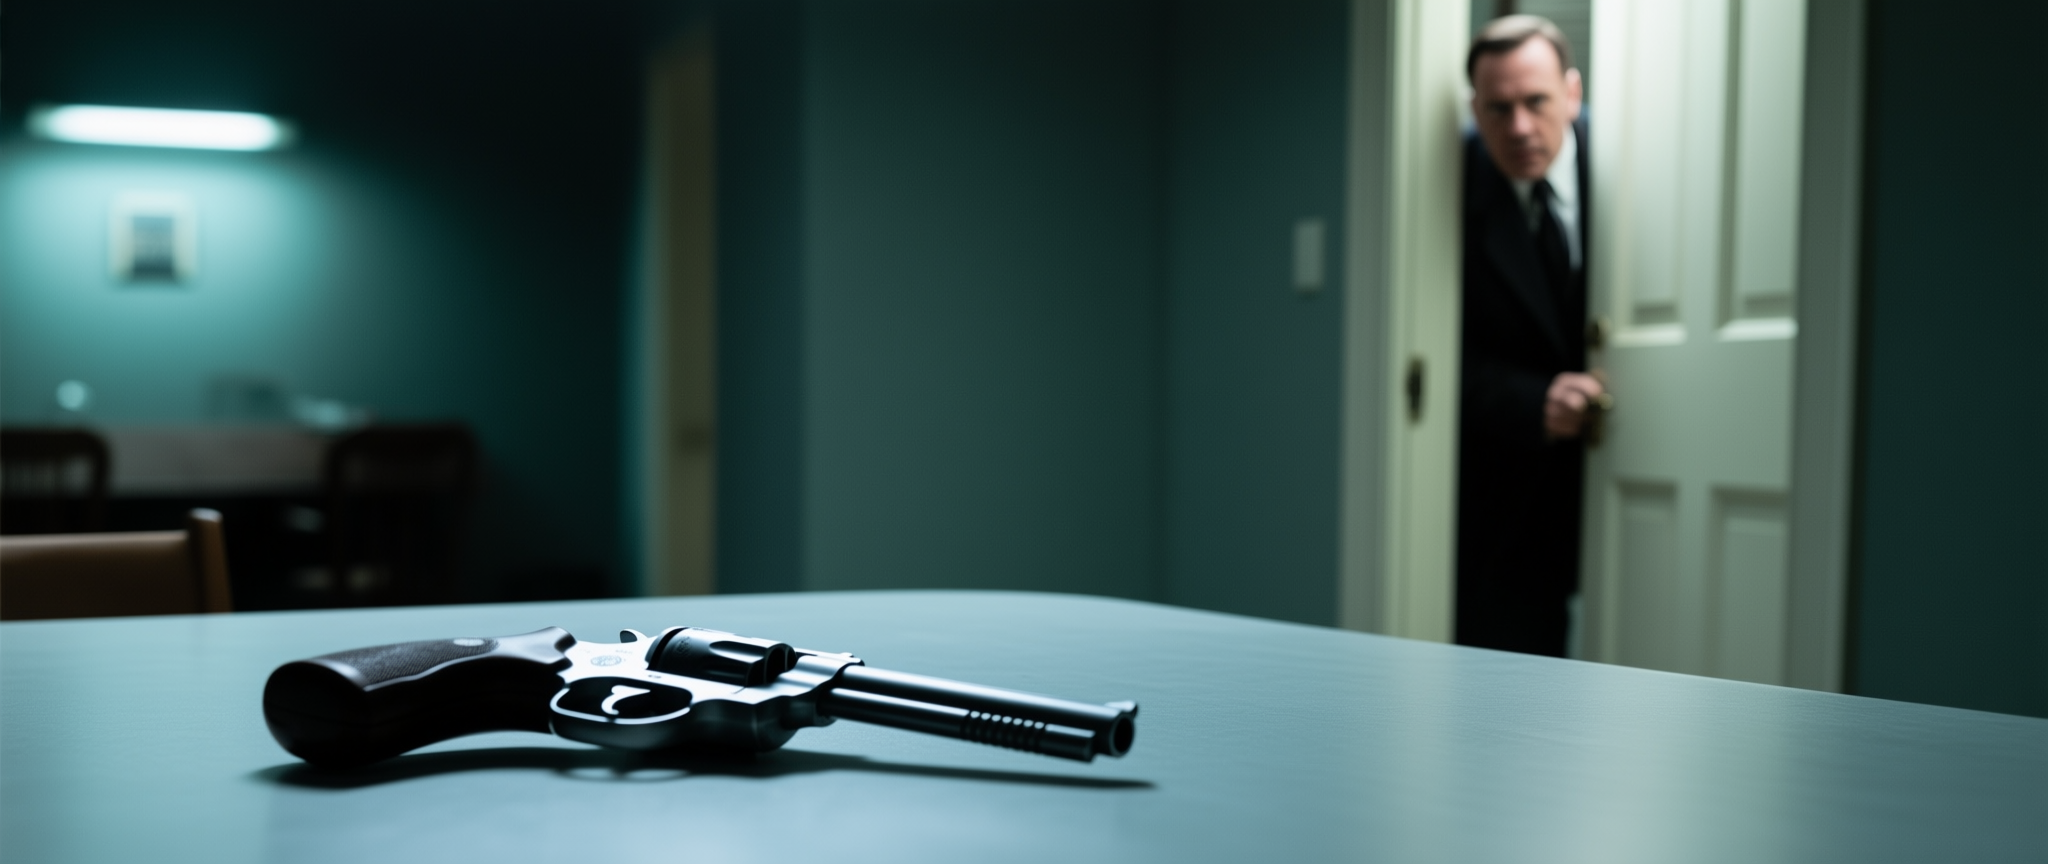
(This prompt clearly asks for that split-focus look. Ideal outcome: the image shows the gun very large and clear in front, and far back the detective’s face also clear, with maybe a noticeable divide or blur between them. The mood is tense because we see the important clue (the gun) and the detective concurrently, something usually achieved with a split diopter lens[36]. Whether the AI can perfectly do it is uncertain, but the prompt sets the stage for it. If it works, the viewer will unconsciously pick up that something is dramatic and important about those two elements – a cool, stylized effect.)
Silhouette Shot
Definition: A silhouette shot is when the subject is captured in near-complete darkness against a brighter background, so you see only their outline (silhouette) and no or very few details on the subject itself. Common scenario: a person in front of a sunset appears as a dark shape with maybe rim light. Basically, the lighting is such that the subject is backlit and unexposed, creating a stark silhouette.
Emotional Impact: Silhouettes evoke a sense of mystery, drama, and universality. Since you can’t see details, the subject can become symbolic or iconic (anyone can imagine themselves as that figure). It often feels poignant or romantic (think two lovers kissing in silhouette at sunset) or dramatic and foreboding (an ominous figure with only outline visible). Removing facial details can actually amplify emotion in a scene by focusing on body language and the backdrop’s mood. It can also feel lonely or contemplative – a lone silhouette against a vast background suggests solitude or reflection.
When to Use It: You’d prompt this by emphasizing backlighting and that the subject is dark. E.g., “silhouette of a couple under a tree at dusk” or “silhouette shot, the hero stands in doorway, only outline visible with bright light behind.” The AI will then likely render the subjects as black shapes. It’s great for sunset/sunrise scenes, foggy or smoky backgrounds with clear outlines, or any time you want anonymity or focus on form over detail. For instance, if you want to depict a soldier but not any particular face = silhouette against a war-torn sky can be powerful. It’s also useful if details might be distracting or if you want to add a bit of stylistic flair. Note that silhouette photography often yields very graphical, high-contrast images, which can be visually striking. Use it for emotional moments, iconic poses, or suspense (like the shadow of a villain). It’s a simple trick that can make an image look artistic and dramatic in one go.
Prompt Example:
silhouette shot of an elephant walking on the savannah at sunset, the sky ablaze with orange and red, the elephant’s shape completely black and majestic against the glowing horizon
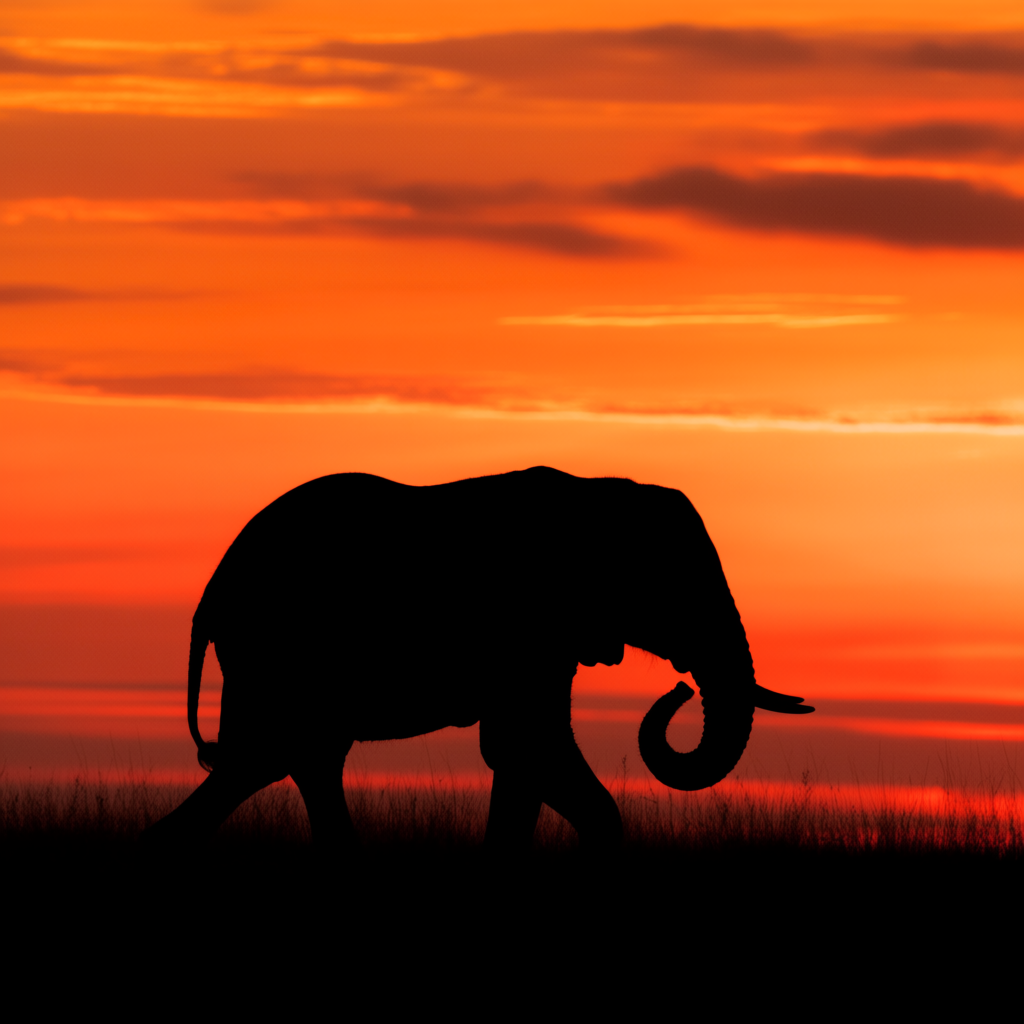
(This explicitly says “silhouette shot” and describes the lighting. We expect an image where the elephant is just an outline (no visible texture), with a vibrant sunset behind. The feeling will likely be majestic and a bit emotional (sunsets plus silhouettes often convey a natural beauty and maybe nostalgia). It demonstrates how a strong outline – the recognizable shape of an elephant – can carry the image when lit from behind. The viewer’s focus goes to that outline and the sky, eliciting a sense of awe without needing detail on the elephant itself.)
X-Ray / Magical Vision
Definition: “X-ray or magical vision” implies a view that sees things not normally visible – like an X-ray seeing through skin to bones, or a magical vision seeing hidden auras, internal energy, or perhaps through walls. It’s a specialty perspective often used in sci-fi/fantasy: showing the inside of an object or a character’s internal workings, or the world as perceived by a supernatural being.
Emotional Impact: An X-ray or special vision shot can feel intriguing, scientific, or eerie, depending on usage. Seeing something’s insides (like skeletons visible) can be unsettling or educational. Magical vision might make things look wondrous or scary if, say, a wizard sees someone’s aura (glowing colors around people indicating mood) or a predator sees heat signatures (infrared vision, like Predator movie). It creates a sense of otherworldliness – we’re not seeing normally, which can be cool and novel for the viewer. It might also convey revelation – revealing secrets (like a concealed weapon on someone, shown via X-ray view). It has a bit of a “superpower” vibe.
When to Use It: This one is very context-specific. If you want an X-ray style image, prompt something like “X-ray vision view of a hand – bones visible through the skin” or “magical vision showing the hidden runes on a wall.” The AI might interpret “X-ray” literally (like medical X-ray style) or more creatively with partial transparency. Magical vision could be described: e.g., “as seen with magical sight, the forest is full of floating spirits” – so you’d see normally invisible spirits. You use these when you want to illustrate things normally unseen. For example, “X-ray shot of a person showing their heart glowing inside their chest” for a metaphorical image, or “dragon’s magical vision revealing the heat of knights hiding in fog” – could produce a thermal vision effect. It’s a neat trick for creative or conceptual art. It’s definitely stylized: don’t expect photorealism; it will look like an effect overlay. But that can be exactly the point – to give an image a surreal or tech/fantasy feel. Essentially, use it to show a hidden truth or layer in the image’s story.
Prompt Example:
magical vision shot of a wizard observing a village – the scene is overlaid with glowing outlines around each house, mystical symbols hovering that only the wizard’s sight reveals, a faint X-ray-like transparency showing hidden treasures under the floors
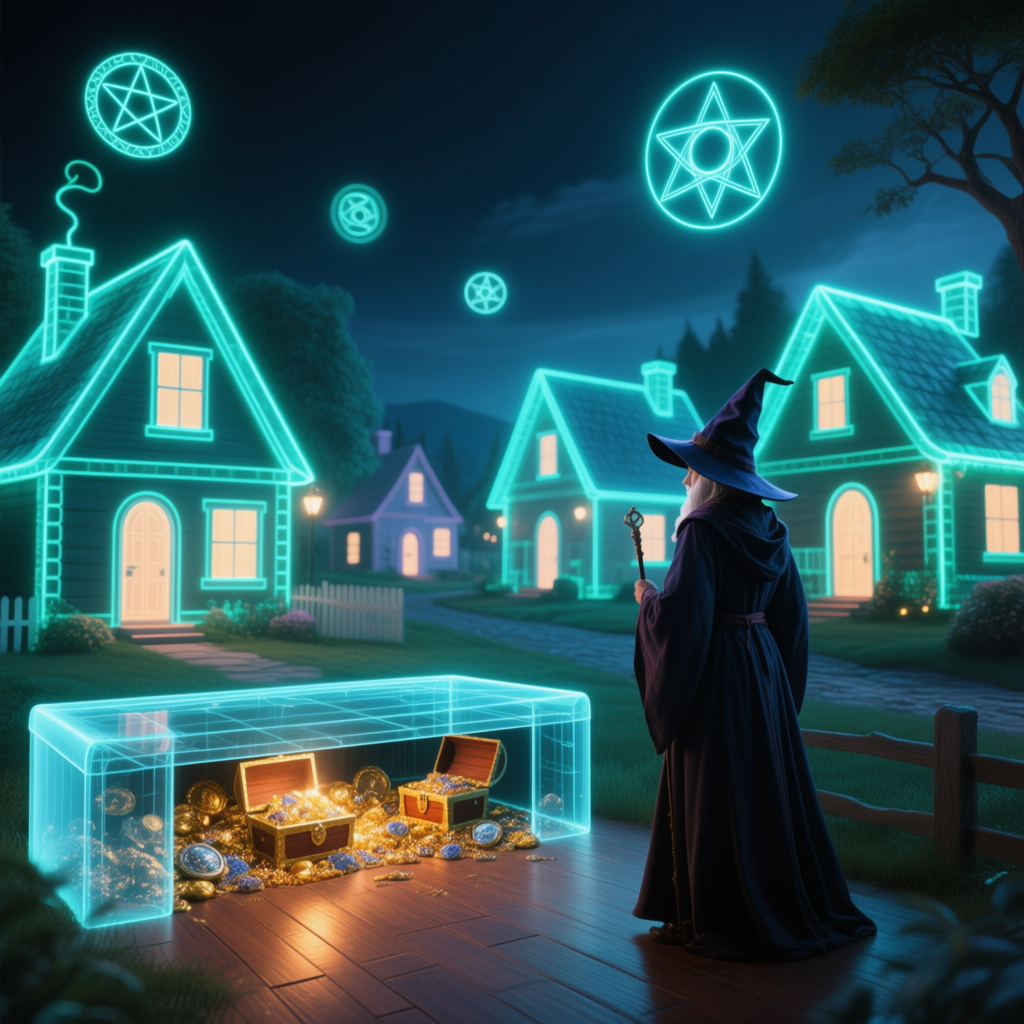
(This is a bit complex, but it asks for the idea that the wizard’s POV includes elements that normal vision wouldn’t. The AI might respond by making the houses semi-transparent or adding glowing symbols. The result should feel ethereal, like we’re seeing the magical overlay on reality. The emotional tone is one of enchantment and insight – we, as viewers, feel like we have secret knowledge by looking through the wizard’s eyes. This shows how combining “magical vision” with an X-ray concept (seeing hidden treasures under floors) can yield a unique, storytelling-rich image.)
Long Take Framing
Definition: A long take refers to an extended continuous shot in film without cuts. For our purposes, “long take framing” might mean composing an image as if it’s from a scene where the camera hasn’t cut, often resulting in multiple points of interest or a wider field to allow action to unfold continuously. In a single frame, we obviously don’t have time, but maybe the idea is to frame things in a way that suggests a continuous narrative flow or depth of action (like something happening in foreground, mid, and background all in one shot – since in a long take you might see a lot of the set as actors move through).
Emotional Impact: Referencing a long take can give a sense of realism and immersion – since long takes often make the audience feel like they are watching real time unfold. It might also imply complexity in the scene (choreography of elements). In a still, if executed, it could feel lively and continuous, like the moment captured is part of a fluid movement and not a quick cut. It can be impressive or tense (some long takes in movies build great tension because we know we aren’t cutting away).
When to Use It: Admittedly, this is a tough one to translate to a single prompt. Perhaps you’d use “one-take style framing” if you want the AI to include a lot in one image: e.g., “long-take style wide shot of a busy kitchen – chefs in foreground chopping, waiters in midground, customers in background, all visible and in focus.” That might simulate the feeling of one continuous shot where different mini actions happen at different depths (which a director might do in a long take rather than cutting to each). So use it when you want a busy scene with multiple focal points all in one image, captured as if the camera is just observing continuously. It could also mean a somewhat wide composition that allows for movement, rather than a tight focus on one subject. The phrase “long take” itself might not be recognized by AI, so better to describe the effect: “continuous action framing” or “multiple layers of action in one frame.” The effect should be an image that tells a story with background and foreground interactions, not just a single subject. It gives a feeling of scope and continuity. It might also keep everything in focus (similar to deep focus which is common in scenes where long takes show background happenings). So basically, use this approach for complex scenes where context and simultaneous actions matter.
Prompt Example:
one-take style framing of a theater stage performance – in the single shot, actors are dancing in the foreground, stagehands are visible changing the set in the midground, and an audience in the background, all elements captured together as if a continuous live scene
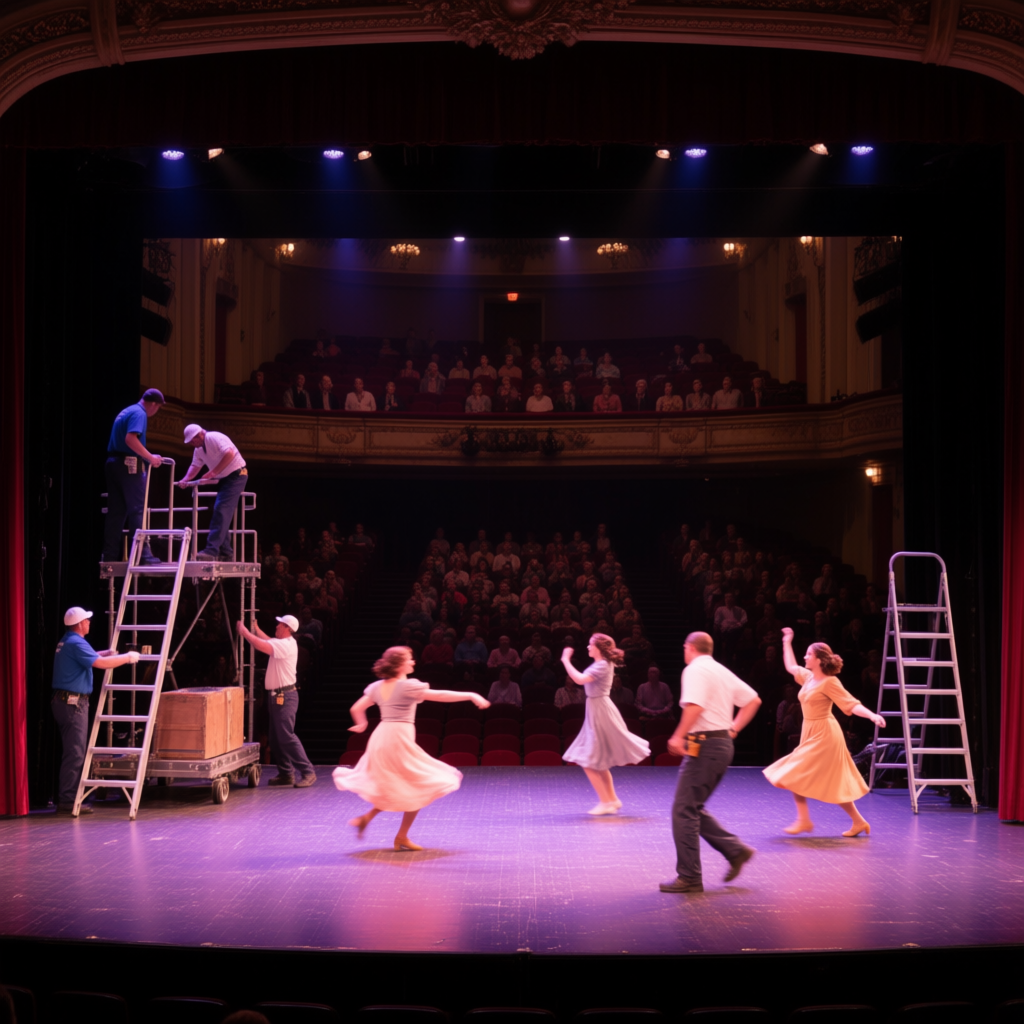
(The prompt explains the desired complexity: multiple things happening at once in one view. The AI should try to produce an image where you see dancers up close, maybe some stagehands at work on the side, and even the audience dimly beyond, all part of one composition. The feeling will be that of actually being there watching a live performance without cuts – the image conveys a lot of simultaneous life. This mimics how a long take might wander its focus but keep rolling: we see more than a typical shot might show at once. The result is a richer, more immersive snapshot that suggests the continuity of time and space beyond the frame.)
Fisheye Distortion
Definition: A fisheye lens is an ultra-wide angle lens that produces strong barrel distortion, making the image look curved at the edges (like a fisheye view). It captures a very wide field (up to 180° or so), resulting in lines bending outward near the edges of the frame. The center can appear to bulge. Think of those peephole door viewers or a GoPro wide shot – that’s the fisheye look.
Emotional Impact: Fisheye shots feel dynamic, distorted, and often playful or surreal. Because they warp perspective, they can make scenes look exaggerated or curved, which might feel trippy or comic. Straight lines (like horizon or buildings) become curves, giving a sense of all-encompassing view but also unreality. It can also convey spaciousness in a small area (as it crams a lot in). If used on faces or close subjects, it creates a caricature effect (big nose closer to lens, etc., can be funny or unsettling). Overall it’s attention-grabbing because it’s not how we normally see.
When to Use It: You’d mention a fisheye lens or distortion when you want that effect. E.g., “fisheye lens shot of a skateboarder doing a trick – edges of frame distorted” or simply “fisheye perspective”[37]. The AI likely understands “fisheye lens” as a style. Use it for skateboarding, sports, or music videos style shots where it’s common, or for artistic interior shots to capture a lot (like a fisheye of a full room). It’s also great for POV of animals (some say fisheye mimics how certain animals see, though not exactly). If you want a scene to look edgy or distorted to imply maybe intoxication or a dream, fisheye could help. In summary, pick fisheye when a super wide, bent perspective will enhance the image – either by fitting more in or by giving a quirky vibe. Just note it will curve things, so best used when that’s desirable for style.
Prompt Example:
fisheye lens view of a city street corner, the buildings and lamp posts curving at the edges of the frame, a cyclist approaching close to the camera appears exaggerated in size, dynamic and immersive urban shot
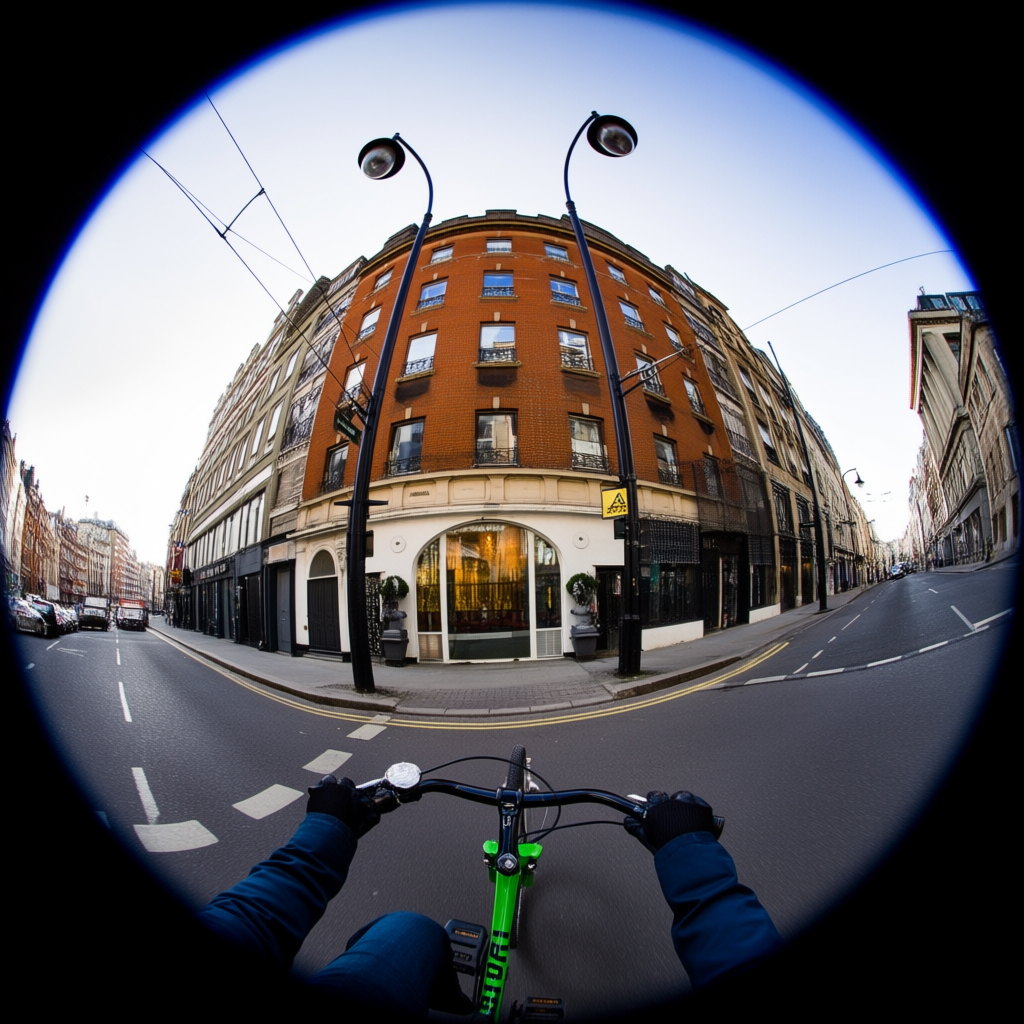
(By specifying “fisheye lens view,” the AI should produce an image with that barrel distortion – buildings bending. The cyclist near the camera might have an enlarged look (since fisheye up-close magnifies). The result should feel like a GoPro or skate video style shot in the city – energetic and a bit warped. It demonstrates how fisheye can turn a normal city scene into something more immersive and stylized, capturing a wide expanse in one frame with a signature distortion.)
Those are the specialty angles! Each of these – from Dutch tilts to fisheye – can be powerful tools in prompt-building to evoke certain feelings or styles. Next, we’ll discuss mixing angles and a quick reference list of all these terms.
Mixing Angles for Creative Results
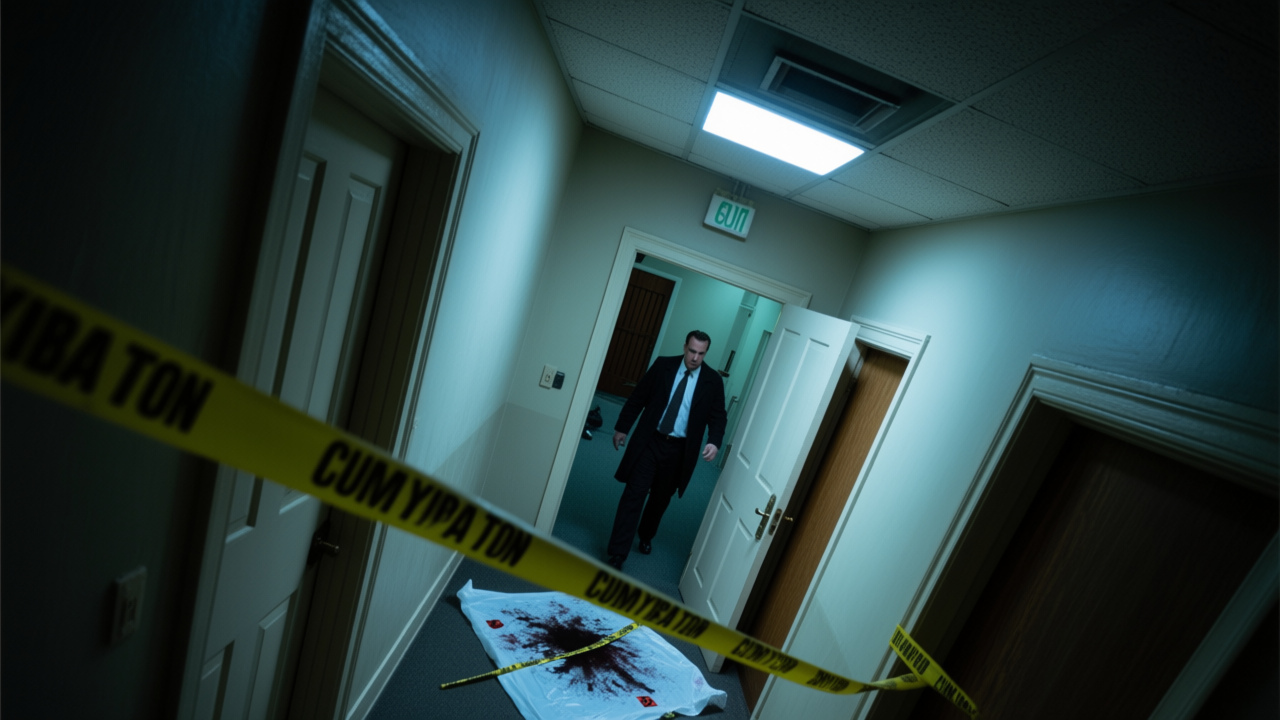
Individual camera angles are powerful on their own, but you can also combine multiple angle types in one prompt to create even more interesting and specific compositions. In photography and film, the camera’s vertical angle, horizontal placement, framing, and motion can all be chosen at once – and we can mimic that in prompts. For instance, you might want a low-angle over-the-shoulder close-up, which mixes a height angle (low), a horizontal setup (behind someone’s shoulder), and a framing (close-up). Combining descriptors lets the AI know you want aspects of each.
When mixing, be mindful that some terms might conflict (e.g., “high-angle low-angle” wouldn’t make sense together). But most different category terms complement each other. You can specify one from each category: one vertical (high/low/eye-level/etc.), one horizontal (front/side/OTS/etc.), one framing (close-up, medium, wide, etc.), and even a motion style (like tracking or Dutch tilt). This paints a detailed picture of the camera setup.
Example Multi-Angle Prompt Ideas:
“Low-angle, over-the-shoulder medium shot of two knights dueling – camera at ground level behind one knight, looking up at the other, both figures half in frame, intense action scene.” Here we combined low-angle (vertical) + over-the-shoulder (horizontal) + medium shot (framing). The result would feel like you’re behind one knight, low to the ground, seeing the other looming larger – a very dramatic composition.
“High-angle wide establishing shot, slightly Dutch-tilted, of a detective entering a crime scene – the view from a corner of the ceiling, room looks askew and distant, capturing the whole scene with an uneasy vibe.” This mixes high-angle (vertical) + wide establishing (framing) + Dutch tilt (stylized). The camera is high and tilted, giving a full view of the room and a sense of tension.
“Tracking low-angle close-up of a running cheetah – camera at the animal’s shoulder height, moving alongside it, face in focus filling a lot of frame, background blurred with motion.” That combines low-angle (we’re at the cheetah’s level) + close-up (framing on its face) + tracking (motion feel). This would yield an intense, in-the-run shot.
When combining, order in the prompt can sometimes matter. It helps to lead with the more dominant angle or the one that sets overall composition, then add modifiers. E.g., start with “high-angle long shot” then add “over-the-shoulder” if both are used, since OTS is a specific composition within that.
Also, not every combination will always perfectly render – the AI might prioritize one over the other if it’s tricky (for instance, “close-up establishing shot” is inherently contradictory, since establishing is usually wide – so choose logically compatible mixes).
The fun of mixing is you can get extremely specific, tailoring the image to a story or mood. Maybe you want a POV Dutch angle for a dizzy, personal feeling, or a fish-eye over-the-weapon shot for a really stylized action POV. Feel free to experiment; if the result isn’t as expected, you can reword or simplify.
Multi-Angle Prompt Example:
Let’s do one step-by-step: Say we want an image of a car chase from a very engaging perspective. We could combine: - Horizontal: over-the-shoulder – maybe as if we’re in the chase vehicle. - Vertical: eye-level or low inside the car. - Framing: maybe a medium shot (enough to see some interior and the road ahead). - Motion: tracking (since cars moving) + possibly a bit of dutch tilt if we want chaos.
Prompt could be: “over-the-driver’s-shoulder tracking shot from inside a car during a chase, camera at the driver’s eye level looking out at the road, the view ahead is Dutch-angled and motion-blurred, intense action mood.”
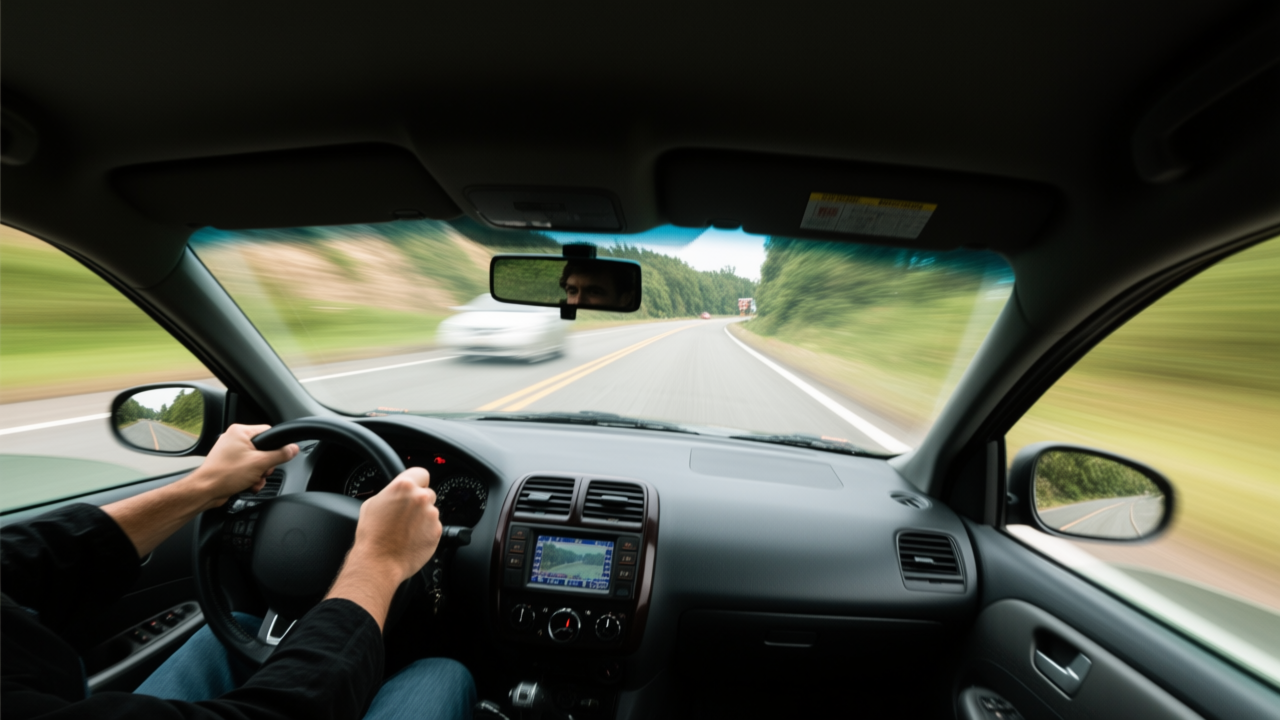
This instructs: we’re in a car (so OTS of driver), we’re moving (tracking + motion blur), we have a tilt (Dutch) to emphasize chaos, and eye-level to keep it like a real POV height. An AI might produce an image as if you’re in the backseat watching over the driver’s shoulder as they speed, with the windshield view tilted and blurred. That’s a rich combination you’d never get from a single word prompt.
In summary, mixing angles = richer storytelling in one frame. You can set the scene (high/low, etc.), position the viewer (horizontal choice), decide how much they see (framing), and add flair or motion (Dutch, blur, etc.) all together. Don’t be afraid to use multiple comma-separated descriptors to layer these instructions. It might take a bit of prompt engineering to get it right, but the results can be very rewarding and unique.
Angles vs. Perspective
Before we wrap up, let’s clarify a point that often confuses beginners: the difference between camera angles and perspective. In everyday language we mix them (and even in this guide we’ve loosely referred to “perspective” sometimes), but it’s good to understand:
Camera Angle usually refers to the physical position and tilt of the camera relative to the subject (high angle, low angle, Dutch tilt, etc.) – basically all the things we’ve been discussing.
Perspective in visual terms refers to how objects appear relative to each other depending on the camera’s position and lens. It’s about depth, scale, and spatial relationships. For example, a wide-angle lens up close has a perspective that makes near things look huge and far things tiny (exaggerated perspective), whereas a telephoto lens flattens perspective (far and near seem similar size). In art class, perspective is about vanishing points and how parallel lines converge in the distance.
In simple terms: angle is where you place the camera; perspective is how the world’s depth is rendered from that viewpoint.
A relatable example: imagine you’re talking to a friend at a table. If you stand up and look down at them, that’s a high angle. If you kneel, that’s a low angle. Now, perspective: if you put on a pair of those funny wide-angle goggles (like a fisheye), your friend’s nose might look big – that’s perspective distortion due to lens. Or if you squint through a paper tube, things might look flatter – that’s a different perspective (like telephoto). The angle (your position) might not have changed, but the perspective (the way depth is portrayed) can change with optics.
In AI prompting, when we say perspective, some models might interpret it as either of these. For example “from a bug’s perspective” implies a low angle (because a bug is on the ground) – effectively angle. While “forced perspective” is a technique where perspective is used to create illusion (not angle). Generally, if you stick to camera angle terms for angle and use words like “wide-angle” or “fisheye” for perspective distortion, you’ll communicate clearly.
Another everyday way to see it: - If you are at a certain place looking – that’s angle (on the roof looking down = high angle). - If you are seeing in a certain style – that can be perspective (a distorted, panoramic, or flat look).
In prompts: - Use angle words (high, low, POV, etc.) to set where the camera is. - Use lens words (wide-angle, telephoto, fisheye, macro) to influence perspective/distortion and field of view. - Use depth words (foreground, background, depth of field) to clarify how perspective is shown (sharp vs blurry etc.).
For beginners: don’t stress the academic difference too much. If you say “from above” or “bird’s perspective,” any AI will do a high angle. If you say “wide-angle shot,” it implies both an angle (somewhat maybe at human eye level unless stated) and a perspective (wide lens look). We often bundle them, and that’s okay.
The main thing is understanding that angles change the storytelling viewpoint (power, emotion, context), whereas perspective (lens choices) change how exaggerated or realistic the spatial relations appear.
A quick test: Look at your room through a camera app with fisheye if available – everything curves and the room looks huge: you changed perspective (lens) but not angle (you stood in same spot). Now hold the camera high then low: you changed angle (viewpoint) but perspective (lens) might have stayed same. See how the feeling changes in both cases? Use both in prompts to your advantage.
So when crafting prompts: - Choose the angle to set mood (e.g., high angle for vulnerability). - Choose the perspective/lens to set drama (e.g., wide-angle for exaggerated depth or telephoto for flatter, closer feel). - And yes, you can mention perspective in terms of character too (like “from the perspective of a child” often implies both a lower angle and perhaps a sense of wonder).
Example to illustrate: If I say “a dog as seen from a child’s perspective,” likely that’s a low angle (the child is short, looking up at dog maybe). If I say “a dog in wide-angle from up close,” the dog’s nose might look huge (that’s perspective distortion). If I combine: “a low-angle, wide-angle shot of a dog” – camera near ground (angle) and using wide lens (perspective) – dog will look big and looming with maybe a funny big snout (both effects).
In summary, angles vs perspective: Angle is where you place the camera, Perspective is how the scene’s depth is rendered. In prompts, we mostly use angle terms we discussed, but knowing perspective (like lens effect) can further refine your image generation once you get angles down.
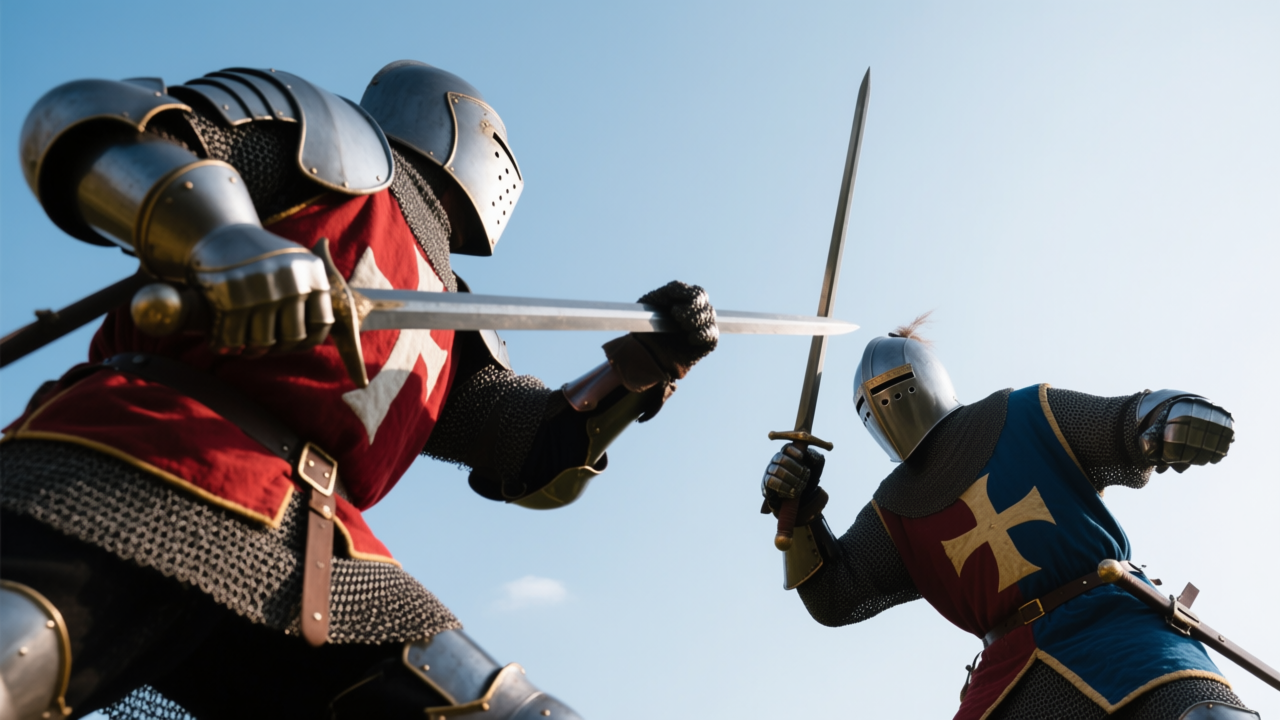
Quick-Reference Summary of Angles
To wrap up, here’s a handy list of the angle keywords and concepts we’ve covered. You can use these terms in your prompts (copy-paste or modify) to achieve the described shots. Mix and match as needed!
· High Angle – camera above the subject, looking down (subject looks small/vulnerable).
· Low Angle – camera below the subject, looking up (subject looks large/powerful).
· Bird’s-Eye View – very high, aerial view (like from a drone or bird, wide context).
· Overhead / God’s Eye – directly above, 90-degree top-down shot.
· Worm’s-Eye View – extremely low angle from ground, looking sharply up.
· Eye-Level – camera at subject’s eye height, neutral perspective.
· Front View – subject facing the camera frontally.
· Three-Quarter View – subject turned ~45°, showing front and side.
· Profile Shot (Side View) – subject seen from the exact side (90°), just their profile.
· Side Angle – camera positioned directly to the side of action/scene (lateral view).
· Back Shot (From Behind) – camera behind subject, showing their back (facing away).
· Over-the-Shoulder (OTS) – camera just behind one person’s shoulder, facing another subject.
· Reverse Angle – opposite viewpoint from a previous shot (show the other side of an interaction).
· Extreme Close-Up – very tight frame on detail (e.g., part of face or small object).
· Close-Up – frames face or object closely (face fills frame, background barely seen).
· Medium Shot – frames subject from about waist up (balanced person and some surroundings).
· Medium Long (3/4) Shot – frames subject from roughly knees up.
· Full Shot (Wide Shot) – shows the subject’s full body head-to-toe.
· Extreme Wide Shot – subject is far small in frame, vast environment shown.
· Establishing Shot – wide shot that establishes scene/setting (often at scene start).
· Dolly-In (Push-In) – simulate camera moving closer (subject looming larger, background expands).
· Dolly-Out (Pull-Back) – simulate camera moving away (revealing more, subject gets smaller).
· Tilt Up – camera tilts upward (often to reveal something above or tall subject).
· Tilt Down – camera tilts downward (to reveal ground or something below).
· Whip Pan – very fast pan blurring motion (use motion blur for energetic turn).
· Tracking Shot – camera moves with subject (subject in focus, background blurs with motion).
· Crane Shot – camera moves vertically through space (up or down), often high sweeping view.
· Arc Shot – camera moves in an arc around subject (semi-circling, dynamic view).
· (Simulated) Drone Shot – aerial moving perspective (like a drone capture, high and sweeping).
· Dutch Angle (Tilt) – camera rotated diagonally, slanted horizon (creates unease).
· Point-of-View (POV) – viewpoint of a character (see what they see; often includes their hands/etc.).
· Over-the-Weapon View – first-person view showing a weapon in foreground (FPS game style).
· Reflection Shot – subject/scene visible via a reflection (mirror, water, glass) rather than directly.
· Split Diopter Effect – both foreground and background in sharp focus (dual-focus shot).
· Silhouette Shot – subject dark against bright background, only outline visible.
· X-Ray/Magical Vision – see hidden aspects (e.g., skeletons, auras, or through surfaces).
· Long Take Framing – composed to show multiple action layers in one shot (continuous-scene feel).
· Fisheye Distortion – ultra-wide fisheye lens look, curves edges, extremely wide field of view.
Feel free to use these terms in your prompts to guide the AI. With practice, you’ll get a feel for which models respond best to which words (some might prefer “bird’s eye” vs “aerial shot” or understand “OTS” vs needing “over the shoulder,” etc.). You can always rephrase if the AI doesn’t get it first try (for instance, if “split diopter” is too niche, you might describe the effect instead).
Now you’re armed with a whole arsenal of camera angle tricks – from simple high/low angles to fancy specialty shots. Use them to add depth, emotion, and storytelling to your AI-generated images. A well-chosen angle in a prompt can be the difference between a flat image and a captivating one. Have fun experimenting, and may your prompts always find the perfect angle!
[1] [4] Simple Composition Tricks to Instantly Improve AI Images with Prompts.pdf
file://file-DkwbsrRFpZZ1ykfwToWxw6
[2] [3] [5] [6] [8] [13] [27] [32] Camera Shots - Ms. Dodge's Website
https://gmhsart.weebly.com/camera-shots.html
[7] [10] [11] [12] [14] [15] [18] [31] The 16 Types of Camera Shots & Angles | Boords
https://boords.com/blog/16-types-of-camera-shots-and-angles-with-gifs
[9] Master the Shot-Reverse shots | Improve Your Film's Flow with ...
https://www.capcut.com/resource/master-shot-reverse-shots
[16] [17] [28] [29] [30] [37] 15 Midjourney Camera Angles and How to Choose (with Examples) - Aiarty
https://www.aiarty.com/midjourney-prompts/midjourney-camera-angles.htm
[19] [20] [21] [22] [23] [24] [25] [26] How filmmakers manipulate our emotions using camera angles and movement
https://wolfcrow.com/how-filmmakers-manipulate-our-emotions-using-camera-angles-and-movement/
[33] [34] [35] [36] What Is a Split Diopter Shot? Film Technique Explained
https://spotlightfx.com/blog/what-is-a-split-diopter-shot-cinematography-technique-explained


