This is part 6 of a series:
Simple Composition Tricks to Instantly Improve AI Images with Prompts
More Simple Composition Tricks to Instantly Improve AI Images Using Prompts
Intermediate Composition Tricks to Instantly Improve AI Images Using Prompts
Intermediate Emotional & Narrative Composition Techniques for AI Images Using Prompts
Simple Composition Tricks to Instantly Improve AI Images with Prompts: Camera Angles Edition
Simple Composition Tricks to Instantly Improve AI Images with Prompts: Perspective Edition
Simple Composition Tricks to Instantly Improve AI Images with Prompts: Color & Mood Edition
Simple Composition Tricks to Instantly Improve AI Images with Prompts – Light & Shadow Edition
Simple Composition Tricks to Instantly Improve AI Images with Prompts: Texture & Detail Edition
Simple Composition Tricks to Instantly Improve AI Images with Prompts – Perspective Edition
Introduction: Perspective is the visual depth and spatial relationship in an image – essentially, how a 3D scene is represented on a flat 2D surface. In photography, painting, and filmmaking, creative use of perspective can make a scene feel vast, intimate, or even surreal. By adding perspective cues to your AI image prompts, you can instantly get more dynamic and professional-looking results. This guide introduces the most important types of perspective (from classic one-point perspective to wild fisheye distortion) in plain English, and shows how to use them effectively in text prompts. Each perspective type includes a simple definition, the visual effect it creates, when to use it for storytelling, and example prompt phrases you can try. We’ll also cover how to mix perspectives for creative results, and clarify how perspective differs from camera angle (so you don’t mix them up). Let’s dive in!
Single-Point Perspectives
(One-Point Perspective, Central Vanishing Point, “Tunnel” View)
Single-point perspective means there is just one vanishing point in the scene. All the parallel lines in the composition converge toward a single spot in the distance, creating depth[1]. This is the simplest form of linear perspective and is often used when you are looking straight on at a scene or directly down something like a road or tunnel. Single-point setups tend to naturally draw the viewer’s eye toward the center of the image or into the distance.
One-Point Perspective
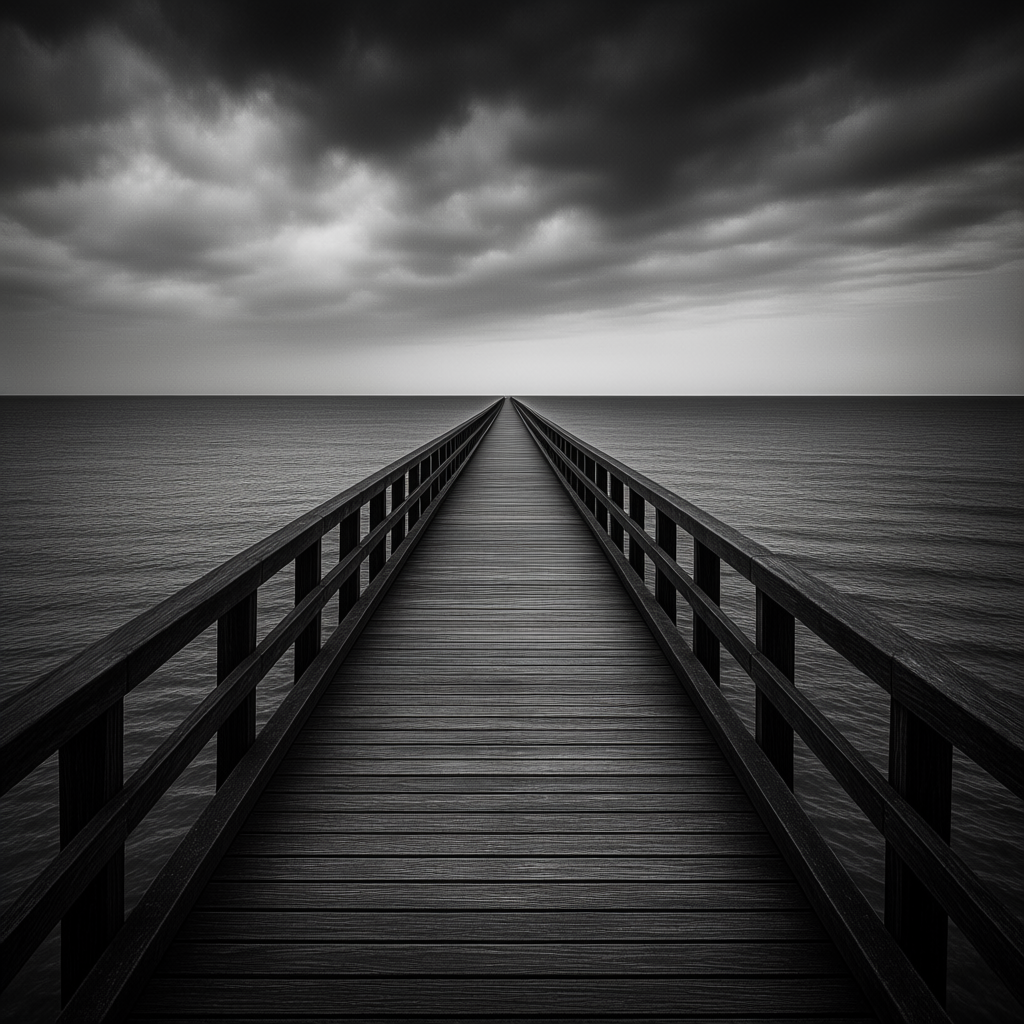
Definition: One-point perspective uses one vanishing point on the horizon line to depict depth and distance[1]. Imagine standing in the middle of a straight road or a long hallway – the sides appear to converge at a single far-off point. That distant “meeting point” is the vanishing point. In a one-point perspective scene, objects get smaller as they recede toward that point, giving a strong illusion of depth[2].
Visual Effect: One-point perspective creates a strong sense of depth and direction in an image. It often feels like the viewer is being drawn into the scene. Visually, it can be very symmetrical and focused when the vanishing point is centered (for example, looking straight down a railway track or tunnel). Everything in the scene seems to lead toward one spot, which can create a bold, sometimes dramatic composition. This perspective also makes scenes feel orderly and realistic, as it mimics how we truly perceive parallel lines in real life (they narrow toward the distance)[2].
When to Use It: Use one-point perspective when you want to emphasize depth or distance in a straightforward way, or when your scene has a natural “tunnel” shape. It works best for views that are head-on: for instance, looking down a road, hallway, corridor, railroad tracks, or any scene where you are facing a flat surface directly[3]. It’s great for centering attention on a subject at the end of a path, or creating a sense of journey into the image. In storytelling, one-point perspective can convey focus (all eyes drawn to one point) or even isolation (a lone subject at the convergence point). It’s commonly seen in interior shots (a room head-on) and architectural drawings because it clearly shows how space extends backward.
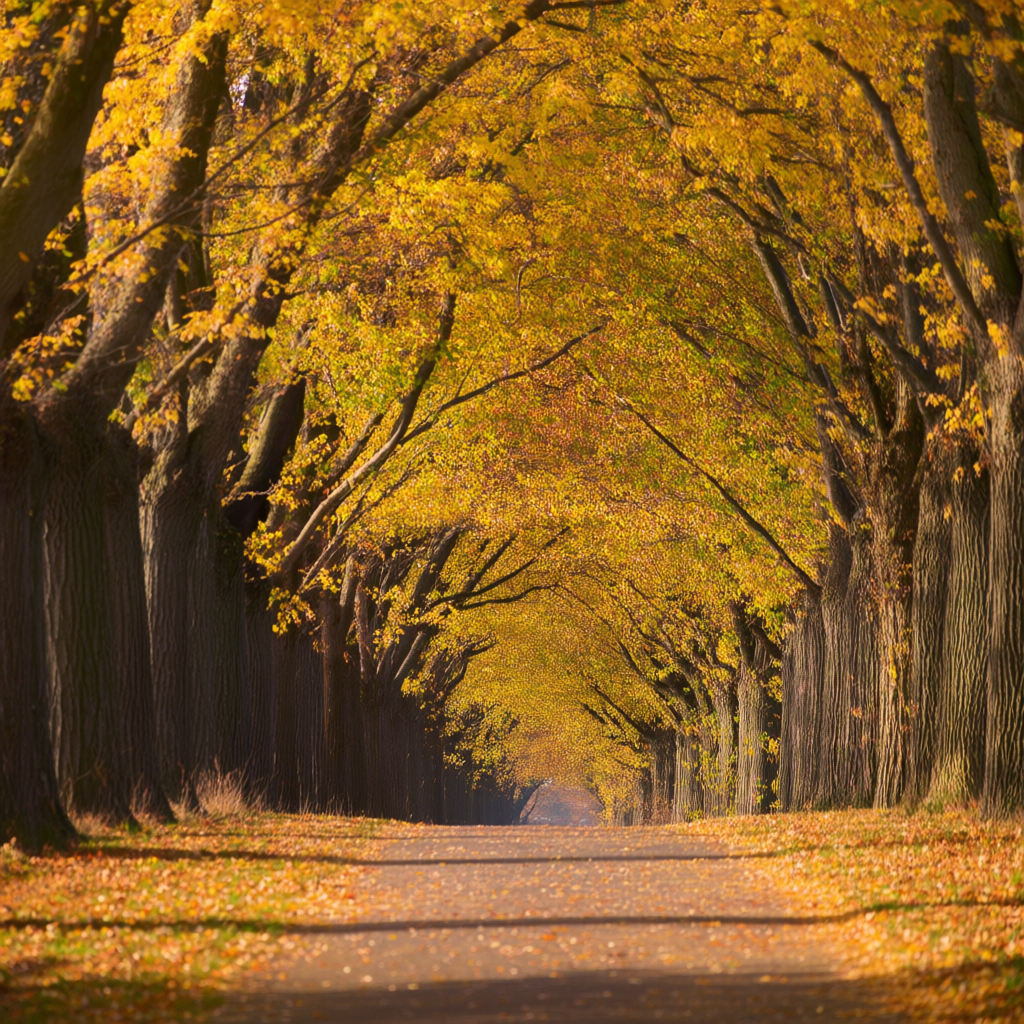
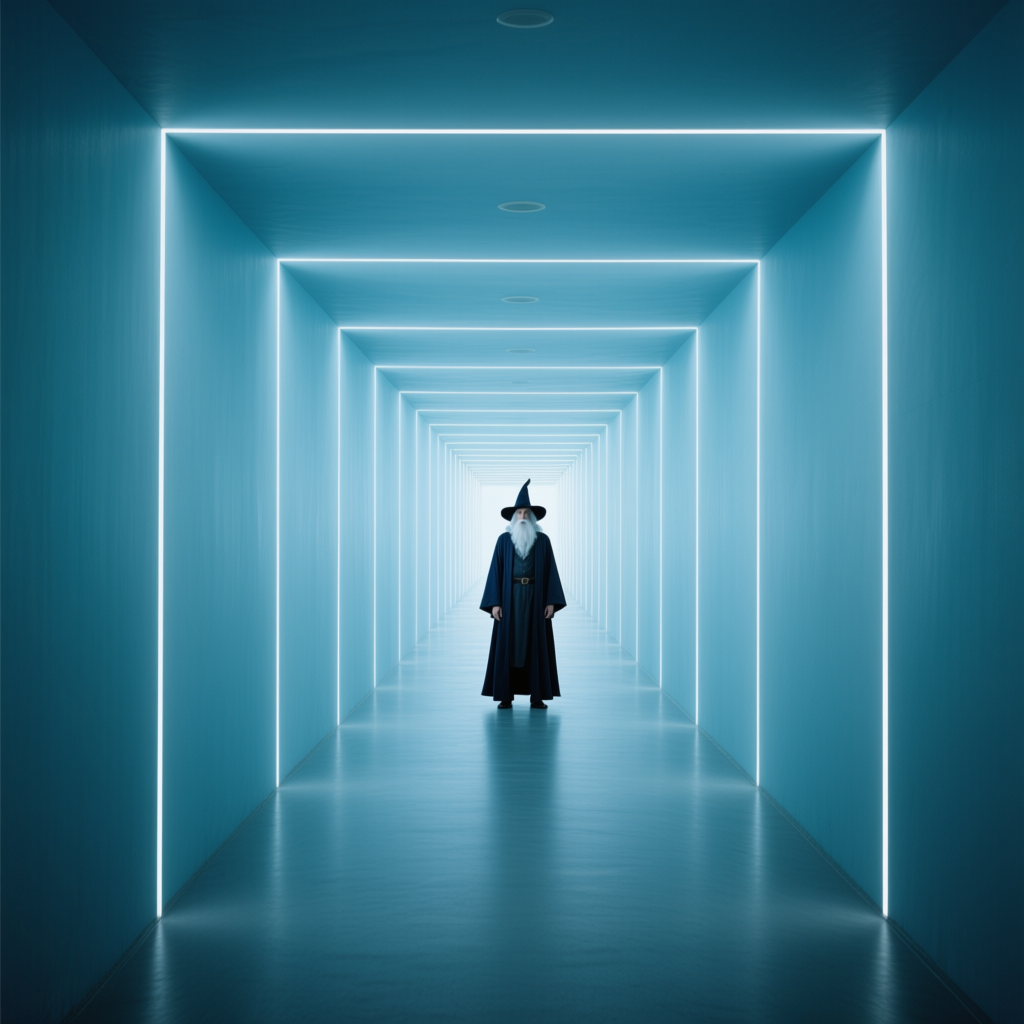
Prompt Examples: To prompt this, include phrases like “one-point perspective” or describe the scene’s lines converging. For example: “a dramatic photograph of a long pier stretching out to sea, one-point perspective, the boards converging to a single vanishing point at the horizon”. Another example: “portrait of a wizard standing in an endless hallway, central vanishing point composition, walls and ceiling lines all meeting behind him”. In both cases, we’re telling the AI to arrange the image so that it feels like everything is receding toward one far point. Including terms like “vanishing point” or “tunnel view” can help too. For instance: “a tree-lined pathway in autumn, tunnel view perspective, branches arching overhead and converging in the distance” – this suggests that the trees form a tunnel-like one-point perspective leading the eye inward. The AI should respond by creating a scene where the composition clearly narrows to a point, giving that satisfying depth effect.
Central Vanishing Point (Centered Perspective)
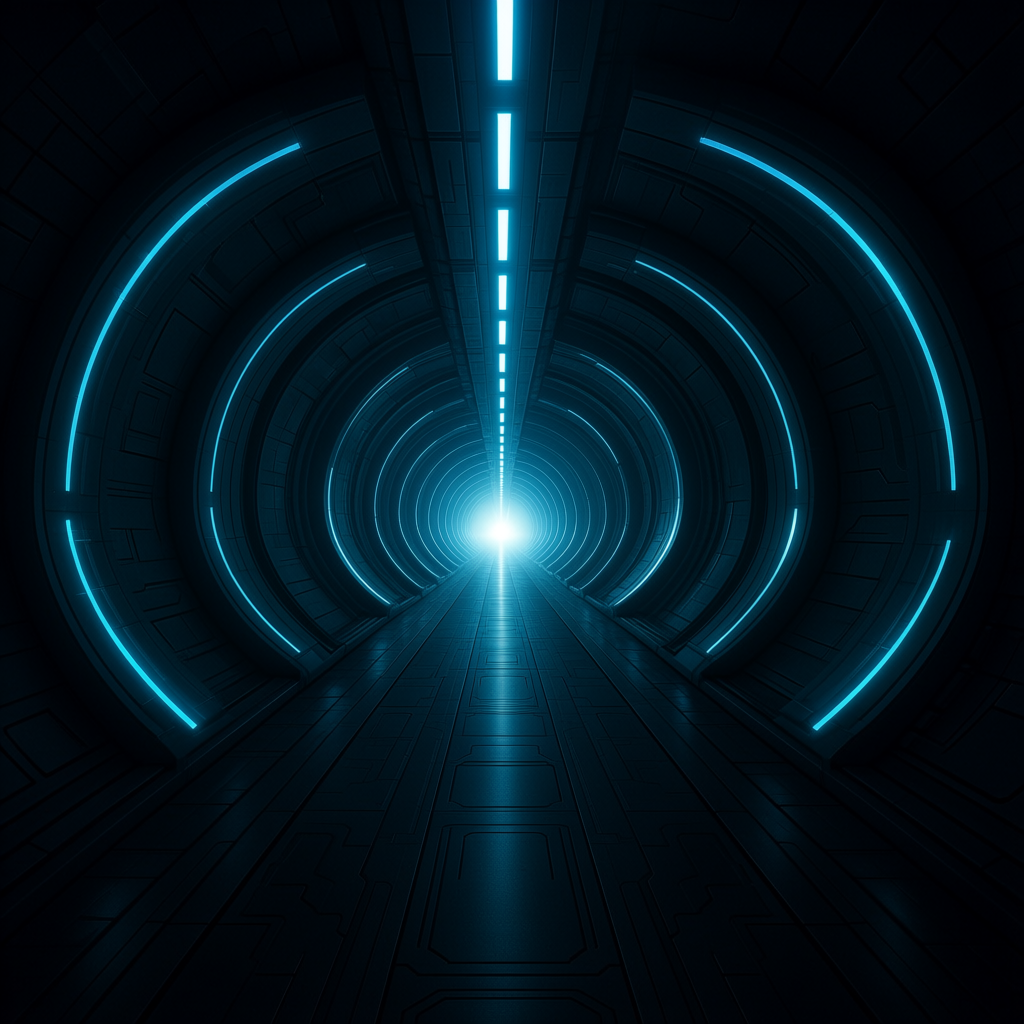
Definition: A central vanishing point perspective is essentially a special case of one-point perspective where the single vanishing point is placed dead center in the frame[4]. All the converging lines meet at the exact center of the image. This is the classic “looking straight down the middle” composition – think of standing perfectly centered in a symmetric hallway or at the midpoint of railroad tracks, so the depth lines go to the middle of the horizon.
Visual Effect: Using a centered vanishing point gives an image a strong symmetrical and often formal feel. Because the vanishing point is in the center, both halves of the image tend to mirror each other (left and right sides converge equally). This creates a tunnel-like or “portal” effect – the viewer feels like they’re being drawn straight forward into the middle of the scene. It can be very eye-catching and immersive. The depth is highlighted in a bold way, and the symmetry can lend a sense of stability or even awe (imagine standing inside a grand cathedral looking down the central aisle).
When to Use It: Choose a central vanishing point when you want perfect symmetry in perspective or to give the viewer a sense they’re going straight into the scene. It works best for scenes that are naturally symmetric or when you want a formal, balanced composition. For example, architecture shots (corridors, tunnels, roads) often use this to appear majestic or infinite – like a “hallway that goes on forever” vibe. Story-wise, a centered one-point perspective can emphasize a subject placed in the dead center (framed by converging lines), making them feel important or fated. It’s great for fantasy or sci-fi scenes of portals, endless halls, or any scenario where you want the focus smack in the middle with depth drawing in around it.
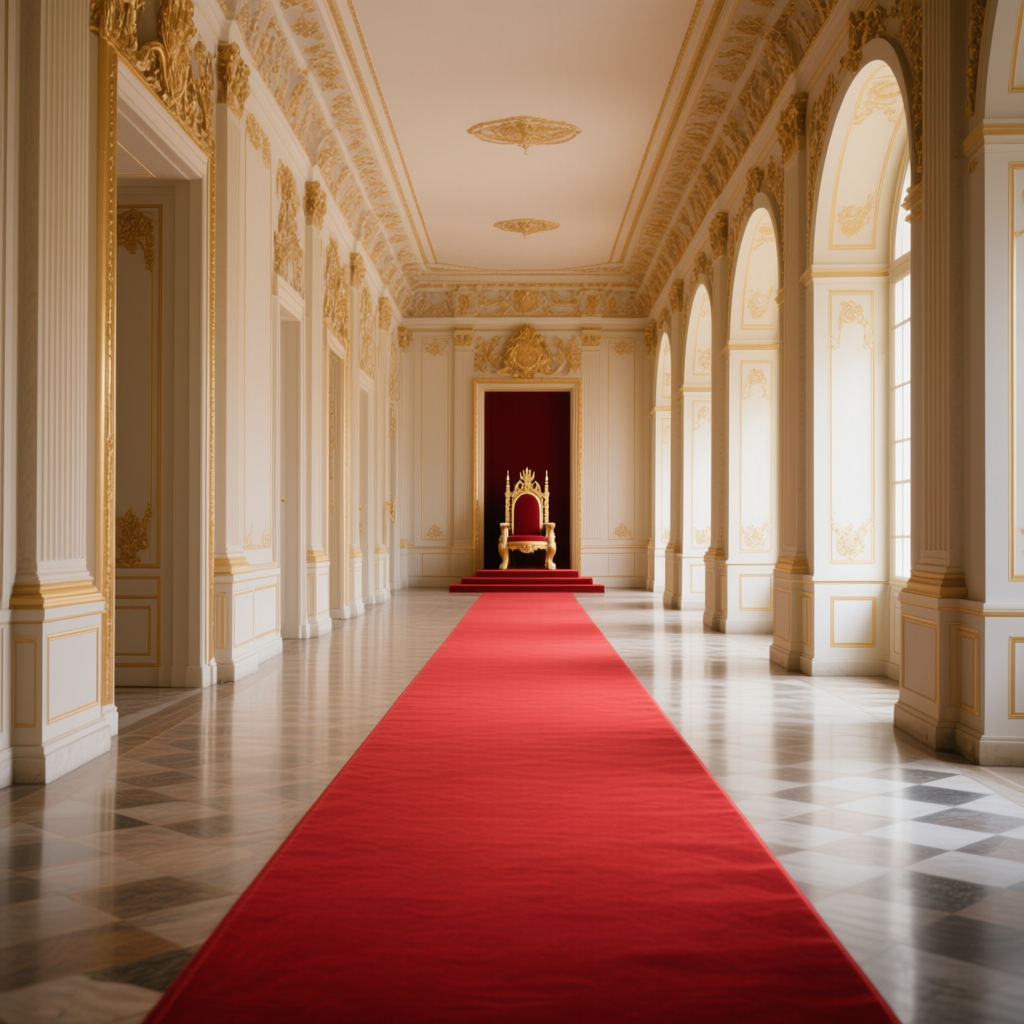
Prompt Examples: Include words like “central vanishing point” or simply ensure your description has symmetry with a distant point. For instance: “a futuristic tunnel, central vanishing point perspective, glowing light at the end” will tell the AI to make a tunnel where everything lines up toward the center. Or “majestic tree-lined avenue in winter, perspective lines converging at the center”. Another approach is to describe the scene as “perfectly centered” with one-point perspective elements: “an empty palace corridor, perfectly centered one-point perspective, red carpet leading straight to a throne”. All these cues encourage the AI to align the composition so that depth lines meet centrally (like a satisfying mirror image leading inward).
“Tunnel View” Perspective
Definition: “Tunnel view” isn’t a technical term but a descriptive one – it refers to a composition where the surroundings form a tunnel-like frame around the scene, drawing the eye inward to a single point. Essentially, the image looks like you are standing inside a tunnel or archway, looking out. It’s usually a variant of one-point perspective (often central) where the objects (trees, buildings, etc.) arch over or surround the viewer’s view, creating a tunnel shape.
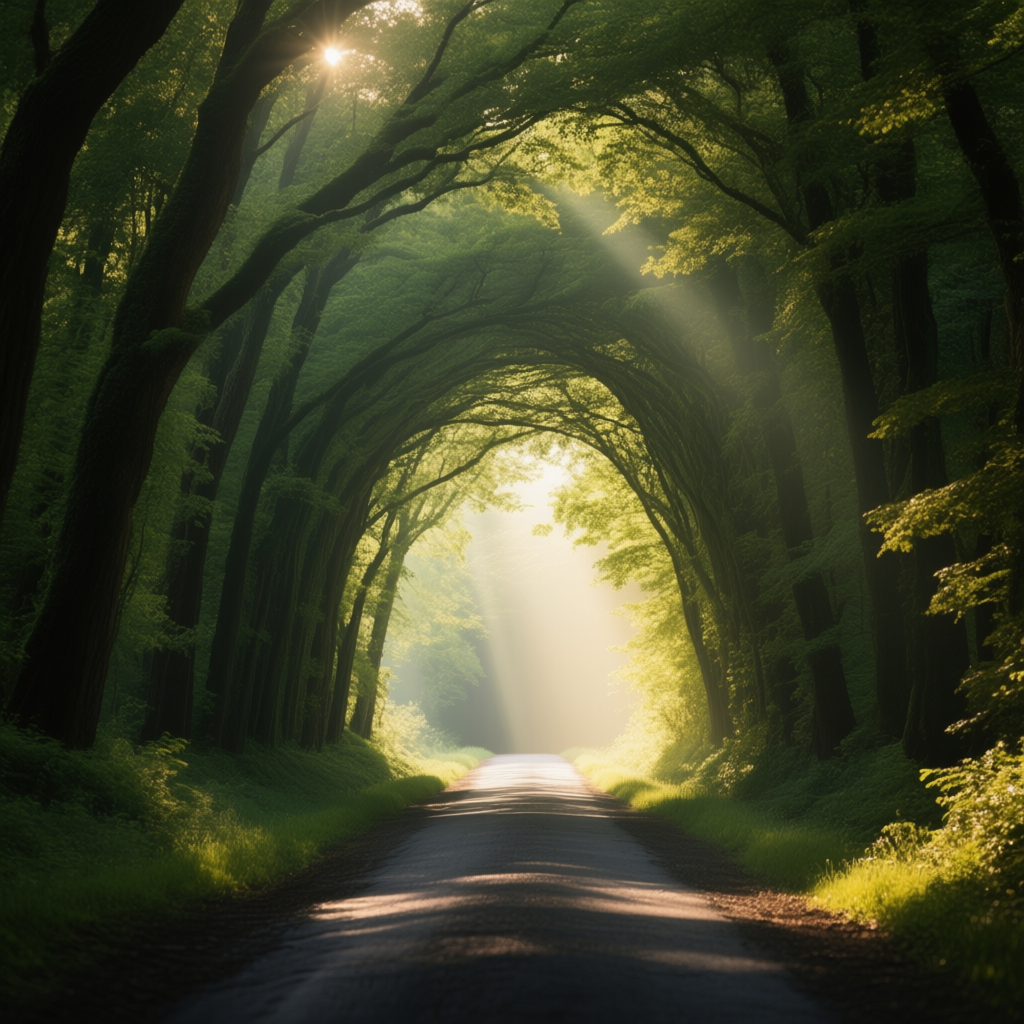
Visual Effect: The effect of a tunnel view perspective is a strong feeling of enclosure and depth. The viewer feels like they’re peering through a passageway or a cylindrical space. This naturally focuses attention on whatever is at the far end of the tunnel (often the subject or bright light at the exit). Tunnel views create a frame within the frame – for example, overhanging trees and converging branches can form a tunnel that frames a distant subject. Visually, this can be very dramatic and almost cinematic, giving a sense of traveling or “there’s light at the end.” It also adds depth by showing layers: near arch or trees in the foreground, and the far point in the distance.
When to Use It: Use a tunnel-like perspective for scenes that you want to feel intimate yet leading to reveal something. It’s great for storytelling when the idea is “emerging from darkness to light” or discovery (like coming out of a cave, or a secret entrance opening onto a view). Photographers use natural tunnel views often with tree canopies, rock formations, or arching architecture to lead the viewer to a subject at the end. In AI prompts, this is useful when you want a very focused composition with a lot of natural framing. For example, a romance scene could be a couple at the end of a tunnel of trees, giving a feeling of a private, enchanted pathway. Or an adventure scene might be looking out of a cave tunnel at a landscape beyond. It works best when you have elements that can surround the edges of the scene (like curved walls, foliage, arches).
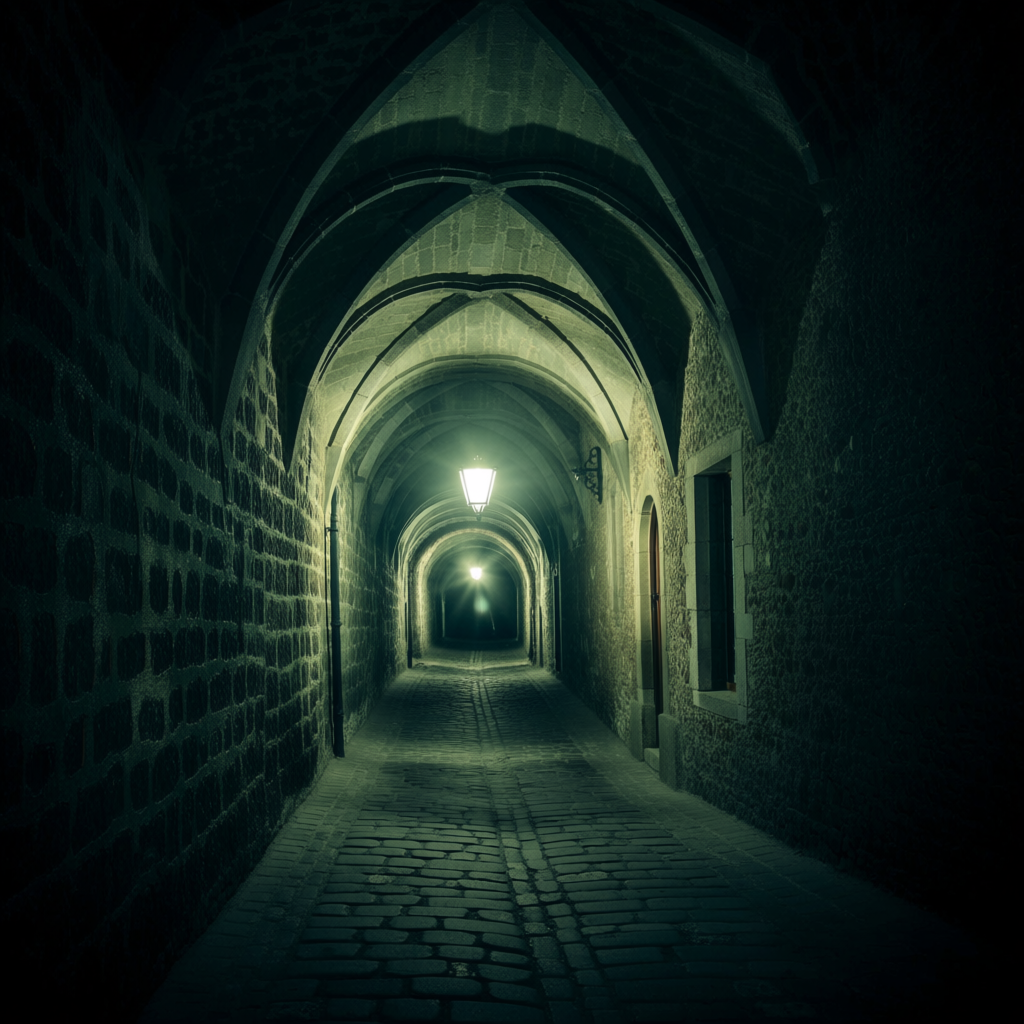
Prompt Examples: Key phrases include “tunnel view”, “archway perspective”, or describing the framing elements. For example: “a medieval alleyway at night, tunnel view perspective, stone archways curving overhead toward a lamplight at the end”. This tells the AI to form an arched, enclosing scene. Or “sunlight at the end of a forest tunnel, trees forming a natural arch, one-point perspective”. You can also explicitly say “framed by”: “a child at the end of a tunnel-like hallway, framed by dark brick walls curving around”. These prompt elements encourage the AI to create a one-point perspective that is enclosed by surrounding shapes, resulting in that tunnel feeling. The result should have a vignetted, framed depth – like you’re standing inside something looking out, with everything funneled toward one bright end point.
Multi-Point Perspectives
(Two-Point Perspective, Three-Point Perspective, Isometric Perspective)
Multi-point perspectives involve more than one vanishing point, which allows for more complex and realistic depictions of objects viewed at an angle or from unusual viewpoints. Unlike single-point (straight-on) views, multi-point perspectives show multiple sides of objects or scenes. This can make an image feel more dynamic or three-dimensional from corner views, up/down angles, or even give a stylized “3D diagram” look in the case of isometric. We’ll cover two-point (often used for corners and angles), three-point (for looking up/down at tall things), and isometric (parallel perspective often used in games and diagrams).
Two-Point Perspective
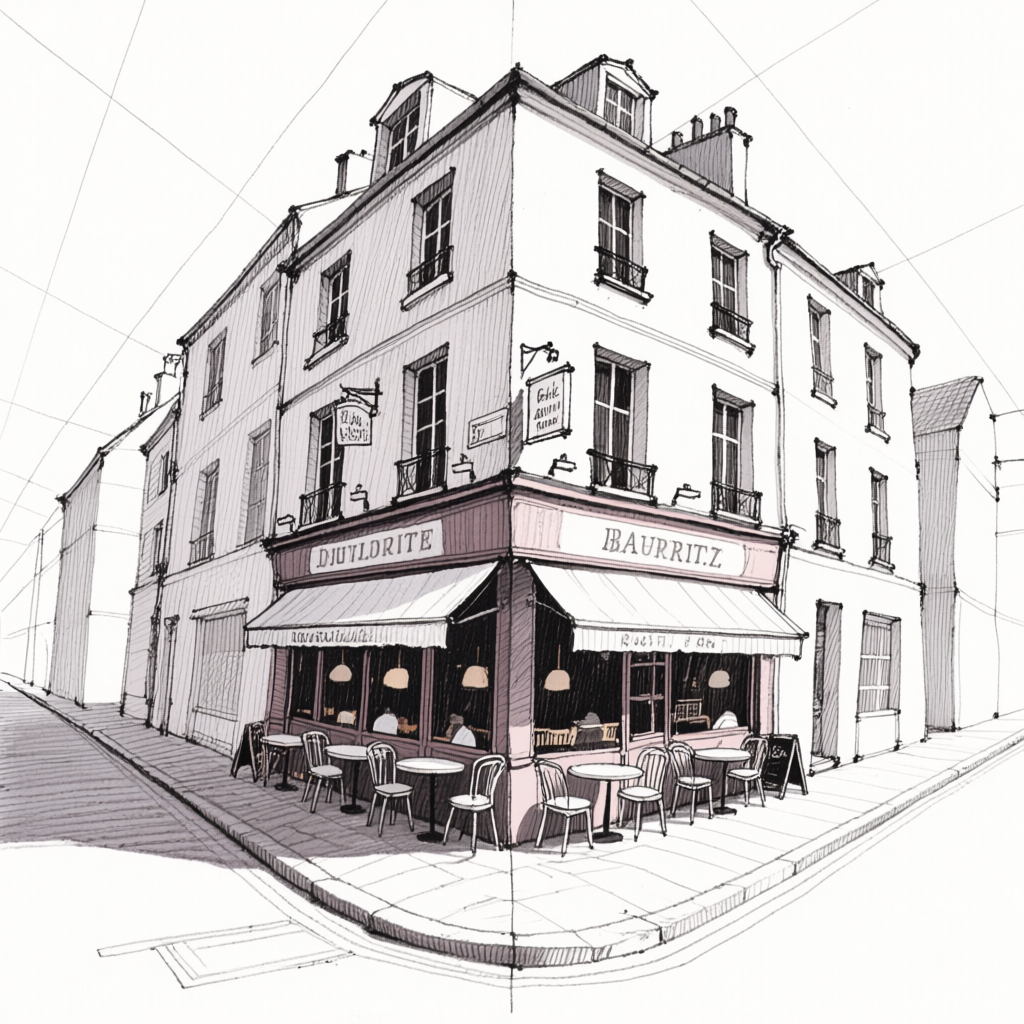
Definition: Two-point perspective uses two vanishing points on the horizon line[5]. This typically occurs when you look at a scene or object at an angle rather than straight on. For example, imagine standing at the corner of a building so you can see two sides of it receding into the distance – one wall’s lines converge toward one vanishing point on the left, and the other wall’s lines converge toward a second point on the right (both points lie on the horizon). In drawing terms, no surface is directly facing you; instead, you have two sets of parallel lines going to two different distant points.
Visual Effect: Two-point perspective makes an image feel more dynamic and three-dimensional compared to one-point. You see multiple faces of objects, which gives depth in two directions. Visually, it often creates a sense of looking at a corner or an angle – for instance, the near corner of a building appears closest, and the sides of the building recede away from us on both sides. This perspective avoids the flat “head-on” look and instead gives a corner view that feels more realistic for many scenes. The converging lines to two different points can also lead the eye in a more complex way (left and right), making compositions look more engaging. It’s a staple in architectural art because it represents structures accurately when viewed obliquely[5].
When to Use It: Use two-point perspective when your scene has a corner or when you want to show both the front and side of something. It’s ideal for showing buildings, streets, or any rectangular forms at an angle – e.g. a house viewed from the corner, a city block, or a room seen from a corner viewpoint. It’s also great for landscapes with diagonal elements (like a road that cuts across the scene). In storytelling, two-point perspective can add a sense of movement or tension, since the scene isn’t straight-on; it feels like the viewer is slightly rotated or approaching from a side angle. Anytime you want a less static, more lifelike scene where things recede in two directions (left-right instead of just straight), two-point is the way.
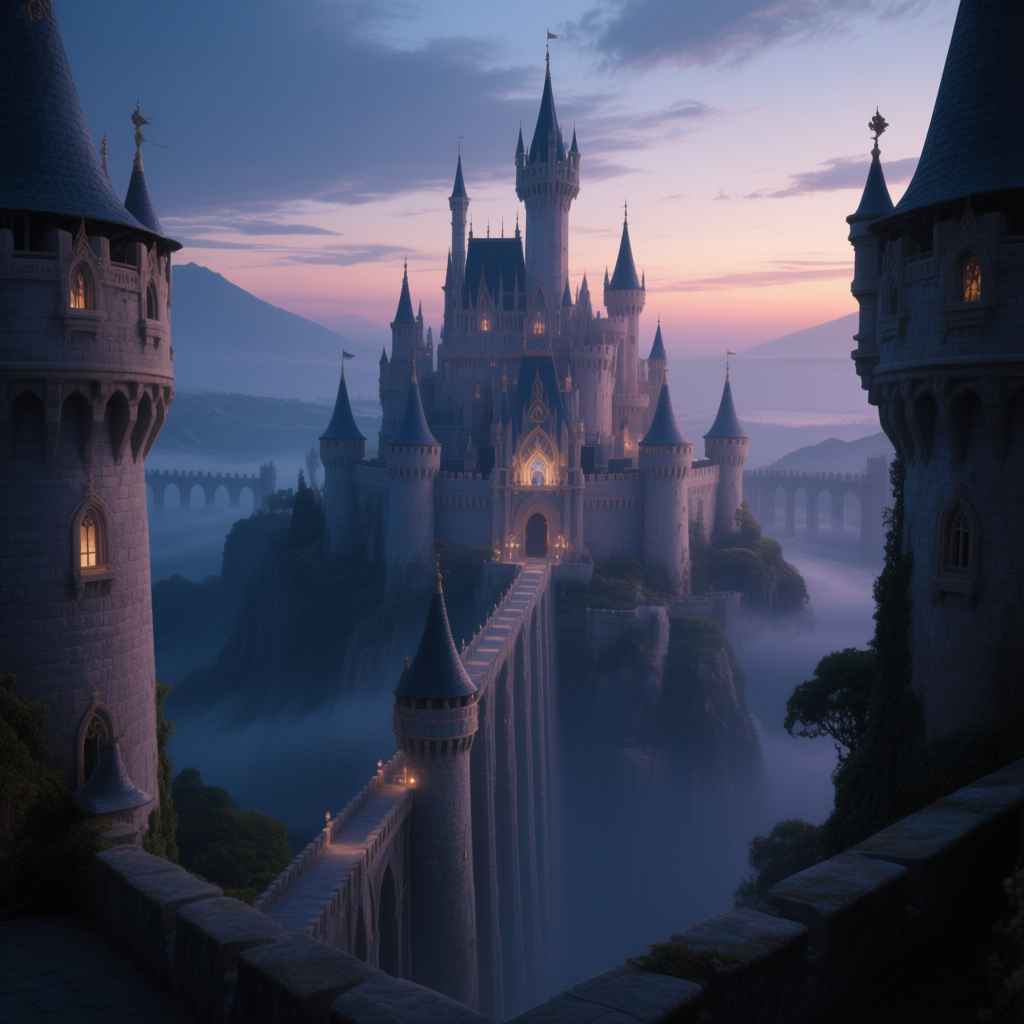
Prompt Examples: You can include “two-point perspective” in your prompt, or describe the angled view. For example: “sketch of a quaint cafe on a street corner, two-point perspective, the building’s front and side both visible with perspective lines”. This tells the AI to imagine the scene from a corner angle. Another prompt: “a fantasy castle at dusk, viewed from an angle, two-point perspective, towers receding toward two opposite vanishing points”. The model will attempt to show the castle’s two faces diminishing into the distance on either side. You might also phrase it as “at a 45-degree angle view” or “corner view of…” if the AI doesn’t grasp “two-point” explicitly. For example: “corner view of a city street, perspective lines of buildings vanishing in two directions”. The key is indicating multiple vanishing directions – the AI should then give you a composition where depth goes both left and right, not just straight back.
Three-Point Perspective
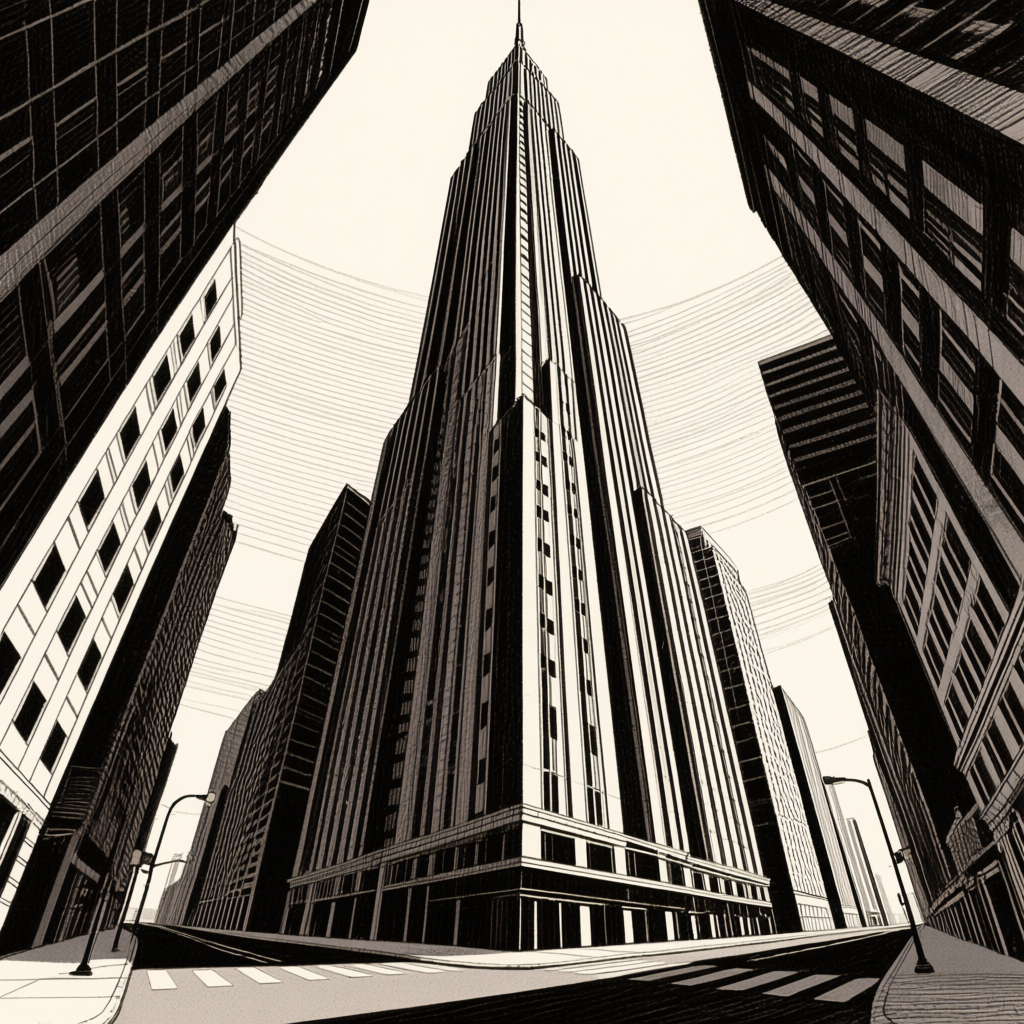
Definition: Three-point perspective incorporates three vanishing points to depict scenes with significant height or depth in the vertical direction[6]. In three-point perspective, you still have two vanishing points on the horizon (just like two-point perspective for the horizontal plane), plus a third vanishing point either above or below the horizon. This third point is where vertical lines converge. Think of looking up at a very tall skyscraper: the vertical lines of the building (edges of the walls) seem to angle toward a point high in the sky. That’s a three-point perspective (with the third point above). Or imagine looking down from a tall cliff; the verticals would converge downward. Essentially, three-point happens when you tilt your view up or down so that vertical edges are no longer straight up and down in your view, but instead slant toward a vanishing point.
Visual Effect: Three-point perspective gives a dramatic sense of scale and grandeur. It makes tall structures or deep pits appear extremely tall or deep by adding that third dimension of convergence. Visually, it can create a feeling of looking up (towering) or looking down (dizzying height). For example, a city skyline seen from street level with skyscrapers will have the buildings’ edges narrowing upward – the viewer feels small. Conversely, looking down from a bird’s-eye view, things narrow toward the ground. Three-point perspective often feels a bit more exaggerated or extreme than the first two because our eye isn’t used to seeing strong convergence in vertical lines unless we’re at extreme angles (like at the base of a skyscraper). It adds a lot of depth in both width and height, making an image feel truly 3D and impressive[7][8].
When to Use It: Use three-point perspective for scenes with great height or depth, where you want to convey epic scale or unusual POVs. It’s perfect for skyscrapers, tall trees, canyons, cliffs, etc., especially if you want the viewer to feel awe (looking up) or vertigo (looking down). In storytelling, an ant’s perspective (looking up at a human or building) could be done with three-point to show how towering the subject is. Or an aerial shot (looking down at a city) can use three-point so the buildings taper toward the ground, enhancing the sense of altitude. Fantasy or comic-book scenes often use three-point for dramatic hero or villain shots (imagine a superhero on top of a building shot from below – the city around might angle sharply upward to emphasize height). Essentially, whenever you tilt the camera up or down in a scene with tall elements, you’re invoking three-point perspective. It adds drama and energy, making the viewer feel the size differences.
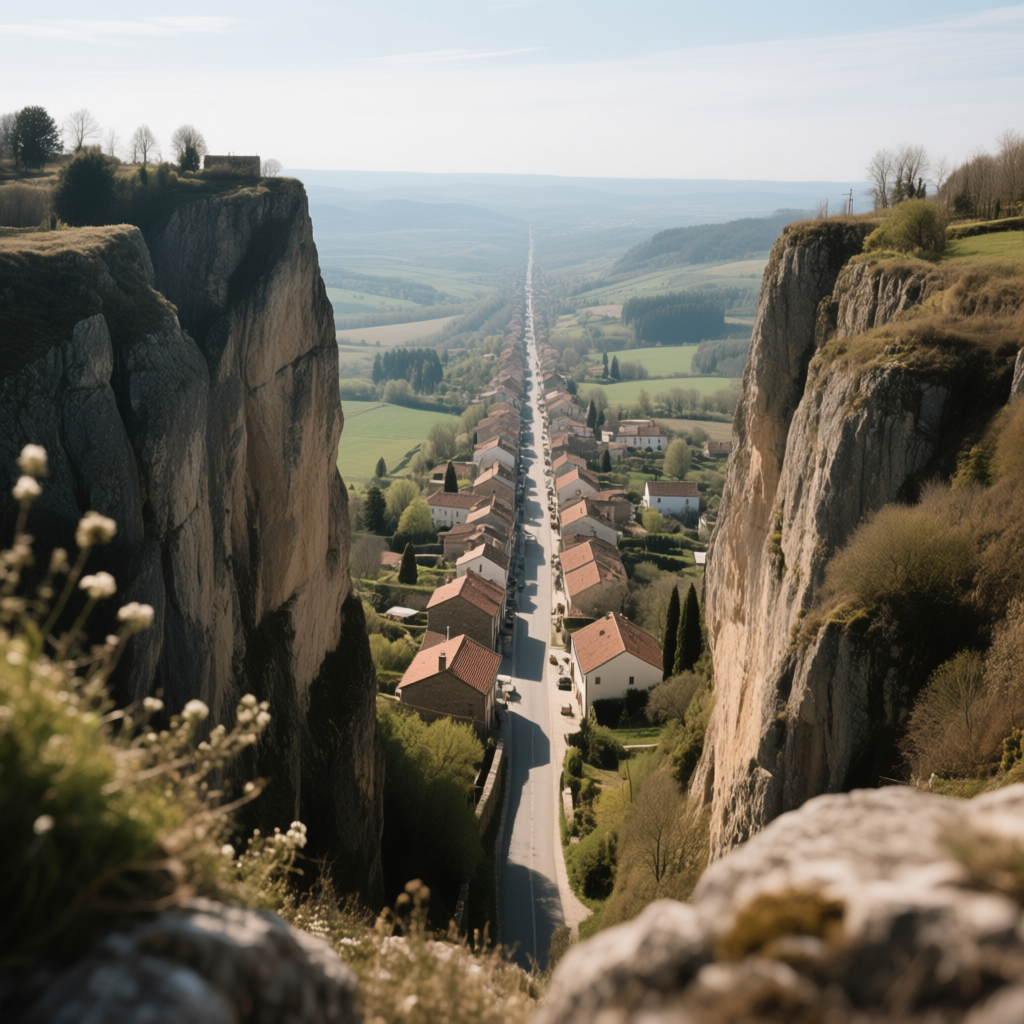
Prompt Examples: Phrases to try include “three-point perspective” or descriptive angles. For instance: “dramatic illustration of a skyscraper, three-point perspective, seen from street level – the building’s vertical lines converging high above”. This should prompt the AI to show the building narrowing upward. Another: “view from atop a cliff looking down at a village, three-point perspective, depth dropping to a vanishing point below”. This suggests a bird’s-eye effect with convergence downward. You can also imply it by words like “worm’s-eye view” (for looking up) or “bird’s-eye view” (for looking down), combined with perspective hints: “worm’s-eye view of ancient trees in a forest, trunks converging to the sky” or “bird’s-eye perspective of a city plaza, buildings converging downward”. In a prompt, explicitly mentioning the extreme viewpoint often triggers that third vanishing point effect. The AI, if it understands, will produce an image where vertical elements tilt toward a point (above or below), achieving the intended towering or plunging look.
Isometric Perspective
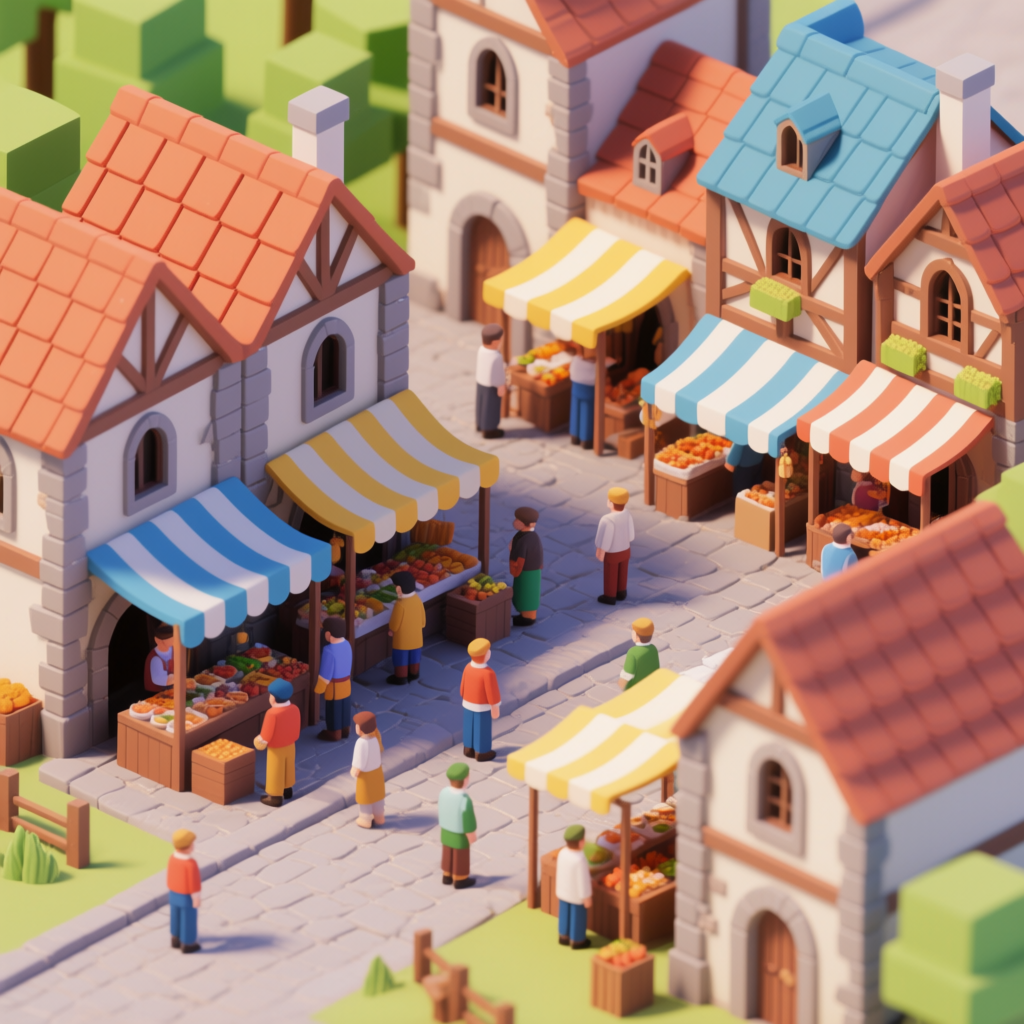
Definition: Isometric perspective (also known as isometric projection) is a bit different – it’s actually a form of parallel projection where there are no vanishing points at all. In isometric perspective, all lines that are parallel in reality remain parallel in the image (they don’t converge). Objects are drawn or rendered at an angle (often 30 degrees to the horizontal on both sides), so you can see multiple sides at once, but unlike true perspective, they don’t get smaller with distance[9]. This results in a clean, slightly “geometric” looking 3D effect. If you’ve ever seen old video game maps or architectural diagrams where the buildings look 3D but nothing in the distance is smaller, that’s isometric. It’s as if the camera is at an infinite distance with no perspective distortion, viewing the scene from a high angle.
Visual Effect: The visual effect of isometric perspective is a pseudo-3D, map-like look. Everything appears evenly scaled regardless of depth – so it can seem a bit unrealistic but very clear and stylized. You can see the tops and sides of objects, but parallel lines remain parallel (they do not converge as they would in real life)[9]. This gives a clean, technical feel. It often looks a bit like a toy diorama or an architectural model. Depth is communicated by overlap and angle, rather than shrinking size. The overall impression is often orderly and cute or diagrammatic – popular in illustrations, infographics, and strategy game art. Because there is no vanishing point, isometric images have a sense of infinite space – you could imagine the scene could tile or extend without distortion. Visually, it also avoids any warping at the edges that wide perspectives might have. It can make complex scenes easier to take in since scale is uniform.
When to Use It: Use isometric perspective when you want a stylized or informational look. It’s great for maps, city layouts, building cutaways, or any scene where you want equal emphasis on multiple areas (since nothing recedes into tiny background). In AI image terms, you might use it to get an illustration-style output: for example, an “isometric view of a cyberpunk city” could yield a cool diorama-like image of a city block. It’s also useful if you want to show multiple sides of an object clearly (like product designs or fantasy isometric art of rooms). Since isometric is commonly used in game art, prompting it might result in a more game-like or cartoonish style (depending on the model’s training). Story-wise, isometric perspective doesn’t occur in natural vision (we always have perspective), so it’s used more for stylistic effect or clarity than emotional storytelling. But that stylistic effect can itself be the goal – to make the image look like concept art, a technical diagram, or just give it a unique twist.
Prompt Examples: Definitely use the word “isometric” in your prompt for this one – most AI models understand that term to produce a parallel projection style. For example: “isometric perspective illustration of a bustling medieval town marketplace, highly detailed”. This should instruct the AI to generate a 3D-ish view where you can see building sides and perhaps the ground plan, but no shrinking into the distance. Another prompt: “isometric cutaway of a futuristic laboratory, multiple floors visible”. By saying “isometric” you tell the AI to keep lines parallel and give that angled top-down view. Other phrases like “3/4 view” or “axonometric” might also work, but “isometric” is most recognized. You can combine it with subject matter: “isometric view of a fantasy castle and surrounding landscape, pixel art style” (if you want that classic game vibe) or “isometric city block, tiny cars and people, richly colored”. The results should look like miniaturized scenes where you see the front and side of buildings equally, with a consistent scale. If the AI doesn’t quite nail it, sometimes adding “in an isometric style” or referencing known isometric art can help. But generally, “isometric perspective” is a strong keyword for this distinctive look. The outcome will feel like a neat dollhouse or map you can peer into, adding variety to your compositions.
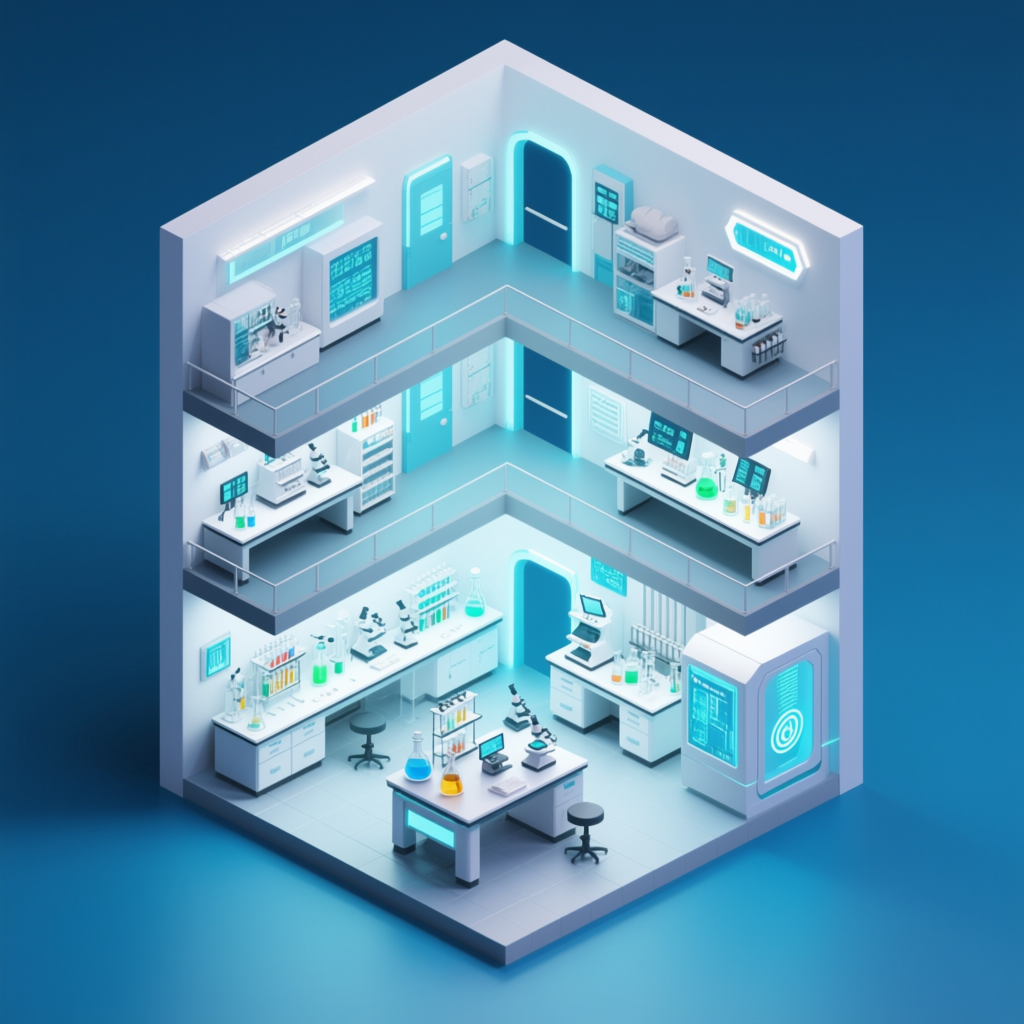
Atmospheric & Depth Perspectives
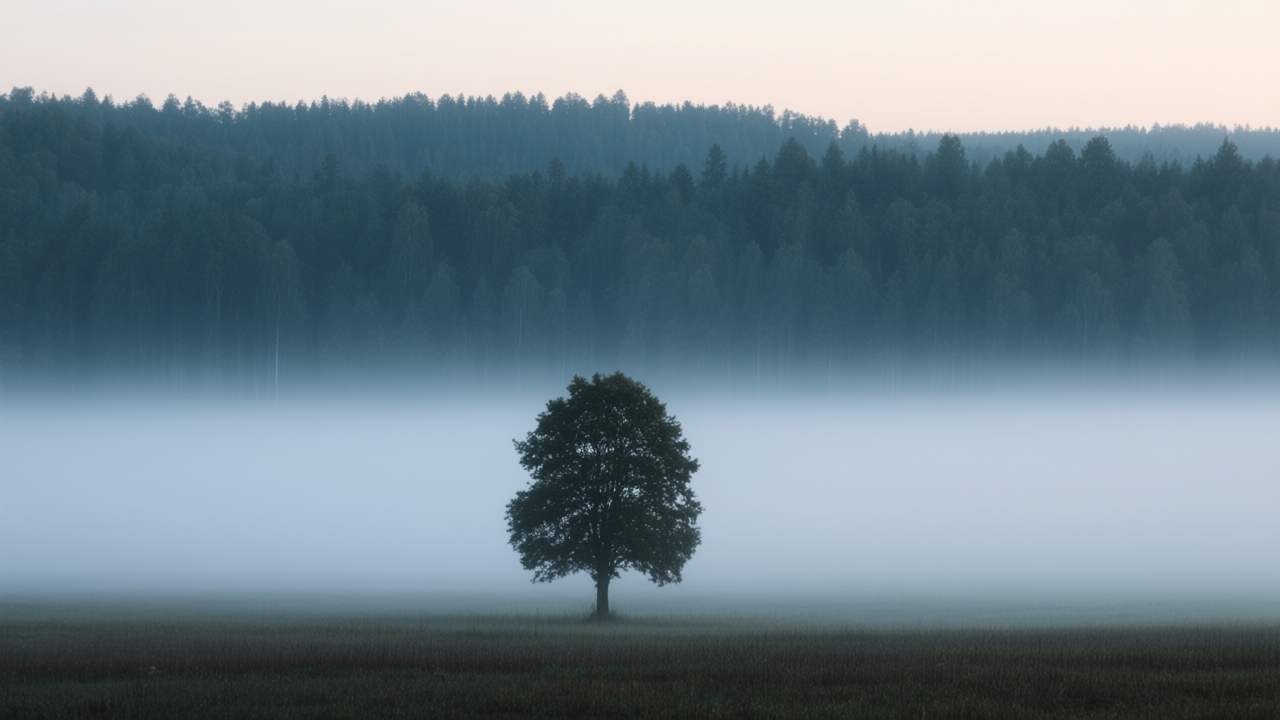
(Aerial Perspective, Atmospheric Haze, Gradient Fading, Scale & Depth Tricks)
Not all depth cues come from lines and vanishing points – atmospheric perspective and related techniques create depth by manipulating clarity, color, and scale. This category is about conveying distance using the air or space between objects, and other tricks to make an image appear deep. We’ll cover aerial/atmospheric perspective (how distant things look hazy or bluish), using haze explicitly, gradient fading (gradually fading things out with distance), and scale tricks (using relative size of familiar elements to show depth). These methods are especially handy for landscape scenes and any image where you want layers of distance.
Aerial Perspective (Atmospheric Perspective)
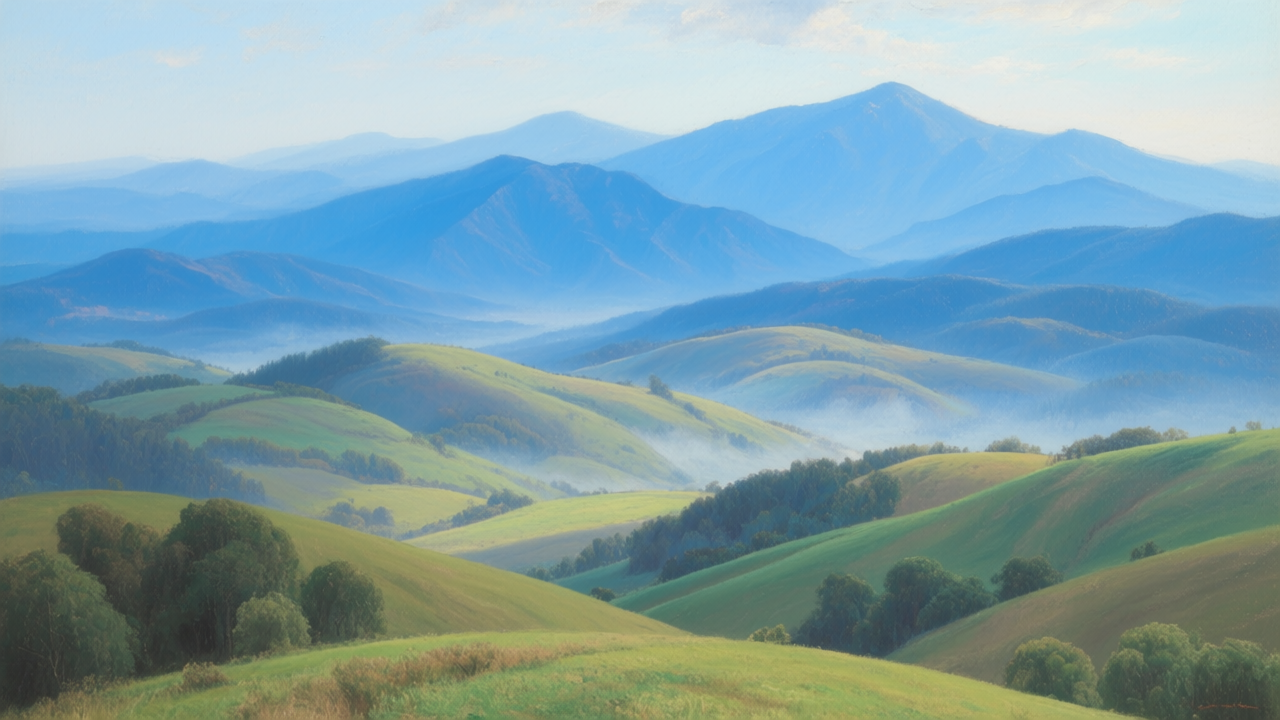
Definition: Aerial perspective (also called atmospheric perspective) is the effect where distant objects appear lighter, fainter, and often bluer due to the atmosphere[10][11]. In reality, particles in the air (moisture, dust) scatter light – reducing contrast and muting colors as distance increases. Artists replicate this by making far-off elements hazy and less detailed. In simple terms: the farther something is, the more it fades into the color of the sky or air. Mountains on a horizon, for example, often look pale blue or grey and lacking detail compared to closer hills. Aerial perspective is not about lines or geometry, but about air and light.
Visual Effect: The visual effect is a natural sense of depth through color and clarity. Foreground elements will be crisp, high-contrast, and saturated in color; background elements will progressively lose contrast, lose saturation (often shifting towards a bluish or gray tone), and blur out slightly[10]. This creates the illusion of layers – you can “feel” the distance because distant things literally look far. The mood it creates can be dreamy or grand. For instance, a landscape with atmospheric perspective feels expansive because the far distance melts into the sky. It can also convey weather or time of day (haze at morning, golden mist at sunset, etc.). Overall, aerial perspective adds softness and realism to deep scenes, preventing the background from competing with the foreground.
When to Use It: Use aerial perspective for landscapes, cityscapes, or any scene with great distance in it. It’s particularly effective for mountain ranges, valleys, large open scenes, or futuristic city skylines – anywhere you want to show faraway layers. If you find your AI-generated image looks too flat (background is as sharp as foreground), adding an atmospheric hint in the prompt can help. Story-wise, aerial perspective can set atmosphere (literally): a misty background can make a scene feel calm or mysterious; a dusty distance can imply heat or vastness (like a desert). It’s also useful to emphasize scale – e.g. a giant creature partially obscured by atmospheric haze will seem very far or massive. Basically, whenever you want to push things “into the distance” in a believable way, mention atmospheric perspective.
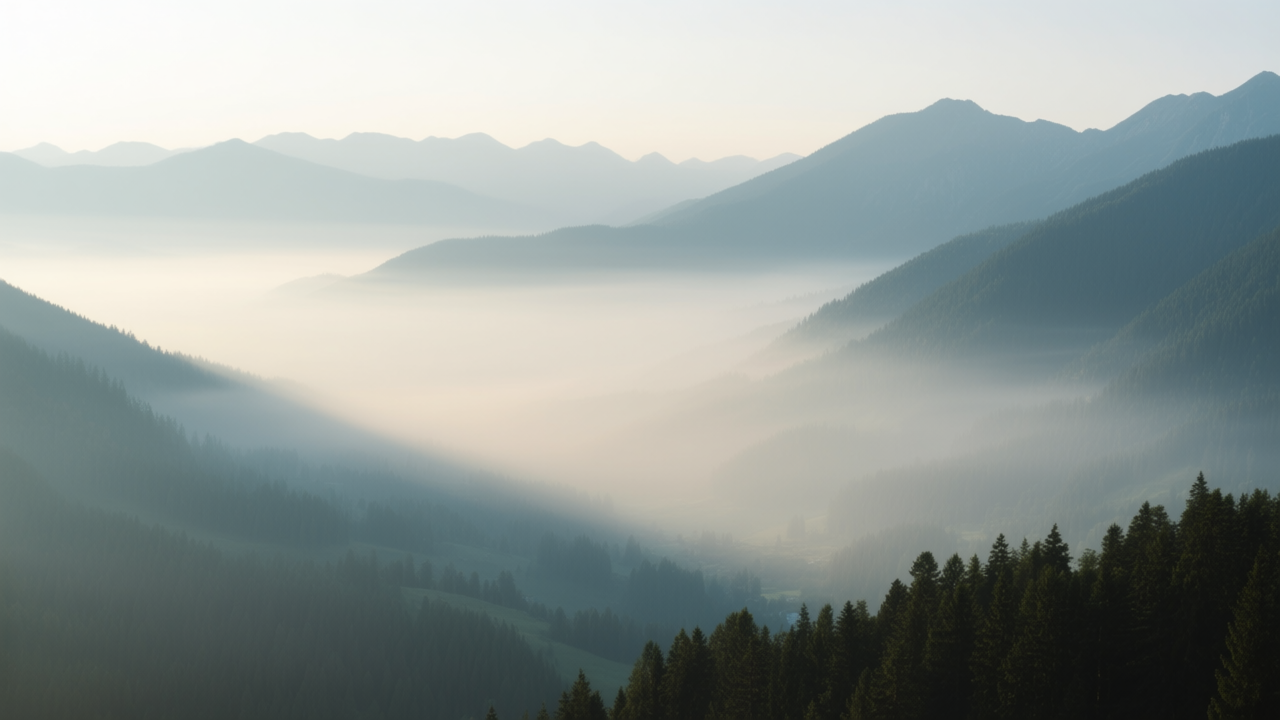
Prompt Examples: Keywords include “atmospheric perspective”, “aerial perspective”, “hazy distance”, or simply describing distant elements as “faded” or “misty”. For example: “epic landscape painting of rolling hills, atmospheric perspective with the far mountains fading blue into the sky”. This tells the AI to apply that haze effect to far mountains[12]. Another: “morning city skyline, atmospheric haze, buildings in the distance barely visible”. You can also be subtle: “a lone tree in the foreground and misty forests far behind”. Many models will understand “misty” or “hazy horizon” as cues for aerial perspective. If needed, explicitly saying “distant background low contrast and bluish” could reinforce it. The result should be an image where the background elements look paler and less distinct than the foreground, giving depth. One more example: “desert at dawn, aerial perspective – each farther dune is lighter and less detailed”. In all cases, we’re asking the AI to simulate how air affects visibility. By including these terms, your AI image will likely have a rich depth: crisp subjects up front and whispery silhouettes far away, enhancing realism and scale.
Atmospheric Haze (Depth Haze)
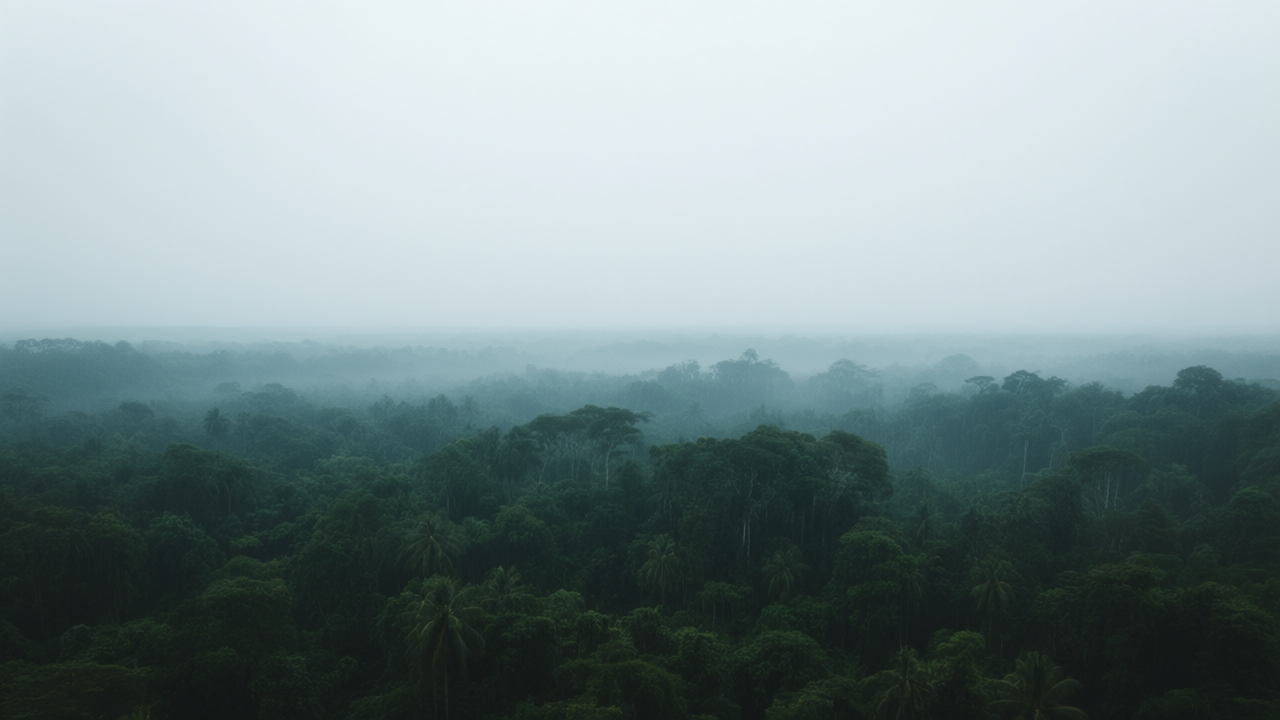
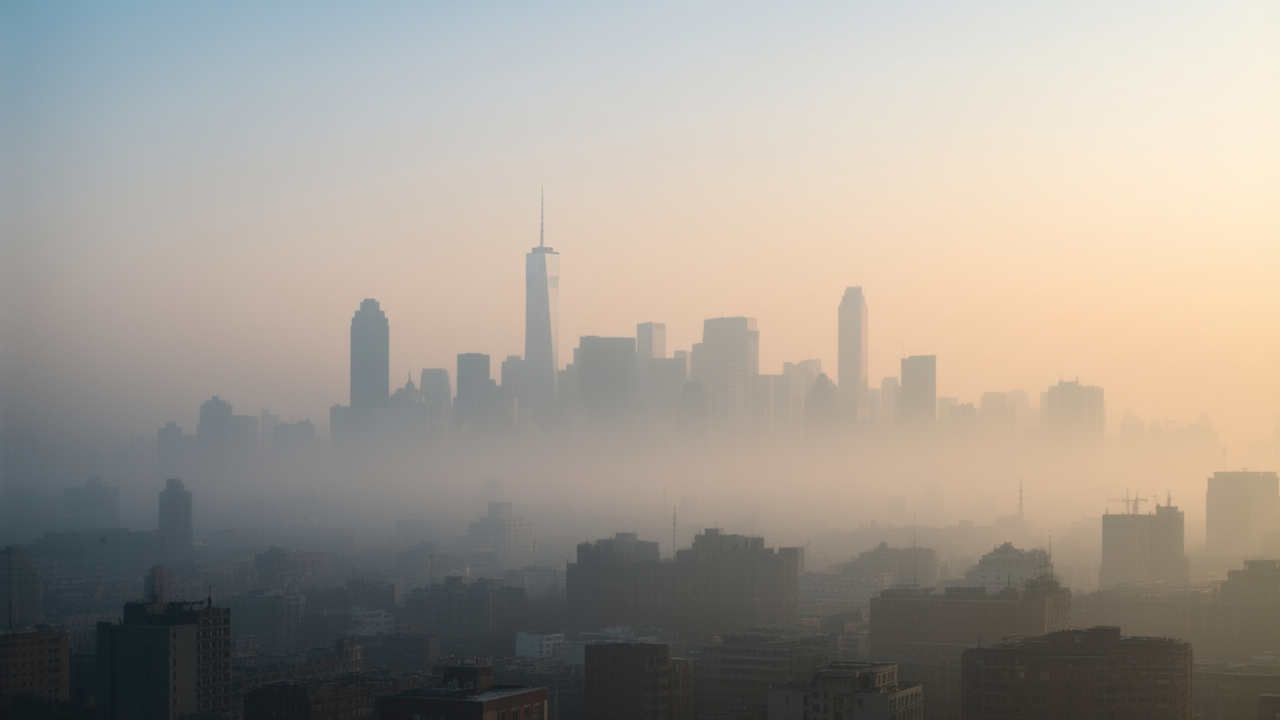
Definition: Atmospheric haze refers specifically to the visible haze or mist in the air that causes aerial perspective. It’s basically the medium (like fog, mist, smog) that fills the scene and obscures distant objects. Unlike “aerial perspective” which is more about the effect, saying “haze” focuses on the substance causing it. In a photo or painting, haze might appear as a light bluish or gray layer over distant areas, sometimes even visible sun rays or a soft glow. In everyday terms, it’s like the thin fog you see in valleys in the morning or the smog in a city that makes distance look milky.
Visual Effect: Including atmospheric haze in an image creates a soft, graded depth – things progressively lighten and desaturate with distance, and you might literally see the “fog”. It also can add a mood: haze often looks serene, mysterious, or majestic depending on context. Visually, haze can catch light (like golden fog at sunrise) which gives a beautiful depth effect. Contrast is reduced in the distance, so backgrounds blend gently into the sky. Also, shafts of light (god rays) become visible if haze is present, which can add drama. Essentially, haze separates the image into layers: foreground clear, background veiled. It tends to make images feel more 3D and atmospheric – you can almost sense the air.
When to Use It: Use “atmospheric haze” when you want to emphasize depth in a natural way or create a certain atmosphere (no pun intended). Landscapes during early morning, after rain, or at humid times often have haze. Mountain scenes particularly benefit from it (mountains fading into clouds). Cityscapes at dawn or dusk look great with a bit of smoggy haze turning buildings blue. Also, if you’re going for a mystical or ethereal vibe – like a forest with mist – mentioning haze helps. Haze is also useful if you want to obscure distant elements deliberately (maybe to add mystery or focus on foreground). In storytelling, haze can imply weather (fog = mystery or calm, heat haze = scorching environment), time of day (misty dawn), or even emotion (haze can feel melancholic or nostalgic). Whenever the scene shouldn’t have crystal-clear air – either for realism or mood – bring in the haze.
Prompt Examples: Use words like “haze”, “mist”, “fog”, or “hazy” to convey this. For instance: “a vast jungle stretching to the horizon, humid haze blurring the far trees”. Or “a hazy summer morning in the mountains, atmospheric depth”. You can combine it with light: “sunbeams shining through a misty forest, atmospheric haze catching the light”. This will likely produce visible rays and a nice fade of distant trees. Another example prompt: “noir cityscape at dawn, distant skyscrapers fading in smoggy haze”. Even without saying “perspective”, just the word “haze” signals the AI to add that depth gradient. If the model knows “volumetric lighting” or “foggy”, those can emphasize it too (but avoid too technical terms if not needed). Simpler: “hazy horizon”, “foggy distance”. The outcome we want is that classic distance fade: objects losing contrast and clarity as they recede. By explicitly adding haze, your AI images will more likely show realistic depth layering and possibly a moodier, softer feel.
Gradient Fading Depth
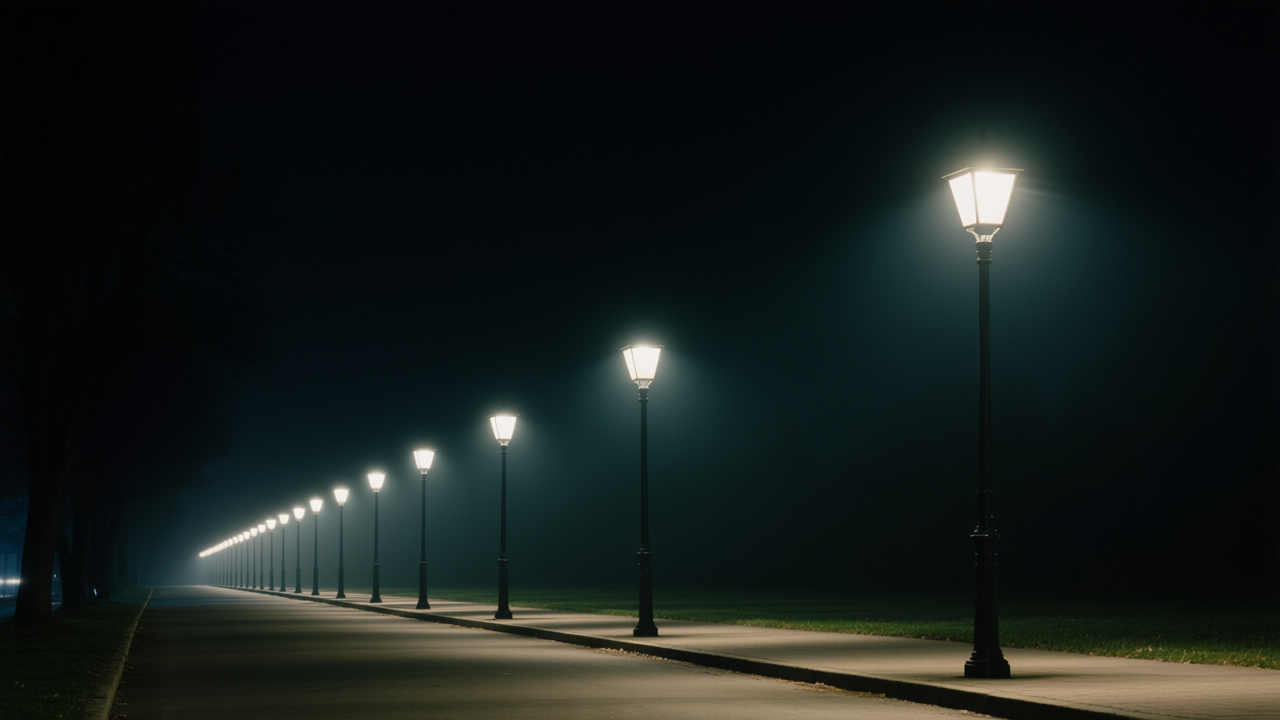
Definition: Gradient fading (in the context of depth) means intentionally making elements fade out gradually with distance, like a gradient from solid to transparent or vivid to pale. It’s a technique often used in art and design to simulate depth by literally blending far objects into the background. Think of it as a controlled version of atmospheric perspective – instead of a realistic haze, it might be a more stylized gradient where things fade to a background color or darkness. In AI prompting, this could be invoked by terms like “fade into” or “gradually vanishing detail”.
Visual Effect: The effect is a smooth transition from foreground to background. For example, a line of trees might start detailed in front and then each further tree is more faded until they almost disappear. Or the ground could gradually fog out as it goes back. Visually, gradient fading can make an image look dreamy or stylized, because not everything is in full focus. It reinforces depth by showing that beyond a certain point, things just melt away. It can also add a bit of mystery or focus, as the eye naturally focuses on the sharper areas while the far areas softly blend away. In some cases, it’s used for artistic effect, like an illustration where the edges of the scene vignette into white or a color. But for us, the main point is to create depth cues. Gradient fading can also be vertical – e.g., fading to black at the bottom for depth in darkness. In summary, it produces a layered, vanishing look.
When to Use It: Use gradient fading in prompts when you want a soft, layered depth or a touch of surreal atmosphere. It’s great if you want to ensure the background doesn’t distract (since it fades off). For instance, if generating a portrait but you want a sense of space behind the subject, you could mention background fading into blur or darkness. In landscapes, if the AI sometimes makes everything super sharp, you might say “distant landscape gradually fading into fog” to enforce depth. It’s also useful stylistically for anything like “misty gradient sky blending into mountains”. In storytelling, gradient fades can imply an infinite expanse (if things just disappear) or a gentle environment (like a calm morning where land and sky meld together). It’s more of a prompt trick to guide the AI’s composition – especially effective with models that understand artistic terms. If you’re doing concept art or backgrounds, gradient fading can yield nice results where the scene has a natural fade-out at the horizon or edges.
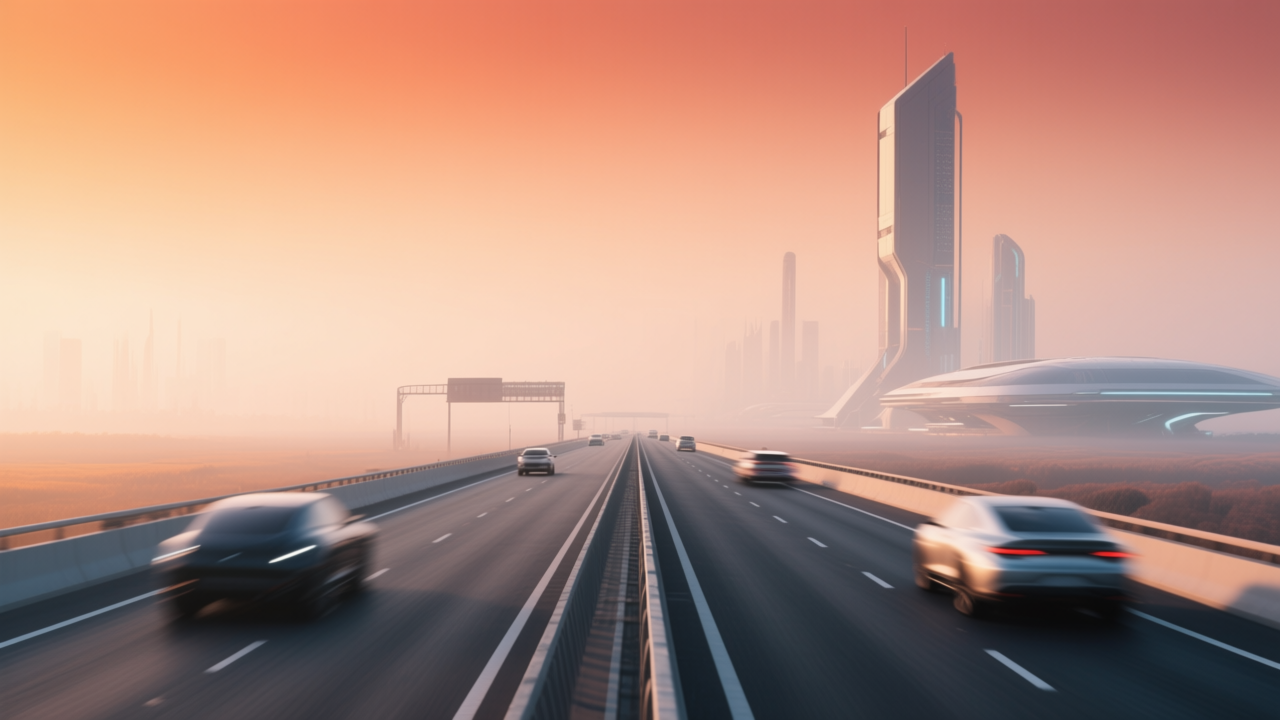
Prompt Examples: Use phrases like “fading into”, “gradually disappearing”, “gradient of fog”, etc. For example: “a row of street lamps at night, each further one fading into the darkness”. Or “a futuristic highway stretching out, with distant cars blurring into a heat haze gradient”. Another: “vast ocean at dawn, the horizon line fading into pale sky”. These descriptions signal the AI that the far end of the scene shouldn’t be sharply defined. Even “background out of focus” or “background fade” might help in some cases (though that crosses into depth of field, which is a related but different effect). If you want a very explicit gradient, you could say “layers of mountains, each layer lighter and more faded than the last”. This essentially describes atmospheric perspective in a gradient manner. One more example: “desert dunes in afternoon light, a gradient of dust making distant dunes barely visible”. By painting the picture of a continuous fade, you encourage the AI to allocate depth layers. The output should ideally have a gentle transitional depth – strong detail up close, gently vanishing detail far off, which looks realistic and pleasing.
Scale Depth Tricks (Relative Size)
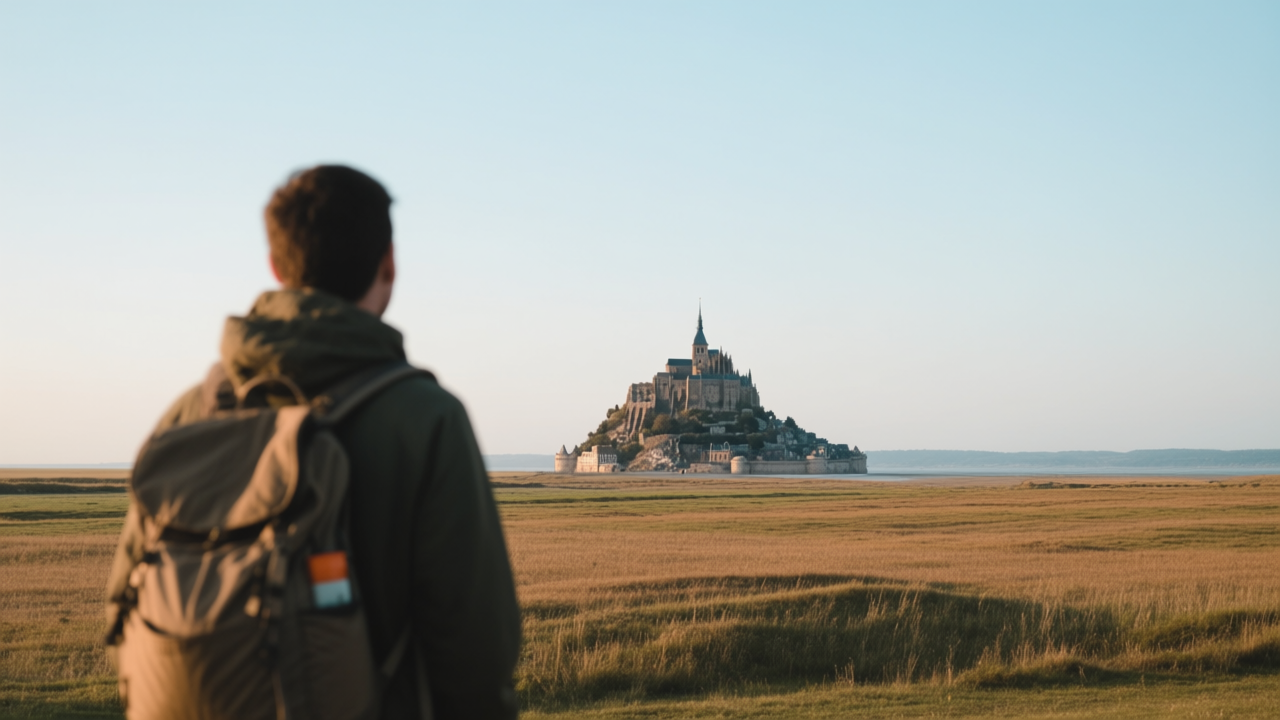
Definition: Scale depth tricks involve using relative size and known scale of objects to emphasize depth. It’s less about any optical effect and more about composition: placing objects of known size (people, trees, animals) at different distances to show how far apart things are. Our brain knows, for example, how big a person is – so if we see a tiny person next to a huge mountain, we register that the mountain is very far or very large (or both). Another scale trick: overlapping elements (one object covering part of another) – the front one appears closer. Essentially, these are classic techniques: big vs small and overlap to convey depth. In prompts, you can indicate this by explicitly stating sizes or distances of multiple elements.
Visual Effect: The effect is a strong sense of scale and distance. When you have, say, a large object in the foreground and small versions of similar objects in the background, it creates a depth cue – the background ones are far away. It makes the scene feel three-dimensional because your mind compares sizes. For instance, “a large boulder up close and smaller boulders in the distance” immediately implies those smaller ones are farther (not actually tiny boulders). Using a familiar object (like a human, an animal, a vehicle) as a scale reference amplifies this: a person in foreground vs another person far behind (much smaller) clearly shows depth[13]. Overlap is another: if one element partially covers another, it’s in front – giving layering. These tricks can dramatically improve an AI image’s depth if the model listens, because otherwise AI might make everything similarly sized or flat. By forcing scale differences, you get foreground-middle-background separation.
When to Use It: Use scale tricks in prompts when your scene could benefit from a sense of vastness or distance, or when you want to highlight size differences. Landscapes are a prime example: adding a tiny human figure in a vast landscape gives a sense of how big the environment is. City scenes with people at various distances, or wildlife photos with one animal close and others far, etc., all use relative scale. In storytelling, this can make your subject feel small and lonely (a small person against big mountains) or emphasize a huge object (giant robot with tiny buildings around). Also, if your AI images often come out too flat or everything the same size, deliberately adding a foreground element (like “close-up flowers in front, a house in the distance”) can fix that composition. Essentially, whenever you can mention something in the foreground and something in the background, you are guiding the AI to think in layers and scale.
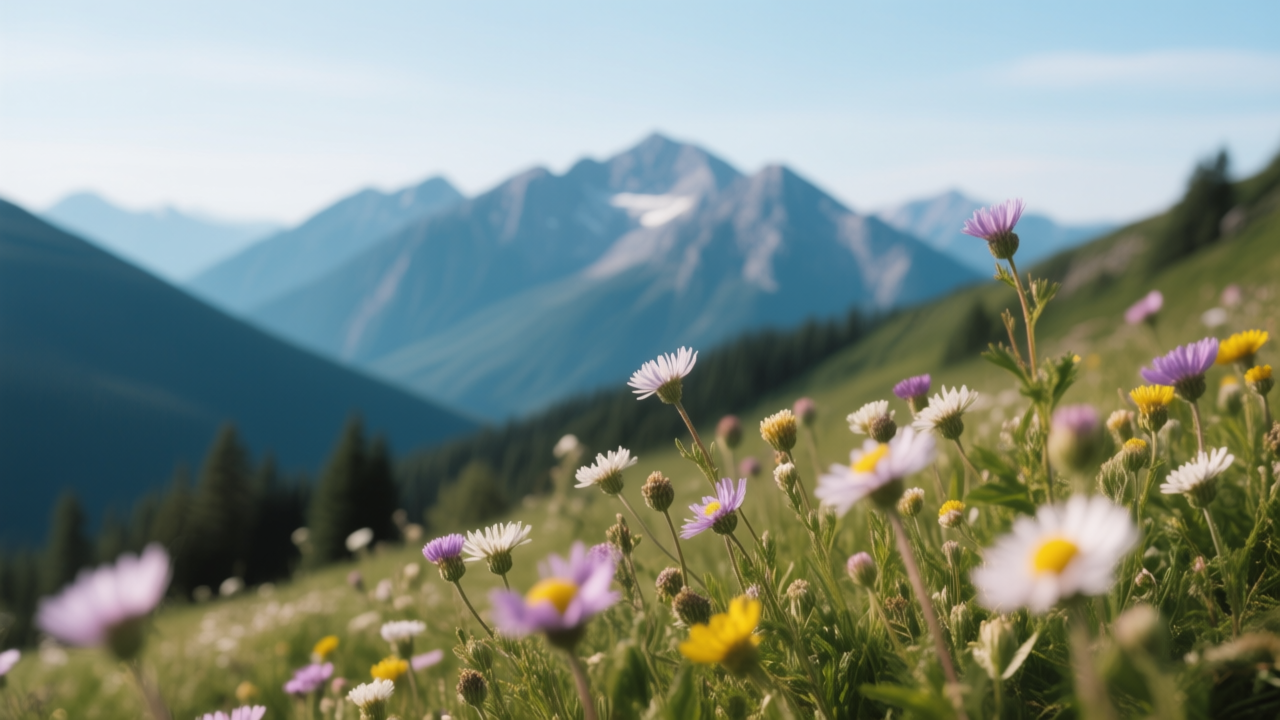
Prompt Examples: Be explicit about near vs far in the prompt. For example: “a traveler stands in the foreground, and in the far distance a towering castle appears small on the horizon, emphasizing scale”. That description tells the AI: person = near (big), castle = far (tiny relative but known to be huge). Another: “close-up of wildflowers, with grand mountains far behind, tiny in comparison”. Or “an archway in the foreground leads to a distant city skyline with tiny buildings”. You can also use words like “in the foreground”, “in the distance”, “background” explicitly. For overlap, you might say: “a horse drawn in front of a fence (the horse overlaps it, creating depth)” – though that might be too technical; better to just mention the positions. If you want multiple layers: “a depth composition: a tree branch up close, a cabin mid-distance, and snowcapped peaks far away”. This essentially forces three layers at different scales. Many models understand positional words, so use them to ensure scale: “tiny” for something far (tiny figure on a hill), or “towering” for something close (towering rock in foreground). These relative descriptors act as hints[13]. After prompting this way, the resulting image should have clear depth: large, detailed objects in front, and progressively smaller, fainter objects in back – exactly what we want for a convincing 3D feel.
Forced & Exaggerated Perspectives
(Forced Perspective, Extreme Wide-Angle, Fisheye, Surreal Distortions)
Now we move into more playful and extreme uses of perspective. These techniques bend or exaggerate reality for creative effect. Forced perspective is about optical illusions with scale (classic “holding up the Leaning Tower” photos). Extreme wide-angle and fisheye perspectives stretch and distort a scene by capturing a very wide field of view, making close things look huge and far things tiny. And surreal perspective distortions involve deliberately messing with normal perspective to achieve dreamlike or impossible scenes. These are great for getting very dynamic, fun, or trippy AI images by explicitly instructing the model to break the usual rules.
Forced Perspective
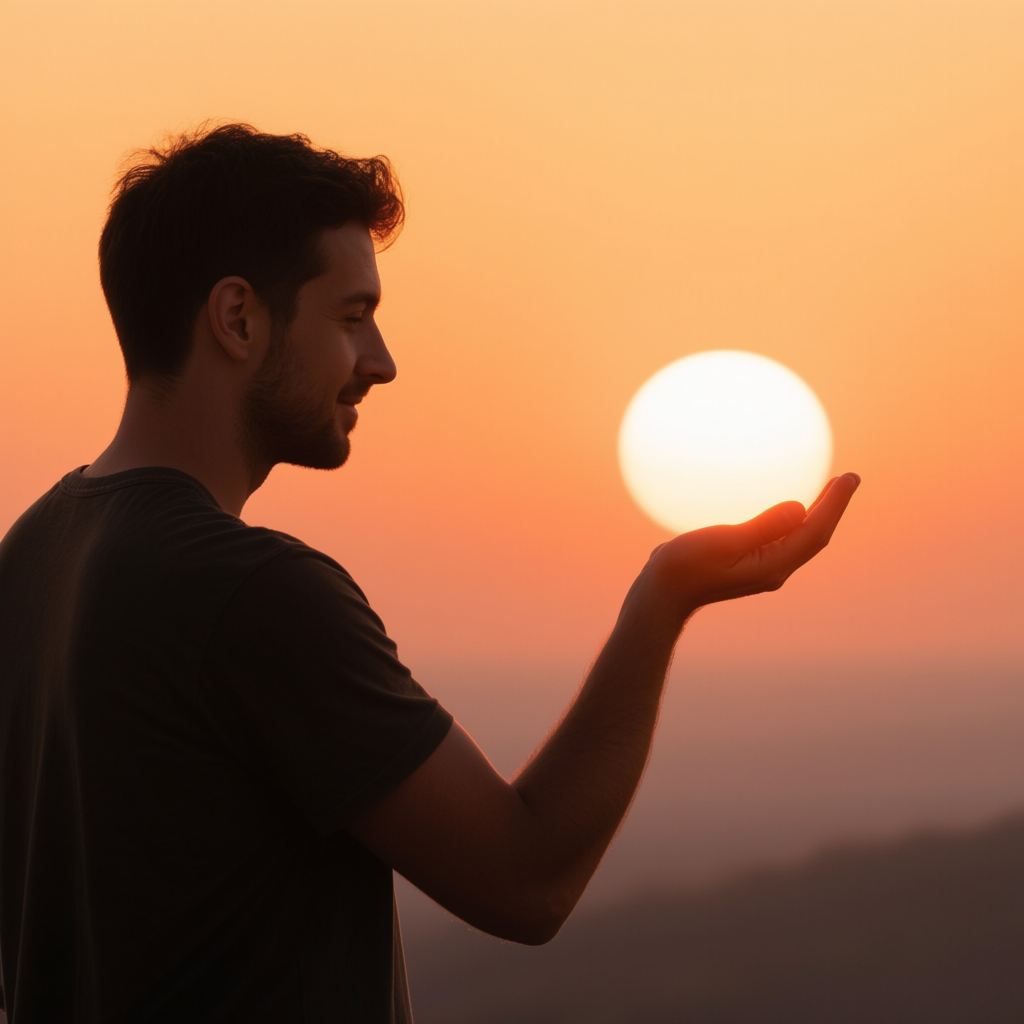
Definition: Forced perspective is a technique that uses optical illusion to make objects appear larger, smaller, closer, or farther than they really are[14]. In photography/film, this is done by positioning a subject and background object at just the right distances so they seem to interact (like a person “pinching” the moon). In prompts, invoking forced perspective means you want a composition where relative sizes are played with creatively – basically a deliberate trick of scale. It “forces” your viewpoint to see something unusual in terms of size relation.
Visual Effect: The effect can be whimsical, surprising, or surreal. For example, an image might show a person appearing to hold a giant object in the background (through alignment) or two disparate scenes merged as one. Visually, forced perspective images often look like optical illusions: something in the foreground might align perfectly with something in the distance. It creates a flattening of depth in one sense (because two far-apart objects appear together), but it’s done to fool the eye. A classic result is humorous or mind-bending – e.g., someone “leaning” on a distant tower, or a toy placed close to camera looking as big as a person farther away. It’s basically playing with our perception of scale and distance[14]. The outcome is usually that the viewer does a double-take, as the image defies their normal depth cues.
When to Use It: Use forced perspective prompts for creative, fun scenes or illusions. If you want an image that makes the viewer say “wait, how’s that possible?”, this is the technique. It’s great for fantastical scenes (maybe a tiny dragon perched on a finger but actually far away), comedy (like those tourist photos), or surreal art. In AI art, you might also employ it to merge two concepts – for example, “forced perspective such that a coffee cup in the foreground looks as big as a house in the background”. If you have a concept where one object should look unusually big relative to another (without actually being a giant), forced perspective is the way to describe it. It’s also useful if you want to depict giants or miniature figures interacting with normal-sized things in a semi-realistic way (the technique used in movies to show hobbits and humans together at different scales). Essentially, any scenario where size reality is skewed by camera trickery is a candidate for this.
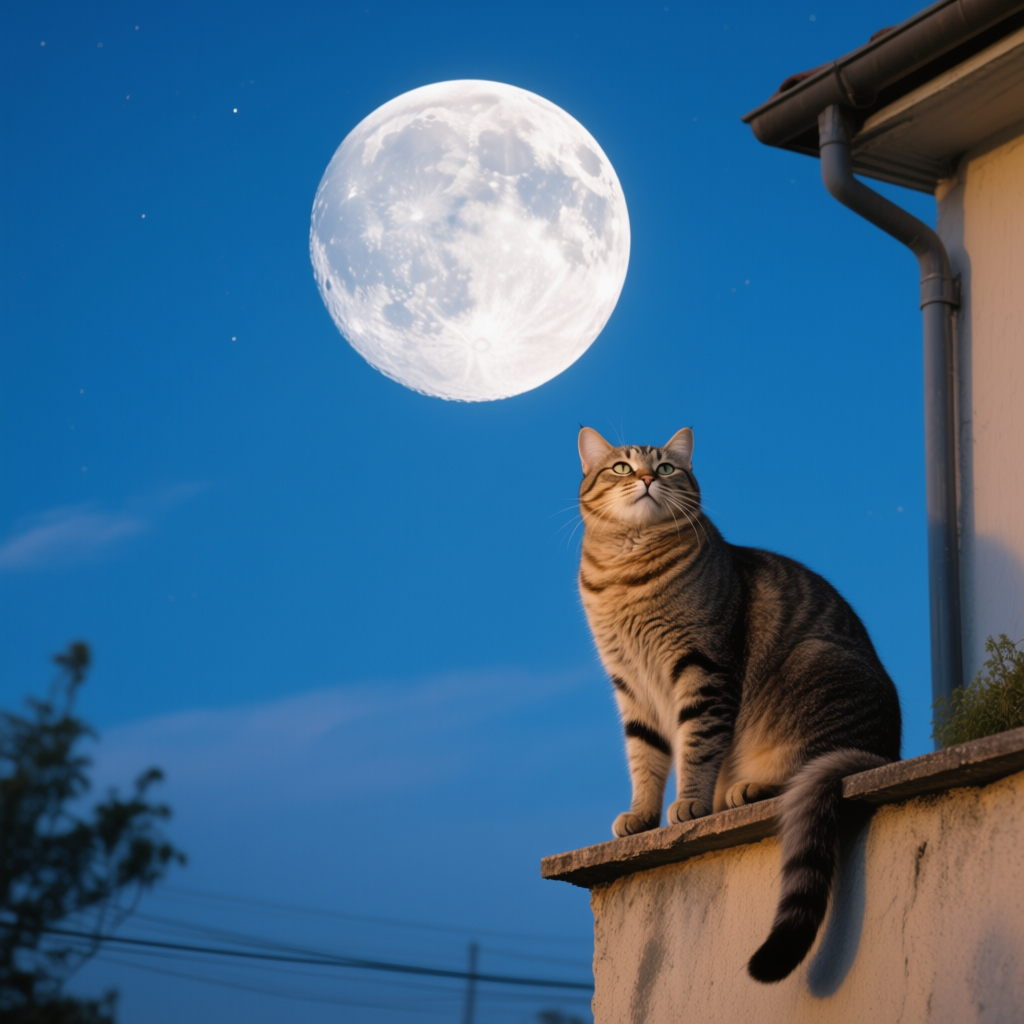
Prompt Examples: Definitely use the phrase “forced perspective” in your prompt to clue in the AI[14]. For example: “photo of a man and the sun in forced perspective – he appears to hold the setting sun in his hand”. This directly tells the model the style of illusion. Another: “forced perspective shot of a child appearing to be as tall as a skyscraper”. You can also describe the setup: “an optical illusion composition: a teacup in front looks huge enough for a person in the distance to sit in (forced perspective)”. Some models might not do it perfectly, but including “forced perspective” increases the chance they attempt the scale trick. Additionally, you can specify positions: “close-up of a toy car in foreground and a real car far behind aligned so they look the same size”. That paints the exact illusion you want. Remember, forced perspective usually requires a foreground and background subject interaction, so mention both clearly: e.g., “A cat on a nearby ledge looking as big as the full moon in the sky behind (forced perspective illusion)”. The result should be an image where composition tricks make sizes misleading – a fun outcome that adds a lot of interest and shows how inventive prompts can be.
Extreme Wide-Angle Perspective

Definition: An extreme wide-angle perspective comes from using an ultra-wide lens in photography or simulating that effect in art. It means a very broad field of view (much wider than normal vision), typically around 14mm or less in full-frame camera terms, which causes strong perspective distortion. In simpler terms, this perspective makes close objects look much larger and far objects much smaller than normal – emphasizing depth to an extreme. It often also captures a huge expanse of scene in one image. This is not as curvy as a fisheye (which we cover next), but straight lines might still converge heavily near the edges.
Visual Effect: The visual result is a scene that feels expansive, dynamic, and a bit distorted. Foreground elements can dominate because they’re exaggerated in size, while background elements recede dramatically (even more than usual). For instance, if you take a portrait with an extreme wide lens up close, the nose might look big and background tiny. In landscapes, an extreme wide perspective might show a vast sky and stretching ground, with maybe a rock or person in front looking relatively large. It accentuates distance – near/far differences are magnified[15]. Vertical lines may tilt if the camera isn’t level (leading to a sense of perspective convergence). Overall, it gives images a bold, energetic feel – often described as “dynamic perspective”. Straight edges near image borders might bend slightly (due to lens distortion). It’s great for creating an immersive “you are there” look because so much of the scene is in view. Colors and details can also stretch out, giving a sense of motion or depth. In short, it packs in a lot of scene and makes depth very obvious (sometimes comically so for close things).
When to Use It: Use an extreme wide perspective when you want your image to feel grand or up-close and personal at the same time, or to give a sense of scale between foreground and background. It’s perfect for dramatic landscapes, architecture from up close, or any time you want a bit of distortion for effect. For example, if you prompt a scene in a small room and mention ultra-wide, it’ll feel bigger. Or a scene with the sky – you’ll capture more sky for a majestic feel. In storytelling, wide-angle perspectives can add a sense of urgency or intensity (think of movie scenes where the camera is very close to a subject’s face with background visible – it feels intense). It can also lend a sense of space or loneliness, because the subject might appear isolated in a vast environment. If you want to highlight a foreground subject in context of a broad environment, this is great. Be cautious: extremely wide perspective can introduce distortion that looks surreal – that might be your goal though. It’s also a hallmark of certain styles (e.g., some comic book or fantasy art uses exaggerated perspectives for impact).
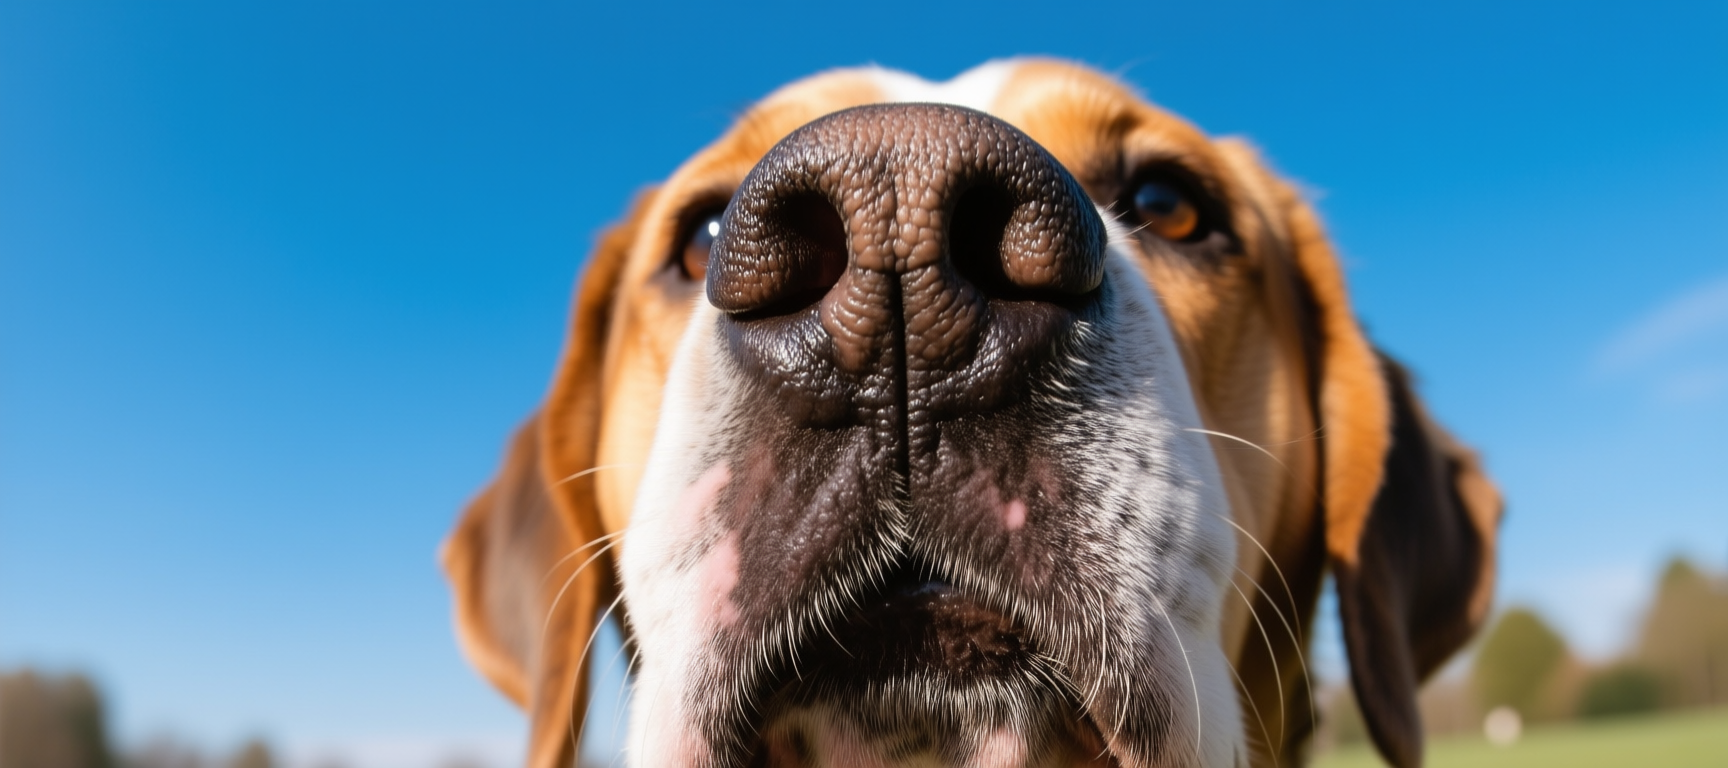
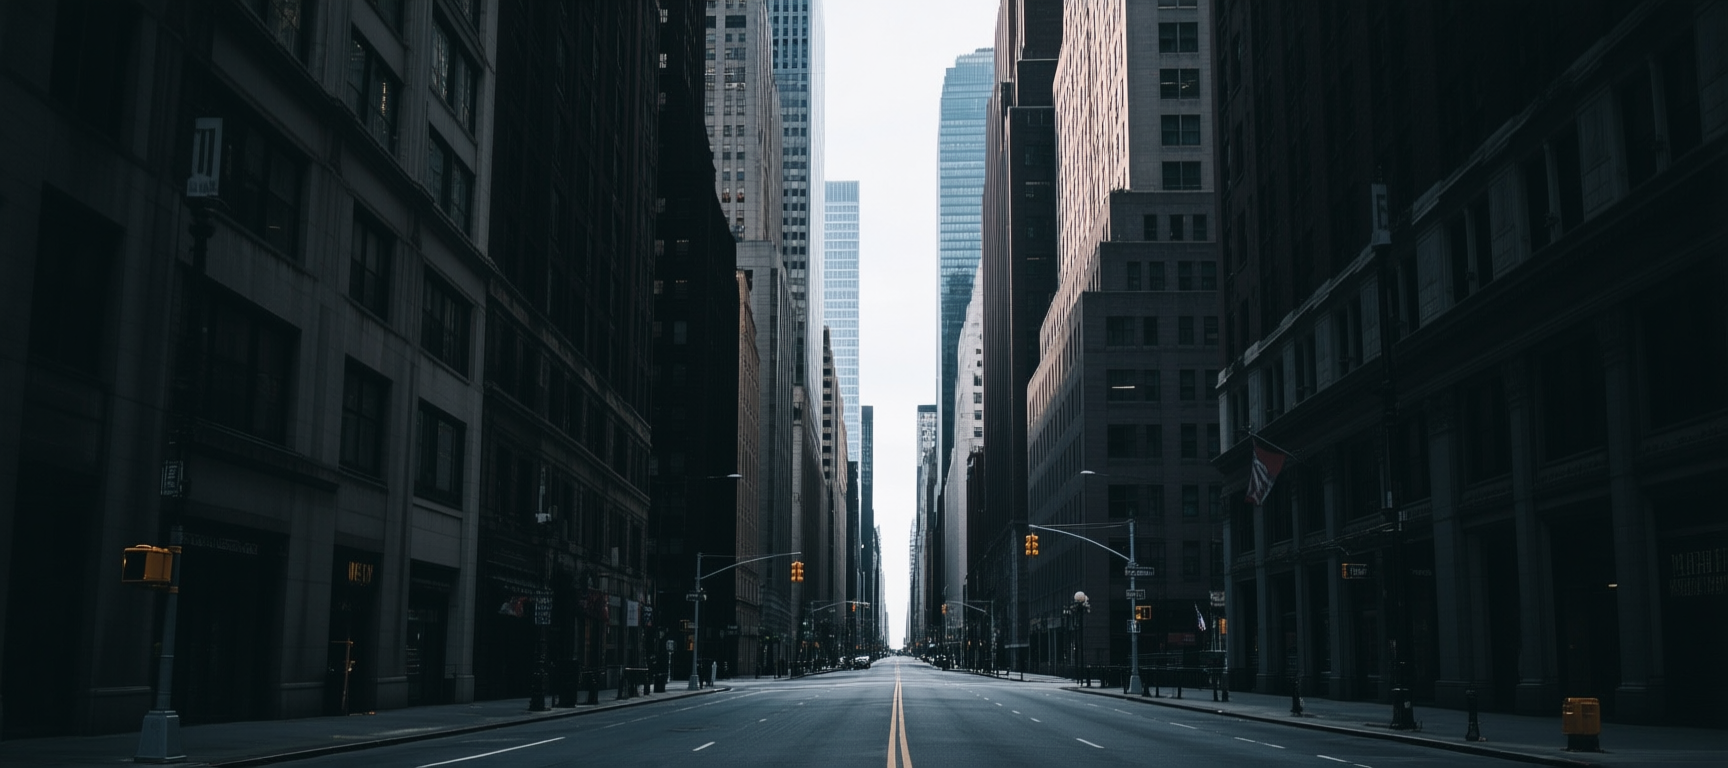
Prompt Examples: Use terms like “ultrawide angle”, “14mm lens” (or even 10mm, etc.), “wide-angle perspective”, or “panoramic view”. For instance: “ultrawide angle photo of a beach, close seashell in foreground looks big, vast shoreline stretching into distance”. This implies that distortion where the shell is large and beach long. Another: “dramatic wide-angle perspective of a city street – buildings looming and street stretching far”. You might also explicitly say “distorted perspective” or “exaggerated depth”: “portrait of a dog with big nose due to wide-angle perspective (close-up)”. If the AI knows camera lens terms: “shot with a 12mm lens” can trigger it. The result should be an image that clearly isn’t from a normal viewpoint – it will encompass a lot in frame and make near things prominent. Lines might converge steeply toward vanishing points at the edges, which actually adds to the depth effect. One more example prompt: “ultrawide landscape, foreground flowers enormous, mountains tiny in background, extreme depth”. This describes the intended distortion. With these cues, the AI should give you that impactful, deep perspective where you feel inside the scene with an almost 3D warp.
Fisheye Exaggeration
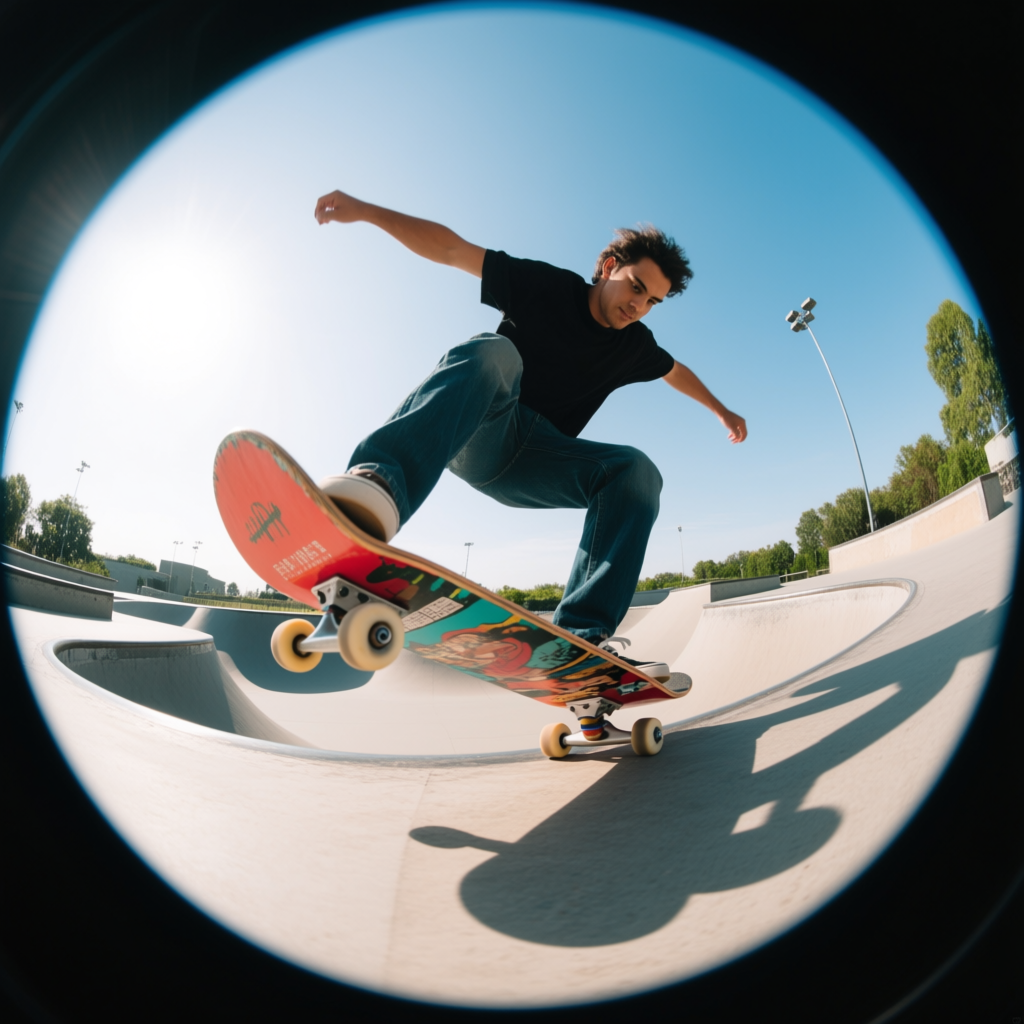
Definition: A fisheye perspective is an ultra-ultra-wide view, generally covering close to or beyond 180 degrees, often with deliberate barrel distortion (curved lines)[16]. It’s like looking through a peephole or the eye of a fish – hence the name. In images, a fisheye lens creates a spherical or hemispherical distortion where straight lines (except through the center) appear curved outward. Everything is in view, often even a full circle image. It’s the extreme end of wide-angle. In prompts, asking for a fisheye look means you want a very distorted, bubble-like rendition of the scene.
Visual Effect: The effect is highly distorted, curved, and dynamic. The image might even appear as a circle within the frame (depending if it’s a full-frame or circular fisheye). Lines that are straight in reality (like the horizon or building edges) will bow outward near the edges of the image[17]. The center of the image might look somewhat normal, but towards the periphery, everything “wraps” as if on a globe. This can create really funky proportions: objects at the center can seem smaller than those halfway to the edge (because of how fisheye mapping works). It captures an immense field of view – potentially the entire 360° around if pointed in a certain way. This yields a panoramic, immersive feel but clearly non-linear. The fisheye perspective often feels quirky, surreal, or action-packed (imagine those skateboard videos filmed with fisheyes – they have a cool distortion vibe). It can also emphasize movement, as curves imply motion lines. Overall, it gives a novel viewpoint that’s clearly not how human vision normally sees, thus adding interest.
When to Use It: Use a fisheye perspective when you want a creative distortion or a very wide scene in one shot. It’s excellent for scenes meant to feel trippy or off-kilter, or to encompass a lot (like showing the entirety of a room or landscape in one go). It can be used for comedic effect (big round distortion can look funny) or for POV shots (like as if we see through a security peephole or the compound eye of an insect). In fantasy or sci-fi art, fisheye can portray some magical or altered reality view. It’s also useful if you want to show 360-degree context – e.g., a full sky and ground in one image. Story-wise, it might indicate a surveillance camera or something uncanny about the perspective (maybe a dream sequence or drug-like effect). If you simply want to wow the viewer with an unusual perspective, fisheye is a go-to. Technically, if you say “fisheye lens” to AI, many know it as a style. Be mindful that not all models handle it perfectly, but many do. It’s more extreme than just “ultrawide”, so only use it when you specifically want curvilinear distortion.
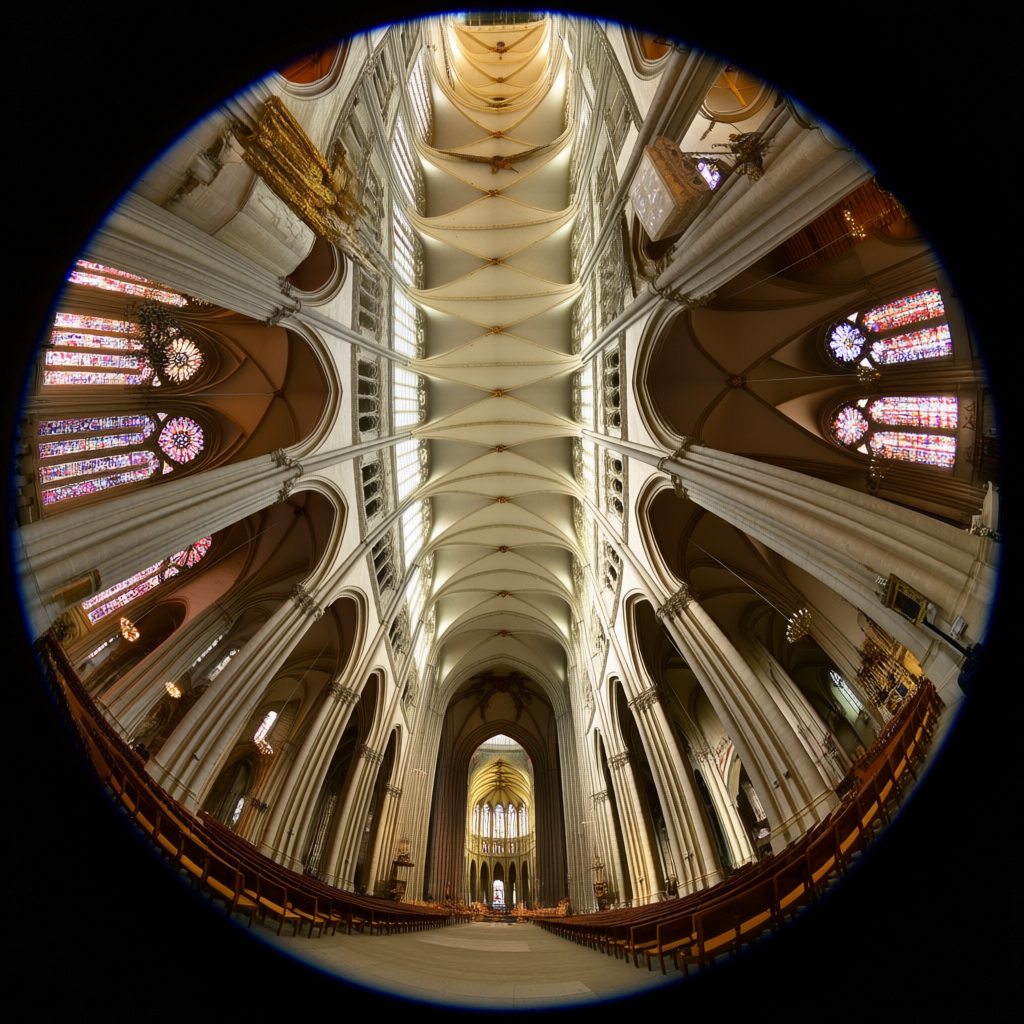
Prompt Examples: Keywords: “fisheye lens”, “fisheye perspective”, “curvilinear perspective”. For example: “skateboarder performing a trick, shot with a fisheye lens, dynamic curved perspective”. This likely yields the classic skate video look – very wide, with curves at edges. Another: “interior of a cathedral, fisheye view looking upward – columns and ceiling curving”. That will capture the whole dome perhaps. You can also mention “360°” or “panoramic fisheye”. Example: “planet earth from space, fisheye perspective, as if seen through a door peephole”. That hints at a hemispherical distortion. The AI might even produce circular images (some do that to mimic real fisheye photos). If you specifically want the image contained in a circle, you could say “circular fisheye image of…”. Another fun prompt: “dog’s face up close in fisheye, nose huge and surroundings warped humorously”. That exaggerates features for a cartoonish effect. The results from fisheye prompts should have a bold curvature – straight lines bent into arcs and a dramatic spatial stretch. It’s a great way to add instant intrigue to an image via perspective, turning a normal scene into something that feels like a bubble of reality.
Surreal Perspective Distortions
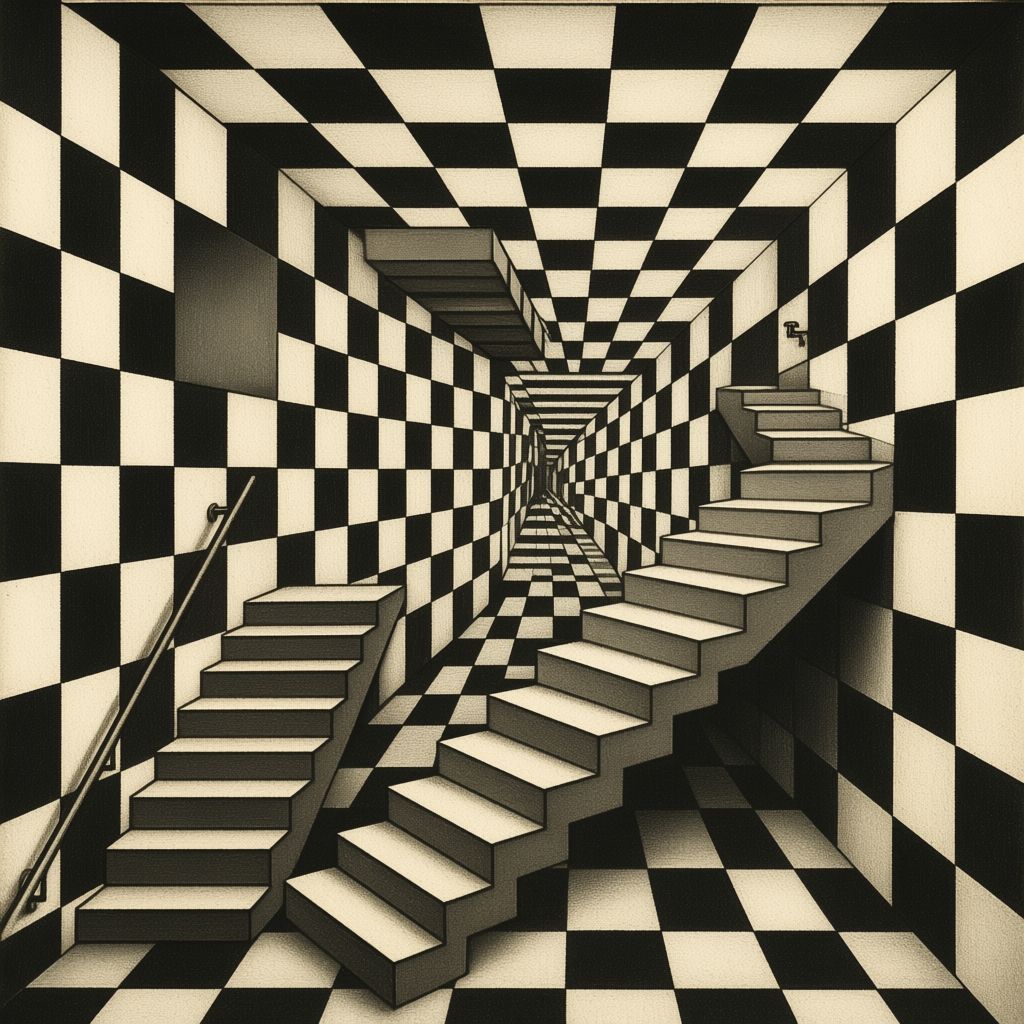
Definition: This refers to intentionally distorted or impossible perspectives used for surreal or artistic effect. It’s not a single defined perspective like the others, but a catch-all for creative bending of perspective rules. This could mean multiple perspectives in one image (like a collage of viewpoints), M.C. Escher-style tricks (impossible stairs, water flowing uphill), or wildly warped scenes that don’t obey linear perspective at all. In prompts, invoking surreal perspective means you want the AI to break reality’s rules of perspective – the result might be a melting horizon, gravity-defying angles, or merged viewpoints.
Visual Effect: The visual effect is dreamlike, disorienting, or mind-bending. You might see buildings at warped angles, floors that seamlessly become walls (reverse perspective), or objects that seem to exist in two places at once. Surreal perspective often gives a sense of “this looks normal at first, but something is off”. For example, Escher’s famous “Relativity” drawing shows multiple gravity sources – people walking on walls and ceilings relative to different staircases – that’s a perspective trick: it uses multiple vanishing points for different parts of the scene. Another effect could be stretching or skewing parts of the image unnaturally (like a Dalí painting where objects elongate). In general, surreal perspective distortions break coherence: the eye might follow lines that don’t converge where they should, creating an impossible structure. Or perspective might shift across the image (as if two different cameras took each half). It gives a magical realism or abstract art vibe. Often it’s used to convey uncertainty, complexity, or a dream state visually.
When to Use It: Use surreal perspective when you want an image to feel impossible or to visually represent a paradox or dream. If you’re going for Alice in Wonderland-type scenes or abstract concept art, this is perfect. It’s also great for portraying things like confusion, insanity, or alternate dimensions. For instance, a hallway that twists and folds back onto itself, or a city drawn with wonky perspective to feel unsettling. In storytelling terms, this perspective can signal that the normal laws don’t apply – perhaps the character is hallucinating, or we are in a fantasy realm where physics are different. It’s also employed in some surreal photography/art where multiple photos are stitched in weird ways (like those “tiny planet” panoramas or collage perspectives). If you just want to spice up a scene to be less literal and more artistic, asking for some perspective distortion can do that. It’s an advanced use – models may not always get it, but many have seen art of this sort. Essentially, whenever breaking reality’s perspective will enhance the concept, go surreal.
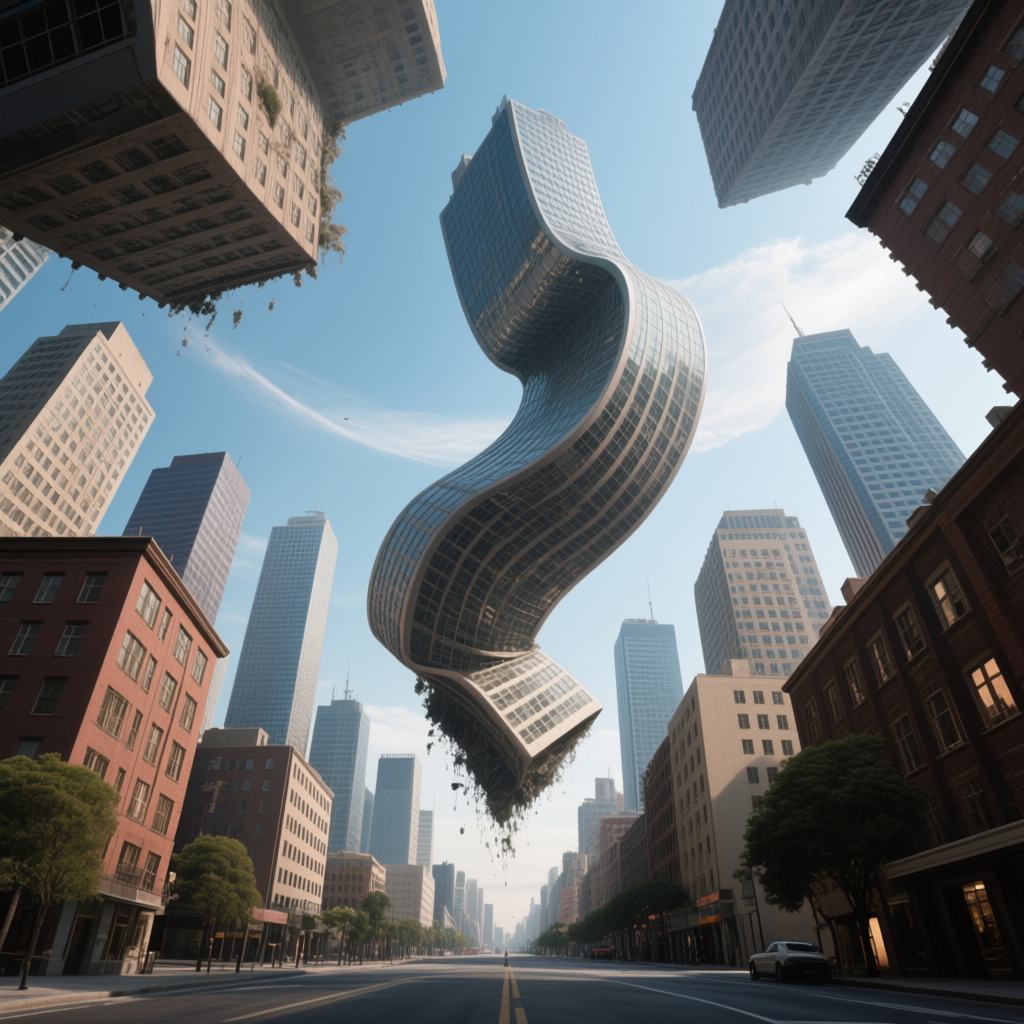
Prompt Examples: Use terms like “surreal perspective”, “impossible perspective”, “Escher-esque”, “dreamlike distortion”. For example: “stairs leading in impossible directions, Escher style perspective”. This directly asks for that kind of scene[18][19]. Another: “surreal cityscape with warped perspective, buildings bending and defying gravity”. Or “room drawn in reverse perspective (walls expand instead of converge), surreal effect”. You might mention multiple angles: “painting of a house shown simultaneously from above and below (multiple perspectives)”. The AI might attempt a cubist take (like showing all sides). Also consider “dreamlike shifting perspective”: “in a dream, the hallway stretches and tilts unnaturally – surreal perspective”. Combining with known artists (e.g. “in the style of M.C. Escher” or “Dalí”) could emphasize it, but sticking to general terms also can work. The result we seek is an image that clearly violates normal perspective for artistic effect: things might loop, twist, or have conflicting vanishing points. If the model is literal and struggles, you could get creative – e.g., “a melting street that curves upward into the sky” (that implies perspective distortion). But many models trained on art will know “surreal” and “Escher” cues. Expect something intriguing and not physically correct – which is exactly the goal here!
Stylized & Conceptual Perspectives
(Flat Perspective, Layered Cutaway, Infinite Recursion, Symbolic/Abstract Perspective)
Finally, let’s explore perspectives that aren’t about realism at all, but about style or concept. These include intentionally flat perspective (no depth, like stylized art or telephoto compression), layered or cutaway perspective (showing multiple layers or interiors in one view), infinite recursion perspective (images repeating within themselves, e.g. Droste effect), and symbolic/abstract perspective (where size and arrangement are based on ideas, not optical reality). These techniques can add unique flavors to your prompts, making AI outputs that resemble illustrations, x-ray diagrams, mind-bending infinite loops, or ancient art styles. They are great for experimenting and conveying more conceptual or informational scenes.
Flat Perspective
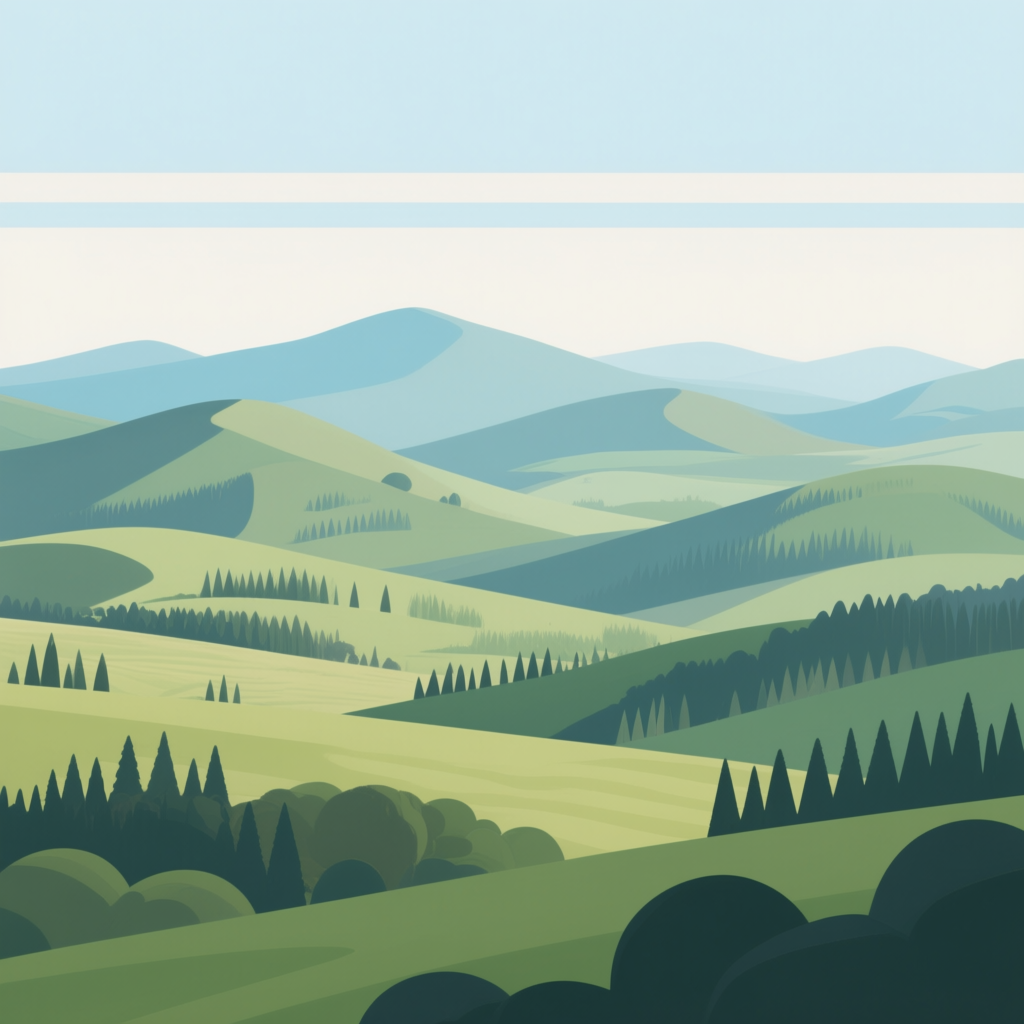
Definition: A flat perspective means an image with little to no apparent depth – the scene appears flat, with minimal size difference between near and far objects. In art, this can be achieved by using a very long focal length (telephoto) which compresses space, or by stylistic choice (like old paintings or animations where depth cues are ignored). Essentially, parallel lines remain parallel and objects don’t get smaller in the distance (almost like isometric, but not necessarily angled – could be straight-on). It’s the opposite of dramatic perspective: everything looks on the same plane.
Visual Effect: The effect is an image that feels compressed or two-dimensional. Background and foreground elements might appear roughly the same size and clarity, so the image can look very graphic or pattern-like. A flat perspective often emphasizes shapes and patterns over depth – for instance, a telephoto shot of a city skyline can stack buildings seemingly right behind each other, creating a flat pattern of windows. Colors and lines align in a way that doesn’t guide the eye into depth but rather across the surface. This can make an image feel calm, formal, or abstract, because the usual depth cues (overlap, scale change) are reduced. It can also highlight symmetry or design, since you’re not distracted by 3D depth. Another aspect: a flat perspective can make the subject and background seem closer together than they are (space compression[20]). Visually, think of a collage or a stage backdrop – everything appears on one plane.
When to Use It: Use flat perspective when you want a stylized, graphic look or to focus on composition elements like color and form rather than depth. For example, if you’re aiming for a vintage poster or painted look (some traditional art intentionally flattens perspective). It’s also useful for isolating a subject – if the background appears flat with the subject, they merge in pattern or tone, giving an artistic effect. In photography terms, you’d use a telephoto lens for compression; in AI terms, you might mention that or simply describe the scene as flat. If you like the aesthetic of Japanese ukiyo-e prints or medieval art where distant figures are same size as near ones, that’s symbolic/flat perspective. In storytelling, a flat perspective can convey a sense of order, simplicity, or even eeriness (because our brains expect depth). It’s great for designs, architectural elevations, or minimalist scenes. Also, if you have a busy scene but want it not to be too chaotic in depth, flattening it can turn it almost into a pattern (like a crowded beach seen head-on with everyone seemingly on the same plane).
Prompt Examples: Phrases to use include “flat perspective”, “telephoto compression”, “no depth”, “flattened scene”. For instance: “landscape in flat perspective, distant hills appear nearly the same size as the close ones, very compressed scene”. Or simpler: “flat perspective illustration of a city – minimal depth, like a flat poster art”. You could also reference the style: “in the style of a flattened mural, perspective is very shallow”. If you want the telephoto effect: “photo with telephoto lens flattening perspective, layers of mountains stacked with no depth”. Another example: “side view of a train with flat perspective – cars and background all seem on one plane”. This might produce an image where the train and scenery behind it look equally close. If the AI is not getting it, you might combine with “orthographic” or “isometric” (though isometric gives an angle, it’s still flat depth). But often just saying “flattened perspective” or “no diminishing size” can hint it. The result should come out with an intentionally lack of dramatic depth – which can be striking in its own way, offering a clean and designful image that stands apart from typical 3D-looking outputs.
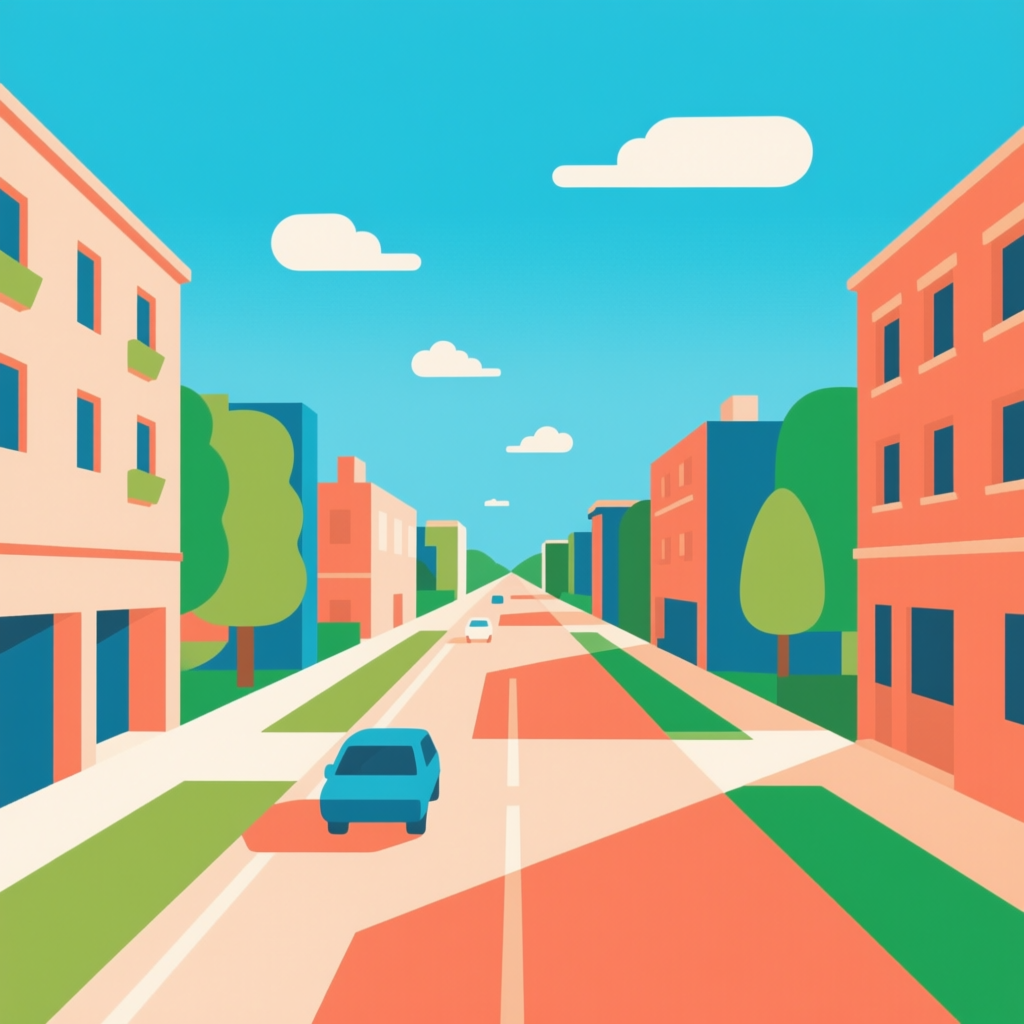
Layered Cutaway Perspective
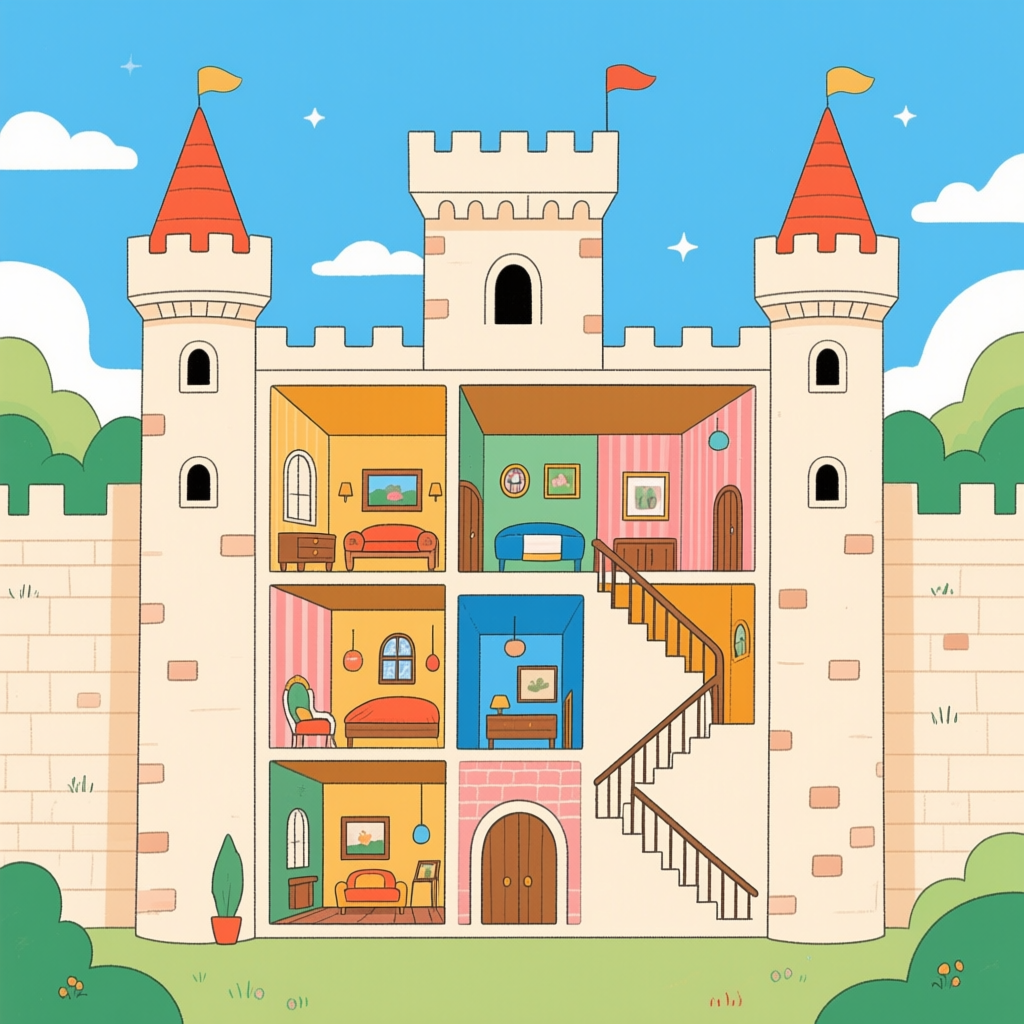
Definition: A layered cutaway perspective is when part of a scene or object is cut away or sliced so you can see inside or behind it, often showing multiple layers at once. It’s like those diagrams of buildings where one wall is removed to reveal the interior, or an illustration of the Earth with a wedge cut out to show inner layers. Essentially, it combines an exterior view with an interior or cross-section view in one image[21]. It’s not a perspective type in the linear sense, but a compositional technique that reveals layers that normally you wouldn’t see together.
Visual Effect: The visual effect is informative and intriguing – you get a quasi 3D look where part of the subject is transparent or missing, allowing a peek at inner details. Imagine a house: you see the facade, but a portion is open so you also see the furnished rooms inside (each layer perhaps drawn in perspective too). This creates a dollhouse effect. It can also apply to natural things, like a cutaway of a mountain showing caves, or a person with a cutaway to muscles (though that can be gory if anatomical). The key is you see multiple layers or sections simultaneously. This perspective feels a bit technical or educational often, since it’s used in textbooks, but can also be creative (like showing hidden worlds inside objects). It effectively flattens one dimension (the removed part) to expose something normally hidden. The image often has a clear boundary where the cut is – sometimes drawn as a bold outline – separating outside and inside. It gives a sense of depth through layers rather than vanishing lines. Also, it can be visually busy but in a purposeful way: each layer is its own scene, yet all part of the whole.
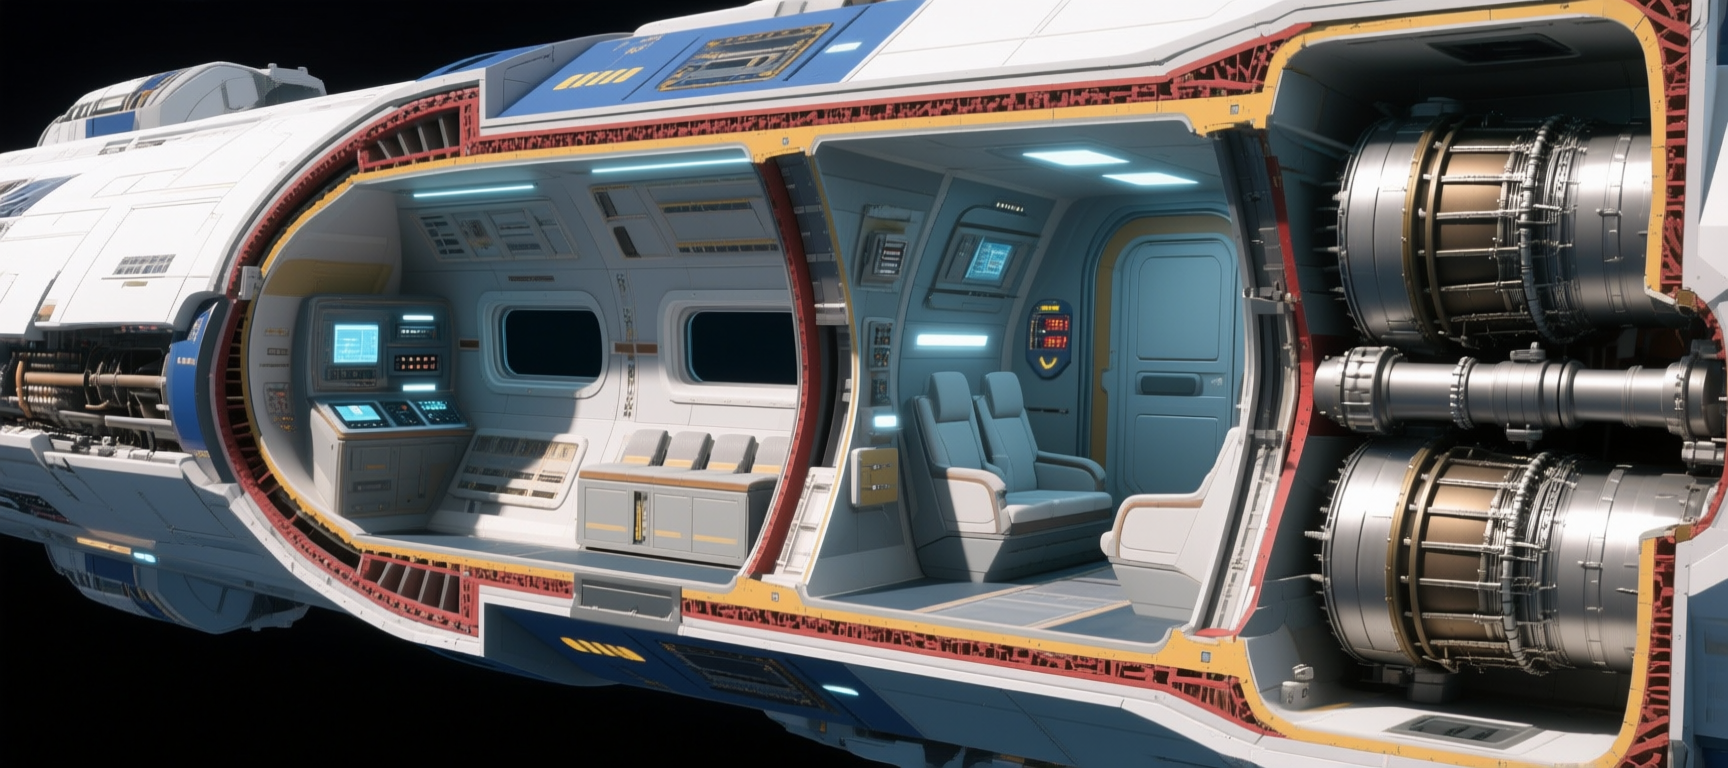
When to Use It: Use a layered cutaway perspective when you want to show interior detail or multiple story layers in one view. It’s perfect for explaining a concept (like how a building is structured, how a vehicle looks inside) or for imaginative art (like showing that inside a mountain lives a dragon – drawn as a cut-section). In prompts, this is great if you want an AI image that has both external and internal elements. For example, a “cutaway of an astronaut helmet showing the electronics inside” – it will show the helmet and an opening with circuits. It’s also good for playful scenes: e.g., “cutaway of an anthill” will show tunnels under ground and ants inside, along with above ground. If you have a narrative where hidden things matter, a cutaway illustration can convey that in one frame. It often yields a diagrammatic or infographic-style image, which can be really interesting combined with artistic elements. It’s a bit advanced, and not all models might do it well, but many have been trained on magazine cutaway illustrations and such[21], so they might surprise you.
Prompt Examples: Definitely use words like “cutaway”, “cross-section”, or “cut open view”. For example: “illustration of a castle cutaway, revealing the rooms and stairs inside the walls”. That should instruct the AI to open up the castle. Another: “cross-section perspective of a spaceship, interior cabins and engines visible”. Or “side cutaway of a volcano, showing lava channels underground and eruption above”. You can combine it with isometric or perspective: “isometric cutaway of a submarine” might yield a nice technical drawing style. Also “layered cutaway of a dollhouse – front wall removed to show all the rooms furnished”. The model will attempt to show both the outside shape and inner contents. Another fun one: “cutaway view of a fruit, with inner core and seeds visible in perspective”. The result should give you an image where part of the subject is missing or transparent so you can see inside – essentially a peek inside without removing the context of the outside. It’s a compelling way to get a lot of information or creativity into one prompt, and when done right, the images feel like those classic encyclopedia cutaway diagrams (which are both cool and educational).
Infinite Recursion Perspective (Droste Effect)
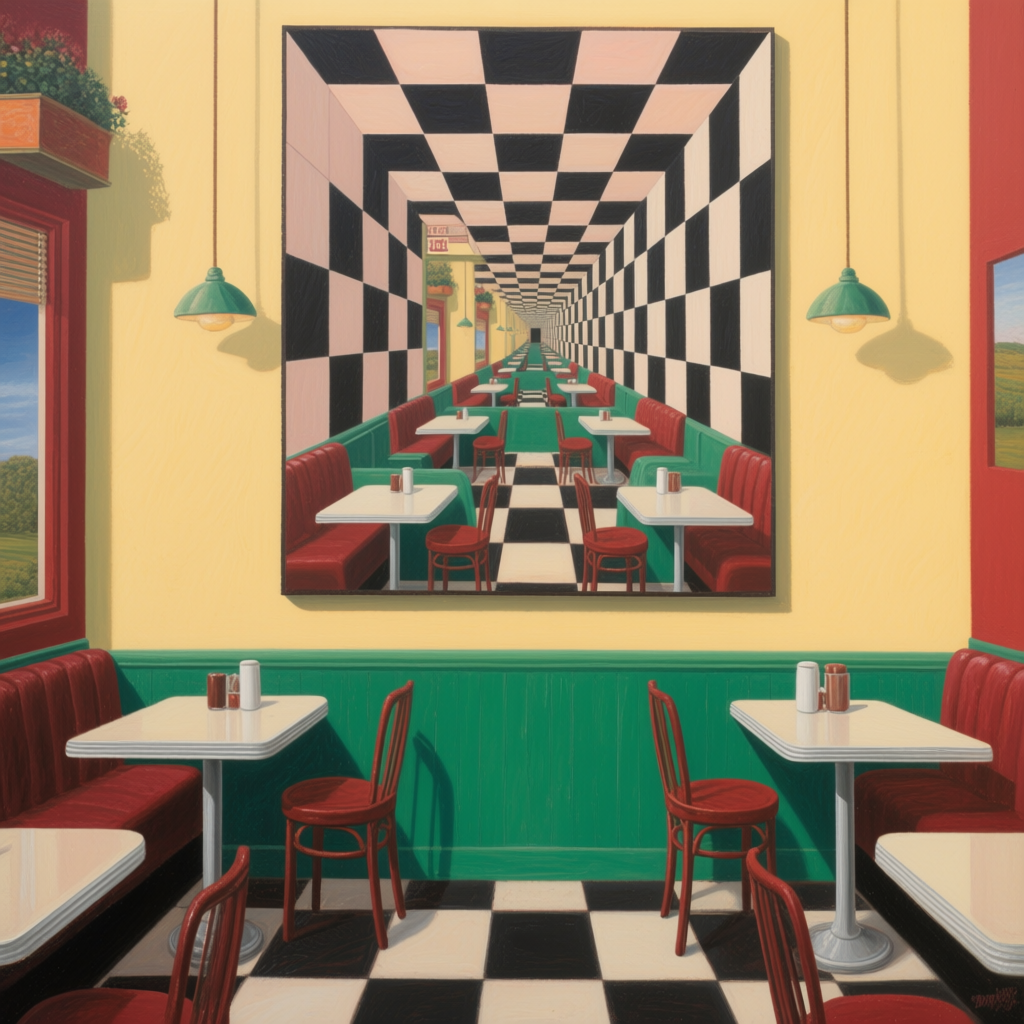
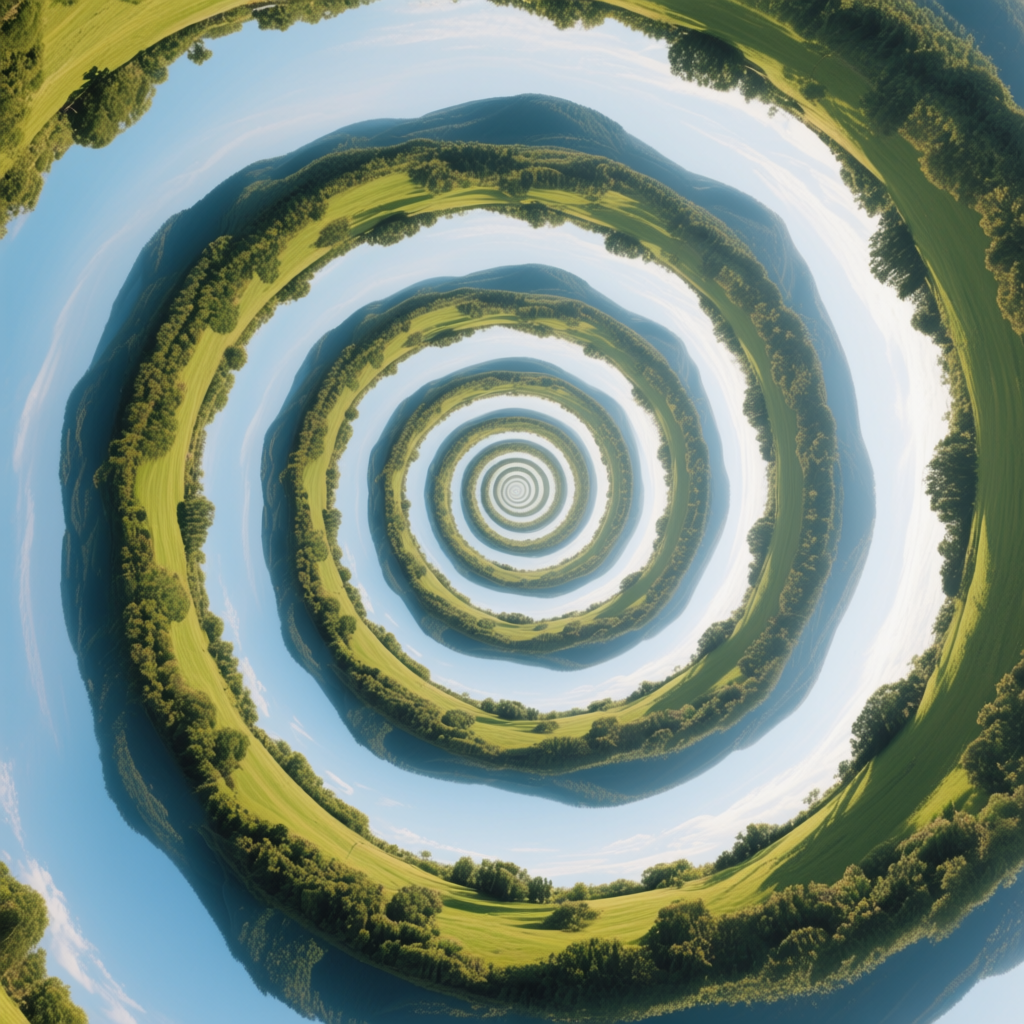
Definition: Infinite recursion perspective refers to images that repeat within themselves, creating an illusion of endless repetition. The most famous example is the Droste effect[22] – a picture that contains a smaller copy of itself, which in turn contains an even smaller copy, and so on (like a picture on a cereal box that shows someone holding that same cereal box). Another form is two mirrors facing each other, reflecting an infinite corridor of images. Essentially, it’s a perspective that loops back on itself recursively.
Visual Effect: The effect is mesmerizing and paradoxical – you see the same scene or object repeated multiple times, getting smaller or fading as it goes toward infinity[22]. Often it forms a spiral or vortex visually (in Droste effect, sometimes a spiral is used to fit the infinite repetition). For instance, a portrait might have a smaller version of that portrait hanging on the wall behind the subject, and that smaller one has an even smaller version, etc. It gives a sense of infinite depth or scale that’s not physically real (since you can’t actually see infinite detail). It can also have a tunnel effect if done via mirrors – like looking into mirrors and seeing countless copies trailing off. This perspective can feel a bit mind-bending, sometimes a little eerie, but definitely intriguing. It draws viewers in as they notice the repetition. Visually, one has to arrange it so the repeated element fits naturally – often toward a vanishing point or within an object. Color and detail usually diminish with each recursion, drawing the eye inward. It’s a great way to imply infinity in a concrete image.
When to Use It: Use infinite recursion when you want to convey infinity, self-reference, or a mind-boggling concept of endlessness. It’s excellent for surreal or conceptual pieces – for example, to illustrate the concept of infinite worlds, or a time loop, or just to add a cool Easter egg (like a poster that contains itself). In AI art, this might be a bit tricky but models have seen Droste effect art so some understand it. If you have a scene where a prop can have the scene itself on it (like someone reading a book that has a picture of them reading the same book), that’s a recursion. Also, if you simply want a neat “infinite hallway” or “mirror corridor”, that falls here. For a magical or sci-fi story, maybe a portal showing the whole scene again within it infinitely. It’s a very specific effect, so you’d use it when the infinity itself is part of the message or aesthetic. Otherwise, it might confuse the image if not central to the idea. But it’s certainly memorable and can yield jaw-dropping results if done well – viewers love noticing that kind of recursive detail.
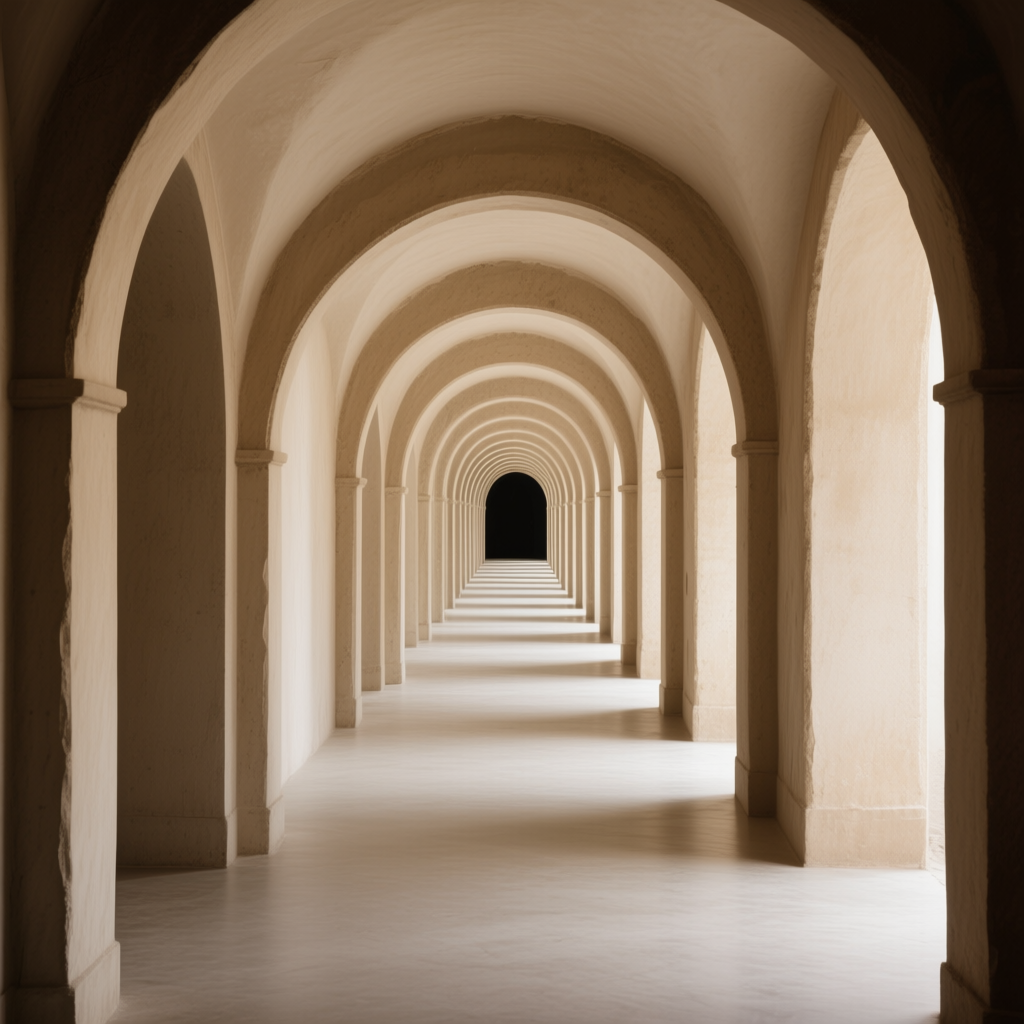
Prompt Examples: Key terms: “Droste effect”, “infinite recursion”, “recursive image”, “mirror reflection infinite”. For example: “surreal painting of a cafe with a Droste effect – the painting on the wall is the entire scene itself repeating”. That explicitly asks for it[22]. Another: “photograph of two mirrors facing each other, creating an infinite mirror reflection perspective”. Or “book cover design showing an infinite recursion of itself (Droste effect)”. Even just “recursive spiral image of a landscape repeating into itself”. You might also try describing it: “infinite hallway of arches, each arch contains another arch behind it ad infinitum”. That suggests a visual recursion even if the AI doesn’t know the term. One more imaginative prompt: “a person holding a picture frame that contains the entire scene including themselves, repeating infinitely smaller each time – Droste perspective”. We’re basically instructing the model to embed the image in itself[23]. Keep in mind not all models handle it perfectly (some might just make many frames but not exactly nested), but many will approximate an endless reflection or repeated pattern. The output should evoke that “mirror in a mirror” or “picture in a picture” look. If it works, you’ll get a fascinating image that viewers can get lost in, following the repeating pattern as it dwindles into infinity.
Symbolic or Abstract Perspective
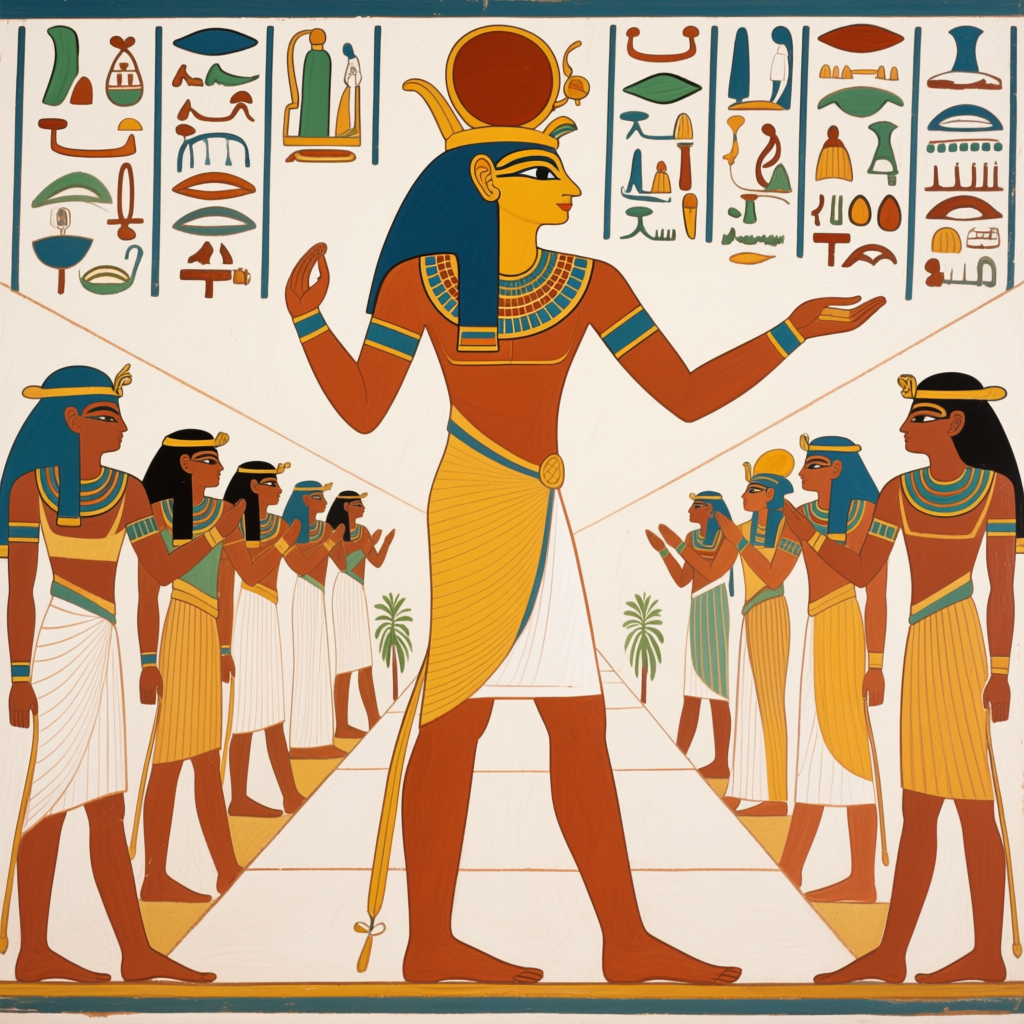
Definition: This is a broad concept where perspective is not used to reflect optical reality, but to convey symbolism, importance, or abstract relationships. Historically, for example, in ancient Egyptian art or medieval art, important figures were drawn larger and higher up than less important ones – this is hierarchical or symbolic perspective, not based on viewpoint[24]. Abstract perspective could also mean mixing different perspectives or ignoring them entirely to suit a conceptual layout. Essentially, symbolic perspective prioritizes meaning over realism: sizes, positions, or angles might be chosen to tell a story or show significance rather than how it would look in a photo.
Visual Effect: The visual effect can be stylized, narrative, or conceptually striking. You might see an image where the king is huge and subjects tiny (to symbolize importance), or an exploded view where time or story is shown in one frame (like comic strip panels merged). It often feels flat or oddly composed because the usual depth cues aren’t followed – but this very oddness draws attention to what the artist deems important. For example, a child’s drawing might put mom and dad big in center and the house small off to side – not realistic perspective, but meaningful. Or a modern illustration might flatten perspective intentionally but arrange elements around a page in order of narrative. Symbolic perspective could also be multiple moments in time shown at once (as some ancient paintings do), which breaks normal perspective continuity. In summary, the image might not “look real,” but it communicates a message through its spatial arrangement. The viewer’s eye might travel in a designed sequence rather than get lost in depth. It can feel decorative, instructional, or dreamlike because of this deliberate unrealness.
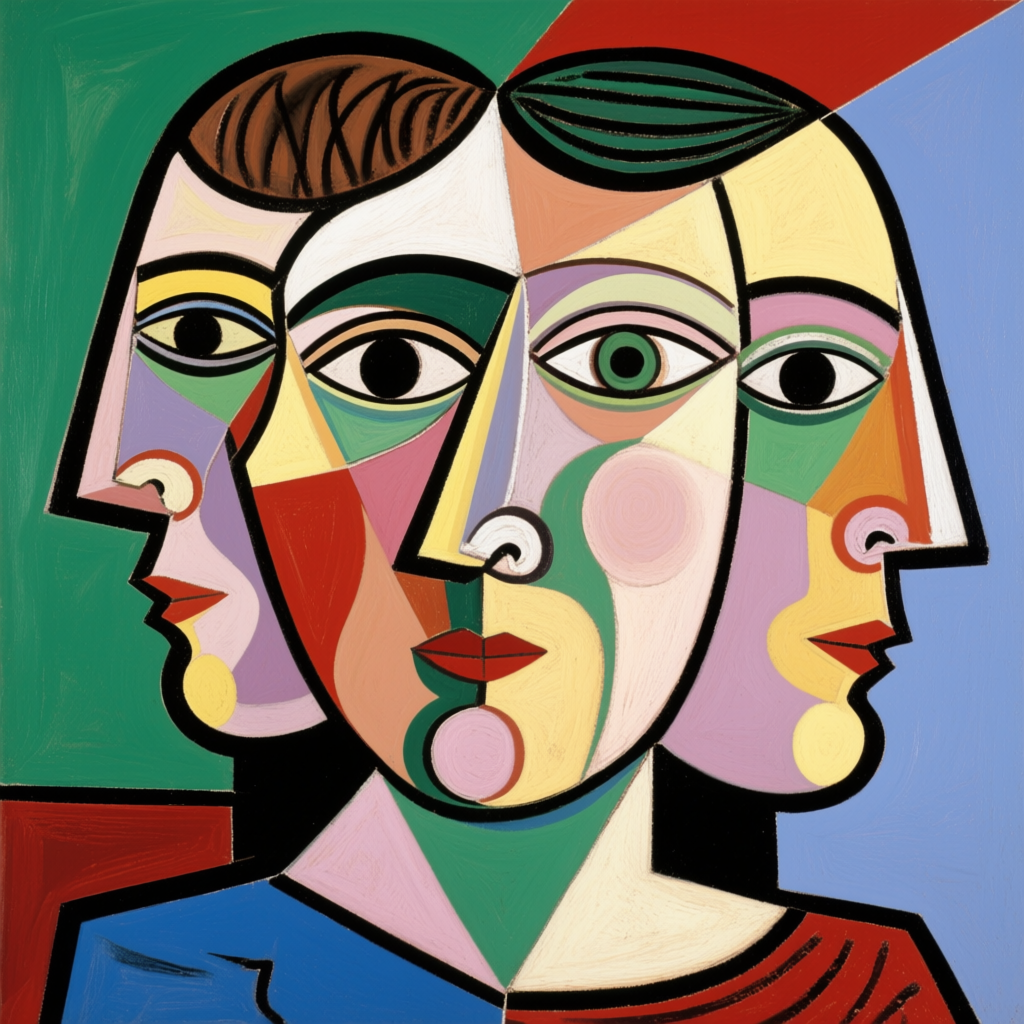
When to Use It: Use symbolic/abstract perspective when your goal is to emphasize ideas or relationships rather than physical space. If you want your prompt to yield an image that feels like a map, a storybook, or an infographic, this is useful. For instance, “medieval tapestry style battle scene, with important knights drawn larger than castles” – that will echo how perspective was symbolic in the Middle Ages (size indicates importance). Or if illustrating a concept like “the mind”, you might place symbols physically larger or above others to indicate significance. This perspective is also great if you aim for a certain cultural art style: many folk arts around the world use perspective symbolically (flat space, important elements prominent). For abstract concepts, maybe you want multiple perspective viewpoints combined – that could show different sides of an issue or multiple dimensions (like Cubism showing all angles of a face at once – that’s an abstract perspective approach). Also, if realism isn’t desired at all and you want a more diagrammatic or collage outcome, guiding the AI toward symbolic perspective can do that.
Prompt Examples: You might directly mention “symbolic perspective” or describe the intended effect. For example: “ancient Egyptian style painting of a pharaoh and subjects – symbolic perspective where the pharaoh is much larger and on a higher register”. This references the known historical practice[24]. Another: “illustration with abstract perspective, showing multiple sides of an object at once”. If looking for that Cubist vibe: “portrait in Picasso’s analytical cubism style, fractured abstract perspective showing face from different angles”. Or, “conceptual diagram-like art, not to scale, perspective is symbolic: (e.g. the heart drawn large above small figures to show love)”. You can also instruct composition: “flat schematic composition: each element sized by importance not distance”. Another example: “medieval illustration with no linear perspective, size of characters denotes rank”. The AI might not fully understand all of that, but including such hints nudges it to break the normal rules. If you want a more modern infographic feel: “poster with symbolic perspective – timeline events drawn larger as they are more important, ignoring realistic depth”. The output should reflect an intentional skewing of perspective – perhaps flattened, sizes off, maybe multiple scenes in one. It may come out looking more like an illustrated chart or a surreal arrangement than a coherent 3D space, but that’s the point: it conveys meaning in the composition itself, giving your image a thoughtful, designed quality beyond photorealism.
Combining Perspectives for Creativity
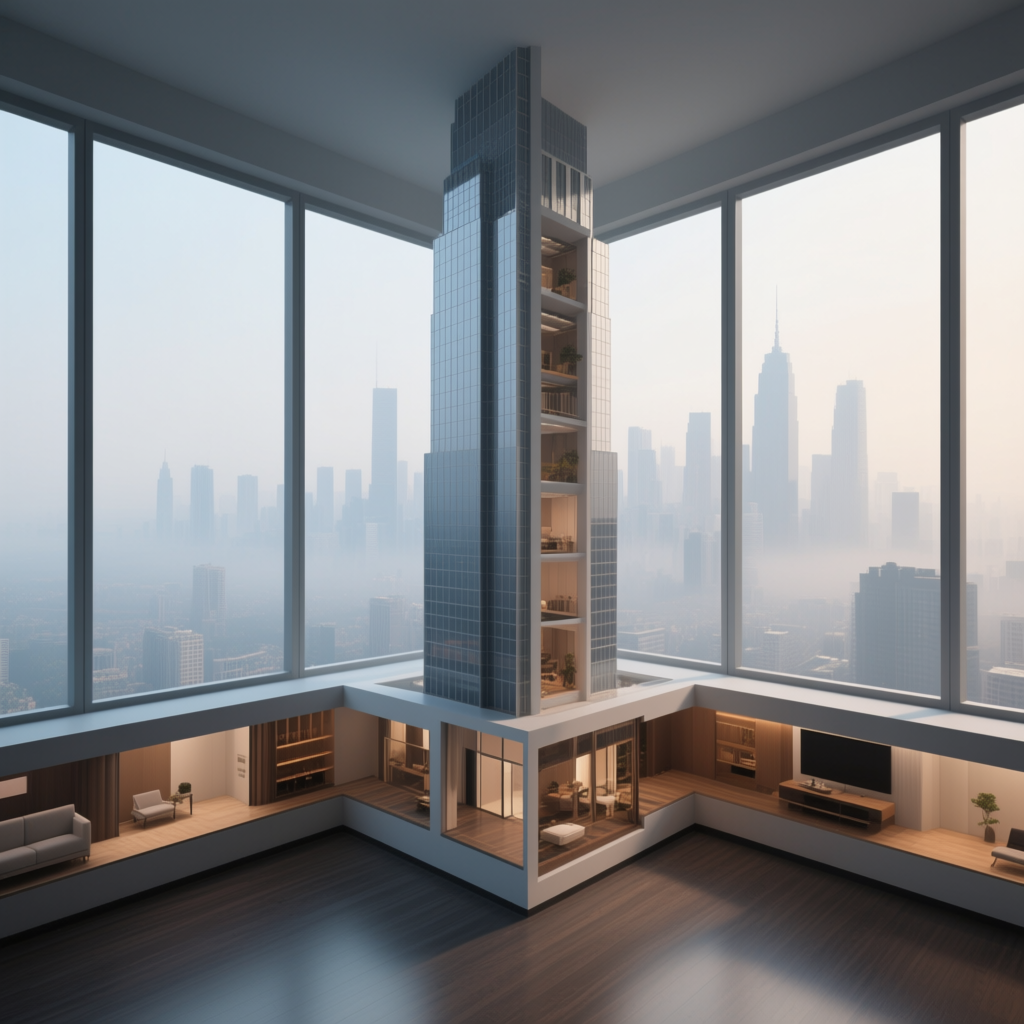
Who says you must pick one perspective at a time? You can mix and match perspectives in a single prompt to get truly unique results. Combining perspectives can produce images that have multiple layers of interest or hybrid styles. For instance, you might combine a one-point perspective background with a fisheye distortion on a foreground element, or use atmospheric perspective and a forced perspective trick together. When blending perspectives, be clear in your prompt which part or aspect should use which perspective, so the AI has guidance.
By creatively combining, you could get something like a one-point tunnel view with a Droste recursion at the end, or an isometric cutaway that also has atmospheric haze in its layers. Think of it like giving the AI multiple lenses or techniques in one image. Maybe you want a character in extreme wide-angle (making them pop) set against a flat, symbolic background – that contrast can be very cool.
Example Prompt – Combination 1: “an isometric cutaway of a skyscraper interior, with a one-point perspective city skyline visible through the windows in the background, atmospheric haze in the distant city”. Here we combined layered cutaway (the building interior) with a one-point perspective background (the view out the window converges to a point) and used atmospheric depth for the far city. The AI might produce a dollhouse-like skyscraper where you see inside rooms (cutaway), and through the cut windows you see a city vanishing toward a point with haze. This mix gives both technical clarity inside and realistic depth outside.
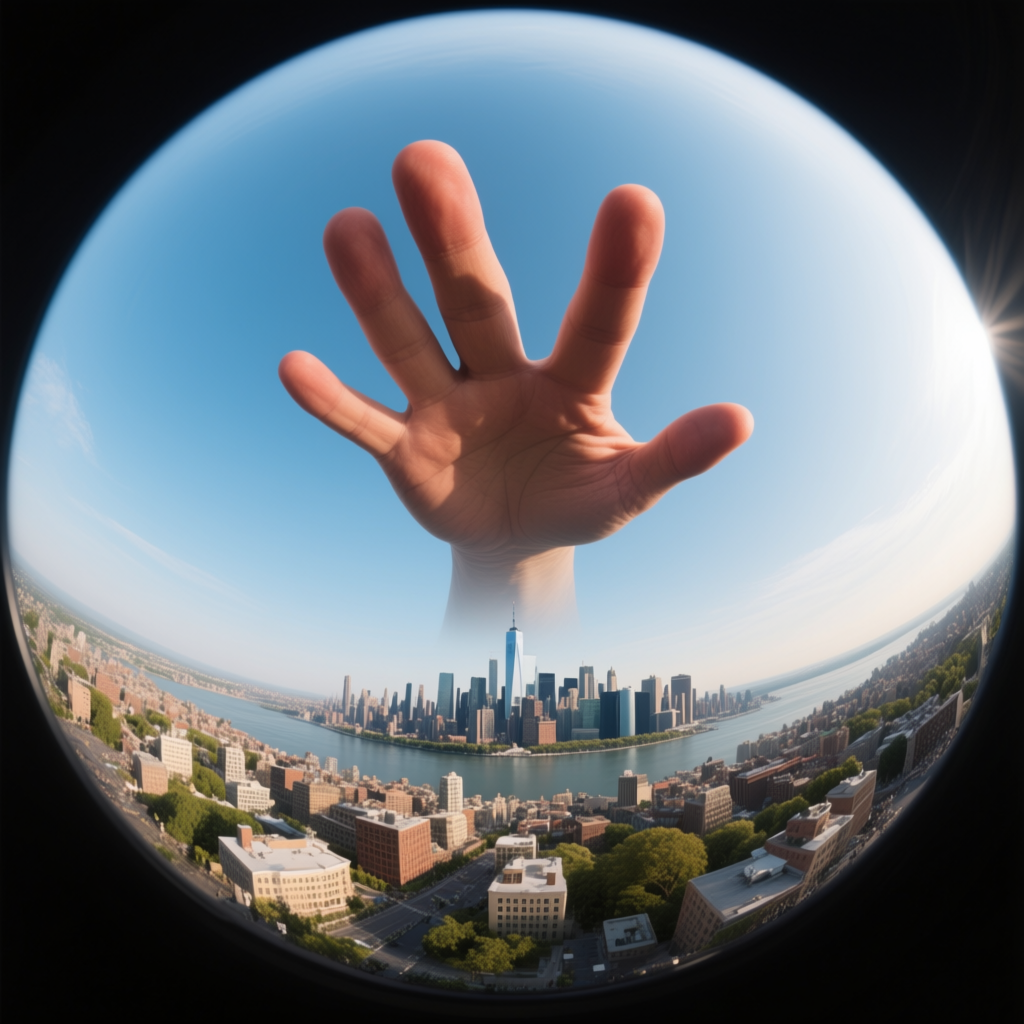
Example Prompt – Combination 2: “surreal forced perspective scene with fisheye lens: a giant hand (close-up) reaches toward a tiny city skyline in the distance, all captured in a fisheye perspective so the horizon curves around”. This merges forced perspective (hand and city interacting in scale) with fisheye distortion (curved horizon). The result could be a very trippy wide image where the hand looks enormous and the city small under a curved sky – almost like the viewer is inside a bubble. It’s a perspective mash-up that emphasizes the weirdness.
When combining, try not to overload too many conflicting perspectives unless that chaos is what you want. It helps if each serves a role (like foreground vs background differences, or primary style + a touch of another). Also, use punctuation or separate clauses in your prompt to delineate parts if needed (some people use parentheses for separate aspects, but plain description works too). For instance: “foreground in fisheye, background in flat perspective” could be phrased as “foreground distorted in fisheye perspective, background remaining flat and graphic”. The AI will attempt to reconcile them – results may vary, but experimenting is part of the fun.
Overall, combining perspectives can lead to some of the most innovative and striking AI images. You’re basically giving the AI permission to break realism in multiple ways at once, which often yields artistic results. Don’t be afraid to play around – you might stumble on a combination that becomes your signature style!
Perspectives vs. Camera Angles
It’s easy to mix up perspective with camera angle, because both relate to how a scene is depicted. In simple terms, camera angle is where you place the viewer, and perspective is how the space is drawn from that viewpoint. An everyday analogy: if you’re looking at a building, moving your position (ground level vs. from above vs. from the side) changes the angle. Meanwhile, perspective is like the lens or technique shaping the space – are lines converging to a point? Is the scene flattened? That’s perspective.
Camera Angle = “Where you stand to look at something.” It’s about the viewpoint position and orientation. Examples: high angle (bird’s eye view), low angle (worm’s eye view), front view, side view, dutch angle (tilted horizon). This affects what you see (top of someone’s head vs. their face) and the psychological feeling (looking down on someone vs. up at them). But camera angle doesn’t inherently decide how depth is rendered beyond that – you could be at a low angle and still use one-point perspective or two-point, etc.
Perspective = “How space itself is drawn or projected.” It’s about the geometry of the scene. Given any camera angle, you could choose to use normal linear perspective (things get smaller with distance), or you might flatten it (telephoto, no shrinkage), or distort it (fisheye, curvilinear). Perspective controls the depth relationships and how lines and scale behave in the image[15].
In practice: If we say “low-angle shot of a building,” that implies the camera is near the ground looking up. Now, perspective-wise, that building could be drawn with three-point perspective (for realism, verticals converging up) or perhaps we flatten it (making it look like a schematic elevation from below, which would be odd). The angle is the vantage point; the perspective is the projection method.
Another way to see it: Angle is like choosing your seat at a theater, perspective is like the type of lens glasses you’re wearing. Where you sit changes your viewpoint (seeing the stage from front, side, above), and the glasses might distort or not distort what you see (fisheye glasses vs. normal vision vs. some prism glasses).
When prompting AI, you can and should use both angle and perspective terms for best results. For example, “a high-angle view (camera above) of a room, in one-point perspective (all lines to one vanishing point)”. The high-angle ensures the model knows we’re looking downward, and one-point tells it how to arrange the lines of the room. If you only said one-point perspective, it might default to eye-level; if you only said high-angle, it might tilt down but not align the lines as strongly.
To sum up: Camera angles tell the AI which direction or position we’re viewing from, while perspective terms tell it how to handle depth and space from that view. Use camera angle to get the right composition (e.g. bird’s-eye for maps, eye-level for immersive, low-angle for heroic looking up) and use perspective to get the right depth feeling (e.g. fisheye for extreme distortion, atmospheric for depth cues, isometric for no convergence, etc.). Knowing the difference helps you craft prompts that control both where the “camera” is and what kind of “lens/technique” is used to capture the scene.
Quick-Reference Summary
Here’s a handy list of perspective-related keywords and phrases discussed, which you can mix into your prompts. Use these to quickly nudge an AI image in the direction of a certain perspective style. Copy-paste or tweak as needed:
· one-point perspective (single vanishing point, e.g. “railroad tracks converge in one-point perspective”)
· central vanishing point (vanishing point at image center for symmetric depth)
· tunnel view (enclosed, arching perspective leading inward)
· two-point perspective (two vanishing points, corner view of objects)
· three-point perspective (three vanishing points, adds height depth – e.g. “looking up at skyscraper, three-point perspective”)
· isometric perspective (parallel projection, no vanishing point; use “isometric view” or “axonometric”)
· aerial perspective (atmospheric depth; distant objects faded/bluish – keywords: “atmospheric perspective”, “hazy distance”)
· atmospheric haze (explicit fog/mist for depth; words: “haze”, “misty background”)
· gradient fading (distance fades out gradually; e.g. “background fades into white/sky”)
· forced perspective (scale illusion; e.g. “forced perspective makes toy car look life-size”)[14]
· ultrawide angle (extreme wide perspective, strong near/far distortion; also try “14mm lens”, “wide-angle shot”)[15]
· fisheye lens perspective (full 180° curvilinear distortion; keywords: “fisheye”, “curved panoramic”)[17]
· surreal distortions (for unusual perspective: “Escher-like perspective”, “impossible geometry”, “warped perspective”)
· flat perspective (no depth effect; e.g. “telephoto compression”, “flattened space”)[20]
· cutaway view (cut open to show interior; use “cutaway diagram”, “cross-section view”)[21]
· infinite recursion (Droste effect or infinite mirror; words: “Droste effect”, “infinite reflection”)[22]
· symbolic perspective (size/position by importance; e.g. “hierarchical scale”, “no linear perspective, symbolic layout”)[24]
Feel free to combine these terms with your subject. For instance: “a castle interior, two-point perspective, with atmospheric haze outside the windows” or “space station cutaway, isometric perspective”. Small additions like these can make a big difference in how the AI composes the image. Happy prompting, and enjoy experimenting with perspective to take your AI-generated art to new depths (or deliberately flat heights)!
[1] [5] [6] [7] [8] [11] What is Perspective in Art: The Guide to Understanding Depth
https://www.21-draw.com/what-is-perspective-in-art/
[2] [3] One Point Perspective Drawing: The Ultimate Guide
https://www.studentartguide.com/articles/one-point-perspective-drawing
[4] Perspective (graphical) - Wikipedia
https://en.wikipedia.org/wiki/Perspective_(graphical)
[9] What Is Isometric Perspective? | Domestika
https://www.domestika.org/en/blog/11503-what-is-isometric-perspective
[10] [12] Aerial perspective - Wikipedia
https://en.wikipedia.org/wiki/Aerial_perspective
[13] 6 quick tricks to add depth to your landscape photos
[14] Forced Perspective - Everything You Need to Know - NFI
https://www.nfi.edu/forced-perspective/
[15] [18] [19] [20] [24] Perspective distortion - Wikipedia
https://en.wikipedia.org/wiki/Perspective_distortion
[16] [17] Fisheye lens - Wikipedia
https://en.wikipedia.org/wiki/Fisheye_lens
[21] Cutaway drawing - Wikipedia
https://en.wikipedia.org/wiki/Cutaway_drawing
[22] [23] Droste Effect in Art: A Mesmerizing Visual Journey Through Infinite Repetition - Surrealism Today


